selection criteria and the 10 most common mistakes 2009 by Adcon Telemetry GmbH
|
|
|
- Annice Hampton
- 5 years ago
- Views:
Transcription
1 » Sensor Technology for improved water efficiency - selection criteria and the 10 most common mistakes BOKU, June 2009 by Adcon Telemetry GmbH
2 » Sensor Technology to improve Water efficiency 3 accepted technologies: - Weather Stations - Soil Sensors - Plant Sensors
3 » Sensor Technology to improve Water efficiency Weather Stations: - Calculating Evapotranspiration ETo / ETc according to - FAO-56 (P.M.) - Shuttleworth-Wallace th ll - Priestley-Taylor - Hargreaves, - etc.
4 » Sensor Technology to improve Water efficiency Soil Sensors to monitor - Soil Moisture - Soil Conductivity - Soil Salinity it - Soil Temperature
5 » Sensor Technology to improve Water efficiency Plant Sensors to monitor - Shrinkage and Expansion of trunk, branches and fruits (dendrometers) Best if used in conjunction with other methods, in particular with soil moisture sensors.
6 » The Process of Selection - Installation - Operation Bad Data in - Bad Data out. Before taking any decision follow this 7 step process: Step 1: Definition of the purpose of the equipment Step 2: Risk Assessment Step 3: Select equipment according to the results of Steps 1 and 2 Step 4: Site Selection Step 5: Installation at Step 6: Ongoing Maintenance Step 7: Replacement
7 » Step 1: Defining the Purpose of the Equipment a) What is the equipment needed for? General Meteorology Agro-Meteorology Disease modeling Evapotranspiration Soil and Plant Monitoring Hydro-Meteorology Airport Meteorology Wind energy site testing Roadside Weather A combination of the above...?
8 » Step 1: Defining the Purpose of the Equipment b) Which requirements exist for the respective application? b1) Legal requirements Informal requirements recommendations, rules, standards b2) Requirements as to sensor accuracy e.g. WMO recommendations logger accuracy mechanical characteristics orifice, sun shield, ventilation, heating,.. installation method and location distance to soil surface, distance from each other, distance to nearby objects, etc. data collection method number of samples, averaging methods, frequency of measurement,.. transmission intervals
9 » Installation scheme according to WMO
10 » Step 2: Risk Assessment Choose the equipment according to the purpose, e.g. - a3-year research project - a valuable crop - food security Questions to be answered: What's at stake? What are the potential benefits? What are the potential damages? What happens if...? Will my insurance accept data from my equipment?
11 » Step 2: Risk Assessment Examples: 1) 25 hectares of grapes, 14 avg. sprays at Euro 40/ha. Potential saving of 5 sprays = 5.000,00 p.a. 2) 200 hectares of potatoes, 6 avg. sprays at USD 40/ha. Saving only 1 spray = USD 8.000,00 p.a. 3) 50 ha of grapes, average yield per ha: Euro Total: Irrigating too little or too late, spraying too late, resulting in a loss of only 1% of crop quantity of quality ranking amounts to 7.500,00 4) 1000 hectares of corn, average yield per ha: 10mt@USD158/mt - 2 stress days due to late or low irrigation = up to 10% lower yield > loss of USD ,00!
12 » Step 3: Select Equipment acc. to steps 1 and 2 Specification of technical characteristics of loggers and each sensor according to The required installation methods The required accuracy The cost / risk ratio The insurance companies assessment
13 » Installationsdiagramm nach WMO 1. Temp. ventilated, t 200cm 2. Temp. ventilated, 20cm 3. RH, 200cm 4. Wind, 250cm 5. Solar radiation 6. Leaf Wetness 7. Soil Temp. in 5cm 8. Soil Temp. in 20cm 9. Soil Temp. in 50cm 10. Heated Rain Gauge 11. Bird Protector 12. Ventilation for Air Temp. 13. Data Logger 14. Communications Cable V Power Supply (c) Bayr. LA f. Landwirtschaft, Weihenstephan


14 » Step 3: Select Equipment acc. to steps 1 and 2


15 » Step 3: Select Equipment acc. to steps 1 and 2
16 » Step 4: Site Selection The site has to meet the requirements of the application. Evaluate which application is of highest significance. WMO disease models ETo differ in their requirements. Disease models: old models station outside of crop recent models stations inside the crop ETo: 1ha of short-cut grass Soil moisture sensors: installation site must be typical for soil type, crop type, crop age, irrigation system,...
17 » Step 4: Site Selection Permanent installation or temporary? If installation is permanent evaluate a site on a timeline what will it look like in years? Are trees nearby? Variety? Max. size? Can they be cut? Are water bodies nearby? Flooding areas? Zoning of the area construction work to be expected?
18 » Weather Stations for Irrigation Improvements What is todays most important rule for irrigators?
19 » Weather Stations for Irrigation Improvements What is todays most important rule for irrigators?


20 » Proper Installations ETo as it should be in Chile
21 » Proper Installations A good example for leaf wetness from Styria


22 » Step 5: Site Selection
23 » Step 5: Site Selection
24 » Step 5: Site Selection


25 » Step 5: Site Selection - Sensor Positioning Moisture Zones in Drip Irrigation Sand Loam Clay Access Tubes To wet To dry Soil Moisture Optimum
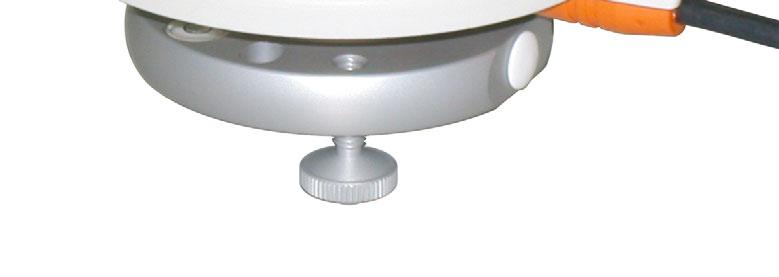
26 » Step 5: Installation Good equipment - great site - bad installation? Pole well anchored in the ground and perfectly vertical Guy wires if necessary (soft soil, strong winds) Solar panel facing South Wind direction facing North Orifice of Rain gauge g and pyranometer must be absolutely horizontal Sensors must not influence each other Keep sensors away from hot surfaces (esp. Temp., RH, Leaf wetness, pyranometres!) Take a picture of the installation and note the GPS
27 » Step 6: Installation - What s this- disease or ETo?
28 » Step 6: Ongoing Maintenance The best equipment will have a short lifetime and little reliability if no proper maintenance is being performed! Clean the solar panel, pyranometer, rain gauge once per month Visually check all sensors for damage, dirt, foreign objects once per month / every visit Check cables for nicks and animal bites. Make sure all connectors are seated well. If applying chemicals cover sensors before spray or clean them thereafter. Check sensor readings in the field with reference sensor
29 » Step 6: Ongoing Maintenance The best equipment will have a short lifetime and little reliability if no proper maintenance is being performed! Replace the humidity sensor every 3 max. 5 years. Depending on the application recalibrate a e sensors so s every e 1 5 years Calibrate spare sensors in the lab and only replace in the field.


30 » Maintenance is key!


31 » Maintenance - why birds love rain gauges


32 » Maintenance - expect the unexpected!
33 » Step 6: Ongoing Maintenance Keep an eye on your data! Much can be told from the office. Check patterns of moisture: RH - rain - leaf wetness Check RH sensor diurnal fluctuations Check for regularly occurring errors.
34 » Step 6: Ongoing Maintenance Keep an eye on your data! Much can be told from the office. Check patterns of moisture: RH - rain - leaf wetness Check RH sensor diurnal fluctuations Check for regularly occurring errors.
35 » Step 7: Replacement Even the best equipment, well maintained, i doesn t live forever. Make appropriate accruals for replacement of certain components after x years. X will depend on quality level of equipment, maintenance, environmental conditions, etc. Leaf Wetness: every 2-3 years Data loggers: years (aging of electronics, voltage references, oscillators, ADC, etc.) Wind speed and direction: 10 years (bearings) Pyranometers: years Rain gauges: 10 years depending on model (min. reed switches)
36 » Thank you for your attention!