APPENDIXES. Appendix 1A. Preparation of a 1% Agarose Gel for Gel Electrophoresis
|
|
|
- Gabriel McCoy
- 5 years ago
- Views:
Transcription
1 APPENDIXES Appendix 1A Preparation of a 1% Agarose Gel for Gel Electrophoresis 2. For a 1% agarose gel, weigh out 1 gram of agarose (powder) on a weighing scale. Note: percentage of the gel reflects the amount of agarose in gram in 100 ml of 1X TAE buffer, depending on the final percentage of agarose in the gel. Example: If you want to make a 0.7% agarose gel (0.7 g/100 ml, w/v), weigh out 0.7 g of agarose for 100 ml of agarose solution 3. Carefully, put the agarose in a 250-mL Erlenmeyer flask. 4. Measure out 100 ml of 1X TAE buffer using a plastic or glass graduated cylinder. 5. Add 100 ml of 1X TAE buffer into the flask in step Cover the flask with a piece of plastic wrap. Poke 3-4 holes on the plastic wrap using a pointed end of a pencil or pen (Note: the holes allow the steam to escape during microwaving in step 6 below). Swirl the solution to break up any lumps of agarose granules. 7. Microwave the solution for about 2 minutes or until the agarose granules have completely melted.! Be careful with the flask. The solution gets very hot.! Constantly watch over the solution because when it starts boiling, it might overflow.! Swirl gently the solution several times while microwaving to help melt agarose evenly.! Once the agarose has melted completely, the solution is clear. 8. Cool down the agarose solution for at least 30 min in a 55ºC water bath. 9. While the agarose solution is cooling, prepare the gel cast with the appropriate comb.! The comb depends on the number of samples to be loaded on the gel. For example, if there are less than 18 samples, then use a 20-tooth comb; but, if there are 21 samples, then use a 30-tooth comb. Preparation of Agarose Gel - A1A.1
2 ! Remember to add two more wells to the number of wells needed for the samples. These two wells will be for loading 1kb DNA ladder in the first and the last wells (or left and right sides of loaded samples). 10. After the agarose solution has been cooled down, add 5 µl of Ethidium Bromide (EtBr) into the solution and swirl the flask GENTLY to mix. Note: Do NOT swirl vigorously to generate many bubbles. 11. Pour the agarose/etbr solution into the gel cast. Wait for 30 min for the agarose solution to solidify. Note: IMMEDIATELY after pouring the agarose solution, inspect the agarose solution s surface for the present of bubbles. If there are many bubbles floating on the surface of the gel solution, use a pipette tip to pop them before the gel is completely solidified. 12. Pour ~600 ml of 1X TAE buffer into the gel box. After the agarose has solidified into a gel, take out the comb gently by pulling it straight up out of the gel and put the gel in the gel box containing the 1XTAE running buffer. Preparation of Agarose Gel - A1A.2
3 Appendix 1B What is a spectrophotometer? It is an instrument that measures the amount of molecules absorbing at a given wavelength of energy. In this exercise, we measure the amount of DNA molecules in a given volume in the ultraviolet wavelengths of nm (nm stands for nanometer, which is 1 billionth of a meter). The bases of DNA have the absorbance at the wavelength of 254 nm. The absorbance of DNA molecules over the wavelength range of nm is represented as a spectrum with a peak at near 260 nm as illustrated by the Nanodrop spectrophotometer readout below: a spectrum of DNA DNA concentration Nanodrop Spectrophotometer - 1B.1

4 OPERATION OF NANODROP SPECTROPHOTOMETER ND-1000 Note: The Nanodrop is powered by the computer via the USB port. 1. Turn ON the Computer (laptop) that connects to the Nanodrop. 2. Turn ON the Nanodrop by clicking an "ND-1000 v3.1.0" icon on the computer desktop. Wait for a few seconds for the Nanodrop to be up. You see the Nanodrop Diagnose panel with User field as Default. 3. Click on Nucleic Acid button on the top left column for reading concentration of DNA and RNA solutions. " You see a following message: Ensure Sample Pedestals are clean and then load a water sample. After loading water sample, click OK to initialize instrument 4. a. Clean the sample pedestals as followings: i. Raise the Sample Arm up by holding at its end as shown on the picture below. Caution: NEVER hold the Optical Cord when lifting and lowering the Sample Arm because the cord is fragile; and it is very expensive to replace it. ii. Wipe both the Measurement Pedestal and the Sample Arm with a piece of Kimwipes slightly wetted with distilled water. Fiber Optic cable Sample Arm (Handle HERE) Magnet Pole Measurement Pedestal Nanodrop Spectrophotometer - A1B.2


5 b. Pipet µl of water on the Measurement pedestal. Note: Even though the Nanodrop Inc. claims that the Nanodrop can read as low as 1 µl, the concentration reading is NOT consistent at this volume. Therefore, the minimal volume for the concentration reading is 1.5 µ c. Slowly Lower the SAMPLE Arm to its horizontal position. Caution: NEVER let the arm fall freely. d. Click the OK button. The Nanodrop is INITIALIZED. You see a Dialog panel as shown below Nanodrop Spectrophotometer - A1B.3
6 What do you need to do, NEXT? a. Change SAMPLE TYPE (if necessary) from DNA-50 (by Default) to RNA-40 or Other (for Oligonucleotides), depending on your sample. b. Type in the SAMPLE ID field the Information of your sample. c. Make a NEW BLANK measurement d. (Option) Change the OVERLAY CONTROL field from the Default setting of CLEAR GRAPH EACH SAMPLE to CLEAR GRAPH ON NEW REPORT or ACCUMULATE UNTIL CLEAR or CLEAR GRAPH NOW 5. Wipe off the liquid on BOTH the ARM and Measurement pedestals with a piece of Kimwipes. 6. Make a Blank measurement by pipetting L of either double-distilled water or TE (depending on whether your sample solution is in double-distilled water or TE) on the Measurement Pedestal. Then lower the Sample Arm to its horizontal position. 7. Click the BLANK button. The blank was made. 8. After the reading is done, bring the Sample Arm up to the vertical position and Wipe off the liquid on BOTH the ARM and Measurement pedestals with a piece of Kimwipes. 9. Pipet L of SAMPLE on the Measurement Pedestal and lower the Sample Arm. 10. Type in the SAMPLE ID field Information of a sample solution. 11. Click the MEASURE button to determine concentration of your sample. 12. After the reading is done, a sample concentration (in ng/ L) and a spectrum of the sample along other information are shown. You can either a. Save the window of measured sample by clicking on FILE # choose SAVE WINDOW # Select an existing folder or Create a NEW folder (give a name for the NEW folder) # Type in a Name file in the FILE NAME field # Click the SAVE button to save the file or b. Print the window by clicking the PRINT SCREEN button. Nanodrop Spectrophotometer - A1B.4
7 Note: To print the current spectrum of the sample, you MUST print it before reading the next sample. Otherwise, you need to repeat reading the sample. 13. Repeat steps 8-12 for other samples. 14. After reading the last sample, click the PRINT BATCH button to print concentrations of all read samples. 15. If done with the Nanodrop, click the EXIT buttons. 16. Clean the Measurement Pedestal and the Sample Arm with a piece of Kimwipes slightly wetted with distilled water. Nanodrop Spectrophotometer - A1B.5


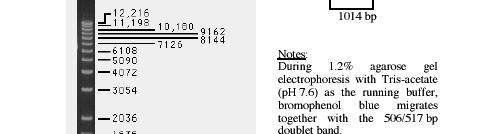
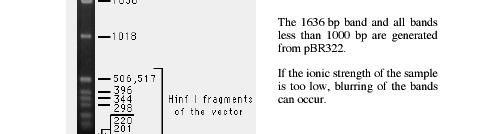
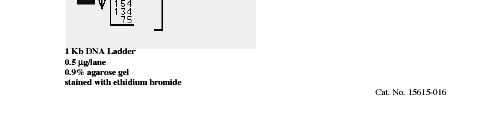
8 Appendix 1C 1-kb DNA Ladder (Taken from Invitrogen website) 1-kB DNA Ladder - A1C.1

9 1-kB DNA Ladder - A1C.2
10 Appendix 1D iproof High-Fidelity DNA Polymerase (Taken from Bio-Rad Website) iproof High-Fidelity DNA Polymerase - A1D 1
11 iproof High-Fidelity DNA Polymerase - A1D.2
12 iproof High-Fidelity DNA Polymerase - A1D.3


13 Appendix 1E PCR-Blunt II-TOPO Cloning Instruction Manual (Taken from Invitrogen Website) pcr-blunt II-TOPO Cloning Instruction - A1E 1

14 pcr-blunt II-TOPO Cloning Instruction - A1E.2


15 pcr-blunt II-TOPO Cloning Instruction - A1E.3


16 pcr-blunt II-TOPO Cloning Instruction - A1E.4
17 pcr-blunt II-TOPO Cloning Instruction - A1E.5


18 pcr-blunt II-TOPO Cloning Instruction - A1E.6
19 pcr-blunt II-TOPO Cloning Instruction - A1E.7

20 pcr-blunt II-TOPO Cloning Instruction - A1E.8
21 pcr-blunt II-TOPO Cloning Instruction - A1E.9

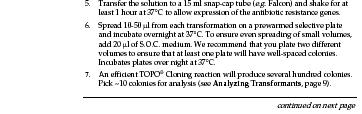
22 pcr-blunt II-TOPO Cloning Instruction - A1E.10


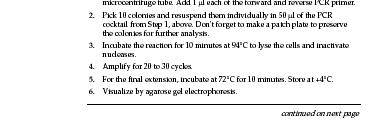
23 pcr-blunt II-TOPO Cloning Instruction - A1E.11

24 pcr-blunt II-TOPO Cloning Instruction - A1E.12
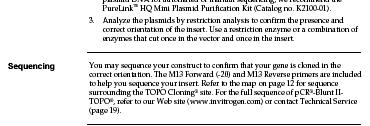
25 Appendix 1F QIAprep Miniprep Handbook (Taken from Qiagen Website) QIAprep Miniprep Handbook - A1F 1
26 QIAprep Miniprep Handbook - A1F.2
27 QIAprep Miniprep Handbook - A1F.3


28 QIAprep Miniprep Handbook - A1F.4
29 QIAprep Miniprep Handbook - A1F.5
30 QIAprep Miniprep Handbook - A1F.6


31 QIAprep Miniprep Handbook - A1F.7
32 QIAprep Miniprep Handbook - A1F.8


33 QIAprep Miniprep Handbook - A1F.9
34 QIAprep Miniprep Handbook - A1F.10
35 QIAprep Miniprep Handbook - A1F.11
36 QIAprep Miniprep Handbook - A1F.12

37 QIAprep Miniprep Handbook - A1F.13
38 QIAprep Miniprep Handbook - A1F.14
39 QIAprep Miniprep Handbook - A1F.15
40 QIAprep Miniprep Handbook - A1F.16
41 QIAprep Miniprep Handbook - A1F.17
42 QIAprep Miniprep Handbook - A1F.18


43 QIAprep Miniprep Handbook - A1F.19
44 QIAprep Miniprep Handbook - A1F.20
45 QIAprep Miniprep Handbook - A1F.21


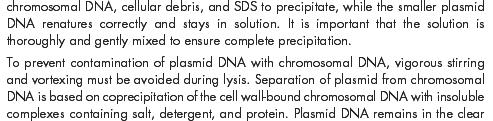
46 QIAprep Miniprep Handbook - A1F.22


47 QIAprep Miniprep Handbook - A1F.23


48 QIAprep Miniprep Handbook - A1F.24
49 QIAprep Miniprep Handbook - A1F.25