Oracle Product Management Cloud. Release 13 (updates 18A 18C) What s New
|
|
|
- Deirdre Barrett
- 5 years ago
- Views:
Transcription
 What s")
1 Oracle Product Management Cloud Release 13 (updates 18A 18C) What s New


2 TABLE OF CONTENTS DOCUMENT HISTORY 5 UPDATE 18C 5 Revision History 5 Overview 5 Optional Uptake of New Features (Opt In) 6 Feature Summary 7 Product Development 10 Capture Electronic Signatures with Passwords to Meet Compliance and Audit Requirements 10 Use REST Web Services for Change Management and Item Where-Used Queries 11 Manage Conflicts During Execution of Multiple Scheduled Changes for Affected Items 12 Notify Suppliers of Change Requests and Improve their Navigation Experience 13 Perform Impact Analysis on a Change Request 14 Set Cycle Time Thresholds to Improve Change Management Process 14 Capture Change Order and Change Request History 15 Product Hub 16 Manage Item Templates of an Item Class Efficiently with Improved User Interface 16 Map Nested XML Structures in Import Maps 18 Use Item Definition Grouping 20 Import Product Catalogs Using File-Based Data Import 22 Execute Reports and Analytics from the Product Information Management Work Area 23 Innovation Management 24 Use Advanced Search for Proposals in Portfolios 24 Manage Data Security in Innovation Management Subject Areas 25 Manage Ideas Using REST Services 26 Refresh Requirement Specification to Correct Sequence Numbers 26 Use Web Services to Manage Idea and Proposal Teams 27 Analyze Portfolio Resource Time-Phasing with Oracle Transactional Business Intelligence 28 Manage Attachments in Innovation Management 30 Quality Management 31 Manage Quality Inspection Plans Using a REST Service 31 Configure Inspection Actions 32 Manage Data Security Across Issues and Actions 34 Display Manufacturing Resource Instance 36 Mandate Signature Password upon Workflow Approval 36 Extend Quality Issues and Actions Using Application Composer 38 UPDATE 18B 39 Revision History 39 Overview 39 Optional Uptake of New Features (Opt In) 40 Feature Summary 41 Innovation Management 43 Use Application Composer Extensibility Framework for Innovation Management 43 Add Roles to Manage Team for Ideas, Proposals, Concepts, and Requirement Specifications 46 Use Web Services to Add or Update Attachments to Ideas 47 View Gantt Charts and Resources as Separate Tabs of Roadmap Analysis 47 Get Insights into Idea Votes and Like Counts Using Transactional Analytics 48 Product Development 50 Define Business Events for Integration Cloud Service 50 2
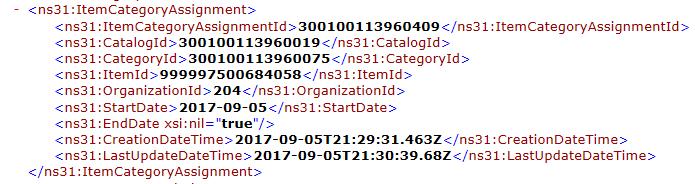
3 Seamlessly Handle Change Management Activities with Consistent User Interface 50 Upload Bulk Attachments for Computer-Aided Design Integration with Cloud 53 View Approved Manufacturer Parts Directly in the Item Structure Table 53 Leverage Structure Approved Manufacturer Table View Improvements 55 Manage Tasks for Change Orders 55 Define and Configure Item Flexfields 56 Control Access to Manufacturing Parts with View-Only Privilege 56 Secure Engineering Item Structures in Your Master Organization 57 Leverage New Item Request Task Improvements 58 Quality Management 59 Use Application Composer Extensibility Framework for Quality Issues and Actions 59 View Item Lot and Serial Number for Inspection Based Quality Issues 64 Collect Ad Hoc Inspection Results Using REST Services 64 Product Hub 65 Automatically Synchronize Item Attributes with No Values During Import 65 Use Advanced Import Maps to Streamline the Item Onboarding Process 66 Leverage Visual Error Indicators for Smart Spreadsheets 68 Use Blending Rules for Non-Supplier Spoke Systems 69 Reassign Items to a Catalog or Category Using Item Business Rules 70 Automatically Assign Items to Child Organizations for a Master-Controlled Catalog 72 Track and Audit Changes to an Item Catalog 72 Complete New Item Request Tasks with Simplified Navigation 73 UPDATE 18A 75 Revision History 75 Overview 75 Optional Uptake of New Features (Opt In) 76 Feature Summary 77 Leverage the Application Extensibility Framework (Applications Composer) 79 Product Development 80 Import Item Structures for Efficient Structure Building 80 Create a Change Order Directly from a Change Request 81 Manage Affected Items More Efficiently 83 View Item and Item Structure Details in a New Table Format 86 Segregate Users for Commercialization Activities on Items 87 Improve Resource Utilization with New Search and Navigation Options 89 Create a Change Request Directly from an Item 93 Use Web Services for Data Validations and Integrations 94 Quality Management 95 Analyze Quality Issues and Actions Using OTBI Reports 95 Configure Workflows for Quality Issues and Actions 97 Integrate REST Services with Quality Issues and Actions 98 Use Application Composer Extensibility Framework to Configure Quality Issues and Actions 99 Enter Inspection Results as Free-Form Text 100 Enter Inspection Results for an Inventory or Work in Process Lot 100 Innovation Management 103 Use Application Composer Extensibility Framework for Innovation Management 103 Increase Productivity When Working with Proposals 113 Product Hub 115 Onboard New Style Items from an External Source Using Import Maps 115 Secure Digital Assets and Files Associated to Products and Related Objects 116 Generate OTBI Reports with Additional Criteria and Easily Drill Down to Items in a Report 118 Use the Item Catalog Web Service for Item Category Assignments and Attachments 119 3
4 Add Standard Coverage for an Item in Service Contracts Using the New Item Operational Attribute 119 Publish Trading Partner Items, Item Catalog Assignments and Item Class Related Metadata 120 4
5 DOCUMENT HISTORY This document will continue to evolve as existing sections change and new information is added. All updates appear in the following table: Date Update Version Notes 21 SEP 2018 Update 18C Delivered new features in update 18C. 06 JUN 2018 Update 18B Revised update 18B. 06 JUN 2018 Update 18A Revised update 18A. UPDATE 18C REVISION HISTORY This document will continue to evolve as existing sections change and new information is added. All updates appear in the following table: Date Feature 21 SEP 2018 Notes Created initial document. OVERVIEW This guide outlines the information you need to know about new or improved functionality in this update, and describes any tasks you might need to perform for the update. Each section includes a brief description of the feature, the steps you need to take to enable or begin using the feature, any tips or considerations that you should keep in mind, and the resources available to help you. SECURITY AND NEW FEATURES The Role section of each feature identifies the security privilege and job role required to use the feature. If feature setup is required, then the Application Implementation Consultant job role is required to perform the setup, unless otherwise indicated. (If a feature doesn't include a Role section, then no security changes are required to use the feature.) If you have created job roles, then you can use this information to add new privileges to those roles as needed. GIVE US FEEDBACK We welcome your comments and suggestions to improve the content. Please send us your feedback at oracle_fusion_applications_help_ww_grp@oracle.com. 5
6 OPTIONAL UPTAKE OF NEW FEATURES (OPT IN) We continue to add many new features to the Oracle Cloud Applications, and for some features, you can take advantage of new functionality at a pace that suits you by opting in to the feature when you re ready. You can opt in to a feature in two ways: by using the New Features work area, or by using the Setup and Maintenance work area. To opt in using the New Features work area: Click the Navigator, and then click New Features (under the My Enterprise heading). On the New Features page, select the offering that includes new features you d like to review. Click Go to Opt In for any feature that you want to opt in to. On the Edit Features page, select the Enable option for the feature, and then click Done. To opt in using the Setup and Maintenance work area: Click the Navigator, and then click Setup and Maintenance. On the Setup page, select your offering, and then click Change Feature Opt In. On the Opt In page, click the Edit Features icon. On the Edit Features page, select the Enable option for any feature you want to opt in to. If the Enable column includes an Edit icon instead of a check box, then click the icon, select your feature options, and click Save and Close. 5. Click Done
7 FEATURE SUMMARY Column Definitions: Report = New or modified, Oracle-delivered, ready to run reports. UI or Process-Based: Small Scale = These UI or process-based features are typically comprised of minor field, validation, or program changes. Therefore, the potential impact to users is minimal. UI or Process-Based: Larger Scale* = These UI or process-based features have more complex designs. Therefore, the potential impact to users is higher. Opt In Only = These features are made available for use via Opt In. No additional setup steps are required. Opt In, Plus Additional Steps Required = To use these features you must first Opt In, then perform additional setup steps. Steps Required (No Opt In) = Setup steps must be performed before these features can be used. For example, new or expanded BI subject areas need to first be incorporated into reports. Integration is required to utilize new web services. New Features Delivered Ready to Use (Delivered Enabled) Reports plus Small Scale UI or Process-Based new features will have minimal user impact after an update. Therefore, customer acceptance testing should focus on the Larger Scale UI or ProcessBased* new features. Feature Report UI or ProcessBased: Small Scale UI or ProcessBased: Larger Scale* New Features That Customer Must Take Action to Use (Delivered Disabled) Not disruptive as action is required to make these features ready to use. As you selectively choose to leverage, you set your test and roll out timing. Customer Action: Opt In Only Customer Action: Opt In, Plus Additional Steps Required Customer Action: Steps Required (No Opt In) Product Development Capture Electronic Signatures with Passwords to Meet Compliance and Audit Requirements Use REST Web Services for Change Management and Item Where-Used Queries Manage Conflicts During Execution of Multiple Scheduled Changes for Affected Items Notify Suppliers of Change Requests and Improve their Navigation Experience Perform Impact Analysis on a Change Request 7
8 New Features Delivered Ready to Use (Delivered Enabled) Reports plus Small Scale UI or Process-Based new features will have minimal user impact after an update. Therefore, customer acceptance testing should focus on the Larger Scale UI or ProcessBased* new features. Feature Report UI or ProcessBased: Small Scale UI or ProcessBased: Larger Scale* New Features That Customer Must Take Action to Use (Delivered Disabled) Not disruptive as action is required to make these features ready to use. As you selectively choose to leverage, you set your test and roll out timing. Customer Action: Opt In Only Customer Action: Opt In, Plus Additional Steps Required Customer Action: Steps Required (No Opt In) Set Cycle Time Thresholds to Improve Change Management Process Capture Change Order and Change Request History Product Hub Manage Item Templates of an Item Class Efficiently with Improved User Interface Map Nested XML Structures in Import Maps Use Item Definition Grouping Import Product Catalogs Using File-Based Data Import Execute Reports and Analytics from the Product Information Management Work Area Innovation Management Use Advanced Search for Proposals in Portfolios Manage Data Security in Innovation Management Subject Areas Manage Ideas Using REST Services Refresh Requirement Specification to Correct Sequence Numbers Use Web Services to Manage Idea and Proposal Teams Analyze Portfolio Resource Time-Phasing with Oracle Transactional Business Intelligence Manage Attachments in Innovation Management Quality Management Manage Quality Inspection Plans Using a REST Service 8
9 New Features Delivered Ready to Use (Delivered Enabled) Reports plus Small Scale UI or Process-Based new features will have minimal user impact after an update. Therefore, customer acceptance testing should focus on the Larger Scale UI or ProcessBased* new features. Feature Report UI or ProcessBased: Small Scale UI or ProcessBased: Larger Scale* New Features That Customer Must Take Action to Use (Delivered Disabled) Not disruptive as action is required to make these features ready to use. As you selectively choose to leverage, you set your test and roll out timing. Customer Action: Opt In Only Customer Action: Opt In, Plus Additional Steps Required Customer Action: Steps Required (No Opt In) Configure Inspection Actions Manage Data Security Across Issues and Actions Display Manufacturing Resource Instance Mandate Signature Password upon Workflow Approval Extend Quality Issues and Actions Using Application Composer 9
10 PRODUCT DEVELOPMENT CAPTURE ELECTRONIC SIGNATURES WITH PASSWORDS TO MEET COMPLIANCE AND AUDIT REQUIREMENTS In most cases, signatures are required for a prescribed set of transactions, product sets, or documents. Capturing proper documentation can be difficult, leading to outdated and inefficient management of paper records. You can now provide more granular auditing and traceability of user sign-off on a change workflow with electronic signatures, to support strict compliance for regulated industries such as Life Sciences. Simply enable an advanced signature capture option that mandates the need for a user ID and a password. When you capture approval history using electronic signatures with passwords, you only need a single approval within the Product Management tool; you do not need to sign off or approve the same content in two or more locations. You can meet compliance requirements without maintaining a separate ride-along process for signature capture. Electronic Signature Setup 10
11 User Sign-in Prompt Navigate to the Setup and Maintenance work area. Search for the task Manage Approval Groups. Click the task to open BPM Worklist in a new browser tab. Click Task Configuration. Search for and select ChangeOrderApprovalTask. Click the Edit Task icon (pencil icon) next to the Tasks to be configured header. Click the Access panel tab. Choose Password Required in the Signature Policy list. USE REST WEB SERVICES FOR CHANGE MANAGEMENT AND ITEM WHERE-USED QUERIES Integrate with external systems using REST web services to improve your management of change orders, item structures, and item where-used information. Use the Change Management and Item Where-Used REST services to do the following: Redline item header attributes Redline reference designators Redline affected item AML Redline change order headers and affected item attachments Redline item substitutes Retrieve where-used information of an item Leverage these REST web services to improve the management of changes and the collection of where-used information for your items through the integration technology made available to you or your systems' integrators. 11
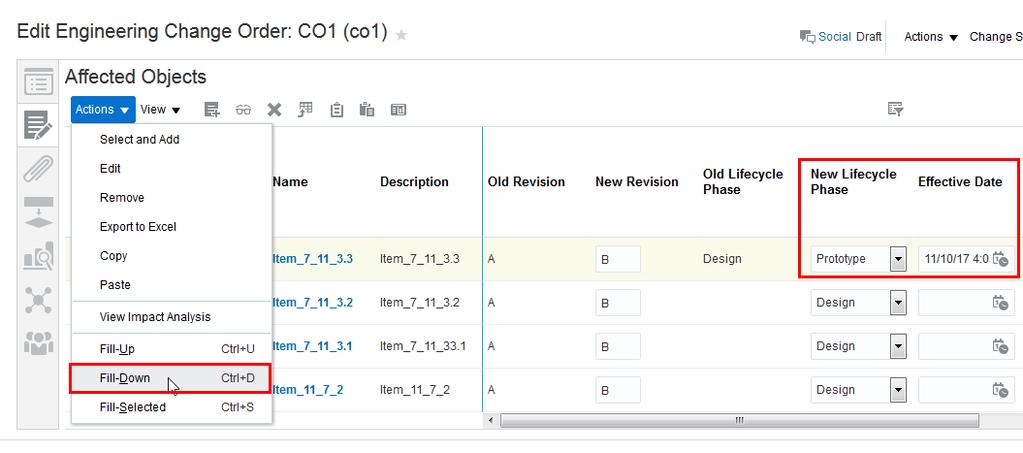
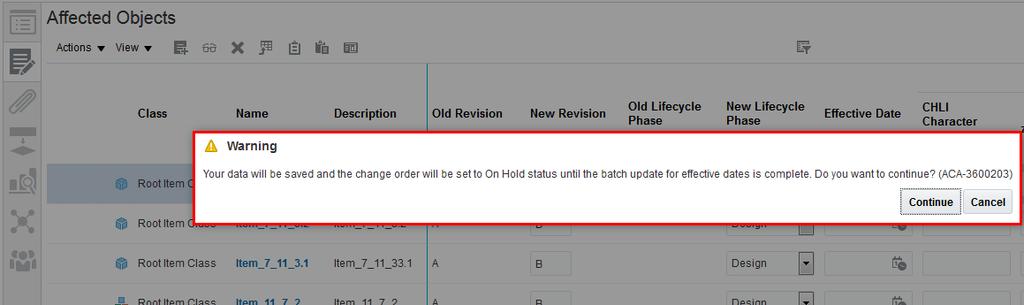
12 If you're using REST services with your Oracle Cloud implementation for the first time, then follow the instructions in the Quick Start section of the REST API for Oracle Supply Chain Management Cloud guide, available on the Oracle Help Center KEY RESOURCES Refer to the REST APIs for Oracle supply Chain Management Cloud documentation, available on the Oracle Help Center. MANAGE CONFLICTS DURING EXECUTION OF MULTIPLE SCHEDULED CHANGES FOR AFFECTED ITEMS The rework or canceling of change orders due to conflicting concurrent changes can be very costly to your organization. Change orders are initiated and then withdrawn or canceled, only to be recreated after all pending change orders are investigated for conflicts and remedies. Validate item rules and review warnings about other changes that are in process for affected items that you add to a change order. When an affected item is already assigned to a pending change order, a warning message appears and prompts you to confirm that you want to continue with the change. You can then make informed decisions about the timeliness, and sequencing or combining of change orders, and adherence to business rules, even before the change workflow begins. With this functionality, you can: Ensure data consistency while editing affected objects Avoid concurrent changes and reduce effort to merge changes late in the process View important information directly on the Affected Objects tab Warning Message - Affected Item Already on Pending Change Order No steps are required to enable this feature. 12
13 NOTIFY SUPPLIERS OF CHANGE REQUESTS AND IMPROVE THEIR NAVIGATION EXPERIENCE Delays in communication and information exchange between you and your suppliers can be very costly to your company. It is unrealistic to assume that a supplier would take the initiative to go and search for a required action, especially with the number of customer and supplier relationships in today's global supply chain. The late implementation of a change can cost hundreds of thousands of dollars to your bottom line, whether it is a cost reduction, quality event, or new product introduction change. You need to enable quicker navigation and faster response times for change collaboration with suppliers. Improvements to the Supplier Portal now enable suppliers to not only search for and access change requests that they have been added to, but also view notifications about change requests that require approval, and navigate to affected items directly from the change request notification. The Supplier Portal user will not see affected objects belonging to other suppliers or any comments on the approval notification panel. The workflow history on the Change Request notification panel will not be visible to the user. With these improvements, you can easily protect supply chain data and your company's intellectual property while collaborating with suppliers. The improved notification process and navigation, and the restrictions on visibility, ensure that your suppliers get the information needed for their success and yours. Supplier Notification No steps are required to enable this feature. 13
14 PERFORM IMPACT ANALYSIS ON A CHANGE REQUEST Initiating a change order process without a full assessment of its effect on all of your products, services, and supply chain, can cause costly rework and non-compliance situations for your company. Analyze the impact of a change request by viewing the top-level assemblies, as well as multi-level structures that are impacted by the change. Understand the full scope of the request through a complete assessment of the impact of a change and decide who should be part of the change management process. Providing impact details ahead of a change order process helps to ensure the right people are involved in the change and full design and supply chain assessments can be made at a less costly point in that process. Change Request Impact Analysis No steps are required to enable this feature. SET CYCLE TIME THRESHOLDS TO IMPROVE CHANGE MANAGEMENT PROCESS Lengthy and unmeasured change management processes can place a heavy burden on your company and its products and services. You can now establish and capture change order cycle time thresholds in the Oracle Transactional Business Intelligence (OTBI) application. Use OTBI's support of cycle time thresholds to monitor, manage, and assess your change management process for bottlenecks and areas of concern. With these measurement criteria, you can address delays in your process and identify improvements to quickly implement changes. The following screen capture shows a sample report created using the new metrics: 14
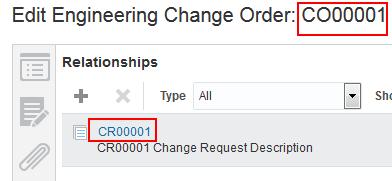
15 Sample Report Showing Cycle Time Thresholds The following screen capture shows the new measure, Cycle Time Threshold in Days, added in the Product Management - Change Order Real Time subject area. New Measure in the Change Order Real TimeSubject Area You can add the new Cycle Time Threshold in Days measure to your existing reports, or create new reports that use the new measure. For details about creating and editing reports, see the Oracle SCM Cloud: Creating and Administering Analytics and Reports guide, available on the Oracle Help Center CAPTURE CHANGE ORDER AND CHANGE REQUEST HISTORY View the action history of your product or document change orders and change requests. You can use the History tab on a change to clearly view specific actions, status changes, and approval events. You can see what actions were taken on a change and by whom, and ensure that a granular audit trail is recorded for each change. The current focus is on status changes. 15
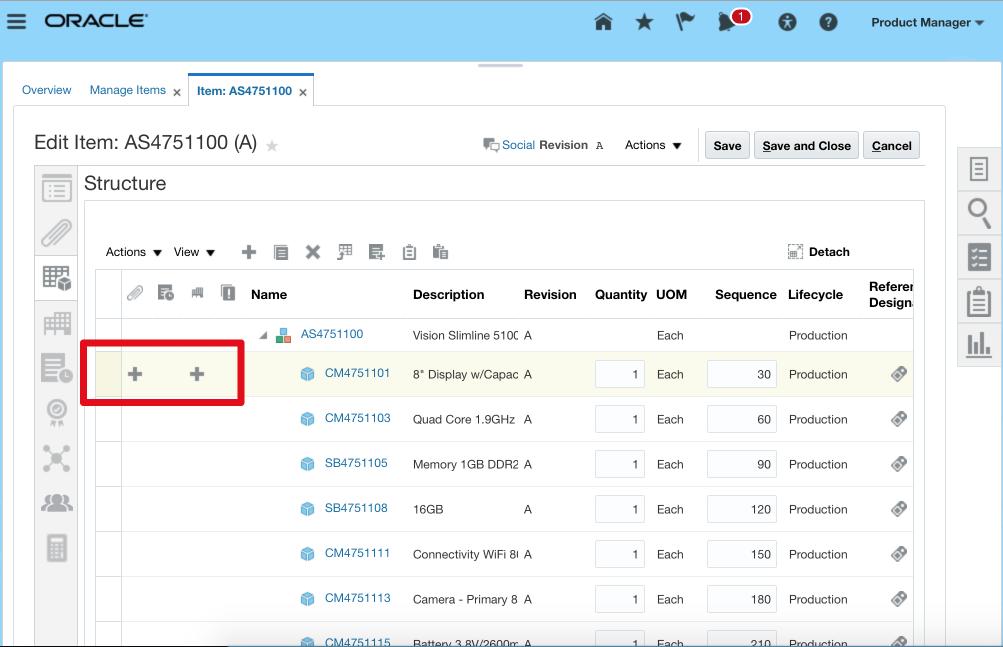
16 This functionality provides you with the details necessary to audit your change management processes as well as retrace the steps of a change order or change request to understand all of the actions and workflow movements throughout the lifecycle of that change or change request. View History No steps are required to enable this feature. PRODUCT HUB MANAGE ITEM TEMPLATES OF AN ITEM CLASS EFFICIENTLY WITH IMPROVED USER INTERFACE Creating new item templates for multiorganizational companies is a time consuming task. It is often error prone due to the extensive manual effort required for initial implementations and on-going maintenance, which are inherent in ever-changing enterprises. The Item Templates user interface is now enhanced to support copying of templates to other organizations. In addition, if these templates fail to get created under any circumstances, you can add predefined item templates directly from the user interface. The ability to copy item templates to multiple organizations in one go allows data stewards to use their time more efficiently. It allows new and on-going maintenance changes to be executed faster. The ability to add 16
17 predefined item templates through the UI directly makes the overall application more robust as there are built-in mitigation flows for possible environmental challenges. The following screen capture illustrates the feature and its benefits. Copy Multiple Templates to Multiple Organizations No steps are required to enable this feature. TIPS AND CONSIDERATIONS You can also choose an organization hierarchy while copying one or more templates. The selected templates get copied to all the organizations in the chosen organization hierarchy. ROLE INFORMATION To use this feature, the following privilege or role is required: Privilege Name and Code: Manage Item Class (EGP_MANAGE_ITEM_CLASS_PRIV) Duty Role Name and Code: Product Model Administration (ORA_EGP_PRODUCT_MODEL_ADMINISTRATION_DUTY) Job Role Name and Code: Product Data Steward (ORA_EGI_PRODUCT_DATA_STEWARD_JOB) 17
18 MAP NESTED XML STRUCTURES IN IMPORT MAPS The Import Map user interface is now enhanced to support the mapping of complex XML structures. You can map multilevel item structures and packs defined in XML files with nested tree structures. Import maps have also been enhanced to map multiple rows of multirow extensible flexfields, multiple item attachments, and so on, that are defined as repeating XML nodes. You can also map and import language specific item data, unit of measures, and others that are defined in XML node attributes. 18
19 The following screen capture illustrates this feature and its benefits. Import Map Enhancements for Mapping Nested XMLs No steps are required to enable this feature. 19
20 TIPS AND CONSIDERATIONS To import packaging and structure data, first map the parent node containing item information to item node in the Master Data region of import maps. Then, map the parent node from the starting point of the packaging-child-item information or structure-child-item information to the pack or structure node in the Master Data region of import maps. ROLE INFORMATION Privilege Name and Code: Manage Item Import Map (EGI_MANAGE_ITEM_IMPORT_MAP) Job Role Name and Code: Product Data Steward (ORA_EGI_PRODUCT_DATA_STEWARD_JOB) USE ITEM DEFINITION GROUPING With this update, you can group item organizations and inventory organizations into logical sets of organizations with each set made up of one Item Definition Organization (mandatory) and many Reference Organizations (optional) that use identical attribute values for an item. For example, let us say you have multiple distribution organizations in California (for example San Francisco, Santa Cruz, and Los Angeles) for marine engine parts. Let us also assume that all the distribution centers in California for marine engine parts have identical attribute values (for example, Lead Time = 7 days, Invoice Enabled = Yes). Under such a scenario, you can group the organizations by making the San Francisco distribution center as a representative Item Definition Organization and by making the rest of California distribution centers (for example, Santa Cruz and Los Angeles) as Reference Organizations. For each set of organizations, item attributes are maintained only in the Item Definition Organization (for example, San Francisco). These attributes are available in a read-only mode during runtime for inheritance by any of its associated Reference Organizations (for example, Santa Cruz and Los Angeles). In other words, for an item, the item attribute values in a set consisting of a Definition Organization and their associated Reference Organizations are identical. As and when the business needs change, subject to certain conditions, you can modify any of the said set of organizations by removing or reassigning any of its Reference Organization to another such organization set. If the business needs dictate so, you can also dismantle the set by converting its Item Definition Organization into a Reference Organization. Conversely, you can create a new set by converting an existing Reference Organization into an Item Definition Organization. Because the Reference Organizations inherit the item attribute values from the Item Definition Organization (for example, San Francisco) at runtime only, there is no need to maintain item attribute values at the Reference Organization level (for example, Santa Cruz and Los Angeles). This results in a significant reduction in the volume of item data pertaining to item attributes. The reduced data volume has cascading benefits such as shorter item-data migration time even for large and complex businesses, and improved item search performance throughout Oracle Cloud applications. In short, this update helps you with further optimized itemattributes data management capability. 20
21 The following screen capture illustrates the feature and its benefits: Manage Item Organization Parameters You must opt in to and enable this feature. For instructions, refer to the Optional Uptake of New Features section of this document. After you opt in, perform the following steps to enable item definition grouping: 1. Login as a Supply Chain Implementation Consultant. 2. In the Setup and Maintenance work area, select the Product Management offering, and then select the Item Organizations or Inventory Organizations functional area. 3. Search for and open the Manage Item Organizations task. 4. Configure item definition organizations and item reference organizations. TIPS AND CONSIDERATIONS This feature allows you to maintain item attributes at the item definition organization only. By carefully evaluating the business need to control attribute values at the organization level, it may be possible to reduce the number of item definition organizations you may need. Organizations tend to have identical attribute values when grouped by geography (for example, Northern California, Southern California) or business functions (for example, Distribution Division). KEY RESOURCES Product Information Management White Papers on support.oracle.com (Doc Id: ) ROLE INFORMATION Job Role Name and Code Supply Chain Implementation Consultant (ORA_RCS_FACILITY_SCHEDULE_MANAGEMENT_DUTY) Product Data Steward (ORA_EGI_PRODUCT_DATA_STEWARD_JOB) 21
22 IMPORT PRODUCT CATALOGS USING FILE-BASED DATA IMPORT Catalogs can now be created and maintained through the catalog import interface. You can now import a complete catalog and catalog-category hierarchy content from any source using the catalog import interface in conjunction with the Catalogs file-based data import (FBDI) template. Item category assignments can be imported through the existing item import interface. The catalog import interface uses a FBDI template that provides a formatted spreadsheet where you provide your catalog information. You can use the template to create a complete catalog or update an existing catalog. You can also specify additional catalog content such as attachments and descriptive flexfields into this spreadsheet. The detailed status of the import is available in the catalog import log. The catalog import framework replaces the existing Edit in Spreadsheet capabilities. It extends this functionality to handle larger catalogs and allows external catalog to be imported into the system using integration processes. Note that the Publish Catalog report will be replaced with full capabilities of the reporting framework. You will be able to create and configure any report using the catalog content in conjunction with other content. The following screen capture illustrates the FBDI template: FBDI Template Contain UNSPC Classification Download and review the latest Catlogs import template in the File-Based Data Import for Oracle Supply Chain Management Cloud guide, available on the Oracle Help Center. To import data using the template, follow the instructions in the Loading Data into Tables: Explained topic. The following is an overview of the steps required to import catalogs using the Catalogs import template. More information is available in the Instructions tab of the Catalogs import template Download the Catalogs import template. Enter the data into tabs in the spreadsheet template file. Generate the CSV file in a zipped file format. Upload the zipped file to the Oracle Universal Content Management application repository. Load the data into the Catalog Management interface tables. Import the data into the Catalog Management product tables. 22
23 ROLE INFORMATION Privilege Name and Code: Manage Item Import Map (EGI_MANAGE_ITEM_IMPORT_MAP) Job Role Name and Code: Product Data Steward (ORA_EGI_PRODUCT_DATA_STEWARD_JOB) Product Manager (ORA_PRODUCT_MANAGER_JOB) EXECUTE REPORTS AND ANALYTICS FROM THE PRODUCT INFORMATION MANAGEMENT WORK AREA You can now execute reports and analytics directly from the Product Information Management work area. Use the Reports and Analytics icon, which is available in the side panel, to execute business intelligence reports. Alternatively, you can continue to execute your reports from the Reports and Analytics work area. The following screen capture illustrates the feature and its benefits: Invoke Reports and Analytics No setup is required to enable this feature. ROLE INFORMATION Job Role Name and Code: Product Data Steward (ORA_EGI_PRODUCT_DATA_STEWARD_JOB) 23
24 INNOVATION MANAGEMENT USE ADVANCED SEARCH FOR PROPOSALS IN PORTFOLIOS Extend the advanced search for proposals to match specific criteria during portfolio analysis, and quickly identify those proposals that are a good fit to fill portfolio gaps and achieve targeted growth objectives. Portfolio managers can use the Select and Add option to include search criteria such as Proposal Status, Proposal Type, Latest Version, and custom attributes, and use these in conjunction with operators such as Contains, Does Not Contain, Equals, Is Blank, Between, Greater Than, etc. With this feature, you can easily evaluate dozens of proposals to identify those that best meet the overall portfolio objectives. The following screen captures illustrate this feature and its benefits: Use Select and Add to IncludeCustom Attributes As Search Criteria 24
25 Custom Attributes Appear As Search Fields Filter Search by Additional Criteria and Operators No steps are required to enable this feature. ROLE INFORMATION ORA_ACE_PRODUCT_PORTFOLIO_MANAGER_JOB MANAGE DATA SECURITY IN INNOVATION MANAGEMENT SUBJECT AREAS Restrict visibility of information on critical projects, innovations, or new technologies, to a selected, secured team of collaborators, reviewers and approvers. You can add a Team to an object, to ensure that it is accessible and visible only to team members. This data security is extended across Oracle Transactional Business Intelligence for Innovation Management subject areas. When a team is assigned to an object, and Allow Access to Team Members Only is selected, only the team members have visibility of the analysis through a secured view. 25
26 Perform the following steps: 1. In the Navigator, select the Ideas work area (for Ideas) or the Concepts work area (for Ideas/Proposals /Concepts/Requirements Specification). 2. Select a specific object using Manage Ideas for Ideas or Manage Proposals /Manage Concepts/ Manage Ideas/ Manage Proposals/ Manage Concepts/ Manage Requirements Specifications. 3. Select Manage Team from the Actions menu of an Ideas/Proposals/Concepts/Requirements Specification. 4. Select the Allow access To Team members only option. 5. Select and add users using the Search field. TIPS AND CONSIDERATIONS This enhanced data security is now available for the following Subject Areas: Ideas, Proposals, Concepts and Requirement Specifications. To make sure the data security is applied to your analysis, ensure that the analysis contains at least one measure (such as # Ideas in the Ideas Subject Area). MANAGE IDEAS USING REST SERVICES Capture ideas from multiple sources including external systems and applications to boost your ideation capabilities. You can now use REST APIs to get, create, update and delete ideas, thus enabling communication between external systems, portals or social applications, and Innovation Management Ideation Cloud Service. REST resources include ideas, attachments, votes and comments. REST APIs extend Ideation to help you capture and react to the true voice of the customer. Use the Ideas REST service to do the following: Create, update, or delete ideas Create, update, or delete idea attachments, votes and comments If you're using REST services with your Oracle Cloud implementation for the first time, then follow the instructions in the Quick Start section of the REST API for Oracle Supply Chain Management Cloud guide, available on the Oracle Help Center KEY RESOURCES Refer to the REST APIs for Oracle Supply Chain Management Cloud documentation, available on the Oracle Help Center. REFRESH REQUIREMENT SPECIFICATION TO CORRECT SEQUENCE NUMBERS The drafting of requirements is typically a cross-functional, multiple stakeholder, collaborative activity, with many users editing the specification simultaneously. To prevent multiple users from duplicating sequence numbers, a new action icon Refresh is now available. You can use this icon to sort and reorder the requirement nodes in the tree. This action enables an automatic save of current edits to the specification and resets duplicate tree sequence numbers. 26
27 The following screen capture illustrates this feature: Refresh Icon to Correct Sequence Numbering No steps are required to enable this feature. TIPS AND CONSIDERATIONS When working on requirement specifications simultaneously with multiple users, click Refresh before adding new requirements. This will ensure that the requirements are presented in the correct sequence. USE WEB SERVICES TO MANAGE IDEA AND PROPOSAL TEAMS With no shortage of ideas, it is a challenge to quickly evaluate and progress ideas with the most potential value. New APIs enable you to automate the process of adding team members to ideas and proposals based on object attribution values. You can quickly add the right team members to each idea or proposal to enable faster focus and cycle time for evaluation, and determine which ideas to progress into the innovation funnel for potential commercialization. The following operations have been added to Idea Web Service and Product Concept Web Service (applicable to both Concepts and Proposals ) addteammembers deleteteammembers Review the SOAP service changes, and update your SOAP implementation as desired. KEY RESOURCES Refer to the SOAP Web Services for Oracle Supply Chain Management Cloud documentation, available on the Oracle Help Center. 27
28 ANALYZE PORTFOLIO RESOURCE TIME-PHASING WITH ORACLE TRANSACTIONAL BUSINESS INTELLIGENCE The analysis of resource needs against resource capacity is a crucial metric in determining the right portfolio. This is often a cumbersome and error-prone process, involving the aggregation of resource needs with different start and end dates per proposed project and across multiple resource types, causing delays in making investment decisions. Take quicker decisions with clearer insights, using the following new metrics, dimensions and dimensional attributes added to the Portfolio Resources Real Time subject area within the Resource Time Phased folder: Resource Head Count Per Month Resource Head Count Per Quarter Resource Head Count Per Year Resource Capacity Per Month Resource Capacity Per Quarter Resource Capacity Per Year With these new analyses, you can perform a what-if analysis prior to saving a portfolio. This enables your organization to evaluate the use of resources against available capacity and present capacity, and perform timephased resource analysis, with easy-to-consume management reporting. The following screen capture shows a sample analysis that leverages the new metrics: Sample Analysis The new metrics and attributes are available in the Innovation Management - Portfolio Resources Real Time Subject Area. The following screen captures show the location of these new metrics and attributes, and a sample request: 28
29 Resource Time-Phased Folder Sample Request You can add the new dimensions and dimensional attributes in the Portfolio Resources Real Time subject area to your existing reports, or create new reports that use the subject area. For details about creating and editing reports, see the Oracle SCM Cloud: Creating and Administering Analytics and Reports guide, available on the Oracle Help Center TIPS AND CONSIDERATIONS With the introduction of time-phased metrics, you can create a time-phased OTBI chart without the need to break down the resource pool by time buckets,such as months or quarters, in the Resource tab of the proposal. This reduces the number of rows you have to add in the Resource tab of the proposal. 29
30 ROLE INFORMATION ORA_ACE_PRODUCT_PORTFOLIO_MANAGER_JOB MANAGE ATTACHMENTS IN INNOVATION MANAGEMENT Attachments such as spreadsheets, justifications, and preliminary specifications can change versions iteratively during the lifecycle of the innovation process as the related discovery unfolds. The inability of users to associate a specific version or track a date history makes it difficult to track progress and ownership, and creates the risk of one user overwriting another's efforts. For ideas and proposals, you can now associate a specific version of an attachment, and check in, check out, or download the most current version of an attachment. Streamlined file attachment steps minimize user clicks and navigational steps required to add multiple attachments simultaneously. The feature offers visibility and traceability into attachment details and history. The following screen captures illustrate the feature and its benefits: Add Multiple Files as Attachments To check in or check out attachments, you can use the icons on the toolbar or the options in the Actions menu. Check In or Check Out Attachments 30
31 View File Revision History You can set one of the versions as Active. Any version of the attachment can be downloaded. No steps are required to enable this feature. QUALITY MANAGEMENT MANAGE QUALITY INSPECTION PLANS USING A REST SERVICE Oracle Quality Management Cloud provides web services to enable integration with external systems, such as an external quality management system, shop floor devices, or mobile devices. With this update, you can now create and update quality inspection plans. Use the Inspection Plan REST service to do the following: Get quality inspection plan details, specifications, and inspection criteria Create and update quality inspection plans details Create, update, and delete quality inspection plan specifications Create, update, and delete quality inspection plan criteria Create and delete attachments at any of the following levels: Inspection plan details Inspection plan specifications This REST service helps streamline the management of inspection plans by automating the initial load of inspection plans, synchronizing inspection plan changes, and sharing inspection plans with external systems. 31
32 If you're using REST services with your Oracle Cloud implementation for the first time, then follow the instructions in the Quick Start section of the REST API for Oracle Supply Chain Management Cloud guide, available on the Oracle Help Center KEY RESOURCES Refer to the REST APIs for Oracle Supply Chain Management Cloud documentation, available on the Oracle Help Center. ROLE INFORMATION Privilege Name and Code: Edit Inspection Plans (QA_EDIT_INSPECTION_PLANS) Job Role Name and Code: Quality Engineer (ORA_QA_QUALITY_ENGINEER_JOB) CONFIGURE INSPECTION ACTIONS Quality Engineers require a methodical approach to implement post-inspection activities and procedures based on the outcome of quality inspection for a particular item, supplier, resource, or business process such as incoming, in process, and final inspection. With configurable inspection actions, you can configure the IfThen decision rules of what actions the user or application should take to ensure compliance with standard quality procedures. As part of an inspection plan, you can visualize and define action rules based on the inspection plan specifications. When results entered for one or more inspection characteristics match the action rule conditions, the corresponding action is triggered. With inspection data, proper follow-up procedure, and disposition you can ensure adherence to the highest quality standards. Configurable inspection actions will allow you to: Change the material status of a lot, serial, or subinventory Create a nonconformance issue Display alert messages Trigger a quality inspection business event that can be extended through PaaS integration to call a web service Send a workflow notification to a specified recipient View the noted history of actions triggered 32
33 Manage Inspection Action Rules No steps are required to enable this feature. TIPS AND CONSIDERATIONS The setup of action rules in the Inspection Plan UI is optional. Save the inspection plan specifications before configuring the inspection action rules. You can define one or more inspection actions per inspection characteristic. You can re-implement the automatic generation of nonconformance data using configurable inspection action rules. NOTE: You can create and modify inspection actions only from the Inspection Plans UI. You cannot create or update them using the Manage Quality Inspection Plans REST services. ROLE INFORMATION Privilege Name and Code: Edit Inspection Plans (QA_EDIT_INSPECTION_PLANS) Job Role Name and Code: Quality Engineer (ORA_QA_QUALITY_ENGINEER_JOB) 33
34 MANAGE DATA SECURITY ACROSS ISSUES AND ACTIONS The new Security panel on Issues and Actions enables you to restrict data visibility and access to each object. You can add specific users and roles in the Security panel of an object to make sure only these users and roles are able to access these issues and actions. Creators and assignees have automatic access to their issues or actions. Security Panel on a Quality Issue Since data security has been enabled in order to protect issues and actions from being seen by unprivileged users, some additional setup steps are required. Each user role, such as a Quality Analyst, must have data security grants assigned to access issues and actions. Perform the following steps to enable this feature: 1. Open the Security Console. 2. Search for and edit all the roles that should be able to access issues and actions. 3. On the Data Security Policy tab of the Role Definition, grant access to the ENQ_ISSUES_B and ENQ_ACTIONS_B DB resources by instance set. 34
35 Configuring Access to Quality Issues and Actions in the Security Console In addition, for every user who needs to add new entries to the Security panel of the quality issue and quality action, the respective user role should be able to modify the Security table. To enable this: 1. Search for and edit all the roles that should be able to add new entries to the Security tab of a quality issue or quality action. 2. On the Data Security Policy tab of the Role Definition, you need to grant access to the FND_OBJECTS resources by instance set, for quality issues and for quality actions (two entries). Configuring Rights to Add Entries in the Security Panel of QualityActions and Issues 35
36 TIPS AND CONSIDERATIONS In order to make these "private" issues and actions "public" again, remove all users and roles from the Security panel. Once you do this, all other users with privileges can see the issues and actions again. DISPLAY MANUFACTURING RESOURCE INSTANCE When raising a resource production exception in Manufacturing, you can define a more granular representation of a resource instance. This resource instance is stored and displayed along with the affected manufacturing resource on the quality issue that was created as a production exception. With the addition of resource instance details on the Affected Objects page of quality issues or actions, and visibility of this information within Oracle Transactional Business Intelligence analysis, you can quickly assess which child of a resource is contributing most to production exceptions, and requires immediate attention. Resource Instance Details Displayed No steps are required to enable this feature. MANDATE SIGNATURE PASSWORD UPON WORKFLOW APPROVAL In some industries, a prescribed set of workflow approval transactions for quality issues or actions require greater granularity of electronic signatures. You can enable an advanced signature capture option that mandates the need for a user ID and a password supporting the 36
37 strict compliance requirements for regulated industries, such as Life Sciences, to maintain the audit history and traceability of signatures. User Name and Password Required Fields for Approval Set the signature policy of the workflow approval task to Password Required Set Up Signature Policy As Password Required 37
38 EXTEND QUALITY ISSUES AND ACTIONS USING APPLICATION COMPOSER Oracle Quality Management Cloud currently allows you to configure existing ready-to-use objects such as adding user-defined attributes. New extensibility capabilities now available through Oracle Application Composer greatly expand the ability to configure Quality Management's standard issues and actions objects. You can modify and enhance existing business processes using: New Attribute Types: DCL, Checkbox, Percentage, Date Time, and Long Text Dynamic Field Layouts: Group attributes based on criteria that align with your processes Tabs: Show or hide and reorder tabs based on criteria, and add URL tabs Buttons and Actions: Add user-defined actions and buttons Application Composer leverages a set of standard design patterns and wizards to remove the complexity of making user-defined changes, allowing you to focus on the application changes required for your business. Configuring Buttons and Actions Using Application Composer Newly Configured Action Displayed in Actions Menu 38
39 For details about configuring Quality Issues and Actions objects using Applications Composer, refer to the Oracle Applications Cloud: Configuring and Extending guide, available on the Oracle Help Center UPDATE 18B REVISION HISTORY This document will continue to evolve as existing sections change and new information is added. All updates appear in the following table: Date Feature Notes 06 JUN 2018 Complete New Item Request Tasks with Simplified Navigation Updated document. Feature delivered in update 18B. 20 APR 2018 Created initial document. OVERVIEW This guide outlines the information you need to know about new or improved functionality in this update, and describes any tasks you might need to perform for the update. Each section includes a brief description of the feature, the steps you need to take to enable or begin using the feature, any tips or considerations that you should keep in mind, and the resources available to help you. SECURITY AND NEW FEATURES The Role section of each feature identifies the security privilege and job role required to use the feature. If feature setup is required, then the Application Implementation Consultant job role is required to perform the setup, unless otherwise indicated. (If a feature doesn't include a Role section, then no security changes are required to use the feature.) If you have created job roles, then you can use this information to add new privileges to those roles as needed. CUSTOMERS UPGRADING FROM RELEASE 12 If you're upgrading from Release 12 to Release 13, then you should review all of the release readiness content for Release 13 (updates 17B - 17D, as well as, updates 18A - 18B) to learn about all of the features available in release 13. GIVE US FEEDBACK We welcome your comments and suggestions to improve the content. Please send us your feedback at oracle_fusion_applications_help_ww_grp@oracle.com. 39
40 OPTIONAL UPTAKE OF NEW FEATURES (OPT IN) We continue to add many new features to the Oracle Cloud Applications, and for some features, you can take advantage of new functionality at a pace that suits you by opting in to the feature when you re ready. You can opt in to a feature in two ways: by using the New Features work area, or by using the Setup and Maintenance work area. To opt in using the New Features work area: Click the Navigator, and then click New Features (under the My Enterprise heading). On the New Features page, select the offering that includes new features you d like to review. Click Go to Opt In for any feature that you want to opt in to. On the Edit Features page, select the Enable option for the feature, and then click Done. To opt in using the Setup and Maintenance work area: Click the Navigator, and then click Setup and Maintenance. On the Setup page, select your offering, and then click Change Feature Opt In. On the Opt In page, click the Edit Features icon. On the Edit Features page, select the Enable option for any feature you want to opt in to. If the Enable column includes an Edit icon instead of a check box, then click the icon, select your feature options, and click Save and Close. 5. Click Done