Notice: Falsification of timesheets, whether submitting or approving, can be grounds for immediate termination.
|
|
|
- Collin Ball
- 5 years ago
- Views:
Transcription
1 Employee Functions Time & Attendance Experience the Workforce system from the employee perspective. Learn Workforce navigation fundamentals and functions related to reporting time, activities, and absences in the system. Notice: Falsification of timesheets, whether submitting or approving, can be grounds for immediate termination. University time system:
2 Table of Contents About This Guide... 1 Objectives... 1 Conventions... 1 Home Screen Navigation... 2 Logging into the Home Screen... 2 Actions... 4 Customizing the Home Screen... 5 Online Help... 6 The Manager Dashboard... 7 Manager Functions... 7 Time Entry... 7 Reports... 7 Schedules... 8 Settings... 8 Timesheet Components... 9 Timesheet Window Buttons... 9 Setting Date and Save Options Finding Timesheets Sorting Timesheets Navigating Timesheets Working with Employee Timesheets Editing Employee Time Using Pay Codes Entering Timesheet Details Exception Handling Deleting a Time Entry Comp Time vs Overtime Using Banked Comp Time Holiday and Administrative Leave Winter Break PTO Rules Editing Employee Leave Supplemental Payments Group Time Entry Adding and Editing Group Entries Using Other Group Time Entry Tools Working with Schedules... 32
3 Standard Schedule Assignment Assigning Permanent Schedule Templates Assigning Temporary Schedule Templates Assigning Schedules to Dates Outside of Current Pay Period Edit an Assigned Schedule Other Manager Functions End-of-Period Reminders Approving Timesheets Rejecting Timesheets Amending Timesheets Approving Time Off Requests Cancelling an Approved Time-Off Request Delegation Cancelling or Revoking a Delegated Role Generating Reports General Reports View Reports Conversion Chart... 57
4
5 About This Guide This guide will help you learn the most commonly used functions in Workforce Time and Attendance. Access to Workforce is browser-based. Workforce supports Internet Explorer, Firefox, and Safari. Objectives This guide will help you learn how to: Log in to Workforce and navigate through the application as a manager Edit employee timesheet information Review bank balances and pay calculations Approve and amend employee timesheets Process time-off requests Perform end-of-period activities as a manager Delegate privileges to others Generate reports Conventions This guide uses the following notational conventions: Bold text depicts tab labels, menu names, policy labels (Pay Code policy), function buttons (Submit Timesheet button), and computer keyboard keys (press Enter). Bold text and the right arrow symbol ( ) depict hierarchical choices in menus. Bold italics represents field labels (Status_Code_1 field). Bordered text depicts notes, cautions, or warnings. University time system:
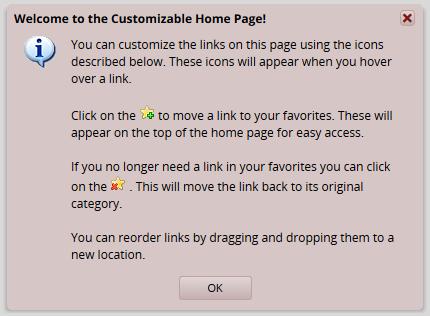
6 Home Screen Navigation You will access the University time system, Workforce software, through a web browser at or clock interface to perform functions such as entering time, time-off requests, work schedules, requesting FMLA, and reviewing leave balances. The method you use to report time depends on your department preference. You might access Workforce in one or more of the following ways: Web-based interface on a workstation. Workforce supports the Microsoft Internet Explorer, Mozilla Firefox, and Apple Safari web browsers. WebClock on a personal computer or kiosk Workforce Mobile Time Clock Logging into the Home Screen 1. Log into Workforce by entering your OUNet ID and Password into the Login window. 2. The first time you log into Workforce, the following dialog appears. Click OK. 2
7 3

8 3. The Manager Home Screen appears. The following is a sample of the employee Home Screen. Workforce Manager Functions The employee Home Screen provides links to the following Time & Attendance related functions. The functions on your Home Screen may vary from those described here based on your security and access. Actions My Timesheet: View, enter or update timesheet data. My Time Off: Submit time off requests, track the status of your requests, and view past request history. My Calendar: Shows your personal calendar which displays events such as time off, pending time off, and holidays. View Reports: Workforce includes reports for both employees and managers. Employees can access general reports to view timesheet information for a certain period, roles delegated to them, or comments on timesheets. 4


9 Customizing the Home Screen Workforce supports the following Time & Attendance Home Screen customizations: Rearranging Function Links To rearrange the order in which functions appear within a category, click and drag the function link. Creating a Favorites category for frequently-used functions Hover the mouse pointer over the function s star icon and click to move the function to the Favorites section of the Home Screen. Removing a Function from Favorites Hover the pointer over the respective function link and click the star icon. The function returns to its original category. 5
10 Online Help Once logged into Workforce, you have access to online documentation for Time and Absence Compliance through the Help link. The Time and Absence Compliance link opens the online help options in a new browser window. 6

11 The Manager Dashboard The functions available on the Workforce dashboard depend on the type of role of the user. The manager s dashboard offers functions not available to non-management employees to assist managers in handling the time and attendance data of their employees. Managers can use these options to perform such functions as editing and approving employee timesheets, assigning schedules, or reviewing employee time off requests. Manager Functions The functions available on the dashboard are arranged in groups of related tasks. See below for a description of each of the links on your dashboard. Time Entry My Timesheet: View, enter or update timesheet data through the timesheet. Edit Employee Time: View and edit employee timesheets. Edit Time for Groups: Add and edit time entries for a group of assignments at once. Approve Timesheets: Approve timesheets for groups of employee assignments. Instead of approving timesheets individually, you can approve the timesheets for all employee assignments in a group. Reports View Reports: Generate general reports to view timesheet information for a certain period, delegated roles, or comments on timesheets. 7
12 Schedules My Calendar: View your calendar. Employee Calendars: View your employee calendars. Group Calendars: View your groups calendars. My Time Off: Submit time off requests, track the status of your requests, and view the history of past requests. Review Time off Requests: Approve or reject employee time off requests. Assign Schedules: Assign schedules or schedule cycles to employees. Manage Group Schedules: Enables the adding and editing of schedules for an entire group of assignments at once. Managers should use this window for one-time schedule modifications. Settings Manage Delegations: The roles for an assignment group can be delegated to another user. When delegating assignment group roles, the owner can delegate only those roles that are at or below the owner s role for the group; i.e., an owner with manager role for a group cannot delegate the Payroll administrator role to the group. The owner delegating the roles can indicate if the recipient of the delegation is allowed to re-delegate the role to another user. Once an owner has delegated a role, that owner can also cancel the delegation. 8
13 Timesheet Components When viewing and editing individual employee timesheets or schedules, the work area of the manager s window resembles the work area of an employee s window, and includes buttons that perform similar tasks. No preferred names will appear in Workforce for any employee. Timesheet Window Buttons Button Button Function The Minimize button lets you hide the assignment tree. When hidden, the button toggles to a Maximize button. The Prev and Next buttons move you to the previous or next record available, respectively, based on your selection criteria. The Find button locates records based on a common set of search criteria. To sort your search results, click the top of any column in the Find Employees window. The Sort button arranges employee records in a specific order. The Work Period button, in Table and List view, displays the timesheet s period. In Day View, this button indicates the date displayed in the timesheet. This button opens a pop-up calendar from which you can select a pay period. 1. Click an assignment in the assignment tree on the left side of the window to reveal the group s employees. 2. Click a name to open the employee s timesheet. 9
14 Setting Date and Save Options You can specify date and save options that help you locate and process employee timesheets or schedules more efficiently. The options you select remain valid for the current session only. 1. To set the date and save options, click the Pay Period button to access a pop-up calendar. 2. Select the period from the calendar by doing one of the following: Click the desired date. The period containing that date appears. Click the Current Period button to specify the current period. Click the Today button to specify the period containing today s date. The selected period appears in yellow. 3. Click the arrow in the Save button to access its drop-down menu, and choose what the system will do whenever you save an employee s timesheet. By default, the system saves just the employee s timesheet and performs no further action. Select Save and Next to direct the system to save the employee s timesheet, then close it, and display the timesheet of the next employee in the group. Select Save and Find to direct the system to save the employee s timesheet, then close it and open the Find Employees pop-up window. Finding Timesheets Use the Find button to quickly locate the timesheet for an employee or a set of employees based on specific search criteria. 1. Click the Find button to display the Find Employees pop-up window. 2. Enter your search criteria. For example, you may enter a Last Name or Employee ID. You can also use a character string and or the wildcard character (*) to retrieve a list of employees matching the characters you enter. 3. Click Search to find the records, or click Cancel to exit the pop-up without searching. When the search completes, the results expand within the Find Employees pop-up window and appear in a table. You are able to sort your search results by clicking the top of any column in the Find Employees pop-up window. 4. Click a row in the table to display the record for that employee. To refine your search, click the plus button to expand Search Criteria, make any changes, and click Search. Sorting Timesheets Use Sort to specify the order in which to arrange records. To sort records, click the Sort button to display the Sort drop-down list. Select the option by which you want the records sorted. 10


15 Navigating Timesheets 1. To select a pay period for viewing or editing, click the Work Period button to access the pop-up calendar, and select a pay period. 2. Use the Minimize and Maximize buttons to collapse or expand the left panel. 3. Use Tab or Shift + Tab to move between fields on the timesheet. 4. Click the Schedule tab to display the employee s work schedule. 5. Click the Exceptions tab on the bottom panel to display system-generated messages related to the timesheet. 6. Click the Time Off tab to view the employee s bank balances. 11

16 7. Click the Results tab to view a pay summary of the timesheet. 8. Select and click the Print item from the More button to print the timesheet. 9. Click the Save icon to save any changes you make. Select and click the Save and Find option from the Save button to save the timesheet and automatically open the Find Employees window. Select the Save and Next option to save the timesheet and automatically open the timesheet of the next employee in the group. 12
17 Working with Employee Timesheets Editing Employee Time The Manager Time Entry window enables you to: Edit employee timesheets View an employee s time off balances and pay preview 1. Select Time Entry > Edit Employee Time in the dashboard. The Manager Time Entry window appears. 2. Select an assignment group if you have been delegated more than one group of employees. 3. Select an employee from that assignment group. The employee s timesheet appears. Editing the timesheet for an assignment in the Manager Time Entry window is the same as working in the Personal Time Entry window. CAUTION: It is always recommended for a supervisor to return a timesheet to an employee and have the employee make the correction/change. There are some instances where the employee is unable to make the correction (ex. Time/web clock punches) and the supervisor must update the employee s timesheet. In these instances, be sure to note in the comments why you are making the change and keep back up for your records. 13

18 Using Pay Codes A pay code is an entry-type identifier required for every transaction recorded on a timesheet or schedule. Each pay code has an entry type such as amount, elapsed time, or in/out time. Managers may have access to certain pay codes which are unavailable to employees and can modify employee timesheets by selecting from a number of additional pay codes. Pay codes such as vacation, paid leave scheduled or paid leave unscheduled will decrease time off banks. 1. Open an employee s timesheet. 2. Select the needed pay code. 3. Enter the hours for the pay code or the elapsed time. 14

19 Entering Timesheet Details The Comments field can be used to enter details about an infrequently used pay code to a timesheet entry or to enter any additional information related to a particular time entry. If a timesheet entry contains any details, a Comment Indicator appears in the field associated with the comment. 1. Click the small black arrow to expand and collapse the Comments field. An alternative method is to press the Shift and Enter keys at the same time. By default, when the Comments field contains data, the comment indicator and comment toggle are green. If the Comments field contains any invalid data, such as an invalid date format or too many characters, the comment indicator is red. 2. To hide the Comments field, click the small black arrow. 15
20
21 Exception Handling An exception is a conflict noted between time and attendance information and the rules under which the timesheet is processed. Exceptions generate messages which appear in the Exceptions tab on the Time Entry window. Some messages are informational and require no action; others require a satisfactory resolution before the timesheet can be successfully submitted. Error level exceptions must be corrected before the respective time is paid. The Exceptions tab presents exceptions. Each exception shows the: Date of the exception Exception message describing the problem Severity of the exception (Informational, Error, or Warning) Any action which may be required If a time entry has a related exception, a color-coded exception pin appears which, when clicked, displays the Exception tab. The exception messages are also color-coded to identify the level of severity, and sometimes the system is configured to automatically send notification of the exception to you or another appropriate party. To view exceptions for a specific day, select the Filter exception by day checkbox. White: No exceptions or only informational messages present Yellow: Warnings present Red: Errors present By default, exception messages are displayed in decreasing order of severity. The rank of severity codes, from lowest to highest, is as follows: Severity Level Least Severe Most Severe Field Options No Exceptions Informational message no action required Informational message action may be Warning Warning paid differently than entered Error record not paid Error entire timesheet not paid/held 17

22 1. Select any column header (Date, Exception Message, or Action Required) to reorder the list. 2. Click the arrow which appears next to the column name to select a different sort order. 3. Time entries associated with exceptions appear on the timesheet marked with a colored pin. Deleting a Time Entry You can delete a row of time, a time transaction commonly called a slice, in Table View. 1. Switch to Table view if necessary. 2. To delete a time slice, select the time slice to delete. 3. Right-click and select Delete Entry. 18
, as this is the")
23 Comp Time vs Overtime Depending on your departmental policies, most overtime worked is accrued as Comp Time at a 1 ½ rate. You can store earned overtime by using the pay code Comp Time Banked. To do so enter Comp Time Banked on your timesheet on the Friday of the week in which overtime was earned (make sure to use the value the system provides to fully bank all overtime), as this is the last day of the weekly schedule. 1. If you work more than 40-hours during the work week you will receive an exception message explaining that overtime has been earned for the pay period and can be banked as Comp Time. 2. Add a new row to Friday of that week and select pay code Comp Time Banked and enter the number of hours in the exception message. 3. In this example, the overtime worked was 3hrs but accrued as Comp Time at the 1 ½ rate which is 4.50hrs. 4. Comp time to be banked must be approved/acknowledged (check box checked) by the manager for the time to accrue into their bank. If the manager does not approve, the hours are paid as overtime. When an employee banks comp time, the supervisor will notice a warning on the employees timesheet requesting acknowledgement by the supervisor. Once the supervisor click the acknowledgement indicator and saves the page, the exeption message changes to informational and is no longer highlighted. 19
24 5. Comp time to be banked must be approved/acknowledged (check box checked) by the employees manager for the time to accrue into their bank. If the manager does not approve the comp time, the hours are paid as overtime. Using Banked Comp Time 1. To Enter banked comp time, select the pay code Comp Time and enter the number of hours taken. The system will require an employee to use any hours accrued in their Comp Time Bank prior to using paid or extended sick leave. 2. If you have an employee that has multiple assignments, they can only take comp time used with the department where the hours were accrued. 20
 the number of hours, based on your FTE, will automatically be entered onto your timesheet.")
25 Holiday and Administrative Leave When the University is closed due to Holiday or Administrative Leave (bad weather, icy roads, etc.) the number of hours, based on your FTE, will automatically be entered onto your timesheet. If you are required to work over a Holiday, depending on your departmental policies, you can bank the Holiday hours on your timesheet to use at a later date. 1. Leave the Holiday hours populated and add your hours worked for the day. 2. After adding daily time entry you will be prompted in the messages tab to acknowledge the time transfer to your Holiday leave bank. Check the Acknowledge box and save the timesheet, if you do not check the message and save your timesheet you will be paid in addition to your holiday hours and the holiday time will not be banked. Using Banked Holiday Time 1. To use banked Holiday Time, select Banked Holiday and enter the number of hours taken. 21
26 Winter Break PTO Rules Editing Employee Leave Each winter break there are 2 days in which Paid Time Off (PTO) is used to complete the time period. In Workforce the each benefits eligible employees timesheet will be pre-populated with the pay code Paid Leave Scheduled in accordance to the empoyees FTE for these days. This may cause an error to be displayed for any employee that has a comp time bank balance, Comp Time must be exhausted prior to using Paid Leave. If this happens, there will will be a red error in the messages tab in that states the comp time must be used prior to scheduled paid leave, this error must be corrected by the manager or timekeeper in order for the timesheet to pay. To correct this the timekeeper will need to edit any affected employees time by using any available comp time balances prior to paid leave scheduled. To edit an employees time please reference the following steps: 1. Select Time Entry > Edit Employee Time 2. Select the employee group. 22

27 3. Choose the hourly employee whom has an error that needs correction and select their timesheet. 4. Select the day you are correcting leave for on the timesheet. In the drop down, select the pay code Comp Time on a new line and enter either the full hour value for the day or the amount of comp time to be use prior to Paid Leave Scheduled. 5. Enter 1.5 hours of Comp Time to exhaust the bank, for the remainder of the day you can use 6.5 hours of Paid Leave Scheduled to removed the error pin. 6. You will see now that the error message and red pin have been removed from the timesheet and the messages tab. The results will also be reflected in the time off tab below the timesheet for the current changes. 7. Save the timesheet. You may now approve time if necessary and the timesheet will pay, so long as there are no further error messages that need to be addressed. 23

28 Supplemental Payments Supplemental payments may be added to hourly employee timesheets that are working in your department. No supplemental payments may be added to any monthly employee timesheets. Follow these steps to add a supplemental payment to an hourly employees timesheet for the current pay period: 8. Select Time Entry > Edit Employee Time 9. Select the employee group. 10. Choose the hourly employee you are entering the supplemental payment for and select their timesheet. 11. Select the day you are entering the payment for on the timesheet. In the drop down, select the pay code supplemental payment. 24


29 12. The Hours, Combo Code, Rate and Comments field will be open for entry. 13. Enter the appropriate Hours, Rate and Combo Code for the payment. Add any necessary comment and save the timesheet. 14. Supplemental payments do not require approval above your access. Make sure that you have all the necessary documentation and a signed supplemental payment form on file to justify the supplemental payment. In an audit, you will be asked to provide the documentation. For a prior pay period, you will need to Amend the timesheet before entering the supplemental payment details. Adding a supplemental payment to a prior pay period may cause the employee to be owed overtime. 25

30 Group Time Entry The Group Time Entry window enables managers to perform bulk time entry tasks for groups of employees. You can edit an entire or partial group of employees. For example, you can add a week of training to a group of employees in a division or add a holiday for an entire unit. 1. To display the Group Time Entry window, select Edit Time for Groups from the Time Entry area of the dashboard. The Group Time Entry window appears. The Group Time Entry window enables you to select and edit entries for multiple timesheets. Your window may also contain buttons for other tools, depending on the system configuration. 2. To select group entries, select the appropriate assignment group from the Assignment Group drop-down menu. Once the relevant information loads, a grid displays employee names, days, and dates. 26

31 For large groups, only the first 25 members display. Use the filter button to refine your results. Time entries associated with warning and error exceptions appear with a shaded background. Yellow indicates exception warnings, while red indicates error exceptions. If your system has been configured to include cross-period exceptions, a cross-period exception button appears to the right of the employee name. 1. In most cases, the grid s default view displays the current pay period. To choose a different pay period, select a date that falls within that pay period by doing one of the following: Enter a date in the Date field. Use the following format: MM/DD/YY, including the slashes or dashes. Alternatively, click the Calendar button (if available) and select a date. After selecting a new date, the grid automatically updates to that date. 2. Select entries to modify by clicking the appropriate cells in the grid. To select all dates in the time period, click the cell containing the employee (assignment) name. To select a specific date for all members in the group (i.e., a column), click the cell containing the date (the column header). To select specific dates for specific members, click the cells you would like to edit. To select a range of cells, click the first cell in the range, and then press SHIFT while clicking the last cell in the range. To select multiple concurrent cells, click a cell and drag the mouse across additional cells while holding down the mouse button. Click the Clear Selection button to start over. 3. Select the Daily Entry Add/Edit option to apply different changes to individual employees. 4. Edit the timesheet as you would in the Manager Time Entry window. 27
32 5. You can use the drop down menu to switch between the Daily Entry and the Group Entry. 6. Select the Group Entry Add/Edit option to apply a single change to all employees. 7. After you ve made the desired edits, select Save and Return to save the changes and return to the main Group Time Entry Window. Select Save to save changes and remain on the same page. Select Back to return to the main window without saving the changes. 8. To edit the assignments of employees in a different group, select a different group from the Assignment Group drop-down menu. Adding and Editing Group Entries You can add and edit entries for just a few records or a large number of records. 1. To add or edit group entries, select the cells for which entries are to be added or modified. 2. Choose the task and method to be performed. In the Group Entry area, click Add or Edit to add or edit large groups of entries. This is a good choice when you have selected dates for entire groups of assignments. In the Daily Entry area, click Add or Edit to add or edit daily entries. This is a good choice when you have selected just a few assignments or an individual assignment. The Group Time Entry window opens in either Group Entry view or Day view for adding and editing group entries. 28

33 When you select one or more assignments for editing, the window displays the pay code for the in and out times, and groups consecutive in and out times with the same pay code. In and out times are grouped even if there are gaps between them, provided the times are not separated by another in and out time with a different pay code. For example, in the Group Entry view, the Regular pay codes are grouped together in one row, and the OVERTIME pay code is grouped in a different row, similar to the Table View in the Time Entry Window. The Day View lists each employee s worked days in a separate row, similar to the List View in the Time Entry Window. 3. Make the necessary changes or additions. Click the Insert button to add time or schedule entries. Click the Delete button to delete time or schedule entries. Use Tab or Shift + Tab to move between fields. 4. Save your work. Click the Save button to save your changes. Click the Save and Return button to save your changes and go back to the entry grid. Click the Back button to exit the window without saving your changes. 29
34 Using Other Group Time Entry Tools In addition to the standard tools used for working with multiple entries, you can use the following options if your system has been configured to include them. Button Description Arranges your records in a specific order. Lets you take action on exceptions. Sort Employees 1. In the list of sort options, arrange the options in the order by which the records will sort. For example, you can sort first by hire date, then by last name, etc. 2. Click Sort to use the sort hierarchy you have specified, or click Close Window to exit the pop-up without sorting. Edit Exceptions 1. Select exceptions to modify by clicking the appropriate cells in the grid. To select all dates in the time period, click the cell containing the employee (assignment) name. To select a specific date for all members in the group (i.e., a column), click the cell containing the date (the column header). To select specific dates for specific members, click the cells you would like to edit. Select a range of cells, click the first cell in the range, and then press the Shift key while clicking the last cell in the range. To select multiple concurrent cells, click a cell and drag the mouse across additional cells while holding down the mouse button. 2. Click the Edit Exceptions button. A new window opens for addressing and resolving exceptions. Depending on your configuration, the appearance of this window can vary. 3. To select certain exception types, do the following: a. Click the Exception Filter button. The Exception Filter dialog box opens to let you select specific exceptions and to filter exceptions by severity level. 30

35 b. From the Minimum Exception Severity Level drop-down list, select the lowest level exception you want to view or edit. c. In Exception Codes, select the specific exceptions you want to view or edit. By default, the system selects all exception codes. d. Do one of the following: i. To save your changes, click Save. The Exception Filter dialog closes and the Group Time Entry window displays the filtered results. ii. To display all exceptions, click Reset to Default. The Exception Filter dialog closes and the Group Time Entry Window displays unfiltered results. iii. To cancel any filter changes, click Close Window. The Exception Filter dialog closes and the Group Time Entry Window display does not change. 4. Make the necessary changes or additions. a. Click the Insert button to add time or schedule entries. b. Click the Delete button to delete time or schedule entries. c. Select the Acknowledged checkbox to acknowledge the exception. 5. Save your work. a. Click the Save button to save your changes. b. Click the Save and Return button to save your changes and go back to the entry grid. c. Click the Back button to exit the window without saving your changes. 31

36 Working with Schedules There are a variety of ways to assign schedules, develop, or edit them in Workforce. This chapter describes each of the methods available to you. Standard Schedule Assignment Workforce has basic scheduling functionality for departments to utilize when it is beneficial for their organization. Once schedules and schedule cycles (optional, for rotating schedule needs) have been created, managers can easily assign them to individuals or to groups of employees. 1. To assign either a permanent or temporary schedule template, begin by selecting Assign Schedules from the Schedules area of the dashboard. The Schedule Maintenance window appears. 2. Choose Assign Schedule Templates from the Permanent Changes section or Assign Schedule Templates from the Temporary Changes section. Assigning Permanent Schedule Templates An administrator may develop schedule templates for employees with work activities that follow a regular pattern from pay period to pay period. Managers can then assign the schedule template once and have it applied on a permanent basis to successive pay periods. 1. In the Permanent Changes area of the Schedule Maintenance window, click Assign Schedule Templates. Select an assignment group from the assignment tree on the left. A window appears listing the employees in the selected group. 32
37 2. For a Mass Edit, select the checkbox next to the names of the employees you wish to change. 3. Click on the Mass Edit checkbox. 4. From the Schedule Template drop-down list, select the correct schedule template. 5. Enter the date on which to begin the schedule in the Effective Date field. The date must fall within the period defined in the Valid Date Range field. 6. For individual edits, select the Manager Override checkbox to make the Schedule Template field active. 7. From the Schedule Template drop-down list, select the correct schedule template. 8. Enter the date on which to begin the schedule in the Effective Date field. The date must fall within the period defined in the Valid Date Range field. The recommended best practice is to select the first date in the pay period whenever possible. A second recommended best practice is to select the first date in the work week. 9. After completing your permanent schedule template assignments, choose how to proceed. Click the Save icon to save your changes. Click the Reset icon to clear your changes and start again. Click the Back icon to return to the Schedule Maintenance window without saving your changes. 33
38 Assigning Temporary Schedule Templates An administrator may develop schedule templates for employees to follow on a temporary basis; i.e., within a specific pay period or for a limited length of time. Managers can then assign the schedule template on an as needed basis. 1. In the Temporary Changes area of the Schedule Maintenance window, click Assign Schedule Templates. Select an assignment group from the assignment tree on the left. A window appears listing the employees in the selected group. 2. For a Mass Edit, select the checkbox next to the names of the employees you wish to change. 3. Click on the Mass Edit checkbox. 4. From the Schedule Template drop-down list, select the correct schedule template. 5. Enter the date on which to begin the schedule in the Effective Date field. The date must fall within the period defined in the Valid Date Range field. 6. For individual edits, select the Manager Override checkbox to make the Schedule Template field active. 7. From the Schedule Template drop-down list, select the correct schedule template. 34
39 8. Enter the date on which to begin the schedule in the Effective Date field. The date must fall within the period defined in the Valid Date Range field. The recommended best practice is to select the first date in the pay period whenever possible. 9. A second recommended best practice is to select the first date in the work week. 10. After completing your temporary schedule template assignments, choose how you want to proceed. Click the Save icon to save your changes. Click the Reset icon to clear your changes and start again. Click the Back icon to return to the Schedule Maintenance window without saving your changes. Schedule assignments using this method will remain in effect for exactly one pay period. After that, the employee will revert back to his or her normally assigned schedule. Assigning Schedules to Dates Outside of Current Pay Period Managers can schedule employees for assignments to dates outside of the current pay period. Examples are employees with schedules different from other assignments, or for employees who will be temporarily working on a project or schedule that is outside of their normal duties. 1. To assign either a permanent or temporary schedule template, begin by selecting Assign Schedules from the Schedules area of the dashboard. The Schedule Maintenance window appears. 2. In the Permanent Changes area of the Schedule Maintenance window, click Assign Schedule Templates. 3. Click the checkbox below Employees Active On and select the week you want to assign from the calendar. The range in the Valid Date Range column at the right of the screen will change to a pay period that includes the week you ve just selected. 4. Select an assignment group from the assignment tree on the left. A window appears that lists the employees in the selected group. 35

40 5. For a Mass Edit, select the checkbox next to the names of the employees you wish to change. 6. Click on the Mass Edit checkbox. 7. From the Schedule Template drop-down list, select the correct schedule template. 8. Enter the date on which to begin the schedule in the Effective Date field. The date must fall within the period defined in the Valid Date Range field. 9. For individual edits, select the Manager Override checkbox to make the Schedule Template field active. 10. From the Schedule Template drop-down list, select the correct schedule template. 11. Enter the date on which to begin the schedule in the Effective Date field. The date must fall within the period defined in the Valid Date Range field. 12. After completing your future dated schedule template assignments, choose how you want to proceed. Click the Save icon to save your changes. Click the Reset icon to clear your changes and start again. Click the Back icon to return to the Schedule Maintenance window without saving your changes. 36

41 Edit an Assigned Schedule Employees are occasionally asked to deviate from their normal schedule for a very short amount of time, perhaps a single day or one week. When that happens, it can be easier to change the schedule from the Manager Time Entry window. This method works well for assignments with schedules that are different than most other assignments or for employees who temporarily work on a project or schedule outside of their normal duties. 1. Use the Schedule tab from the Edit Employee Time window. 2. Select an assignment group. 3. Select an employee to develop individual schedules for employee assignments. Schedule changes using this method will remain in effect only for the dates affected. After that, the employee will revert back to his or her normally assigned schedule. Other Manager Functions Managers have responsibilities to perform other tasks in Workforce such as assigning schedules or approving timesheets. Each of those additional functions is described in this chapter. End-of-Period Reminders At the end of each pay period, most time entry employees will submit their timesheets, and managers will review and approve employee timesheets using the Approve Timesheets function. Reminder messages are sent to remind employees that timesheets need to be entered and submitted near or at the end of a work period. Reminders are sent to remind managers to approve employee timesheets. Reminders are sent only to managers who have not approved all of their employee timesheets. Reminder s are sent as indicated in the following table. Biweekly Reminders Date/Time Sent to Monday of the payroll week Monday of the payroll week Monday of the payroll week Tuesday of the payroll week Employee 1 8am Employee 2 - Noon Manager Reminder 1 3pm Manager Reminder 2 8am 37
42 Monthly Reminders Date/Time Sent to Last working day of the month Employee 1 - Noon 5 th day of new month Employee 2- Noon 6 th day of the new month Manager Reminder 1 8am 7 th day of the new month Manager Reminder 2 8am Approving Timesheets Managers can approve hours for individual employees or for an entire group. When you review employee hours, the system allows you to see whether an employee s timesheet contains any exception messages. Timesheets with errors need attention before approval. You can choose to open and edit timesheets to correct any condition causing an exception, to reject timesheets and direct employees to correct them, or approve them despite exceptions. If there is a mixture of errorfree timesheets and timesheets with exceptions, you have the option of approving the errorfree timesheets immediately. The primary focus of approving or rejecting hours is to correct timesheets to eliminate exceptions. CAUTION: It is always recommended for a supervisor to return a timesheet to an employee and have the employee make the correction/change. There are some instances where the employee is unable to make the correction (ex. Time/web clock punches) and the supervisor must update the employees timesheet. In these instances, be sure to note in the comments why you are making the change and keep back up for your records. 1. To approve or reject employee time, select Time Entry Approve Timesheets. The Approve Timesheets window appears. 2. From the assignment tree, select the group for which you want to approve or reject hours. 38


43 3. The Approve Current Timesheets window appears. The names of the employees in the group populate the main window. 4. You can view an employee s timesheet by clicking on the row of the respective employee. 5. If you would like to view timesheets ending on a different date than the default (the current date), do the following: a. Select the checkbox in the Employees Active On field. A pop-up calendar appears. b. Select a different date. The window updates with timesheet information for the period containing the date you selected. c. If you would like to return to the current date, deselect the checkbox in the Employees Active On field. 6. To approve employee timesheets, do the following: 39
44 a. To approve an individual employee s hours, select the Approve checkbox in the Manager s Approval field. The Approve button for an accepted timesheet includes a green check mark. This is a toggle; you can click it again to undo the approval. b. If the timesheet data indicates that all timesheets have been submitted without any errors or exceptions that will prevent you from approving them, you can approve them at once using the Approve All button. c. If the timesheet data indicates a mixture of error-free timesheets and timesheets with exceptions, you can approve the error-free timesheets immediately by checking the box for Manager s Approval. Of course, you may choose to correct all timesheet errors first, and then approve all employees at once. 7. Click Save Approvals. The hours for the applicable employees are saved for the specified work period. When employees access their timesheet for that work period, a note appears informing them that the hours have been approved. They will not be able to enter changes to their timesheet for that work period. Notice: Falsification of timesheets, whether submitting or approving, can be grounds for immediate termination. 40

45 Rejecting Timesheets To reject an employee timesheet, do the following: 1. Click the Reject timesheet button in the Manager Approval field. 2. The Reject Timesheet window appears. 3. If the employee has an address on file you can send an notification to the employee about their rejected timesheet. Complete the fields in the Reject Timesheet dialog, using the following table as a guideline. Field Notify subject message Comments Description The employee to be notified about the rejected timesheet. The subject title of the to be sent to the employee. (The subject can be changed.) A message to convey to the employee about the rejected timesheet. Additional information about the rejected timesheet. 4. Do one of the following: Click Reject to reject the timesheet and send the message. Click Close Window to quit the Reject Timesheet window without rejecting the timesheet. 41
46 Click Undo to rescind the previous rejection of a timesheet. This option is enabled only if you previously rejected the timesheet. Note: Clicking Undo moves the timesheet to a neutral status. You can also undo a rejected timesheet by selecting the checkbox on the Approve button and clicking Save Approval. This method will save the timesheet as approved. 5. If you have rejected the timesheet, the Approve button is grayed out. Click Save Approvals. Once saved, the Approve button for a rejected timesheet is no longer grayed out. 6. Click the History button to view the approval or rejection history for an employee timesheet. 7. The Approval History for Employee window appears. The Approval History window displays the action taken, who took action, the date and time of the action, any messages sent, and comments made. 8. Review and click Close Window. 42

47 Amending Timesheets Managers can amend timesheets for past pay periods for employees in assignment groups delegated to them. How far back in the past amendments are permitted is determined by your organizational rules and can differ by role. Data from amended timesheets are not included in reports unless the amended timesheet has been approved or approved and locked. Amended timesheets must be approved by a manager, or a higher role, to be included in end of period processing and paid. Any changes made to a timesheet that has already been paid will cascade through all timesheets up through the current pay period. The difference will be applied to the current pay and bank balances. If you amend a past timesheet to account for a vacation day that that was entered as a work day, then that change because it affects the vacation bank is used to recalculate the bank balances for each successive timesheet up through the current pay period. 1. To amend a timesheet, click the Amend button for the timesheet in the pay period that needs to be modified. 2. The timesheet opens for edits. Edit and Save the timesheet. The Other Versions button appears. 3. Click the Other Versions button. The Timesheet Versions window appears. 43
48 4. Click View This Version to display the original version of the timesheet. 5. Click Compare To Open Version to list the differences between the two versions. A pop-up window displays the results of the comparison. 6. After viewing the comparison, you can print the results, or close the window to return to the timesheet. 44


49 Approving Time Off Requests When an employee submits a time off request, the request is forwarded to the employee s manager for review. The manager can then approve or reject the request. 1. To view a listing of the time off requests that have been submitted by employees, select Schedules Review Time Off Requests on the dashboard. The Time Off Review Summary window appears, listing pending requests, if any, and a history of past requests. 2. Select an employee. The request for that employee appears, including the hours requested, remaining bank balances, and history of the request. Notice that the Request Summary window includes a link to the Group Calendar window (Open the Group Calendar), which enables you to ensure that staffing needs will be met during the time period affected by the request. The Group Schedule window also displays any other time off requests already approved. 3. Select Approve this Time Off Request. Use the Manager Comments field to forward comments about the request to the employee. 4. The Request Summary window appears again. The previous request now appears on the Time Off Request History tab. 45

50 Cancelling an Approved Time-Off Request 1. To cancel an approved time off request, select a request from the Time Off Request History tab. The Request Summary window appears. 2. Click Cancel Request. The Reason for Cancellation window appears. 3. Enter a reason for cancellation, if necessary. The cancellation is in effect after you select Cancel Request. A confirmation message displays. 4. The status of the request on the Time Off Request History tab is changed from Approved to Cancelled. 46
 when the typically assigned person is not available.")

51 5. Click the cancelled request to see a detailed history of the request. Delegation Delegation is the act of granting another member of the organization authority over a group of employees (an assignment group) when the typically assigned person is not available. For example, a manager going on vacation for a week can delegate authority over his or her employees to another manager to ensure timesheets are reviewed and approved in his or her absence. A user can delegate an assignment group and grant the delegation recipient his or her role to define the delegation recipient s access to the group. When delegating, the owner can delegate only those roles that are at or below the owner s role for the group; i.e., someone with manager role for a group cannot delegate the Administrator role to others. First, delegation is restricted such that only users of designated roles are permitted to receive delegations. This was described in the User Role section above. Second, when you delegate responsibility for an assignment group to another user, you can only delegate the set of responsibilities associated with your own user role, and optionally lower roles in the user role hierarchy. 1. To delegate roles, select Settings Manage Delegations from the dashboard. The Manage Delegations window appears. 47
 to retrieve a list of groups you have delegation rights too. 4. Click Search.")
52 2. Click Delegate Authority. The Enter Search Criteria window appears which lets you search for one or more assignment groups. 3. Enter your search criteria. You can enter a the employee group and/or the wildcard character (*) to retrieve a list of groups you have delegation rights too. 4. Click Search. A window lists the assignment groups matching your search, along with the roles you are granted for each group. 5. For each assignment group being delegated, choose your delegation options. In the Assignment Group column, select the checkbox next to the assignment group name. In the Role to Delegate column, use the drop-down menu to select the roles to be delegated for the assignment group. In the Effective Date and End Effective Date columns, enter the dates during which the assignment group roles will be delegated. Effective Date defaults to today. End Effective Date defaults to one week from today. To make a delegation permanent, enter an End Effective Date of 12/31/3000. If you are delegating many groups and entering many dates, you can omit the slashes. The system will insert them for you as you exit the date fields. In the Allow Re-delegation column, place a checkmark in the checkbox to allow the delegation recipient to delegate the assignment group to another user. IMPORTANT! Allowing redelegation lets the delegate share authority over the assignment group with another user. If that happens, the system will not automatically 48


53 notify you and employee information could be inadvertently shared with others who should not see it. Best practice is to never check the Allow Re-delegation checkbox. 6. Click Next to display a search window for selecting the user who will be delegated that assignment group. 7. In the search window, enter your search criteria. You can also use a character string, the wildcard character (*), or a combination to retrieve a list of users matching the characters you enter. If you are including a wildcard, use the Max Results field to limit the number of displayed records. 8. Click Search. A window appears with the results of the search. 9. Select a delegate. 49

54 10. Click Select. A confirmation message appears that indicates a successful delegation. If any delegations fail, a status message appears listing the unsuccessful delegations and why they failed. For example, a delegation could fail because the assignment group is already delegated to the selected delegate. 11. Click Continue to return to the Manage Delegations window. Cancelling or Revoking a Delegated Role Once an owner has delegated a role, that owner can also cancel the delegation. 1. Select Settings Manage Delegations in the in the Dashboard. 2. In the Manage Delegations dialog box, click View/Revoke Delegations. The Enter Search Criteria window appears. 50


55 3. Enter your search criteria. A window appears that lists the roles currently delegated within your assignment groups, along with your role for each group. 4. If an assignment group contains more than one delegated role, click the Expand Group button displayed next to the Assignment Group name to see all of the delegated roles. 5. In the Actions column, select the delegation to be cancelled. Selecting Revoke cancels only the delegation appearing in a single row. Figure : Actions Revoke. Selecting Revoke All (if shown) cancels all delegations for that assignment group. 51


56 Figure : Action Revoke All. A new window appears listing the delegated right to be cancelled. 6. Choose the date on which the revocation is to be in effect or select the Revoke Immediate checkbox. 7. Click Confirm to proceed with the cancellation. A message appears verifying the cancelled delegation. 8. Click Continue to return to the Delegations window. 52

57 Generating Reports General Reports Managers access reports to view information including about timesheets, schedules, and employees many of the reports with information restricted to their assignment groups. See the Workforce Time & Attendance Report Reference Guide for more information. View Reports Reports provide specific information about select groups of employees. 1. To view a group report, click View Reports from the Reporting area on the dashboard. 2. A list of report categories appears. 3. Do one of the following: Scroll to the name of the report you want to generate. View reports in a report category. 4. Select the category; for example, Manager Reports. The right field populates with the various reports or subcategories in that category. 53

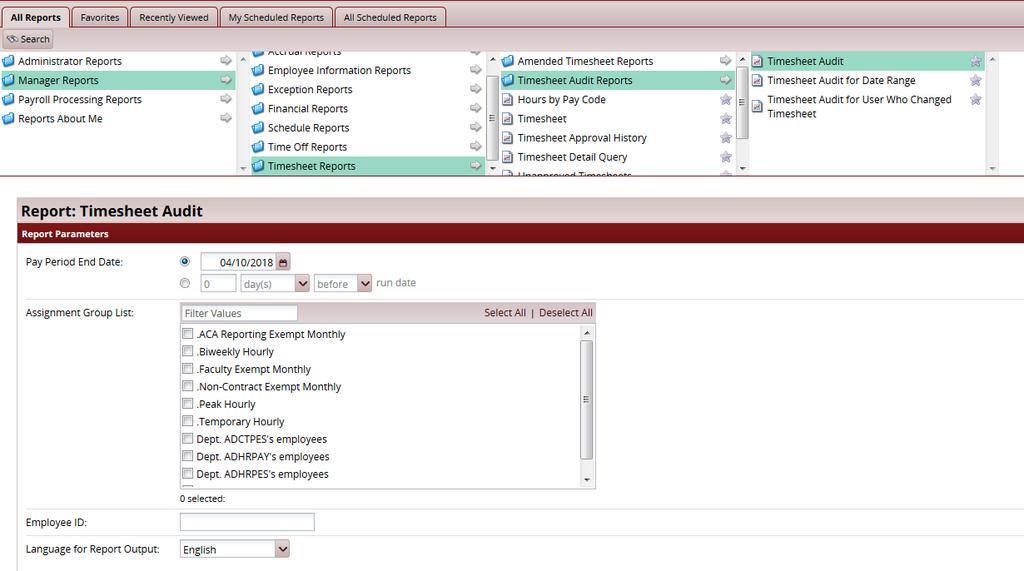
58 i. Select a subcategory if necessary. ii. In the right-most field, select the name of the report to generate. Search for the report. i. Enter the name or part of the name of the report in the Search field. ii. Press the Enter key. 5. Reports with the search criteria in their name appear in a Search Results pane. 6. Click the name of the report you want to generate. 7. A second pane appears, allowing you to specify report criteria. Complete the various fields. Click Run Now. 54


59 8. Select your preferred output format: Excel to view/print the output in an Excel spreadsheet. HTML to view the report in the browser window as a web page. PDF to view/print the output in Adobe PDF format. 9. Click Run Now to process the report. Workforce displays the report in a separate window. Managers can audit timesheets to see who entered information onto the timesheets. On the All Reports tab, click Manager Reports > Timesheet Reports > Timesheet Audit Reports > Timesheet Audit. 55
60 56