Vendor Management v4.3 For Passageways Portal Framework
|
|
|
- Giles Horn
- 5 years ago
- Views:
Transcription


1 Vendor Management v4.3 For Passageways Portal Framework Vendor management module allows your organization to take a comprehensive view of your vendor relationships and organize that information for easy access and compliance Win Hentschel Blvd. West Lafayette, IN support@passageways.com
2 Contents Section 1. Overview... 1 Section 2. The Module Properties... 1 Section 3. Managing Vendor Categories... 2 A. Adding a New Vendor Category... 2 B. Editing a Vendor Category... 3 C. Deleting a Vendor Category... 3 Section 4. Managing Vendors... 4 A. Adding a New Vendor B. Editing a Vendor... 5 C. Deleting a Vendor... 5 D. Importing Vendors... 6 Section 5. Managing Permissions... 8 A. Managing Permissions by Vendor... 8 B. Managing Permissions by User/Role... 9 C. Managing User/Role for a Specific Permissions Section 6. Managing Vendor Fields A. Creating a New Custom Vendor Field B. Editing a Custom Vendor Field C. Deleting a Custom Vendor Field Section 7. Managing Risk Classifications A. Creating a Vendor Risk Classification B. Editing a Vendor Risk Classification C. Creating a Risk Classification Checklist D. Editing a Risk Category Checklist Item E. Deleting a Risk Category Checklist Item Section 8. Managing the Scorecard Template A. Creating a New Scorecard Template B. Editing a New Scorecard Question Section 9. Manage Alerts Section 10. The Vendor Snapshot... 16
3 A. Assigning the Risk Classification with the Scorecard B. Assigning the Risk Classifications without the Scorecard C. Editing Vendor Information D. Adding Vendor Contacts E. Related Vendors F. Editing Additional Information G. Commenting H. Managing Relationship Managers I. Updating a Risk Checklist J. Archiving a Risk Checklist K. Managing Risk Assessment L. Managing Contacts M. Adding Additional Documents N. Viewing Important Dates O. Adding Notes Section 11. My Vendors Island A. My Vendors B. My Pending Checklist Items C. My Important Dates D. My Risk Mitigation Steps Section 12. Browse Vendors Island Section 13. Vendors Report A. Vendor Summary Report B. Incomplete Checklist Report C. Vendor Assessment Report D. Scorecard Report E. Benchmark Spending Report F. Vendor Additional Information Report Appendix I: Setting up Vendor Management Appendix II: Field Type and Properties... 34
4 Watch for Alert Icons: Helpful tips and hints Additional important information

5 Section 1. Overview The module keeps track of all vendors in one secure location for any organization. The Vendor Management Module provides an intuitive method to store vendors and vendor contacts in a simple, organized rolodex. It allows for easy vendor due diligence by compliance and audit staff by creating and assigning custom risk categories and individual renewal dates to all vendors. This module gives an organization a one-stop solution to stay up to date on all of its vendors, related documents and compliance status. Section 2. Managing Vendor Categories The Manage Vendor Categories Tool allows you to create a list of category names that can help organize your company s vendor list. You can create as many categories as needed with specialized Administrators. The Category Administrators are the only individuals who can add vendors to the Manage Vendors list that fit into the particular category. Creating a list of Vendor Categories should be your first step in creating a list of vendors. A. Adding a New Vendor Category 1. Click Module Tools; 2. Click Vendor Management; 3. Click Manage Vendor Categories; 4. Click New Category; 5. Type Category Name (required); 6. Type Description; 7. Choose users that can add/edit vendors in this category; 8. Click OK Vendor Management 1


6 B. Editing a Vendor Category Vendor category names, descriptions, and administrators can be edited at any time. 1. Click Module Tools; 2. Click Vendor Management; 3. Click Manage Vendor Categories; 4. Click Edit 5. Edit any of the information; 6. Click OK C. Deleting a Vendor Category Vendor category names, descriptions, and administrators can be deleted at any time. 1. Click Module Tools; 2. Click Vendor Management; 3. Click Manage Vendor Categories; 4. Click Delete; 5. Click OK Make sure that you do not have any vendor contacts in a category before you delete a vendor category. Deleting a category will delete all of the vendors in that category. To remove a vendor from a category, have the user who has the permission EditProfileInfo for the vendor edit the category using the Manage Vendors Tool. 2 Vendor Management
7 Section 3. Managing Vendors The Manage Vendor Module Tool allows you to maintain the list of available vendors, input information about vendors, create Review Reminders, and assign Relationship Managers to vendors. The vendor list can be sorted by clicking on the headings Company, Category, or Active. A. Adding a New Vendor 1. Click Module Tools; 2. Click Vendor Management; 3. Click Manage Vendors; 4. Click New Vendor; 5. Choose a Category (required, see page 1 for more information); 6. Type Company Name (required); 7. In the Review Reminders tab, set the First Reminder date (required); 8. In the Relationship Managers tab, choose Relationship Manager(s) (required); 9. Fill in all the available information about the Vendor; 10. Click Add Vendor; 11. Choose a Permission set; 12. Choose Users for that Permission; 13. Choose a different Permission (optional); 14. Click Switch; 15. Repeat steps as needed; 16. Click OK If you are not a Relationship Manager for a particular Vendor and a Category Administrator that a Vendor is listed in, that specific Vendor will not be visible in the Manage Vendors list. Vendor Management 3

8 B. Editing a Vendor By using the Manage Vendors tool a person that has the proper permissions can edit a Vendor s information. 1. Click Module Tools; 2. Click Vendor Management; 3. Click Manage Vendors; 4. Click a Company Name; 5. Edit any of the information; 6. Click Update Vendor C. Deleting a Vendor At any time a user who can view a vendor in the Manage Vendors list can delete that vendor. 1. Click Module Tools; 2. Click Vendor Management; 3. Click Manage Vendors; 4. Click Delete; 5. Click OK Instead of deleting a Vendor and removing information forever, you may want to just deactivate them. When a vendor is deactivated, the vendor s information remains on the Manage Vendors list, but is not accessible through the Portal Islands. 4 Vendor Management
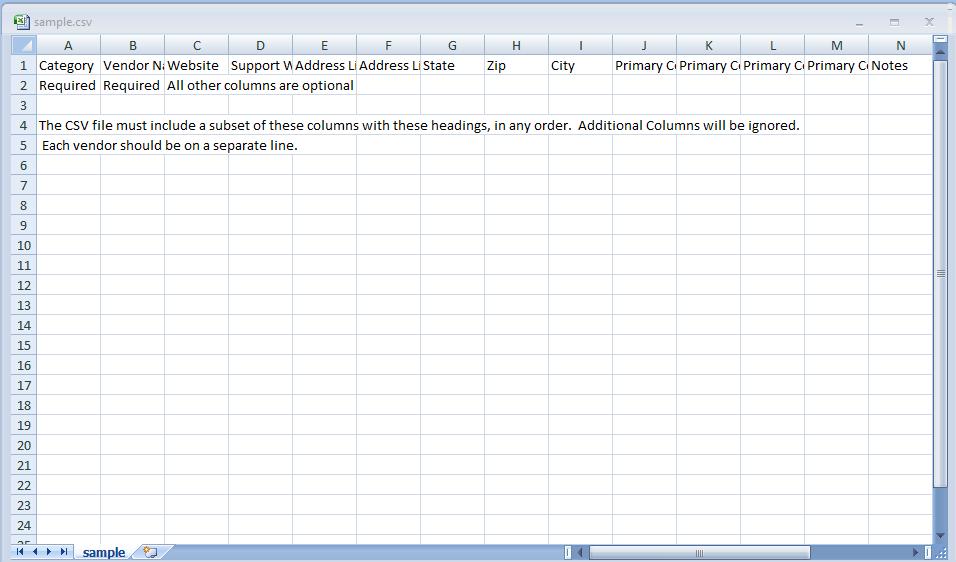
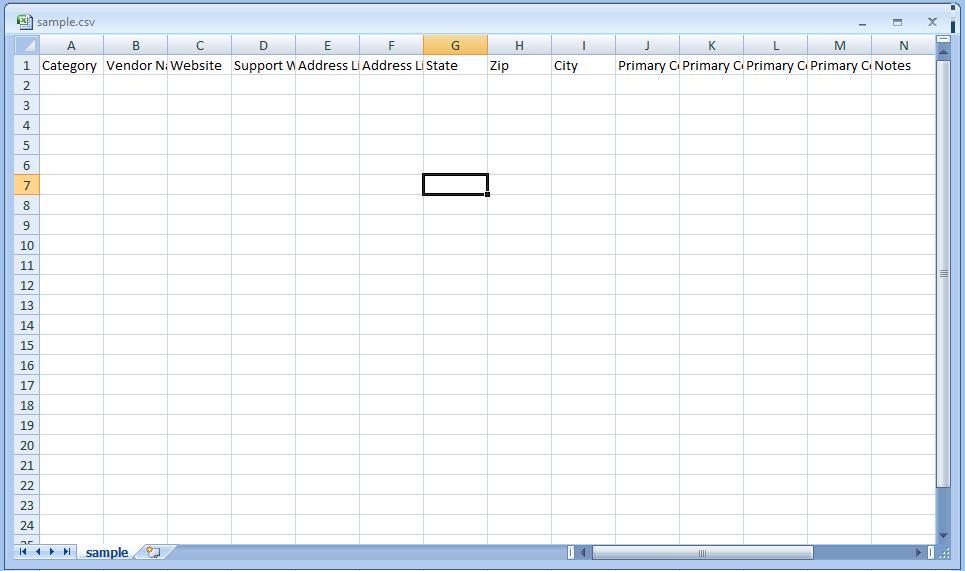
9 D. Importing Vendors The Manage Vendors Tool allows you to import a listing of Vendors and their information using a pre-created comma separated template. 1. Click Module Tools; 2. Click Vendor Management; 3. Click Manage Vendors; 4. Click Import Vendors; 5. Click Download Sample CSV File; 6. Open the sample.csv template; 7. Delete all the text EXCEPT the column header text, see example on right; 8. Enter in all Vendor information, Category and Vendor Name are required for each Vendor; 9. Save the file; 10. From the Import Vendors page, click Browse...; 11. Click on the saved file as a.csv file; 12. Click Import When Importing Vendors there are a few important thing to remember: Do not use commas in the import text. The import is a comma separated value file. Additional commas will throw your data off. Make sure your data contains no carriage returns as this will throw your data off. Make sure if you use a Category multiple times, that the uses of the Category are identical, ie same case, same spacing, same spelling. Vendor Names must be unique. If you have multiple vendors that share the same name, possibly differentiate them with a (parenthesis) description. Do not leave any blank rows between Vendors. An import will not override current Vendor information. This allows for either multiple imports or manual Vendor entry to coincide an import. An import will not override Vendors with the same name. If already have a Vendor s information entered into Vendor Management, but want the import to override that information, delete the Vendor before the import. The person who does the import will be the default Relationship Manager. To edit this or any of the Vendor information, you must have the proper permissions from the Manage Permission Tool, see page 7. Vendor Management 5
10 6 Vendor Management

11 Section 4. Managing Permissions The Manage Permissions Tool allows you to control which users and/or roles have access to change a Vendor s information using either the Manage Vendors Tool or the islands. This tool allows you to manage these permissions by Vendor, User/Role, or Specific Permission. A. Managing Permissions by Vendor 1. Click Module Tools; 2. Click Vendor Management; 3. Click Manage Permissions; 4. Choose Manage Permissions by Vendor; 5. Click OK; 6. Choose a Vendor; 7. Click OK; 8. Choose a Permission; 9. Click OK; 10. Select Users and/or Roles; 11. Click Save Permissions; 12. Choose a different Permission; 13. Click Switch; 14. Repeat steps as desired; 15. Click Save Permissions When choosing Permissions remember the -All Permissions- option to give a user or role all the permissions for a chosen Vendor. Vendor Management 7
12 B. Managing Permissions by User/Role 1. Click Module Tools; 2. Click Vendor Management; 3. Click Manage Permissions; 4. Choose Manage Permissions by User/Role; 5. Click OK; 6. Select a User or Role; 7. Click Next; 8. Select the specific permissions; 9. Click Finish; 10. Click OK When choosing Permissions if you check the Vendor Categories box all of the permissions for every vendor will be granted to the choose user or role. 8 Vendor Management

13 C. Managing Users/Roles for a Specific Permission 1. Click Module Tools; 2. Click Vendor Management; 3. Click Manage Permissions; 4. Choose Manage Users/Roles for a Specific Permission; 5. Click OK; 6. Choose a Permission; 7. Click OK; 8. Click New Permission; 9. Choose a Vendor; 10. Click OK; 11. Choose Users and/or Roles; 12. Click OK; 13. Click OK; 14. Click OK Vendor Management 9

14 Section 5. Managing Vendor Fields The Manage Vendor Fields Tool allows you to add additional fields to capture information about Vendors. These Custom Fields will show in ever Vendor s profile under the Additional Information tab in the Vendor s Snapshot. A. Creating a New Custom Vendor Field 1. Click Module Tools; 2. Click Vendor Management; 3. Click Manage Vendor Fields; 4. Click New Field; 5. Add Field Properties; 6. Click OK B. Editing a Custom Vendor Field 1. Click Module Tools; 2. Click Vendor Management; 3. Click Manage Vendor Fields; 4. Click Edit; 5. Edit the Field Properties; 6. Click OK C. Deleting a Custom Vendor Field Custom fields can be deleted at any time. Be careful though, any Vendor information that has been entered into the Custom Field for all Vendors will be deleted permanently. 1. Click Module Tools; 2. Click Vendor Management; 3. Click Manage Vendor Fields; 4. Click Delete; 5. Edit the Field Properties; 6. Click OK For more information on the Custom Field Properties, see Appendix 1 10 Vendor Management
15 Section 6. Manage Risk Classifications The Manage Risk Classifications tool allows you to create risk management categories that vendors can be placed into. Checklists for these categories can also be created that allow for risk management personnel make sure vendors meet company requirements. If using the Calculate Risk Classifications by Scorecard, see page 1, you can define the Scorecard Weight Range of the Risk Classification. A. Creating a Vendor Risk Classification 1. Click Module Tools; 2. Click Vendor Management; 3. Click Manage Risk Classification; 4. Click New Risk Category; 5. Type Name (required); 6. Type Description; 7. Type Minimum Point Value (if Calculate Risk Classifications by Scorecard is checked); 8. Type Maximum Point Value (if Calculate Risk Classifications by Scorecard is checked); 9. Click OK B. Editing a Vendor Risk Classification 1. Click Module Tools; 2. Click Vendor Management; 3. Click Manage Risk Classifications; 4. Click desired Name; 5. Edit Name; 6. Edit Description; 7. Edit Minimum Point Value (if Calculate Risk Classifications by Scorecard is checked); 8. Edit Maximum Point Value (if Calculate Risk Classifications by Scorecard is checked); 9. Click Update Vendor Management 11
; 7. Type Description; 8. Check Is Checklist Item Required (optional); 9. Check Is Document Upload Required (optional); 10.")
; 7. Edit Description; 8.")

16 C. Creating a Risk Classifications Checklist 1. Click Module Tools; 2. Click Vendor Management; 3. Click Manage Risk Classifications; 4. Click Edit Checklist; 5. Click Add; 6. Type Name (required); 7. Type Description; 8. Check Is Checklist Item Required (optional); 9. Check Is Document Upload Required (optional); 10. Click Add; 11. Repeat steps 5-10 as needed; 12. Click Close D. Editing a Risk Category Checklist Item 1. Click Module Tools; 2. Click Vendor Management; 3. Click Manage Risk Classifications; 4. Click Edit Checklist; 5. Click Edit; 6. Edit Name (required); 7. Edit Description; 8. Check Is Checklist Item Required (optional); 9. Check Is Document Upload Required (optional); 10. Click Update; 11. Repeat steps 5-10 as needed; 12. Click Close E. Deleting a Risk Category Checklist Item 1. Click Module Tools; 2. Click Vendor Management; 3. Click Manage Risk Classifications; 4. Click Edit Checklist; 5. Click Delete; 6. Click OK; 7. Repeat steps 5-6 as needed; 8. Click Close 12 Vendor Management

17 Section 7. Manage Scorecard Template The Manage Scorecard Template tool allows you to create a template to determine the risk classification category for a vendor automatically. You can create as many questions as needed. Each question can have a variety of answers. Each answer is assigned a weight measured in a numeric value. The numeric value is totaled and based on the Scorecard Weight Range of a Risk Classification, a Vendor will be automatically placed into a Risk Classification. If this feature is not functioning, please contact your Passageways Support Representative, the EnableScorecard Module property must be set to True. A. Creating a New Scorecard Question 1. Click Module Tools; 2. Click Vendor Management; 3. Click Manage Risk Classification; 4. Click New Scorecard Question; 5. Type Question; 6. Click OK; 7. Click Add Answers; 8. Type Answer; 9. Type Weight; 10. Click OK; 11. Click Add Another Answer; 12. Type Answer; 13. Type Weight; 14. Repeat steps as desired; B. Editing a New Scorecard Question 1. Click Module Tools; 2. Click Vendor Management; 3. Click Manage Risk Classification; 4. Click the desired Question; 5. Edit Question; 6. Edit desired Answers; 7. Edit desired Weight; 8. Click Delete for desired Answers; For Additional answers 1. Click add more answers; 2. Type Answer; 3. Type Weight; 4. Click OK; 5. Repeat steps 1-4 as desired; 6. Click Return to Scorecard Scorecard Templates can be exported and sent to other Passageways Vendor Management users where they can then important the template. Vendor Management 13

18 Section 8. Manage Alerts The Manage Alerts Tool allows you to view all of the alerts that will be sent out of Vendor Management. If you are upgrading from a previous version of Vendor Management, this tool will also convert your information into the new alert system. Upgrading a your alerts from a previous version of Vendor Management This only need to be run once and only if you are upgrading from a version of Vendor Management before version 4.2. If it is run unnecessarily no data will be harmed. After running the conversion, any contract or Vendor Alert Status listed as Ready to Be Schedule will be converted to Working Correctly. Any Alert Status listed as Requires Manual Correction will need you to go to that vendor to enter an alert date. 1. Click Module Tools; 2. Click Vendor Management; 3. Click Manage Alerts; 4. Click Schedule Alerts 14 Vendor Management

19 Section 9. The Vendor Snapshot The Vendor Snapshot displays a Vendor s information. By default, the Snapshot is read only. If a user has the proper permissions assigned to them they can update Vendor details and information. A. Assigning the Risk Classification with the Scorecard To assign a Risk Classification using the Scorecard two conditions must be met. First the Scorecard option must be checked, see page 13. Second, you must have the AssignRiskClassfication permission assigned to you for the Vendor, see page 7. From the Vendor s Snapshot: 1. Click Edit Risk Classification; 2. Choose Answers for all of the Questions; 3. Click OK; 4. Click Confirm and Save; 5. Click OK B. Assigning the Risk Classification without the Scorecard To assign a Risk Classification without using the Scorecard two conditions must be met. First the Scorecard option must not be checked, see page 13. Second, you must have the AssignRiskClassfication permission assigned to you for the Vendor, see page 7. From the Vendor s Snapshot: 1. Click Edit Risk Classification; 2. Choose Risk Classification; 3. Click Apply to all Sub-Vendors (optional); 4. Click OK; 5. Click OK Vendor Management 15
20 C. Editing Vendor Information Relationship Managers must have the permission EditProfileInfo, see page 7, assigned to them to be able to edit a Vendor s Information. From the Vendor s Snapshot: 1. Click Edit Company Information; 2. Add information and click check; 3. Click to edit information, then to save it; 4. Click to delete information; 5. Click OK In order to save any changes made to the Vendor Information, make sure that you clicked it s corresponding check before clicking OK. 16 Vendor Management
21 D. Adding Vendor Contacts Relationship Managers must have the permission EditProfileInfo, see page 7, assigned to them to be able to add or edit a Vendor s Contacts. From the Vendor s Snapshot: To Edit:: 1. Click the Vendor Contacts tab; 2. Click New Contact; 3. Enter information; 4. Click OK 1. Click the Vendor Contacts tab 2. Click the Edit for the desired Contact; 3. Edit information; 4. Click OK E. Related Vendors The Related Vendors tab shows if a Vendor has a parent company or has any subsidiary organizations that have also been entered into Vendor Management. The only way to edit this information is from the Manage Vendor tool, see page 3. Vendor Management 17
22 F. Editing Additional Information Relationship Managers must have the permission EditProfileInfo, see page 7, assigned to them to be able to edit fields in the Additional Information tab. If you want to add or remove fields from this list, it must be done using the Manage Vendor Fields tool, see page 10. From the Vendor s Snapshot: 1. Click the Additional Information tab; 2. Enter or edit information; 3. Click OK G. Commenting Any user that can access a Vendor s Snapshot will have the ability to view and add Comments about the Vendor. From the Vendor s Snapshot: 1. Click the Comments tab; 2. Type information into the Write a comment field; 3. Click Comment 18 Vendor Management

23 H. Managing Relationship Managers Relationship Managers must have the permission AddRemoveRelationshipManager, see page 7, assigned to them to be able to edit who and who is not a Relationship Manager for a particular Vendor. From the Vendor s Snapshot: 1. Click the Relationship Managers tab; 2. Click Manage Relationship Managers; 3. Add or Remove users; 4. Click OK I. Updating a Risk Checklist A user must have the ViewFullSnapshot permission to view all of the tabs in the lower section of a Vendor s Snapshot. Relationship Managers must have the permission UpdateChecklist, see page 7, assigned to them to be able to update a Vendor s Checklist. From the Vendor s Snapshot: 1. Click the Checklist tab; 2. Click Update Checklist; 3. Click on an Item; 4. Choose an Item Complete status; 5. Type Comments; 6. Click Browse to Upload a file; 7. Click OK; 8. Repeat steps 3-7 as needed; Vendor Management 19

24 J. Archiving a Risk Checklist A user must have the ViewFullSnapshot permission to view all of the tabs in the lower section of a Vendor s Snapshot. Relationship Managers must have the permission UpdateChecklist, see page 7, assigned to them to be able to archive a Vendor s Checklist. Archiving allows you to save a past checklist while making room to complete a new one. From the Vendor s Snapshot: 1. Click the Checklist tab; 2. Click Update Checklist; 3. Click Archive this Checklist; 4. Choose any Items that you wish to Carry Forward as completed to the new Checklist; 5. Type Archive Comments; 6. Click OK; 7. Click OK; 8. Click << Go back to Vendor Snapshot A user with the ViewFullSnapshot permission can view all Archived Checklist Items by clicking the Archived Checklist button on the Checklist tab. 20 Vendor Management

25 K. Managing Risk Assessment The Risk Assessment tab can be used to complete an assessment of any Vendor that your company is currently using to help mitigate risk. By using the Risk Assessment tab a Relationship Manager can update and manage the steps used to complete a Vendor s current Risk Assessment. A user must have the ViewFullSnapshot permission to view all of the tabs in the lower section of a Vendor s Snapshot. Relationship Managers must have the permission AddAssessment, see page 7, assigned to them to be able to use the Risk Assessment tools. Assessment steps can be assigned to any Portal user. Those individuals use the My Mitigation Steps tab in the My Vendors Island, see page 25, to complete the assigned steps. i. Adding Risk Mitigation Steps From the Vendor s Snapshot: 1. Click the Risk Assessment tab; 2. Click New Risk Assessment; 3. Click Browse; 4. Type Comments; 5. Click OK; 6. Click New Risk Mitigation Step; 7. Type Step Name; 8. Choose Assigned To; 9. Choose Due Date; 10. Click OK; 11. Click OK; 12. Repeat steps 6-11 as desired; 13. Click << Go back to vendor snapshot ii. Viewing Risk Mitigation Steps From the Vendor s Snapshot: 1. Click the Risk Assessment tab; 2. Click the desired Risk Assessment; 3. Click the desired Risk Mitigation Step; 4. Make any changes (optional); 5. Click OK; 6. Click OK; 7. Repeat steps 3-6 as desired; 8. Click << Go back to vendor snapshot Vendor Management 21

; 4. Type Details; 5. Click Browse to attach the contract; 6. Type Contract Amount; 7. Type General Ledger statement; 8.")
26 L. Managing Contracts By using the Contract tab, a user can upload contracts and information about contracts into a Vendor s Snapshot. A user must have the ViewFullSnapshot permission to view all of the tabs in the lower section of a Vendor s Snapshot. Relationship Managers must have the permission AddContract, see page 8, assigned to them to be able to add to the Contracts tab. i. Adding a Contract From the Vendor s Snapshot: 1. Click the Contracts tab; 2. Click Add Contract; 3. Type Name (required); 4. Type Details; 5. Click Browse to attach the contract; 6. Type Contract Amount; 7. Type General Ledger statement; 8. Choose Contract Type; 9. Choose Contract Dates (required); 10. Choose Expiration Reminder (required); 11. Choose Renewal/Cancellation Reminder (required); 12. Click OK; 13. Click OK The Expiration Reminder and the Renewal/Cancellation Reminder will be sent as a portal alert to whom ever is the Relationship Manager for that Vendor. Be very aware of the Recurrence Pattern of the reminder to maximize the effectiveness of the Reminder system. 22 Vendor Management
; 4. Type Details; 5. Click Browse to attach the contract; 6. Type Contract Amount; 7.")
27 ii. Editing a Contract A user with the AddContract permission can also edit any existing contract. This is very useful to edit any mis-entries or to reset the Reminder dates for alerts. From the Vendor s Snapshot: 1. Click the Contracts tab; 2. Click Add Contract; 3. Type Name (required); 4. Type Details; 5. Click Browse to attach the contract; 6. Type Contract Amount; 7. Type General Ledger statement; 8. Choose Contract Type; 9. Choose Contract Dates (required); 10. Choose Expiration Reminder (required); 11. Choose Renewal/Cancellation Reminder (required); 12. Click OK; 13. Click OK M. Adding Additional Documents By using the Additional Documents tab, a Relationship Manager can upload additional files with information into a Vendor s Snapshot. A user must have the ViewFullSnapshot permission to view all of the tabs in the lower section of a Vendor s Snapshot. Relationship Managers must have the permission AddDocuments, see page 7, assigned to them to be able to add to the Additional Documents tab. From the Vendor s Snapshot: 1. Click the Additional Documents tab; 2. Click Add Document; 3. Type Name; 4. Type Comments (optional); 5. Click Browse; 6. Click OK; 7. Click OK Vendor Management 23

28 N. Viewing Important Dates A user must have the ViewFullSnapshot permission to view all of the tabs in the lower section of a Vendor s Snapshot including the Important Dates tab. The dates here are based on the information entered into the Vendor Information tab s Review Date and Contract s tab contract dates. O. Adding Notes A user must have the ViewFullSnapshot permission to view all of the tabs in the lower section of a Vendor s Snapshot including the Notes tab. The Notes tab is a great place to store any additional information that you wish to capture about a Vendor. From the Vendor s Snapshot: 1. Click the Notes tab; 2. Enter or edit information that is in the Rich Text Editor; 3. Click Save 24 Vendor Management


29 Section 10. My Vendors Island The My Vendors Island grants you access to all of the Vendor information that you are responsible for completing or maintaining. There are four tabs in this Island: My Vendors, My Pending Checklist Items, My Important Dates, and My Risk Mitigation Steps. A. My Vendors The My Vendors tab lists all of the Vendors that you have been given the Relationship Manage permission. This tab allows you to view the current status of a Vendor s Risk Management Check List and update the progress of that checklist. By clicking on the Checklist Status you can view, update, or even Archive the Checklist. Also you can click on the name of a Vendor and go directly to that Vendor s snapshot. Vendor Management 25


30 B. My Pending Checklist Items The My Pending Checklist Items tab lists all of the Risk Management Checklist Items that have yet to be completed for all of the Vendors that you are a Relationship Manager. By clicking on the name of the Vendor, you can update that checklist item. C. My Important Dates From the My Important Dates tab, a Relationship Manager can see the list of dates for Risk Management items such as contract expiration and Vendor review date. When you click on a Vendor s name, it will bring you to that Vendor s snapshot. All the dates from the My Important Dates tab can be revised on the Vendor snapshot, but only if you have the proper Permissions that have been granted by the Manage Permissions Tool (see page 7). 26 Vendor Management

31 D. My Risk Mitigation Steps If you have been assigned a mitigation step of a Vendor the My Risk Mitigation Steps tab will display what risk mitigation steps have been assigned to you. You can click on the Step Name and complete the step that has been assigned to you. Vendor Management 27


32 Section 11. Browse Vendors Island The Browse Vendors Island is used to display the contact information for all the vendors that have been entered into the Manage Vendors tool list. If a user has been given permissions using the Manage Permissions tool, they will be able to edit the sections of the Vendors snapshot with those set permissions. 28 Vendor Management


33 Section 12. Vendors Report There are five reports to easily give details on your Vendor status. By default you need to be a Portal Administrator to view these reports. By using the Module Report Security tool a Portal Administrator can grant any portal user access any of the reports. A. Vendor Summary Report The Vendor Summary Report gives the current status of all of your organizations Vendors. This report can be filtered by choosing a dropdown list item and clicking the Apply button to get the specific information you desire. Also you can export this data to a.csv file. B. Incomplete Checklist Report The Incomplete Checklist Report gives the current status of checklist for each Vendor. This report can be filtered by Relationship Manager. Also, you can click on an incomplete checklist to investigate the details of the checklist. Vendor Management 29


34 C. Vendor Assessment Report The Vendor Summary Report gives the current status of all Risk Mitigation steps for each Vendor Assessment This report can be filtered by Risk Category. Also, you can click on the Vendor Assessment date to see the details of the Risk Assessment. D. Scorecard Report The Scorecard Report shows the results of the Vendor Scorecard for each Vendor. E. Benchmark Spending Report The Benchmark Spending Report shows the value of each contract by Vendor. This data can be exported as a.csv file. 30 Vendor Management

35 F. Vendor Additional Information Report This report allows users to pull any data entered into additional custom Vendor Fields. These fields are created using the Manage Vendor Fields Module Tool. Using the filter options you are able to view just a specific vendor or all the vendors in a particular Category. There is also an export to CSV button if you would like to download the results. Vendor Management 31
36 Appendix I : Setting up Vendor Management When you are setting up Vendor Management for the first time, we recommend that you follow these steps: Step 1: Island and Report Access Using the Island Access tool for Vendor Management can be very important for you organization. Your organization will also have to discuss if you want to allow all users to access the Browse Vendors Island and the Vendor Reports. Allowing all users to access to the My Vendors island is not a problem since a user has to be a the Relationship Manager or have a Mitigation Step assigned to them to see any of the Vendor Snapshots. Step 2: Assign Your Module Administrators The Portal Administrator can assign access to Module Administrator Tools. There are six Module Administrator Tools that you can assign to users and roles. The Manage Vendor Categories Tool will be used by people who create and update vendor categories. The Manage Vendors Tool will be used by people who and new vendors and update vendor information. The Manage Permissions Tool will be used by people that set and maintain who has access to view and edit Vendor information in the Vendor s snapshot. The Vendor Fields Tool will be used by people who create and update any additional information fields that need to be created for every Vendor. The Manage Vendor Risk Classifications Tool will be used by people creating and updating the vendors risk categories and due diligence checklists for the corresponding risk categories. The Vendor Scorecard Template Tool will be used by people creating and updating the scorecard to classify the Risk Categories of Vendors. Step 3: Create Your Vendor Categories The Vendor Categories help organize your list of vendors. Also when you create a vendor, one of the steps is to chose the vendor s category. So, if you don t have the categories created, you will not be able to add vendors. Make sure that you assign the proper people as Category Administrators. Your Category Admins are going to be creating and updating vendors from a particular category. If a user isn t listed as a Category Administrator for any Category, they will not be able to create new vendors. Also Category Admins will only be able to view the list of vendors in the Manage Vendors Tool that belong to the particular Categories. In other words, if there are 20 vendors, 5 of which are in the Category called software. I am a Category Administrator only for the software Category, when I go into the Manage Vendors Tool, I will only see the 5 vendors that are in the software Category. 32 Vendor Management
37 Step 4: Addition Vendor Fields Using the Manage Vendor Fields Tool, you can create placeholders in you Vendor snapshots to gather any additional information about your Vendor s as you choose. If you want to have a field that captures a Vendor s emergency contact phone number, use the Manage Vendor Fields Tool to create it. Step 5: Set Your Vendor Permission Permissions allow users to edit existing Vendors. If a user does not have the proper permissions to a Vendor, they will not be allow to make any updates to that Vendor s information. Step 6: Create Your Vendors Having complete Vendor information is important. Make sure that you have at least the critical information such as the vendor s Primary Contact, phone number, and address. It is recommended that you try and fill in as much information as possible. It is better to have that information as available as possible. Step 7: Create Your Risk Categories and Risk Scorecard Risk Categories are traditional requirements that a Vendor has to meet to be associated with your business and how important those Vendors are to your organization. When creating these categories, your Risk Management department should be involved. They will have the proper risk names and checklists that need to be created. Plus if you are using the Scorecard, you can classify the weight of each Category. If you use a series of questions to classify your Risk Categories, use the Manage Scorecard Template to create that questionnaire. That way when it s time to classify your Vendors, the Scorecard will do it for you. Step 8: Starting Using Vendor Management Now you can tell your Vendor Managers to start using the My Vendors Island to populate Vendor information, completing Risk Category Checklists, and maintaining Risk Mitigation. Vendor Management 33
38 Appendix II: Field Types and Properties Here is a list of all the available Custom Vendor Field Types and a description of their properties. A. Check Box The Check Box tool is used by the form creator to create a list of choices and allow users to select or check as many as needed. Property Name Label Name Read-Only Required Default Value Text Align Repeat Direction Repeat Columns Items Property Function Text that will be displayed in front of list of check box options. Text that will be displayed in the field database. Make it the same as the Label field to keep things consistent. Blocks form users from making any edits. Not important here. When marked Yes, users will not be able to save without choosing at least one option from the Items list. A list of values from that Items list can be typed here to make these options checked. Values are separated by pressing the Enter key. Left will place text on the left of the check box. Right will place text on the right of the check box Vertical will list all of the Items in a top down format. Horizontal will list all of the Items in a left to right format. Enter a numeric value to create columns of check list Items. Enter values to list different checkable options users to select. Values are separated by pressing the Enter key. 34 Vendor Management
39 B. Date Picker The Date Picker tool is used to allow users to select a specific date. Users can click on the calendar button to get a quick calendar to select the desired date. Property Name Label Name Read-Only Required Default Value Property Function Text that will be displayed in front of the Date Picker field. Text that will be displayed in the field database. Make it the same as the Label field to keep things consistent. Blocks form users from making any edits. Not important here. When marked Yes, users will not be able to save without choosing a date for the field. A value that will appear in the field as a default. Sets how the date information will be displayed. There are four different options. Short Date: 2/14/2010 Format Long Date: Sunday, February 14, 2010 Month Day: February 14 Year Month: February, 2010 Vendor Management 35
40 C. Date/Time Picker The Date/Time Picker tool is used to allow users to select a specific date. Users can click on the calendar button and the time button to select a desired date and time. Property Name Label Name Read-Only Required Default Value Property Function Text that will be displayed in front of the Date/Time Picker field. Text that will be displayed in the field database. Make it the same as the Label field to keep things consistent. Blocks form users from making any edits. Not important here. When marked Yes, users will not be able to save without choosing a date and time for the field. A value that will appear in the field as a default. Sets how the date information will be displayed. There are four different options. Format Short Date and Time: 2/14/2010 1:00 PM Long Date: Sunday, February 14, :00 PM Month Day: February 14 1:00 PM D. Drop Down List The Drop Down List tool allows form creators to make a list of items that form users will be able to choose one item from the list. Property Name Label Name Read-Only Required Default Value Property Function Text that will be displayed in front of the Drop Down List field. Text that will be displayed in the field database. Make it the same as the Label field to keep things consistent. Blocks form users from making any edits. Not important here. When marked Yes, users will not be able to save without choosing an option from the Items list. A value that will appear in the field as a default. Should be one of the options in the Items list. Items Enter values to list different options users can select. Values are separated by pressing the Enter key. 36 Vendor Management
41 E. List Box The List Box tool allows form creators to make a list of items that form users will be able to choose one or multiple items from the list. Property Name Label Name Read-Only Required Default Value Property Function Text that will be displayed in front of the List Box field. Text that will be displayed in the field database. Make it the same as the Label field to keep things consistent. Blocks form users from making any edits. Not important here. When marked Yes, users will not be able to save without choosing an option from the Items list. A value that will appear in the field as a default. If the Selection Mode option is set at single, should be one of the options in the Items list. If Selection Mode is set at multiple, there can be one or more values from the Items list here separated by pressing the Enter key. Selection Mode Choose to allow form user to either make Single or Multiple choices from the Items list. For users to select multiple items, they must hold their Ctrl key. Items Enter values to list different options users can select. Values are separated by pressing the Enter key. Vendor Management 37
42 F. Masked Text Box The Masked Text Box tool allows form creators to make a customized field to limit the information a user can enter into the field. Property Name Label Name Read-Only Required Default Value Mask Property Function Text that will be displayed on in front of the Masked Text Box. Text that will be displayed in the field database. Make it the same as the Label field to keep things consistent. Blocks form users from making any edits. Not important here. When marked Yes, users will not be able to save without choosing an option from the Items list. A value that will appear in the field as a default. The value should match with the format set by the Mask. A customizable limitation that can be set for users to input data into the field. See Appendix II The options to show mask data in the results of a form. A Literal is text that is inputted into the mask that from users cannot change. A Prompt is an area, usually marked with an underline _, that is a placeholder for form users to enter data. Value Type Text: Will only show the inputted data from a user and non of the literals or prompts. Text with Literals: Will show the inputted data and any literals than have been entered into the mask. Text with Prompt: Will show the inputted data and any uncompleted prompts than have been entered into the mask. Text with Prompt and Literals: Will show the inputted data, any literals, and any uncompleted prompts that have been entered into the mask. 38 Vendor Management
43 G. Phone Number The Phone Number tool allows form creators to make a field for users to enter a phone number. Users will not be able to enter letters, punctuation, special characters, or too many numbers into this field. Property Name Label Name Read-Only Required Default Value Property Function Text that will be displayed in front of the Phone Number field. Text that will be displayed in the field database. Make it the same as the Label field to keep things consistent. Blocks form users from making any edits. Not important here. When marked Yes, users will not be able to save without choosing an option from the Items list. A value that will appear in the field as a default. The value should match with the format set by the other properties. Show Country Code If change to Yes, the place holder - will appear in the field allowing users to input the country code for a phone number. Users will only be able to enter 4 numbers into this area. Show Area Code If change to Yes, the place holder ( ) - will appear in the field allowing users to input the area code for a phone number. Users will only be able to enter 3 numbers into this area. Show Extension If change to Yes, the place holder ext. will appear in the field allowing users to input the extension for a phone number. Users will only be able to enter 4 numbers into this area. Vendor Management 39
44 H. Radio Button The Radio Button tool allows form creators to make a list of available choice where the form users will be able to select a singe option. Property Name Label Name Read-Only Required Default Value Text Align Repeat Direction Repeat Columns Items Property Function Text that will be displayed in front of list of Radio Button options. Text that will be displayed in the field database. Make it the same as the Label field to keep things consistent. Blocks form users from making any edits. Not important here. When marked Yes, users will not be able to save without choosing an option from the Items list. The value from that Items list can be typed here to make these options selected. Left will place text on the left of the radio buttons. Right will place text on the right of the radio buttons. Vertical will list all of the Items in a top down format. Horizontal will list all of the Items in a left to right format. Enter a numeric value to create columns of radio button list Items. Enter values to list different checkable options users to select. Values are separated by pressing the Enter key. I. Social Security Number The Social Security tool allows form creators to have a field that limits form users to enter data in the traditional social security format. The field will have spaces for the 3 numbers, 2 numbers, and then 4 numbers without having to make the user enter any dashes -. Property Name Label Name Read-Only Required Default Value Property Function Text that will be displayed in front of Social Security field. Text that will be displayed in the field database. Make it the same as the Label field to keep things consistent. Blocks form users from making any edits. Not important here. When marked Yes, users will not be able to save without typing in any information. The value from that Items list can be typed here to have a default value in the field. 40 Vendor Management
45 J. Text Box The Text Box tool allows form creators to have a field form users can enter text. Property Name Label Name Read-Only Required Default Value Max Length Rows Text Mode Wrap Property Function Text that will be displayed in front of Text Box field. Text that will be displayed in the field database. Make it the same as the Label field to keep things consistent. Blocks form users from making any edits. Not important here. When marked Yes, users will not be able to save without typing in any information. The value text that will appear in the field. The number of characters, including spaces, that form users will be able to enter into the field. Used in conjunction with the Text Mode: Multiple Line. It is the number of multiple line rows that show in the field. Single Line: A single line for text to be entered. Hitting the Enter key will not create a new line of text. Multiple Line: Used in conjunction with the Rows property to create a field with multiple rows of text. Hitting the Enter key will create a new line of text. Password: Text entered will appear as a dot. Results viewers will see the actual text. Used in conjunction with the Text Mode: Multiple Line. Entered text will not scroll the text box but go to the next line in the field. Vendor Management 41
46 K. Time Picker The Time Picker tool is used to allow users to select a specific time. Users can click on the button to select a desired time. time Property Name Label Name Read-Only Required Default Value Property Function Text that will be displayed in front of the Time Picker field. Text that will be displayed in the field database. Make it the same as the Label field to keep things consistent. Blocks form users from making any edits. Not important here. When marked Yes, users will not be able to save without entering a time into the field. A value that will appear in the field as a default. Sets how the time information will be displayed. There are two different options. Format Short Time: 1:00 PM Long Time: 1:00:00 PM L. User Drop Down List The User Drop Down List tool allows form creators to have a field that form users can select another portal user. This list is populated by the portal user database. Property Name Label Name Read-Only Required Default Value Property Function Text that will be displayed in front of field. Text that will be displayed in the field database. Make it the same as the Label field to keep things consistent. Blocks form users from making any edits. Not important here. When marked Yes, users will not be able to save without typing in any information. The value user that will be displayed. 42 Vendor Management
47 M. Zip Code The Zip Code tool allows form creators to have a field that form users can enter a postal zip code. Property Name Label Name Property Function Text that will be displayed in front of the Zip Code field. Text that will be displayed in the field database. Make it the same as the Label field to keep things consistent. Read-Only Blocks form users from making any edits. Not important here. Required Default Value When marked Yes, users will not be able to save without typing in any information. The value user that will be displayed. Show +4 Code When marked Yes, users will be able to enter the default 5 digit zip code and the 4 digit extension. The field will have a - placeholder. N. Hyperlink The Hyperlink tool allows form creators to have a field that form users can enter a link. Users will enter information into the field and it will change to a clickable link to results views. Property Name Label Name Property Function Text that will be displayed in front of the Hyperlink field. Text that will be displayed in the field database. Make it the same as the Label field to keep things consistent. Read-Only Blocks form users from making any edits. Required Default Value When marked Yes, users will not be able to save without typing in any information. The value user that will be displayed. Vendor Management 43
48 Appendix III: Vendor Manager Permissions Using the Permissions Tool allows you to assign specific permissions to specific users and roles. Here is a list of all of the Permissions and their functions. Permission Name Permission Function AddContract Allows users to manage contracts in a Vendor s Snapshot. A EditProfileInfo AddRemoveRelationshipManager AssignRiskClassification AddAssessment Allows users to edit a Vendor s information either from the Manger Vendor Tool or the Vendor s Snapshot Allows users to add or remove a user from being a Vendor s Relationship Manager either from the Manage Vendor Tool or the Vendor s Snapshot. Allows users to assign a risk classification to a Vendor from the Vendor s Snapshot. Allows users to create a Vendor Assessment to manage a Vendor s Risk Mitigation from the Vendor s Snapshot. A user must also have the ViewFullSnapshot permission. AddDocuments Allows users to manage documents in a Vendor s Snapshot. A UpdateChecklist Allows users to update risk checklists from a Vendor s Snapshot. A user must also have the ViewFullSnapshot permission. ViewFullSnapshot Allows users to view the bottom section of a Vendor s 44 Vendor Management
49 Take Note! Information in this document, including URL and other Internet Web Site references, is subject to change without notice. Unless otherwise noted, the example companies, organizations, products, domain names, addresses, logos, people, places, and events depicted herein are fictitious, and no association with any real company, organization, product, domain name, address, logo, person, place, or event is intended or should be inferred. Complying with all applicable copyright laws is the responsibility of the user. Without limiting the rights under copyright, no part of this document may be reproduced, stored in or introduced into a retrieval system, or transmitted in any form or by any means (electronic, mechanical, photocopying, recording, or otherwise), or for any purpose, without the express written permission of Passageways, LLC Passageways, LLC. All rights reserved. The names of actual companies and products mentioned herein may be the trademarks of their respective owners. Last Updated December 2012
1 Vendor Management Module v6.0 User s Guide
 1 Vendor Management Module v6.0 User s Guide C Page 1 2 Vendor Management Module v6.0 User s Guide Notifications... 18 Table of Contents Introduction... 4 Core Vendor Management Module Concepts... 4 Key
Expense Report Module v4.11.1
 1 Expense Report Module v4.11.1 Page 1 2 Expense Report Module v4.11.1 Contents Frequently Asked Questions... 4 Q: We have a user who sent in their expense report, but their manager is out on vacation.
Transportation Management Accounting Portal Invoice Upload
 Transportation Management Accounting Portal Invoice Upload USER REFERENCE V.5 To help facilitate the submission of transportation invoices for payment, Crowley has designed a solution for the carrier to
Copyright Basware Corporation. All rights reserved.. Vendor Portal User Guide Basware P2P 17.3
 Copyright 1999-2017 Basware Corporation. All rights reserved.. Vendor Portal User Guide Basware P2P 17.3 Table of Contents 1 Vendor Portal Registration... 4 1.1 Register for Vendor Portal...4 2 Vendor
Or, from the View and Manage RFx(s) page, click the Create RFx button. Create New RFx - Use this button to create an RFQ from scratch.
 page, click the Create RFx button. Create New RFx - Use this button to create an RFQ from scratch.") Request for Quote How to Create Create an RFQ To create any RFx (RFI, RFQ, RFP, Auction or Buyer Survey), from the View and Manage RFx(s) page, click on the Create RFx button. Follow the steps below to
Request for Quote How to Create Create an RFQ To create any RFx (RFI, RFQ, RFP, Auction or Buyer Survey), from the View and Manage RFx(s) page, click on the Create RFx button. Follow the steps below to
HealthEquity Employer Portal Guide HealthEquity All rights reserved.
 HealthEquity Employer Portal Guide 2013-2015 HealthEquity All rights reserved. INTRODUCTION 09 ACCESSING PENDING PAYMENTS 01 LOGIN PROCESS 09 MODIFYING EMPLOYER INFORMATION 01 ADDING INSURANCE INFORMATION
OnCorps Reports 2.0, Standard Reports. Site Supervisor Tutorial
 OnCorps Reports 2.0, Standard Reports Site Supervisor Tutorial i Table of Contents Table of Contents Welcome to OnCorps Reports... 1 Getting Started... 2 System Requirements... 3 Logging Into and Logging
TEAMS User Guide. Requisitions. First Edition
 TEAMS User Guide Requisitions First Edition 2014 Prologic Technology Systems, Inc. All rights reserved. Prologic, the Prologic logo, TEAMS, TEAMS Business Administration, TEAMS Student Accounting, TEAMS
Invoice Manager Admin Guide Basware P2P 17.3
 Invoice Manager Admin Guide Basware P2P 17.3 Copyright 1999-2017 Basware Corporation. All rights reserved.. 1 Invoice Management Overview The Invoicing tab is a centralized location to manage all types
User Guide. Introduction. What s in this guide
 User Guide TimeForce Advanced Scheduling is the affordable employee scheduling system that lets you schedule your employees via the Internet. It also gives your employees the ability to view and print
Microsoft Dynamics GP Business Portal. Project Time and Expense User s Guide Release 3.0
 Microsoft Dynamics GP Business Portal Project Time and Expense User s Guide Release 3.0 Copyright Copyright 2005 Microsoft Corporation. All rights reserved. Complying with all applicable copyright laws
Chapter Contents. Manage Employers Option Screen
 16: Manage Employers Chapter Contents Create an Employer Account (Registration)... 16-2 Add Employer Locations... 16-6 Assign a Case Manager... 16-8 Add Contacts... 16-9 Assist an Employer... 16-13 Search
Sage ERP Accpac Online 5.6
 Sage ERP Accpac Online 5.6 Integration Resource Guide for Sage ERP Accpac And Sage CRM (Updated: December 1, 2010) Thank you for choosing Sage ERP Accpac Online. This Resource Guide will provide important
TimeKeeper Training. SIGNING INTO V6 PAYROLL MODULE Select Payroll and enter your User Name and Password and then click Sign In.
 SIGNING INTO V6 PAYROLL MODULE Select Payroll and enter your User Name and Password and then click Sign In. ALERTS SETUP Select Alerts Setup from the TimeKeeper dropdown menu. This is where you set up
HR Recruiting Solutions
 HR Recruiting Solutions Automated Request to Advertise User Guide Contact Us: web www.csus.edu/irt/acs/services/cms/training/reference.stm phone (916) 278-7337 Service Desk Last updated 4/29/2015 Overview
PROCAS Time User Instructions
 PROCAS Time User Instructions PROCAS, LLC Copyright 2013 PROCAS, LLC, All rights reserved Table of Contents i TABLE OF CONTENTS Introduction... iii Chapter 1 PROCAS Time User Basics... 1 Establish a Password...
created & maintained by the Vendor & Item Support Team
 Sears Sales (Alex) Reporting Application Overview Guide created & maintained by the Vendor & Item Support Team October 2016 Objectives Sears Sales (Alex) Reporting is a reporting application which provides
Solutions Implementation Guide
 Solutions Implementation Guide Salesforce, Winter 18 @salesforcedocs Last updated: November 30, 2017 Copyright 2000 2017 salesforce.com, inc. All rights reserved. Salesforce is a registered trademark of
Performance Management System Reference Guide Administrators
 Performance Management System Reference Guide Administrators Administration 6 Manage Company Information... 6 Navigation... 6 Company Data... 6 Company Logo... 6 Password Settings... 6 Review Settings...
Employee Dashboard Users Guide
 Employee Dashboard Users Guide And Training Centre Workflow January 29, 2016 Supply Chain Qualification and Management www.browz.com Table of Contents Employee Dashboard... 2 Manage Employees Tab... 2
PAYGLOBAL EXPLORER USER GUIDE
 PAYGLOBAL EXPLORER USER GUIDE Table of Contents Revised March 2002 by Ian Johnson (PayGlobal Pty Ltd) to include changes for rate over-rides and breaks. Revised June 2002 by Ian Johnson (PayGlobal Pty
Essential Time & Attendance Supervisor Scheduling Basics
 ADP Workforce Now Essential Time & Attendance Supervisor Scheduling Basics Handout Manual Need support after training? To exchange tips and best practices with fellow users, get on The Bridge an online
Table of Contents. 2 P a g e
 Skilldex Training Manual October 2012 Table of Contents Introduction to Skilldex... 3 Skilldex Access... 4 Sections of Skilldex... 5 Current Program... 6 Toolbox... 7 Employers... 8 New Employer... 9 All
George Washington University Workforce Timekeeper 6.0 Upgrade Training
 Workforce Timekeeper 6.0 Upgrade Training Table of Contents Topic 1: Workforce Timekeeper 6.0 New Features...4 Topic 2: Logging On and Off...5 Topic 3: Navigating in Workforce Timekeeper...7 Topic 4: Reviewing
SyftForce User Manual. ios MANUAL VERSION 2.0
 SyftForce User Manual ios MANUAL VERSION 2.0 Table of Contents SECTION 1. Where can I Download the App? 2. Setting up your Account as an Admin Manager 3. Setting up your Account as a Staffing Manager 4.
CASELLE Classic Cash Receipting. User Guide
 CASELLE Classic Cash Receipting User Guide Copyright Copyright 1987-2008 Caselle, Inc. All rights reserved. This manual has been prepared by the Caselle QA documentation team for use by customers and licensees
Payroll Guide Guru Guide Version
 Payroll Guide Guru Guide Version 2017.01.13 Copyright 2017 PeopleGuru, Inc. All rights reserved. Information in this document is subject to change without notice. The software described in this document
VTK Finance Tab. Troop Leader Training
 VTK Finance Tab Troop Leader Training 1 Welcome, Troop Leaders and Troop Treasurers to the Volunteer Tool Kit Finance Tab Training. The VTK Finance Tab is a NEW on-line form for Troops to submit their
Microsoft Dynamics GP. Purchase Order Processing
 Microsoft Dynamics GP Purchase Order Processing Copyright Copyright 2005 Microsoft Corporation. All rights reserved. Complying with all applicable copyright laws is the responsibility of the user. Without
ReadyResults.net. Entering Scores and Reporting for Stanford English Language Proficiency (SELP) Stanford Spanish Language Proficiency (SSLP) Tests
 Stanford Spanish Language Proficiency (SSLP) Tests") ReadyResults.net 2014 Entering Scores and Reporting for Stanford English Language Proficiency (SELP) Stanford Spanish Language Proficiency (SSLP) Tests For help: help@readyresults.net 877-456-1547 Table
ReadyResults.net 2014 Entering Scores and Reporting for Stanford English Language Proficiency (SELP) Stanford Spanish Language Proficiency (SSLP) Tests For help: help@readyresults.net 877-456-1547 Table
Completing an Internal Audit User Guide For the Reliance Assessment Database
 Completing an Internal Audit User Guide For the Reliance Assessment Database Contents Logging into Reliance... 2 Creating an Audit Plan: Planning Your Internal Audit... 4 Approving an Audit Plan... 20
Manager Dashboard User Manual
 Manager Dashboard User Manual Manager User Guide The Manager User Guide is designed to provide a supervisor or a manager with step-by-step instructions for their daily tasks. Although every database will
Web TimeSheet Integration Manager for Microsoft Project Server. Version 2.6 USER GUIDE
 Web TimeSheet Integration Manager for Microsoft Project Server Version 2.6 USER GUIDE Notices 2004-2006 Replicon, Inc. All rights reserved. All parts of this manual are the property of Replicon Inc. No
ONESolution Accounts Payable Special District User Guide
 ONESolution Accounts Payable Special District User Guide SunGard Public Sector 1000 Business Center Drive Lake Mary, Florida 32746 Phone: (800) 695-6915 Fax: (407) 304-1005 Web site: http://www.sungardps.com
Essential Time & Attendance Supervisor Basics
 ADP Workforce Now Essential Time & Attendance Supervisor Basics Handout Manual V09021480778WFN70 Copyright 2012 2014 ADP, LLC ADP Trademarks The ADP logo and ADP are registered trademarks of ADP, LLC.
REFERENCE GUIDE. January, 2018
 REFERENCE GUIDE January, 2018 1 Contents Introductory Evaluation for New Hires and Transfers... 3 Adding Goals After Introductory Eval... 5 Re-Evaluation: Introductory & Annual... 7 Focus Review 1 and
After logging into PrintGizmo create your profile and complete the information requested by navigating the menu to Configuration > Profile.
 Printer Guide Quick Start Guide Step 1: Setup your Profile See Profile under Configuration After logging into PrintGizmo create your profile and complete the information requested by navigating the menu
PROPRIETARY MATERIALS
 PROPRIETARY MATERIALS No use of these proprietary materials is permitted without the express written consent of or license from Thomson Reuters. Altering, copying, distributing or reproducing any of these
Dealer Business System (DBS) Helping Dealers do business AMSOIL INC. 5/16/2014
 Helping Dealers do business AMSOIL INC. 5/16/2014") Dealer Business System (DBS) Helping Dealers do business AMSOIL INC. 5/16/2014 Table of Contents Activation... 6 Business Information... 6 Shipping Setup... 6 Charge Shipping on Pickup Orders: Checking
Dealer Business System (DBS) Helping Dealers do business AMSOIL INC. 5/16/2014 Table of Contents Activation... 6 Business Information... 6 Shipping Setup... 6 Charge Shipping on Pickup Orders: Checking
PM Created on 1/14/ :49:00 PM
 Created on 1/14/2015 12:49:00 PM Table of Contents... 1 Lead@UVa Online Training... 1 Introduction and Navigation... 1 Logging Into and Navigating the Site... 2 Managing Notes and Attachments... 9 Customizing
Alberta Prorate IRP System. Online Services User Guide
 Alberta Prorate IRP System Online Services User Guide Document Version: 1.1 Status: Final Date: February 7, 2012 Amendment History - Document Status (e.g. Draft, Final, Release #): Version Modified Date
TABLE OF CONTENTS. Introduction... 18
 SAP Fieldglass Supplier Administrator Guide Updated: November 2017 TABLE OF CONTENTS GUIDE OVERVIEW... 5 Learning Objectives/Agenda... 5 INTRODUCTION TO SAP FIELDGLASS... 6 Terminology... 6 SAP FIELDGLASS
Specialized Data Systems, Inc. Web Financial Office ACA 2015 Reporting Instructions Specialized Data Systems, Inc Revised Last:
 , Inc. Web Financial Office ACA 2015 Reporting Instructions Specialized Data Systems, Inc. 2015 Revised Last: 12.28.2015 ACA 2015 Reporting Table of Contents... 3 Setup...3 Step 1 Update Web Financial
H.E.L.P. HARVESTERS EXPRESS LEARNING PROGRAM User Guide for Harvesters Express 3.0 Ordering System
 H.E.L.P HARVESTERS EXPRESS LEARNING PROGRAM User Guide for Harvesters Express 3.0 Ordering System A Customer Care Training Program Created For Harvesters Member Agencies Version 3.0 Issued February 5,
SAMPLE - Not to be Reproduced. designed by Regina Rexrode
 Images used on the front cover and throughout this book were obtained under license from Shutterstock.com. 2016 Copyright by Armond Dalton Publishers, Inc. Okemos, Michigan All Rights Reserved. No part
Microsoft Dynamics GP. Purchase Order Processing
 Microsoft Dynamics GP Purchase Order Processing Copyright Copyright 2007 Microsoft Corporation. All rights reserved. Complying with all applicable copyright laws is the responsibility of the user. Without
Costpoint Training Guide: Employee Training Manual. Electronic Timekeeping
 Costpoint Training Guide: Employee Training Manual Electronic Timekeeping Table of Contents: Welcome:... 3 Activating Your Account:... 4 Password Requirements:... 5 Accessing the Portal:... 6 Logging into
Creating Requisitions
 Creating Requisitions Users Guide REVISED 1/27/10 DEL MAR COLLEGE, PURCHASING DEPARTMENT TABLE OF CONTENTS TABLE OF CONTENTS... 2 LOGGING INTO DATATEL - COLLEAGUE... 3 PROCESS FLOW... 5 CREATING A NEW
Salesforce Lightning Partner Management
 Salesforce Lightning Partner Management Salesforce, Winter 17 @salesforcedocs Last updated: November 23, 2016 Copyright 2000 2016 salesforce.com, inc. All rights reserved. Salesforce is a registered trademark
Reporting and Dashboards
 Reporting and Dashboards Page i Copyrights 2002-2011 Propertyware, Inc. All rights reserved. No part of this publication may be reproduced, transmitted or stored in any archives without the expressed
Introduction to IBM Cognos for Consumers. IBM Cognos
 Introduction to IBM Cognos for Consumers IBM Cognos June 2015 This training documentation is the sole property of EKS&H. All rights are reserved. No part of this document may be reproduced. Exception:
MEANINGFUL SELECTIONS REFERENCE GUIDE. Funeral Home Admin Module March 2016
 MEANINGFUL SELECTIONS REFERENCE GUIDE Funeral Home Admin Module March 2016 Copyright 2014-2016 Batesville Services Inc. Updated 3/2016 MEANINGFUL SELECTIONS REFERENCE GUIDE Funeral Home Admin Module Getting
Data Exchange Module. Vendor Invoice Import
 Data Exchange Module Vendor Invoice Import Information in this document is subject to change without notice and does not represent a commitment on the part of Dexter + Chaney. The software described in
UC LEARNING CENTER Manager Guide
 UC LEARNING CENTER Manager Guide Table of Contents Introduction 3 UCLC Overview 3 Browser Capability 3 Obtaining a Logon ID 4 Logging into the UC Learning Center 4 Help Contact 4 Navigation 5 Home Page
CAT Enterprise. Reports Manual
 CAT Enterprise Reports Manual Version 1.6 Revised February 2013 NOTICE AND DISCLAIMER The information contained herein (WORK) was prepared by or contributed to by various parties in support of professional
CALIFORNIA. Guide to CAASPP Completion Status and Roster Management Administration
 CALIFORNIA Assessment of Student Performance and Progress Guide to CAASPP Completion Status and Roster Management 2016 17 Administration Smarter Balanced Summative Assessments for English Language Arts/Literacy
Sage ERP Accpac 6.0A. SageCRM 7.1 I Integration Update Notice
 Sage ERP Accpac 6.0A SageCRM 7.1 I Integration Update Notice 2011 Sage Software, Inc. All rights reserved. Sage, the Sage logos, and all Sage ERP Accpac product and service names mentioned herein are registered
QUICKBOOKS 2018 STUDENT GUIDE. Lesson 3. Working with Lists
 QUICKBOOKS 2018 STUDENT GUIDE Lesson 3 Working with Lists Copyright Copyright 2018 Intuit, Inc. All rights reserved. Intuit, Inc. 5100 Spectrum Way Mississauga, ON. L4W 5S2 Trademarks 2018 Intuit Inc.
Version 1.0. Halogen eappraisal User Guide
 Version 1.0 Halogen eappraisal User Guide Non-Represented And Teamster 2015 Please direct your comments and/or questions about this manual to: Bill Howlett, Manager T&OP bill.howlett@cityofhenderson.com
PARS 7 Training. Training website: https://slcctraining.peopleadmin.com/hr. Human Resources
 PARS 7 Training Training website: https://slcctraining.peopleadmin.com/hr Human Resources 10/8/2012 Contents Navigation of PARS... 4 Inbox... 4 Watch List... 4 Bread Crumbs... 5 Help Options... 5 Check
Step by Step Guide to
 2010 National Competitive Recruitment Examinations (NCRE) Step by Step Guide to Applying for the 2010 NCRE Job Openings In the UN Careers Portal This guide offers step-by-step procedures on how to search
TimeClick QuickBooks Pro Integration Manual
 1 TimeClick QuickBooks Pro Integration Manual TimeClick LE 16 2016 Manual v. 1.0 - Last updated Mar 2016 QuickBooks is a registered trademark of Intuit, Inc. Hawkeye Technology LLC is not affiliated with
TEMPLE UNIVERSITY CEMS Chemical Environmental Management System
 TEMPLE UNIVERSITY CEMS Chemical Environmental Management System CEMS OVERVIEW What CEMS is: CEMS is the online chemical inventory system for Temple University and Temple University Health System. All chemical
Department of Management Services People First. People First! New Employee Orientation. Working together to put People First! Last Updated
 ! New Employee Orientation Last Updated 09-19-08 Working together to put! Table of Contents Click on the topic to jump to that section. Service Center EEO-Veterans-AAP How to Log in to Emergency Contact
Taleo Enterprise. Taleo Compensation Manager Guide
 Taleo Enterprise Taleo Compensation Feature Pack 12B August 31, 2012 Confidential Information and Notices Confidential Information The recipient of this document (hereafter referred to as "the recipient")
Data Exchange Module. Vendor Invoice Import
 Data Exchange Module Vendor Invoice Import Information in this document is subject to change without notice and does not represent a commitment on the part of Dexter + Chaney. The software described in
Procurement. User Guide
 Procurement User Guide The information in this document is subject to change without notice and does not represent a commitment on the part of Horizon. The software described in this document is furnished
Time and Attendance - Managing Timecards
 Kronos Workforce Timekeeper v8.0 Time and Attendance - Managing Timecards SOCIETY User Guide Table of Contents Using Kronos Workforce Time and Attendance Using Kronos Workforce Time and Attendance... 1
DHL IMPORT EXPRESS ONLINE USER GUIDE FOR IMPORTERS WE COORDINATE EFFECTIVE COMMUNICATION BETWEEN YOUR SHIPPERS AND YOU FOR YOU. dhl-usa.
 DHL IMPORT EXPRESS ONLINE USER GUIDE FOR IMPORTERS WE COORDINATE EFFECTIVE COMMUNICATION BETWEEN YOUR SHIPPERS AND YOU FOR YOU. dhl-usa.com/ieo CONTENTS Importer Manage Your Imports 3 Helpful Guide Information
Lesson 3 Working with Lists
 Q U IC K BOOKS 2017 STUDEN T GUIDE Lesson 3 Working with Lists Copyright Copyright 2017 Intuit, Inc. All rights reserved. Intuit, Inc. 5100 Spectrum Way Mississauga, ON. L4W 5S2 Trademarks 2017 Intuit
NOVAtime 5000 User Guide
 NOVAtime 5000 User Guide Table of Contents Logging In... 4 Terminology... 4 Dashboard... 5 3.1 The Dashboard Gadgets...5 Changing Timesheet Status... 7 Changing Pay Periods... 8 Timesheet Icons Definitions...
A SIMPLER WAY TO SHIP. Instant Quotes Anytime, Anywhere. mytnt 2 Online Shipping User Guide
 A SIMPLER WAY TO SHIP Instant Quotes Anytime, Anywhere mytnt 2 Online Shipping User Guide 02 Welcome to mytnt 2 Online Shipping Tool! Easy Get started with just an email address & password Fewer steps
IMS Online Max. Manager user guide
 IMS Online Max Manager user guide Table of Contents Logging into IMS Online Max... 3 Web address... 3 Login details... 3 Changing your password... 3 IMS Online Max screens... 4 Timesheets... 5 Create a
ejobs Guide for Hiring Managers
 ejobs Guide for Hiring Managers Contents ejobs Overview... 4 Posting and Hiring Process... 5 Approval Processes... 5 Getting Help... 5 Navigating ejobs... 7 Logging In... 7 Navigating the Home Page...
User Manual NSD ERP SYSTEM Customers Relationship Management (CRM)
") User Manual Customers Relationship Management (CRM) www.nsdarabia.com Copyright 2009, NSD all rights reserved Table of Contents Introduction... 5 MANAGER S DESKTOP... 5 CUSTOMER RELATIONSHIP MANAGEMENT...
User Manual Customers Relationship Management (CRM) www.nsdarabia.com Copyright 2009, NSD all rights reserved Table of Contents Introduction... 5 MANAGER S DESKTOP... 5 CUSTOMER RELATIONSHIP MANAGEMENT...
AutoClerk User Guide. Tape Chart, Marketing, Yield Management
 AutoClerk User Guide Tape Chart, Marketing, Yield Management Table of Contents TABLE OF CONTENTS... 2 COPYRIGHT INFORMATION... 3 1. TAPE CHART... 4 SETTING TAPE CHART PARAMETERS... 4 MENU BAR... 6 TAPE
Supervisor User Guide
 Supervisor User Guide Clockwise by GHG Corporation Software Release: 7.5.3.9_#489 960 Clear Lake City Blvd Document By: Sarah Harmeyer Webster, Texas 77598 Published: September 2018 www.goclockwise.com
3Gtms Supplier User Guide REFERENCE GUIDE
 This Reference Guide is for CNRL Suppliers to help them ship freight to CNRL using 3Gtms Software. Background CNRL uses a software system called 3Gtms for Transportation Management. It is used for the
Microsoft Dynamics GP 2015 Benefit Self Service Released: December 5, 2014
 Microsoft Dynamics GP 2015 Benefit Self Service Released: December 5, 2014 Benefit Self Service User s Guide 1 Conditions and Terms of Use Microsoft Partner - See Terms of Use [NDA Required] This training
Purchase Requisitions and Receiving
 Purchase Requisitions and Receiving VERSION: February 2018 Table of Contents About the Purchasing Process 3 Working With Requester Preferences 5 Creating a New Purchase Requisition 9 Reporting a Misuse
Version /2/2017. Offline User Guide
 Version 3.3 11/2/2017 Copyright 2013, 2018, Oracle and/or its affiliates. All rights reserved. This software and related documentation are provided under a license agreement containing restrictions on
A licence, course, competency, or other training that has been completed by a Person.
 Key Terms Record: Need: A licence, course, competency, or other training that has been completed by a Person. Requirement that has been identified for a Person to undertake or obtain training or a competency.
Croner Simplify. Croner Simplify. ~ Manager Training Workbook ~ Version 5.0. P a g e 1. January 17
 ~ Manager Training Workbook ~ Version 5.0 P a g e 1 Manager View Managers can see information about themselves and their teams. Their role within Croner Simplify is to complete certain tasks for their
Workforce One Time & Labor Management
 Workforce One Time & Labor Management Web Based Time & Labor Management is a web-based time and attendance system used for a variety of labor tracking needs such as: attendance management, project tracking,
Croner Simplify. Croner Simplify. ~ Manager Training Workbook ~ Version 6.0. P a g e 1
 ~ Manager Training Workbook ~ Version 6.0 P a g e 1 Manager View Managers can see information about themselves and their teams. Their role within Croner Simplify is to complete certain tasks for their
Your easy, colorful, SEE-HOW guide! Plain&Simple. Microsoft Project Ben Howard
 Your easy, colorful, SEE-HOW guide! Plain&Simple Microsoft Project 03 Ben Howard Published with the authorization of Microsoft Corporation by O Reilly Media, Inc. 005 Gravenstein Highway North Sebastopol,
Ariba Network Online Invoice Guide
 Ariba Network Online Invoice Guide Introduction Regions Financial Corporation Specifications Your Ariba Network Account Invoices Accessing Your Account Account Navigation Account Configuration Settlement/Remit-To
The name of the supervisory organization in which the position was created.
 Keep in mind Managing an applicant pool is a dynamic process. Within the process, you may skip or even repeat various processes as you work through your applicant pool. At the end of the search, all documentation
IBM TRIRIGA Application Platform Version 3 Release 4.1. Reporting User Guide
 IBM TRIRIGA Application Platform Version 3 Release 4.1 Reporting User Guide Note Before using this information and the product it supports, read the information in Notices on page 166. This edition applies
ExpressMaintenance Release Notes
 ExpressMaintenance Release Notes ExpressMaintenance Release 9 introduces a wealth exciting features. It includes many enhancements to the overall interface as well as powerful new features and options
Deltek Touch for Maconomy. Touch 2.2 User Guide
 Deltek Touch for Maconomy Touch 2.2 User Guide July 2017 While Deltek has attempted to verify that the information in this document is accurate and complete, some typographical or technical errors may
elumen Faculty Role The Basics in 6.5
 Where to find elumen 6.5: myhancock/work Tools or Faculty Tab/Assessment & Institutional Effectiveness Channel/eLumen Login Use Firefox or Chrome Browser. Internet Explorer can be temperamental. Login
ON SITE SYSTEMS Chemical Safety Assistant
 ON SITE SYSTEMS Chemical Safety Assistant CS ASSISTANT WEB USERS MANUAL On Site Systems 23 N. Gore Ave. Suite 200 St. Louis, MO 63119 Phone 314-963-9934 Fax 314-963-9281 Table of Contents INTRODUCTION
Table of Contents. Login Screen Introduction...2 Login Screen Navigation...2 Passwords Requirements...3 Logging Into People First...
 Table of Contents Login Screen... 2 Introduction...2 Login Screen Navigation...2 Passwords Requirements...3 Logging Into People First...3 Home Page... 3 Introduction...3 Home Page Description...4 Updating
Navigating in ADP Workforce Now for Practitioners
 ADP Workforce Now Navigating in ADP Workforce Now for Practitioners Introduction In this self-study, you will learn how to navigate in ADP Workforce Now. The features that you will use depend on your job
BillQuick QuickBooks Integration
 Time Billing and Business Management Software Built With Your Industry Knowledge BillQuickQuickBooks Integration Advanced Integration Guide BQE Software, Inc. 2601 Airport Drive Suite 380 Torrance CA 90505
Administrator Guide. Advanced HR 2.0
 Administrator Guide Advanced HR 2.0 Copyright 2018 by Asure Software. All rights reserved. Printed in USA. The contents of this guide and the software described are copyrighted. No part of this guide or
Accountant User Guide
 Accountant User Guide Clockwise by GHG Corporation Software Release: 7.5.3.9_#489 960 Clear Lake City Blvd Document By: Sarah Harmeyer Webster, Texas 77598 Published: November 2018 www.goclockwise.com
Lesson 3 Working with Lists
 Q U IC K BOOKS 2017 STUDEN T GUIDE Lesson 3 Working with Lists Copyright Copyright 2017 Intuit, Inc. All rights reserved. Intuit, Inc. 5100 Spectrum Way Mississauga, ON. L4W 5S2 Trademarks 2017 Intuit
 You have confirmed that you will be using an alternative system to assess your workers. We ll send any workers who join the pension scheme our terms and conditions with their welcome pack. The welcome