QUICK START GUIDE. Version August 27, For all questions regarding this document, please
|
|
|
- Anthony Black
- 5 years ago
- Views:
Transcription

1 QUICK START GUIDE Version August 27, 2014 For all questions regarding this document, please

2 This Quick Start Guide will provide you with a general overview of TaxWorkFlow to help you start simplifying your tax preparation process as quickly as possible. TaxWorkFlow offers a variety of tools for optimal organization of client data, efficient internal and external communication, and successful tax return completion. Please refer to the complete TaxWorkFlow User Guide for detailed information about using these tools for tax preparation and other engagements. 1. Getting Started: Adding Clients To begin using TaxWorkFlow you must add clients and information about them into the system s database. You must also add your company information and set-up any TaxWorkFlow users you wish to have. TaxWorkFlow uses a master- slave relationship when creating a client that has both business and personal tax returns. When a business return is created a master of the return can be defined linking it to a personal or another business return. By establishing this relationship between business and personal returns, TaxWorkFlow will ensure that K-1 information is imported into the business return and that ownership relationships are mapped. The first step in the tax return preparation workflow is to create a new client. To do this, click Customers Create customer or Ctrl + F3 and fill in all required fields. Click the Save button to save new customer to the database or Ctrl + Enter to save and close this form. Complete information about client management is described in the TaxWorkFlow User Guide.
3 2. Using Client Tickets to Optimize Workflow Client tickets are the backbone of TaxWorkFlow s streamlined system. Each client ticket is comprised of a series of tasks. It is important to note that a task is one event of a series of events that must occur for the workflow in a particular ticket to be completed. Tasks can be customized at the universal or individual customer level, to ensure that the unique needs of each client are met. There is also a built-in tickler system to ensure that a full tax return is completed on time for every client. In addition, administrators of the program can assign individual user passwords and logins to control access to information and to monitor workflow progress. In the Create Task window, you can choose a client from the drop-down menu, assign tasks to your staff or to yourself, determine deadlines, and prioritize tasks, then related instructions and files can be added. To manage task dependencies and teamwork more effectively, you can organize typical tasks into a ticket which is composed of at least two or more tasks. A ticket is a preprogrammed set of instructions that allows workflow to progress in a sequential order. Tickets help reproduce the same sequence of steps over and over again for various clients. Below is an example of the ticket with three simple task instructions (prepare, review, and print):
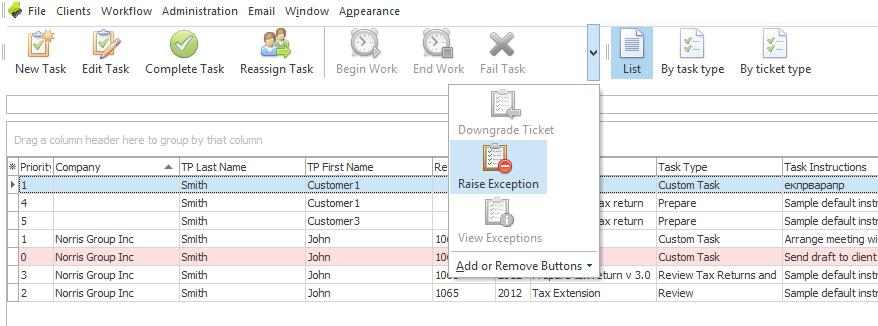
4 Each scheduled task of the new ticket has its own order number. You move over to the next task in the queue after you complete the current task. This is called "upgrading the ticket", i.e. advancing the ticket up the scheduled pipeline of tasks until all are completed. Downgrading the ticket means taking a step back, e.g. from the review stage back to the prepare stage. Each task of the ticket and a whole ticket itself can be assigned or re-assigned to any user. 3. TaxWorkFlow Exceptions TaxWorkFlow allows you to add many exceptions to address issues that arise in your practice. Exceptions stop the processing of a ticket when a certain condition is met. When an exception is raised, the ticket cannot be upgraded until the exception is cleared. Exceptions can be managed using the "Exceptions" button on the Edit Task or View Tasks forms. From this list, you can review task exceptions, a reminder, or clear exceptions. To raise an exception, select the task or ticket and click the "Raise Exception" button. You can also raise an exception with custom information by double-clicking the left mouse button or by clicking a right mouse button and selecting "Raise exception with custom info" from the drop-down menu. By raising the exception, you will effectively put a road block on the further execution of the ticket until you receive the missing information from the client.
5