Online Payment Request Form User Guide
|
|
|
- Willis McBride
- 5 years ago
- Views:
Transcription
1 Online Payment Request Form User Guide Facilities Technology Services Last Updated: Nov 6, of 27
2 Overview Accessing the Application PRF Dashboard Create Payment Request Look Up Vendor Select Purchase Order Enter Line Amounts Enter Payment Details Enter Pick-Up Form Information (Optional) Print Payment Request Form Submit Request to FPPS FPPS Review Questions or Comments PRF - 11/6/2014 System Update Creating a Payment Request Direct-Pay Requests Pay Specific PO 2 of 27
3 Overview The Online Payment Request Form has been updated to provide access to vendor and purchase order data from SAP as well as better integration with the Invoice Tracker Application. This document will provide an overview of the features found in the new application as well as highlight any important changes to the process. Please note that this tool is intended to be used to process payment requests only. Encumbrance requests will continue to be processed with the current tool. 3 of 27
4 Accessing the Application To access the new application you must log into using your LAUSD Single Sign-on and password and go to My Account. A link to the Online Payment Request Form will be available under the Web Applications listing. 4 of 27
5 PRF Dashboard The PRF Dashboard is the gateway to the application with from which you can search and generate a new payment requests. The default view in this screen will present to you any payment requests that you have initiated but you can use the other filtering options to look for other payment requests in the system. 5 of 27
6 Create Payment Request From the dashboard screen you can initiate a new payment request by clicking on the Create Payment REquest button on the top-right side of the main screen. Look Up Vendor The first step is to create look for the vendor by using the look-up box on the screen. Performing a search will return a list of matches found by the system with the SAP vendor number and address information. Select the appropriate vendor and click on Continue to proceed. 6 of 27
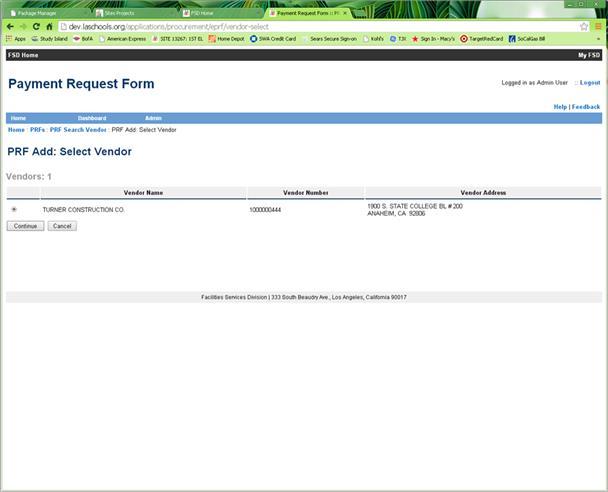
7 7 of 27

8 Select Purchase Order The next step is to identify the Purchase Order that will be used to pay the invoice. The application will present to you a list of purchase orders available for the selected vendor. Select one of the purchase orders in the list to proceed. 8 of 27
9 Enter Line Amounts Next, specify the amount received for each line item in the purchase order. Enter the quantity received for the amount that is approved for payment to the vendor. This is the amount that will be paid to the vendor. After you enter the amount(s) click Continue to proceed. 9 of 27

10 Enter Payment Details With the vendor and funding information in place a shell of a payment application will be created for you to provide additional details about the request including invoice dates, requester information and designated approver. To edit this information click on the Edit button on the top-right corner above payment details and enter all the required information marked by an asterisk. When you update this information please make sure to enter the Vendor Invoice Number as it appears on the vendor invoice. (The application will default this to the PRF ID) In this version of the application you will be required to specify the payee on the invoice which is derived from SAP which will determine the Remittance Address for the payment. In most cases this will be the vendor on the PO but for other cases you will be able to select a different payee. Click on Save when you finish entering the necessary information and return to the PRF details screen. 10 of 27
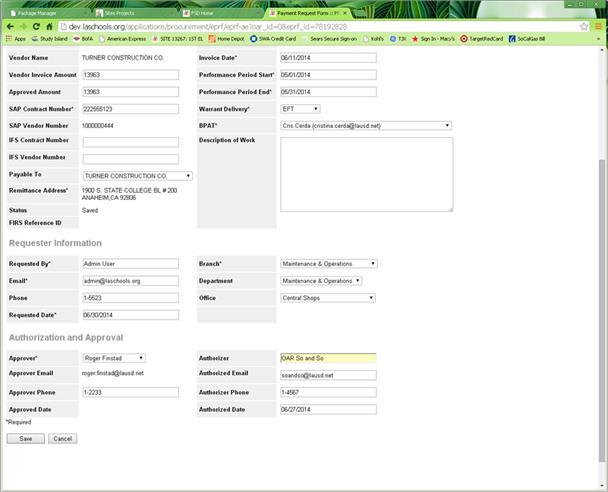
11 11 of 27

12 Enter Pick-Up Form Information (Optional) If you selected Pick-Up as the Warrant Delivery, you must enter the pick-up information by clicking on Pick-Up Form on the payment details screen. Enter the pick-up form information and click Save. The information you enter will be displayed in the Pick-Up form that will be generated along with the payment request. 12 of 27
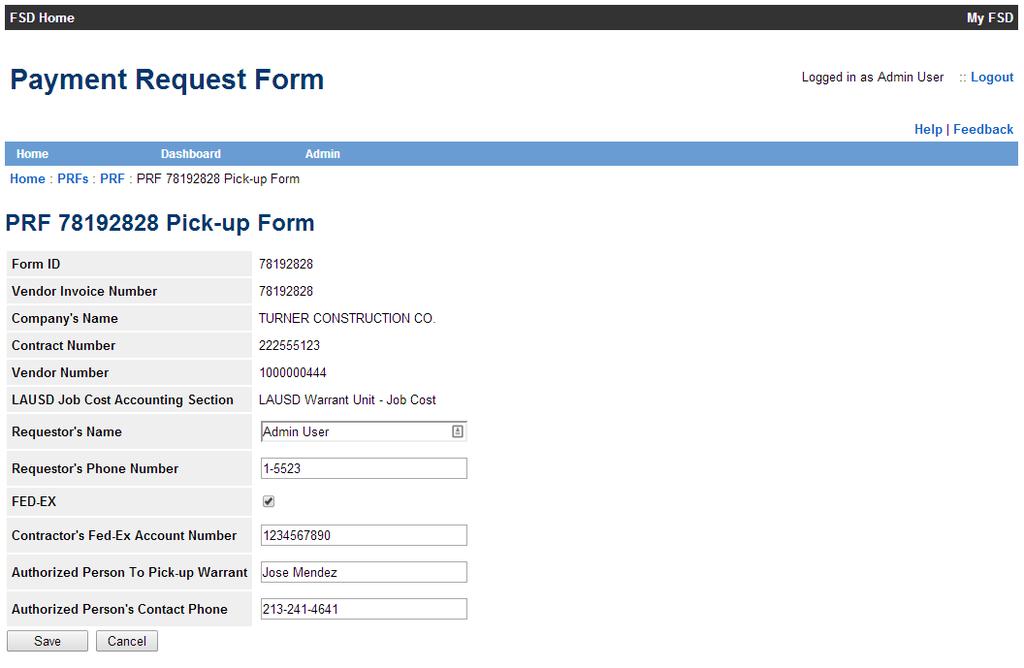
13 13 of 27
14 14 of 27

15 Print Payment Request Form Once all the required information is entered you can print the payment request by clicking on the Finalize PRF button. This will generate the PDF form which you can download to print. Click on the Download PDF button located on the top-right side of the payment details screen to get a copy of the form and prepare the invoice package for approval signatures. 15 of 27
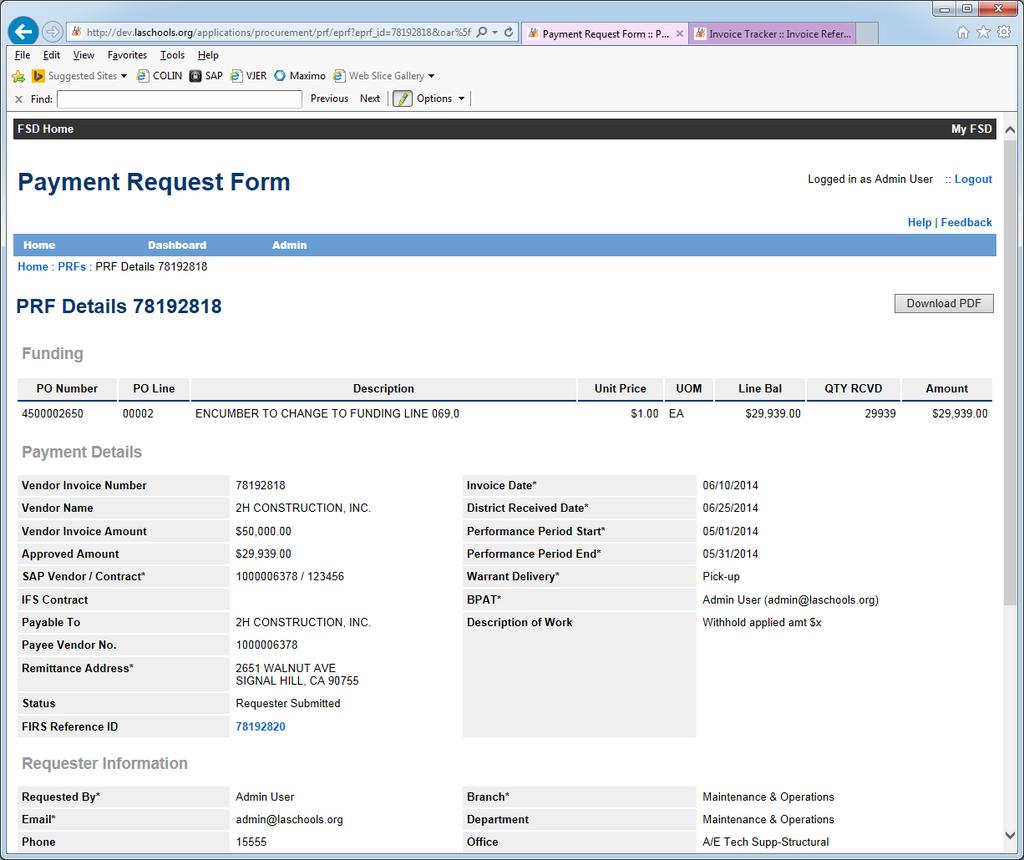
16 16 of 27
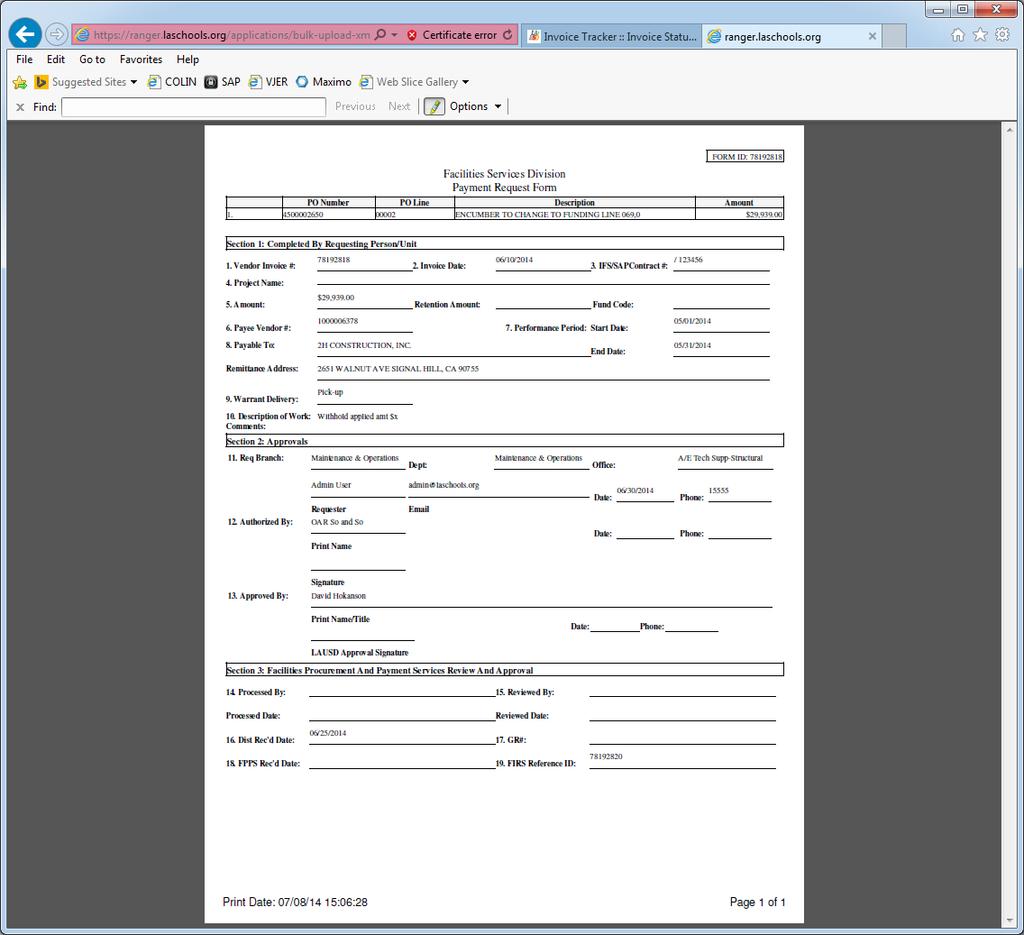
17 17 of 27
18 If you need to make changes to the form you can click on Unfinalize to set the form back to an editable state. Once you complete the changes click Finalize to re-print the form. 18 of 27
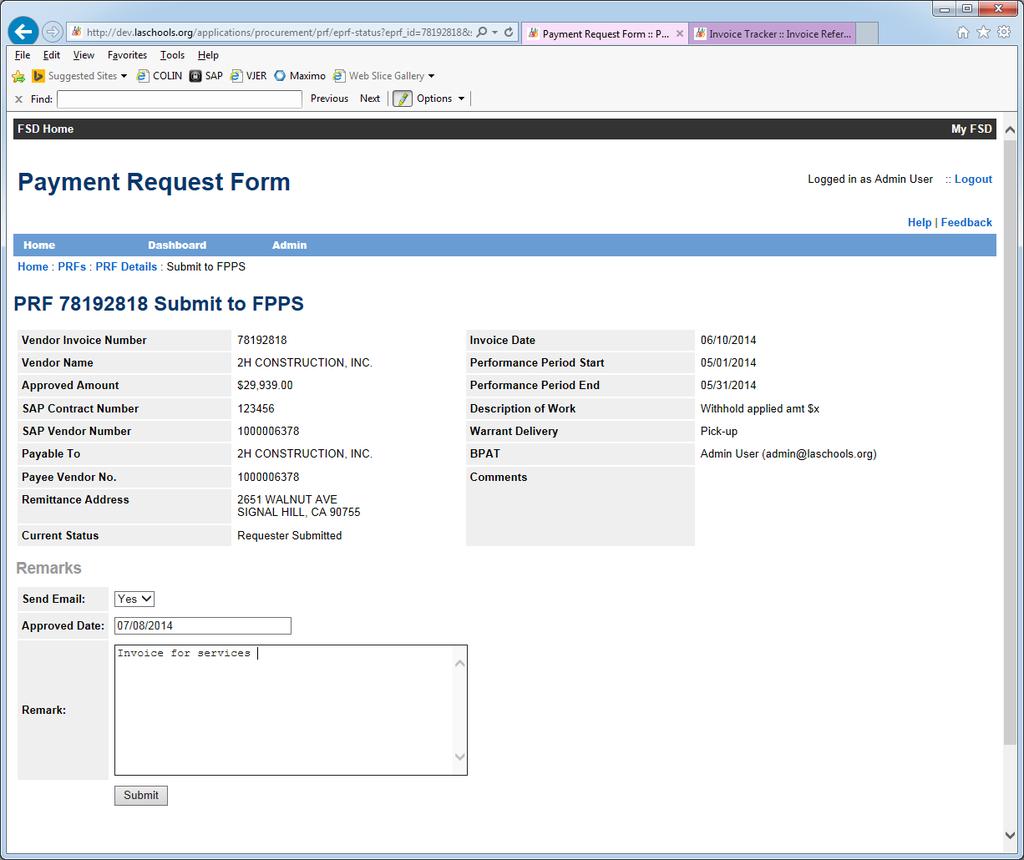
19 Submit Request to FPPS After the invoice package has been signed and approved, you must send the invoice package to FPPS and submit the payment request electronically. Both steps must be completed for FPPS to accept the payment request. To submit the payment request electronically you must click the Submit to FPPS button at the bottom of the payment request page. Enter the Approval Date as captured on the signed form and an optional message which will be sent to the designated BPAT as part of the notification that will be generated. Finally, click on Submit to send the payment request. 19 of 27
20 20 of 27

21 FPPS Review Once the payment request form has been electronically submitted and the invoice package sent with the supporting documentation FPPS will review the generated records for completeness. If any information is missing or is in error, FPPS may opt to return the payment request to the requester which will trigger an notification to inform the requester of the issues that were found. If all information is in order, FPPS will approve the payment request which will trigger a similar notification. Any status change from FPPS during the FPPS review process will be visible to users in the PRF dashboard. 21 of 27
22 Questions or Comments If you have any questions or comments, please direct your inquiries to 22 of 27
23 PRF - 11/6/2014 System Update Included in this update: 1. Ability to create Direct-Pay request 2. Ability to initiate a payment request using the PO Number 3. Auto-population of telephone numbers for Requester and Approver 4. Various UI and performance improvements Creating a Payment Request In this update we have added a few options when creating a payment request: In the PRF Add screen, we have introduced Payment Type which allows you to select the type of request you are submitting. 1. Payment - This option will guide you through the current process of creating a payment request. Selecting a vendor and purchase order. 2. Pay Specific PO - This option allows you to enter the specific PO for which you are creating a payment request, bypassing the need to look up the vendor first. 3. Direct Pay - This option allows you to create a direct-pay payment request for which there is no purchase order to reference. 23 of 27

24 Direct-Pay Requests When creating a Direct-Pay request, the first thing you must do is select that option from the list of Payment Types and search for the vendor you need to pay. With the vendor selected, click on Continue to proceed to the Payment Details screen. 24 of 27

25 In the Payment Details screen, notice that the Funding section is populated with the keywords Direct Pay. This indicates that it is a Direct-pay request and no PO information is to be referenced. To process the request, enter the rest of the payment details to finalize and submit the payment request to FPPS. Note that you must follow FPPS s procedure for documenting funding sources needed to process the payment. 25 of 27

26 Pay Specific PO To create a payment request for a specific PO, select the Pay Specific PO option from the list of Payment Types. Enter the PO and click on Select. Notice that if the PO number is invalid, you will receive a notification letting you know that the PO does not exist. 26 of 27


27 Entering a valid PO will take you directly to the screen where you can enter the PO line amounts. The vendor is automatically derived from the purchase order. When done entering the line amounts, click Continue to proceed to entering the Payment Details to finalize the form and submit it to FPPS. 27 of 27