TECHNICAL INFORMATION FOR HARD SURFACE
|
|
|
- Audra Black
- 5 years ago
- Views:
Transcription
1 TECHNICAL INFORMATION FOR HARD SURFACE
2 TECHNICAL Resilient Structures Quantum Guard HP Recommended Usage Chart Installed Cost Specifications EPD Summaries Adhesives Installation Maintenance Stain Chart Warranties 2
3 R E S I L I E N T S T R U C T U R E S LVT PREMIUM TILE, VCT, SLIP-RETARDANT TILE PRODUCTS Assurance Squared, Nature s Paths Select, Nature s Paths, Nature s Paths LockSolid Premium Tile: Touchstone VCT: Essentials, Progressions Slip-Retardant Tile: Safewalks Assurance Squared Overall Thickness: (3.2mm) Nature s Paths Select, Nature s Paths Overall Thickness: (2.5mm) Nature s Paths LockSolid Overall Thickness: (4.0mm) Progressions Overall Thickness: 1/8 (3.2mm) CONSTRUCTION Wearlayer / Finish Assurance Squared, Nature s Paths Select, Nature s Paths LockSolid, Nature s Paths.020 (0.51mm) Quantum Guard HP, a patented high performance wearlayer with urethane aluminum oxide / UV cured NOTE: Assurance Squared exceeds ADA guidelines Pattern Layer Remarkable realism Proprietary process combines latest advances in imaging, texturing and finishing Backing Layer Provides additional product toughness and strength Wearlayer / Finish Nature s Paths LockSolid.157 (4.0mm) Quantum Guard HP, a patented high performance wearlayer with urethane aluminum oxide / UV cured Pattern Layer Remarkable realism Proprietary process combines latest advances in imaging, texturing and finishing Backing Layer Proprietary and patent-pending locking system that doesn t require adhesive. Avoids abatement requirements and moisture remediation. Installs over most existing surfaces and on concrete subfloors up to 8 lbs MVER Superior hold strength for no buckling or seam seperation Through-Pattern Construction The pattern extends throughout the thickness of each tile to resist scuffs, scrapes and high traffic wear SafeWalks-quartz content provides a slip retardant surface Non-Phthalate construction for Essentials, and Safewalks PERFORMANCE ATTRIBUTES Assurance Squared embossed texture provides slip resistant properties in an 18 x 18 (457mm x 457mm) tile size for unique design flexibility Nature s Paths Select includes both wood and tile, select patterns offer embossed-in-register visuals for remarkable depth, realism and authentic detail. Tiles available in 18 x 18 (457mm x 457mm) and planks available in 3 (76mm) x 12 (305mm), 24 (610mm), 36 (914mm) and 48 (1,219.2mm) multiple lengths), 5 (127mm) and 7 (178mm) widths by 48 lengths (style dependent) Nature s Paths a well balanced collection of wood plank and tiles. Planks are available in 3 (76mm), 4 (102mm) and 6 (152mm) widths by 36 (914.4mm) lengths (style dependent) and tiles are available in 18 x 18 (457mm x 457mm) and 18 x 36 (457mm x 914mm). Nature s Paths LockSolid is available in 4 x 36 (102mm x 914mm) and 6 x 36 (152mm x 914mm) planks with proprietary and patent-pending locking system that does not require adhesive. Featuring Quantum Guard HP, a patented high performance wearlayer providing low maintenance, durability and appearance retention ASTM F-1700 Class 3, Type B Through-pattern construction offers exceptional durability even under heavy rolling loads or high traffic areas Available in 12 x 12 (305mm x 305mm) tiles ASTM F-1066 Class 2 RESILIENT STRUCTURES ENVIRONMENTAL ATTRIBUTES Made in USA (excludes Assurance Squared) Certified under FloorScore an independent 3rd Party IAQ verification system for low emitting flooring. Approved as CA01350, compliant Adhesive meets VOC content limit of SCAQMD Rule #1168; CA01350, ISO and 9001 registered manufacturing facility Contributes to LEED and Green Globes Contains recycled content Recyclable LOOP Take-Back Available Products are composed of 85% limestone, an abundant natural resource Certified NSF/ANSI-332 Gold Progressions and Touchstone contain 2% post-consumer recycled content Certified under FloorScore an independent 3rd Party IAQ verification system for low emitting flooring. Approved as CA01350, compliant Adhesive meets VOC content limit of SCAQMD Rule #1168 ISO 9001 / registered manufacturing facility Made in the USA (excluding Safewalks) Contributes to LEED and Green Globes Recyclable LOOP Take-Back Available Limited 10-Year Quantum Guard HP Wear Warranty Limited 10-Year Commercial Warranty (Assurance Squared, Nature s Paths Select, Nature s Paths, Nature s Paths LockSolid) Limited 10-year No Gap warranty (Nature s Paths LockSolid) Limited 5-Year Commercial Warranty WARRANTY 3
4 R E S I L I E N T S T R U C T U R E S RUBBER SHEET & TILE RUBBER TILE RECYCLED RUBBER SPORTS FLOORING RUBBER SKATE & SPIKE TILE PRODUCTS ColorFields ColorScape, ColorSpec, Audio Spectra Reset Enforcer ColorFields Overall Thickness: 1/8 (3.2mm) ColorScape Overall Thickness: 1/8 (3.2mm) Reset Overall Thickness: 3/8 nominal (9.0mm) Enforcer Overall Thickness: 1/4 (6.0mm) CONSTRUCTION Through-Pattern Construction ColorFields (3mm) The pattern extends throughout the thickness of each tile to resist scuffs, scrapes and high traffic wear PVC-free Through-Pattern Construction ColorScape/ColorSpec/Audio Spectra 1/8 (3.2mm) The pattern extends throughout the thickness of each tile to resist scuffs, scrapes and high traffic wear Profile design allows for enhanced cleanability PVC-free Profiles available: ColorScape: round, square, sculptured ColorSpec: square, sculptured Audio Spectra: hola, tic toc, silence Through-Pattern Construction Reset 3/8 nominal (9.0mm) The pattern extends throughout the thickness to resist scuffs, scrapes and high traffic wear Slip-resistant, enhanced stability and traction PVC-free Through-Pattern Construction Enforcer - 1/4 (6.0mm) Profiles available: sculptured PVC-free PERFORMANCE ATTRIBUTES ColorFields features a smooth surface rubber sheet flooring with beautiful color chip aesthetics from soft neutrals to expressive brights. Thermoset rubber, type TS 4 x 49.2 (1.2M x 15M) sheet or 24 x 24 (610 x 610mm) tile Superior indention resistance and slip resistance Excellent color retention and scratch resistant ASTM F-1859 (Sheet), ASTM F-1344, Class 1-B (Tile) Audio Spectra s three patterns are based on spectrograph readings of Silence, the spanish word Hola and the Tic Toc of a metronome. Available in 12 x 24 (305.8mm x 601.0mm) ColorScape - Solid color tiles available in round, square and sculptured profiles 18 1/8 x 18 1/8 (460mm x 460mm) ColorSpec - Multiflec color tiles available in square or sculptured profiles 18 1/8 x 18 1/8 (460mm x 460mm) Thermoset rubber tile: Type TS Superior indention resistance and slip resistance Excellent color retention and scratch resistance ASTM F-1344, Class 1-A (ColorScape/Audio Spectra) ASTM F-1344, Class 1-B (ColorSpec) Meets ADA requirements for walking surfaces and ramps Recycled rubber from postconsumer truck tires High-performance, slip-resistant surface provides enhanced stability and traction Impact resistant and quiet underfoot Available in 18 x 18 (457mm x 457mm) tile, 24 x 24 (610mm x 610mm) interlocking tile, and 4 x 50 (1.2M x 15.2M) sheet Enforcer Skate & Spike Resistant features visuals like ColorScape and ColorSpec engineered to resist the wear and tear of skate and spike traffic and is guaranteed to endure the toughest recreational environments. Available in 36 x 36 (914mm x 914mm) tile. Thermoset rubber tile: Type TS Superior indention resistance and slip resistance Excellent color retention and scratch resistant ASTM F-1344, Class 1-A (ColorScape/Audio Spectra) ASTM F-1344, Class 1-B (ColorSpec) Meets ADA requirements for walking surfaces and ramps ENVIRONMENTAL ATTRIBUTES Contains 6% rapidly renewable resource content Certified under FloorScore an independent 3rd Party IAQ verification system for low emitting flooring. Approved as CA01350, compliant Adhesive meets VOC content limit of SCAQMD Rule # 1168; CA01350, May contribute to LEED and Green Globe No wax required, eliminating the need for cleaning agents, strippers and polishes due to its cleanability and durability Certified under FloorScore an independent 3rd Party IAQ verification system for low emitting flooring. Approved as CA01350, compliant Adhesive meets VOC content limit of SCAQMD Rule # 1168 Made in the USA May contribute to LEED and Green Globe Solid black contains a minimum of 91% post-consumer recycled content by total product weight. All other color tones contain a minimum of 72% post-consumer recycled content by total product weight. Certified under FloorScore an independent 3rd Party IAQ verification system for low emitting flooring. Approved as CA01350, compliant Adhesive meets VOC content limit of SCAQMD Rule # 1168 Made in the USA May contribute to LEED and Green Globe No wax required, eliminating the need for cleaning agents, strippers and polishes due to its cleanability and durability Certified under FloorScore an independent 3rd Party IAQ verification system for low emitting flooring. Approved as CA01350, compliant Adhesive meets VOC content limit of SCAQMD Rule # 1168 Made in the USA May contribute to LEED credits RESILIENT STRUCTURES WARRANTY Limited 5-Year Wear Warranty Limited 10-Year Commercial Warranty Limited 10-Year Wear Warranty Limited 10-Year Commercial Warranty Limited 5-Year Commercial Warranty Limited 10-Year Wear Warranty Limited 10-Year Commercial Warranty 4
 Magna Overall Thickness: 0.080 (2.03mm) Relay RE Overall Thickness: 0.080 (2.03mm) Realities Overall Thickness: 0.080 (2.03mm) CONSTRUCTION Wearlayer / Finish BioSpec MD, LifeLines II, Mannington Assurance II.")
5 R E S I L I E N T S T R U C T U R E S HOMOGENEOUS INLAID HETEROGENEOUS - CHIP HETEROGENEOUS - PRINTED PRODUCTS BioSpec MD, Mannington Assurance II Fine Fields, Magna Relay RE Realities, Primus, Vivendi, Paradigm BioSpec MD Overall Thickness: (2.03mm) Magna Overall Thickness: (2.03mm) Relay RE Overall Thickness: (2.03mm) Realities Overall Thickness: (2.03mm) CONSTRUCTION Wearlayer / Finish BioSpec MD, LifeLines II, Mannington Assurance II.080 (2.03mm) Quantum Guard HP, a patented high performance wearlayer with urethane aluminum oxide / UV cured MCare anti-microbial technology (BioSpec MD) Pattern Layer Through-chip color for excellent wear and durability Backing Layer Non-Phthalate Construction Wearlayer / Finish Fine Fields.066 (1.67mm) Quantum Guard HP, a patented high performance wearlayer with urethane aluminum oxide/uv cured Magna.055 (1.39mm) Quantum Guard a protective urethane wearlayer Chip Layer Through-chip color offers exceptional wear and durability Backing Layer - Felt Provides a higher moisture tolerance for installation Hides subfloor irregularities Non-Phthalate Construction Wearlayer / Finish Relay RE.030 (0.76mm) Quantum Guard HP, a patented high performance wearlayer with urethane aluminum oxide / UV cured Inlaid Chip Layer Superior range of colors with rich clarity and dimension Recycled Backing Layer Provides additional product toughness and strength against heavy rolling loads Contains recycled carpet Wearlayer / Finish Realities / Primus / Vivendi / Paradigm.020 (0.51mm) Quantum Guard HP, a patented high performance wearlayer with urethane aluminum oxide / UV cured Pattern Layer - Printed Superior range of patterns and colors with rich clarity and texture Reinforcement Layer - Foam Provides thickness and dimensional stability Backing Layer Provides additional product toughness and strength against heavy rolling loads Non-Phthalate Construction PERFORMANCE ATTRIBUTES BioSpec MD features MCare anti-microbial technology that inhibits a wide range of bacteria and mold growth. Testing results show efficacy against MRSA Staph, C-Diff and E-Coli bacterium Mannington Assurance II - slip retardant floor provides slip retardance, cleanability and durability Available in 6 (1.83m) width Features Quantum Guard HP, a patented high performance wearlayer providing low maintenance, durability and appearance retention ASTM F-1913, Exceeds Available in 6 (1.83m) width Fine Fields features MCare antimicrobial technology - inhibits a wide range of bacteria and mold growth. Testing results show efficacy against MRSA Staph, C-Diff and E-Coli bacterium. Fine Fields features Quantum Guard HP - A patented high performance wear layer providing low maintenance, durability and appearance retention. Magna s Quantum Guard protective urethane wearlayer provides low maintenance. ASTM F-1303 Type 2, Class 1, Grade A Through-chip color offers exceptional wear and durability Available in 6 (1.83m) width Featuring Quantum Guard HP, a patented high performance wearlayer providing low maintenance, durability and appearance retention ASTM F Type II Grade 2, Class B Offers dimensional stability even under heavy rolling loads Available in 6 (1.83m), 9 (2.75m) and 12 (3.66m) widths Featuring Quantum Guard HP, a patented high performance wearlayer providing low maintenance, durability and appearance retention ASTM F-1303 Type 1, Grade 1, Class B RESILIENT STRUCTURES ENVIRONMENTAL ATTRIBUTES Certified NSF/ANSI-332 Gold BioSpec MD contains a minimum of 5% post-consumer recycled content Certified under FloorScore an independent 3rd Party IAQ verification system for low emitting flooring. Approved as CA01350, compliant Adhesive meets VOC content limit of SCAQMD Rule #1168 ISO 9001 and registered manufacturing facility Made in the USA Contributes to LEED credits and Green Globes Certified NSF/ANSI-332 Gold Certified under FloorScore an independent 3rd Party IAQ verification system for low emitting flooring. Approved as CA01350, compliant Adhesive meets VOC content limit of SCAQMD Rule #1168 ISO 9001 and registered manufacturing facility Made in the USA Contributes to LEED and Green Globes Certified NSF/ANSI-332 Gold Contains a minimum of 35% recycled content by total product weight 20% post-consumer (carpet) / 15% pre-consumer 3rd party certified Certified under FloorScore an independent 3rd Party IAQ verification system for low emitting flooring. Approved as CA01350, compliant Adhesive meets VOC content limit of SCAQMD Rule #1168 ISO 9001 and ISO registered manufacturing facility Made in the USA Contributes to LEED and Green Globes Certified under FloorScore an independent 3rd Party IAQ verification system for low emitting flooring. Approved as CA01350, compliant and recognized in LEED IEQ Credit 4.3 Adhesive meets VOC content limit of SCAQMD Rule #1168 Made in the USA Contributes to LEED and Green Globes ISO registered manufacturing facility WARRANTY Limited 5-Year Quantum Guard HP Wear Warranty Limited 5-Year Commercial Warranty Limited 5-Year Quantum Guard HP Warranty (Fine Fields) Limited 5-Year Commercial Warranty Limited 5-Year Quantum Guard HP Wear Warranty Limited 5-Year Commercial Warranty Limited 10-Year Quantum Guard HP Wear Warranty Limited 10-Year Commercial Warranty 5
 Aberdeen - Classic Overall Thickness: 0.060 (1.52mm) CONSTRUCTION Wearlayer / Finish Aberdeen-Axis -.012 (0.31mm) Aberdeen-Classic -.010 (0.")


6 R E S I L I E N T S T R U C T U R E S HETEROGENEOUS - PRINTED PRODUCTS Aberdeen Collection Insight Plus Aberdeen - Axis Overall Thickness: (1.91mm) Insight Plus Overall Thickness: (2.03mm) Aberdeen - Classic Overall Thickness: (1.52mm) CONSTRUCTION Wearlayer / Finish Aberdeen-Axis (0.31mm) Aberdeen-Classic (0.25mm) Pattern Layer - Printed A variety of printed patterns and colors with exceptional clarity and depth Natural pattern realism with surface embossing technology Reinforcement Layer - Foam Comfort underfoot Backing Layer - Vinyl Improves installation for moisture sensitive areas Hides subfloor irregularities Non-Phthalate Construction Wearlayer / Finish Insight Plus.020 (0.51mm) Quantum Guard HP, a patented high performance wearlayer with urethane aluminum oxide / UV cured Pattern Layer - Printed A variety of printed patterns and colors with exceptional clarity and depth Natural pattern realism with surface embossing technology Reinforcement Layer - Foam Comfort underfoot Backing Layer - Felt Improves installation for moisture sensitive areas Hides subfloor irregularities Contains recycled content Non-Phthalate Construction PERFORMANCE ATTRIBUTES Features natural pattern realism with surface embossing technology Available in 12 (3.66m) width Aberdeen-Axis ASTM F-1303 Type 1, Grade 2, Class A Aberdeen-Classic ASTM F-1303 Type 1, Grade 3, Class A Features natural pattern realism with surface embossing technology Available in 12 (3.66m) width Insight Plus features Quantum Guard HP, a patented high performance wearlayerproviding low maintenance, durability and appearance retention Insight Plus ASTM F-1303 Type 1, Grade 1, Class A ENVIRONMENTAL ATTRIBUTES Certified under FloorScore an independent 3rd Party IAQ verification system for low emitting flooring. Approved as CA01350, compliant ISO registered manufacturing facility Adhesive meets VOC content limit of SCAQMD Rule #1168 Made in the USA Contributes to LEED and Green Globes Certified under FloorScore an independent 3rd Party IAQ verification system for low emitting flooring. Approved as CA01350, compliant ISO registered manufacturing facility Adhesive meets VOC content limit of SCAQMD Rule #1168 Made in the USA Contributes to LEED and Green Globes RESILIENT STRUCTURES WARRANTY Limited 10-Year Light Commercial Warranty Limited 10-Year Quantum Guard HP Wear Warranty (Insight Plus) Limited 10-Year Light Commercial Warranty 6
7 R E S I L I E N T S T R U C T U R E S The Right Product for Every Application Heterogeneous Construction Homogeneous Construction - Available in 6, 9 and 12-9 roll for corridors = less waste, lower cost, fewer seams 9' 12' MATERIAL WASTE (SQ YDS) MATERIAL WASTE (%) MATERIAL WASTE ($) % $ % $3,500 - Quantum Guard HP patented wearlayer with superior stain and scratch resistance. No Wax. - Broad portfolio of visuals and colors - Seam + Advantage eliminates transition strips - Enhanced slip retardance when compared to standard resilient floors - Made in USA - Through-chip construction resists cuts and gouges - Quantum Guard HP patented wearlayer - High roller mobility - Safety floor options available - Post-consumer recycled content - Resistant to wear, soiling and discoloration - Single-layer composition for sterile environments - Made in USA Carpet 6,6 NYLON - Modular and broadloom - Broad portfolio of aesthetics - Advanced performance backing with high recycled content - 6,6 nylon resists crushing and matting, staining, and soiling - Stain-defying XGuard - Bleach-resistant ColorSafe - Warranties for wick-back staining, moisture resistance, delamination and wear - Loop take-back modular LVT - Beautiful realistic and abstract aesthetics - Sophisticated colors - Tile and plank formats - Design flexibility - Ease of installation - Engineered for durability - Quantum Guard HP patented wearlayer - Renewable resource content - Loop take-back RESILIENT STRUCTURES VCT 132 COLORS - Performs beautifully - Low maintenance - Through-pattern construction - Economical and durable - A wide palette of neutral and vibrant colors - Post-consumer recycled content - Loop take-back - Made in USA Rubber - Broad portfolio of tiles, sheet, stair treads, wall base, and finishing accessories - Comfort underfoot - Sync color coordination system - Superior indentation resistance, color retention, scratch, and slip-resistance - Acoustic properties - Self-waxing feature for superior appearance retention - Profile designs allow for enhanced cleanability 7
8 Q U A N T U M G U A R D H P Resilient Sheet Quantum Guard HP Patented. Tested. Proven. Annual Maintenance Cost Savings: STANDARD RESILIENT VS. QGHP 50,000 SF FACILITY POLISH WEARLAYER WARRANTY WEARLAYER WARRANTY 10 5 YEAR YEAR STAIN AND WEAR RESISTANT REGULAR MAINTENANCE ANNUAL TOTAL HETEROGENEOUS SHEET HOMOGENEOUS SHEET $32,500=QGHP $48,750=STD. RES. Cumulative Cost Per Square Foot By Year RESTORATIVE MAINTENANCE ANNUAL TOTAL CUMULATIVE COST $35.00 $30.00 $25.00 $20.00 $15.00 $10.00 $5.00 $0.00 YEAR QGHP STANDARD VCT STANDARD RESILIENT % ANNUAL MAINTENANCE SAVINGS PER SQ. FOOT $5,000 $4,500 STD. RES. $2,500 $0 QGHP TOTAL ANNUAL COST PER SQ. FT. $1.07 STANDARD RESILIENT Break Even on Product and Maintenance Cost Difference Between: VCT VS. QGHP = 3 YEARS STANDARD RESILIENT VS. QGHP = 1 YEAR $0.65 QGHP MOH HARDNESS 10 SCALE 9 10= 9= QGHP 7= Quartz 2= Urethane without aluminum oxide QGHP 5 QGHP The highest performance commercial urethane finish in the industry. The patented aluminum oxide UV cured wearlayer eliminates the need for polish, while enhancing durability, cleanability, appearance retention and slip retardance when compared to standard resilient floors. QUANTUM GUARD HP 8
9 Q U A N T U M G U A R D H P LV T Quantum Guard HP Patented. Tested. Proven. Annual Maintenance Cost Savings: STANDARD LVT VS. QGHP LVT 25,000 SF FACILITY POLISH WEARLAYER WARRANTY 10 YEAR STAIN AND WEAR RESISTANT REGULAR MAINTENANCE ANNUAL TOTAL $20,000 $16,500 STD. LVT Cumulative Cost Per Square Foot By Year MANNINGTON WITH QGHP STANDARD LVT 70% $10,000 $0 $4,875 QGHP LVT $15.00 CUMULATIVE COST $11.25 $7.50 $3.75 $0.00 YEAR ANNUAL MAINTENANCE SAVINGS PER SQ. FOOT TOTAL ANNUAL COST PER SQ. FT. $0.66 STANDARD LVT $0.20 QGHP LVT Break Even on Product and Maintenance Cost Difference Between: LVT VS. QGHP = 2 YEARS QUANTUM GUARD HP MOH HARDNESS 10 SCALE 9 10= 9= QGHP 7= Quartz 2= Urethane without aluminum oxide QGHP 5 QGHP The highest performance commercial urethane finish in the industry. The patented aluminum oxide UV cured wearlayer eliminates the need for polish, while enhancing durability, cleanability, appearance retention and slip retardance when compared to standard resilient floors. 9

10 Q U A N T U M G U A R D H P Pen The Quantum Guard HP Pen is a quick and easy way to provide topical protection to heat welded and chemically welded seams in Mannington Commercial sheet vinyl products that have the patented high performance urethane Quantum Guard HP wearlayer. The Quantum Guard HP wearlayer is a factory applied, UV cured system that provides superior appearance retention, cleanability and durability and does not require the use of polish or wax. The process of cutting and seaming the products interrupts this high performance wearlayer. The seamed area, regardless if it is either a chemically or heat welded seam, cannot provide the same level of cleanability and durability inherent in the factory applied finish. This is why the Quantum Guard HP Pen was developed. Similar in appearance to a highlighter pen, the cartridge of the Quantum Guard HP Pen contains a blend of high quality acrylic floor finish and urethane coating that is easy and accurately applied. In high traffic areas it is a good practice to apply two or even three coats of finish from the Quantum Guard pen. It is a coating that helps retain seam appearance initially and when in service. A properly cut, welded and now coated seam will provide years of service and appearance. Be certain to have sufficient quantities of Quantum Guard HP Pens on hand for your next Mannington Commercial Sheet vinyl installation project. QUANTUM GUARD HP 10
11 R E C O M M E N D E D U S A G E C H A R T FINISH QUANTUM GUARD HP w/mcare QUANTUM GUARD HP QUANTUM GUARD URETHANE RUBBER VCT CONSTRUCTION Homogeneous LVT Heterogeneous Light Heterogeneous Slip Resistance Inlaid Light Heterogeneous Rubber Tile Type TS Recycle Sports Tile Rubber Sheet Type TS VCT Slip Resistance PRODUCTS BioSpec MD Fine Fields Nature s Paths Nature s Paths LockSolid Nature s Paths Select Paradigm, Primus, Realties, Vivendi Relay RE Insight Plus Mannington Assurance II (e) Assurance Squared (e) Magna Aberdeen Audio, Spectra, ColorScape, ColorSpec, Enforcer Reset ColorFields Essentials, Progressions, Touchstone SafeWalks (e) RECOMMENDED AREAS Corridors HR HR HR HR R HR HR R R HR NR HR HR HR Vestibules / Entryways (b,d) R R R R R HR HR R R HR NR HR R HR Lobbies / Lounge Areas R HR R R R HR HR R R R NR R R HR RECOMMENDED USAGE CHART COMMON USE HOSPITAL / HEALTHCARE (a) EDUCATIONAL / INSTITUTIONAL OFFICE ASSISTED LIVING RETAIL TENANT Multipurpose HR HR HR HR R R R R R HR R HR HR R Lavatories (2) R R R R R HR HR R R R NR HR R R Ramps (3) NR NR NR R NR HR HR NR NR HR NR HR NR NR Utility / Storage Areas R R R R HR R R HR HR R R R HR HR Elevators HR HR HR HR R HR HR R R HR NR HR R R Dining / Hospitality Rooms HR HR HR HR R HR HR R R R NR R R R Fitness Areas R R HR HR R R R R R HR HR HR R R Indoor Pool / Spa Decks (3,f) NR NR NR NR NR HR HR NR NR R NR R NR NR Patient Rooms (1) HR R HR HR R R R R R R NR HR R R Patient Corridors HR HR HR HR R HR HR R R HR NR HR HR HR Operating Rooms (1,5), (a) HR NR R HR NR HR NR NR NR NR NR R NR NR Scrub Rooms (2) HR NR R HR NR HR R NR NR NR NR R NR NR Emergency Rooms / Areas HR R HR HR NR HR R NR NR R NR R NR NR Procedure Rooms HR R HR HR R HR R R R HR NR HR R R Laboratories HR R HR HR R HR R R R R NR HR NR NR Physical Therapy Rooms (c) HR HR HR HR R HR R R R HR HR HR R R Dialysis (c) HR NR HR HR R HR R R R R NR R NR NR Critical / Intensive Care HR NR HR HR NR HR NR NR NR NR NR HR NR NR Community Rooms R HR R R R R R R R HR NR HR HR HR Residence Rooms R HR R R HR R R HR HR R NR R R R Classrooms R HR R R R R R R R R NR R HR HR Laboratories HR R HR HR R R R R R R NR R R R Computer Labs (4) NR NR NR NR NR NR NR NR NR NR NR NR NR NR Cafeterias, Dining Areas (b) R R R R NR HR HR NR NR HR NR HR R R Food Service Areas (b) R R R R NR HR HR NR NR R NR R R R Dormitory Rooms R R R R HR R R HR HR R NR R R R Locker Rooms (no spikes) (3) NR NR NR NR NR R R NR NR HR HR R NR NR Dance Studios R R R R NR NR NR NR NR R HR R NR NR Offices / Conference Rooms R HR R R R R R R R R NR R R R Lunchrooms (b) R HR R R R HR HR R R HR R HR R R Corridors, Patient Rooms HR HR HR HR R HR HR R R HR NR HR HR HR Residence Kitchens (b) HR HR HR HR HR R R HR HR R NR R R R Game / TV Rooms HR HR HR HR HR R R HR HR R R R HR HR Sales Floors R HR R R R R R R R HR NR HR HR R Checkout / Cash Wrap Areas R HR R R NR HR HR NR NR HR NR HR HR R Food Service (b) R R R R NR HR HR NR NR HR NR HR R HR Specialty Shops / Areas HR HR HR HR R R R R R HR NR HR HR HR Produce Areas (3,f) NR NR NR NR NR HR HR NR NR HR NR HR R HR Frozen Food (f) R R R R R HR HR R R HR NR HR R HR Common Spaces HR HR HR HR R R R R R HR NR HR HR R Residence Rooms R HR R R HR R R HR HR R NR R R R 11
12 R E C O M M E N D E D U S A G E C H A R T Notes Key HR: Highly Recommended An excellent floor for the space R: Recommended Other floors may be better suited NR: Not Recommended Should not be used in this space Each of the following classifications: HR (Highly Recommended), R (Recommended), and NR (Not Recommended), are based on durability, cost, and the design criteria of the space, not solely on performance. General Notes Mannington Resilient floors are not recommended for commercial kitchens. Mannington Resilient floors are not recommended for heavy industrial areas. Heat weld is the recommended seaming technique for sheet products. Polish may be required. All furniture must have proper floor protectors Casters must be clean and operate properly (flat, minimum 1 width casters for hospital beds). Mannington Resilient floors are not recommended for exterior use or where golf or track shoes are present. Mannington Resilient floors are generally not suitable as wall covering or wall surfacing. All Mannington Commercial sheet floors can be flashed coved (integral cove). Most building codes consider flash coving in the same category as baseboard trim when applied to fire coding. Consult fire codes to determine allowable height for flash cove. Mannington Resilient flooring is generally not recommended for applications such as hyperbaric rooms, computer rooms, electronic manufacturing or test labs where control of static is critical. The Following Codes Explain Why Specific Flooring Types Receive an NR Recommendation 1. Aseptic Area Hygienic conditions are extremely important 2. Water Resistance Wet area installation is necessitated (flash coving, sealed seams) 3. Slip Retardance A good traction, secure surface is required 4. Static Control High level of static control normally called for in this area (static dissipative or conductive) 5. Required maintenance not practiced in this area Annotated Notes a. Only use in operating rooms not requiring conductive or static dissipative flooring b. No standing water; non-staining entryway systems required c. Not recommended in laboratories that require special decontamination procedures on surfaces, including floors d. For areas where there can be significant exposure to trafficked dirt and debris, it is recommended that 1-2 coats of a high quality finish be utilized to minimize the risk of ground in trafficked grime e. SafeWalks, Mannington Assurance II and Assurance Square may require higher level of maintenance versus smooth surface floors f. V-95 adhesive required for areas exposed to heavy rolling loads (i.e. hospital beds) RECOMMENDED USAGE CHART 12
13 S P E C I F I C A T I O N S Assurance Squared PHYSICAL CONSTRUCTION CONSTRUCTION WEARLAYER SIZE WEARLAYER THICKNESS OVERALL THICKNESS Slip Retardant Luxury Vinyl Tile Quantum Guard HP Urethane Aluminum Oxide Topcoat Cured by UV Process 18 x 18 (457.2 mm x mm).020 (0.51 mm).125 (3.2 mm) PIECES PER CARTON 16 COVERAGE PER CARTON 36 ft 2 (3.34 m 2 ) WEIGHT PER PIECE WEIGHT PER CARTON 2.4 lbs (1.1 kg) 38.4 lbs (17.6 kg) CARTONS PER PALLET 44 STATIC LOAD LIMIT 750 psi ENVIRONMENTAL 3RD PARTY CERTIFIED INDUSTRY-WIDE TYPE III EPD FLOORSCORE INDOOR AIR QUALITY CDPH Standard Method v ISO AND 9001 REGISTERED MANUFACTURING FACILITY TESTING ASTM SPECIFICATION (ASTM 1700) HEAT STABILITY (ASTM F-1514) STAIN & CHEMICAL STABILITY (ASTM F-925) HUD/FHA REQUIREMENTS STATIC COEFFICIENT OF FRICTION Class 3, Type B Passes Passes Exceeds Meets ADA Guidelines FLOORING RADIANT PANEL TEST (ASTM-E-648).45 watts per cm 2, Passes (Class I) N.B.S. SMOKE CHAMBER TEST (ASTM-E-662) ELECTRICAL RESISTANCE, EN1815 < 450 Passes 2 kv WARRANTIES LIMITED 10 YEAR COMMERCIAL WARRANTY LIMITED 10 YEAR QUANTUM GUARD HP FINISH WARRANTY INSTALLATION SPECIFICATIONS INSTALLATION ADHESIVE, POROUS SUBFLOOR INSTALLATION ADHESIVE, POROUS AND NON-POROUS SUBSTRATES INSTALLATION ADHESIVE, NON-POROUS SUBFLOOR V-82 / Full Spread* Mannington V-88 / Transitional Pressure Sensitive / Full Spread** V-95 / Full Spread* (Must use V-95 under OR tables, hospital beds and heavy rolling loads) Quantum Guard HP is a low maintenance floor providing superior appearance retention, cleanability, durability and slip retardance. Quantum Guard HP can eliminate the need for polish over an extended period of time depending upon the amount of commercial traffic. Mannington Assurance Squared with Quantum Guard HP is suitable for ramps. The Quantum Guard HP finish provides an enhanced level of traction and protection against slip compared to standard resilient floors. Mannington Assurance II is not recommended in commercial areas that require static dissipation. Mannington Assurance II is not recommended in commercial areas where the surface temperature over radiant heated substrate exceeds 85 F. *Verify substrate (concrete) is dry per ASTM F lbs. maximum MVTR or ASTM F % maximum relative humidity. **Verify substrate (concrete) is dry per ASTM F lbs. maximum MVTR or ASTM F % maximum relative humidity. Dirt, wetness, finish selection and maintenance schedule may cause significant variation in actual performance. Specifications are based on averages from normal manufacturing tolerances. Such variations do not affect product performance. This product is intended solely for use as an indoor floor covering and is not recommended or sold for any other purpose. Use entryway systems outside each entrance to prevent dirt, sand, grit and other substances from being tracked onto floor. XpressStep Glue option. 13
14 S P E C I F I C A T I O N S Nature s Paths PHYSICAL CONSTRUCTION CONSTRUCTION WEARLAYER SIZE (STYLE DEPENDENT) WEARLAYER THICKNESS OVERALL THICKNESS Luxury Vinyl Plank with Micro Bevel Edges Quantum Guard HP Urethane Aluminum Oxide Topcoat Cured by UV Process 3 x 36 (76.2 x mm) / 4 x 36 (101.5 x 94.5 mm) / 6 x 36 (152.5 x mm) / 18 x 18 (457.2 mm x mm) / 18 x 36 (457.2 mm x mm).020 inches (0.51 mm).100 inches (2.5 mm) PIECES PER CARTON 3 = 48, 4 = 36, 6 = 24, 18 x 18 = 18, 18 x 36 = 9 COVERAGE PER CARTON 3, 4, 6 = 36 ft 2 (3.34 m 2 ) / 18 x 18, 18 x 36 = 40.5 ft 2 (3.76 m 2 ) WEIGHT PER PIECE WEIGHT PER CARTON STATIC LOAD LIMIT 3 x 36 =.69 lbs (.31 kg) / 4 x 36 =.92 lbs (.42 kg) / 6 x 36 = 1.38 lbs (.63 kg) / 18 x 18, = 38.1 lbs (17.3 kg) 33.8 lbs (15.3 kg) 750 psi ENVIRONMENTAL 3RD PARTY CERTIFIED INDUSTRY-WIDE TYPE III EPD EXTENDED PRODUCER RESPONSIBILITY (EPR) RECLAMATION AND RECYCLING PROGRAM (LOOP) FLOORSCORE INDOOR AIR QUALITY CDPH Standard Method v MANUFACTURE LOCATION Madison, GA USA ISO 9001 AND ISO REGISTERED MANUFACTURING FACILITIES TESTING SPECIFICATION (ASTM 1700) HEAT STABILITY (ASTM F-1514) STAIN & CHEMICAL STABILITY (ASTM F-925) HUD/FHA REQUIREMENTS STATIC COEFFICIENT OF FRICTION Class 3, Type B Passes Passes Exceeds Meets ADA Guidelines FLOORING RADIANT PANEL (ASTM-E-648).45 watts per cm 2, Passes (Class 1) N.B.S. SMOKE CHAMBER (ASTM-E-662) < 450 Passes WARRANTIES LIMITED 10 YEAR COMMERCIAL WARRANTY LIMITED 10 YEAR QUANTUM GUARD HP FINISH WARRANTY INSTALLATION INSTALLATION ADHESIVE, POROUS SUBFLOOR INSTALLATION ADHESIVE, POROUS & NON-POROUS SUBFLOORS INSTALLATION ADHESIVE, NON-POROUS SUBFLOOR SPRAY ADHESIVE V-82 / Full Spread* V-88 / Transitional Pressure Sensitive / Full Spread** V-95 / Full Spread* (Note: Must use V-95 Adhesive under hospital beds, heavy rolling loads, or where high performance is needed.) XpressStep** / XpressStep Premium*** Quantum Guard HP is a low maintenance floor providing superior appearance retention, cleanability, durability and slip retardance Quantum Guard HP can eliminate the need for polish over an extended period of time depending upon the amount of commercial traffic. Nature s Paths is not recommended in commercial areas that require static dissipation. Nature s Paths is not recommended in commercial areas where the surface temperature over radiant heated substrate exceeds 85 F. Dirt, wetness, finish selections and maintenance schedule may cause significant variation in actual performance. Specifications are based on averages from normal manufacturing tolerances. Such variations do not affect product performance. This product is intended solely for use as an indoor floor covering and is not recommended or sold for any other purpose. Use entryway systems outside each entrance to prevent dirt, sand, grit, and other substances from being tracked onto floor. *Verify substrate (concrete) is dry per ASTM F lbs. maximum MVTR or ASTM F % maximum relative humidity. **Verify substrate (concrete) is dry per ASTM F lbs. maximum MVTR or ASTM F % maximum relative humidity. ***Verify substrate (concrete) is dry per ASTM F lbs. maximum MVTR or ASTM F % maximum relative humidity. SPECIFICATIONS 14
15 S P E C I F I C A T I O N S Nature s Paths Locksolid PHYSICAL CONSTRUCTION CONSTRUCTION WEARLAYER SIZE WEARLAYER THICKNESS OVERALL THICKNESS Luxury Vinyl Plank with Micro Bevel Edges Quantum Guard HP Urethane Aluminum Oxide Topcoat Cured by UV Process 3 2/3 x 35 2/3 (93.0 x mm).020 inches (0.5 mm).157 inches (4.0 mm) PIECES PER CARTON 16 COVERAGE PER PIECE 0.91 ft 2 (0.08 m 2 ) COVERAGE PER CARTON 14.5 ft 2 (1.34 m 2 ) WEIGHT PER PIECE WEIGHT PER CARTON 1.4 lbs (0.64 kg) 22.9 lbs (10.21 kg) CARTONS PER PALLET 80 STATIC LOAD LIMIT 750 psi ENVIRONMENTAL 3RD PARTY CERTIFIED INDUSTRY-WIDE TYPE III EPD EXTENDED PRODUCER RESPONSIBILITY (EPR) RECLAMATION AND RECYCLING PROGRAM (LOOP) FLOORSCORE INDOOR AIR QUALITY CDPH Standard Method v MANUFACTURE LOCATION Madison, GA USA ISO 9001 AND ISO REGISTERED MANUFACTURING FACILITIES TESTING SPECIFICATION (ASTM 1700) HEAT STABILITY (ASTM F-1514) STAIN & CHEMICAL STABILITY (ASTM F-925) HUD/FHA REQUIREMENTS IMPACT SOUND TRANSMISSION IIC (ASTM E-492) STATIC COEFFICIENT OF FRICTION Class 3, Type B Embossed Surface Passes Passes Exceeds Greater than or equal to 50 with Whisper 3N1 Underlayment Meets ADA Guidelines FLOORING RADIANT PANEL (ASTM-E-648).45 watts per cm 2, Passes (Class 1) N.B.S. SMOKE CHAMBER (ASTM-E-662) FLOORSCORE INDOOR AIR QUALITY < 450 Passes SCS Certified WARRANTIES LIMITED 10 YEAR COMMERCIAL WARRANTY LIMITED 10 YEAR NO GAP WARRANTY SPECIFICATIONS LIMITED 10 YEAR QUANTUM GUARD HP WEAR WARRANTY INSTALLATION INSTALLATION ADHESIVE Nature s Paths LockSolid utilizes a proprietary and patented locking system that does not require adhesive. Whisper 3N1 Underlayment is optional for all grades; above, on, and below. Whisper 3N1 Underlayment should not be used in heavy rollilng load areas. Quantum Guard HP is a low maintenance floor providing superior appearance retention, cleanability, durability and slip retardance. Quantum Guard HP can eliminate the need for polish over an extended period of time depending upon the amount of commercial traffic. Nature s Paths Locksolid is not recommended in commercial areas that require static dissipation. Nature s Paths Locksolid is not recommended in commercial areas where the surface temperature over radiant heated substrate exceeds 85 F. Concrete subfloors that exceed 8 lbs MVER as determined with the Calcium Chloride test (ASTM F-1869) or 95% RH as determined by the Relative Humidity test (ASTM F-2170) should be considered excessive with regards to moisture emissions. Dirt, wetness, finish selections and maintenance schedule may cause significant variation in actual performance. Specifications are based on averages from normal manufacturing tolerances. Such variations do not affect product performance. This product is intended solely for use as an indoor floor covering and is not recommended or sold for any other purpose. Use entryway systems outside each entrance to prevent dirt, sand, grit, and other substances from being tracked onto floor. 15
16 S P E C I F I C A T I O N S Nature s Paths Select PHYSICAL CONSTRUCTION CONSTRUCTION Luxury Vinyl Tile & Luxury Vinyl Plank with Micro Bevel Edges WEARLAYER Quantum Guard HP Urethane Aluminum Oxide Topcoat Cured by UV Process STATIC LOAD LIMIT 750 psi WEARLAYER THICKNESS.020 inches (0.51mm) OVERALL THICKNESS.100 inches (2.5mm) SIZE 18 x 18 (457.2 x mm) PIECES PER CARTON 18 PLANK 7 WIDTH PLANK 5 WIDTH PLANK 3 WIDTH TILE COVERAGE PER CARTON 40.5 ft 2 (3.76 m 2 ) WEIGHT PER PIECE 2.12 lbs (.96 kg) WEIGHT PER CARTON 38.1 lbs (17.3 kg) CARTONS PER PALLET 48 SIZE 3 x multiple lengths: 12, 24, 36, 48 / (76.2 x 304.8, 609.6, 914.5, mm) PIECES PER CARTON 48 COVERAGE PER CARTON 48 ft 2 (4.46 m 2 ) WEIGHT PER PIECE 12 :.071 lbs (.32 kg), 24 : 1.42 lbs (.064 kg), 36 : 2.13 lbs (.97 kg), 48 : 2.82 lbs (1.28 kg) WEIGHT PER CARTON 45 lbs (20.4 kg) CARTONS PER PALLET 65 SIZE 5 x 48 (127 x mm) PIECES PER CARTON 22 COVERAGE PER CARTON 36.7 ft 2 (3.41 m 2 ) WEIGHT PER PIECE 1.57 lbs (.71 kg) WEIGHT PER CARTON 34.5 lbs (15.7 kg) CARTONS PER PALLET 63 SIZE 7 x 48 (177.8 x mm) PIECES PER CARTON 16 COVERAGE PER CARTON 37.3 ft 2 (3.47 m 2 ) WEIGHT PER PIECE 2.20 lbs (1.0 kg) WEIGHT PER CARTON 35.2 lbs (15.9 kg) CARTONS PER PALLET 65 ENVIRONMENTAL 3RD PARTY CERTIFIED INDUSTRY-WIDE TYPE III EPD EXTENDED PRODUCER RESPONSIBILITY (EPR) RECLAMATION AND RECYCLING PROGRAM (LOOP) FLOORSCORE INDOOR AIR QUALITY CDPH Standard Method v MANUFACTURE LOCATION Madison, GA USA ISO 9001 AND ISO REGISTERED MANUFACTURING FACILITIES TESTING SPECIFICATION (ASTM 1700) Class 3, Type B HEAT STABILITY (ASTM F-1514) Passes STAIN & CHEMICAL STABILITY (ASTM F-925) Passes HUD/FHA REQUIREMENTS Exceeds FLOORING RADIANT PANEL (ASTM-E-648).45 watts per cm 2, Passes (Class 1) N.B.S. SMOKE CHAMBER (ASTM-E-662) < 450 Passes STATIC COEFFICIENT OF FRICTION Meets ADA Guidelines WARRANTIES LIMITED 10 YEAR COMMERCIAL WARRANTY 10 YEAR QUANTUM GUARD HP WARRANTY INSTALLATION INSTALLATION ADHESIVE, POROUS SUBFLOOR V-82 / Full Spread* INSTALLATION ADHESIVE, POROUS AND NON-POROUS SUBSTRATES V-88 / Transitional Pressure Sensitive / Full Spread** INSTALLATION ADHESIVE, NON-POROUS SUBFLOOR V-95 / Full Spread (Must use V-95 for heavy rolling loads)* SPRAY ADHESIVE XpressStep** / XpressStep Premium*** SPECIFICATIONS Nature s Paths Select is not recommended in commercial areas that require static dissipation. Nature s Paths Select is not recommended in areas where the surface temperature over radiant heated substrate exceeds 85 F. *Verify substrate (concrete) is dry per ASTM F lbs. maximum MVTR or ASTM F % maximum relative humidity. **Verify substrate (concrete) is dry per ASTM F lbs. maximum MVTR or ASTM F % maximum relative humidity. ***Verify substrate (concrete) is dry per ASTM F lbs. maximum MVTR or ASTM F % maximum relative humidity. Dirt, wetness, finish selections and maintenance schedule may cause significant variation in actual performance. Specifications are based on averages from normal manufacturing tolerances. Such variations do not affect product performance. This product is intended solely for use as an indoor floor covering and is not recommended or sold for any other purpose. Use entryway systems outside each entrance to prevent dirt, sand, grit, and other substances from being tracked onto floor. 16
17 S P E C I F I C A T I O N S Vivendi PHYSICAL CONSTRUCTION CONSTRUCTION WEARLAYER Heterogeneous Sheet Flooring (Non-Phthalate Construction) Quantum Guard HP Urethane Aluminum Oxide Topcoat Cured by UV Process SIZE 6, 9, 12 (1.83 m, 2.75 m, 3.66 m) WEARLAYER THICKNESS OVERALL THICKNESS inches (.51 mm) inches (2.03 mm) WEIGHT PER SQUARE YARD 4.70 lbs per yd 2 (2.55 kg per m 2 ) MINIMUM SQUARE YARD PER ROLL 6 = 30 yd 2 (25.0 m 2 ) / 9 = 30 yd 2 (25.0 m 2 ) / 12 = 30 yd 2 (25.0 m 2 ) MAXIMUM SQUARE YARD PER ROLL 6 = 50 yd 2 (41.8 m 2 ) / 9 = 75 yd 2 (62.7 m 2 ) / 12 = 100 yd 2 (83.6 m 2 ) STATIC LOAD LIMIT 750 psi ENVIRONMENTAL 3RD PARTY CERTIFIED INDUSTRY-WIDE TYPE III EPD FLOORSCORE INDOOR AIR QUALITY MANUFACTURE LOCATION CDPH Standard Method v Salem, NJ USA ISO REGISTERED MANUFACTURING FACILITY TESTING ASTM SPECIFICATION (F-1303) HUD / FHA REQUIREMENTS ELECTRICAL RESISTANCE, EN1815 Type 1, Grade 1, Class B Exceeds 2 kv FLOORING RADIANT PANEL TEST (ASTM-E-648).45 watts per cm 2, Passes (Class I) N.B.S. SMOKE CHAMBER TEST (ASTM_E662) STATIC COEFFICIENT OF FRICTION < 450 Passes Meets ADA Guidelines WARRANTIES LIMITED 10 YEAR COMMERCIAL WARRANTY LIMITED 10 YEAR QUANTUM GUARD HP FINISH WARRANTY INSTALLATION SPECIFICATIONS ADHESIVE, POROUS SUBSTRATES ADHESIVE, POROUS AND NON-POROUS SUBSTRATES ADHESIVE, NON-POROUS SUBSTRATES INSTALLATION IN AREAS WITH TOPICAL MOISTURE SPRAY ADHESIVE CHEMICAL SEAM SEALER MLG 33 HEAT WELD SEAMING Mannington V-82 / Full Spread* Mannington V-88 / Transitional Pressure Sensitive / Full Spread** Mannington V-95 / Full Spread* (Must use V-95 under hospital beds and heavy rolling loads) V-95 Adhesive must be used, seams must be properly sealed, and perimeter/edges must be protected or coved up the wall. XpressStep for Sheet Vinyl Mannington Commercial Sold Color Weld Rods Quantum Guard HP is a low maintenance floor providing superior appearance retention, cleanability, durability and slip retardance. Quantum Guard HP can eliminate the need for polish over an extended period of time depending upon the amount of commercial traffic. Vivendi is not recommended in commercial areas that require static dissipation. Vivendi is not recommended in commercial areas where the surface temperature over radiant heated substrate exceeds 85 F. *Verify substrate (concrete) is dry per ASTM F lbs. maximum MVTR or ASTM F % maximum relative humidity. **Verify substrate (concrete) is dry per ASTM F lbs. maximum MVTR or ASTM F % maximum relative humidity. Dirt, wetness, finish selection and maintenance schedule may cause significant variation in actual performance. Specifications are based on averages from normal manufacturing tolerances. Such variations do not affect product performance. This product is intended solely for use as an indoor floor covering and is not recommended or sold for any other purpose. Use entryway systems outside each entrance to prevent dirt, sand, grit, and other substances from being tracked onto floor. 17
18 S P E C I F I C A T I O N S Relay RE PHYSICAL CONSTRUCTION CONSTRUCTION WEARLAYER Heterogeneous Sheet Flooring Quantum Guard HP Urethane Aluminum Oxide Topcoat Cured by UV Process SIZE 6 (1.83 m) ROLL: MIN MAX Average: yd 2 ( m 2 ) AVERAGE WEIGHT 6.0 lbs per yd 2 (3.26 kg per m 2 ) (Packing weight includes interleaf of.04 lbs per yd 2 ) WEARLAYER THICKNESS OVERALL THICKNESS PATTERN REPEAT STATIC LOAD LIMIT (0.76 mm) (2.03 mm) Random Repeat, Reverse Sheet for Seaming 750 psi ENVIRONMENTAL RECYCLED CONTENT FLOORSCORE INDOOR AIR QUALITY NSF / ANSI-332 CERTIFICATION MANUFACTURE LOCATION 20% Post-Consumer & 15% Pre-Consumer Recycled Content CDPH Standard Method v Gold Salem, NJ USA ISO AND 9001 REGISTERED MANUFACTURING FACILITY TESTING ASTM SPECIFICATION (F-1303) HUD/FHA REQUIREMENTS ELECTRICAL RESISTANCE, EN1815 Exceeds Exceeds 2 kv FLOORING RADIANT PANEL TEST (ASTM-E-648).45 watts per cm 2, Passes (Class I) N.B.S. SMOKE CHAMBER TEST (ASTM_E662) STATIC COEFFICIENT OF FRICTION < 450 Passes Meets ADA Guidelines WARRANTIES LIMITED 5 YEAR COMMERCIAL WARRANTY LIMITED 5 YEAR QUANTUM GUARD HP WEAR WARRANTY INSTALLATION INSTALLATION ADHESIVE, POROUS SUBFLOOR INSTALLATION ADHESIVE, POROUS & NON-POROUS SUBFLOORS INSTALLATION ADHESIVE, NON-POROUS SUBFLOOR SPRAY ADHESIVE CHEMICAL SEAM SEALER MLG 33 HEAT WELD SEAMING V-82 / Full Spread* V-88 / Transitional Pressure Sensitive / Full Spread** V-95 / Full Spread* (Must use V-95 under OR tables, hospital beds and heavy rolling loads) XpressStep for Vinyl Mannington Commercial Solid Color Weld Rods SPECIFICATIONS Quantum Guard HP is a low maintenance floor providing superior appearance retention, cleanability, durability and slip retardance Quantum Guard HP can eliminate the need for polish over an extended period of time depending upon the amount of commercial traffic. While not rated for ramps the Quantum Guard HP finish provides an enhanced level of traction and protection against slip compared to standard resilient floors. Relay RE is not recommended in commercial areas that require static dissipation. Relay RE is not recommended in commercial areas where the surface temperature over radiant heated substrate exceeds 85 F. Dirt, wetness, finish selection and maintenance schedule may cause significant variation in actual performance. Specifications are based on averages from normal manufacturing tolerances. Such variations do not affect product performance. This product is intended solely for use as an indoor floor covering and is not recommended or sold for any other purpose. Use entryway systems outside each entrance to prevent dirt, sand, grit, and other substances from being tracked onto floor. * Verify substrate (concrete) is dry per ASTM F lbs. maximum MVTR or ASTM F % maximum relative humidity. ** Verify substrate (concrete) is dry per ASTM F lbs. maximum MVTR or ASTM F % maximum relative humidity. 18
19 S P E C I F I C A T I O N S Paradigm PHYSICAL CONSTRUCTION CONSTRUCTION WEARLAYER Heterogeneous Sheet Flooring (Non-Phthalate Construction) Quantum Guard HP Urethane Aluminum Oxide Topcoat Cured by UV Process SIZE 6, 9, 12 (1.83 m, 2.75 m, 3.66 m) WEARLAYER THICKNESS OVERALL THICKNESS inches (.51 mm) inches (2.03 mm) WEIGHT PER SQUARE YARD 4.70 lbs per yd 2 (2.79 kg per m 2 ) MINIMUM SQUARE YARD PER ROLL 6 = 30 yd 2 (25.0 m 2 ) / 9 = 30 yd 2 (25.0 m 2 ) / 12 = 30 yd 2 (25.0 m 2 ) MAXIMUM SQUARE YARD PER ROLL 6 = 50 yd 2 (41.8 m 2 ) / 9 = 75 yd 2 (62.7 m 2 ) / 12 = 100 yd 2 (83.6 m 2 ) STATIC LOAD LIMIT 750 psi ENVIRONMENTAL 3RD PARTY CERTIFIED INDUSTRY-WIDE TYPE III EPD FLOORSCORE INDOOR AIR QUALITY MANUFACTURE LOCATION CDPH Standard Method v Salem, NJ USA ISO REGISTERED MANUFACTURING FACILITY TESTING ASTM SPECIFICATION (F-1303) ELECTRICAL RESISTANCE, EN1815 Exceeds 2 kv FLOORING RADIANT PANEL (ASTM-E-648).45 watts/cm 2, Passes (Class I) N.B.S. SMOKE CHAMBER TEST (ASTM-E662) STATIC COEFFICIENT OF FRICTION < 450 Passes Meets ADA Guidelines WARRANTIES LIMITED 10 YEAR COMMERCIAL WARRANTY LIMITED 10 YEAR QUANTUM GUARD HP FINISH WARRANTY INSTALLATION INSTALLATION ADHESIVE, POROUS SUBSTRATES V-82 / Full Spread* SPECIFICATIONS INSTALLATION ADHESIVE, POROUS AND NON-POROUS SUBSTRATES INSTALLATION ADHESIVE, NON-POROUS SUBSTRATES SPRAY ADHESIVE CHEMICAL SEAM SEALER HEAT WELD SEAMING Note: The Flow pattern runs horizontally (cross direction) along the length of the sheet. M-Guard V-88 / Transitional Pressure Sensitive / Full Spread** Mannington V-95 / Full Spread* (Must use V-95 under hospital beds and heavy rolling loads or where high performance is needed.) XpressStep for Sheet Vinyl MLG-33 Mannington Commercial Sold Color Weld Rods Quantum Guard HP is a low maintenance floor providing superior appearance retention, cleanability, durability and slip retardance Quantum Guard HP can eliminate the need for polish over an extended period of time depending upon the amount of commercial traffic. While not rated for ramps the Quantum Guard HP finish provides an enhanced level of traction and protection against slip compared to standard resilient floors. Paradigm is not recommended in commercial areas that require static dissipation. Paradigm is not recommended in commercial areas where the surface temperature over radiant heated substrate exceeds 85 F. Dirt, wetness, finish selection and maintenance schedule may cause significant variation in actual performance. Specifications are based on averages from normal manufacturing tolerances. Such variations do not affect product performance. This product is intended solely for use as an indoor floor covering and is not recommended or sold for any other purpose. Use entryway systems outside each entrance to prevent dirt, sand, grit, and other substances from being tracked onto floor. *Verify substrate (concrete) is dry per ASTM F lbs. maximum MVTR or ASTM F % maximum relative humidity. **Verify substrate (concrete) is dry per ASTM F lbs. maximum MVTR or ASTM F % maximum relative humidity 19
20 S P E C I F I C A T I O N S Primus PHYSICAL CONSTRUCTION CONSTRUCTION WEARLAYER Heterogeneous Sheet Flooring (Non-Phthalate Construction) Quantum Guard HP Urethane Aluminum Oxide Topcoat Cured by UV Process SIZE 6, 9, 12 (1.83 m, 2.75 m, 3.66 m) WEARLAYER THICKNESS OVERALL THICKNESS inches (.51 mm) inches (2.03 mm) WEIGHT PER SQUARE YARD 4.70 lbs per yd 2 (2.55 kg per m 2 ) MINIMUM SQUARE YARD PER ROLL 6 = 30 yd 2 (25.0 m 2 ) / 9 = 30 yd 2 (25.0 m 2 ) / 12 = 30 yd 2 (25.0 m 2 ) MAXIMUM SQUARE YARD PER ROLL 6 = 50 yd 2 (41.8 m 2 ) / 9 = 75 yd 2 (62.7 m 2 ) / 12 = 100 yd 2 (83.6 m 2 ) STATIC LOAD LIMIT 750 psi ENVIRONMENTAL 3RD PARTY CERTIFIED INDUSTRY-WIDE TYPE III EPD FLOORSCORE INDOOR AIR QUALITY MANUFACTURE LOCATION CDPH Standard Method v Salem, NJ USA ISO REGISTERED MANUFACTURING FACILITY TESTING ASTM SPECIFICATION (F-1303) HUD / FHA REQUIREMENTS ELECTRICAL RESISTANCE, EN1815 Type 1, Grade 1, Class B Exceeds 2 kv FLOORING RADIANT PANEL (ASTM-E-648).45 watts per cm 2, Passes (Class I) N.B.S. SMOKE CHAMBER TEST (ASTM-E662) STATIC COEFFICIENT OF FRICTION < 450 Passes Meets ADA Guidelines WARRANTIES LIMITED 10 YEAR COMMERCIAL WARRANTY LIMITED 10 YEAR QUANTUM GUARD HP FINISH WARRANTY INSTALLATION INSTALLATION ADHESIVE, POROUS SUBSTRATES INSTALLATION ADHESIVE, POROUS AND NON-POROUS SUBSTRATES INSTALLATION ADHESIVE, NON-POROUS SUBSTRATES SPRAY ADHESIVE CHEMICAL SEAM SEALER HEAT WELD SEAMING V-82 / Full Spread* V-88 / Transitional Pressure Sensitive / Full Spread** Mannington V-95 / Full Spread* (Must use V-95 under hospital beds and heavy rolling loads) XpressStep for Sheet Vinyl MLG-33 Mannington Commercial Sold Color Weld Rods Quantum Guard HP is a low maintenance floor providing superior appearance retention, cleanability, durability and slip retardance Quantum Guard HP can eliminate the need for polish over an extended period of time depending upon the amount of commercial traffic. While not rated for ramps the Quantum Guard HP finish provides an enhanced level of traction and protection against slip compared to standard resilient floors. Primus is not recommended in commercial areas that require static dissipation. Primus is not recommended in commercial areas where the surface temperature over radiant heated substrate exceeds 85 F. *Verify substrate (concrete) is dry per ASTM F lbs. maximum MVTR or ASTM F % maximum relative humidity. **Verify substrate (concrete) is dry per ASTM F lbs. maximum MVTR or ASTM F % maximum relative humidity. Dirt, wetness, finish selection and maintenance schedule may cause significant variation in actual performance. Specifications are based on averages from normal manufacturing tolerances. Such variations do not affect product performance. This product is intended solely for use as an indoor floor covering and is not recommended or sold for any other purpose. Use entryway systems outside each entrance to prevent dirt, sand, grit, and other substances from being tracked onto floor. SPECIFICATIONS 20
21 S P E C I F I C A T I O N S Realities PHYSICAL CONSTRUCTION CONSTRUCTION WEARLAYER Heterogeneous Sheet Flooring (Non-Phthalate Construction) Quantum Guard HP Urethane Aluminum Oxide Topcoat Cured by UV Process SIZE 6, 9, 12 (1.83 m, 2.75 m, 3.66 m) WEARLAYER THICKNESS OVERALL THICKNESS inches (.51 mm) inches (2.03 mm) WEIGHT PER SQUARE YARD 4.70 lbs per yd 2 (2.55 kg per m 2 ) MINIMUM SQUARE YARD PER ROLL 6 = 30 yd 2 (25.0 m 2 ) / 9 = 30 yd 2 (25.0 m 2 ) / 12 = 30 yd 2 (25.0 m 2 ) MAXIMUM SQUARE YARD PER ROLL 6 = 50 yd 2 (41.8 m 2 ) / 9 = 75 yd 2 (62.7 m 2 ) / 12 = 100 yd 2 (83.6 m 2 ) STATIC LOAD LIMIT 750 psi ENVIRONMENTAL 3RD PARTY CERTIFIED INDUSTRY-WIDE TYPE III EPD FLOORSCORE INDOOR AIR QUALITY MANUFACTURE LOCATION CDPH Standard Method v Salem, NJ USA ISO REGISTERED MANUFACTURING FACILITY TESTING ASTM SPECIFICATION (F-1303) HUD / FHA REQUIREMENTS ELECTRICAL RESISTANCE, EN1815 Type 1, Grade 1, Class B Exceeds 2 kv FLOORING RADIANT PANEL TEST (ASTM-E-648).45 watts per cm 2, Passes (Class I) N.B.S. SMOKE CHAMBER TEST (ASTM_E662) STATIC COEFFICIENT OF FRICTION < 450 Passes Meets ADA Guidelines WARRANTIES LIMITED 10 YEAR COMMERCIAL WARRANTY LIMITED 10 YEAR QUANTUM GUARD HP FINISH WARRANTY INSTALLATION SPECIFICATIONS INSTALLATION ADHESIVE, POROUS SUBSTRATES INSTALLATION ADHESIVE, POROUS AND NON-POROUS SUBSTRATES INSTALLATION ADHESIVE, NON-POROUS SUBSTRATES INSTALLATION IN AREAS WITH TOPICAL MOISTURE SPRAY ADHESIVE CHEMICAL SEAM SEALER MLG 33 HEAT WELD SEAMING Mannington V-82 / Full Spread* Mannington V-88 / Transitional Pressure Sensitive / Full Spread** Mannington V-95 / Full Spread* (Must use V-95 under hospital beds and heavy rolling loads) V-95 Adhesive must be used, seams must be properly sealed, and perimeter / edges must be protected or coved up the wall. XpressStep for Sheet Vinyl Mannington Commercial Sold Color Weld Rods Quantum Guard HP is a low maintenance floor providing superior appearance retention, cleanability, durability and slip retardance Quantum Guard HP can eliminate the need for polish over an extended period of time depending upon the amount of commercial traffic. While not rated for ramps the Quantum Guard HP finish provides an enhanced level of traction and protection against slip compared to standard resilient floors. Realities is not recommended in commercial areas that require static dissipation. Realities is not recommended in commercial areas where the surface temperature over radiant heated substrate exceeds 85 F. *Verify substrate (concrete) is dry per ASTM F lbs. maximum MVTR or ASTM F % maximum relative humidity. **Verify substrate (concrete) is dry per ASTM F lbs. maximum MVTR or ASTM F % maximum relative humidity. Dirt, wetness, finish selection and maintenance schedule may cause significant variation in actual performance. Specifications are based on averages from normal manufacturing tolerances. Such variations do not affect product performance. This product is intended solely for use as an indoor floor covering and is not recommended or sold for any other purpose. Use entryway systems outside each entrance to prevent dirt, sand, grit, and other substances from being tracked onto floor. 21
22 S P E C I F I C A T I O N S Aberdeen Collection - Axis & Classic PHYSICAL CONSTRUCTION CONSTRUCTION Heterogeneous Light Commercial (Non-Phthalate Construction) SIZE 12 (3.66 m) WEARLAYER WEARLAYER THICKNESS (AXIS) WEARLAYER THICKNESS (CLASSIC) OVERALL THICKNESS (AXIS) OVERALL THICKNESS (CLASSIC) Urethane.012 inches (0.31 mm).010 inches (0.25 mm).075 inches (1.91 mm).060 inches (1.52 mm) WEIGHT PER SQUARE YARD (AXIS) 2.81 lbs per yd 2 (1.5 kg per m 2 ) WEIGHT PER SQUARE YARD (CLASSIC) 2.61 lbs per yd 2 (1.4 kg per m 2 ) ROLL: MIN / MAX (AXIS) 55 yd 2 (46.0 m 2 ) / 175 yd 2 (146.3 m 2 ) ROLL: MIN / MAX (CLASSIC) 55 yd 2 (46.0 m 2 ) / 170 yd 2 (142.1 m 2 ) STATIC LOAD LIMIT 75 psi ENVIRONMENTAL 3RD PARTY CERTIFIED INDUSTRY-WIDE TYPE III EPD FLOORSCORE INDOOR AIR QUALITY MANUFACTURE LOCATION CDPH Standard Method v Salem, NJ USA ISO REGISTERED MANUFACTURING FACILITY TESTING ASTM SPECIFICATION F-1303 (AXIS) ASTM SPECIFICATION F-1303 (CLASSIC) HUD/FHA REQUIREMENTS STATIC COEFFICIENT OF FRICTION (ASTM C1028) Type 1, Grade 2, Class A Type 1, Grade 3, Class A Exceeds Meets ADA Guidelines FLOORING RADIANT PANEL TEST (ASTM-E-648).45 watts per cm 2, Passes (Class I) N.B.S. SMOKE CHAMBER TEST (ASTM-E-662) < Passes WARRANTIES LIMITED 10 YEAR LIGHT COMMERCIAL WARRANTY LIMITED 15 YEAR RESIDENTIAL WARRANTY INSTALLATION INSTALLATION ADHESIVE CHEMICAL SEAM SEALER Mannington V-81 / Full Spread* MLG-33 Seam Sealer / VST-96 Applicator Kit Aberdeen is not recommended in commercial areas that require static dissipation. Aberdeen is not recommended in commercial areas where the surface temperature over radiant heated substrate exceeds 85 F. *Verify substrate (concrete) is dry per ASTM F lbs. maximum MVER or ASTM F % maximum relative humidity. Dirt, wetness, and improper maintenance may cause significant variation in actual performance. Specifications are based on averages from normal manufacturing tolerances. Such variations do not affect product performance. This product is intended solely for use as an indoor floor covering and is not recommended or sold for any other purpose. Use entryway systems outside each entrance to prevent dirt, sand, grit, and other substances from being tracked onto floor. SPECIFICATIONS 22
23 S P E C I F I C A T I O N S Insight Plus PHYSICAL CONSTRUCTION CONSTRUCTION WEARLAYER Heterogeneous Light Commercial (Non-Phthalate Construction) Quantum Guard HP Urethane Aluminum Oxide Topcoat Cured by UV Process SIZE 12 (3.66 m) WEARLAYER THICKNESS OVERALL THICKNESS.020 inches (.51 mm).080 inches (2.03 mm) WEIGHT PER SQUARE YARD 3.3 lbs per yd 2 (1.8 kg per m 2 ) ROLL: MIN MAX yd 2 ( m 2 ) AVERAGE WEIGHT 3.3 lbs per yd 2 (1.76 kg per m 2 )* STATIC LOAD LIMIT 175 psi ENVIRONMENTAL 3RD PARTY CERTIFIED INDUSTRY-WIDE TYPE III EPD FLOORSCORE INDOOR AIR QUALITY MANUFACTURE LOCATION CDPH Standard Method v Salem, NJ USA ISO REGISTERED MANUFACTURING FACILITY TESTING ASTM SPECIFICATION (F-1303) HUD/FHA REQUIREMENTS ELECTRICAL RESISTANCE, EN1815 STATIC COEFFICIENT OF FRICTION (ASTM C1028) Type 1, Grade 1, Class A Exceeds 2 kv Meets ADA Guidelines FLOORING RADIANT PANEL TEST (ASTM-E-648).45 watts per cm 2, Passes (Class I) N.B.S. SMOKE CHAMBER TEST (ASTM-E-662) < Passes WARRANTIES LIMITED 10 YEAR LIGHT COMMERCIAL WARRANTY LIMITED 15 YEAR RESIDENTIAL WARRANTY LIMITED 10 YEAR QUANTUM GUARD HP FINISH WARRANTY INSTALLATION SPECIFICATIONS INSTALLATION ADHESIVE CHEMICAL SEAM SEALER Mannington V-81 / Full Spread* MLG-33 Seam Sealer / VST-96 Applicator Kit Quantum Guard HP is a low maintenance floor providing superior appearance retention, cleanability, durability and slip retardance Quantum Guard HP can eliminate the need for polish over an extended period of time depending upon the amount of commercial traffic While not rated for ramps the Quantum Guard HP finish provides an enhanced level of traction and protection against slip compared to standard resilient floors. Insight Plus is not recommended in commercial areas that require static dissipation. Insight Plus is not recommended in commercial areas where the surface temperature over radiant heated substrate exceeds 85 F. *Verify substrate (concrete) is dry per ASTM F lbs. maximum MVTR or ASTM F % maximum relative humidity. Dirt, wetness, finish selection and maintenance schedule may cause significant variation in actual performance. Specifications are based on averages from normal manufacturing tolerances. Such variations do not affect product performance. This product is intended solely for use as an indoor floor covering and is not recommended or sold for any other purpose. Use entryway systems outside each entrance to prevent dirt, sand, grit, and other substances from being tracked onto floor. 23
24 S P E C I F I C A T I O N S BioSpec MD PHYSICAL CONSTRUCTION CONSTRUCTION ANTIMICROBIAL WEARLAYER SIZE WEARLAYER THICKNESS OVERALL THICKNESS Homogeneous Sheet Flooring (Non-Phthalate Construction) mcare by Mannington Quantum Guard HP Urethane Aluminum Oxide Topcoat Cured by UV Process 6 (1.83m).080 (2.03 mm).080 (2.03 mm) AVERAGE WEIGHT 6.5 lbs per yd 2 (3.53 kg per m 2 ) (Packing weight includes interleaf of.04 lbs per yd 2 ) ROLL: MIN / MAX 30 yd 2 (25.1 m 2 ) / 68 yd 2 (56.9 m 2 ) PATTERN REPEAT STATIC LOAD LIMIT Random Repeat, Reverse Sheet for Seaming 750 psi ENVIRONMENTAL 3RD PARTY CERTIFIED INDUSTRY-WIDE TYPE III EPD FLOORSCORE INDOOR AIR QUALITY NSF / ANSI-332 CERTIFICATION MANUFACTURE LOCATION CDPH Standard Method v Gold Salem, NJ USA ISO AND 9001 REGISTERED MANUFACTURING FACILITY TESTING ASTM SPECIFICATION (F-1913) HUD/FHA REQUIREMENTS ELECTRICAL RESISTANCE, EN1815 Exceeds Exceeds 2 kv FLOORING RADIANT PANEL TEST (ASTM-E-648).45 watts per cm 2, Passes (Class I) N.B.S. SMOKE CHAMBER TEST (ASTM-E-662) STATIC COEFFICIENT OF FRICTION < Passes Meets ADA Guidelines WARRANTIES LIMITED FIVE YEAR COMMERCIAL WARRANTY LIMITED FIVE YEAR QUANTUM GUARD HP WEAR WARRANTY INSTALLATION INSTALLATION ADHESIVE, POROUS SUBFLOOR INSTALLATION ADHESIVE, POROUS AND NON-POROUS SUBSTRATES INSTALLATION ADHESIVE, NON-POROUS SUBFLOOR INSTALLATION IN AREAS WITH TOPICAL MOISTURE SPRAY ADHESIVE CHEMICAL SEAM SEALER HEAT WELD SEAMING V-82 / Full Spread* V-88 / Transitional Pressure Sensitive / Full Spread** V-95 / Full Spread* (Must use V-95 under OR tables, hospital beds and heavy rolling loads) V-95 Adhesive must be used, seams must be properly sealed, and perimeter / edges must be protected or coved up the wall. XpressStep for Sheet Vinyl MCS-42 with VST-96 Applicator Kit Mannington Commercial Solid or Camouflaged Weld Rods SPECIFICATIONS Quantum Guard HP is a low maintenance floor providing superior appearance retention, cleanability, durability and slip retardance. Quantum Guard HP can eliminate the need for polish over an extended period of time depending upon the amount of commercial traffic. While not rated for ramps the Quantum Guard HP finish provides an enhanced level of traction and protection against slip compared to standard resilient floors. BioSpec MD is not recommended in commercial areas that require static dissipation. BioSpec MD is not recommended in commercial areas where the surface temperature over radiant heated substrate exceeds 85 F. Dirt, wetness, finish selection and maintenance schedule may cause significant variation in actual performance. Specifications are based on averages from normal manufacturing tolerances. Such variations do not affect product performance. This product is intended solely for use as an indoor floor covering and is not recommended or sold for any other purpose. Use entryway systems outside each entrance to prevent dirt, sand, grit and other substances from being tracked onto floor. *Verify substrate (concrete) is dry per ASTM F lbs. maximum MVTR or ASTM F % maximum relative humidity. **Verify substrate (concrete) is dry per ASTM F lbs. maximum MVTR or ASTM F % maximum relative humidity. 24
25 S P E C I F I C A T I O N S Fine Fields PHYSICAL CONSTRUCTION CONSTRUCTION ANTIMICROBIAL Inlaid Sheet Flooring (Non-Phthalate Construction) mcare by Mannington SIZE 6 (1.83 m) WEARLAYER WEARLAYER THICKNESS OVERALL THICKNESS Quantum Guard HP.066 (1.67 mm).080 (2.03 mm) AVERAGE WEIGHT 5.7 lbs per yd 2 (3.10 kg per m 2 ) ROLL: MIN MAX yd 2 ( m 2 ) PATTERN REPEAT STATIC LOAD LIMIT Random Repeat, Reverse Sheet for Seaming 500 psi ENVIRONMENTAL 3RD PARTY CERTIFIED INDUSTRY-WIDE TYPE III EPD FLOORSCORE INDOOR AIR QUALITY NSF / ANSI-332 CERTIFICATION MANUFACTURE LOCATION CDPH Standard Method v Gold Salem, NJ USA ISO AND 9001 REGISTERED MANUFACTURING FACILITY TESTING ASTM SPECIFICATION (F-1303) HUD/FHA REQUIREMENTS Type 2, Grade 1, Class A Exceeds FLOORING RADIANT PANEL TEST (ASTM-E-648).45 watts per cm 2, Passes (Class I) N.B.S. SMOKE CHAMBER TEST (ASTM-E-662) STATIC COEFFICIENT OF FRICTION < Passes Meets ADA Guidelines WARRANTIES LIMITED 5 YEAR COMMERCIAL WARRANTY LIMITED 5 YEAR QUANTUM GUARD HP WEAR WARRANTY INSTALLATION SPECIFICATIONS INSTALLATION ADHESIVE CHEMICAL SEAM SEALER HEAT WELD SEAMING V-81 / Full Spread* MCS-42 with VST-96 Applicator Kit Mannington Commercial Solid and Camouflage Color Weld Rods Fine Fields is not recommended in commercial areas that require static dissipation. Fine Fields is not recommended in commercial areas where the surface temperature over radiant heated substrate exceeds 85 F. Dirt, wetness, finish selection and maintenance schedule may cause significant variation in actual performance. Specifications are based on averages from normal manufacturing tolerances. Such variations do not affect product performance. This product is intended solely for use as an indoor floor covering and is not recommended or sold for any other purpose. Use entryway systems outside each entrance to prevent dirt, sand, grit, and other substances from being tracked onto floor. *Verify substrate (concrete) is dry per ASTM F lbs. maximum MVTR or ASTM F % maximum relative humidity. 25
26 S P E C I F I C A T I O N S Magna PHYSICAL CONSTRUCTION CONSTRUCTION Inlaid Sheet Flooring (Non-Phthalate Construction) SIZE 6 (1.83 m) WEARLAYER WEARLAYER THICKNESS OVERALL THICKNESS Quantum Guard (1.39 mm) (2.03 mm) AVERAGE WEIGHT 5.9 lbs per yd 2 (3.10 kg per m 2 ) ROLL: MIN MAX yd 2 ( m 2 ) PATTERN REPEAT STATIC LOAD LIMIT Random Repeat, Reverse Sheet for Seaming 500 psi ENVIRONMENTAL 3RD PARTY CERTIFIED INDUSTRY-WIDE TYPE III EPD FLOORSCORE INDOOR AIR QUALITY NSF / ANSI-332 CERTIFICATION MANUFACTURE LOCATION CDPH Standard Method v Gold Salem, NJ USA ISO AND 9001 REGISTERED MANUFACTURING FACILITY TESTING ASTM SPECIFICATION (F-1303) HUD/FHA REQUIREMENTS Type 2, Grade 1, Class A Exceeds FLOORING RADIANT PANEL TEST (ASTM-E-648).45 watts per cm 2, Passes (Class I) N.B.S. SMOKE CHAMBER TEST (ASTM-E-662) STATIC COEFFICIENT OF FRICTION < Passes Meets ADA Guidelines WARRANTIES LIMITED 5 YEAR COMMERCIAL WARRANTY INSTALLATION INSTALLATION ADHESIVE V-81 / Full Spread* CHEMICAL SEAM SEALER HEAT WELD SEAMING MCS-42 with VST-96 Applicator Kit Mannington Commercial Solid Color Weld Rods Magna is not recommended in commercial areas that require static dissipation. Magna is not recommended in commercial areas where the surface temperature over radiant heated substrate exceeds 85 F. Dirt, wetness, finish selection and maintenance schedule may cause significant variation in actual performance. Specifications are based on averages from normal manufacturing tolerances. Such variations do not affect product performance. This product is intended solely for use as an indoor floor covering and is not recommended or sold for any other purpose. Use entryway systems outside each entrance to prevent dirt, sand, grit, and other substances from being tracked onto floor. *Verify substrate (concrete) is dry per ASTM F lbs. maximum MVTR or ASTM F % maximum relative humidity. SPECIFICATIONS 26
27 S P E C I F I C A T I O N S Mannington Assurance II PHYSICAL CONSTRUCTION CONSTRUCTION WEARLAYER Slip Retardant Sheet Flooring (Non-Phthalate Construction) Quantum Guard HP Urethane Aluminum Oxide Topcoat Cured by UV Process SIZE 6 (1.83 m) WEARLAYER WEARLAYER THICKNESS OVERALL THICKNESS Quantum Guard HP.080 (2.03 mm).080 (2.03 mm) WEIGHT PER SQUARE YARD 6.5 lbs per yd 2 (3.53 kg per m 2 ) (Packing weight includes interleaf of.04 lbs per yd 2 ) ROLL: MIN / MAX 30 yd 2 (25.1 m 2 ) / 68 yd 2 (56.9 m 2 ) PATTERN REPEAT STATIC LOAD LIMIT Random Repeat, Reverse Sheet for Seaming 750 psi ENVIRONMENTAL 3RD PARTY CERTIFIED INDUSTRY-WIDE TYPE III EPD FLOORSCORE INDOOR AIR QUALITY NSF / ANSI-332 CERTIFICATION MANUFACTURE LOCATION CDPH Standard Method v Gold Salem, NJ USA ISO AND 9001 REGISTERED MANUFACTURING FACILITY TESTING ASTM SPECIFICATION (F-1913) HUD/FHA REQUIREMENTS ELECTRICAL RESISTANCE, EN1815 Exceeds Exceeds 2 kv FLOORING RADIANT PANEL TEST (ASTM-E-648).45 watts per cm 2, Passes (Class I) N.B.S. SMOKE CHAMBER TEST (ASTM-E-662) STATIC COEFFICIENT OF FRICTION < 450 Passes Meets ADA Guidelines WARRANTIES LIMITED FIVE YEAR COMMERCIAL WARRANTY LIMITED FIVE YEAR QUANTUM GUARD HP WEAR WARRANTY INSTALLATION SPECIFICATIONS INSTALLATION ADHESIVE, POROUS SUBFLOOR INSTALLATION ADHESIVE, POROUS AND NON-POROUS SUBSTRATES INSTALLATION ADHESIVE, NON-POROUS SUBFLOOR INSTALLATION IN AREAS WITH TOPICAL MOISTURE SPRAY ADHESIVE CHEMICAL SEAM SEALER HEAT WELD SEAMING V-82 / Full Spread* V-88 / Transitional Pressure Sensitive / Full Spread** V-95 / Full Spread* (Must use V-95 under OR tables, hospital beds and heavy rolling loads) V-95 Adhesive must be used, seams must be properly sealed, and perimeter / edges must be protected or coved up the wall. XpressStep for Sheet Vinyl MLG-33 Mannington Commercial Solid Color Weld Rods Quantum Guard HP is a low maintenance floor providing superior appearance retention, cleanability, durability and slip retardance. Quantum Guard HP can eliminate the need for polish over an extended period of time depending upon the amount of commercial traffic. While not rated for ramps the Quantum Guard HP finish provides an enhanced level of traction and protection against slip compared to standard resilient floors. Mannington Assurance II is not recommended in commercial areas that require static dissipation. Mannington Assurance II is not recommended in commercial areas where the surface temperature over radiant heated substrate exceeds 85 F. *Verify substrate (concrete) is dry per ASTM F lbs. maximum MVTR or ASTM F % maximum relative humidity. **Verify substrate (concrete) is dry per ASTM F lbs. maximum MVTR or ASTM F % maximum relative humidity. Dirt, wetness, finish selection and maintenance schedule may cause significant variation in actual performance. Specifications are based on averages from normal manufacturing tolerances. Such variations do not affect product performance. This product is intended solely for use as an indoor floor covering and is not recommended or sold for any other purpose. Use entryway systems outside each entrance to prevent dirt, sand, grit and other substances from being tracked onto floor. 27
28 S P E C I F I C A T I O N S ColorFields PHYSICAL CONSTRUCTION CONSTRUCTION SIZE (ROLL) Homogeneous Thermoset Rubber with smooth profile design containing rapidly renewable resource content 4 x 49.2 (1.2 x 15 m+) Full rolls only SIZE (TILE) 24 x 24 (610 x 610 mm) (min. order: 5,600 ft 2 for 24 tile) ROLL SIZE ft 2 min. (18.5 m 2 ) OVERALL THICKNESS (3 mm) sheet and tile AVERAGE WEIGHT 0.95 lbs per ft 2 (4.6 kg per m 2 ) PIECES PER CARTON 20 WEIGHT PER CARTON STATIC LOAD LIMIT 24 x 24 : 76 lbs per carton 800 psi ENVIRONMENTAL FLOORSCORE INDOOR AIR QUALITY RAPIDLY RENEWABLE RESOURCE CONTENT CDPH Standard Method v % Rapidly Renewable resource content by total content weight TESTING HUD / FHA REQUIREMENTS ASTM SPECIFICATION (F-1859) SHEET Exceeds Type 1 Homogeneous Rubber Sheet ASTM SPECIFICATION (F-1344) TILE Class 1, Type B, Grade 1 STATIC COEFFICIENT OF FRICTION Meets ADA Guidelines FLOORING RADIANT PANEL TEST (ASTM E-648).45 watts per cm 2, Passes (Class I) N.B.S. SMOKE CHAMBER TEST (ASTM E-662) BACTERIA RESISTANCE (ASTM G-21) BACTERIA RESISTANCE (ASTM E-2180) < 450 Passes Resistant to bacteria & micro-organism activity Resistant to bacteria & micro-organism activity WARRANTIES LIMITED 5 YEAR WEAR WARRANTY LIMITED 10 YEAR COMMERCIAL WARRANTY INSTALLATION INSTALLATION ADHESIVE CHEMICAL SEAM SEALER HEAT WELD SEAMING Mannington MR-911 Acrylic Adhesive, Mannington MR-710 One Part Polyurethane Adhesive (MR-710 for Heavy Points, Hospital Beds and areas with topical moisture) Not available Heat Weld Only Mannington ColorFields Solid Weld Rods ColorFields formulations are made with our superior rubber so they retain their amazing color, resist indentations and cracking, and are quiet underfoot. Requires no finish or stripping, lowering maintenance costs. ColorFields is not recommended in areas that require static dissipation or where exposure to animal fats or cooking oils will occur. Dirt, wetness and improper maintenance may cause significant variation in actual performance. Specifications are based on averages from normal manufacturing tolerances. Such variations do not affect product performance. Can be installed in wet areas when seams are properly sealed and perimeter edges are protected and coved up the wall. This product is intended solely for use indoors and is not recommended or sold for any other purpose. Use entryway systems outside each entrance to prevent dirt, sand, grit and other substance from being tracked onto the floor. SPECIFICATIONS 28
29 S P E C I F I C A T I O N S Audio Spectra PHYSICAL CONSTRUCTION CONSTRUCTION SIZE PROFILE OVERALL THICKNESS PIECES PER CARTON WEIGHT PER CARTON STATIC LOAD LIMIT Thermoset Rubber Tiles 12 x 24 (305 mm x 610 mm) (Note: Each pattern has a 5/16 smooth frame around the entire tile.) Hola, Tic Toc, Silence 1/8 (3.2 mm) 20 pieces Hola: 39 lbs (17.6 Kgs), Tic Toc: 38 lbs (17.2 Kgs), Silence: 40 lbs (18 Kgs) 500 psi ENVIRONMENTAL FLOORSCORE INDOOR AIR QUALITY MANUFACTURE LOCATION CDPH Standard Method v San Jose, CA USA TESTING ASTM SPECIFICATION (F-1344) STATIC COEFFICIENT OF FRICTION Class 1, Type A Meets or Exceeds ADA Guidelines for walking surfaces and ramps FLOORING RADIANT PANEL TEST (ASTM-E-648) >.45 watts/cm 2, Passes (Class I) N.B.S. SMOKE CHAMBER TEST (ASTM-E-662) < 450, Passes WARRANTIES LIMITED 10 YEAR WEAR WARRANTY; LIMITED 10 YEAR COMMERCIAL WARRANTY INSTALLATION INSTALLATION ADHESIVE Mannington MR-721 Epoxy Adhesive, M-725 Polyurethane Adhesive, MR-911 One Part Acrylic Adhesive for above-grade and stairwell applications Audio Spectra formulations are made with our superior rubber so they retain their amazing color, resist indentations and cracking, and are quiet underfoot. Built-in waxes produce a natural luster that requires no finish or stripping, lowering maintenance costs. Audio Spectra is not recommended in commercial areas that require static dissipation. In the spaces to receive rubber flooring and accessories, maintain a minimum temperature of 65 F (18 C) and a maximum temperature of 85 F (29 C) for at least 48 hours before, during, and for not less than 48 hours after installation. Thereafter, maintain a minimum temperature of 55 F (13 C) in areas where work is completed. Dirt, wetness and improper maintenance may cause significant variation in actual performance. Such variations do not affect product performance. Specifications are based on averages from normal manufacturing tolerances. This product is intended solely for use indoors and is not recommended or sold for any other purpose. Use entryway systems outside each entrance to prevent dirt, sand, grit and other substance from being tracked onto floor. SPECIFICATIONS 29
30 S P E C I F I C A T I O N S Enforcer PHYSICAL CONSTRUCTION CONSTRUCTION SIZE PROFILE (COLORSCAPE & COLORSPEC) OVERALL THICKNESS PIECES PER CARTON WEIGHT PER CARTON STATIC LOAD LIMIT Thermoset Rubber Tiles 36 x 36 (914 mm x 914 mm) Sculptured 1/4 (6.0 mm) Sold by the piece 18 lbs (39.6 Kgs) 500 psi ENVIRONMENTAL FLOORSCORE INDOOR AIR QUALITY MANUFACTURE LOCATION CDPH Standard Method v San Jose, CA USA TESTING ASTM SPECIFICATION (F-1344) STATIC COEFFICIENT OF FRICTION Class 1-A (ColorScape), Class 1-B (ColorSpec), both with the exception of Durometer (hardness) which will be 70 +/- 10 Meets or Exceeds ADA Guidelines for walking surfaces and ramps FLOORING RADIANT PANEL TEST (ASTM-E-648) >.45 watts/cm 2, Passes (Class I) N.B.S. SMOKE CHAMBER TEST (ASTM-E-662) < 450, Passes WARRANTIES LIMITED 10 YEAR WEAR WARRANTY; LIMITED 10 YEAR COMMERCIAL WARRANTY INSTALLATION INSTALLATION ADHESIVE Mannington MR-721 Epoxy Adhesive, M-725 Polyurethane Adhesive Mannington Enforcer Skate and Spike Resistant Rubber Sports Tile is available in ColorScape and ColorSpec colorways. Enforcer is made specifically to resist sports-shoe spike and skate traffic. Skate guards are not required. Enforcer is made with our superior rubber so it retains color depth, resists indentations and punctures, and is quiet underfoot. Built-in waxes produce a natural luster that requires no finishes, top coatings, or waxes. This eliminates stripping, which dramatically lowers maintenance costs. Enforcer is not recommended in commercial areas that require static dissipation. In the spaces to receive rubber flooring and accessories, maintain a minimum temperature of 65 F (18 C) and a maximum temperature of 85 F (29 C) for at least 48 hours before, during, and for not less than 48 hours after installation. Thereafter, maintain a minimum temperature of 55 F (13 C) in areas where work is completed. Dirt, wetness and improper maintenance may cause significant variation in actual performance. Such variations do not affect product performance. Specifications are based on averages from normal manufacturing tolerances. This product is intended solely for use indoors and is not recommended or sold for any other purpose. Use entryway systems outside each entrance to prevent dirt, sand, grit and other substance from being tracked onto floor. SPECIFICATIONS 30
31 S P E C I F I C A T I O N S Reset PHYSICAL CONSTRUCTION CONSTRUCTION Recycled Rubber Sheet Goods and Tiles, Homogeneous Throughout, with or without EPDM Colored Chips SIZE 18 x 18 Square Edge Tile, Glue Down (457 mm x 457 mm) 4 x 50 Rolled Sheet, Glue Down (1.2 m x 15.2 m) 24 x 24 Interlocking Tile, Loose Lay (610 mm x 610 mm) OVERALL THICKNESS 3/8 (9.0 mm) PACKAGING 18 x 18 Square Edge Tile: Sold by the piece 4 x 50 Rolled Sheet: Sold by full roll only 24 x 24 Interlocking Tile: Sold by the piece WEIGHT PER PIECE 18 x 18 Square Edge Tile: 4.37 lbs (1.98 Kgs) 4 x 50 Rolled Sheet: 400 lbs ( Kgs) 24 x 24 Interlocking Tile: 8 lbs (3.63 Kgs) STATIC LOAD LIMIT 400 psi ENVIRONMENTAL RECYCLED CONTENT FLOORSCORE INDOOR AIR QUALITY MANUFACTURE LOCATION Black: 91% Post-Consumer / Colors: 72% Post-Consumer CDPH Standard Method v Lancaster, PA USA TESTING DENSITY (ASTM D-3676) > 60 lbs/ft 3 (961 kf/m 3 ) STATIC COEFFICIENT OF FRICTION (ASTM D2047) > 0.8 CHEMICAL RESISTANCE (ASTMF-925) HARDNESS (ASTM E-2240) No Change 60 Shore A SOUND TRANSMISSION COEFFICIENT (ASTM E-413) > 50 FLAMMABILITY (ASTM D-2859) Passes WARRANTIES LIMITED 5 YEAR COMMERCIAL WARRANTY INSTALLATION INSTALLATION ADHESIVE Mannington MR-710 One-Part Urethane or MR-725 Two-Part Urethane Note: Adhesives are for 18 x 18 tile and sheet only. No adhesive is needed for the 24 x 24 interlocking tile. SPECIFICATIONS Visual color variations can occur from roll to roll or tile to tile. This is not considered a manufacturing defect and does not affect product performance. Refer to Mannington s installation and maintenance instructions for best appearance results. Reset is not recommended in commercial areas that require static dissipation. Perform subfloor moisture test ASTM F-1869 Calcium Chloride Test or ASTM F-2170 % RH and a bond test as described in Mannington s Installation Guide to determine if surfaces are dry, free of curing and hardening compounds, old adhesive, and other coatings. In the spaces to receive rubber flooring and accessories, maintain a minimum temperature of 65 F (18 C) and a maximum temperature of 85 F (29 C) for at least 48 hours before, during, and for not less than 48 hours after installation. Thereafter, maintain a minimum temperature of 55 F (13 C) in areas where work is completed. Dirt, wetness and improper maintenance may cause significant variation in actual performance. Such variations do not affect product performance. Specifications are based on averages from normal manufacturing tolerances. This product is intended solely for use indoors and is not recommended or sold for any other purpose. 31
32 S P E C I F I C A T I O N S ColorScape & ColorSpec PHYSICAL CONSTRUCTION CONSTRUCTION SIZE PROFILE: COLORSCAPE PROFILE: COLORSPEC OVERALL THICKNESS Thermoset Rubber Tiles 18 1/8 x 18 1/8 (460 x 460 mm) Round, Square & Sculptured (Face profile height for round and square is.025 / 6 mm) Square and Sculptured (Face profile height for square is.025 / 6 mm) 1/8 (3.2 mm) PIECES PER CARTON 20 WEIGHT PER CARTON STATIC LOAD LIMIT 44 lbs (20 kg) per carton 500 psi ENVIRONMENTAL FLOORSCORE INDOOR AIR QUALITY MANUFACTURE LOCATION CDPH Standard Method v San Jose, CA USA TESTING ASTM SPECIFICATION (F-1344) STATIC COEFFICIENT OF FRICTION Class 1, Type A (Colorscape) / Class 1, Type B (Colorspec) Meets ADA Guidelines FLOORING RADIANT PANEL TEST (ASTM-E-648).45 watts/cm², Passes (Class I) N.B.S. SMOKE CHAMBER TEST (ASTM-E-662) < 450 Passes WARRANTIES LIMITED 10 YEAR WEAR WARRANTY LIMITED 10 YEAR COMMERCIAL WARRANTY INSTALLATION INSTALLATION ADHESIVES Mannington MR-721 Epoxy Adhesive, M-725 Polyurethane Adhesive, MR-911 One Part Acrylic Adhesive for above-grade and stairwell applications ColorScape and ColorSpec formulations are made with our superior rubber so they retain their amazing color, resist indentations and cracking, and are quiet underfoot. Built-in waxes produce a natural luster that requires no finish or stripping, lowering maintenance costs. ColorScape and ColorSpec are not recommended in commercial areas that require static dissipation. In the spaces to receive rubber flooring and accessories, maintain a minimum temperature of 65 F (18 C) and a maximum temperature of 85 F (29 C) for at least 48 hours before, during, and for not less than 48 hours after installation. Thereafter, maintain a minimum temperature of 55 F (13 C) in areas where work is completed. Dirt, wetness and improper maintenance may cause significant variation in actual performance. Such variations do not affect product performance. Specifications are based on averages from normal manufacturing tolerances. This product is intended solely for use indoors and is not recommended or sold for any other purpose. Use entryway systems outside each entrance to prevent dirt, sand, grit and other substance from being tracked onto floor. SPECIFICATIONS 32
33 S P E C I F I C A T I O N S Edge Effects PHYSICAL CONSTRUCTION CONSTRUCTION FINISH CORNERS Thermoplastic Rubber, Type TP Sculptured Wall Base Smooth Matte Finish Pre-Mitered Inside and Outside Corners PROFILE CACHE 3 FLAIR ILLUSION CACHE 4 1/4 ICONIC THICKNESS 3/8 (9.52 mm) 5/16 (7.94 mm) 3/8 ( 9.52 mm) 3/8 (9.52 mm) 3/8 (9.52 mm) HEIGHT 3 (7.62 cm) 3 (7.62 cm) 3 1/4 (8.26 cm) 4 1/4 (10.8 cm) 4 1/4 (10.8 cm) PIECES PER CARTON 1-50 (15.24 m) coiled 1-50 (15.24 m) coiled 1-36 (11 m) coiled 1-50 (15.24 m) coiled 1-50 (15.24 m) coiled WEIGHT PER CARTON 23 lbs (10.43 kg) 23 lbs (10.43 kg) 30 lbs (13.60 kg) 37 lbs (16.80 kg) 47 lbs (21.30 kg) CORNER WT / CARTON 5 lbs (2.27 kg) 5 lbs (2.27 kg) 5 lbs (2.27 kg) 6 lbs (2.73 kg) 6 lbs (2.73 kg) CORNERS / CARTON 10 (20 pieces) 10 (20 pieces) 10 (20 pieces) 10 (20 pieces) 10 (20 pieces) PROFILE MARQUEE ETCHED DOUBLE ETCHED SOPHISTICATE SIMPLICITY THICKNESS 3/8 (9.52 mm) 1/4 (6.35 mm) 1/4 (6.35 mm) 3/8 (9.52 mm) 5/16 (7.94 mm) HEIGHT 4 1/4 (10.8 cm) 4 1/ cm) 4 1/4 (10.8 cm) 4 1/4 (10.8 cm) 4 1/2 (11.4 cm) PIECES PER CARTON 1-50 (15.24 m) coiled 1-50 (15.24 m) coiled 1-50 (15.24 m) coiled 1-50 (15.24 m) coiled 1-36 (11 m) coiled WEIGHT PER CARTON 47 lbs (21.30 kg) 45 lbs (20.40 kg) 45 lbs (20.40 kg) 48 lbs (21.80 kg) 44 lbs (20.00 kg) CORNER WT / CARTON 6 lbs (2.73 kg) 6 lbs (2.73 kg) 6 lbs (2.73 kg) 6 lbs (2.73 kg) 7 lbs (3.18 kg) CORNERS / CARTON 10 (20 pieces) 10 (20 pieces) 10 (20 pieces) 10 (20 pieces) 10 (20 pieces) PROFILE CETERA REGAL ELEGANCE EFFECTUAL-CHAIR RAIL QUARTER-ROUND THICKNESS 5/16 (7.94 mm) 3/8 (9.52 mm) 3/16 (4.76 mm) 1/4 (6.35 mm) 1/2 (12.7 mm) HEIGHT 4 1/2 (11.43 cm) 5 1/4 (13.3 cm) 6 (15.24 cm) 4 (10.2 cm) 1/2 (1.3 cm) PIECES PER CARTON 1-36 (11 m) coiled 1-25 (7.62 m) coiled 1-36 (11 m) coiled WEIGHT PER CARTON 42 lbs (19 kg) 42 lbs (19 kg) 43 lbs (19.50 kg) 46 lbs ( kg) 35 lbs (15.88 kg) CORNER WT / CARTON 5 lbs (2.27 kg) 5 lbs (2.27 kg) 5 lbs (2.27 kg) NA NA CORNERS / CARTON 10 (20 pieces) 10 (20 pieces) 10 (20 pieces) NA NA ENVIRONMENTAL FLOORSCORE INDOOR AIR QUALITY MANUFACTURE LOCATION CDPH Standard Method v San Jose, CA USA TESTING ASTM SPECIFICATION (F-1861) Type TP, Group 1 FLOORING RADIANT PANEL TEST (ASTM-E-648).45 watts/cm 2, Passes (Class I) N.B.S. SMOKE CHAMBER TEST (ASTM-E-662) < 450 Passes SPECIFICATIONS WARRANTIES LIMITED 5 YEAR COMMERCIAL WARRANTY INSTALLATION INSTALLATION ADHESIVE Mannington MR-101 Acrylic Wall Base Adhesive In the spaces to receive rubber flooring and accessories, maintain a minimum temperature of 65 F (18 C) and a maximum temperature of 85 F (29 C) for at least 48 hours before, during, and for not less than 48 hours after installation. Thereafter, maintain a minimum temperature of 55 F (13 C) in areas where work is completed. Dirt, wetness and improper maintenance may cause significant variation in actual performance. Such variations do not affect product performance. Specifications are based on averages from normal manufacturing tolerances. This product is intended solely for use indoors and is not recommended or sold for any other purpose. 33
34 S P E C I F I C A T I O N S Optimum Edge PHYSICAL CONSTRUCTION CONSTRUCTION FINISH HEIGHT / SIZE CORNERS OVERALL THICKNESS PIECES PER CARTON WEIGHT PER CARTON 2.5 / 4 / 6 WEIGHT PER CARTON CORNERS Thermoset Vulcanized Rubber, Type TS Wall Base, PVC-Free Construction Smooth Stain Luster 2.5 (64 mm), 4 (102 mm), 6 (152 mm), Coved or Toeless Factory molded, specify jobsite wrapped or molded 1/8 (3.2 mm) 25 4 pieces = 100 per carton Coved = 27 / 39 / 53 lbs, Toeless = 24 / 39 / 50 lbs Coved = 3 / 4 / 7 lbs, Toeless = 3 / 4 / 7 lbs ENVIRONMENTAL FLOORSCORE INDOOR AIR QUALITY MANUFACTURE LOCATION CDPH Standard Method v San Jose, CA USA TESTING ASTM SPECIFICATION (F-1861) Type TS, Group 1 FLOORING RADIANT PANEL TEST (ASTM-E-648).45 watts/cm 2, Passes (Class I) N.B.S. SMOKE CHAMBER TEST (ASTM-E-662) < 450 Passes WARRANTIES LIMITED FIVE YEAR COMMERCIAL WARRANTY INSTALLATION INSTALLATION ADHESIVES Mannington MR-101 Acrylic Wall Base Adhesive Maintain a minimum temperature in the spaces to receive the wall base and accessories of 65 F (18 C) and a maximum temperature of 85 F (29 C) for at least 48 hours before, during and for not less than 48 hours after installation. Thereafter, maintain a minimum temperature of 55 F (13 C) in areas where work is completed. Dirt, wetness and improper maintenance may cause significant variation in actual performance. Such variations do not affect product performance. Specifications are based on averages from normal manufacturing tolerances. This product is intended solely for use indoors and is not recommended or sold for any other purpose. SPECIFICATIONS 34
35 S P E C I F I C A T I O N S Optimum Edge 100 PHYSICAL CONSTRUCTION CONSTRUCTION FINISH HEIGHT / SIZE CORNERS OVERALL THICKNESS PIECES PER CARTON WEIGHT PER CARTON 4 COLOR AVAILABILITY Thermoset Vulcanized Rubber, Type TS Wall Base in 100 Foot Rolls, PVC-Free Construction Smooth Stain Luster 4 (102 mm) only, Coved Profile only Specify jobsite wrapped corners only 1/8 (3.2 mm) 1 continious roll of 100 Linear Feet per carton Coved = 38 lbs Black, Deep Suede, Dark Chocolate, Bark, Pewter, Stone Gray, Sable, Mineral Gray, Flax and Sandrift ENVIRONMENTAL FLOORSCORE INDOOR AIR QUALITY MANUFACTURE LOCATION CDPH Standard Method v San Jose, CA USA TESTING ASTM SPECIFICATION (F-1861) Type TS, Group 1 FLOORING RADIANT PANEL TEST (ASTM-E-648).45 watts / cm 2, Passes (Class I) N.B.S. SMOKE CHAMBER TEST (ASTM-E-662) FLOORSCORE INDOOR AIR QUALITY < 450 Passes CDPH Standard Method v WARRANTIES LIMITED FIVE YEAR COMMERCIAL WARRANTY INSTALLATION INSTALLATION ADHESIVES Mannington MR-101 Acrylic Wall Base Adhesive Mannington Wall Base is not recommended in commercial areas that require static dissipation. Maintain a minimum temperature in the spaces to receive the wall base and accessories of 65 F (18 C) and a maximum temperature of 85 F (29 C) for at least 48 hours before, during and for not less than 48 hours after installation. Thereafter, maintain a minimum temperature of 55 F (13 C) in areas where work is completed. Dirt, wetness and improper maintenance may cause significant variation in actual performance. Such variations do not affect product performance. Specifications are based on averages from normal manufacturing tolerances. This product is intended solely for use indoors and is not recommended or sold for any other purpose. SPECIFICATIONS 35
36 S P E C I F I C A T I O N S Premium Edge PHYSICAL CONSTRUCTION CONSTRUCTION FINISH HEIGHT / SIZE CORNERS OVERALL THICKNESS PIECES PER CARTON WEIGHT PER CARTON 2.5 / 4 / 6 WEIGHT PER CARTON CORNERS Thermoplastic Rubber, Type TP Wall Base, Non-Phthalate Construction Smooth Matte Finish 2.5 (64 mm), 4 (102 mm), 4.5 (114 mm), 6 (152 mm), Coved or Toeless Factory pre-formed, specify jobsite wrapped or pre-formed 1/8 (3.2 mm) continuous roll or 25 4 pieces Coved = 25 / 38 / 53 lbs, Toeless = 23 / 35 / 52 lbs Coved = 3 / 4 / 9 lbs, Toeless = 3 / 4 / 9 lbs ENVIRONMENTAL FLOORSCORE INDOOR AIR QUALITY MANUFACTURE LOCATION CDPH Standard Method v Eustis, FL USA TESTING ASTM SPECIFICATION (F-1861) Type TP, Group 1 FLOORING RADIANT PANEL TEST (ASTM-E-648).45 watts/cm 2, Passes (Class I) N.B.S. SMOKE CHAMBER TEST (ASTM-E-662) < 450 Passes WARRANTIES LIMITED FIVE YEAR COMMERCIAL WARRANTY INSTALLATION INSTALLATION ADHESIVES Mannington MR-101 Acrylic Wall Base Adhesive Maintain a minimum temperature in the spaces to receive the wall base and accessories of 65 F (18 C) and a maximum temperature of 85 F (29 C) for at least 48 hours before, during and for not less than 48 hours after installation. Thereafter, maintain a minimum temperature of 55 F (13 C) in areas where work is completed. Dirt, wetness and improper maintenance may cause significant variation in actual performance. Such variations do not affect product performance. Specifications are based on averages from normal manufacturing tolerances. This product is intended solely for use indoors and is not recommended or sold for any other purpose. SPECIFICATIONS 36
37 S P E C I F I C A T I O N S Mannington Edge PHYSICAL CONSTRUCTION CONSTRUCTION FINISH HEIGHT / SIZE CORNERS OVERALL THICKNESS PIECES PER CARTON WEIGHT PER CARTON 2.5 / 4 / 4.5 / 6 WEIGHT PER CARTON CORNERS Thermoplastic Vinyl, Type TV Wall Base (Non-Phthalate Construction) Matte Finish 2.5 (64 mm), 4 (102 mm), 4.5 (114 mm), 6 (152 mm), Coved or Toeless Factory Pre-Formed, specify jobsite wrapped or pre-formed.080 (2.0 mm) & 1/8 (3.2 mm) continuous roll or 25 4 pieces Coved (.080 ) = 19 / 27 / 41 / 42 lbs, Toeless (.080 ) = 17 / 25 / 41 / 39 lbs Coved (1/8 ) = 24 / 37 / 41 / 53 lbs, Toeless (1/8 ) = 23 / 36 / 41 / 52 lbs Coved (.080 ) = 3 /3 / 8 lbs, Toeless (.080 ) = 2 / 3 / 7 lbs Coved (1/8 ) = 3 / 4 / 9 lbs, Toeless (1/8 ) = 3 / 4 / 9 lbs ENVIRONMENTAL FLOORSCORE INDOOR AIR QUALITY MANUFACTURE LOCATION CDPH Standard Method v Eustis, FL USA TESTING ASTM SPECIFICATION (F-1861) Type TV, Group 1 FLOORING RADIANT PANEL TEST (ASTM-E-648).45 watts/cm², Passes (Class I) N.B.S. SMOKE CHAMBER TEST (ASTM-E-662) < 450 Passes WARRANTIES LIMITED FIVE YEAR COMMERCIAL WARRANTY INSTALLATION INSTALLATION ADHESIVES Mannington MR-101 Acrylic Wall Base Adhesive Maintain a minimum temperature in the spaces to receive the wall base and accessories of 65 F (18 C) and a maximum temperature of 85 F (29 C) for at least 48 hours before, during and for not less than 48 hours after installation. Thereafter, maintain a minimum temperature of 55 F (13 C) in areas where work is completed. Dirt, wetness and improper maintenance may cause significant variation in actual performance. Such variations do not affect product performance. Specifications are based on averages from normal manufacturing tolerances. This product is intended solely for use indoors and is not recommended or sold for any other purpose. SPECIFICATIONS 37
38 S P E C I F I C A T I O N S Essentials PHYSICAL CONSTRUCTION CONSTRUCTION SIZE OVERALL THICKNESS PACKAGE / COUNT Through-Pattern Vinyl Composition Tile (Non-Phthalate Construction) 12 x 12 (305 mm x 305 mm) 1/8 (3.2 mm) 45 per carton COVERAGE PER CARTON 5 yd 2 (4.2 m 2 ) AVERAGE WEIGHT 65 lbs per carton (29.5 kg per carton) / 1.4 lbs per tile (0.6 kg per tile) BOXES PER PALLET 30 ENVIRONMENTAL 3RD PARTY CERTIFIED INDUSTRY-WIDE TYPE III EPD FLOORSCORE INDOOR AIR QUALITY CDPH Standard Method v % LIMESTONE ABUNDANT NATURAL RESOURCE EXTENDED PRODUCER RESPONSIBILITY (EPR) RECLAMATION AND RECYCLED PROGRAM (LOOP) MANUFACTURE LOCATION Salem, NJ USA ISO 9001 AND REGISTERED FACILITY TESTING ASTM SPECIFICATION (F-1066) Class 2 FLOORING RADIANT PANEL TEST (ASTM-E-648) >.45 watts per cm 2, Passes Class 1 N.B.S. SMOKE CHAMBER TEST (ASTM-E-662) HUD / FHA REQUIREMENTS STATIC COEFFICIENT OF FRICTION < 450 Passes Exceeds Meets ADA Guidelines STATIC LOAD LIMIT 125 psi (8.79 kg per cm 2 ) WARRANTIES LIMITED 5 YEAR COMMERCIAL WARRANTY INSTALLATION INSTALLATION ADHESIVE Mannington M-Guard V-11 / Full Spread* SPRAY ADHESIVE Mannington XpressStep for VCT* Color and pattern extend through the thickness of the tile. VCT is not recommended for use in hospital operating suites, commercial kitchens, or in areas that require static dissipation. Darker colors of vinyl composition tile may be subject to scratch whitening, requiring more frequent maintenance. Wood subfloors directly on concrete or sleepers, either on or below grade, are unsatisfactory for VCT installation. Dirt, wetness, finish selection and maintenance schedule may cause significant variation in actual performance. VCT is not recommended in commercial areas where the surface temperature over radiant heated substrate exceeds 85 F. Specifications are based on averages from normal manufacturing tolerances. Such variations do not affect product performance. This product is intended solely for use as an indoor floor covering and is not recommended or sold for any other purpose. Use entryway systems outside each entrance to prevent dirt, sand, grit, and other substances from being tracked onto floor. *Verify substrate (concrete) is dry per ASTM F lbs. maximum MVTR or ASTM F % maximum relative humidity. SPECIFICATIONS 38
39 S P E C I F I C A T I O N S Progressions PHYSICAL CONSTRUCTION CONSTRUCTION SIZE OVERALL THICKNESS PACKAGE / COUNT Through-Pattern Vinyl Composition Tile 12 x 12 (305 x 305 mm) 1/8 (3.2 mm) 45 per carton COVERAGE PER CARTON 5 yd 2 (4.2 m 2 ) AVERAGE WEIGHT 65 lbs per carton (29.5 kg per carton) / 1.4 lbs per tile (0.6 kg per tile) BOXES PER PALLET 30 ENVIRONMENTAL 3RD PARTY CERTIFIED INDUSTRY-WIDE TYPE III EPD FLOORSCORE INDOOR AIR QUALITY CDPH Standard Method v NSF / ANSI GOLD 85% LIMESTONE ABUNDANT NATURAL RESOURCE 2% POST-CONSUMER RECYCLED CONTENT EXTENDED PRODUCER RESPONSIBILITY (EPR) RECLAMATION AND RECYCLED PROGRAM (LOOP) MANUFACTURE LOCATION Salem, NJ USA ISO 9001 AND REGISTERED FACILITY TESTING ASTM SPECIFICATION (F-1066) Class 2 FLOORING RADIANT PANEL TEST (ASTM-E-648) >.45 watts per cm 2, Passes Class 1 N.B.S. SMOKE CHAMBER TEST (ASTM-E-662) HUD / FHA REQUIREMENTS STATIC COEFFICIENT OF FRICTION < 450 Passes Exceeds Meets ADA Guidelines STATIC LOAD LIMIT 125 psi (8.79 kg per cm 2 ) WARRANTIES LIMITED 5 YEAR COMMERCIAL WARRANTY INSTALLATION SPECIFICATIONS INSTALLATION ADHESIVE SPRAY ADHESIVE Mannington M-Guard V-11 / Full Spread* Mannington XpressStep for VCT* Color and pattern extend through the thickness of the tile. VCT is not recommended for use in hospital operating suites, commercial kitchens, or in areas that require static dissipation. Darker colors of vinyl composition tile may be subject to scratch whitening, requiring more frequent maintenance. Wood subfloors directly on concrete or sleepers, either on or below grade, are unsatisfactory for VCT installation. Dirt, wetness, finish selection and maintenance schedule may cause significant variation in actual performance. VCT is not recommended in commercial areas where the surface temperature over radiant heated substrate exceeds 85 F. Specifications are based on averages from normal manufacturing tolerances. Such variations do not affect product performance. This product is intended solely for use as an indoor floor covering and is not recommended or sold for any other purpose. Use entryway systems outside each entrance to prevent dirt, sand, grit, and other substances from being tracked onto floor. *Verify substrate (concrete) is dry per ASTM F lbs. maximum MVTR or ASTM F % maximum relative humidity. 39
40 S P E C I F I C A T I O N S Touchstone PHYSICAL CONSTRUCTION CONSTRUCTION SIZE OVERALL THICKNESS PACKAGE / COUNT Through-Pattern Vinyl Composition Tile 12 x 12 (305 x 305 mm) 1/8 (3.2 mm) 45 per carton COVERAGE PER CARTON 5 yd 2 (4.2 m 2 ) AVERAGE WEIGHT 65 lbs per carton (29.5 kg per carton) / 1.4 lbs per tile (0.6 kg per tile) BOXES PER PALLET 30 ENVIRONMENTAL 3RD PARTY CERTIFIED INDUSTRY-WIDE TYPE III EPD FLOORSCORE INDOOR AIR QUALITY CDPH Standard Method v NSF / ANSI GOLD 85% LIMESTONE ABUNDANT NATURAL RESOURCE 2% POST-CONSUMER RECYCLED CONTENT EXTENDED PRODUCER RESPONSIBILITY (EPR) RECLAMATION AND RECYCLING PROGRAM (LOOP) MANUFACTURE LOCATION Salem, NJ USA ISO 9001 AND REGISTERED FACILITY TESTING ASTM SPECIFICATION (F-1066) Class 2 HUD / FHA REQUIREMENTS Exceeds FLOORING RADIANT PANEL TEST (ASTM-E-648) >.45 watts per cm 2, Passes Class 1 N.B.S. SMOKE CHAMBER TEST (ASTM-E-662) STATIC COEFFICIENT OF FRICTION < 450 Passes Meets ADA Guidelines STATIC LOAD LIMIT 125 psi (8.79 kg per cm 2 ) WARRANTIES LIMITED 5 YEAR COMMERCIAL WARRANTY INSTALLATION INSTALLATION ADHESIVE SPRAY ADHESIVE Mannington M-Guard V-11 / Full Spread* Mannington XpressStep for VCT* Color and pattern extend through the thickness of the tile. VCT is not recommended for use in hospital operating suites, commercial kitchens, or in areas that require static dissipation. Darker colors of vinyl composition tile may be subject to scratch whitening, requiring more frequent maintenance. Wood subfloors directly on concrete or sleepers, either on or below grade, are unsatisfactory for VCT installation. Dirt, wetness, finish selection and maintenance schedule may cause significant variation in actual performance. VCT is not recommended in commercial areas where the surface temperature over radiant heated substrate exceeds 85 F. Specifications are based on averages from normal manufacturing tolerances. Such variations do not affect product performance. This product is intended solely for use as an indoor floor covering and is not recommended or sold for any other purpose. Use entryway systems outside each entrance to prevent dirt, sand, grit, and other substances from being tracked onto floor. *Verify substrate (concrete) is dry per ASTM F lbs. maximum MVTR or ASTM F % maximum relative humidity. SPECIFICATIONS 40
41 S P E C I F I C A T I O N S SafeWalks PHYSICAL CONSTRUCTION CONSTRUCTION SIZE OVERALL THICKNESS PACKAGE / COUNT Through-Pattern Vinyl Composition Tile (Non-Phthalate Construction) 12 x 12 (305 x 305 mm) 1/8 (3.2 mm) 45 per carton COVERAGE PER CARTON 5 yd 2 (4.2 m 2 ) AVERAGE WEIGHT 60.5 lbs per carton (29.5 kg per carton) / 1.4 lbs per tile (0.6 kg per tile) BOXES PER PALLET 30 ENVIRONMENTAL FLOORSCORE INDOOR AIR QUALITY CDPH Standard Method v % LIMESTONE ABUNDANT NATURAL RESOURCE EXTENDED PRODUCT RESPONSIBILITY (EPR) RECLAMATION AND RECYCLING PROGRAM (LOOP) TESTING ASTM SPECIFICATION (F-1066) Class 2 HUD / FHA REQUIREMENTS Exceeds FLOORING RADIANT PANEL TEST (ASTM-E-648) >.45 watts per cm 2, Passes Class 1 N.B.S. SMOKE CHAMBER TEST (ASTM-E-662) STATIC COEFFICIENT OF FRICTION < 450 Passes Meets ADA Guidelines STATIC LOAD LIMIT 125 psi (8.79 kg per cm 2 ) WARRANTIES LIMITED 5 YEAR COMMERCIAL WARRANTY INSTALLATION INSTALLATION ADHESIVE SPRAY ADHESIVE Mannington M-Guard V-11 / Full Spread* Mannington XpressStep for VCT* SPECIFICATIONS Quantum Guard HP is a low maintenance floor providing superior appearance retention, cleanability, durability and slip retardance Quantum Guard HP can eliminate the need for polish over an extended period of time depending upon the amount of commercial traffic. While not rated for ramps the Quantum Guard HP finish provides an enhanced level of traction and protection against slip compared to standard resilient floors. Relay RE is not recommended in commercial areas that require static dissipation. Relay RE is not recommended in commercial areas where the surface temperature over radiant heated substrate exceeds 85 F. Dirt, wetness, finish selection and maintenance schedule may cause significant variation in actual performance. Specifications are based on averages from normal manufacturing tolerances. Such variations do not affect product performance. This product is intended solely for use as an indoor floor covering and is not recommended or sold for any other purpose. Use entryway systems outside each entrance to prevent dirt, sand, grit, and other substances from being tracked onto floor. * Verify substrate (concrete) is dry per ASTM F lbs. maximum MVTR or ASTM F % maximum relative humidity. 41
42 ENVIRONMENTAL PRODUCT DECLARATIONS Because designers and end users need standardized tools to communicate the environmental performance of products, Mannington has released EPDs for both hard and soft surface flooring products. These EPDs conform to international standards based on the North American Flooring PCR via NSF International, and are derived from data gathered from a comprehensive life cycle assessments of the product s environmental impact. Each life cycle assessment went through third party critical review, and each EPD went through third party verification by a program operator. All EPDs meet ISO Type III Product EPDs Heterogeneous Sheet Flooring Heterogeneous sheet flooring is a multi-layer product used in commercial, light commercial and residential interiors. Typically, heterogeneous flooring consists of a backing layer, reinforcement layer, pattern layer and wear layer / finish. Declaration Number: 12CA Certifications: FloorScore Certified Homogeneous Sheet Flooring Homogeneous sheet flooring is a single layer product used in commercial, light commercial, healthcare, educational, retail and office interiors. Typically, homogeneous flooring consists of an inlaid chip layer and a wear layer / finish. Declaration Number: 12CA Certifications: FloorScore Certified Rubber Tile Rubber floor tile is a single layer or multi-layer product used commercially in healthcare, educational, retail, transportation, institutional and office interiors. Typically, rubber floor tile is made from a homogeneous composition of synthetic and/or natural rubber, high quality additives and colorants. Declaration Number: 12CA Certifications: FloorScore Certified LVT Vinyl tile is a single layer or multi-layer product used residentially and commercially in healthcare, education, specialty retail, and hospitality interiors. Vinyl tile is made primarily from calcium carbonate, polyvinyl chloride, plasticizers, additives and in some cases, fiberglass. Declaration Number: 12CA Certifications: FloorScore Certified EPD VCT Vinyl composition tile is a single layer product used in commercial, light commercial and residential interiors. Vinyl composition tile is made primarily from calcium carbonate with smaller amounts of polyvinyl chloride, plasticizers and additives. Declaration Number: 12CA Certifications: FloorScore Certified 42
43 INSTALLATION Mannington Commercial Luxury Vinyl Tile General Information Contact Mannington Technical Services for guidance about subfloor testing and installation recommendations. Technical Services can be reached Monday to Friday, 8:00 a.m. to 5:00 p.m. EST at (800) EXT 3. These instructions cover all fully adhered installations of Mannington Commercial Luxury Vinyl Floors (LVF) this includes both Tile (LVT) and Plank (LVP). This includes: Assurance Squared, Nature s Path, Nature s Path Select, Nature s Path LockSolid and Walkway luxury vinyl flooring. Nature s Path LockSolid utilizes a proprietary locking system that is installed as a floating floor and does not require adhesive. All recommendations are based on the most recent available information. The information on these sheets provides general guidelines. For complete details consult Mannington s General Installation Guide or visit our website at manningtoncommercial.com. These instructions and recommendations must be followed for a satisfactory installation. The installation of Mannington LVF is straightforward and similar to the installation procedures that apply to all quality resilient tile floors. Good preparation is essential for a trouble-free installation. Do not install Mannington LVF until jobsite testing and subfloor preparations are finished and the work of all other trades is complete. Site conditions must comply with the relevant building codes and local, state and national regulations. Mannington LVF is recommended for use over properly prepared concrete, suspended wood, metal and other suitable substrates. Never install Mannington LVF over residual asphalt type (Cutback) adhesive as Bleed Through may occur. Mannington LVF is not suitable for external installation or unheated locations. Mannington flooring, adhesive, jobsite and subfloor must be acclimated to a stable condition before installation (See Job site testing). Following installation, Mannington LVF foot traffic should be minimized for 24 hours; point loads and rolling traffic for 48 hours and should utilize minimal wet cleaning for 5 days (except LockSolid). Mannington LVF flooring should remain at a temperature between F (13-29 C) during its service life. Adhesive types can have a significantly different moisture tolerance which can influence required subfloor prep as well as install time. Material Receiving, Handling & Storage 1. All floor covering products require care during storage and handling. It is important to store flooring products in a dry, temperature-controlled interior area. 2. The temperature range should be between 65º F and 100º F, and the relative humidity should be controlled and maintained between 30% to 70%. 3. Material must be conditioned for at least 48 hours before beginning the installation. 4. Flooring materials that are shipped in cartons must also be stored properly. Cartons must be kept squarely positioned on the pallet to prevent distortion of the contents and to be fully supported. Do not store close to exterior walls, in direct sunlight or near HVAC vents. 5. Stored cartons are to be protected from forklift and other traffic that can damage carton corners. Never doublestack pallets of flooring products. 6. Immediately remove all shrink wrapping before acclimation and verify materials delivered are correct style, color and quantity. INSTALLATION 7. Report discrepancies immediately to Mannington at EXT 2 (Claims) for installation of products installed with visual defects, mixed production runs, or incorrect style will not be honored. Jobsite Testing 1. Before jobsite testing, the building envelope must be sealed (walls, roofing, windows, doorways etc., installed). 2. The installation area and materials to be installed shall be maintained at a minimum of 65 F (18.3 C) and a maximum of 85 F (29.4 C) for 48 hours before, during and for 48 hours after completion of the installation. Relative humidity level extremes should also be avoided. General recommended humidity control level is between %. If a system other than the permanent HVAC source is utilized, it must provide proper control of both temperature and humidity to recommended or specific levels for the appropriate time duration. 3. Test sites must be properly prepared and protected for the duration of testing to achieve valid results. 4. Surface Flatness for all Subfloors: The surface shall be flat to 3/16 (3.9mm) in 10 ft. (3050 mm) and 1/32 (0.8 mm) in 1 ft (305 mm) To check flatness, place a 10 ft straight edge, string, laser level or use another suitable method on the surface and measure the gap. 43
44 INSTALLATION Mannington Commercial Luxury Vinyl Tile (continued) Jobsite Testing (continued) 5. Concrete Subfloors: a. Concrete subfloors must be finished and cured, free of all sealers, coatings, finishes, dirt, film forming curing compounds, or other substances that may prevent proper bonding of the flooring materials (ACI and ASTM F710). b. Randomly check concrete subfloor for porosity using the drop water test. Place a 1 inch diameter drop of water directly onto the concrete subfloor. If the water droplet does not dissipate within 60 to 90 seconds the subfloor is considered non-porous. c. Concrete subfloors must have a minimum compressive strength of 3000 psi. Concrete subfloors shall not consist of lightweight concrete or gypsum. d. Moisture Testing: Perform either the preferred In-situ Relative Humidity (RH) Test (ASTM F2170) or the acceptable Moisture Vapor Emission Rate (MVER) Test (ASTM F1869). For acceptable moisture limits please refer to the specifications of the adhesive of choice. e. Alkalinity: Must test surface alkalinity (ASTM F710). A 7.0 to 9.0 ph is acceptable. 6. Wood Subfloors and underlayment panels shall have the moisture content tested using a suitable wood pin meter. Readings between the wood subfloor and underlayment should be within 3% and have a maximum moisture content of 14% or less. Moisture Suppressant System Concrete subfloors that exceed adhesive specifications will require a Moisture Suppressant System. Due to complexities associated with moisture vapor transmission, emissions and movement of soluble salts (alkalinity) in concrete subfloors, we do not offer, recommend, or warranty a specific solution for excess moisture in concrete slabs. However, there are many companies that offer solutions with warranties for excess moisture in concrete slabs. Mannington Commercial suggests that you reference the current ASTM F710, Standard Practice for Preparing Concrete Floors to Receive Resilient Flooring and ASTM F301 Standard Practice for Two Component Resin Based Membrane Forming Moisture Mitigation Systems for Use Under Resilient Flooring Systems. Contact one or more of the following or other moisture suppressant system suppliers for assistance: Ardex (724) Koester American Corp. (757) Mapei (800) Uzin Ltd. (800) Subfloor Preparation Concrete Careful subfloor preparation is vital for an excellent floor appearance and good tile/plank adhesion. The subfloor must be smooth, firm, flat, clean, dry, free from defects, and fit for purpose. A suitable smoothing compound should be used to ensure that no irregularities show through to the surface of the finished floor. In all cases, the subfloor must meet the moisture and ph requirements before installation. Below and On-grade concrete subfloors must have a suitable vapor retarder properly installed directly beneath the slab. Always follow manufacturers written recommendations for the use and installation of their appropriate surface preparation materials. 1. Record and file site conditions, test results and any corrective action(s) taken. It is important to maintain this documentation throughout the warranty period. 2. Subfloor must be clean (free of dirt, sealers, curing, hardening or parting compounds or any substance that may stain or prevent adhesion), smooth, flat, sound, fit for purpose, free of movement, excessive moisture and high alkalinity. 3. Slick surfaces such as power troweled concrete shall be abraded or profiled to allow for a mechanical bond between the adhesive and subfloor. INSTALLATION 4. Remove existing resilient floor covering; remove all residual adhesive, paint or other contaminants following RFCI recommended work practice. The use of adhesive removers or solvents in the abatement or removal of existing or old adhesives is prohibited and may void any warranty. WARNING: ASBESTOS & SILICA - Refer to the current Resilient Floor Covering Institute (RFCI) document Recommended Work Practices for Removal of Existing Resilient Floor Coverings for guidance ( 44
45 INSTALLATION Mannington Commercial Luxury Vinyl Tile (continued) Subfloor Preparation (continued) 5. Perform corrective actions necessary for elevated moisture or high alkalinity conditions. 6. Surface Flatness for all Subfloors: The surface shall be flat to 3/16 (3.9mm) in 10 ft. (3050mm) and 1/32 (0.8mm) in 1 ft (305mm) Bring high spots level by sanding, grinding etc. and fill low spots. Smooth surface to prevent any irregularities or roughness from telegraphing through the new flooring. 7. Leveling and Patching: a. For concrete subfloors, use only high quality Portland cement based materials (minimum 3000 psi compressive strength according to ASTM C109). Mix with water only, do not use latex. Caution: Do not lightly skim coat highly polished or slick power troweled concrete surfaces. A thin film of floor patch will not bond to a slick subfloor and may become a bond breaker causing flooring to release at the interface of the subfloor and patching material. If in doubt, perform a bond test prior to commencing with the installation. Wood b. Wood subfloors require an underlayment (double layer construction) with a minimum total thickness of 1 (25 mm). Use minimum 1/4 (6 mm) thick APA rated underlayment grade plywood with a fully sanded face or other underlayment panel that is appropriate for the intended usage. Install and prepare panels and seams according to the manufacturers instructions. Also refer to ASTM F 1482 Standard Practice for Installation and Preparation of Panel Underlayments to receive Resilient Flooring. c. Many times wood panel subfloors are damaged during the construction process or are not underlayment grade. These panels must be covered with an appropriate underlayment. Underlayment panels are intended to be used to provide a smooth surface on which to adhere the finished floor covering. It should be understood that underlayment panels cannot correct structural deficiencies. d. Panels intended to be used as underlayment should be specifically designed for this purpose. These panels should have a minimum thickness of 1/4 (6mm) any panels selected as an underlayment must meet the following criteria: Be dimensionally stable Have a smooth, fully sanded face so graining or texture will not telegraph through Be resistant to both static and impact indentation Be free of any surface components that may cause staining such as plastic fillers, marking inks sealers, etc. Be of uniform density, porosity and thickness Have a written warranty for suitability and performance from the panel manufacturer or have a history of proven performance e. Any unevenness at the joints between panels must be sanded to a level surface. Gaps between panels, hammer indentations, and all other surface irregularities must be filled and sanded. INSTALLATION 8. Particleboard, chipboard, construction grade plywood, any hardboard and flake-board, are not recommended as underlayments for fully adhered installations. All have inadequate uniformity, poor dimensional stability, and variable surface porosity. Mannington Commercial will not accept responsibility for adhered installation over these subfloors. Nature s Paths LockSolid can be installed over all wood and wood composition panels provided that they are smooth, flat, structurally sound and free of deflection. This includes plywood, particleboard, oriented strand board (OSB), flake-board and wafer board. If the surface of the subfloor is not smooth, a ¼ underlayment should be installed over the subfloor. In all cases, the underlayment manufacturer or underlayment installer is responsible for any / all underlayment warranties. Installation Procedures Before starting the Mannington Luxury Vinyl Flooring (LVF) (LVT or LVP) installation, ensure the following are satisfactorily completed. Acclimation: The installation area and materials to be installed shall be maintained at a minimum of 65 F(18.3 C) and a maximum of 85 F (29.4 C) for 48 hours before, during and for 48 hours after completion of the installation. Relative humidity level extremes should also be avoided. General recommended humidity control level is between %. If a system other than the permanent HVAC source is utilized, it must provide proper control of both temperature and humidity to recommended or specific levels for the appropriate time duration. Flooring Materials: Check quantity of Mannington LVF and adhesive are sufficient for area to be installed. Check tile for visual defects before installation. Installation of flooring acknowledges acceptance of materials. Report discrepancies immediately to Mannington at EXT 2 (Claims) for installation of products installed with visual defects or incorrect style will not be honored. 45
46 INSTALLATION Mannington Commercial Luxury Vinyl Tile (continued) Installation Procedures (continued) Expansion joints, isolation joints, or other moving joints are incorporated into concrete floor slabs in order to permit movement without causing random cracks in the concrete. These joints must be honored and not be filled with underlayment products or other materials, and floor coverings must not be laid over them. Expansion joint covering systems should be detailed by the architect or engineer based upon intended usage and aesthetic considerations. Surface cracks, grooves, depressions, control joints or other non-moving joints, and other irregularities shall be filled or smoothed with high quality Portland cement based patching or underlayment compound for filling or smoothing, or both. Patching or underlayment compound shall be moisture, mildew, and alkali-resistant, and shall provide a minimum of 3000 psi compressive strength after 28 days, when tested in accordance with ASTM C109 or ASTM C472, whichever is appropriate. Subfloor Preparation: Make sure all surfaces to be covered are completely clean, dry and smooth and that all necessary subfloor preparation has been properly completed and documented. Inspect Substrate: Perform final acceptance inspection of substrate. Adjacent Surfaces Protection: Protect adjacent work areas and finish surfaces from damage during product installation. Flooring Protection: Mannington LVF should be the last material installed to prevent other trades from disrupting the installation and adhesive set-up or damaging the floor. Start of flooring installation indicates acceptance of current subfloor conditions and full responsibility for completed work. Mannington LVF products have arrows imprinted on the back. Lay all arrows pointing in the same direction. Mannington LVF comes in plank and square tile formats. Mannington LVF can be laid out to run either parallel or diagonal to the room or primary wall. Tiles should be installed running in the same direction (block or staggered), when quarter turned, arrows should alternate. Plank flooring should have end joints offset by at least 6 and staggered to create a random appearance that avoids alignment of end joints. (All arrows pointing in the same direction) The following conditions must be given consideration when determining how the Mannington LVF will be installed: 1. Layout: Layout shall be specified by end user, architect or designer. a. Establish center marks and determine start point to balance installation in room and have equal tile widths on opposite sides of room. This can be facilitated by dry laying tiles and marking base lines. b. The room layout must be set-up so that all flooring can be installed while staying off freshly installed tiles. This will minimize tile shifting, adhesive displacement and wet adhesive from oozing up and getting onto the face of the tiles. This can be accomplished by creating work zones outlined with chalk lines to spread adhesive aligned with established base lines. Create work zones that are no wider than the installers comfortable arm reach and in multiples of the tile width. c. All Installations: Spread only the amount of adhesive that can be covered within the working time specific to the adhesive being used. When all preparatory work is satisfactorily completed, including dry fitting cut tiles (if applicable), proceed with installation. Inspect each tile for visual defects before installing. Installation of the flooring implies acceptance of materials. Nature s Path LockSolid utilizes a proprietary locking system that is installed as a floating floor and does not require adhesive. When installing Nature s Path LockSolid, maintain a 5/16 gap at all fixed vertical surfaces. Adhesives: Mannington Commercial recommends the following adhesives for the installation of Mannington Commercial LVF. Only these adhesives should be used. Other adhesives may not provide adequate performance and could result in a failure. 1. Mannington Commercial V-82 Adhesive: Solvent-free, acrylic adhesive for installation of Mannington Commercial LVF on porous substrates including concrete that is dry per ASTM F lbs maximum MVER or ASTM F % maximum relative humidity. V-82 should be applied with a trowel 1/16 wide x 1/32 deep and spaced 1/32 apart. Spread rate approximately sq ft per gallon. See adhesive label for details. INSTALLATION 2. Mannington M-Guard V-88 Adhesive: Moisture resistant transitional pressure sensitive adhesive is recommended for higher moisture tolerance of 8 lbs maximum MVER or 90% relative humidity. M-Guard V-88 adhesive will not correct pre-existing moisture problems in older concrete subfloors. V-88 should be applied with 1/16 wide x 1/32 deep and spaced 1/32 apart U notched trowel for porous substrates and a 1/16 wide x 1/32 deep and spaced 5/64 apart U notched trowel for non-porous substrates. Porous spread rate approximately 250 sq ft per gallon. Non-porous spread rate 350 sq ft per gallon. For non-porous substrates adhesive must dry completely. See adhesive label for details. 46
47 INSTALLATION Mannington Commercial Luxury Vinyl Tile (continued) Installation Procedures (continued) 3. Mannington Commercial V-95 adhesive: Solvent-free two-component, epoxy for use on non-porous substrates, under hospital beds, operating room tables, heavy rolling loads, areas subject to standing water, topical moisture or where high performance is needed. Moisture limits are per ASTM F lbs maximum MVER or ASTM F % maximum relative humidity. V-95 should be applied with a 1/16 wide x 1/32 deep and spaced 1/32 apart. Spread rate approximately sq ft per gallon. See adhesive label for details. 4. XpressStep Premium Spray Adhesive: Water based spray adhesive recommended for the installation of Mannington Commercial LVF over porous and non-porous substrates. Moisture limits are 10 lbs maximum MVER or 93% relative humidity. Spread rate approximately sq ft per can. XpressStep Spray Adhesive: Moisture limits are 8 lbs MVER or 90 % relative humidity. Spread rate approximately sq ft per can. Note: It is not recommended to install Nature s Paths LockSolid over concrete slabs with a history of excessive moisture or hydrostatic conditions. Concrete subfloors that exceed 8 lbs MVER as determined by the Calcium Chloride MVER test (ASTM F-1869) or 95% RH as determined by the In-Situ Relative Humidity test (ASTM F-2170) should be considered excessive with regards to moisture emissions and may require the installation of a moisture suppressant membrane. Nature s Path LockSolid can be installed over most existing hard surface floor coverings provided that the existing floor surface is well bonded and can be made smooth. Mannington Commercial will not assume responsibility for floor covering failure due to hydrostatic pressure or moisture vapor emission. The final responsibility for determining if the concrete is dry enough for installation of the flooring lies with the floor covering installer. CAUTION: Temperature directly affects adhesive working and setting times. Warmer temperatures shorten working times and colder temperatures lengthen working times of adhesive. Follow instructions on container for proper application. Adhesive Application: Follow the instructions on the adhesive labels. a. Use a trowel with appropriate notch size. Do not use worn trowels (approximately 600 sf usage on concrete). b. Spread adhesive evenly with proper trowel held at 60 degree angle avoiding skips or voids and excessive adhesive application. c. Only spread sufficient adhesive that can be covered within the adhesive working time. d. Tiles/Planks must be placed into adhesive as specified (follow label directions). e. Install rows to chalk line making sure tiles/planks are precisely aligned with chalk line and adjacent tiles. f. Randomly check tiles/planks for complete coverage of adhesive onto back of tile especially near the end of each adhesive spread. If there is little or no adhesive transfer, or if the adhesive has flashed off or skinned over; adequate bonding may not be possible. Scrape the flashed off adhesive from the floor and spread fresh adhesive. g. If tiles/planks shift, use releasable masking tape diagonally over seams to keep tiles tight and aligned. h. Wet-Set Application: Do not work on top of freshly installed flooring. This will minimize tile/plank shifting, adhesive displacement, and prevent wet adhesive from oozing up and getting onto the surface of the new flooring. If you must work on top of newly installed flooring, use kneeling and or walk boards. INSTALLATION i. The floor must be rolled in both directions using a 100 lb 3-section roller. Roll floor as soon as conditions permit without the tiles/planks sliding or adhesive bleeding to the surface. Roll floor again 90 degrees to the first within 1 hour. Mannington Commercial s V-95 and V-82 adhesives should provide 100% uniform adhesive transfer (no visible trowel ridges) onto the back of the tile/plank (and not cause adhesive to squeeze out between tiles/planks). Pressure Sensitive Adhesive will not transfer 100% to the backing of the tile/plank. Be sure not to exceed the 3 hour working time. j. Clean excess adhesive as you install before it is allowed to dry. Use a soapy clean soft cloth to remove wet excess adhesive. k. Clean up all debris as you work. l. Wait 24 hours for normal foot traffic and wait 48 hours for point and rolling loads after installation. m. During first five days minimize heavy wet cleaning to allow adhesive to fully set. 47
48 INSTALLATION Mannington Commercial Luxury Vinyl Tile (continued) Special Considerations a. Radiant Heat: Mannington Commercial LVF can be installed over Radiant heating (hydroponic) systems. The maximum temperature of the subfloor surface must not exceed 85. Before installing flooring products over newly constructed radiant-heating systems, operate the system at maximum capacity to force any residual moisture from the cementitious topping of the radiant-heating system. Then set the thermostat to a comfortable room temperature for the installation. For existing systems the system must be switched off for a minimum of 48 hours before, during and 48 hours after flooring installation. b. Direct Sunlight: Installations in areas where there is heavy direct sunlight exposure for long periods of time should utilize window treatments and/or utilize Mannington s V 95 two part urethane adhesive in these areas. c. Protecting New Installations: New Installations must be protected while the adhesive cures. Early foot traffic, point or rolling loads can cause adhesive displacement or breaking of the bond between the adhesive and the tile or substrate. Routine Maintenance To get your new Mannington Commercial floor looking its best, and to keep it that way, Mannington Commercial recommends the following initial maintenance procedures. For detailed recommendations, see the Mannington Maintenance Instructions. Use non-staining matting system at exterior doors that is appropriate for soil load and weather conditions. Use appropriate floor protectors, glides and wheels and do not drag or slide objects across the surface of the floor. Do not use abrasive cleaners that can scratch the floor surface or detergent cleaners that leave a residue. Day 1 Stay off the new floor. Minimize traffic. Day 2 to 4 Dust mop, sweep or vacuum the floor to remove loose dirt and grit. Lightly damp mop (well wrung out mop) floor with properly diluted Neutral cleaner solution. Day 5 Choose from multiple routine maintenance options to suit individual circumstances and end user preference. Maintenance Precautions & Safety Information Effective maintenance includes promptly removing all spills and then thoroughly cleaning with a diluted neutral cleaner or cleaner/maintainer solution. Failure to establish an effective routine maintenance program will not only detract from the appearance of the floor but may shorten its useful life. SAFETY FIRST: Before commencing work, put out signs or safety cones to warn that cleaning is in progress. A slippery floor can cause accidents. This can be caused by poor maintenance, surface contamination, spills or when the floor is wet. All hard floors can be slippery when wet. Ensure the floor is clean and dry before resuming use. Use warning signs in commercial areas when performing maintenance or cleaning spills. INSTALLATION 48
49 INSTALLATION Heterogeneous Sheet Flooring General Information All recommendations are based on the most recent available information. These installation specifications are for fully adhered installations of Mannington Commercial heterogeneous product, Relay RE, Realities, Paradigm Collection, Primus and Vivendi Collection. 1. Cut order pieces should be rolled face out on a core to take to the job site. Otherwise, the roll will flatten or oval, making it difficult to get the floor covering to lay flat when unrolled. 2. The floor covering, adhesive, and room temperature must be kept at a minimum temperature of 65 F with a maximum of 90 F for at least 48 hours before and during, and 48 hours after installation. 3. All subfloor patching on and below grade must be done with a non-shrinking, water-resistant Portland cement patching compound. 4. Never install Mannington sheet goods over residual asphalt-type (cut back) adhesive. It can bleed through the new floor covering. Residual asphalt type adhesive must be removed or isolated from the finished flooring by providing a mechanical barrier. 5. Must be fully adhered using Mannington V-82 or M Guard V-88 on porous or non-porous substrates. Use Mannington Commercial high performance V-95 two-part epoxy adhesives on non-porous substrates or in areas that require high performance adhesives (i.e. under hospital beds, exceptional high traffic areas). 6. All seams must be sealed by either using Mannington Commercial MLG-33 chemical seam sealer or heat welded with Mannington solid color weld rod. Subfloor Information Careful and correct preparation of the subfloor is a major part of a satisfactory sheet floor covering installation. Roughness or unevenness of the subfloor will telegraph through the new floor covering, resulting in an unsightly surface and excessive wear on high spots. Proper subfloor selection and preparation are essential for a trouble-free job. Wood Subfloors 1. GENERAL All wood floors must be suspended at least 18 above the ground. Adequate cross-ventilation must be provided and the ground surface of a crawl space must be covered with a suitable vapor barrier. Wood subfloors directly on concrete or installed over sleeper construction are not satisfactory for the installation of Mannington Resilient flooring products. Wood subfloors must be covered with a minimum 1/4 or heavier underlayment rated panel to assure a successful finished flooring installation. INSTALLATION 2. UNDERLAYMENT Many times wood panel subfloors are damaged during the construction process or are not of underlayment grade. These panels must be covered with an approved underlayment. Underlayment panels are intended to be used to provide a smooth surface on which to adhere the finished floor covering. It must be understood that underlayment panels cannot correct structural deficiencies. Particleboard, chipboard, construction grade plywood, any hardboard and flakeboard are not recommended as underlayment. All have inadequate uniformity, poor dimensional stability, and variable surface porosity. Mannington Resilient Floors will not accept responsibility for adhered installation over these subfloors. In all cases, the underlayment manufacturer or underlayment installer is responsible for all underlayment warranties. 3. UNDERLAYMENT REQUIREMENTS Panels intended to be used as underlayment should be specifically designed for this purpose. These panels should have a minimum thickness of 1/4. Any panels selected as an underlayment must meet the following criteria: Be dimensionally stable. Have a smooth, fully sanded face so the graining or texturing will not show through. Be resistant to both static and impact indentation. Be free of any surface components that may cause staining such as plastic fillers, marking inks, sealers, etc. Be of uniform density, porosity and thickness. Have a written warranty for suitability and performance from the panel manufacturer or have a history of proven performance. Any unevenness at joints between panels must be sanded to a level surface. Gaps between panels, hammer indentations, and all other surface irregularities must be patched with an underlayment or equivalent. 49
50 INSTALLATION Heterogeneous Sheet Flooring (continued) Subfloor Information (continued) Concrete Subfloors 1. Concrete subfloors must be dry, smooth, and free from dust, solvent, paint, marker, wax, grease, oil, asphalt sealing compounds and other extraneous materials. The surface must be hard and dense, and free from powder or flaking. 2. New concrete slabs must be thoroughly dry (at least six weeks) and completely cured. Curing agents, surface hardeners and other additives may cause adhesive bonding failure. These should be removed by sanding or grinding. 3. All concrete slabs must be checked for moisture before installing material. Follow ASTM F-1869 recommendations for performing calcium chloride test. Alternate Test F-2170 with a relative humidity level of 75% maximum. 4. Mannington Commercial heterogeneous flooring products must never be installed where hydrostatic pressure or excessive moisture vapor emissions may exist. Moisture emission from subfloor cannot exceed 3 lbs. per 1,000 sq. ft. per 24 hours. Mannington will not assume responsibility for floor covering failure due to hydrostatic pressure or moisture vapor emission that exceed the levels stated above. When using Mannington Commercial M-Guard V-88 the moisture level of concrete must be no greater than 8 lbs. /1000 sq. ft. /24 hours (2.27 kg /92.9 m2 /24 hours) as determined by a calcium chloride test according to ASTM F-1869 test method and/or 90% RH as determined by ASTM F in situ relative humidity test. If both tests are performed the RH test is the qualifying standard. The ph must be below The final responsibility for determining if the concrete is dry enough for installation of the flooring lies with the floor covering installer. 6. Concrete floors with a radiant heating system are satisfactory, provided the temperature of the floor does not exceed 90 F at any point. 7. Holes, grooves, and other depressions must be filled with a patching and leveling compound, (or equivalent) and troweled smooth and feathered even with the surrounding surface. Installation Existing Resilient Floor Coverings To achieve maximum product performance, Realities, Primus, Paradigm Collection and Vivendi Collection should not be installed over existing resilient floor coverings. In the rare cases where removal of the existing resilient floor covering is not an option, the existing flooring must be covered with an appropriate porous underlayment. NOTE: If the flooring contractor elects to install new floor covering over an existing floor covering, the flooring contractor assumes all responsibility as to the suitability and continued performance of the existing floor covering. If removal of existing resilient floor covering is required, follow all recommended Resilient Covering Flooring Institute (RFCI) work practices at NOTE: Consult Mannington s Commercial Installation Guide or the Recommended Work Practices brochure from the Resilient Floor Covering Institute for specific instructions on removal of old resilient floor covering. Visit WARNING: Do not sand, dry sweep, dry scrape, drill, saw, beadblast, or mechanically chip or pulverize existing resilient flooring, backing, lining felt, paint, asphaltic cutback adhesives, or other adhesives. These products may contain asbestos fibers or crystalline silica. Avoid creating dust. Inhalation of such dust is a cancer and respiratory tract hazard. Smoking by individuals exposed to asbestos fibers greatly increases the risk of serious bodily harm. Unless positively certain that the product is a non-asbestos-containing material, you must presume it contains asbestos. Regulations may require that the material be tested to determine asbestos content. The Resilient Floor Covering Institute (RFCI) document Recommended Work Practices for Removal of Resilient Floor Coverings should be consulted for a defined set of instructions addressed to the task of removing all resilient floor covering structures. For more information, visit the Resilient Floor Covering Institute at Cutting & Fitting It is imperative that the material, adhesive and job site be maintained at a minimum temperature of 65 F or a maximum of 90 F 48 hours before, during and 48 hours after installation. If the material has been stored at colder temperatures, it will be necessary to unroll the material and allow it to relax over night before proceeding with the installation. If the job site is complex and requires a precise fit, traditional pattern scribing techniques should be used. The material may also be fit using direct scribing techniques. Once the material has been fit, it will be necessary to tube or lap half of the sheet back to expose the underfloor for adhesive application. Care should be taken when folding the material back. Always fold the material in a wide radius to avoid sharp kinks and creases, which may cause breaks in the product. INSTALLATION 50
51 INSTALLATION Heterogeneous Sheet Flooring (continued) Installation (continued) Adhesive Application After the material has been trimmed to fit the room, it should be tubed or lapped back to expose the underfloor. On porous substrates, V-82 adhesive should be applied with a 1/16 wide, 1/32 deep spaced 1/32 apart notched trowel. M-Guard V-88 can be used on both porous and non-porous substrates. Over porous substrates apply with 1/16 x 1/32 x 1/32 U notched trowel. (1.6mm x 0.8mm x 0.8mm). Over non-porous substrates use a 1/16 x 1/32 x 5/64 U notched trowel(1.6mm x 0.8mm x 2mm). When installing homogenous sheet vinyl, it is recommended to trowel the adhesive then back roll with a short-nap paint roller to minimize the possibility of trowel ridge telegraphing. V-95 two-component epoxy adhesive must be used on all non-porous substrates and in areas demanding high performance. Follow all directions on adhesive container. V-95 has low initial tack, it may be necessary to apply weights, particularly in the seam area, until adhesive sets. V-95 should be applied with a 1/16 wide, 1/32 deep, spaced 1/32 apart notched trowel and then rolled with a 3/8 nap paint roller. The adhesive must be spread over 100% of the exposed subfloor, leaving no gaps or puddles. Uniform coverage can be maintained by keeping the trowel clean and properly notched. After the adhesive has been applied, roll the sheet forward into the adhesive to eliminate trapping air. Do not drop or flop the material into the adhesive. Roll the floor covering with a three-section 100 lb. or heavier floor roller in both directions. After the first half of the sheet has been adhered and rolled, fold back the second half and repeat the procedure. When using V-95, the flooring should be rolled with a 100 lb. floor roller within one hour after the flooring is installed. Wait 1 2 hours then re-roll again to insure full contact and to remove any trapped air. CAUTION: When providing open time, do not permit the adhesive to skin over or dry. Too much open time will result in insufficient bonding. Seaming Relay RE is available in 6 widths. Realities, Primus, Paradigm Collection and Vivendi Collection are available in 6, 9 and 12 widths. Choose product width to eliminate unnecessary seams and minimize waste. When seaming is required Relay RE should be positioned Reverse Sheets for seaming. Primus, Realities, Paradigm Collection and Vivendi Collection should be Do Not Reverse for seaming. The construction of heterogeneous flooring requires that the seams be cut using the trace cutting technique. INSTALLATION The selvage edge of one sheet should be straight-edged approximately 3/8 from the edge. Position the sheets in such a manner that the straight-edged top sheet will overlap the untrimmed bottom sheet and maintain the pattern match. Carefully trace along the edge of the top sheet with a utility knife with a sharp blade or a cutting tool designed for this purpose. Remove the trimmed selvage edge of the bottom sheet. Once the seams are cut, weigh the sheets and tube or lap back the sheets to expose the underfloor. Apply the appropriate Mannington adhesive using the correctly notched trowel over 100% of the exposed underfloor. After providing sufficient open time for the adhesive, lay the straight-edged sheet into the adhesive first and then lay in the second sheet. Roll the adhered areas to within about 6 of the seam line with a 100 lb. three-section floor roller. Roll the seam area with a hand seam roller to bring the seam edges level. Re-roll the entire adhered area with the 100 lb. floor roller. Thoroughly clean the seam area and wipe dry. Heat Welding Heterogeneous Flooring Seams may be heat welded using coordinating solid color weld rod. Wait at least 24 hours after initial installation to allow the adhesive to cure before grooving the flooring product to receive the heat weld rod. Proper temperature of the heat welding tool is critical to the success of this process. Heat welding is always dependent on speed of application and temperature. Practice on a scrap piece of material to determine optimum speed and temperature. After the weld rod has cooled, trim the applied weld rod in two steps. Always use a trim plate with a sharp spatula trim knife for the first pass. Trim weld rod flush with the spatula knife, being careful to not gouge the vinyl surface. Mannington Commercial Heat Weld Rod is color coordinated for use with Relay RE, Realities and Primus, Paradigm Collection and Vivendi Collection. Contrasting colors may be used if so desired. 51
52 INSTALLATION Heterogeneous Sheet Flooring (continued) Installation (continued) Chemical Seam Sealing Heterogeneous Flooring Seams may be sealed using the chemical seam sealing method. The seams will be sealed with MLG-33 and the VST 96 professional applicator tip. Before sealing the seams, make certain all seams are clean, dry and free of adhesive contamination. Fill the VST-96 applicator bottle at least 2/3 full of sealer. Tightly screw on the applicator tip. Before using, check the flow through the applicator on a scrap piece of flooring. Insert the fin into the seam cut and lightly squeeze the bottle to apply a uniform bead of sealer approximately 1/8 wide, centered on the seam cut. It is crucial that the seam sealer penetrates the full thickness of the seam cut to insure a proper chemical bond. Do not wipe the sealer from the surface of the flooring. Flash Coving All Mannington Commercial sheet flooring can be integrally self or flash coved at the wall line. Flash coving is the procedure in which the flooring material is continued up the wall to the height of 4 or 6 inches. This coving technique eliminates the floor-wall juncture and provides for easy maintenance. When flash coving is required, follow these recommendations: Prepare the area by installing a cove fillet strip and a cove cap (either aluminum or vinyl). The cap should be firmly attached to the wall at the designated height. Outside corners in the cap should be notched and formed rather than mitered. This eliminates a sharp edge at the corner. Cove fillet strip is available in both plastic and wood. The fillet strip should have a minimum 1 1/8 radius. The cove stick should be precisely mitered at all inside and outside corners and firmly secured into the floor or the wall. Best results can be obtained by pattern or template scribing Mannington Commercial Sheet flooring when flash coving is required. Traditional pattern scribing techniques should be followed. Inside corners should be cut net, with no fullness or gaps. Outside corners must be filled using boot plugs. Preformed metal corner caps may also be used. Finishing the Job Cover all exposed edges. Use wood molding or vinyl cove base along all walls, cabinet toekicks, etc. Use metal strips in doorways or where new flooring joins another floor covering. Caulk along tubs, toilet bowls, etc. Do not wash the floor for 48 hours after installation. After 48 hours, damp mop to remove residual surface dirt. Follow appropriate maintenance schedule for heterogeneous flooring products. Cautions & Miscellaneous Do not place heavy items on newly installed floor covering for at least 48 hours after completion of the installation. Heavy furniture should be equipped with suitable non-staining, wide-bearing casters. Furniture should be moved onto the newly installed floor using an appliance hand truck over hardboard runways. Floor covering subjected to excessive heat and light exposure is subject to thermal degradation. Use appropriate precautions to minimize potential affects on the floor covering. Oil or petroleum-based products can result in surface staining. Do not track asphalt driveway sealer or automobile oil drips onto the vinyl floor covering. Use non-staining walk-off mats at building entrances to remove excess dirt and grit from foot traffic rubber can discolor vinyl floor covering. INSTALLATION 52
53 INSTALLATION Inlaid, Homogenous Inlaid, Heterogeneous Light, Slip-Retardant Sheet Roll Widths PRODUCT CONSTRUCTION ROLL WIDTH MAXIMUM MVER Fine Fields, Magna Inlaid 6 wide rolls only 5 lbs 80% RH BioSpec MD Homogeneous Inlaid 6 wide rolls only 3 lbs 75% RH with M-Guard V-88 adhesive 8lbs 90% RH Aberdeen Collection, Insight Plus Heterogeneous Light 12 wide rolls only 3 lbs 75% RH Mannington Assurance II Slip-Retardant Sheet 6 wide rolls only 3 lbs 75% RH with M-Guard V-88 adhesive 8lbs 90% RH Because Mannington Commercial Resilient Sheet Flooring products are intended for use in high-traffic areas, underfloor selection and preparation are especially important. In most cases, remove all existing floor coverings before installing these commercial products. (You must strictly follow all federal, state, and local regulations regarding the removal of existing flooring.) Furthermore, all concrete under floors must be tested for moisture before starting the installation. Mannington requires that the concrete be tested for moisture using either the anhydrous calcium chloride test following ASTM F 1869 procedures and or the in-situ relative humidity test following ASTM F Maximum permissible MVER are determined by product construction and adhesive type (see chart above). NOTE: While either of these industry accepted moisture testing methods may be used, the results are not exchangeable, if both tests are performed they must both be in the acceptable range to be considered valid. Handling Procedures It is imperative to maintain the material, adhesive, and job site at a minimum temperature of 65 F and a maximum temperature of 85 F for 48 hours before, during, and after the installation. If the material has been stored at colder temperatures, it will need to be unrolled and allowed to relax overnight before proceeding with the installation. When using V-95 adhesive, make sure to maintain the adhesive, floor covering, and job site at a minimum temperature of 65 F for a minimum of 48 hours before, during, and after the installation. NOTE: If the flooring contractor elects to install new floor covering over an existing floor covering, the flooring contractor assumes all responsibility as to the suitability and continued performance of the existing floor covering. If removal of existing resilient floor covering is required, follow all recommended Resilient Covering Flooring Institute (RFCI) work practices at Please be aware that installing these products over existing flooring may reduce their excellent indentation resistance. These products may also be installed over properly prepared and approved wood panel or wood composition panel underlayments on wood subfloor systems. INSTALLATION CAUTION: Do not sand, dry sweep, dry scrape, drill, saw, beadblast, or mechanically chip or pulverize existing resilient flooring, backing, lining felt, paint, asphaltic cutback adhesives, or other adhesives. These products may contain asbestos fibers or crystalline silica. Avoid creating dust. Inhalation of such dust is a cancer and respiratory tract hazard. Smoking by individuals exposed to asbestos fibers greatly increases the risk of serious bodily harm. Unless positively certain that the product is a non-asbestos-containing material, you must presume it contains asbestos. Regulations may require that the material be tested to determine asbestos content. The Resilient Floor Covering Institute (RFCI) document Recommended Work Practices for Removal of Resilient Floor Coverings should be consulted for a defined set of instructions addressed to the task of removing all resilient floor covering structures. For more information visit the Resilient Floor Covering Institute at Patching & Leveling Compounds We recommend the use of latex / Portland cement trowelable underlayments or self-leveling cementitious products for repairing or leveling concrete subfloors. Sand and fill approved underlayment panel joints using a latex / Portland cement compound. Do not use gypsum or mineral-based patching compounds in commercial applications under any circumstances. 53
54 INSTALLATION Inlaid, Homogenous Inlaid, Heterogeneous Light, Slip-Retardant Sheet (continued) Cutting & Fitting Mannington Commercial inlaid products are flexible and will handle easily when cutting and fitting. This product characteristic enables the installer to fit the material using freehand knifing techniques. If the job site is complex and requires a precise fit, use pattern-scribing techniques. The material may also be fit using direct scribing techniques. (Refer to Mannington s Professional Installation Handbook for pattern scribing and direct scribing.) Once the material has been fit, it is necessary to tube or lap back half of the sheet to expose the underfloor for adhesive application. Take care when folding the material back. Always fold the material in a wide radius to avoid sharp kinks and creases, which may cause breaks in the product. Applying Adhesive Fully adhere Mannington Commercial resilient sheet flooring to an approved underfloor. After you have trimmed the material to fit the room, tube or lap it back to expose the underfloor. Apply adhesive with the recommended notched trowels found in the adhesive label. Spread adhesive over 100% of the exposed subfloor, leaving no gaps or puddles. Maintain uniform coverage by keeping the trowel clean and properly notched. In most cases it is advisable to give the adhesive sufficient open time. Open time allows the moisture to flash off the adhesive, permitting the adhesive to develop more body and immediate tack. Open time is always determined by subfloor porosity and atmospheric conditions. Be certain to provide ample open time on non-porous subfloors and at seam lines. After the adhesive has begun to tack-up, roll the sheet forward into the adhesive to avoid trapping air. Do not drop or flop the material into the adhesive. Roll the floor covering with a three-section, 100 lb (or heavier) floor roller in both directions. After the first half of the sheet has been adhered and rolled, fold back the second half and repeat the procedure. CAUTIONS: When providing open time, do not permit the adhesive to skin over or dry. Too much open time will result in insufficient bonding. BioSpec MD and LifeLines II should be installed using V-82 adhesive over porous substrates. Use V-95 adhesive over non-porous substrates. M-Guard V-88 may be used over both porous and non-porous subfloors. Mannington V-95 adhesive has low initial tack. It may be necessary to apply weights to the floor covering, especially in the seam area, until the adhesive sets. When using V-95 adhesive, roll the adhered flooring with a 100 lb (or heavier) roller within one hour after the flooring is installed. Wait one to two hours and re-roll the flooring again to ensure full contact has been achieved. Re-rolling the material will also help remove any trapped air bubbles. Seam Cutting & Seam Sealing PRODUCT METHOD TO USE Aberdeen Collection, Insight Plus Traditional Double-cutting method Magna, Fine Fields, BioSpec MD, Mannington Assurance II Recess Scribing method Double-Cutting Seams Aberdeen Collection and Insight plus 1. If required to seam Aberdeen Collection or Insight Plus products, provide additional length on the second and succeeding sheets to allow for proper pattern alignment. 2. Position Aberdeen Collection and Insight Plus floors using the Reverse or Do not Reverse method. INSTALLATION 3. To minimize pattern run-out, the floor covering should always be laid out minimizing the length of the seams. 4. Cut material to the appropriate sizes the day before the actual installation. 5. Store the material at recommended temperatures. 6. Roll these cuts tightly, face-out around a core, maintaining as equal a diameter as possible. 54
55 INSTALLATION Inlaid, Homogenous Inlaid, Heterogeneous Light, Slip-Retardant Sheet (continued) Double-Cutting Seams (continued) 7. Cut and install the pieces in sequential order. If the job requires more than one roll of floor covering, make sure all rolls are marked with the same shade letter and that the roll serial numbers are in consecutive order. 8. After aligning the pattern and providing adequate overlap, adhere the sheets of material up to the predestinated dry zone. 9. Cut the seam using a utility knife with a new, sharp blade. Using a steel straightedge, cut through both sheets of flooring at a 90 angle to the floor covering. 10. Once you have cut the seam, remove the selvage and fold back the sheets to expose the dry zone. 11. Apply adhesive with a properly notched trowel across the dry zone. 12. Allow the adhesive to develop tack and lay the sheet that was on the bottom during the cutting process into the adhesive first. 13. Then place the top sheet into the adhesive; avoid scraping adhesive into the cut. Roll the area with the three-section floor roller. 14. Bring seam edges level with the use of a hand seam roller. 15. Thoroughly clean the seam area and wipe dry. For a more detailed and photographed description, see Mannington s Professional Installation Handbook. Sealing Seams Aberdeen Collection and Insight Plus Seal all Aberdeen Collection and Insight Plus seams using Mannington Commercial MLG 33 Seam Sealer. Fill the applicator bottle at least two thirds full with the seam-sealing liquid and allow all entrapped air bubbles to disperse prior to sealing the seam. Follow the seam sealing directions in Mannington s Professional Installation Guide, but do not wipe the sealer from the surface of the Aberdeen Collection and Insight Plus. Allow the seam sealer to thoroughly dry (minimum two hours) before traffic is allowed on the floor. Do not allow dirt or dust to contaminate the wet sealer. Avoid walking on the seam or moving heavy furniture over it for another 24 hours. It is crucial to apply the seam sealer between the full thickness of the floor covering from top to bottom. To ensure a strong, tight seam make sure there are no skips or skids along the cut. A properly sealed seam will provide a continuous, impervious surface and will remain intact for the life of the flooring. Recess Scribing Seams for Inlaid Construction Mannington Assurance II, BioSpec MD, Fine Fields, and Magna INSTALLATION When seaming is required with Magna, Fine Fields, BioSpec MD, and Mannington Assurance II, position the materials as Reverse Sheets. This requires positioning similar sides of the sheet together. Cut the selvage edge of one sheet using a straightedge and a utility knife or edge trimmer. Trim off about 3/8 from the edge. Trimming is necessary since 6 rolls are typically stored on-end causing compression on one edge. Or the rolls might even be damaged during transport. Position the sheets in such a manner that the top sheet will overlap the previously straightened sheet by approximately 1/2. Fold back the sheets to expose the underfloor and apply the appropriate adhesive. Place the trimmed sheet into the adhesive while providing sufficient overlap of the second sheet; then lay in the second sheet. Roll the adhered areas to within 6 of the seam line with a 100 lb three-section floor roller. Adjust the recess scriber before actually cutting the seam by cutting a slit in a scrap piece of resilient flooring material. Insert the button on one edge of the slit. The needle should just touch the opposite side of the slit. Make sure to set the scriber to produce a net fit, neither gapped nor too full. Using a recess-scribing tool, insert the scriber against the straightedge piece of resilient. Use the bottom end of the tool, the guide, to follow the bottom sheet and lightly score the top sheet with the needle of the scribing tool. Keep the scribing tool perpendicular to the seam when scribing. Cut the seam net with a utility knife (straight or hook blade). Cut the seam by following the scribed mark. A burr may be created on the seam in the needle of the scriber is set too deep or too much pressure is applied. Remove any burrs by placing the seam with the back of a hook knife. CAUTION: If the scriber is pulled too tightly against the bottom sheet, the seam will be too full to have the potential to peak. After scribing and cutting the seam, roll the seam area with a hand seam roller to bring the seam edges level. Re-roll the entire adhered area with the 100 lb floor roller. Thoroughly clean the seam area and wipe dry. 55
56 INSTALLATION Inlaid, Homogenous Inlaid, Heterogeneous Light, Slip-Retardant Sheet (continued) Recommended Seaming Methods - Chemical or Heat Welded Seams PRODUCT CHEMICALLY WELDED HEAT WELDED Mannington Assurance II, BioSpec MD Recommended Recommended-Preferred Method Fine Fields, Magna Recommended Recommended-Preferred Method Aberdeen Collection, Insight Plus Recommended Not Recommended Mannington Assurance II To utilize a chemical seam sealing method for Mannington Assurance II, the flooring must be installed full spread using appropriate adhesive. Using V-95 centered at the seam location in a 4-6 wide band. After installing the flooring, apply a narrow bead of MLG-33 seam sealer using the applicator with the fin up. Do not insert the fin into the seam. Be sure that the sealer is in contact with both sides of the flooring. Leave this bead of sealer on top of the flooring. Do not wipe the seam. Allow 24 hours for the sealer to set up before allowing foot traffic or moving furniture / appliances across seamed area. Chemical Seam Sealing Magna, Fine Fields, and BioSpec MD Thoroughly clean the seam of all adhesives, dirt, etc, before sealing it. If the seams are to be chemically welded, use Mannington Commercial MCS 42 Seam Sealer. When inserting the applicator tip into the seam cut, it is crucial that the seam sealer be applied to the full depth of the cut. Wipe off all sealer from the surface of the seam with a clean white cloth dampened with mineral spirits. Because the seam sealer should not be allowed to remain on the surface of the flooring more than 30 or 40 seconds, it is recommended 5 or 6 lineal feet of seam be sealed and then wiped clean. Be certain to overlap each application of seam sealer. Heat Welding Heat welding is the act of fusing resilient sheets together with a heated thermal vinyl weld rod. This technique is suitable for installing the following Mannington Commercial resilient sheet flooring products: Fine Fields, BioSpec MD, Magna, and Mannington Assurance II. Never use heat welding on Mannington resilient products, Aberdeen Collection or Insight Plus. NOTE: Heat welding is the preferred method of sealing seams for homogeneous products. Weld Rods Mannington s weld rod is available on spools and is designed to fit the most popular heat welding guns. Mannington offers a broad range of solid rod colors to coordinate with all of our heat-weldable flooring. Camouflage weld rods are offered for Fine Fields and BioSpec MD. Heat Welding Recommendations To achieve good sealing results, knowledge of proper heat welding procedures is important. A repeated stop / start method will produce rough uneven seams, creating an unpleasant appearance. Temperature setting is critical to the success of any heat welding application. If the welding gun is set too hot or applied too slowly, the flooring is likely to burn, char, or craze the surface next to the weld rod. If welding gun is not hot enough or applied too quickly, the weld may have poor fusion. Follow all Mannington temperature requirements to achieve an even seam with good bond strength and integrity. After waiting 24 hours for the adhesive to dry, use a power-grooving machine to cut a groove the entire length of the seam. Adjust the machine so the depth of the groove is about two thirds of the product s thickness. Stop machine grooving several inches away from the wall. Extend the groove to the wall using a hand-grooving tool. INSTALLATION 56
57 INSTALLATION Inlaid, Homogenous Inlaid, Heterogeneous Light, Slip-Retardant Sheet (continued) Heat Welding Recommendations (continued) Prior to heat welding, allow the flooring adhesive to completely dry. Preheat welding gun and determine proper temperature setting and router depth by practicing on scrap pieces of flooring. Make certain the speed nozzle is clean and free of obstructions. Insert welding rod into the speed nozzle allowing approximately 3 to extend out. Arrange welding rod in such a manner that it will not interfere with the application. Be careful when inserting the welding rod because the nozzle is extremely hot. Pull the gun along the length of the seam toward your body while maintaining a downward pressure. Keep the gun perpendicular to the floor. Weld the seam at a constant, even speed. Stop and change direction of the weld when you are near the back wall. Pull the gun out of the groove and cut the weld rod. Remove the urethane coating before heat welding inside corner by grooving or sanding. Performed metal corner caps may also be used. Allow welded rod to cool, and then groove the installed rod with a hand-grooving tool. Grooving the rod makes it possible to achieve complete seam coverage when you start seaming from the opposite direction to finish the job. Reposition yourself and your tools at the back wall and continue welding into the grooved rod you just made so there are no missed spots in the seam. It is important to achieve a smooth, continuous coverage of the rod into the seam. After the welded rod shrinks and cools for approximately 30 minutes, trim down the excess by using the following two steps: Remove approximately two thirds of the exposed welded rod. Use a spatula trim knife and trim plate to trim off the top layer. There should be about 1/32 excess weld rod projected above the surface of the resilient. CAUTION: When trimming weld rods on Mannington Assurance II, do not allow weld rod to cool. The second step is to trim the welded rod level until it is flush with the surface of the resilient sheet. Use an extremely sharp spatula knife without the trim place at a 5 to 10 angle to the floor surface. Keep the sharpened side down against the welded rod. Be careful not to cut or dig into the resilient surface. Inspect the finished seam carefully and remove any missed high spots with a spatula knife. If there are low spots, the seam weld may require a rod reapplication. Once the entire area has been trimmed and inspected, smooth out seam with one of the two recommended methods. When using camouflage weld rods, both steps are required. 1. Glaze Curing the Seam: Apply heat from the welding tool by removing speed nozzle and using the same heat setting to direct a flow of heat from the gun along the length of the seam. 2. Seam Sealing the Seam: To smooth out the seam, apply MCS 42 seam sealer to the welded seam and leave it on no longer than 30 to 40 seconds. Wipe all sealer from the surface of the seam with a clean white cloth dampened with mineral spirits. Do not wipe the seams of camouflage weld rods. Allow the sealer to be absorbed into the rod. Both of these two last steps reduce porosity of the trimmed rod and glaze the surface of the welded rod to produce a smooth, continuous appearance. 3. When the delayed maintenance procedure is used the glazed weld rod should be protected by applying a uniform coating from QGHP marker. This antimicrobial, protective coating will keep the seam area clean. INSTALLATION Finishing & Maintenance Protect all exposed edges of floor covering with trim or restrictive moldings. Remove all scraps and trash from the jobsite. Remove all adhesive smears or residue from the surface of the floor covering with a clean cloth dampened with mineral spirits. After 24 hours of the completed installation, thoroughly clean the floor. Repairs Replacing Damaged Areas If possible, the floor covering repair piece should come from the original installation. Typically, consumers retain leftover pieces from the original installation. Tape the repair piece over the damaged area and double-cut using a steel square as a guide. Remove the damaged area and scrape the subfloor clean. Apply adhesive on the back of the repair piece and insert into the flooring. Roll the repair piece with a hand seam roller. Use the appropriate Mannington seam sealer to seal all cuts. 57
58 INSTALLATION Inlaid, Homogenous Inlaid, Heterogeneous Light, Slip-Retardant Sheet (continued) Flash Coving Resilient Sheet Products All Mannington resilient sheet goods can be installed using the flash coving method. This edging technique, often preferred by hospitals and other health care facilities, is a process of extending the resilient flooring up the wall to create a wall base. Normally, the floor covering is extended up the wall to a height of 4 to 6. Coving is popular with end users because it eliminates the need for a floor/wall juncture and it is also easy to maintain. As with all resilient installations, proper preparation of the work area is critical to the success of the installation. Clean the underfloor carefully and make certain it is structurally sound. The juncture of the floor and wall also needs special preparation before beginning a coved installation. Follow the instructions below to install the cove cap and the cove stick (cove fillet strip). Measure desired height for the cove caps at each corner and strike a chalk line. Attach aluminum or vinyl cove caps at this height using flathead nails with a hammer or brad pusher, or use contact cement. Always miter inside and outside corners in the cap. When mitering the outside corners, file the ends of the cap smooth. Use a specially designed miter tool with interchangeable die sets to make corners on the cove cap. This tool eliminates sharp edges at the outside corners. Cove sticks support the resilient flooring as it is flashed up the wall, eliminating the chance of puncturing the resilient flooring. Firmly secure plastic or wood cove sticks where the floor meets the wall with adhesive or nails. Use nonstaining nails and set the flush with the stick. The stick should have a minimum radius of 1 1/8 and be precisely mitered at all inside and outside corners. Provide a smooth transition in the door casings and other areas where the coving ends by cutting back to the cove stick. Tack the scribing felt to the wall with brad type nails before beginning to scribe it. Use a combination square, a small metal ruler, or a 1 piece of resilient to pattern scribe the felt. Fit the scribing tool up inside the cove cap and scribe the felt by sliding the tool along the cap as you mark the felt with a pencil. Scribe and cut the outside corners of the felt using a utility knife and the inside corners of the felt, using dividers. After scribing the entire work area, position the pattern squarely on the resilient sheet flooring and transcribe the pattern with pencil dividers. Be careful when cutting the material on the inside and outside corners. Dry fit the material. Inside corners should fit snug, but not be forced into position. Make sure to always position the shorter side first and then the longer side. Gently pull material away from the wall. Apply the appropriate adhesive to the floor, wall, cove cap, and cove stick. Allow the appropriate amount of open time. Fit the material back into place. Remember to always position the shorter side first. Roll the flooring with the appropriate size roller (use a hand roller on coved areas). Apply the appropriate seam sealer at all seams, following the recommended directions for the resilient floor being installed. The most demanding aspect of a coved installation is forming the outside corners. Fill outside corners with a boot type plug, rather than a V-type plug, on the least visible wall. The plugged corner fill piece should extend back at least several inches from the corner. The seam of the floor should be below the cove stick. Using an underscriber, scribe the back of the plug at the corner. This will mark the pattern of the corner on the plug. Cut along the scribed line at a 45 angle with a curved trim knife or a utility blade while holding the plug steady with a metal ruler and your other hand. When cutting, leave the face of the plug longer than the back. Check the fill piece for accurate fit. Make any minor adjustments to the plug as necessary to fill the space correctly. Remove the fitted fill piece and apply the appropriate adhesive. Reposition the fill piece and apply seam sealer. NOTE: If planning to heat weld the seams, be aware that only Mannington Commercial Fine Fields, BioSpec MD, Mannington Assurance II, and Magna products can be used. Remove the urethane coating before heat welding each inside corner by grooving or sanding. Preformed metal corner caps may also be used. INSTALLATION 58
59 A D H E S I V E S XpressStep Spray Flooring Adhesive for LVT Plank & Tile & Infinity Carpet Tile Installation 1. Store adhesive at a minimum temperature of 68 F (20 C) for 24 hours prior to installation. Condition flooring per manufacturer s recommendations. 2. Ensure substrate, fooring and surrounding areas are clean and dust free. Damp-mop substrate if dust is present. Only use Portland based patching and leveling compounds. 3. Wipe hand across surface. If dust transfers, substrate is not clean. 4. HVAC must be continuously operated for a minimum of 48 hours at a temperature between F (20-35 C) and a relative humidity between 30-60% prior to, durring and following installation. 5. Protect from overspray with a spray shield, drop cloths, paper or masking. 6. Shake aerosol can well. Remove black cap. 7. Stand straight up to spray. Hold can upside down, approximately inches (50-76 cm) horizontally from the substrate, aim at floor and press tip with finger. Walk right to left smoothly to achieve results in photo below. Adhesive should spray out in a wide mist and fall similar to snow. NOTE: Spraying in a sweeping motion may result in an inconsistent spray pattern. Excess buildup or inconsistent spray pattern on substrate may cause telegraphing. Avoid extremely heavy application. 8. To ensure optimal spray pattern, remove any adhesive build up on the spray tip that may occure during the application process. 9. If overspray occurs, it may be removed with a damp cloth while the adhesive is still wet. 10. Allow adhesive to dry until there is no adhesive transfer when lightly touched (10-20 min). High humidity and/or low temperature increases tack time. 11. Open time after application is 4 hours. While open, ensure that adhesive is not contaminated by dust. 12. Follow flooring manufacturer s recommendations for installation. Position tile or plank, ensure proper alignment before application of pressure. Reposition as necessary. 13. Roll flooring with a lb(45 kg) roller within 1 hour after installation to complete the bonding process. After rolling, floor is ready for all access. Coverage Per Can ft 2 ( m 2 ) Match spray pattern by placing guide on floor. Cautions CONTENTS UNDER PRESSURE. Do not puncture or incinerate container. Do not expose to heat or store at temperature above 120 F. Avoid contact with eyes and prolonged contact with skin. Use with adequate ventilation. Do not take internally. First Aid In case of contact with eyes, flush thoroughly with water. If irritation persists, get medical attention. For skin contact, wash with soap and water. If ingested, do not induce vomiting. Contact Physician. KEEP OUT OF REACH OF CHILDREN. ADHESIVES

60 A D H E S I V E S XpressStep Premium Spray Flooring Adhesive for LVT Plank & Tile Installation 1. Store adhesive at a minimum temperature of 68 F (20 C) for 24 hours prior to installation. Condition flooring per manufacturer s recommendations. 2. Ensure substrate, fooring and surrounding areas are clean and dust free. Damp-mop substrate if dust is present. Only use Portland based patching and leveling compounds. 3. Wipe hand across surface. If dust transfers, substrate is not clean. 4. HVAC must be continuously operated for a minimum of 48 hours at a temperature between F (20-35 C) and a relative humidity between 30-60% prior to, during and following installation. 5. Protect from overspray with a spray shield, drop cloths, paper or masking. 6. Shake aerosol can well. Remove black cap. 7. Stand straight up to spray. Hold can upside down, approximately inches (50-76 cm) horizontally from the substrate, aim at floor and press tip with finger. Walk right to left smoothly to achieve results in photo below. Adhesive should spray out in a wide mist and fall similar to snow. NOTE: Spraying in a sweeping motion may result in an inconsistent spray pattern. Excess buildup or inconsistent spray pattern on substrate may cause telegraphing. Avoid extremely heavy application. 8. To ensure optimal spray pattern, remove any adhesive build up on the spray tip that may occure during the application process. 9. If overspray occurs, it may be removed with a damp cloth while the adhesive is still wet. 10. Allow adhesive to dry until there is no adhesive transfer when lightly touched (10-20 min). High humidity and/or low temperature increases tack time. 11. Open time after application is 4 hours. While open, ensure that adhesive is not contaminated by dust. 12. Follow flooring manufacturer s recommendations for installation. Position tile or plank, ensure proper alignment before application of pressure. Reposition as necessary. 13. Roll flooring with a lb(45 kg) roller within 1 hour after installation to complete the bonding process. After rolling, floor is ready for all access. Coverage Per Can ft 2 ( m 2 ) Match spray pattern by placing guide on floor. Cautions CONTENTS UNDER PRESSURE. Do not puncture or incinerate container. Do not expose to heat or store at temperature above 120 F. Avoid contact with eyes and prolonged contact with skin. Use with adequate ventilation. Do not take internally. First Aid In case of contact with eyes, flush thoroughly with water. If irritation persists, get medical attention. For skin contact, wash with soap and water. If ingested, do not induce vomiting. Contact Physician. KEEP OUT OF REACH OF CHILDREN. ADHESIVES
61 A D H E S I V E S XpressStep Spray Flooring Adhesive for LVT Plank & Tile & Infinity Carpet Tile Description Faster Installation Low Odor / Low VOC Uses Up To 80% Less Adhesive Non-Toxic Water-Based No Troweling Non-Flammable XpressStep is a water-based spray adhesive recommended for installations of luxury vinyl tiles and planks over porous and non-porous substrates. It is particularly convenient since it can be used in occupied buildings and greatly reduces the handling and application requirements associated with conventional adhesives. XpressStep has a very low odor and a very low VOC contents. For best bond performance with Mannington floors, Mannington trowel-able adhesives remain the standard. However spray adhesives have advanced sufficiently in ease of use, less material required and faster installation along with adequate bond performance that Mannington can now offer XpressStep to install with our Mannington modular tiles and planks particularly Commercial Luxury Vinyl Tile-Planks. Environmental XpressStep Adhesive may contribute to points within the LEED Rating System (where applicable): Low Emitting Materials, adhesives that comply with the requirements of the South Coast Air Quality Management District (SCAQMD) Rule #1168. NOTE: SHAKE WELL BEFORE EACH USE - CONTENTS UNDER PRESSURE Coverage Coverage will depend on use, approximately square feet per can. Open Time Allow the adhesive to become tacky to the touch with little or no transfer to fingers when lightly touched. Open time will vary depending on the substrate, adhesive coverage and the ambient conditions. Working time for the adhesive is up to 4 hours. Shelf Life 3 year from the manufacturing date, in an unused container. Protect from freezing at all time. ADHESIVES Substrate Preparations XpressStep may be used on porous or non-porous surfaces, such as metal, wood, fiberglass, terrazzo, and existing properly prepared vinyl Composition tile, and concrete substrates with up to 90% in-situ Relative Humidity as determined per latest version of ASTM F2170, ph up to 11.0, and 8 lbs. Calcium Chloride. Follow concrete substrate preparation guidelines for resilient flooring as outlined in latest version of ASTM F710. For installation over Mannington approved panel substrates follow ASTM F The substrate must be sound, even, smooth, dry and absolutely clean. Remove any dirt, dust, wax, loose paint, existing adhesives, concrete sealers, curing and parting agents, and all other foreign matter that would interfere with a good bond. The installation site must be acclimated with HVAC in operation. Use only Portland based patching and leveling compounds. The room temperature, as well as flooring materials and adhesive, must be maintained between F, and the relative humidity between 30%-60% for 48 hours prior to, during and after the installation. Do not use on substrates that have been chemically cleaned. Application Shake can well. Point can downwards, lightly press the side of the nozzle tip while walking slowly back and forth. Do not use a sweeping arm motion as this will create uneven coverage. Installation Roll flooring immediately after installation is complete with an appropriate lb. 3-section roller. Normal traffic may be allowed as soon as the installation, finishing and clean-up are complete. 61
62 A D H E S I V E S XpressStep Spray Flooring Adhesive for LVT Plank & Tile & Infinity Carpet Tile (continued) Safety & Clean Up Wet adhesive overspray or drips should be cleaned with damp cloth. Dried adhesive may require the use of an adhesive remover such as low odor mineral spirits or equivalent. Between uses, clean the spray tip immediately with a clean wet cloth to prevent accumulation of dried adhesive. Empty aluminum spray cans; bleed off excess pressure and recycle or dispose of in accordance with local requirements. Warning Do not puncture or incinerate. Keep out of reach of children. Always put cap on after use. First Aid Avoid contact with eyes and skin. For eye contact, flush thoroughly with water for 15 minutes and get immediate. Disclaimer Users should determine the suitability of this information or product for their own particular purpose or application. Mannington is not responsible for the misuse of this product. Order Code Order Size 6 cans box 22 oz can ADHESIVES 62
63 A D H E S I V E S XpressStep for Sheet Vinyl Description Faster Installation Low Odor / Low VOC Uses Up To 80% Less Adhesive No Troweling Non-Flammable Heat Weld in 1 Hour May Be Used Under Hospital Beds XpressStep is a water-based spray adhesive recommended for installations of sheet vinyl over porous and non-porous substrates. It is particularly convenient since it can be used in occupied buildings and greatly reduces the handling and application requirements associated with conventional adhesives. XpressStep has a very low odor and a very low VOC contents. For best bond performance with Mannington floors, Mannington trowel-able adhesives remain the standard. However spray adhesives have advanced sufficiently in ease of use, less material required and faster installation along with adequate bond performance that Mannington can now offer XpressStep to install with Relay RE, Realities, Paradigm Collection, BioSpec MD, Primus, Vivendi Collection, and Mannington Assurance II. Environmental XpressStep Adhesive may contribute to points within the LEED Rating System (where applicable): Low Emitting Materials, adhesives that comply with the requirements of the South Coast Air Quality Management District (SCAQMD) Rule #1168. NOTE: SHAKE WELL BEFORE EACH USE - CONTENTS UNDER PRESSURE Coverage Coverage will depend on use, approximately square feet per can. Open Time Allow the adhesive to become tacky to the touch with little or no transfer to fingers when lightly touched. Open time will vary depending on the substrate, adhesive coverage and the ambient conditions. Working time for the adhesive is up to 3 hours. Shelf Life 3 year from the manufacturing date, in an unused container. Protect from freezing at all time. ADHESIVES Substrate Preparations XpressStep may be used on porous or non-porous surfaces, such as metal, wood, fiberglass, terrazzo, and existing properly prepared vinyl Composition tile, and concrete substrates with up to 90% in-situ Relative Humidity as determined per latest version of ASTM F2170, ph up to 10.0, and 8 lbs. Calcium Chloride (ASTM F 1869). Follow concrete substrate preparation guidelines for resilient flooring as outlined in latest version of ASTM F710. For installation over Mannington approved panel substrates follow ASTM F The substrate must be sound, level, smooth, dry and absolutely clean. Remove any dirt, dust, stains, wax, loose paint, existing adhesives, concrete sealers, curing and parting agents, and all other foreign matter that would interfere with a good bond. The installation site must be acclimated with permanent HVAC or equivalent, in operation. Use only Portland based patching and leveling compounds. The room temperature, as well as flooring materials and adhesive, must be maintained between F, and the relative humidity between 30%-60% for 48 hours prior to, during and after the installation. Do not use on substrates that have been chemically cleaned. Application Shake can well. Point can downwards, lightly press the side of the nozzle tip while walking slowly back and forth. Do not use a sweeping arm motion as this will create uneven coverage. Installation Roll flooring immediately after installation is complete with an appropriate lb. 3-section roller. Normal traffic may be allowed as soon as the installation, finishing and clean-up are complete. 63
64 A D H E S I V E S XpressStep for Sheet Vinyl (continued) Safety & Clean Up Wet adhesive overspray or drips should be cleaned with damp cloth. Dried adhesive may require the use of an adhesive remover such as low odor mineral spirits or equivalent. Between uses, clean the spray tip immediately with a clean wet cloth to prevent accumulation of dried adhesive. Empty aluminum spray cans; bleed off excess pressure and recycle or dispose of in accordance with local requirements. Warning Do not puncture or incinerate. Keep out of reach of children. Always put cap on after use. First Aid Avoid contact with eyes and skin. For eye contact, flush thoroughly with water for 15 minutes and get immediate. Disclaimer Users should determine the suitability of this information or product for their own particular purpose or application. Mannington is not responsible for the misuse of this product. Order Code Order Size Six - 22 oz cans per box ADHESIVES 64
65 A D H E S I V E S XpressStep for VCT Description Faster Installation Low Odor / Low VOC Uses Up To 80% Less Adhesive Non-Toxic Water Based No Troweling Non-Flammable XpressStep is a water-based spray adhesive recommended for installations of VCT and Premium VCT over porous and non-porous substrates. It is particularly convenient since it can be used in occupied buildings and greatly reduces the handling and application requirements associated with conventional adhesives. XpressStep has a very low odor and a very low VOC contents. For best bond performance with Mannington floors, Mannington trowel-able adhesives remain the standard. However spray adhesives have advanced sufficiently in ease of use, less material required and faster installation along with adequate bond performance that Mannington can now offer XpressStep to install with VCT and Premium VCT. Environmental XpressStep Adhesive may contribute to points within the LEED Rating System (where applicable): Low Emitting Materials, adhesives that comply with the requirements of the South Coast Air Quality Management District (SCAQMD) Rule #1168. NOTE: SHAKE WELL BEFORE EACH USE - CONTENTS UNDER PRESSURE Coverage Coverage will depend on use, approximately square feet per can. Open Time Allow the adhesive to become tacky to the touch with little or no transfer to fingers when lightly touched. Open time will vary depending on the substrate, adhesive coverage and the ambient conditions. Working time for the adhesive is up to 4 hours. Shelf Life 3 year from the manufacturing date, in an unused container. Protect from freezing at all time. ADHESIVES Substrate Preparations XpressStep may be used on porous or non-porous surfaces, such as metal, wood, fiberglass, terrazzo, and existing properly prepared vinyl Composition tile, and concrete substrates with up to 90% in-situ Relative Humidity as determined per latest version of ASTM F2170, ph up to 11.0, and 8 lbs. Calcium Chloride. Follow concrete substrate preparation guidelines for resilient flooring as outlined in latest version of ASTM F710. For installation over Mannington approved panel substrates follow ASTM F The substrate must be sound, even, smooth, dry and absolutely clean. Remove any dirt, dust, wax, loose paint, existing adhesives, concrete sealers, curing and parting agents, and all other foreign matter that would interfere with a good bond. The installation site must be acclimated with HVAC in operation. Use only Portland based patching and leveling compounds. The room temperature, as well as flooring materials and adhesive, must be maintained between F, and the relative humidity between 30%-60% for 48 hours prior to, during and after the installation. Do not use on substrates that have been chemically cleaned. Application Shake can well. Point can downwards, lightly press the side of the nozzle tip while walking slowly back and forth. Do not use a sweeping arm motion as this will create uneven coverage. Installation Roll flooring immediately after installation is complete with an appropriate lb. 3-section roller. Normal traffic may be allowed as soon as the installation, finishing and clean-up are complete. 65
66 A D H E S I V E S XpressStep for VCT (continued) Safety & Clean Up Wet adhesive overspray or drips should be cleaned with damp cloth. Dried adhesive may require the use of an adhesive remover such as low odor mineral spirits or equivalent. Between uses, clean the spray tip immediately with a clean wet cloth to prevent accumulation of dried adhesive. Empty aluminum spray cans; bleed off excess pressure and recycle or dispose of in accordance with local requirements. Warning Do not puncture or incinerate. Keep out of reach of children. Always put cap on after use. First Aid Avoid contact with eyes and skin. For eye contact, flush thoroughly with water for 15 minutes and get immediate. Disclaimer Users should determine the suitability of this information or product for their own particular purpose or application. Mannington is not responsible for the misuse of this product. Order Code Order Size 6 cans box 22 oz can ADHESIVES 66
67 INSTALLATION ColorFields Smooth Rubber Sheet Flooring Products Mannington s ColorFields Sheet Rubber Flooring Roll Widths PRODUCT CONSTRUCTION ROLL WIDTH ROLL LENGTH MAXIMUM MVER ColorFields Smooth Rubber Sheet Flooring Type TS Thermoset Rubber - Homogeneous 48 (1.2 M) 50 ft. (15 M) Min NB. Some rolls may contain 2 sheets with one sheet being a minimum of 15 ft. (4.5M) in length. 3 lbs. 75% RH Because Mannington Commercial Rubber Sheet Flooring products are intended for use in high-traffic areas, underfloor selection and preparation are especially important. In most cases, remove all existing floor coverings before installing these commercial products. (You must strictly follow all federal, state, and local regulations regarding the removal of existing flooring.) Furthermore, all concrete under floors must be tested for moisture before starting the installation. Mannington requires that the concrete be tested for moisture using either the anhydrous calcium chloride test following ASTM F 1869 procedures and or the in-situ relative humidity test following ASTM F Maximum permissible MVER are determined by product construction and adhesive type (see chart above). NOTE: While either of the industry accepted moisture-testing methods may be used, the results are not exchangeable, if both tests are performed they must both be in the acceptable range to be considered valid. Handling Instructions It is imperative to maintain the material, adhesive, and job site at a minimum temperature of 65 F and a maximum temperature of 85 F for 48 hours before, during, and after the installation. To acclimate properly, the flooring material must be unrolled and allowed to relax overnight before proceeding with the installation. Remember; maintain the adhesive, floor covering, and job site between 65 F and 85 F for a minimum of 48 hours before, during, and after the installation. Substrate Considerations and Preparation Concrete Subfloor Requirements The General Contractor must provide a finished concrete subfloor ready to receive Mannington s ColorFields Rubber Flooring. Subfloors must be smooth and level within a tolerance of 1/8 (3 mm) in a 10 (3.05 m) radius. Minor surface cracks or grooves must be filled with a good quality Portland cement based patching or leveling compound with a minimum compressive strength of 3,500 psi. High spots, bumps and peaks must be repaired prior to installation. Concrete subfloors must be dry, sufficiently porous, smooth, clean and free of paint, wax, dust, oil, sealers, grease, curing agents, surface hardeners, old adhesives and any other contaminants that could inhibit or reduce bond strength. Concrete surfaces that are powdery or scaly are not acceptable. INSTALLATION Although a smooth, flat concrete surface is required, a shiny, slick, nonporous surface is to be avoided. To roughen up a concrete substrate, remove sealers and increase the porosity of the substrate, mechanical abrasion options are recommended. A shot blaster or blast track machine using a No. 275 shot is recommended. Also, scarifiers, of various descriptions, are also acceptable. Nonporous surfaces must be mechanically roughen or opened up. Chemical methods, of any description, are not recommended. An over-porous surface is to be corrected with a Portland cement based patching or leveling compound with a minimum compressive strength of 3,500 psi. As a general rule, a Concrete Surface Profile (CSP), as defined by the American Concrete Institute, of about 1 is recommended. Mannington requires that the concrete be tested for moisture. The use of the anhydrous calcium chloride test, following ASTM F 1869 procedures, is acceptable. The test should generate results not exceeding 3 pounds of moisture transpiration for 1,000 Sq. Ft. within 24 hours. In-situ relative humidity tests following ASTM F 2170 is also acceptable and should generate results not exceeding 75 percent. NOTE: While either of the industry accepted moisture-testing methods may be used, the results are not interchangeable. If both tests are performed, they must both be in the acceptable range to be considered valid. More information on maximum moisture levels and test methods is available at Never execute moisture tests until the building s HVAC has been operational for at least 7 days. It is imperative that the site conditions (temperature and humidity) are constant in the building and reflective of in-service conditions. 67
68 INSTALLATION ColorFields Smooth Rubber Sheet Flooring (continued) Substrate Considerations and Preparation (continued) Adhesion (Bond) Test Adhesive Bond Tests should be performed as a final and authoritative real world check. A bond test of at least 24-hour duration should be performed. ColorFields Rubber Sheet Flooring can be cut into 9 x 9 sample sizes. Install samples using the recommended adhesive and procedures. After 24 hours, removing the test samples should be difficult. Most of the cured adhesive should remain bonded to the subfloor. If proper bond is not accomplished, do not proceed with the installation. NOTE: If the flooring contractor elects to install new floor covering over an existing floor covering, the flooring contractor assumes all responsibility as to the suitability and continued performance of the existing floor covering. If removal of existing resilient floor covering is required, follow all recommended Resilient Covering Flooring Institute (RFCI) work practices at Please be aware that installing ColorFields Rubber Flooring over existing floor covering may reduce its excellent indentation and wear resistance and will negate its warranty. WARNING: Do not sand, dry sweep, dry scrape, drill, saw, bead blast, or mechanically chip or pulverize existing resilient flooring, backing, lining felt, paint, asphaltic cutback adhesives, or other adhesives. These products may contain asbestos fibers or crystalline silica. Avoid creating dust. Inhalation of such dust is a cancer and respiratory tract hazard. Smoking by individuals exposed to asbestos fibers greatly increases the risk of serious bodily harm. Unless positively certain that the product is a non-asbestos-containing material, you must presume it contains asbestos. Regulations may require that the material be tested to determine asbestos content. The Resilient Floor Covering Institute (RFCI) document Recommended Work Practices for Removal of Resilient Floor Coverings should be consulted for a defined set of instructions addressed to the task of removing all resilient floor covering structures. For more information visit the Resilient Floor Covering Institute at Patching / Leveling Compounds The use of latex / Portland cement based trowelable patch or self-leveling products are recommended for repairing or leveling concrete subfloors. The minimum psi rating developed should be a 3,500 pounds. Do not use gypsum or mineral based patching compounds in commercial applications under any circumstances. Cutting & Fitting The responsibility for a warranty and the performance of the substrate patching and, or leveling products belongs to the concrete or cementitious patching material manufacturer and the installer. Mannington s ColorFields Sheet Rubber Flooring is dynamic and flexible. It is easy to cut and fit. The installer can achieve good results using freehand knifing techniques. If the job site layout or general design is complex and requires a precise fit, use pattern-scribing techniques. The material may also be fit using direct scribing techniques. (Refer to Mannington s Professional Installation Guide for pattern scribing and direct scribing.) Before starting any installation, verify the product for type, size, thickness, color, visual imperfections or color variations and notify Mannington of any apparent defects. No claims will be accepted after the material has been cut or installed. Allow all adhesives and flooring materials to acclimate to job site temperature and humidity conditions prior to dry lay, fitting and cutting. To acclimate properly, Mannington ColorFields Rubber Flooring must be unrolled and allowed to relax for a minimum of 12 hours in an ambient temperature range between 65 F and 85 F before proceeding with the installation. Unroll the rubber sheet flooring lengths in the same direction. Do not use the reverse roll method when laying out lengths of sheet rubber flooring. See Page 19 in Mannington s Professional Installation Guide for more information. Cut the sheets to the required lengths. INSTALLATION Double Cutting the Colorfields Sheet Rubber Seams is not normally necessary. The Sheet Rubber rolls are manufactured with precision cut edges on both sides of the roll. However, if job-site conditions, or design plans require custom layouts, use the following recommendations. All seams are to be double-cut and must have a minimum 1 1/4 inch overlap. In places, some sheets may have a slight taper near the edge of the sheet. 68
69 INSTALLATION ColorFields Smooth Rubber Sheet Flooring (continued) Cutting & Fitting (continued) When present, tapered edges are to be on the bottom side of the overlap. To double cut seams, start with a long, true straight edge to be used as a guide. Position the straight edge about 1/2 inch from the top edge of the overlap. Use a straight blade utility knife. Hold the utility knife as vertical as possible. Double cut through the top sheet, and about 3/4 of the way through the bottom sheet. Remove material from the bottom cut by pulling it back, under itself, parallel to the cut. Double cut seams must have a close, gap free quality of cut without burrs or tears. Do not pressure fit poorly cut seams together for a passable fit. Dry lay and cut to fit all material prior to adhesion. This includes all perimeters, casework, columns, doorways, et cetera, that are contained within the space. Once the material has been fit, it is necessary to re-roll or lap back half of the sheet to expose the underfloor for adhesive application. Take care when folding the material back. Always fold the material in a wide radius to avoid sharp kinks and creases, which may cause breaks in the product. Recommended Adhesive MR-911 Acrylic Adhesive - is a solvent free, acrylic adhesive formulated for the installation of Mannington Type TS rubber flooring, including ColorFields Sheet Rubber Flooring. It can be used on clean, porous, properly prepared substrates (as previously described) where concrete substrate moisture does not exceed 3 lbs or relative humidity of 75 percent. MR-911 Acrylic Adhesive is available in 1 gallon and 4 gallon units. The coverage rate is approximately 125 Sq. Ft. per gallon. A 1/16 X 1/16 X 1/16 square-notched trowel is recommended. MR-911 Adhesive must be used on porous substrates only. Porous substrates are clearly described in ASTM F710, Standard Specification for the Preparation of Concrete Slabs to Receive Resilient Flooring. Water Droplet Porosity Test The Water Droplet Test is a quick and easy way to confirm that the substrate is porous enough for a successful installation with MR-911 Adhesive. Use regular tap water; apply a droplet about 1 inch in diameter to the concrete. Be sure the droplet is on bare concrete and not on patching materials. Apply droplets throughout the area(s) of the jobsite on which the MR-911 will be used. Droplets must be applied close to walls, columns and other lightly trafficked areas. The concrete is acceptable if the droplets are absorbed within five minutes. If the droplets just bead up and are not absorbed, the concrete is non-porous and the concrete surface is not acceptable. Do not proceed with the installation until the situation is corrected by mechanical surface abrasion needed to open up the concrete. Concrete porosity can vary from one area of the installation to the other. The more porous a given area is, the faster the MR-911 will cure. The open time or working life of the MR-911 Adhesive is also affected by temperature and humidity. The warmer / dryer the jobsite conditions are, the shorter the open time. INSTALLATION The experienced and well-trained flooring installer is aware of the affect of porosity and climate related variables on the workability of the MR-911 Adhesive. Installation procedures and timing adjustments may have to be made. It is always advisable to perform small test applications of MR-911 Adhesive throughout the progress of the installation. This helps the installer monitor both the appropriate open and working time of the adhesive as conditions change. Applying Adhesives Fully adhere Mannington ColorFields Sheet Rubber Flooring to a properly prepared substrate as described previously. After the rubber sheet flooring has been trimmed to fit the room, re-roll or lap back the material to expose the concrete substrate. Vacuum or sweep the floor to clean up any debris that may telegraph after installation. Apply MR-911Adhesive with a 1/16 X 1/16 X 1/16 square-notched trowel. Trowel edges wear after about 700 Sq. Ft. Replace to maintain proper spread rate. Spread adhesive over 100% of the concrete substrate, leaving no gaps or puddles. Allow enough time for the MR-911 to develop some initial tack or grab. Open time varies based on subfloor porosity and atmospheric conditions. Do not allow the MR-911 to skim over and prevent adhesive transfer to the flooring. 69
70 INSTALLATION ColorFields Smooth Rubber Sheet Flooring (continued) Applying Adhesives (continued) After the adhesive has started to tack-up, roll the sheet forward into the adhesive. Roll the sheet into the adhesive; do not drop or flop the material into the adhesive. Carefully rolling the sheet prevents trapping air bubbles that are hard to remove. Use a 100 lb. (or heavier) three-section flooring roller. Consider using conduit handle extensions on the roller to avoid walking on the sheet. Roll the floor in multiple directions for proper adhesive transfer to the flooring material. Roll the floor to eliminate any air entrapment or bubbles. After the first half of the sheet has been adhered and rolled, fold back the second half and repeat the procedure. CAUTIONS: Monitor the adhesive s open time, do not permit the adhesive to skin over or dry. Too much open time will result in poor adhesive transfer and bond failure. Re-roll the flooring after 2 to 3 hours. Wait 72 hours before starting recommended maintenance procedures. The flooring must be installed for at least 12 hours before heat welding. Heat Welding Seams Required Tools: Special joint cutter, and or joint suitable milling machine Suitable heat welding gun and trim plate Proper skiving knife, or a Mozart trimming knife with the 0.7mm spacer Directions: Pre-heat the welding gun to 662 F F (350 C C). It is recommended to practice welding on a piece of scrap flooring material to determine the heat setting and speed. Cut a length of Heat Weld Rod sufficient to weld the entire length of the seam, plus approximately 6 inches extra. Weld the seam starting at the wall and apply slight pressure to the gun nozzle to force the Weld rod into the groove. Properly inserted, the heat weld rod will have a slightly flattened portion on either side. Allow the rod to cool to the touch. Begin the trimming or skiving to remove the excess weld. To help prevent scratching or scuffing the floor surface during skiving, use a 1 part liquid soap to 10 parts water solution. Apply the solution to the weld rod and to an area of 1 on either side using a clean cloth. Using the trim plate and skiving knife, make the first cut of the weld rod. Alternatively, a Mozart trimming knife with the 0.7mm spacer claw can be used. To finish, use only the skiving knife, and finish trimming the remainder of the weld. The finished weld should be smooth and on the same plane as the floor covering. Occasionally, there may be excess weld rod left after the final trim. It will be necessary to remove the excess by using the melting technique. After heating up a non-sharpened metal putty knife, gently glide the putty knife along the seam weld. Excess weld material will collect on the knife and result will be a smooth and flat seam weld. Heat Welding Recommendations To achieve good sealing results, knowledge of proper heat welding procedures is important. Heated stop / start method will produce rough uneven seams, creating an unpleasant appearance. Temperature setting is critical to the success of any heat welding application. If the welding gun is set too hot or applied too slowly, the flooring is likely to burn, char, or craze the surface next to the weld rod. If welding gun is not hot enough or applied too quickly, the weld may have poor fusion. Follow all Mannington temperature requirements to achieve an even seam with good bond strength and integrity. After waiting 24 hours for the adhesive to dry, use a power-grooving machine to cut a groove the entire length of the seam. Adjust the machine so the depth of the groove is about two thirds of the product s thickness. Stop machine grooving several inches away from the wall. Extend the groove to the wall using a hand-grooving tool. Prior to heat welding, allow the flooring adhesive to completely dry. Preheat welding gun and determine proper temperature setting and router depth by practicing on scrap pieces of flooring. Make certain the speed nozzle is clean and free of obstructions. INSTALLATION 70
71 INSTALLATION ColorFields Smooth Rubber Sheet Flooring (continued) Heat Welding Recommendations (continued) Insert welding rod into the speed nozzle allowing approximately 3 to extend out. Arrange welding rod in such a manner that it will not interfere with the application. Be careful when inserting the welding rod because the nozzle is extremely hot. Pull the gun along the length of the seam toward your body while maintaining a downward pressure. Keep the gun perpendicular to the floor. Weld the seam at a constant, even speed. Stop and change direction of the weld when you are near the back wall. Pull the gun out of the groove and cut the weld rod. Remove the urethane coating before heat welding inside corner by grooving or sanding. Performed metal corner caps may also be used. Allow welded rod to cool, and then groove the installed rod with a hand-grooving tool. Grooving the rod makes it possible to achieve complete seam coverage when you start seaming from the opposite direction to finish the job. Reposition yourself and your tools at the back wall and continue welding into the grooved rod you just made so there are no missed spots in the seam. It is important to achieve a smooth, continuous coverage of the rod into the seam. After the welded rod shrinks and cools for approximately 30 minutes, trim down the excess by using the following two steps: Remove approximately two thirds of the exposed welded rod. Use a spatula trim knife and trim plate to trim off the top layer. There should be about 1/32 excess weld rod projected above the surface of the resilient. The second step is to trim the welded rod level until it is flush with the surface of the resilient sheet. Use an extremely sharp spatula knife without the trim place at a 5 to 10 angle to the floor surface. Keep the sharpened side down against the welded rod. Be careful not to cut or dig into the resilient surface. Inspect the finished seam carefully and remove any missed high spots with a spatula knife. If there are low spots, the seam weld may require a rod reapplication. Once the entire area has been trimmed and inspected, smooth out seam with one of the two recommended methods. When using camouflage weld rods, both steps are required. 1. Glaze Curing the Seam: Apply heat from the welding tool by removing speed nozzle and using the same heat setting to direct a flow of heat from the gun along the length of the seam. 2. Seam Sealing the Seam: To smooth out the seam, apply MCS 42 seam sealer to the welded seam and leave it on no longer than 30 to 40 seconds. Wipe all sealer from the surface of the seam with a clean white cloth dampened with mineral spirits. Do not wipe the seams of camouflage weld rods. Allow the sealer to be absorbed into the rod. Both of these two last steps reduce porosity of the trimmed rod and glaze the surface of the welded rod to produce a smooth, continuous appearance. Flash Coving ColorFields Sheet Rubber All Mannington rubber sheet goods can be installed using the flash coving method. This edging technique, often preferred by hospitals and other health care facilities, is a process of extending the resilient flooring up the wall to create a wall base. Normally, the floor covering is extended up the wall to a height of 4 to 6. Coving is popular with end users because it eliminates the need for a floor/wall juncture and it is also easy to maintain. As with all resilient installations, proper preparation of the work area is critical to the success of the installation. Clean the underfloor carefully and make certain it is structurally sound. The juncture of the floor and wall also needs special preparation before beginning a coved installation. Follow the instructions below to install the cove cap and the cove stick (cove fillet strip). INSTALLATION Measure desired height for the cove caps at each corner and strike a chalk line. Attach aluminum or vinyl cove caps at this height using flathead nails with a hammer or brad pusher, or use contact cement. Always miter inside and outside corners in the cap. When mitering the outside corners, file the ends of the cap smooth. Use a specially designed miter tool with interchangeable die sets to make corners on the cove cap. This tool eliminates sharp edges at the outside corners. Cove sticks support the resilient flooring as it is flashed up the wall, eliminating the chance of puncturing the resilient flooring. Firmly secure plastic or wood cove sticks where the floor meets the wall with adhesive or nails. Use nonstaining nails and set the flush with the stick. The stick should have a minimum radius of 1 1/8 and be precisely mitered at all inside and outside corners. Provide a smooth transition in the door casings and other areas where the coving ends by cutting back to the cove stick. Tack the scribing felt to the wall with brad type nails before beginning to scribe it. Use a combination square, a small metal ruler, or a 1 piece of resilient to pattern scribe the felt. Fit the scribing tool up inside the cove cap and scribe the felt by sliding the tool along the cap as you mark the felt with a pencil. Scribe and cut the outside corners of the felt using a utility knife and the inside corners of the felt, using dividers. 71
72 INSTALLATION ColorFields Smooth Rubber Sheet Flooring (continued) Flash Coving ColorFields Sheet Rubber (continued) After scribing the entire work area, position the pattern squarely on the resilient sheet flooring and transcribe the pattern with pencil dividers. Be careful when cutting the material on the inside and outside corners. Dry fit the material. Inside corners should fit snug, but not be forced into position. Make sure to always position the shorter side first and then the longer side. Gently pull material away from the wall. Apply the appropriate adhesive to the floor, wall, cove cap, and cove stick. Allow the appropriate amount of open time. Fit the material back into place. Remember to always position the shorter side first. Roll the flooring with the appropriate size roller (use a hand roller on coved areas). Apply the appropriate seam sealer at all seams, following the recommended directions for the resilient floor being installed. The most demanding aspect of a coved installation is forming the outside corners. Fill outside corners with a boot type plug, rather than a V-type plug, on the least visible wall. The plugged corner fill piece should extend back at least several inches from the corner. The seam of the floor should be below the cove stick. Using an underscriber, scribe the back of the plug at the corner. This will mark the pattern of the corner on the plug. Cut along the scribed line at a 45 angle with a curved trim knife or a utility blade while holding the plug steady with a metal ruler and your other hand. When cutting, leave the face of the plug longer than the back. Check the fill piece for accurate fit. Make any minor adjustments to the plug as necessary to fill the space correctly. Remove the fitted fill piece and apply the appropriate adhesive. Reposition the fill piece and apply seam sealer. NOTE: Preformed metal corner caps may also be used. INSTALLATION 72
73 INSTALLATION Weld Rods Premium Rubber Sheet Flooring COLORFIELDS SOLID ROD 858 Battleship 858WR2 859 Beryl 859WR2 881 Cadet 881WR2 882 Cattail 882WR2 883 Concord 883WR2 884 Cumulus 884WR2 885 Fallow 885WR2 886 Glade 886WR2 887 Laurel Green 887WR2 888 Lupine 888WR2 889 Mesa 889WR2 890 Moraine 890WR2 891 Oak 891WR2 892 Paprika 892WR2 893 Pebble Tan 893WR2 894 Sandbox 894WR2 895 Scroll 895WR2 896 Sonic 896WR2 897 Trumpet 897WR2 898 Vine Charcoal 898WR2 INSTALLATION 899 Warm White 899WR2 73
74 INSTALLATION Mannington Rubber Tile Introduction These instructions address the installation of Mannington s Rubber Tile. ColorScape/ ColorSpec Rubber Tile is available in 18 1/8 x 18 1/8 (460.38mm x mm). Audio Spectra Rubber Tile is available in 12 X 24 (304.8mm x 609.6mm). Important With respect to the type of concrete or other cementitious patching material used in the subfloor, responsibility for a warranty and performance of the subfloor belongs to the concrete or cementitious patching material manufacturer and the installer. Rubber Tile Installation Only Approved Adhesives Must Be Used For Mannington Warranty to Apply: MR-721 epoxy adhesive solvent free MR-725 polyurethane adhesive solvent free MR-911 Acrylic Adhesive solvent free Check order for correct material, color, profile or texture and sufficient quantity. Store tiles off the ground and out of the elements. Do not stack skids, or stack other materials on tiles. If the tiles are to be re-stacked, the tiles must be stacked profile to profile and back to back to avoid mold release or wax transfer from the profile side to the back side. Prior to installation, the tiles and adhesive must be conditioned to an ambient temperature at the actual job site of not less than 65 F (18 C) to not more than 85 F (29 C) for at least 48 hours. In severe climates an 8 day conditioning period may be necessary. Subfloor Preparation For Additional Required Information, refer to ASTM F-710 Practice for Preparing Concrete Floors to Receive Resilient Flooring. Concrete Subfloors On-grade and below-grade subfloors must have a suitable vapor barrier, as recommended in ACI installed directly below the slab. New concrete subfloors should be allowed to cure a minimum of 6 weeks. MOISTURE TESTING Mannington requires, before our rubber flooring is installed, that the concrete subfloor, regardless of age, be tested to verify that excess moisture conditions do not exist. Two tests are recommended, either ASTM F-1869 (Calcium Chloride) or ASTM F-2170 (Insitu % RH). The Mannington rubber flooring can be installed if the ASTM F-1869 test result is 3 lbs or below or if the % RH value per the ASTM F-2170 is 75 % or below. Test kits can be purchased from your local flooring supplies distributor. DO NOT INSTALL if moisture levels are above recommended levels. Concrete Subfloor Condition: The concrete subfloor should be dry, clean, non-scaled and free of dust and flat to within 1/8 in 10 linear feet. The surface should also be finished to a texture similar to 100 grit sandpaper. If the concrete is glazed or very smooth, it must be thoroughly sanded or shot blasted to assure proper adhesion. Remove all dust by vacuuming. ADHESION (BOND) TEST A bond test of at least 24 hour duration should be performed. Recommended to cut Mannington tile into 9 x 9 pieces and install them using the recommended adhesive. These test patches should remain in place for a minimum of 24 hours to determine if there is good bond to the subfloor and also to observe if there is sufficient transfer of adhesive both to the subfloor and to the back of the floor tile. Removing the test patches from the subfloor should be difficult with most of the cured adhesive remaining bonded to the subfloor. If proper bond is not accomplished, do not proceed with the installation. Curing compounds, bond breakers or sealers will seriously inhibit the adhesion of the tile to the subfloor. They should be completely removed by scarifying, grinding (with a terrazzo grinder) or by shot blasting. For more information, contact U. S. Filter Blastrac blasting machine, Blastrac, is made by U.S. Filter Blastrac; (405) ; (800) ; Oil or Grease on the subfloor. Grease or oil stain must be thoroughly washed with a degreaser and thoroughly flushed. If the concrete subfloor is impregnated with oil or grease, do not attempt to install Mannington Rubber Tile. Mannington Commercial does not warrant installation of Mannington Rubber Tile over old floor coverings (such as vinyl tile), coatings and adhesives. Should the installer elect to install over old floor coatings or coverings such as tile, INSTALLATION 74
75 INSTALLATION Mannington Rubber Tile (continued) Subfloor Preparation (continued) adhesives or paint, adequate adhesion may not be achieved. Old black asphalt cut back adhesives are harmful to a good bond and must be mechanically removed or properly covered with approved cementitious patching compound (see #9 below). Mannington MR-725 polyurethane can be used over cut-back residue left after the bulk of it has been scraped off the floor. Do not use Mannington s MR-721 epoxy or contact adhesives over cut-back adhesive residue. Installing Mannington Rubber Tile over ceramic tiles is not recommended. However, when the ceramic tile is well adhered and the the ceramic glaze is sanded thoroughly and when the grout lines are filled and leveled properly with a cementitious leveler, the installation may be successful. Over terrazzo subfloors adhesion is sometimes difficult due to waxes burnished into its very smooth surface. If installation over terrazzo is contemplated, the minimum preparation should be shot blasting or terrazzo grinding to remove all waxes. Remove all dust by vacuuming. An adhesive bond testing must be performed. Mannington Bond or Mannington MR-721 epoxy or MR-725 polyurethane adhesives are the best suited adhesives for good bond, but caution is recommended. Mannington does not warrant our products when installed over old floor coverings. A risk assessment must be made and agreed upon between Flooring Contractor, General Contractor, Architect and Owner before proceeding. Cracks, depressions, saw-cut construction joints (non-moving) and rough areas should be cleaned and filled with a top quality cementitious patching compound. If Mannington MR-721 epoxy is used as a crack filler, plow the epoxy well into the depression. Allow to cure completely. Sand the cured epoxy for better adhesion. Do not use gypsum based leveling or patching compounds under any circumstances. Use only cementitious based trowelable patching or self leveling compounds. No attempt should be made to lay Mannington rubber tile over an architectural concrete expansion joint that is designed to move. Instead, the tile should stop before the joint on both sides. The joint should be protected with a metal cap fastened on one side allowing the joint to move without restriction. Exposure to extreme heat from sun, blowers or radiant heat on the flooring during the adhesive cure will/can cause the tiles to expand and peak. During the period of 24 hours before installation and throughout the adhesive curing period, the subfloor temperature should be at 72 F (24 C) and must not be colder than 65 F (18 C) or warmer than 85 F (29 C). Refer to cure time chart in Section IV B.2. Direct sunlight should be blocked during installation and for the first 8 12 hours of adhesive cure time. Alternatively, the installation could be scheduled in the evening and during the night. Wood Subfloors INSTALLATION Wood subfloors must be double-layer construction plywood with a minimum total thickness of 1. Hardboard, Luan, MDF, chip boards or other engineered wood substrates, are not strong or stable enough and are not recommended. Wood subfloors will require ventilation when laid over concrete to avoid wet and dry rot. At least 18 of airspace and air circulation between an on grade or below grade concrete subfloor and the wood subfloor is mandatory. Planked wood floors used as a subfloor may telegraph through a Mannington Rubber Tile installation. It is best to install plywood over plank floors. Unevenness of wood subfloors should be planed or machine sanded. Remove all dust by vacuuming. Loose subfloor panels should be secured by nailing or refastening with screws. Protruding nails or screws should be leveled or removed. Holdfast or screw nails should be used. Dents, seams and holes may be leveled with the Mannington MR-721 epoxy adhesive or cementitious leveling compound. After cure, the surface adhesive must be sanded to roughen its smooth surface. Plywood subfloors should be screwed down, stapled or secured using flooring ring nails. Use a minimum of 1 fastener per 9 square inches of subfloor. Note: The use of cement board such as Hardie Backer is acceptable. Be sure to smooth all points and dimples made by fasteners with a cementitious patching compound. Sufficient light is essential. Lighting conditions must be bright enough to observe color consistency, registration and seaming quality during dry fit inspection. Dry fitting rubber tile is required. Dry fit an entire floor by sections, positioning the tiles point to point. Tile will display a raised location mark in one corner on the top surface. Position the tile so that the raised location marks are all in the same position. Line up the first row of Mannington tile with a chalk line. Lay a second row again point to point. Audio Spectra 12 X 24 tiles may be installed in a running bond (ashlar fashion). Do not pressure-fit the joints in order to prevent peaking of seams. When the tiles have been dry-fitted, check the flooring for possible imperfections or defects including trim, thickness or color. Replace any such tiles prior to adhesion. NOTE: Any defects in the tile, including color variation, registration, squareness etc. must be reported before the tile is adhered or the installer will be liable for replacement labor and material. 75
76 INSTALLATION Mannington Rubber Tile (continued) Tile Adhesive Descriptions & Procedures Only approved adhesives must be used for warranty to apply. Adhesive Descriptions Mannington MR-721 epoxy solvent free. This is the standard Mannington Rubber Tile adhesive where solid strength but a flexible bond is required for heavy duty foot and vehicle traffic. Above, on or below grade concrete or wood subfloors, this adhesive has high water resistance to surface flooding. Mannington MR-725 polyurethane solvent free. This adhesive will operate at temperatures down to 50 F (7 C). It can be used where some traces of asphalt or cut back adhesive remain in the pores of the slab after most of the cut back has been scraped off. MR-911 Acrylic Adhesive For use with Mannington Rubber Tile, Rubber and Vinyl Stair Treads. MR-911 Acrylic Adhesive is a water-resistant, solvent free, high strength water based acrylic latex adhesive specially formulated for the installation of Mannington Commercial rubber flooring and vinyl and rubber stair treads on clean porous and nonporous surfaces. MR-911 is suitable for use on suspended wood floors, dry concrete floors and staircases above or on grade where concrete substrate moisture does not exceed manufacturer s recommendations. Concrete substrate moisture must be tested by using either ASTM F-1869 Calcium Chloride Test Method with results not exceeding 3 pounds per 24 hours per 1000 square feet or ASTM F-2170 Determination of Relative Humidity within the Concrete (in situ) Test Method with results not exceeding 75%. Two Part Adhesive Mixing Instructions Two Part Adhesive The packaged units of epoxy or urethane are marked A or B. The A & B unit should be mixed together thoroughly and with a rotary motion while at the same time lifting from the bottom. Use an electric drill and paddle for thorough mixing. After mixing, the color of the adhesive must be uniform (i.e., no streaking). Never mix Parts A and B on the subfloor itself. Once the adhesive is mixed it must be removed from the container to slow its curing time pot life ranges between 15 and 20 minutes for Mannington MR-721. The pot life for Mannington MR-725 polyurethane is 40 minutes. Temperature The subfloor temperature affects the curing rate of two part adhesives. Curing will take place between 65 F (18 C) and 85 F (29 C). The ideal temperature for the adhesive cure is 72 F (24 C). This will normally take 8-12 hours. At 65 F (18 C) cure will take approximately three times longer for epoxy and about twice as long with urethane. At 85 F (29 C) cure will take approximately half the time. The chart below shows approximate temperature and appropriate cure times of Mannington s epoxy and urethane adhesives: MANNINGTON MR-721 ACTUAL FLOOR TEMPERATURE Minimum Required Cure Time 65 F (18 C) 72 F (24 C) 85 F (29 C) Heavy Rolling Stock 4 Days 4 Days 3 Days Foot Traffic 12 Hrs. 7 Hrs 6 Hrs. MANNINGTON MR-725 ACTUAL FLOOR TEMPERATURE Minimum Required Cure Time 65 F (18 C) 72 F (24 C) 85 F (29 C) Heavy Rolling Stock 5 Days 4 Days 4 Days Foot Traffic 16 Hrs. 7 Hrs. 6 Hrs. Pour the entire mixed contents out of the can immediately onto the subfloor in the areas of application. Trowel the adhesive with a 1/16 x 1/16 x 1/16 square notched trowel. Yields: The average adhesive yield from a gallon unit of MR-725 epoxy will be approximately 100 square feet per gallon, depending on the smoothness of the subfloor. Coverage for MR-725 urethane adhesive will be approximately 135 square feet per gallon. Rough subfloor surfaces and improper or worn trowel notching will affect the adhesive spread rate. Do not apply adhesive to the tile. Two part adhesive average working life is one hour at a temperature of 72 F (24 C). Tiles may be laid shortly after spreading as no open time is needed. However, if the spread adhesive is allowed to remain open minutes the adhesive will develop more initial tack and will help reduce tile slipping. INSTALLATION Lay tiles point to point as per dry laying instructions (Section III). Audio Spectra 12 X 24 tiles may be installed in a running bond (ashlar fashion). Roll the adhered tiles with a 100 lb. roller diagonally, slowly, in two directions. This should be done soon after laying the tile into the adhesive. Extra care should be given to rolling Audio Spectra. It must be rolled diagonally due to it s pronounced profile. 76
77 INSTALLATION Mannington Rubber Tile (continued) Tile Adhesive Descriptions & Procedures (continued) A second rolling should be done one hour after the first rolling. Weight corners with sand bags, or use duct tape on corners if necessary. Hand roll all seams with a narrow 2 hand roller to level the tile edges to one another. A third rolling may be advisable if the subfloor temperature is cool. Sweep upon completion of laying to detect dropped or oozing adhesive. Remove any such adhesive with water or mineral spirits on a cloth. Do not use turpentine (see Section 1 of Maintenance Instructions). Note: Remove adhesive before it cures. It is nearly impossible to remove adhesive after it cures without damaging the tile surface. An unsheltered but roofed installation should be protected from the heat of the sun or from wetness for at least 8-12 hours after installation. Lay a light colored opaque cover over the installation if necessary for adequate protection from the sun and wetness. No pedestrian foot traffic should be allowed before at least 12 hours after laying and for a longer period if the subfloor temperature is below 72 F (24 C). These cure times can be doubled or tripled as the temperature approaches 65 F (18 C) (see adhesive cure chart on previous page). Scaffolding or wheeled conveyances must not be allowed for at least 4 days (see adhesive cure chart). Construction foot traffic is possible if plywood (one-inch plywood) is laid over the entire installation after the second rolling plus at least and after 8 hours. Traffic directly on the tile weakens or breaks the adhesive bond and will cause tiles to buckle or lift within one year of installation if traffic is allowed too soon. INSTALLATION 77
78 INSTALLATION Reset Recycled Rubber Sports Flooring General Information These installation instructions are for Mannington Commercial Reset Recycled Rubber Tile & Sheet products. All recommendations are based on the most recent available information. The information on this sheet provides general guidelines. All instructions and recommendations must be followed for a satisfactory installation. The floor covering, adhesive, and room temperature must be kept at a minimum temperature of 65 F or warmer for at least 48 hours before, during and 48 hours after installation. Install Mannington Commercial Reset only after the job site has been cleaned and cleared of other trade apparatus that may damage a finished tile installation. Always check to assure the pattern number is correct and lot numbers are the same on all products. Material should be delivered to the job site in its original, unopened packaging with all labels intact. Roll material should always be stored lying down. Storing rubber on end will curl the edges resulting in permanent memory of the material. All edges with memory curl must be straight edge cut before installation. Do not store rolls higher than four rolls or for more than six months. Material should only be stored on a clean, dry, smooth surface. Inspect all materials for visual defects before beginning the installation. No labor claim will be honored on material installed with visual defects. Verify the material delivered is the correct style, color, and amount. Any discrepancies must be reported immediately before beginning installation. All subfloor / underlayment patching must be done with a non-shrinking water resistant Portland cement patching compound. Never install Mannington recycled rubber products over residual asphalt-type (cut back) adhesive. Mechanically remove all traces of old adhesives, paint or other debris by scraping, sanding or scarifying the substrate. Do not use solvents. Mannington Reset (except Interlocking tiles) is to be adhered with Mannington Commercial MR-710 single component urethane adhesive or MR-725 two-part urethane adhesive. Subfloor Information Careful and correct preparation of the subfloor is a major part of a satisfactory floor covering installation. Roughness or unevenness of the subfloor will telegraph through the new floor covering, resulting in an unsightly surface and excessive wear on high spots. Proper subfloor preparation and suitable underlayment installation are essential for a trouble-free job. Wood Subfloors GENERAL All wood floors must be suspended at least 18 above the ground. Adequate cross-ventilation must be provided and the ground surface of a crawl space must be covered with a suitable vapor barrier. Wood subfloors directly on concrete or installed over sleeper construction are not satisfactory for the installation of Mannington Reset flooring products. Wood plank or strip flooring sub floors must be covered with a minimum 1/4 or heavier underlayment rated panel to assure a successful finished flooring installation. UNDERLAYMENT Many times wood panel subfloors are damaged during the construction process or are not of underlayment grade. These panels must be covered with an approved underlayment. Underlayment panels are intended to be used to provide a smooth surface on which to adhere the finished floor covering. It must be understood that underlayment panels cannot correct structural deficiencies. Particleboard, chipboard, construction grade plywood, any hardboard and flakeboard are not recommended as underlayment. All have inadequate uniformity, poor dimensional stability and variable surface porosity. Mannington Resilient Floors will not accept responsibility for adhered installation over these subfloors. In all cases, the underlayment manufacturer or underlayment installer is responsible for all underlayment warranties. UNDERLAYMENT REQUIREMENTS Panels intended to be used as underlayment should be specifically designed for this purpose. These panels should have a minimum thickness of 1/4. Any panels selected as an underlayment must meet the following criteria: Be dimensionally stable Have a smooth, fully sanded face so the graining or texturing will not show through Be resistant to both static and impact indentation Be free of any surface components that may cause staining such as plastic fillers, marking inks, sealers, etc. Be of uniform density, porosity and thickness Have a written warranty for suitability and performance from the panel manufacturer or have a history of proven performance INSTALLATION 78
79 INSTALLATION Reset Recycled Rubber Sports Flooring (continued) Subfloor Information (continued) Any unevenness at joints between panels must be sanded to a level surface. Gaps between panels, hammer indentations and all other surface irregularities must be patched with an underlayment. Concrete Subfloors Concrete subfloors must be dry, smooth and free from dust, solvent, paint, wax, grease, oil, asphalt sealing compounds and other extraneous materials. The surface must be hard and dense, and free from powder or flaking. New concrete slabs must be thoroughly dry (at least six weeks) and completely cured. Curing agents, surface hardeners and other additives may cause adhesive bonding failure. These should be removed by sanding or grinding. All concrete slabs must be checked for moisture before installing material. The final responsibility for determining if the concrete is dry enough for installation of the flooring lies with the floor covering installer. Mannington Reset products must never be installed where excessive moisture emissions may exist. Moisture emission from subfloor cannot exceed 3 lbs. per 1,000 sq. ft. per 24 hours as measured with the calcium chloride test performed according to ASTM F1869 or 75% Relative Humidity measured according to ASTM F Mannington will not assume responsibility for floor covering failure due to hydrostatic pressure or moisture vapor emission. Holes, grooves, expansion joints and other depressions must be filled with an underlayment and trowelled smooth and feathered even with the surrounding surface. Concrete floors with a radiant heating system are satisfactory, provided the temperature of the floor does not exceed 90 F at any point. Hot spots in the radiant heated floors can cause installation problems, so it is recommended that the system be turned off before installation. Existing Resilient Floor Coverings To achieve maximum product performance, Mannington Commercial rubber flooring must not be installed over existing resilient floor coverings. In the rare cases where removal of the existing resilient floor covering is not an option, the existing flooring must be covered with an Embossing Leveler or other appropriate porous underlayment. NOTE: Consult Mannington s Professional Installation Handbook or the Recommended Work Practices brochure from the Resilient Floor Covering Institute for specific instructions on removal of old resilient floor covering. Installation Sufficient light is essential. Lighting conditions must be bright enough to observe color consistency, registration and seaming quality during dry fit inspection. Reset Rubber Sheet Should be installed by a trained professional flooring installer with experience installing rubber flooring. Assume that the walls that the rolls will abut are not perfectly straight or square. NOTE: Mannington Reset Recycled Sports flooring is manufactured from recycled materials. Slight variance in shade and color chip dispersion is normal. It is the installer s responsibility to inspect all products to insure the correct style, thickness, and color. Any moderate to severe discrepancies should be reported immediately before beginning the installation. INSTALLATION All Mannington Reset rolls must be unrolled and installed in the same direction. See Diagram 1. Each roll is marked on the side of the core with red or orange paint. This is an aid to identify a given roll s installation direction. Laying rolls in the opposite direction will cause color variations between the rolls. Roll material is stretched slightly during the manufacturing process. At the job site, the installer should unroll all cuts and allow Reset to relax overnight. A bare minimum of two hours is required. Shaking the material once it is unrolled can help it to relax. 1. Begin by determining the vertical center of the area to be installed. Snap a chalk line. Snap two additional chalk lines 24 out from either side of the original chalk line. This is the guideline for the first 48 wide roll. Insure that the flooring is laid so that any curl is facing down. This will prevent the ends from curling up. 2. Placing the roll end against the wall, unroll the first piece over the prepared area. Maneuver the rubber to lay precisely within the two chalk lines by tapping with a mallet and the wood block. Allow the cuts to relax in position for a minimum of two hours. Twenty-four hours is preferred. If the length of the rubber roll exceeds the length of the floor, use a straight edge and utility knife to trim the excess length, leaving an extra inch for the final cut (see cutting tips). 3. Repeat steps above for remaining rolls. For subsequent roll placement, chalk lines can be used to define the areas of installation, but is not as crucial as with the initial piece. To insure a tight fitting seam when butting one roll up to 79
80 INSTALLATION Reset Recycled Rubber Sports Flooring (continued) Installation (continued) Diagram 1 another, overlap the seam by 1/8. Working from one end, work the overlapping roll down into the seam. If a gap appears, lift the roll and overlap the roll to before the gap and repeat the process. If rippling appears on the far side of the overlapping roll, remove this by stretching the material by pulling or a kicking motion. Always insure a tight fitting seam prior to applying adhesive. Prior to curing, the adhesive will not have enough grab to fix a misaligned seam. Never apply tape to the surface of the flooring as it may leave a residue on the surface when removed. 4. After the room has been laid out and allowed to fully acclimate to the room and floor temperature, trim the roll lengths as required for an exact fit. Beginning with a roll aligned along a front edge or wall; pull the roll back half of its length. Apply adhesive as described below. Lay the flooring back down being careful not to form any air pockets. Repeat for the other half of the roll and move on to adjacent rolls. When laying the other rolls, be sure to overlap the seams by 1/8 and force the overlap into the seam. Be careful not to allow Chalk Line the overlapping part to touch the adhesive first. Thoroughly roll the floor with a 100# roller to assure bonding of the rubber to the adhesive. A hand roller is suggested for the seams. Be careful not to shift the roll while rolling. Rolling should be done again at 30 and 60 minutes after initial placement of the roll into the adhesive. Roll in both directions, width and lengthwise to insure maximum contact. 5. MR-710 adhesive should be applied thinly and evenly with 1/16 x 1/16 x 1/16 square notched trowel. Clean up excess and tools with mineral spirits, but don t allow mineral spirits to contact rubber. Any adhesive coming up through seams should be cut away. Allow 48 hours curing time for the adhesive before traffic is on the floor. If using MR-725 two-part urethane adhesive apply the adhesive with a 1/16 x 1/16 x 1/16 square notch trowel. 18 x 18 Square Edge Tiles Refer to Subfloor and Installation requirements before beginning. 1. Inspect all tiles for visual defects including shade variances prior to beginning installation. No labor claim will be honored on material installed with visual defects or shade variations. Any discrepancies must be reported immediately before beginning the installation. 2. Reset tiles must also be installed in the same direction. (Directional markings stamped on the bottom of the tiles must point in the same direction.) 3. Measure the width of the area to be covered. 4. Mark the center of the area at two points, one at each end. 5. Snap a chalk line, line #1, through these two points. 6. Determine the center point of the chalk line. 7. Using a Carpenter s square or another method, snap a second chalk line, line #2, perpendicular (at 90 ) to the first line. The lines should intersect at their centers. 8. The area to be covered is now divided into quarters. Begin the installation at the center of the area, where the two lines intersect. Reset tiles must be installed in the same direction. (Directional markings stamped on the bottom of the tiles must point in the same direction.) NOTE: To lay in an ashlar configuration, snap a third chalk line parallel to line #2 and perpendicular to line #1. The distance between line #2 and line #3 should be half the width of the tile (9 or 18 inches). 9. After the above procedure is performed, begin application of MR-710, Mannington s recommended one-component moisture-cured polyurethane adhesive or Mannington s MR-725 two-part urethane adhesive. Apply MR-710 to the substrate using a 1/16 x 1/16 x 1/16 square-notched trowel. Apply MR-725 to the substrate using a 1/16 x 1/16 x 1/16 square-notched trowel. INSTALLATION 10. Take care not to spread more adhesive than can be covered with flooring within 30 minutes. The open time of the adhesive is minutes at 70 F and 50% relative humidity. 80
81 INSTALLATION Reset Recycled Rubber Sports Flooring (continued) Installation (continued) 11. Place the first, tile A, into the wet adhesive making sure that the edges are precisely placed along the chalk lines and where they intersect. Press firmly on the tiles to remove any curls or entrapped air. See diagram 5. Reminder: Arrows on bottom of tiles must point in the same direction. 12. Lay whole tiles from left to right along chalk line #1 up to the wall on the opposite side of chalk line #2. The last tile will likely have to be cut to fit against the wall. 13. Do not allow MR-710 or MR-725 to cure on your hands or the flooring. Wipe off excess adhesive with a rag dampened with mineral spirits. Cured adhesive is very difficult to remove from hands. We strongly suggest wearing gloves when using MR-710 or MR Continue this process with each row until you reach the wall across from chalk line # Go back and fill in gaps between the two original chalk lines and the wall on those two sides. 16. If some seams are gapping, hold them together temporarily with painter s or masking tape. Do not use duct tape as it will leave a residue on the floor. Remove the tape after the adhesive has developed a firm set. It may be necessary to weigh down some seams. 17. Roll a 100 lb. roller over the floor within 45 minutes to ensure a proper transfer of adhesive. Overlap each pass of the roller by 50% of the previous pass to ensure that the floor is properly rolled. A hand roller is recommended at the seams. 18. Keep traffic off the floor for a minimum of 24 hours. Floor should be kept free from rolling loads for a minimum of hours. Foot traffic and rolling loads can cause permanent indentations or disbonding in the uncured adhesive and cause tiles to shift. Interlocking Tile Reset Interlocking Tile does not require any specialty tools. 1. DECIDE TILE LAYOUT Reset Interlocking Tile may be laid in straight rows and columns. Another option is to lay the tile in an Ashlar or brick pattern by offsetting either the rows or the columns by 50%. In other words, the tile can be laid point to point or in the offset Ashlar method. There is some locking benefit to the offset Ashlar brick pattern. 2. SNAP CENTER LINES Begin by measuring the length and width of the room. Divide the distances as measured in inches by the width of the tile. This will result in the number of full tiles plus a partial tile. Snap a center line for the width of the room such that the partial tile on either side of the room is no less than 6 wide. Repeat this for the length of the room. 3. LAY TILES Place the first tile at the center of the room where the two lines you snapped in Step Two intersect. Place the tile such that the inside of the dovetail is aligned to both the width and length line. Refer to Step One for proper tile orientation. Place the second tile on the opposite side of one of the lines. Align the dovetail patterns and press together with your thumbs. Complete the process by hitting the seam area with a rubber mallet. INSTALLATION The third tile may be positioned either with the inside of the dovetail aligned to the other line aligning with one of the tiles, or such that 1/2 of the tile locks with the first tile and 1/2 locks with the second tile. Continue laying tiles in all directions until there is not enough room to lay any more full tiles within the space to be filled. There should be a space of at least 6 on all four sides of the room. 4. TRIM TO FIT ROOM Beginning in one corner, first measure from the wall to the inside dovetail pattern at each end of the tile. Then measure from the corner of the wall to the center of the edge of the tile. Position the tile such that the corresponding edge will align to the edge to be fitted and trim to fit the space from the corner to the center of the tile and to the wall or edge. Maintain a 1/4 gap between the edge piece and the wall to allow for expansion. Save the remaining piece to fit to the opposite wall. Continue around the room, measuring and fitting each piece and allowing for a 1/4 gap for expansion. Finish with molding or 1/2 quarter round molding. CUTTING TIPS Here are tips on cutting Reset Rubber Interlocking Tile. This procedure works best when using a non-retractable utility knife. When using a utility knife, be sure to keep the blades sharp to aid in the cut, and help reduce the possibility of injury due to dull blades. 1. Mark the mats you will need to cut with chalk or a chalk line. 81
82 INSTALLATION Reset Recycled Rubber Sports Flooring (continued) Installation (continued) 2. Put your straight edge on the corresponding marks you have made on the mats. 3. Holding the straight edge firmly and score the mats two or three times. 4. Pull the mat close to the score line, lift & bend the mat toward you. The score line will break open. 5. Make several more passes with the knife, working down the established cut until the cut is complete. If a tile is damaged it should be replaced. With the interlocking tile, it will be easier to cut out the center of the tile so that you can get your hand under the tile and work the tabs loose. Fit the replacement tile over the adjoining tiles and lock into place. With a fully adhered tile, it is important to remove as much residual adhesive as possible after removing the damaged tile. Apply a thin film of the appropriate adhesive to the bottom of the replacement tile. Use a hand seam roller to secure the tile into the adhesive and to bring the tile edges into position with adjoining tiles. If the Reset sheet flooring is damaged it is necessary to cut a plug to replace the damaged area. Accurately cut a square of replacement material and position it over the damaged area. Carefully trace cut the repair plug to remove the damaged area. Once the damaged area is cut and removed, remove as much residual adhesive as possible. Apply a thin film of the appropriate adhesive to the back of the repair piece and carefully position. Roll the area with a hand seam roller to bring all edges into proper position. INSTALLATION 82
83 INSTALLATION Mannington Edge Effects Effectual Chair Rail Molding Introduction It is the installer s responsibility to confirm the accuracy of the order. The materials should be checked for damage and defects. Confirm color match prior to installation. An authorized Mannington distributor or Mannington representative must be notified of any issue before installation begins. Mannington Edge Effects Effectual Chair Rail Moldings are for interior installations only. Handling & Storage Mannington Edge Effects Effectual Chair Rail Moldings and adhesives must be site conditioned at temperatures between 65 and 75 F (18 and 24 C) for 24 hours prior to, during, and after the installation. During site conditioning period, roll out Mannington Edge Effects Effectual Chair Rail Molding and allow it to relax. Cutting rough in lengths for each section to be installed allows the product to relax and will be easier to install. In rooms that are exposed to intense or direct sunlight, the product must be protected during the conditioning period, installation, and for 24 hours after installation. Wall Surface Preparations All wall surfaces must be clean, smooth, and dry. Dust, drywall dust, and loose particles must be removed. All drywall- patching compounds and plaster should be sanded smooth and allowed to dry for a minimum of three days. The wall surface must be free of paint, alkali, wallpaper, wallpaper paste, and any other foreign material, which could affect the adhesive bond. Ceramic tile surfaces are not recommended as suitable to for Mannington Edge Effects Effectual Chair Rail. IMPORTANT: Do not install the Mannington Effectual Chair Rail Molding on a painted or wallpapered wall surface. Remove the wallpaper or paint from the desired area prior to installation. Chair Rail Molding Installation 1. Determine acceptable height of chair rail on the wall. Typically, the chair rail height is 1/3 up the wall on an eight-foot wall. The middle of the chair rail is about 32 inches up from the floor. However, any agreed upon height that the end user requires is suitable. There is no hard and fast rule. 2. Use a chalk line, snapped to the proper height, or mark the wall surface in several areas to establish the required installed position. Use a straight edge and level to provide a continuous line on the wall. The line should be level and parallel to the floor. 3. Cut the chair rail to length. Be sure to leave extra length for mitering or coping inside or outside corners. 4. Ideally, the first piece of chair rail molding that is to be installed should be a section that butts up against an inside corner, door or windowsill here a square (90o) angled cut is required. 5. For inside and outside corners, make 45o mitered end cuts. However, keep in mind that not all corners will be 90o. Use a try square to find out actual inside or outside angles and then divide the number by two for making mitered cuts. For example, an 88o inside angle measurement would require the two adjoining lengths of chair rail molding ends be cut at 44o each. For inside corners, the coping method is also acceptable. 6. Use Mannington Double-Sided Adhesive Tape or commercially available Contact Bond Adhesive. Follow manufacturer s directions. INSTALLATION 7. Apply tape or adhesive to the back of the molding and / or the wall surface area. 8. Carefully position and install the molding. Use a J-roller and hand roll the Molding to ensure proper adhesive bond. Important: Mannington Double-Sided Adhesive Tape or Contact Bond Adhesives adhere on contact. Repositioning of the molding is almost impossible once the adhesive makes contact to the adjoining surface. Maintenance 1. Do not perform any maintenance on the product for 24 hours after installation is completed. 2. Thoroughly wipe the entire surface area to remove all dust, dirt and grit. 3. Prepare a cleaning solution by mixing 1 oz. to 4 oz. of a neutral detergent (ph of 7-8) per gallon of warm water. The dilution selected depends on light to heavy soil conditions. 4. Scrub the Effectual Chair Rail molding surface with the solution using a clean cloth or sponge. NOTE: For extremely heavy soil conditions, use Clorox s Soft Scrub or equivalent and scrub surface with a damp cloth or sponge. 83
84 INSTALLATION Mannington Edge Effects (Type TP) Introduction & Preparation Mannington Commercial manufactures stylish highly durable flooring and accessories. It is important that our products are properly installed in order to provide maximum serviceable life. It is also important for the installer, before he starts an installation, to verify the correct material, color, quantity and that there is no damage or defects in the materials. If a problem is encountered, a Mannington Commercial representative should be notified of any problems before the application continues. Acclimate flooring products, adhesives, and all accessories at 65 F (18.3 C) - 85 F (29.5 C) for 48 hours prior to installation, during installation, and afterwards for another 48 hours. Edge Effects should be unrolled during the conditioning period, allowing it to relax and settle. If storing for more than the 2 days prior to installation, store all materials in a weather-tight enclosure. Do not stack pallets, and do not stack boxes any higher than you received them. When handling, keep the wall base face-to-face and back-to-back, just the same as they are packaged. In rooms that are exposed to intense or direct sunlight, protect the materials from the sunlight during storage, conditioning before and after, and installation. Surface Preparation Surface should be dry, smooth, clean from dirt, dust, paint, wax, oil, varnish, finishes, old adhesive, or any material that might interfere with bonding. Prepare the surface for smoothness by sanding, scraping or other appropriate physical means (do not use adhesive removers or chemicals). Ensure that the wall/sheetrock is properly mounted and stable. Repair and level any uneven spots, holes, gaps, joints, cracks, gouges etc. with a good quality patching compound. Let the patching compound properly dry and sand area smooth. Do not install Edge Effects over vinyl wall coverings. To prepare, remove the vinyl wall covering to match the base height, permitting the base to be bonded to the wall underneath the vinyl wall covering. Neutralize soft plaster with a coating of zinc sulfate mixed one pound per gallon of water. Allow plaster to dry. Never install base on walls that will be exposed to moisture or drastic temperature changes. Installation Precautions This product MUST NOT be stretched! Care must be taken NOT TO PULL the wall base excessively when unwinding from the coil, or at any time during or prior to installation. Wall base WILL NOT SHRINK, but it will relax/return to its original length if stretched. When installing the Edge Effects, work back towards the last piece installed or back toward the starting point of the job to prevent stretching. If you do not work back toward the last piece installed or back toward the starting point it is possible that the base will be slightly stretched and after it returns to its original length will leave gaps between pieces. Conditions Proper ventilation and adequate lighting should be available. IMPORTANT: All materials (the flooring products, adhesives, any patching, or leveling compounds, and the surface) need to be conditioned to 70 F (21 C) - 78 F (25.5 C), for 48 hours prior to installation, during installation, and for 48 hours after installation. Allow coiled base to lie flat for at least 48 hours at 70 F (21 C) minimum prior to installation. Equipment 1. Mannington Commercial MR-101 acrylic wall base adhesive 2. Straight edge 3. Utility knife 4. 1/8 V-notched trowel 5. Tape measure INSTALLATION 6. Hand roller 7. Carpenter s square 8. Rags 9. Water 10. Rubbing alcohol or mineral spirits (use sparingly and with adequate ventilation) 84
85 INSTALLATION Mannington Edge Effects (Type TP) (continued) Installation (continued) Application On dry and porous surfaces, the base should be adhered to the wall with Mannington Commercial s MR-101. Use a 1/8 V-notched trowel to spread the adhesive on the back of the base to within 1/4 from the top. The adhesive should cover 90% of the back of the base. The adhesive can be spread on the wall if you prefer. If using a cartridge, then bead the adhesive from bottom to within a 1/4 approximately from the top. If using a multiple hole nozzle on your cartridge, use a 2-hole nozzle for 2½ wall base, a 3-hole nozzle for 4 wall base, and a 5-hole nozzle for 6 wall base. Regardless of which method you use, insure that 90% of the back of the base is covered with adhesive. On a non-porous surface, such as laminated or painted surfaces, and any other non-porous surface applications, you should remove the non-porous wall covering to the height of the base to allow the base to be applied to a porous surface. If you have a non-porous surface that cannot be removed, then install 3 pieces as a test sight with the Mannington MR-101 adhesive on the non-porous surface. Let sit for 24 hours and then check bond, if your bond is strong, go ahead with the application. Mannington MR-101 can work in some non-porous applications, but not all, testing is necessary. Do not use any contact cement on these products. If the wall or floor are uneven, you may need to trim some ends in order to match up seams correctly. Use a sharp utility knife or chop saw and cut from the face to the back. Apply each piece of base once adhesive is applied, and use a hand-roller (or a clean rag and hand-pressure) to push into the base and towards the starting point, in order to properly join the base to the adhesive and avoid stretching. Wall base installed on curves, or irregular surfaces, may need bracing. CORNERS Miter cut pieces are available for making outside corners. If using the pre-cut corners from Mannington Commercial, install these first. Apply adhesive and position in place. Take care to make a tight and even fit. However, you can make your own outside corners by miter cutting the material. Miter cut your pieces at 47 degrees, rather than 45. It allows more forgiveness to make an aesthetically pleasing corner. For inside corners, a coping corner looks best. Mitered inside corners are hard to make fit right, due to the corners of walls in building soften being irregular in shape and contour. They can work though, if the buildings corners are clean and true. ADHESIVE Mannington MR-101 is Mannington Commercial s acrylic wall base adhesive. It is a water based latex-acrylic adhesive. WARNING!! IF ANY EXCESS ADHESIVE COMES UP BETWEEN THE SEAMS, OVER THE TOP OR OOZES OUT OF ANY PLACE, CLEAN IT UP WHILE WET WITH A WET RAG. IF DRY, YOU WILL NEED TO USE RUBBING ALCOHOL OR MINERAL SPIRITS. BEST TO CLEAN-UP WHEN WET, IT IS MUCH EASIER. IF YOU LET THE EXCESS DRY, IT WILL BE TOUGH TO REMOVE, AND SOME SUBSEQUENT DAMAGE MAY OCCUR TO THE BASE OR SURROUNDING AREA IN THE PROCESS. Final Steps INSTALLATION Insure that all areas are securely bonded. Make any needed repairs. Protect from other construction. Maintain 65 F (18.3 C) - 85 F (29.5 C) for the next 48 hours. Cleanup any excess adhesive as described above. Do not perform maintenance for 24 hours. 85
86 INSTALLATION Mannington Rubber & Vinyl Stair Treads (Type TS, Type TP & Type TV) Introduction & Preparation IMPORTANT NOTE - These products should be installed by a professional. There are practices in the application of these products that require professional expertise. Mannington Commercial manufactures stylish, highly durable flooring and accessories. It is important that our products are properly installed in order to provide maximum serviceable life. It is also important for the installer, before he starts an installation, to verify the correct material, color, quantity and that there is no damage or defects in the materials. If a problem is encountered, a Mannington Commercial representative should be notified of any problems before the application continues. If storing for more than the 2 days prior to installation, store all materials in a weather-tight enclosure. Do not stack pallets, and do not stack tiles or boxes of tiles any higher than you received them. When handling, keep the tiles faceto-face and back-to-back, just the same as they are packaged. Do not lean the treads or packages of treads up against walls, or other surfaces, this can cause warpage in the nose area. Leave them flat. In rooms that are exposed to intense or direct sunlight, protect the materials from the sunlight during storage, conditioning before and after installation. Subfloor Types Wood Stairs Wood staircases must be smooth, flat, clean, & dry. They must be securely nailed and stable. Fill all cracks, deformations, and depressions with a cement-type latex patching compound. Let patching compound dry thoroughly, and then sand smooth. Do not install over old resilient flooring, or adhesives. Clean all steps thoroughly before installing new material. Remove old adhesives by physical means only (sanding, scraping, etc), do not use any chemicals or solvents. Concrete Stairs It is recommended to do a bond test. Test one step or use a 12 x 12 sample of the material to bond on the steps, let sit for 24 hours and check for bond strength. If OK, continue with the installation. Fill all depressions, cracks, etc. with a cement-type latex patching compound, let it dry thoroughly and sand smooth. All Steel-Troweled, or Power-Troweled, slick finished concrete steps need to be sanded and roughened up before installing. Ambient temperature is important during installation. But the slab temperature should also be between 65 F to 85 F (18.3 C 29.5 C) for 48 hours before, during, and for 48 hours after installation. Use a surface thermometer. If the temperature is too cold, it will retard the curing of the adhesive considerably. The colder the surface is, the slower the adhesive cures. If the temperature is above 85 F (29.5 C), the adhesive will set-up rapidly, you will have less working time, and will have to roll very soon. When these temperature conditions exist outside of the recommended range, it causes issues with the adhesives ability to work normally. This in turn causes treads and steps to be rolled too soon, leaving gaps, or rolled too late so that thickness differences occur on the floor, because the adhesive cured before it was rolled down flat onto the substrate. Steel Stairs The steps should be carefully cleaned by physical means of wire brush, sandblasting, etc., removing all rust, sealers, coatings, and contaminants. Then the steps should be coated with an anti-corrosive coating to prevent rust, if rust is a concern in your environment. Use Mannington Commercial MR-721 Epoxy adhesive only on this type staircase. Conditions Proper ventilation and adequate lighting should be available. Check steps for conformance to the recommendations above. All materials (the flooring products, adhesives, any patching, or leveling compounds, and the sub floor itself) need to be conditioned to 65 F to 85 F (18.3 C 29.5 C), for 48 hours prior to installation, during installation, and for 48 hours after installation. Porosity Test If using the Mannington MR-911 adhesive you will need to test your substrate for porosity. NOTE: Do not assume that wood or concrete are porous, you must test. Test by dropping a few drops of water on the substrate, if they readily absorb within 30 seconds, it is porous, if not, then your substrate should be considered non-porous. The application of the stair treads depends on the porosity of the floor with this adhesive. INSTALLATION 86
87 INSTALLATION Mannington Rubber & Vinyl Stair Treads (Type TS, Type TP & Type TV) (continued) Equipment Mannington epoxy adhesive MR-721, Mannington MR-911 or Mannington MR-715 Two Part solvent free Epoxy Nose Filler adhesive for stair treads Mannington MR-101 for the skirting, risers and any needed wall base Mixing sticks or drill with mixing paddle Carpenter s square Straight edge Scribe Utility knife Chalk line Tape measure Hand roller Sandbags Recommended trowel 1/16 X 1/16 X 1/16 square-notched for most applications or 1/8 X 1/16 X 1/8 V-notched for only certain conditions (see instructions below) Rags Water Rubbing alcohol Installation of Stair Treads Fitting Stair treads, risers, and skirting / stringers must be scribed and/or measured on each step and trimmed to fit each step and dry laid on each step prior to installing. Leave a 1/16 (1.6mm) gap at either side of the tread to allow for some expansion against the stringer. IT IS THE INSTALLERS RESPONSIBILITY TO INSPECT THE DRY LAID INSTALLATION AND NOTIFY THE APPROPRIATE AUTHORITY OF ANY IMPERFECTION, OR IRREGULARITIES PRIOR TO FINAL ADHESIVE INSTALLATION. Stringer / Skirting Installation If skirting / stringers are required, they must be installed first. Make a template of cardboard or other suitable material, measuring the height and depth of each step, and transferring that data to your template. Rough cut the template, set in place and then trim to form a snug fit to the stairwell. Lay the template over the skirting / stringer and transfer the pattern using an awl. Cut the skirting / stringer material and check the fit. Trim to form a snug fit. If the wall is porous, use the Mannington MR-101 wall base adhesive. If the wall is nonporous, use Mannington MR-911 and follow the instructions on the label for non-porous applications. Install skirting / stringers, roll with the hand roller to insure good adhesive contact. INSTALLATION Adhesives Mannington MR-721, Mannington Commercial epoxy is the most commonly used adhesive for our stair treads. Pour either unit A or B into the other unit and mix until homogenous, no more and no less. Insufficient mixing will cause adhesive failures, and over-mixing breaks down the viscosity of the adhesive and it can become runny. Pot life is short, around minutes (depending on temperature and humidity, hot and dry is quicker, and cold and moist is slower). Once mixed, it is best to get the material out of the can and onto the installation surface (or another surface to work off of) as soon as possible. The air space in the can is small and the chemical reaction can happen very quickly, with the can getting hot to the touch. It is recommended that you use mixing sticks in a folding and stirring fashion until mixed, to avoid over-mixing. If you use a mixing paddle on a drill, keep your RPMs low and be careful not to over-mix, just mix enough to bring it together to a homogenous state, no more. Porosity testing of the substrate is necessary, see porosity testing section above. Mannington MR-721 can be used on porous or non-porous applications. Mannington MR-911, a one-part acrylic adhesive can be used on stair treads if there is no threat of moisture. It can be used on wood or concrete, but the substrate must be tested for porosity. The label on the can thoroughly explains the simple porosity test (a couple of drops of water is all that s required, and observation). The adhesive must be used accordingly for non-porous conditions, or for porous conditions. The label describes both methods. Essentially, if its porous, you can lay into it wet, if non-porous, you must let it flash-off first, the label explains. 87
88 INSTALLATION Mannington Rubber & Vinyl Stair Treads (Type TS, Type TP & Type TV) (continued) Adhesives (continued) Mannington MR-101, a wall base adhesive that can be used on the risers, skirting / stringers, or any wall base needed for the stairwell, if the wall is porous. Mannington Double Faced Tape is a 2-sided, pressure sensitive tape for installing treads and risers. There is a 1 wide roll for use with the stair tread nose, and 6 wide rolls for the step part of the tread and the riser. Use 2-6 wide strips for stair treads and 1-6 wide strips for riser. This product requires a very clean substrate. WARNING - ANY EXCESS ADHESIVE THAT COMES UP BETWEEN SEAMS OR AROUND THE PERIMETER OF PARTS, MUST BE CLEANED UP IMMEDIATELY WITH WATER OR RUBBING ALCOHOL AND A RAG. IF THAT EXCESS ADHESIVE HARDENS ON YOUR FLOORING IT WILL BE PRACTICALLY IMPOSSIBLE TO CLEAN OR REMOVE WITHOUT DAMAGING THE TILE OR TREADS. Trowel Size For most conditions, use a 1/16 X 1/16 X 1/16 square-notched trowel. If your steps are new, porous wood, or new concrete with very open pores, use a 1/8 X 1/16 X 1/8 V-notched trowel. Application NOTE: Mannington Rubber, Type TP and Vinyl, Type TV stair treads require the use of Mannington MR-715, a two part Epoxy Nose Filler. This prevents subsequent nose flexing when there is a gap between the stair step and the stair tread nose. Using an Epoxy Caulking Gun or knife place an adequate amount (about a 1/4 diameter bead) of Mannington MR-715 twopart Epoxy Nose Filler into the nose of the stair tread. Completely fill the void between the stair step and stair tread nose. Be sure to keep the adhesive used for the installation back about 1/2 from the area you applied the two Part Epoxy Nose Filler. This will prevent interference between the two adhesives. CAUTION: Insufficient application of the Nose Filler can result in nose cracking and breaking once the stair treads are subjected to commercial traffic. Spread adhesive on the tread and riser. Use Mannington MR-101 on the riser, if substrate is porous, or use same adhesive as the tread otherwise. If using the tape, then lay the 1 (25.4mm) wide strip on the nose (leaving the peel paper in place) and the 6 (0.15m) strips across the step (leaving peel paper in place), until it is covered. Apply 2 pieces of 6 wide tape to the stair step and one 6 wide tape to the riser. Overlapping the pieces of tape, or leaving a gap between the tape is acceptable. This depends on the stair step depth and the height of the riser. For Mannington MR-911, remember to test for porosity, and use adhesive according to whether or not it is porous. If porous, let adhesive sit for 5-10 minutes, then lay into it wet. If non-porous, let the adhesive dry to the state where nothing comes off on your finger from touching it. At that point, start installing, you have 45 minutes to work. Only apply enough adhesive to allow for 45 minutes of application. If you allow the dry-state to sit open longer than 45 minutes, you lose bond-strength and prevent adhesive transfer between the step and the stair tread. Position and place tread onto step, starting at the nose, and pushing back and pressing down until it is all in place. Roll tread and riser immediately after application with the hand roller to ensure good adhesion. If using the tape, peel the paper from the nose and set your nose first, while holding back the rest of the tread. Peel the paper off strips as you lay the tread back into place from the nose, being careful to keep the tread in proper position. Roll immediately with the hand roller. Make sure that each tread is fit tight to the nose, and is adhered to the nose. Once the installation is complete, roll the treads again, firmly. Cleanup any excess adhesive on the flooring surface while its wet with water, or rubbing alcohol, and a rag. Do not allow it to harden, it cannot be cleaned or removed without damage to the stair treads, if hardened. Final Steps Insure that all areas are securely bonded. Sandbag any areas where needed to insure bond in seams, edges, or any potential problem area. Keep traffic off for at least 12 hours, and do not allow heavy foot traffic for a minimum of 24 hours, 72 hours is best if possible. Permit no heavy equipment or rolling loads for 72 hours. Protect from other construction by covering until construction is complete. Do not perform maintenance for 72 hours. Maintain 65 F to 85 F (18.3 C 29.5 C), for the next 48 hours. Inspect the floor 2.5 hours after installation; roll a 3rd time if necessary. INSTALLATION 88
89 INSTALLATION Mannington Rubber Stair Nosing Introduction These instructions address the installation of Mannington Rubber Stair Nosing (Type TP) extending the life of the stair floorcovering. Top Step or Landing Treatment Mannington does not recommend the installation of a stair tread on the top step (that is; on the landing). Pattern registration between the tile and tread is difficult. Thickness differences between the tile and tread also makes the installation difficult. We recommend using Mannington Rubber Stair Nosing for the top step and covering the rest of the landing with Mannington floor tile. Before Installing Mannington Rubber Nosing Prior to installation, all flooring products, and adhesives must be conditioned to an ambient temperature at the actual job site of not less than 65 F (18.3 C) nor more than 85 F (29.5 C) for at least 48 hours. Step surface temperature should be between 63 F (17.2 C) and 72 F (22.2 C) during installation and curing time. ALL STEPS Must be dry, clean and free of dust, plaster, drywall compound, paints, oil, grease, old coverings, old adhesives and any other foreign matter. Wooden steps must be firmly nailed and sanded flat. Cement stairs should be leveled and all irregularities in the steps must be repaired with a cement based leveling compound with a compressive strength of at least 3,000 psi. Repair worn or uneven edges. Sand painted stair pan noses down to the metal for best adhesion. Dry Fitting Mannington Rubber Nosing is stocked in 144 (3.66 m) lengths. Edges of both ends of the nosing have rough selvage edges from the factory. Each nosing must be cut on both ends and fit against the stringers to assure a proper fit. DO NOT pre-cut a quantity of nosing with the assumption that all step dimensions are the same. Each step is slightly different and each nosing must be custom fit on the job. Allow a 1/16 (1.6mm) on each side to allow for slight expansion of the nosing against the stringer. Too tight a fit may result in the front edge of the nose becoming wavy and buckling over time. NOTE: Mannington highly recommends the use of Wheaton Jigs Stair Wizard for the measurement and cutting of Mannington stair nosing. It provides significant time savings and improvements in cutting accuracy. For more information, call Installation Mannington Commercial rubber stair nosing should be installed with Mannington MR-721 two part Epoxy adhesive. This adhesive is a long term solution and provides the ultimate safety of the installation. 1. Rough up the back of both parts or legs of the nosing. Use coarse sandpaper, a scraper or other method to roughen the back well. 2. Mix the two part Mannington MR-721 two part Epoxy adhesive with an electric powered drill and mixing paddle. Mix for about 4 to 5 minutes. INSTALLATION 3. Apply the mixed adhesive to the back of the nosing thoroughly coating it with a moderately thin layer. 4. Put the nosing in place and use a hand roller to assure the adhesive s proper transfer to the concrete step. Roll thoroughly. 5. Wipe up any adhesive that has oozed out from underneath the nosing with hot water or mineral spirits. Clean up the adhesive while it is still wet because after it is cured, it is almost impossible to remove. 6. Stay off the nosing until it cures. This can take from 8 to 12 hours depending on the temperature of the stairwell. The warmer it is, the faster it will cure. The adhesive has little if any initial grab and will move easily if the adhesive is not cured. Bracing, taping or sand bagging the nosing may be required while the adhesives cures. 7. After the adhesive has cured thoroughly, install the landing tile. 89
90 INSTALLATION Mannington Edge Rubber & Vinyl Wall Base Introduction These instructions address the installation of Mannington Optimum Edge (Type TS), Premium Edge (Type TP) or Mannington Edge (Type TV). Mannington Optimum Edge (Type TS), Premium Edge (Type TP) or Mannington Edge (Type TV) are available in heights of 2 1/2, 4 and 6 and coved or toeless profiles. Preparation The flooring installation must be completed before installing Optimum Edge, Premium Edge, or Mannington Edge wall base. The flooring must be installed close to the wall to provide even support to the base and insure a tight, smooth fit. The dry wall or other wall substrate must extend down to within 3/4 of the floor. Prior to installation, all flooring products and adhesives must be conditioned to an ambient temperature at the actual job site of not less than 65 F (18.3 C) nor more than 85 F (29.5 C) for at least 48 hours. Surface temperature should be between 63 F (17.2 C) and 72 F (22.2 C) during installation and curing time. Avoid excessive heat exposure until adhesive is thoroughly set. Coiled or rolled base should be unrolled and allowed to lie flat for 24 hours before installation to regain normal shape. The wall surface must be structurally sound, clean, dry, smooth, and free of oil, grease, rust, paint, varnish, shellac, or any other foreign substances that may interfere with proper bonding. Cracks, holes, and wall imperfections should be filled and smoothed with latex underlayment. Do not install over non-porous surfaces such as vinyl wall coverings, laminated masonite, plastic laminates, some painted surfaces, and any other non-porous surface. Either remove the non-porous covering to expose a clean, dry, porous surface before installing or use a contact cement for installation to non-porous surfaces. On dry and porous surfaces the base should be cemented to the wall with Mannington MR-101 Acrylic adhesive. THE USE OF ANY OTHER ADHESIVE WILL VOID Mannington commercial WARRANTY. Application A 1/8 V-notched trowel is recommended. Adhesive should be spread on the back of the base and to within a 1/4 from the top or spread on the wall. If using a cartridge then bead the adhesive to approximately an inch from the top. If you are using a multiple-hole nozzle on your cartridge, use a 2-hole nozzle for 2.5, a 3-hole for 4 and a 5-hole nozzle for 6. If the wall or floor is uneven, you might need to trim some wall base ends before adjoining pieces. Use a sharp razoredged utility knife to trim, cutting from the face to the back. Apply wall base to the wall within 20 minutes after spreading adhesive. Be sure to work the wall base back toward your starting point. This slightly compresses the pieces together and eliminates the possibility of gapping at the seams due to improper installation technique. Always press firmly toward the last piece you installed using your hand and a cleanrag or a clean hand roller. Base that is installed on a curved or irregular surface may need bracing until adhesive sets. Outside Corners To form outside corners, fold the base at the proper point and scribe the backside with a V-knife or a wall base gouging tool. Remove no more than 20% of the base thickness. When installing Rubber, Type TP or Vinyl, Type TV wall base, heat the cut backside area with a hot air gun. Apply heat carefully, excessive heat will deform or blister the base. Crease the base at the fold with your hands or a hand roller. Let cool to the touch. Apply adhesive and install. Press firmly to the wall and brace if needed. Use a wet clean cloth to cool the base if hot from heating process. Heating the Optimum Edge (Type TS) wall base is not necessary. Install all corners first. Always maximize the length of the wall base measured from the edge of an outside corner. Extend the job formed corner wall base length on each side of the corner at least 6 inches or more, if possible. The longer the length of wall base extends back from the corner, the better. Inside Corners To form inside corners, mark on the back of the base where the corner will be. Use a straight edge and a utility knife or wall base gouging tool to cut the back of base. Remove no more than 20% of full thickness. If installing coved base, cut a small 90 triangular wedge from the toe at the corner point. When installing Rubber, Type TP or Vinyl, Type TV wall base, heat the back of the base at the corner point with a hot air gun. Apply heat carefully, excessive heat will deform or blister the base. Fold base, apply adhesive while still warm to the touch, and press the corner into place. Carefully push the toe of the base into the corner until your cut triangle closes. Press firmly to insure good adhesive contact. Hold a wet cloth to base to cool. Again, it is important to maximize the length of the base that extends out from the inside corner. Heating the Optimum Edge (Type TS) wall base is not necessary. INSTALLATION 90
91 INSTALLATION Mannington Edge Rubber & Vinyl Wall Base (continued) Clean Up Remove all excess adhesive before it dries, using a cloth dampened with water. Once dry, it is difficult to remove. Mineral spirits may help. Mineral spirits is flammable and contributes to VOC. Use sparingly and with adequate ventilation. Recommended Adhesive Mannington MR-101 Acrylic adhesive is a white, solvent-free, environmentally safe base adhesive to be used when installing on any clean, dry, porous surface. For non-porous surfaces, use contact cement. Follow all contact adhesive manufacturer s warnings, precautions and directions. INSTALLATION 91
92 INSTALLATION VCT & Premium VCT General Information These instructions cover all fully adhered installations of Mannington Commercial VCT and Premium VCT products: Essentials, Progressions, Touchstone and SafeWalks. All recommendations are based on the most recent available information. The information on this sheet provides general guidelines. For complete details consult Mannington s Professional Installation Handbook or visit our website at manningtoncommercial.com. All instructions and recommendations must be followed for a satisfactory installation. Always store Mannington Commercial VCT and Premium VCT in a protected, dry interior area. Do not double-stack pallets. Keep the job site, adhesives, and tile at a minimum temperature of 65 F and maximum of 100 F for at least 48 hours before installation. Maintain this minimum temperature during the installation and for 48 hours after the installation, to assure proper bond of the adhesives. Store VCT and Premium VCT on a dry, level surface. Do not stack VCT or Premium VCT cartons more than five cartons high. Be careful to stack cartoons in straight tiers. Never double-stack pallets of VCT or Premium VCT cartons. Store pallets so they are protected from accidental damage from forklift trucks or other traffic. Protection of the carton corners is highly recommended. If you intend to cover a concrete slab with resilient floor covering, always test the concrete slab for the presence of moisture. The required quantitative tests are the calcium chloride test or the in situ relative humidity test. The maximum acceptable moisture vapor emission rate (MVER) is not to exceed 8 lbs per 1,000 sq ft per 24 hours per ASTM F 1869 or not exceed 90% RH as measured by ASTM F 2170 for all VCT and Premium VCT products when installed with Mannington M-Guard V-11 adhesive. Maximum ph is 10. This only applies to Mannington Commercial VCT and Premium VCT installations using M-Guard V-11 adhesive. If any other adhesive is specified or selected, follow the adhesive manufacturer s warranty and recommendations regarding acceptable maximum moisture emission levels. NOTE: Moisture testing can only indicate conditions at the time of the test and cannot predict any future changes in moisture levels. Neither Mannington nor the flooring contractor can be responsible if moisture levels change in the future. Install Mannington VCT and Premium VCT only after the job site has been cleaned and cleared of other trade apparatus that may damage the finished tile installation. The lighting on the job site must be sufficient to permit inspection and preparation of the underfloor, layout, installation, cleanup, and final inspection of the tile. Always check the cartons to assure the pattern number is correct and that there is a sufficient quantity of tile for the installation. Make certain the lot numbers are the same on all cartons. To minimize any minor shade variation on large installations, mix and install tiles from several different cartons. If the shade variation is extreme, do not install the tile. NOTE: Please be aware that installing VCT and Premium VCT over existing flooring may reduce its excellent indentation resistance. You may position VCT and Premium VCT either square or diagonal to the room. In both cases, layout is critical. All border tiles should be relatively even in width and, if possible, at least one-half of a tile wide. Additionally, if you lay the tile on a diagonal, border tile color and/or graining against the wall should be consistent within the area. Tile Layout Square Layout A A A B B B AC BD AC BD AC BD m m 1 m m 2 C D C D C D INSTALLATION Divide the room into equal quadrants. Because most sites will not be perfect rectangles and will have irregular walls, begin laying the tiles from the center of the work area. To determine the center, take accurate measurements of the length and width of the room, disregarding small offsets, alcoves, etc. Find and mark the midpoints of the end walls (AC & BD) and strike a chalk line between these points. This line bisects the work area across the length of the room. Measure line AC/BD to find and mark the midpoint (m). 92 Using point m as the center, measure out an equal distance from the center on both sides of the midpoint (usually 3 to 5 ) and mark points m1 and m2.
93 INSTALLATION VCT & Premium VCT (continued) Tile Layout (continued) Square Layout (continued) A AB B A AB B AC m BD AC m 1 m m 2 m 1 m 2 BD C CD D C CD D Using any convenient measurement greater than m to m1, strike two arcs perpendicular to line AC/BD from points m1 and m2. Strike a chalk line between the arcs from the intersection of the arcs. This line will pass through point m at right angles to line AC/BD. Once the work area is divided into equal quadrants, the tile should be dry-laid, or precise measurements taken to determine the size of the border tile. Adjust lines AB/CD and/or AC/BD to ensure equal border tile (at least one-half of a tile). Diagonal Layout If you intend to lay the tile on a diagonal (45 ) to the work area, square the room as outlined in the diagram. A A A AB AB AB B B B m 3 m 3 m m m AC BD AC BD AC BD m 1 m 2 m 1 m 2 m 1 m 2 m 4 m 4 C D C D C D CD CD CD Using point m as a center, measure out any workable dimension along lines AC/BD and AB/ CD. Typically, the measurement will be equal to m to m1 and m2. Mark line AB/CD, creating points m3 and m4. Using a dimension greater than m to m1, etc., strike an arc from m1, m2, m3, and m4. A AB m 3 B INSTALLATION AC C m 1 CD BD Connect the intersecting points to create lines AD and BC. Dry-lay tile or take accurate measurements along lines AD and BC to determine the size of the border tile. If proper tile size or color is not obtained, adjust the diagonal lines. The grain of border tiles laid on a diagonal should run in the same direction as the grain of the corresponding tile. m m 4 m 2 D NOTE: Do not install VCT or Premium VCT over existing VCT or Premium VCT below grade. 93
94 INSTALLATION VCT & Premium VCT (continued) Adhesive Recommendations & Application M-Guard V-11 is a premium moisture-resistant pressure-sensitive adhesive developed specifically for installing Mannington VCT and Premium VCT over approved substrates. Intended Use: M-Guard V-11 may be used on concrete or approved and appropriately constructed wood or wood composition subfloors/underlayments. M-Guard V-11 is suitable for use over new concrete substrates with in-situ moisture measurements of 90% RH as measured by ASTM F 2170 or moisture vapor emission rate (MVER) of up to 8 lbs (3.6Kg) per ASTM F 1869, and a ph below 11. (M-Guard V-11 is not designed to be used over floors with moisture vapor emissions rate (MVER) from water of intrusion or hydrostatic pressure. It is designed only for slabs with high vapor emission from water of hydration.) All concrete slabs on or below grade must have a functioning vapor barrier directly under the concrete slab. Use of adhesives contrary to this recommendation is strictly the responsibility of the flooring contractor and/or the adhesive manufacturer. Application Make sure the subfloor is clean of dirt, paint, oils, wax, etc. The subfloor must be smooth and level before starting the installation. Maintain the adhesive, tile, and job site at a minimum temperature of 65 F and a maximum temperature of 100 F during the installation, and for 48 hours after the installation. After you complete the tile layout, apply adhesive to one-half of the work area. Exercise caution to maintain the working lines. If necessary, re-strike the working lines over the adhesive after it dries clear. Apply M-Guard V-11 with a trowel notched 1/16 wide, 1/32 deep, and 5/64 apart. M-Guard V-11 can also be applied using a roller or a brush. Apply adhesive evenly, with no bare spots or heavy puddles. Avoid overlapping edges of adhesive. Before installing tile, allow M-Guard V-11 adhesive to develop tack and dry. This normally takes 45 to 50 minutes. Humidity and/or subfloor porosity, however, always dictate the proper open time. Set tiles firmly against adjoining tiles and press into adhesive. Do not slide tiles into place. You can remove fresh adhesive smears with a cloth dampened with water. Dried adhesive may be cleaned using mineral spirits and a clean cloth. Tile Installation After the M-Guard V-11 adhesive dries, begin laying tile at the intersection of the working lines. Place the first tile squarely against the working lines. Since the positioning of this tile determines the accuracy of the entire installation, it is critical to lay the starter tile exactly on the lines. Once you have set the first tile firmly in place, begin laying tiles outward along both guide lines. Place tiles firmly against adjoining tiles and press into adhesive. Do not slide into place. Keep tiles on the guide line. After you have positioned several tiles along the working lines, begin stair-stepping tiles into the field area. This will keep tiles square to each other throughout the installation. Lay tiles up to where border tiles must be cut to fit. Apply adhesive to the second half of the work area, let it dry clear, then continue laying tile. Cutting & Fitting Border Tiles You may cut border tile to fit, using several techniques. The most common technique for square layouts is to place a full tile directly over the last full field tile. Using another full tile placed firmly against the wall and over the border tile, score the border tile. Be certain the graining of the border tile is properly aligned. Cut the border tile along the scored line and position factory edges of tiles together with the cut edge against the wall. Use a template cut from stiff cardboard or hardboard to cut border tile in diagonal layouts. For Mannington Commercial 12 VCT and Premium VCT, cut the template to the diagonal dimension of the tile, approximately 17 square. Use accurate measurements to measure and cut the template. Use the template in place of the tile and proceed as outlined above. You may direct scribe or pattern scribe the border tile for irregular walls, pipes, etc. For intricate cuts, we recommend you heat the tile from the back and cut with a sharp utility knife along the scribed marks. INSTALLATION Finishing & Maintenance Do not wash or scrub the floor for at least 4 or 5 days after installation, to allow the floor tiles to bond to the underlayment/subfloor. Keep heavy furniture and equipment off the floor for at least 48 hours to allow the adhesive to set. Sweep or vacuum thoroughly, and remove any residual adhesive with a clean, white cloth dampened with mineral spirits. Apply a minimum of two coats of an acrylic floor polish to temporarily protect the floor until regular maintenance procedures can begin. Leave Mannington maintenance and warranty literature with the end-user. These are available at manningtoncommercial.com. 94
95 A D H E S I V E S ADHESIVE PRODUCT APPLICATIONS DESCRIPTION COVERAGE SIZE SHEET GOODS & LVT (TILE & PLANK) V-81 Aberdeen, Fine Fields, Magna, Insight Plus V-82 V-95 XpressStep Sheet Mannington Assurance II, Relay RE, Biospec MD, Paradigm, Vivendi, Realities, Primus, all LVT excluding Nature s Paths LockSolid Mannington Assurance II, Relay RE, Biospec MD, Realities, Primus, Paradigm, Vivendi, all LVT excluding Nature s Paths LockSolid Relay RE, Realities, BioSpec MD, Paradigm, Primus, Vivendi Used with felt-backed resilient sheet; 5 lbs/ 80% RH max moisture; 1/16 x 1/32 x 1/32 nonporous; 1/16 x 1/16 x 1/16 porous Used with homogeneous vinyl-backed sheet goods & LVT; 1/16 x 1/32 x 1/32 ; 3 lbs/75% RH max moisture Two-part epoxy; 1/16 x 1/32 x 1/32; 3 lbs/ 75% RH max moisture Non-porous-180 sf/gal Porous-135 sf/gal sf/gal 4 gal sf/gal 1 gal 1 gal & 4 gal Spray adhesive; 8 lbs MVER; 90% RH, 10 ph sf/can 6 cans per Carton LVT (TILE & PLANK) Xpress Step LVT Xpress Step Premium LVT Spray Adhesive, all LVT excluding Nature s Paths LockSolid Spray Adhesive, all LVT excluding Nature s Paths LockSolid 8 lbs; 90% max. moisture; 11 max ph sf/gal 6 cans per Carton 10 lbs; 93% max. moisture; 12 max ph sf/gal 6 cans per Carton VCT / PVT M-Guard V-11 All VCT & PVT 1/16 x 1/32 x 5/64; 8 lbs/90% RH max moisture; max ph of sf/gal 1,400-1,600 sf/4 gal pail 1 gal & 4 gal Xpress Step Spray adhesive all VCT & PVT 8 lbs; 90% max. moisture; 11 max ph sf/gal 6 Cans per Carton M-GUARD ADHESIVES M-Guard V-88 Mannington Assurance II, Relay RE, Biospec MD, Realities, Paradigm, Primus, Vivendi, all LVT excluding Nature s Paths LockSolid Transitional Pressure Sensitive Adhesive; 1/16 x 1/32 x 1/32 U - porous substrate; 1/16 x 1/32 x 5/64 U - non-porous surfaces; 8 lbs/90% RH max Porous-250 sf/gal Non-porous-350 sf/gal 4 gal MCS-42 Seam Sealer All commercial sheet goods except below For all sheet goods except urethane-based wearlayers (see below) lf /pint 1 pt-12/carton ADHESIVE CHART SEAM SEALERS / WELDS MLG-33 Urethane Sealer VST-96 Weld Rod - Solid Weld Rod - Camouflage Mannington Assurance II, Realities, Primus, Relay RE, Insight Plus, Vivendi, Paradigm Used with seam sealers above All commercial sheet goods except Insight Plus and Aberdeen Biospec MD, Fine Fields 2-part sealer for urethane wearlayers 70 lineal feet/kit 6 kits/carton Professional Applicator Kit; MLG-33 seam sealer kit contains VST-96 Preferred commercial installation method; available in 165 lf/spools Preferred commercial installation method; available in 55 lf spools 4 oz bottle; as needed 6-4oz bottles/ctn 165 lf/spool 1 spool 55 lf/spool 1 spool 95
96 C O M M E R C I A L A D H E S I V E S PRODUCT CATEGORY PRODUCT NAME ADHESIVE FEATURES COVERAGE PACKAGING LIGHT HETEROGENEOUS Insight Plus Aberdeen V-81 5 pounds MVER; 80% RH FloorScore Certified 1/16 x 1/16 x 1/16 Porous 1/16 x 1/32 x 1/32 Non-Porous sf per gallon coverage 4 Gallon Pail; 41.4 lbs (18.78 kg) 1 Gallon Pail (4 per ctn); 9.2 lbs (4.17 kg) HETEROGENEOUS Realities Vivendi Paradigm Primus Relay RE V-82 5 pounds MVER; 75% RH FloorScore Certified Non-porous substrates must be rendered porous by applying an overlay of cementitious product. 1/16 x 1/32 x 1/ sf per gallon coverage 4 Gallon Pail; 46.4 lbs (21.05 kg) 1 Gallon Pail (4 per ctn); 12.2 lbs (5.54 kg) V-88 Transitional pressure-sensitive Porous, non-porous, or 8 lbs MVER, 90% RH FloorScore Certified Over porous substrates 1/16 x 1/32 x 1/ sf per gallon coverage 4 Gallon Unit; 34 lbs (15.42 kg) V-95 Two-component epoxy Non-porous substrates 1/16 x 1/32 x 1/ sf per gallon coverage 1 Gallon Unit XpressStep Spray adhesive Porous, non-porous, or 8 lbs MVER 90% RH FloorScore Certified sf per can coverage 6 cans XpressStep Premium Spray adhesive Porous, non-porous, or 10 lbs MVER 93% RH FloorScore Certified sf per can coverage 6 cans HOMOGENEOUS BioSpec MD V-82 V-88 V-95 XpressStep See Above See above See above SLIP RETARDANT SHEET Mannington Assurance II V-82 V-88 V-95 XpressStep See Above See Above See Above LVT Nature s Paths Nature s Paths Select V-82 V-88 V-95 XpressStep See Above See Above See Above SLIP RETARDANT LVT Assurance Squared V-95 XpressStep See Above See Above See Above LVT CLICK Nature s Paths Locksolid N/A N/A N/A N/A VCT & PREMIUM TILE Essentials M-GUARD V-11 Pressure-sensitive 1/32 x 1/16 x 5/64 5 Gallon Pail; 51.4 lbs (23.82 kg) Progressions 8 lbs MVER; 95% RH sf per gallon coverage 1 Gallon Pail (4 per ctn); 10.2 lbs (4.61 kg) Touchstone ph below 11 FloorScore Certified RUBBER TILE & SPECIALTY RUBBER TILE ColorScape ColorSpec Audio Spectra MR-721 EPOXY Solvent-free Two-component epoxy FloorScore Certified 1/16 x 1/16 x 1/16 Approx. 100 sf per gallon coverage 1 Gallon Unit; 13 lbs (5.9 kg) One 2-part package per carton. Mix parts A & B together for 1 gallon. SPECIALTY RUBBER TILE Enforcer Reset MR-725 POLYURETHANE MR-911 ONE-PART ACRYLIC MR-710 ONE-PART POLYURETHANE Waterproof Solvent-free Polyurethane adhesive 3 lbs MVER; 75% RH FloorScore Certified Water resistant Solvent-free Acrylic adhesive 3 lbs MVER; 75% RH FloorScore Certified Solvent-free One-part polyurethane FloorScore Certified 1/16 x 1/16 x 1/16 Approx. 135 sf per gallon coverage 1/16 x 1/16 x 1/16 Square notched trowel Porous or non-porous Approx. 125 sf per gallon coverage 1/16 x 1/16 x 1/16 Approx. 90 sf per gallon coverage 1 Gallon Unit; 13 lbs (5.9 kg) One 2-part package per carton. Mix parts A & B together for 1 gallon. 4 Gallon Pail; 45 lbs (20.4 kg) 1 Gallon Pail (4 per ctn); lbs (5.10 kg) 4 Gallon Pail; 55 lbs (25.0 kg) ADHESIVE CHART WALL BASE Optimum Edge (TS) Premium Edge (TP) Mannington Edge (TV) MR-101 ACRYLIC WALL BASE ADHESIVE Solvent-free Non-flammable Water-based adhesive FloorScore Certified Approx. 250 lin ft per gallon of 4 base using 1/8 x 1/8 x 1/8 Approx. 65 lin ft per 30 oz cartridge of 4 base using 1/8 x 1/8 x 1/8 4 Gallon Pail; 45 lbs (20.4 kg) 1 Gallon Pail (4 per ctn); lbs (5.10 kg) (6) 30 oz Cartridges per carton; 28 lbs (12.72 kg) per carton RUBBER TILE WALL BASE & SCULPTURED WALL BASE ColorScape ColorSpec Audio Spectra Edge Effects DOUBLE-SIDED ADHESIVE TAPE 1 or 6 wide by 64 long Approx. 164 lin ft per roll 1 wide: 12 rolls per carton; 12 lbs (.45 kg) per carton 6 wide: 2 rolls per carton; 12 lbs (.45 kg) per carton 96
97 A D H E S I V E S V-81 Adhesive V-81 Commercial Premium Latex Adhesive Aberdeen / Magna / Fine Fields / Insight Plus Description V-81 is a solvent-free premium latex adhesive developed specifically for use with Mannington Commercial s commercialgrade Resilient sheet product which has a felt backing. V-81 is non-flammable, light-colored, and provides a strong moisture- and alkali-resistant bond. You may use it over all approved suspended wood underlayments and on, above, or below-grade concrete substrates. Refer to Mannington Professional Installation Guide. Features Easy application VOC-compliant / solvent-free / low odor Non-flammable Moisture- and alkali-resistant Readily identifiable mylar chips Contains fungicide protection Complies with SCAQMD Rule 1168 Features Make sure the underfloor is clean and free of all foreign matter such as dirt, paint, oil, wax, etc. It should be smooth and level. Sand off high spots and fill low spots, cracks, holes, etc., with the appropriate Mannington patching compound. The building must have permanent heat/air. Maintain the adhesive, floor covering, and jobsite at a temperature of at least 65ºF for a minimum of 48 hours before, during, and after the installation. On porous underfloors, apply the adhesive with a trowel having notches 1/16 wide, 1/16 deep, spaced 1/16 apart. On non-porous underfloors, apply a thinner spread of adhesive using a trowel with notches 1/16 wide, 1/32 deep and 1/32 apart. Provide adhesive open time but do not allow the adhesive to skin over before laying the floor covering into the adhesive. Immediately roll the adhered material in both directions using a 100- or 150-lb, three-section floor roller. You can clean fresh adhesive smears with water. Remove dried adhesive with mineral spirits. Avoid heavy traffic on the finished floor for at least 24 hours. Coverage Approximately square feet per gallon. Packaging 1-Gallon Pail #849846, weighs 9.2 lbs (4.17 kg) / 4 per carton 4-Gallon Pail #849845, weighs 41.4 lbs (18.78 kg) ADHESIVES Precautions Do not use with Perimiflex, homogeneous vinyl products or any other vinyl-backed materials. Do not use where excessive moisture, alkali, or hydrostatic pressure exists. Use with adequate ventilation. Avoid contact with eyes. Do not ingest. KEEP OUT OF THE REACH OF CHILDREN. 97
98 A D H E S I V E S V-82 Adhesive For use with porous substrates BioSpec MD / Mannington Assurance II / Assurance Squared / Realities Nature s Paths / Nature s Paths Select / Relay RE / Primus / Paradigm / Vivendi Description V-82 is a nonflammable, solvent-free, light-colored acrylic adhesive that provides good moisture and alkali resistance, and a strong bond for Mannington Commercial s homogeneous vinyl-backed products. Use over approved suspended wood floors and for on, above, or below-grade concrete. Features Easy application VOC-compliant / solvent-free / low odor Non-flammable Moisture- and alkali-resistant Readily identifiable mylar chips Contains fungicide protection Complies with SCAQMD Rule 1168 Features Make sure the underfloor is clean and free of all foreign matter such as dirt, paint, oil, wax, etc. It should be smooth and level. Sand off high spots and fill low spots, cracks, holes, etc., with the appropriate patching compound. The building must have permanent heat / air. Maintain the adhesive, floor covering, and jobsite at a temperature of at least 65ºF for a minimum of 48 hours before, during, and after installation. V-82 adhesive should be applied with a trowel having notches 1/16 wide, 1/32 deep, spaced 1/32 apart. The adhesive must be spread over 100% of the exposed subfloor, leaving no gaps or puddles. Uniform coverage can be maintained by keeping the trowel clean and properly notched. Provide adhesive open time but do not allow the adhesive to skin over before laying the floor covering into the adhesive. V-82 has a 30-minute working time after spread. After the adhesive has been applied, roll the sheet forward into the adhesive to eliminate trapping air. Do not drop or flop the material into the adhesive. Roll the floor covering with a three-section, 150-lb floor roller in both directions. Fresh adhesive smears can be cleaned with water. Remove dried adhesive with mineral spirits or painter s naphtha. CAUTION: Mineral spirits and naphtha are flammable. Avoid heavy traffic on the finished floor for at least 24 hours. CAUTION: All non-porous substrates must be rendered porous by applying an appropriate overlay of a cementitious product before applying V-82. Moisture The maximum moisture vapor emission tolerances as measured according to ASTM F 1869 specifications is 3 lbs per 1000 sq ft. The maximum acceptable in-situ relative humidity level is 75% when measured according to ASTM F If both tests are performed to RH test result is the qualifying standard. Coverage Approximately square feet per gallon. Packaging 4-Gallon Pail #849882, weighs 46.4 lbs (21.05 kg) Precautions Use with adequate ventilation. Do not use where excessive moisture, alkali, or hydrostatic pressure exists. Prevent prolonged breathing of vapor and skin contact. Do not ingest. Avoid contact with eyes. KEEP OUT OF THE REACH OF CHILDREN. ADHESIVES 98
99 A D H E S I V E S V-95 Adhesive BioSpec MD / Mannington Assurance II / Realities / Primus / Nature s Paths Nature s Paths Select / Relay RE / Paradigm / Vivendi / Mannington Assurance LVT Description V-95 is solvent-free, two-component, epoxy adhesive for high-performance indoor installations, of Mannington Commercial BioSpec MD, Mannington Assurance II, Realities, Primus, Nature s Paths, Nature s Paths Select, Relay RE, Paradigm, Vivendi and Mannington Assurance LVT flooring products. V-95 has good resistance to humidity, water, and heat was well as outstanding adhesion and elasticity at low temperatures. You may use V-95 on all approved wood underlayments and on-, above-, or below-grade fully cured concrete substrates, V-95 must also be used when installing Mannington Commercial BioSpec MD, Mannington Assurance II, Realities, Primus, Nature s Path, Nature s Path Select, Relay RE, Paradigm, Vivendi and Mannington Assurance LVT over nonporous substrates or in areas subject to standing water, topical moisture, or where heavy rolling loads are expected (i.e., entryways, around floor drains, spas, saunas, or on ramps). Features Easy application VOC compliant / solvent free / low odor Moisture and alkali resistant Non-flammable Readily identifiable Mylar chips Contains fungicide protection Complies with SCAQMD Rule 1168 Directions 1. Make sure the underfloor is clean and free of all foreign matter such as dirt, paint, oil, wax, etc. It must be smooth and level. Sand off any high spots and fill low spots, cracks, holes, etc., with the appropriate Mannington patching compound. The building must have permanent heat / air. Maintain the adhesive, floor covering, and jobsite at a minimum temperature of 65 F and a maximum temperature of 90 for at least 48 hours before, during, and after the installation. 2. The maximum moisture vapor emission tolerances as measured according to ASTM F 1869 specifications is 3 lbs per 1000 sq ft. The maximum acceptable in-situ relative humidity level is 75% when measured according to ASTM F If both tests are performed to RH test result is the qualifying standard. 3. Pour all of the Part B bottle into the pail containing Part A while slowly mixing with a low-speed drill mixer (300 RPM or less), until a smooth consistency is obtained. V-95 adhesive should be applied with a trowel having notches 1/16 wide, 1/32 deep, and spaced 1/32 apart. The adhesive must be spread over 100% of the exposed subfloor, leaving no gaps or puddles. Uniform coverage can be maintained by keeping the trowel clean and properly notched. Do not spread more adhesive than can be covered within 45 minutes. 4. To help minimize any adhesive bubbling the adhesive ridges are the further flattened with the supplied short nap paint roller. NOTE: The floor temperature directly affects the setting time. The warmer it gets the faster the adhesive sets. 5. Wait minutes, and then install the flooring material into the adhesive while still fresh. Proper adhesive transfer to the backing should be confirmed periodically by lifting the material. Roll the floor covering across the width and length with a 100 lb three-section floor roller to break down adhesive ridges and ensure removal of entrapped air. Wait 1-2 hours and then repeat the rolling procedure to ensure complete removal of all entrapped air. NOTE: The instant grab of V-95 is low, so it is sometimes required to apply weights, particularly on the seams, to maintain contact until the adhesive sets (16-24 hours). ADHESIVES 6. The material should be ready for light traffic in 12 hours, regular traffic in 24 hours. If you must walk on the floor before this time lay plywood boards across the material to disperse the load. Wait at least 72 before allowing heavy traffic on the floor. CAUTION: It is nearly impossible to remove V-95 when dry. You can remove fresh adhesive with mineral spirits. Coverage Approximately sq ft per gallon. Packaging 1-Gallon Pail # Precautions Use with adequate ventilation. Do not use where excessive moisture, alkali, or hydrostatic pressure exists. Do not apply directly over gypsum-based surfaces. Prevent prolonged breathing of vapor and skin contact. Do not ingest. Avoid contact with eyes KEEP OUT OF THE REACH OF CHILDREN. 99
100 A D H E S I V E S M-Guard V-88 For Use with All Vinyl-Back Commercial Sheet Goods, Luxury Vinyl Tile & Plank, Excluding Nature s Paths Locksolid Description Mannington Commercial M-Guard V-88 is an advanced, cross-linking, moisture resistant transitional pressure sensitive adhesive featuring high aggressive peel and shear strength. This solvent-free, non-flammable, easy troweling product provides excellent bond for installations of luxury vinyl tile and plank, homogeneous and heterogeneous vinyl sheet goods over both porous and non-porous surfaces. Intended Use Mannington Commercial M-Guard V-88 can be used over the following: APA registered underlayment grade plywood; terrazzo; existing well adhered tile and sheet goods; radiant heated subfloors where surface temperatures do not exceed 90 F (32.2 C); and above, on, or below grade concrete in the absence of hydrostatic pressure, excessive moisture or alkalinity. For high concrete alkali conditions, a ph reducing primer must be used to lower the ph below 10, and the moisture level of concrete must be no greater than 8 lbs /1000 ft 2 /24 hours (2.27 kg /92.9 m 2 /24 hours) as determined by a calcium chloride test according to ASTM F-1869 test method and/or 90% RH as determined by ASTM F-2170 in situ relative humidity test. If both tests are performed the RH test is the qualifying standard. Mannington Commercial V-88 is not designed to be used over floors with Moisture Vapor Emissions (MVE) from water of intrusion or hydrostatic pressure. It is designed for slabs with high vapor emission from the water of hydration, or initial mixing. Mannington Commercial V-88 should not be used on concrete slabs that do not have a vapor retardant membrane properly placed above the sand layer and next to the concrete. Installation The substrate must be structurally sound, smooth, clean, level, dry, and free of dust, dirt, grease, oil, paint, marker, incompatible curing compounds or sealers, fire retardant chemicals, release agents, or any other foreign substance that might interfere with a good bond. The adhesive, floor covering, and area to receive flooring must be maintained at a temperature of F ( C) and at a relative humidity of 30-60% for 72 hours before, during, and after installation. Porous Surfaces: Mannington Commercial M-Guard V-88 may be used either wet or as a pressure sensitive adhesive over porous surfaces. To use wet, apply adhesive with the recommended trowel and allow to flash off for 5-10 minutes before installing flooring. Lay tile, plank or sheet goods into wet adhesive according to instructions. Adhesive must transfer to floor product to ensure proper bond. To use as a pressure sensitive adhesive, allow to dry to a tacky state and then install flooring according to instructions within 3 hours. Non-Porous Surfaces, Tile & Plank: Apply with the recommended trowel, allow to dry completely from yellow to tan, and lay in the tile or plank according to instructions within 3 hours. The highly aggressive pressure sensitive grip prevents slippage and minimizes seam gaps. Drying time is minutes and will vary depending on temperature and humidity. Installation over areas of incomplete drying can result in job failure. Non-Porous Surfaces, Sheet Goods: Apply with the recommended notch trowel. When installing sheet goods over nonporous surfaces, Mannington Commercial M-Guard V-88 must be allowed to set open for up to 30 minutes until dry-totouch. (Dry-to-touch is tacky but no transfer to fingers). Time required will vary with ambient conditions. Do not allow the adhesive to fully dry or set. The adhesive must be tacky enough to allow 100% wet transfer to the back of the sheet goods to ensure proper adhesion and repositioning. TYPE OF INSTALLATION TROWEL SIZE* AND NOTCH COVERAGE Over Porous Substrates Over Non-Porous Substrates 1/16 x 1/32 x 1/32 U 1.6mm x 0.8mm x 0.8mm U 1/16 x 1/32 x 5/64 U 1.6mm x 0.8mm x 2mm U Up to 350 ft 2 / gal Up to 8.6 m 2 / liter Up to 400 ft 2 / gal Up to 8.9 m 2 / liter ADHESIVES *Trowel dimensions are width x depth x spacing When installing homogenous sheet vinyl, it is recommended to trowel the adhesive then back roll with a short-nap paint roller to minimize the possibility of trowel ridge telegraphing. 100
101 A D H E S I V E S M-Guard V-88 (continued) For Use with All Vinyl-Back Commercial Sheet Goods, Luxury Vinyl Tile & Plank, Excluding Nature s Paths Locksolid Product & Packaging ORDER CODE BASE SIZE COLOR WEIGHT Amide-Ester-Acrylic Resin Blend 4 gallon Yellow when wet, tan when dry 34 lbs PAILS PER PALLET 48 PALLET WEIGHT 1682 lbs PALLET DIMENSION 42 x 42 PROPER STORAGE Store in climate controlled interior locations. Shelf life is one year in unopened containers. Freeze thaw stable to 10 F. Other Waterproof when cured, VOC compliant and contains an anti-microbial agent that protects the dry adhesive film from fungal growth. CRI Green Label + Certified. Clean Up Warm water when wet, mineral spirits when dry. Warranty This product is manufactured according to exacting quality control standards and is warranted to be free from manufacturing defects for a period of one year. ADHESIVES 101

102 A D H E S I V E S XpressStep Spray Flooring Adhesive Features Faster installation time Open to traffic immediately after installation Heat weld in 1 hour for Sheet Vinyl May be used under hospital beds Low VOC/low odor For use with Mannington Luxury Vinyl Tile/Planks, Infinity Carpet Tile, Sheet Vinyl and VCT FloorScore Certified 5 year limited warranty 0 wait time 3 year shelf life Specifications XPRESS STEP PREMIUM FOR LVT XPRESS STEP FOR LVT & INFINITY CARPET TILE XPRESS STEP FOR VCT SHEET RH 93% 90% 90% 90% MVER PH COVERAGE ft 2 ( m 2 ) ft 2 ( m 2 ) ft 2 ( m 2 ) ft 2 ( m 2 ) Installation Notes Use XpressStep for speed and ease of installation. Floor prep and accuracy of pattern must be performed. Detailed installation instructions are located on spray can label. Pre-installation site visits and installation training are available specially for jobs of 1000 yd 2 or more. ADHESIVES 102
103 A D H E S I V E S M-Guard V-11 Adhesive Description M-Guard V-11 is a premium moisture-resistant pressure-sensitive adhesive developed specifically for installing Mannington Vinyl Composition Tile (VCT) and Premium Tile (PT) over approved substrates. Intended Use M-Guard V-11 may be used on concrete or approved and appropriately constructed wood or wood composition subfloors/underlayments. M-Guard V-11 is suitable for use over new concrete substrates with in-situ moisture measurements of 90% RH as measured by ASTM F2170 or moisture vapor emission rate (MVER) of up to 8 lbs (3.6Kg) per ASTM F 1869, and a ph below 11. NOTE: M-Guard V-11 is not designed to be used over floors with moisture vapor emissions (MVE) from water of intrusion or hydrostatic pressure. It is designed only for slabs with high vapor emission from water of hydration. All concrete slabs on or below grade must have a functioning vapor barrier directly under the concrete slab. Coverage Coverage with a 1/16 x 1/32 x 5/64 trowel is sq ft per gallon. Environmental M-Guard V-11 is CRI Green Label Plus Certified (Cert#GLP 7501); Meets VOC content limit of SCAMD Rule #1168; meets CHPS requirement CA 01350, CA 01351: is non-flammable and has anti-microbial protection. Proper Storage Store in climate controlled interior locations. Keep container closed when not in use. Store at F (15-35 C) and out of the sun. Use adequate ventilation to avoid breathing vapors when cover is removed. Shelf life is one year in unopened containers. M-Guard V-11 is freeze thaw stable. Bond Warranty Mannington hereby warrants that their M-Guard V-11 Adhesive will provide suitable adhesive bond when installed over surfaces with moisture vapor emission of up to 8 pounds per ASTM F 1869 or 90% RH per ASTM F2170 and a ph below GALLON 1 GALLON PAIL (4/CARTON) ORDER CODE SAP # COLOR Beige Paste Beige Paste DESCRIPTION M-Guard V-11 Adhesive 4 Gal Pail M-Guard V-11 Adhesive 1 Gal Pail 4/CTN STYLE CODE SA SA UNIT WEIGHT 41.4 lbs (18.8 kg) 40 lbs PAILS/PALLET 48 Pails 36 Cases PALLET WEIGHT 2037 lbs (925.9 kg) 1475 lbs PALLET DIMENSIONS 42 x x 48 ADHESIVES PALLET HEIGHT BACK F F QUALITY 1 1 UOM EA EA Must be ordered in case quantities 103
104 A D H E S I V E S MCS-42 Commercial Seam Sealer BioSpec MD / ColorFields / Magna Description MCS 42 is used to seal all seams in Mannington Commercial Resilient Sheet Flooring (except Mannington Assurance II, Aberdeen, Realities, Primus, Paradigm, Vivendi and Relay RE). A properly sealed seam will be as strong as the surface of the floor covering and will remain intact for the life of the floor. Directions Before sealing the seam, make certain all seams are clean, dry, and free of adhesive contamination. Fill the VST-96 Professional Applicator bottle (sold separately) at least 2/3 full of sealer. Allow applicator bottle to stand until all air bubbles have dispersed. Before using, check the flow through the fin on a scrap piece of flooring. Use the forefinger of one hand on the top flat portion of the tip to guide and ensure proper fin penetration. Use the other hand to control sealer flow. Hold the bottle at approximately a 45 angle. When sealing seams lightly squeeze the bottle and apply a uniform bead of sealer approximately 1/8 wide centered on the seam cut. It is crucial that the seam sealer penetrates the full thickness of the seam cut to ensure a proper chemical weld. Do not wipe the sealer from the surface of Custom Spec II, Insight, Realities and Momemtum. Mark the seam by writing on scrap pieces of flooring place on both sides of the seam. When sealing seams in (except Mannington Assurance) insert the applicator tip into the seam cut making certain that the seam sealer is applied the full depth of the cut. Work in 5 to 6 sections at a time. Gently squeeze the bottle to start the flow of the sealer. Seam sealer flow will stop when hand pressure is removed. This allows you to leave the applicator inserted in the seam cut when you reposition yourself along the length of the seam. It is crucial that the seam sealer penetrates the full thickness of the seam cut to ensure a proper chemical weld. Allow the sealer to remain on the surface of the floor for about seconds after application. Wipe the sealer from the surface of the inlaid product after each sectional application with a clean white cloth dampened with mineral spirits. Allow the sealed seam to dry at least one hour before permitting traffic on the floor. Avoid walking or moving furniture directly over the sealer until it is fully dry; 24 hours is recommended. When sealing multiple seams, keep the applicator tip open by inserting the supplied cleaning wire. After all seams are sealed, pour any unused sealer back into the pint can. Do not store seam sealer in the applicator bottle, it will harden. NOTE: For homogeneous sheet products, heat weld is the preferred seaming method for commercial environments. For best installation results when head welding, apply chemical sealer over installed weldrod to improve stain resistance. Coverage One pint will seal approximately lineal feet. Packaging 1-Pint Cans - # (12 per carton) Precautions Flammable liquid. Do not use near heat, sparks, pilot lights, fire or open flames. Use with adequate ventilation. Avoid contact with skin and eyes. Avoid prolonged breathing of vapors Keep the container tightly closed when not in use. KEEP OUT OF THE REACH OF CHILDREN ADHESIVES 104
105 A D H E S I V E S Low Gloss MLG 33 Urethane Sealer Kit Insight Plus / Aberdeen / Paradigm / Vivendi Description MLG 33 sealer (two-part seam sealer) is designed for Mannington Assurance II, Realities, Primus, Insight Plus, Aberdeen, Paradigm, Vivendi and Relay RE with low-gloss urethane-based wearlayers. A properly sealed seam will be as strong as the surface of the floor covering, and will remain intact for the life of the floor. The Versatile Sealing Tip (VST-96) is included in this kit. Directions 1. Prior to sealing, be certain all seams are clean, dry and free of adhesive contamination. 2. Part B, which contains the de-glossing agent, must be shaken vigorously before blending with Part A. 3. Empty entire contents of Parts A and B into the supplied applicator bottle. After securing the VST Tip to the applicator bottle, gently shake the bottle to mix the ingredients. After mixing, the bottle should stand until all trapped air bubbles have dispersed, typically 15 minutes. 4. Prior to use, check the flow of the sealer on a scrap piece of flooring. 5. Use the forefinger of one hand on top of the flat portion of the tip to guide and ensure proper fin penetration. Use the other hand to control sealer flow. Hold the bottle at approximately a 45 angle. 6. Lightly squeeze the bottle and apply a uniform bead of sealer approximately 1/8 wide centered on the seam cut. NOTE: Do not insert fin into the seam on Assurance II. For Assurance II use the applicator with the fin up. Be sure that the sealer is in contact with both sides of the flooring. 7. Do not wipe the seam. 8. Allow the sealed seam to dry before traffic can be allowed on the floor. Do not walk on or move heavy furniture directly over the sealer until it is fully dry. We recommend 24 hours. Mark the seam by placing a scrap piece of flooring along each side of the seam. 9. MLG 33 cannot be saved for reuse. Safely discard any unused sealer. Coverage One kit of MLG 33 will seal approximately 70 lineal feet of seams. Packaging 6 Kits per carton # / Carton weight 3 lbs (1.4 kg) ADHESIVES Precautions Flammable liquid. Do not use near heat, sparks, pilot lights, fire or other open flames. Do not ingest. Avoid contact with skin and eyes. Use in well-ventilated areas. Avoid prolonged breathing of vapors. Do not save for reuse. KEEP OUT OF THE REACH OF CHILDREN. 105
106 A D H E S I V E S VST-96 Professional Applicator Kit Description The Professional Seam Sealer Applicator Kit contains a 4-ounce bottle, a tip cleaning pin, and the Versatile Sealing Tip (VST-96). The Kit is intended to be used with Mannington MLG 33 and MCS 42 seam sealers. (MLG 33 seam sealer kits contain the VST-96.) The ergonomic design and specially engineered tip help apply the appropriate amount of seam sealer while completely penetrating the seam cut for all Commercial Resilient sheet flooring applications. Prior to sealing seams in all products, make certain that all seams are clean, dry, and free of adhesive contamination. Packaging #832204, weighs approximately 1 lb (0.45 kg) / 6 per carton ADHESIVES 106
107 A D H E S I V E S Mannington MR-721 Description Mannington MR-721 is a two-component, solvent-free epoxy adhesive designed for use with rubber and vinyl floor covering materials. It cures to a tough, flexible film with adhesion to a wide range of substrates. Technical Data A B MIX BASE Epoxy Polyamine Epoxy COLOR Beige Beige Beige WEIGHT PER GALLON 12.6 lbs 11.1 lbs 12.5 lbs M I X RATIO BY WEIGHT BY VOLUME FLASHPOINT > 200 F > 200 F > 200 F VOC POUNDS PER GAL < 0.1 < 0.1 < 0.1 G/L < 12 < 12 < 12 % SOLIDS, WEIGHT > 99 > 99 > 99 SHELF LIFE 1 year 1 year Pot Life Mannington MR-721 has a minute pot life at 75 F, when parts A and B are thoroughly mixed. Pot life will be shorter at higher temperatures. Part A and B must be mixed thoroughly. Set Time At 75 F, allow 8-12 hours for light foot traffic, 24 hours for heavy foot traffic. Set time will be longer at lower temperatures. Allow 72 hours for heavy duty traffic. Open Time The maximum open time is minutes after the adhesive is applied, at 75 F. Higher temperatures will result in shorter open times. Coverage 1/16 x 1/16 x 1/16 in. square notch trowel = 100 sq. ft. per gallon. ADHESIVES Surface Preparation Concrete must be clean and dry prior to adhesive application. Concrete must be free of curing membranes, paint, sealers or hardeners. Concrete must be at least 30 days old and have less than 3 lbs / 1,000 ft 2 per 24 hour period using the Rubber Manufacturers Association CaC1 test. Subfloor preparation must comply with ASTM F Do not apply adhesive if surface temperature drops below the dew point. Do not apply adhesive if hydrostatic pressure exists. Other Do not apply when temperature will go below 50 F or when surface temperature is below the dew point. Ideal application temperature is 75 F. CAUTION: READ MSDS THOROUGHLY BEFORE USING THIS PRODUCT. 107
108 A D H E S I V E S Mannington MR-725 Description Mannington MR-725 is a two-component urethane adhesive designed for use with various floor covering materials on most smooth, solid surfaces. When parts A and B are thoroughly mixed together, they form a reactive adhesive that cures to a tough, flexible film with good adhesion to a wide range of materials. Technical Data A B MIX BASE Urethane Polyamide Urethane COLOR White Black Grey WEIGHT PER GALLON 12.0 lbs 8.2 lbs 11.9 lbs M I X RATIO BY WEIGHT BY VOLUME FLASHPOINT > 200 F > 200 F > 200 F VOC POUNDS PER GAL < 0.1 < 0.1 < 0.1 G/L < 12 < 12 < 12 % SOLIDS, WEIGHT > 99 > 99 > 99 SHELF LIFE 6 months 6 months Pot Life Mannington MR-725 has a minute pot life at 75 F, when parts A and B are thoroughly mixed. Pot life will be shorter at higher temperatures. Part A and B must be mixed thoroughly. Set Time At 75 F, allow 6-8 hours for light foot traffic, 24 hours for heavy foot traffic. Set time will be longer at lower temperatures. Allow 72 hours for heavy duty traffic. Open Time The minimum open time is immediately after the adhesive is applied. The maximum open time is minutes after the adhesive is applied, at 75 F. Higher temperatures will result in shorter open times. Coverage 1/16 x 1/16 x 1/16 in. square notch trowel = ft 2 per gallon 1/32 x 1/16 x 1/32 in. u-notch trowel = ft 2 per gallon Surface Preparation Concrete must be clean and dry prior to adhesive application. Concrete must be free of curing membranes, paint, sealers or hardeners. Concrete must be at least 30 days old and have less than 5% moisture to a depth of one inch (or less than 3 lbs / 1,000 ft 2 per 24 hour period using the Rubber Manufacturers Association CaC1 test). Subfloor preparation must comply with ASTM F Do not apply adhesive if surface temperature drops below the dew point. Do not apply adhesive if hydrostatic pressure exists. Other Do not apply when temperature will go below 50 F or when surface temperature is below the dew point. Ideal application temperature is 75 F. ADHESIVES CAUTION: READ MSDS THOROUGHLY BEFORE USING THIS PRODUCT. 108
109 A D H E S I V E S Mannington MR-911 Description Mannington MR-911 is a solvent-free, acrylic adhesive that is designed to permanently install dimensionally stable vinyl skin backed resilient sheet goods, homogenous commercial grade PVC sheet flooring, PVC sheet vinyl (vinyl backed), vinyl tile and vinyl plank. It is also formulated to provide an exceptional bond when installing rubber or vinyl stair treads, over porous and non-porous surfaces free of moisture. Physical Properties WEIGHT PER GALLON (POUNDS) 9.7 CONSISTENCY FREEZE THAW SHELF LIFE White Paste 5 cycles at 0 F 1 year at 70 F in unopened container Directions 1. All surfaces must be clean, dry, and free of dust, grease, paints, oils, curing compounds, sealers, or any other foreign material which may interfere with proper adhesion. 2. Cracks and uneven surfaces must be filled with cement based patching compound. 3. Mannington Mr-911 is recommended for porous and non-porous applications. 4. For porous applications, once troweled the adhesive should be allowed to remain open (flash-off) for approximately 5-10 minutes before placement of the flooring material. 5. Once placed, the material should be rolled immediately utilizing a 100 pound three-section roller. 6. Note: It is the responsibility of the user to determine whether or not the sub-floor to be covered is porous. To determine if a sub-floor is porous, place two droplets of water in various areas. If the sub-floor is porous, the water will be absorbed within a few seconds. 7. Non-porous installations require that the adhesive be allowed to dry to the touch, so that there is little or no transfer of adhesive to the finger. 8. Once the adhesive dries to the touch, it is ready to accept flooring material. 9. Rolling should take place immediately after the flooring material has been placed into the adhesive. 10. From the time the adhesive is allowed to dry to the touch, to the time it must be covered is approximately 45 minutes. 11. Caution: If the adhesive is allowed to remain uncovered, after initially drying to touch, for periods longer than the recommended 45 minutes a loss in adhesion strength will result. Care must be taken by the installer not to spread more adhesive than can be worked appropriately within the 45 minute time frame. Coverage Approximately 100 ft 2 /gal with 1/16 square notch Approximately 150 ft 2 /gal with 1/16 x 1/16 x 1/16 V-notch ADHESIVES Clean Up Remove wet adhesive immediately with a damp cloth. Use Mineral Spirits to remove dried adhesive. DO NOT APPLY SOLVENT DIRECTLY TO FLOORING MATERIAL. FOR MORE INFORMATION REFER TO MATERIAL SAFETY DATA SHEET. KEEP OUT OF REACH OF CHILDREN. 109
110 A D H E S I V E S Mannington MR-715 Description Mannington MR-715 is a two-component epoxy stair tread caulk designed for use with rubber stair treads. Technical Data A B MIX BASE Epoxy Polyamine Epoxy COLOR White Black Grey WEIGHT PER GALLON 12.7 lbs 12.8 lbs 12.8 lbs M I X RATIO BY WEIGHT BY VOLUME FLASHPOINT > 200 F > 200 F > 200 F VOC POUNDS PER GAL < 0.1 < 0.1 < 0.1 G/L < 12 < 12 < 12 % SOLIDS, WEIGHT > 99 > 99 > 99 SHELF LIFE 6 months 6 months Pot Life When mixed in the proper ratio, Mannington MR-715 has a minute pot life. Higher temperatures result in a shorter pot life. Set Time A 1/4-in. bead will harden in approximately 6-8 hours at 75 F. Thicker sections will cure faster. Cooler temperatures will result in longer cure times. At 75 F allow 24 hours for a full cure. Open Time Maximum open time is minutes at 75 F. Higher temperatures will result in shorter open times. Coverage One gallon will cover 300 lineal feet in a 1/4-in. bead. Clean Up When wet, use IPA, toluene, MEK, trichloroethylene or mineral spirits. Cured adhesive is very difficult to remove. Surface Preparation Concrete must be clean and dry prior to adhesive application. Concrete must be free of curing membranes, paint, sealers or hardeners. Concrete must be at least 30 days old and have less than 5% moisture to a depth of one inch (or less than 3 lbs. per 1,000 sq. ft per 24-hour period using the Rubber Manufacturers Association CaC1 test.) Subfloor preparation must comply with ASTM F Do not apply adhesive if surface temperature drops below the dew point during adhesive application. Do not apply adhesive if hydrostatic pressure exists. CAUTION: READ MSDS THOROUGHLY BEFORE USING THIS PRODUCT. ADHESIVES 110
111 A D H E S I V E S MR-710 Moisture-Cured, Urethane Adhesive Description MR 710 is a solvent free, single component polyurethane adhesive formulated specifically for use with Mannington Commercial ReSet Recycled Rubber Sports Flooring tile and sheet products. MR 710 contains antimicrobial protection and is freeze thaw stable. Directions Spread MR 710 evenly with the proper trowel. Open time is influenced by substrate porosity and atmospheric conditions (i.e. temperature, humidity, and air movement). For best results maintain adhesive, floor covering, and room at a stable temperature of 65 F to 85 F for 24 hours before and after installation. Within minutes, cut, fit and reposition the floor covering as recommended. Roll the installation using a three-section 100 lb roller. Specifications ADHESIVE TYPE Single component moisture cured, urethane QUANTITY 4 gallon pail (Order code ) UNIT WEIGHT COLOR FLASHPOINT VOC SHELF LIFE COVERAGE 55.5 lbs Tan > 500 F 0 - calculated 1 year in unopened container approximately 95 ft 2 per gallon using a 1/16 x 1/16 x 1/16 square-notched trowel ADHESIVES 111
112 A D H E S I V E S Mannington MR-101 Description Mannington MR-101 Wall Base Adhesive is a premium solvent free adhesive with aggressive wet suction to grip rubber and vinyl wall base. MR-101 can be used over most interior wall surfaces with the exception of vinyl wall covering and other similar non-porous surfaces that prevent the curing of any latex-based adhesive. Directions 1. Adhesive, wall base and job site must be conditioned at F for 48 hours before and after installation. 2. Use only on structurally sound surfaces, dry wall, concrete block, brick, plywood, paneling, masonry, plaster, etc. 3. Apply to surfaces that are clean, dry, and free from dust, wax and grease. Remove loose paint, plaster, old adhesive and other contaminates that would interfere with adhesion. 4. Cement or plaster must be thoroughly seasoned and dry. 5. Wrapped base or rolled base should lay flat for 24 hours before application. 6. With a 1/8 square or V-notched spreader, spread on back of base or wall surface. 7. Press base firmly into place immediately after application of adhesive. DO NOT APPLY OVER NON-POROUS SURFACES SUCH AS MASONITE, PLASTIC LAMINATES OR VINYL WALL COVERINGS. Clean Up Wet adhesive may be removed immediately with a damp cloth. If adhesive has dried, use a cloth moistened with Mineral Spirits. Do not allow solvent to penetrate the seams; this can destroy the adhesive bond. Coverage & Trowel Recommendation Approximately linear feet of 4 base per gallon On Cartridges Remove cap and insert cartridge into applicator. Use nozzle with 3 holes for 4 and 5 holes for 6 base. Apply adhesive to back of cove base. Position or roll base immediately or within 20 minutes. Physical Properties WEIGHT PER GALLON 10.4 CONSISTENCY SHELF LIFE Heavy Paste One year at 70 F in un-opened container ADHESIVES 112
113 M A I N T E N A N C E Quantum Guard HP Overview Quantum Guard HP ( QGHP ) is Mannington s patented high performance urethane wearlayer with aluminum oxide particles, cured by a UV (ultra violet) process. Through this proprietary technology, Mannington is able to offer, low maintenance floor solutions that provide superior appearance retention, cleanability, and durability, and does not require the use of polish or wax. The following products incorporate QGHP: Insight Plus, BioSpec MD, Fine Fields, Enlighten, Mannington Assurance II, Assurance Squared, Nature s Paths, Nature s Paths LockSolid, Nature s Path Select, Primus, Relay RE, Realities, Vivendi Collection, and Paradigm Collection, and the maintenance instructions below should be followed for these products. Note: For Mannington Commercial Hardwood please reference maintenance instructions related to commercial wood products. Initial Maintenance for a Newly Installed Floor Proper cleaning is an essential part of keeping your floor attractive and these guidelines will help extend the appearance and life of your Mannington Commercial flooring product(s). 1. Allow the floor to bond to the underlayment/subfloor for at least 48 hours prior to cleaning the floor. 2. When moving furniture, etc into a room protect floor with appropriate runner boards and moving dollies. 3. Sweep or vacuum thoroughly. 4. Remove any marks on the floor s surface. Residual adhesive can be removed using a clean white cloth dampened with mineral spirits. 5. Damp mop the floor as required, using a neutral cleaner. Follow container instructions for proper dilution ratio. No Polish, No Buffing Maintenance Option Routine maintenance options for applications with normal commercial traffic include: 1. Dry sweep or dust mop the floor to remove the loose debris and grit. Note: Using entryway systems / walk-off mats (non-staining types) at entrances to buildings prevent dirt, sand, grit and other substances from being tracked onto the floor and can reduce subsequent maintenance requirements. 2. Damp mop or utilize an auto scrubber with a properly diluted neutral cleaner on a regular basis in order to maintain an attractive floor appearance. 3. Areas that have an oily residue use a diluted degreaser then rinse water to prevent resoil. 4. Based on traffic volume, visual appearance, and as apart of a routine maintenance program, clean with a higher strength cleaner (not stripper) using an auto-scrubber or scrubbing machine with a general purpose (soft to medium) brush ie. 3M #53 or Tennant Equivalent to prevent accumulation of stubborn oil, sticky substances,etc Note: Use of either a brush or synthetic pads work well for cleaning flat surfaces or products with more shallow and rounded embossing. For products with fine texture and / or deeper embossing, use of a brush can at times provide more effective cleaning. Be sure to rinse and allow floor to dry. MAINTENANCE Note: Wet floors can be slippery. Wet floor signs should be conspicuous when wet maintenance is being performed. Alternative maintenance options may include the use of polish, finish, wax or spray buffing. Polish is optional with Mannington Commercial products that incorporate QGHP. Alternate maintenance options may include: (see next page). 113
114 M A I N T E N A N C E Quantum Guard HP (continued) Alternative Maintenance Options POLISH OPTION: 1. When utilizing a polish on a newly installed Mannington Commercial flooring products with QGHP, it is required to thoroughly clean the floor with a strong or deep cleaner (not stripper) using an auto-scrubber or slow speed scrubbing machine using a green or blue pad or soft bristle brush. Rinse and allow the floor to dry before applying polish. 2. Apply five coats of commercial acrylic polish, making sure there is adequate dry time between coats. 3. Follow routine maintenance procedures. See above. TIP: If planning to use a polish contact the polish manufacturer for recommendations regarding maintenance materials that best match your equipment, type and amount of traffic, desired gloss level and cleaning schedule. SPRAY BUFF OPTION: Spray buffing and high speed buffing or burnishing with machines operating at greater than 1500 rpm in order to restore gloss is not normally required for Mannington Commercial products with QGHP. If utilizing spray buffing or high speed burnishing make sure there is an adequate foundation of polish. Note: Cleaning and maintenance frequency varies based on specific traffic volume and area of use. Use of entryway systems/walk-off mats, combined with daily sweeping and a reasonable wet cleaning frequency will help minimize more extensive maintenance steps. Note: Areas that receive an excessive amount of traffic or heavy loads such as direct entryways, ER s, or common areas may require alternative maintenance options for optimal appearance. MAINTENANCE 114
115 M A I N T E N A N C E Aberdeen Collection Heterogeneous Light General Information The following maintenance procedures are recommended for Mannington Aberdeen Collection when installed in light or medium use commercial applications. New Floors Floor covering that has just been installed should not be washed or maintained for at least 24 hours to ensure bonding of all adhesives and seam sealers, etc. Walking traffic should be kept to a minimum and moving of heavy appliances and equipment should be avoided for 24 hours for the same reasons. Seam sealers should be allowed to dry thoroughly and not allowed to be trafficked for at least 24 hours. Precautions When moving heavy furniture, equipment, or appliances over floor covering, care must be taken to use sheets of hardboard, plywood or other suitable protective materials so as not to mar or gouge the floor covering. Use protective runways even if objects are equipped with wheels or an appliance dolly is used. Support furniture with wide-bearing, non-staining floor protectors. Ideally, the protectors should be a minimum of 1 in diameter, made of hard plastic, and rest flat on the floor. Casters with a minimum 3/4 flat surface width or floor protectors are recommended for all movable furniture. Make sure any metal protectors are rustproof. Replace narrow dome furniture rests with wide-bearing ones. Basic Maintenance The basic maintenance schedule for most commercial installations contains five steps: 1. Dry mopping / sweeping 2. Damp mopping 3. Wet scrubbing 4. Rinsing and pick-up 5. Power buffing NOTE: During cleaning, floors become wet and slippery. Caution wet floor signs must be displayed. Although daily sweeping is recommended, the remaining procedures need only be performed as necessary. Controlling Grit Surface dirt and grit should be kept from being tracked onto the flooring. The abrasive action of these materials underfoot can cause surface dulling and scratching. Mats with non-staining backings at entryways are strongly recommended. MAINTENANCE Entryway flooring should be at least as wide as the doorway and a minimum of 6-12 ft. long (3-6 foot falls). Entryway flooring should have non-staining backing. Coco-fiber mats are not recommended as they may scratch the surface of resilient floors. Routine cleaning of entryway flooring should be included in the maintenance procedure. This will increase effective entryway life. Although soft bristle brooms or vacuum cleaners may be used to control dirt and grit, dust-mopping with a treated (non-oily) mop is the most cost effective and, therefore, most widely used method. Damp Mopping Damp mopping should be used to remove residual surface dirt that remains after dust mopping. The use of a tight mop (one that has been well wrung out) is effective and will require less drying time. We recommend high-quality nonalkaline cleaners. Many cleaners leave an unsightly residual film, rinsing the floor will provide a cleaner surface. 115
116 M A I N T E N A N C E Aberdeen Collection (continued) Heterogeneous Light Wet Scrubbing Wet scrubbing is required when the flooring has become heavily soiled or marked. Scrubbing with a high quality nonalkaline cleaner followed by rinsing is recommended. In addition, if stripping solution or cleaner is used at a higher than recommended strength, a final rinse step is required. Scrubbing machines which operate in the low range (350 RPM or less) are most commonly used. These low RPM machines give better scrubbing action, less water slinging, and allow working a soiled or marked area more effectively than a high RPM machine. A pad no coarser than a hog s-hair pad is recommended. (Coarse synthetic pads or stiff bristle brushes should only be used for wet scrubbing when an ample amount of cleaning solution is applied to the floor.) The use of automatic floor machines has become prevalent in the commercial maintenance industry. These machines, which are totally self-contained, apply the cleaning solution, scrub the floor, and vacuum up the dirty solution in one pass. Damp mop rinsing, which provides a cleaner floor, is recommended. Floor Polishing and Dry Buffing Buffing is the recommended method for maintaining and restoring luster on all Mannington Aberdeen Collection floors. Normal cleaning in conjunction with occasional buffing will maintain the floor s luster. Although polishes are not the norm for these products, they will work, and a high quality metal cross-linked liquid acrylic finish can be used. Use of quality cleaner is recommended to remove polish and heavy dirt buildup. Dry buffing over heavily soiled or badly marked areas should be avoided because it increases the risk of burnishing residue into the flooring surface. These heavily soiled areas should receive special attention using appropriate cleaners / strippers during wet scrubbing to ensure complete removal of the soiling material. High-speed buffing (burnishing) machines operate in the medium range (1500 RPM or less). The use of high speed machines, those operating over 1500 RPM, is not recommended. Lamb s wool pads are the preferred pads used for gloss restoration. These pads significantly reduce the chance of scarring or scratching the flooring surface. Lamb s wool pads should be kept clean by washing in Woolite or a similar product. Dry buffing with synthetic pads will also restore gloss. Extreme care must be used to prevent these types of pads from burning or scarring the floor. When using synthetic pads, it is critical to keep the buffing machine in constant motion. Low speed (350 RPM or less) machines will restore gloss as well as higher speed buffers, but will require more time to cover equivalent flooring area. Power buffing machines are intended primarily for gloss enhancement rather than soil or scuff removal. Floor Finishes Although finishes can be used on Mannington s Aberdeen Collection, they are not needed; and by not performing unnecessary procedures, a facility can achieve considerable savings of both time and costs in a commercial maintenance program. MAINENTANCE 116
117 M A I N T E N A N C E Magna Inlaid Maintenance for a Newly Installed Floor 1. Sweep or vacuum the floor after the seam is completely dry. 2. Damp mop the floor the day after installation with a diluted, non-alkaline, general purpose floor cleaning solution to remove heel marks or stubborn soil that may have occurred during installation. 3. Allow at least 48 hours for the seam to be bonded and the floor to be adhered tightly to the sub floor before washing or scrubbing the floor. Keep walking traffic to a minimum and avoid moving heavy objects across the floor during this time period. 4. When the floor has been thoroughly cleaned and dried, immediately apply multiple coats (3 5 coats) of a high quality cross-linked acrylic floor finish to protect the floor surface. Regular Maintenance 1. Dry sweep or dust mop the floor to remove the loose debris and grit. Using walk-off mats at entrances to buildings can prevent grit and stainants from being tracked onto the surface of a floor. 2. Damp mop the floor using a properly diluted, non-alkaline, general purpose floor cleaner to maintain an attractive appearance. A low rpm floor machine with the appropriate pad for scrubbing (white or red) may be used to remove heavy soiling on the floor. 3. After a finished floor is cleaned, rinsed, and dried, it may be spray buffed or burnished to repair scratches in the surface or to bring back the shine of the floor. 4. To spray buff, apply a spray buff medium in front of the machine in an area no larger than 2 x 3 and buff immediately. Buff until the floor is glossy and is not tacky to the touch. 5. Burnish buffing gives a higher gloss look. Utilizing RPM high floor machines with proper selection of pads can restore gloss to a finished floor. 6. To extend the life of the finish and to lengthen the time between recoatings, it is recommended that a finish restorer be used. Apply the finish restorer with a damp mop or automatic scrubber. A thin coating of finish restorer or spray buff solution on the floor can protect the finish from abrading when burnish buffing. 7. If the floor is badly soiled and scratched, spray buffing or burnishing will no longer restore the shine of the floor. A stripping operation is required to remove the dirty and damaged finish, followed by reapplication of a new finish. 8. A deep scrub can be performed to remove scratches and soil. This should be performed with a blue or green pad with a neutral cleaner. Then follow the finishing procedures. If a deep scrub and re-coat does not bring the required luster and shine back, the floor will require stripping. 9. Promptly repair any damage to the floor noticed during the performance of routine maintenance. Refer to the Mannington Professional Installation Guide for floor repair information or call NOTE: During cleaning, floors become wet and slippery. Caution wet floor signs must be displayed. MAINTENANCE Cleaning Procedure 1. Sweep the floor with a dust mop or soft push broom to remove all loose dirt and dust. Carefully remove any sticky substances with a putty knife or dull knife. 2. Damp mop or scrub the floor with a non-alkaline, general purpose cleaner. Prepare the solution according to manufacturer s instructions. 3. Spread the solution on the floor, covering an area about 3 x 3. Use either a mop or a floor machine equipped with a clean scrubbing pad to remove all dirt. Keep the mop as clean as possible by rinsing frequently. This ensures that soil is being removed effectively. In general, one gallon of cleaning solution can clean approximately 2000 square feet. 4. Rinse the floor with a clean mop and clear water. Use a mop or a wet / dry vacuum to remove all wet residue left on the floor. 5. Allow the floor to dry thoroughly before opening it to traffic. NOTE: In special application areas, such as hospital operating rooms and clean rooms where waxes or finishes are not normally applied, the use of wet or dry mechanical scrubbing is NOT recommended nor required. In these areas, floors should be damp mopped to remove soils or stains. Antiseptics or disinfectants may be applied after damp mopping to sanitize, if required, and should be rinsed with water to reduce slip issues. 117
118 M A I N T E N A N C E Magna (continued) Inlaid Finishing Procedure 1. Prior to applying the floor finish, clean the floor thoroughly as described in the cleaning procedure. Any soil left on the floor will become trapped between the finish coats. 2. Dip the mop in the bucket of finish and tap lightly with the wringer. Saturation of the mop provides a more uniform application. Proper saturation is indicated when the finish drips slowly from the wrung-out mop. 3. When the floor is dry, apply the finish in a corner of the room opposite the door and work towards the door. 4. Apply the finish with smooth, overlapping strokes of the mop. Thin coats may dry fast, but often lack strength. Reload the mop with finish frequently enough to ensure that the finish is applied evenly. In general, the finish will cover 2000 square feet per one gallon bottle. 5. It is recommended that 5 coats be applied to build up a gloss and to provide an adequate foundation for spray buffing or burnishing operation. Allow 45 minutes to one hour dry time between each coat applied, and at least one hour after the last coat of finish has dried before opening the floor to traffic. 6. Discard the remaining finish into a sanitary sewer drain, adhering to the local disposition codes and regulations. Stripping Procedure 1. Remove all loose soil and debris from the floor with dust mop, push broom, or vacuum cleaner. 2. Follow the recommended dilution ratio of stripper to water. If cold water is used, longer contact time will be required for complete removal of the old finish. One gallon of properly diluted stripper solution will strip off square feet of floor area. 3. Begin application of the stripper in a corner away from the door, and work towards the door. Liberally apply the stripper solution to the floor with a mop, allowing the stripper solution to penetrate into the floor finish for several minutes. For heavy buildup, it may be necessary to apply more stripper to the floor in order to achieve a complete finish removal. (Warning: At this stage the floor becomes slippery.) 4. Check to see if the finish film is loosened sufficiently to be scraped off easily. Then scrub the floor with a nylon pad or brush (see pages ). 5. Remove all stripping solution with a squeegee and a wet vacuum or with a damp mop. Do not re-use solution. 6. Immediately rinse the floor with clear water, using a clean mop and bucket or auto scrubber. 7. Allow the floor to dry thoroughly. Floor fans will assist in shortening the drying time of the rinsed floor. The floor must be kept free of any dirt at this point, so avoid any walk-through traffic. 8. Immediately apply the finish by the following proper finishing procedure as recommended by manufacturer. 9. Discard the remaining finish into a sanitary sewer drain, adhering to the local disposition codes and regulations. Spray Buffing Procedure Spray buffing is a machine maintenance procedure to restore the gloss of a floor and to remove scuffs and black marks caused by traffic. Spray buffing can only be done when a solid base of at least five coats of finish already exists on the floor. 1. Sweep the floor to remove loose dirt and debris; remove sticky substances carefully with a dull knife. The floor must be clean before spray buffing. Do not spray buff solution as a cleaner. 2. Select the proper, clean spray buffing pad (see pages ) and attach to a floor machine with medium RPM capability. 3. Select an RPM setting appropriate for the buffing medium. Take appropriate precautions to assure grounding and protection of electrical circuits and connections. 4. Dilute the spray buffing medium as per manufacturer s instructions. A high speed floor machine will require that the spray buffing medium be less diluted for proper results. However, using higher concentrations at lower buffer speeds will slow down the operation and result in more soil becoming packed into the spray buffing pad. The spray buffing medium will cover an area of approximately 10,000 to 15,000 square feet per gallon. MAINENTANCE 118
119 M A I N T E N A N C E Magna (continued) Inlaid 5. Spray the medium as a light mist on a 2 x 3 area in front of the machine, enough to wet the pad. This gives the best gloss enhancement and best repair. If the pad is too dry, the operation will scratch and dull the finish. If the pad is overly wet, additional passes with the machine will be required to obtain proper repair of the traffic damage. When the pad becomes clogged with finish and soil, flip the pad over or replace it with a clean pad. The use of a synthetic pad will reduce scratching and burning. 6. After the spray buffing operation has been completed, remove the pad from the machine and clean it with a strong stream of clear water or soak the pad into the stripper solution overnight, and then thoroughly rinse it. 7. Allow the pad to completely dry before reusing. Burnishing / Buffing High speed burnishing / buffing provides the best gloss and damage repair. Floors which are to be high speed burnished should have at least 5-7 coats of finish. This base coat should be periodically rebuilt to compensate for the loss of finish from this operation. How often the floor requires burnishing is determined by the appearance of the floor and the traffic intensity. Burnishing more frequently than actually required wastes labor and unnecessarily removes the protective finish. Burnishing at too low a frequency will result in a degraded floor appearance and may allow traffic damage and soil embed in the finish. High speed burnishing / buffing is NOT a cleaning procedure, nor will it remove larger scratches. Keep the floor clean and minimize the grit that causes these scratches. Any residual soil on the floor will become embedded in the finish and will become darkened and discolored over time. Once this darkening has occurred, stripping off the finish and recoating will be necessary. Proper selection of the appropriate pad to match the floor machine is important. Low RPM machines and ones utilizing lower pad pressure may require the use of a more aggressive pad. Heavier pad pressure and more powerful machines, such as those with internal combustion engines, generally require the use of less aggressive pads. A mismatch of pad and machine may result in floor damage, dulled finish, or insufficient repair of traffic damage. Pads are typically color-coded based upon the aggressiveness of the pads, with lighter being less aggressive and darker being more aggressive. Burnishing / Buffing Procedure 1. The floor must be clean and dry before burnishing. Do not apply antiseptic or disinfectant until burnishing is completed. 2. Sweep or dust mop all surface debris and grit. 3. Damp mop the floor with a properly diluted floor cleaner. 4. Inspect the pad to ensure that it is clean and mechanically sound. 5. Perform a routine safety check on the equipment before beginning the burnishing operation. Take appropriate precautions to assure grounding and protection of electrical circuits and connections. 6. Operate the burnisher in a straight line, making sure to slightly overlap on each pass. MAINTENANCE 7. Keep the machine in constant motion to avoid surface abrasion and heat damage due to operating the machine in one spot too long. 8. When floor appearance does not respond to high speed burnishing, thoroughly clean the floor and apply a gloss restorer, spray buff, or recoat the original finish. 9. Burnishing is not recommended for installations exhibiting telegraphing of subfloor irregularities or debris trapped under the floor (inadequate floor preparation). High places will collect dirt and become dark and scratched. 10. Discard the remaining finish into a sanitary sewer drain, adhering to the local disposition codes and regulations. 119
120 M A I N T E N A N C E Magna (continued) Inlaid Low Maintenance Option 1. Use of walk-off mats at entryways is an essential part of extending the life and appearance of the floor. Frequent cleaning of walk-off mats will minimize tracked in grit. 2. Dry sweep or vacuum to remove the loose debris and grit. 3. Damp mop or scrub the floor using a diluted, non-alkaline general-purpose floor cleaner to maintain an attractive appearance. A low RPM floor machine with the appropriate pad for scrubbing (white or red) may be used to remove heavy soils, stains, or spills on the floor. 4. Dry buffing with a lamb s wool pad or white synthetic pad is the recommended method for maintaining and restoring luster on Realities floors. Normal cleaning in conjunction with occasional buffing will maintain the floor s appearance. Although polishes can be used on Realities floors, they are not needed. Not using polish results in considerable savings of both time and costs in a commercial maintenance program. 5. Dry buffing or spray buffing with synthetic pads will restore luster; however, use care to prevent these pads from burning or scarring the floor. When using synthetic pads, always keep the buffing machine in constant motion. 6. Dry buffing over heavily soiled or badly marked areas should be avoided as it increases the risk of burnishing the residue into the flooring surface. These heavily soiled areas should be scrubbed to ensure complete removal of the soiling material prior to dry buffing. Dry buffing is intended primarily for gloss enhancement rather than soil or scuff removal. 7. The use of high speed buffing (burnishing) machines, those operating over 1500 RPM, is NOT recommended. 8. Burnishing is not recommended for installations exhibiting telegraphing of sub floor irregularities or debris trapped under the floor (inadequate floor preparation). 9. The floor should have 5 coats of polish as a base. The floor must be cleaned, rinsed, and allowed to dry. Then it may be spray buffed or burnished to repair scratches in the surface or to restore the gloss. The use of high-speed buffing (burnishing) machines, those operating over 1500 RPM, is NOT recommended for these products. Lamb s wool pads are the preferred pads used for gloss restoration. These pads reduce the chance of scratching the flooring surface Lamb s wool pads should be cleaned frequently. Dry-buffing with synthetic pads will also restore gloss; however, use care to prevent these pads from burning or scarring the floor. When using 3M Thickline White synthetic pads, always keep the buffing machine in constant motion. MAINENTANCE 120
121 M A I N T E N A N C E ColorFields Rubber Sheet & Tile Introduction The following are recommended maintenance procedures for Mannington ColorFields Rubber Sheet and Tile Flooring. Proper and regular maintenance is necessary to protect and prolong the life of the floor. A good maintenance routine involves the following: Frequent sweeping, mopping, or vacuuming to control loose soil and grit. Prompt removal of stains and spills. Cleaning the floor with a properly diluted quality non-alkaline floor cleaner. Applying two coats of recommended cross-linked acrylic floor polish/sealer. Initial Job-Site Cleanup Maintenance Procedures Initial Cleaning Procedure: Dust mop the area with a Microfiber dust mop before cleaning to remove dirt and soil. For moderate to heavy construction soil during the first cleaning operation, apply a neutral ph cleaner through a properly set up floor scrubber. Follow manufacturers recommendations for the proper dilution ratio for a heavily soiled area. Using a higher dilution may dull the floor. Apply the cleaner through the floor scrubber with the vacuum turned off. Allow the cleaner to work for 5 to 10 minutes. Do not allow the solution to dry out. Once the cleaner has had time to work, scrub again. This time, turn on the vacuum system to remove the cleaning solution, rinse water and dirt. A second cleaning, using the same procedures, may be required on jobsites that are particularly dirty. It is better to repeat the procedures than to use harsher chemicals or methods that are more aggressive. After the job site dirt has been removed, reduce the neutral floor cleaner to a dilution ratio for moderate to light cleaning. Use a neutral floor cleaner to achieving optimal results. Optimal ph is 7 to 8 measured after the cleaner has been added to warm water. Recommended Products and Sources: Diversey Profi (also known as Taski Profi): Item # SJ Rubber floor cleaner and degreaser specially formulated to maintain rubber floors. One of many sources for Diversey Profi is National Everything Wholesale. Phone number is Diversey Wiwax (also known as Taski Wiwax): Item # Sj Diversey Wiwax floor cleaner is specially formulated for use on rubber floors. It is a blend of detergents, waxes and polymers that cleans, shines and protects rubber flooring when used on a regular basis. One of many sources for Diversey Wiwax is National Everything Wholesale. Phone number is Follow the manufacturer s label recommendations for proper dilution, use, clean-up and disposal. See specifications at It is important to use commercial cleaning equipment, described below, to achieve satisfactory results. MAINTENANCE Application of finish/sealer: After the floor is thoroughly cleaned, apply two coats of recommended cross-linked floor polish/sealer. Recommended procedure: Clean ColorFields as outlined above. Apply two coats of recommended finish / sealer with a clean mop or applicator. Allow 30 minutes trying time between coats. Keep all foot traffic off the floor between coats. Follow the manufacturer s recommendations for use and disposal. 121
122 M A I N T E N A N C E ColorFields (continued) Rubber Sheet & Tile Initial Job-Site Cleanup Maintenance Procedures (continued) Recommended Products and Sources: Carefree Floor Finish Sealer by Diversey. One of many sources for Carefree Floor Finish is Floor Hut at Follow the manufacturer s label for proper dilution, use, clean-up and disposal. See specifications at: Husky 1022 Floor Finish provides an optimal gloss level with excellent durability. It is formulated with acrylic polymers and bonding agents to make application easy (less mop drag) and stand up to high traffic applications. One of many sources for Husky 1022 Floor Finish is Jani-Chem, Inc.: (800) Follow the manufacturer s label for proper dilution, use, clean-up and disposal. See specifications at: Ongoing Maintenance Instructions Recommended Ongoing Cleaning Procedure: Ongoing ColorFields maintenance is virtually the same as cleaning newly installed product. Dust mop the area with a Microfiber dust mop before cleaning to remove dirt and soil. Begin ongoing maintenance by thoroughly cleaning the flooring with a properly adjusted Auto Scrubber and hard Microfiber pad for best results. Follow the manufactures recommended dilution ratio of a ph neutral floor cleaner. Use a dilution rate for light soil or heavy soil depending on the condition of the floor. Keep these measurements accurate. Remember, more is not better. Small Sized and Tight Quarter Installations: Dust mop the area with a Microfiber dust mop before cleaning to remove dirt and soil. Begin ongoing maintenance by thoroughly cleaning the flooring with a Microfiber pad. Apply ph neutral cleaning solution with a deck brush Let the solution stand for approximately 5 to 10 minutes before scrubbing. Do not allow the cleaning solution to dry. After 5 to 10 minutes, scrub the surface with Microfiber pad or deck brush. Use a wet / dry vacuum system to remove the cleaning solution, rinse water and dirt. Just mopping will not work. Floor scrubbers for tight quarters are becoming more common and readily available. Using a small floor scrubber is preferred method, if possible. Large Installations: Dust mop the area with a Microfiber dust mop before cleaning to remove dirt and soil. Begin ongoing maintenance by thoroughly cleaning the flooring with a Microfiber pad Mix the manufactures recommended dilution ratio of a ph neutral floor cleaner with warm water. Use a dilution rate recommended for light soil or heavy soil depending on the condition of the floor. Keep these measurements accurate. Remember, more is not better. Use a floor scrubber with the recommended Microfiber pad, a white pad or scrub brushes. Again, Microfiber pads generate the best results. For on-going maintenance, using a floor scrubber, there is no need to let the solution stand for 5 to 10 minutes. One pass is usually sufficient when maintenance events occur on a regularly scheduled basis. Ongoing Maintenance Includes Application of Floor Finish Sealer: Dust mop the area with a Microfiber dust mop before cleaning to remove dirt and soil. To enhance gloss level and appearance retention, buff with a red pad using 175 to 1500 RPM equipment. Alternatively, dry buff using a white pad and 1000 to 1500 RPM equipment. Follow manufacturer s label for proper dilution, use, clean-up and disposal. Recommended Commercial Cleaning Equipment, Pads and Detergents Recommended Commercial Cleaning Equipment: MAINENTANCE The use of a properly adjusted commercial flooring scrubber is required. A floor scrubber applies the recommended detergent at the prescribed dilution rate, scrubs the floor, applies rinse water and vacuums it all up, in one operation. To work properly, a floor scrubber must be set up and adjusted properly. 122
123 M A I N T E N A N C E ColorFields (continued) Rubber Sheet & Tile Recommended Commercial Cleaning Equipment, Pads and Detergents (continued) Notable adjustments include: Scrub head or cylinder pressure Water and detergent auto mixing controls Rinse water application rate Vacuum system adjustments for thorough dirty water reclamation Squeegee pressure, cleanliness, angle and flexibility ColorFields Rubber Flooring is easiest to maintain with a properly adjusted floor scrubber fitted with a hard micro fiber pad (see sourcing details below). A white pad may be used as well. The use of a single disc floor-scrubbing machine, or swing machine will result in less satisfactory results and typically more maintenance effort. A single disc floor scrubber is to be fitted with a with a hard microfiber pad, a white pad or 22 gauge flagged nylon bristle brushes. A wet-dry shop vacuum must be used to reclaim the dirty rinse water after scrubbing. Note: When using a single disc floor-scrubbing machine, the floor MUST be wet with a recommended cleaning solution and kept wet during the procedure. Recommended Microfiber Pads and Floor Scrub Brushes Microfiber Microfiber pads made for cleaning hard surface flooring, installed on an auto scrubber will generate the best results. Microfiber pads remove more soil, more efficiently, than traditional cleaning brushes and standard pads. Microfiber pads are recommended as the best approach for cleaning and maintaining ColorFields Rubber Sheet and Tile. They do a superior job, are reusable and are less costly. It is important to change and launder microfiber pads on a regular basis for best performance and lower overall costs. Standard White Pads When installed on a floor scrubber, white pads will generate acceptable results. Resist the temptation to use pads that are more aggressive. Aggressive pads will tend to dull the floor and make maintenance more difficult. 22 Gauge Flagged Nylon Bristle Brushes - When installed on a floor scrubber, 22 gauge flagged nylon brushes will generate acceptable results. Resist the temptation to increase the auto scrubber s brush pressure setting in an attempt at more aggressive cleaning. Sources of Supply - Recommended Microfiber hard cleaning pads, standard pads and cleaning brushes can be purchased from many janitorial supply providers including: MAINTENANCE Hercules & Hercules Inc.: (855) Carlisle Sanitary Maintenance Products: (608) Heritage Brush: (800) or (610) M Facilities Care and Cleaning: (800) National Everything Wholesale: (800) Floor Hut: (877) Floorguy: (877) Jani-Chem, Inc.: (800) General Precautions Do not use gasoline, turpentine or acetone for spot removal. Do not use abrasive scrubbing or buffing pads or steel wool. Do not use non-flagged brushes, which are too stiff for rubber tiles. Do not use strong cleaners such as Lestoil, Top Job, Pine Sol, Spic n Span or similar products. Note: Challenging floor maintenance situations and stain removal issues are addressed in a separate document called Maintenance Recommendations - Difficult Cleaning Challenges for Mannington Rubber Flooring. Visit Mannington.com for more information. 123
124 M A I N T E N A N C E Reset Recycled Rubber Sports Flooring Sheet, Tile & Interlocking Tile Floor Protection The specifier should include specification details to protect the floor post-installation and until job construction is complete, such as covering the entire floor with paper or other floor cover ing device (plastic, plywood, etc.) until construction is completed and thorough cleaning and maintenance can be implemented. Assignment of Cleaning and Maintenance The specifier should determine and assign the responsibility for the initial cleaning and finishing. This responsibility should be specifically assigned to either the flooring contractor, general contractor, maintenance contractor, or owner. Reset Rubber flooring is manufactured from recycled materials and some variance in shade and color chip dispersion is normal. To help keep shading to a minimum Mannington recommends an initial cleaning as listed below. The specifier should determine and assign the responsibility for the initial cleaning and finishing before installation begins. This responsibility should be specifically assigned to the flooring contractor, general contractor, maintenance contractor, or owner. 1. Initial Cleaning Remove all surface soil, debris, drywall dust, sand, and grit by sweeping, dust mopping, or vacuuming with a high CFM vacuum. Scrub floor with a neutral ph (7-9) detergent, such as TASKI Profi cleaner with a mix of 10 oz./gal. of water, using buffer or auto scrubber with a soft nylon brush or approved pad. If floor is extremely dirty or shade level is high then the recommended stripping pads should be utilized. Pick up solution with a wet vacuum. Rinse with clean water, picking up the rinse water with a wet vacuum. For best results, follow up with a clean water mopping of entire area to remove any remaining residue and allow surface to dry thoroughly. 2. Recommended and Approved Pads 3M 7200 Black Stripping pad 3M 7100 Brown Stripping pad 3M 5000 TopLine Autoscrubber pad 3M 5300 Blue Cleaner pad 3M 5100 Red Buffer pad 3M 3100 Aqua Burnish pad Initial Cleaning TASKI Profi 10 oz./gal. water Daily Cleaning TASKI Profi 6-10 oz./gal. water Black, Brown pad or soft nylon brush Approved pad, soft nylon brush or microfiber mop MAINENTANCE Heavy Soil and Restorative Cleaning TASKI Profi, ice it or rubbersafe 10 oz./gal. water Brown or Black pad 124
125 M A I N T E N A N C E Mannington Linear Stair Treads Introduction Mannington Commercial Linear Series Stair Treads normally require very little maintenance. Due to its refined and integral surface, its natural satin finish is maintained with very little maintenance. Regular Cleaning For routine cleaning, wipe treads with a damp cloth. This is generally sufficient to restore the tread s finish and appearance. For tougher jobs, a deck brush or scrub brush and a neutral detergent will clean off most grime and scuffs. For larger installations, a small rotary scrubber specially made for stair treads is recommended. Your local janitorial supply house may be contacted for various options. Scuff Removal Shoe sole marks, marks from cleaning equipment and other rolling stock can be unsightly and require removal. Most of these marks can be removed with a mildly abrasive cleaner such as Soft Scrub. Abrasive cleaners like Comet are not recommended. Finish or Wax Removal Finishing or waxing Mannington Linear Series Stair Treads is not recommended. It is not required and can be unsightly and objectionable. If the Stair Treads are accidentally finished or finish is splashed onto the surface as it is being applied to the adjacent flooring, the finish or wax can be removed using a gentle hand application of a neutral ph wax remover. Be careful not to over-clean the spot on the Stair Treads, to prevent any surface color variation that may become more noticeable than any the discoloration from the waxed area. MAINTENANCE 125
126 M A I N T E N A N C E Mannington Rubber Tile and Stair Treads Mannington Rubber Flooring Products Mannington rubber flooring is one of the longest wearing and most durable flooring products available. This document addresses initial maintenance procedures, ongoing or more routine recommendations, as well as the special instructions that may call for procedures outside of normal maintenance recommendations. Mannington premium rubber flooring s built-in emerging waxes help release dirt, grime, gum and tobacco tars and allow it to produce a continuous luster for years without waxing. Tile that has not been cleaned in some time will quickly brighten when cleaned as instructed. Proper and regular maintenance procedures are important to ensure maximum savings from our rubber flooring s selfwaxing qualities. Rubber flooring s natural appearance with emerging waxes are much like the natural oils in your skin. Both Mannington rubber flooring and your skin work better with proper care to function efficiently. Strong cleaners used on Mannington rubber flooring can remove its emerging waxes temporarily. This Maintenance Instruction Sheet is divided into three sections: Initial Maintenance for newly-installed tile during its 30 day break-in period, Routine or Ongoing maintenance and Special Maintenance Situations. Within each section, procedures needed to properly maintain small, medium and large areas are reviewed. All maintenance procedures recommended apply equally to Mannington rubber tiles and stair treads. Small to medium-sized areas usually require the most individual pieces of equipment and the most man hours per square foot. Automatic machines are available for medium and large installations, where one operator can quickly apply, scrub and remove cleaning solution in one operation. SECTION 1 Maintenance for Newly-Installed Tile During Its 30 Day Break-In Period During Mannington rubber flooring s break-in period (the 30 days immediately following its installation), the flooring undergoes a maturing process that makes it easier to maintain, produces less tracking and results in a brighter luster. During this time, tile and treads will not look as bright nor be as easy to maintain as when it has completely matured or cured. Mannington rubber flooring may tend to track dirt during this period. However, it will become brighter with each successive maintenance event. This is completely normal for new rubber tile and treads. Therefore, initially do not over clean or over scrub and do not apply waxes or coatings of any kind, except as discussed later. After the tile or treads have been installed, wait as least 72 hours for urethane, epoxy or one-part adhesive to completely cure before initial cleaning. Adhesive Removal: Excess adhesive should have been removed as Mannington rubber tiles or stair treads were being installed. If any dried, one-part adhesive residue is still evident, attempt to remove it with mineral spirits and wipe dry. (Note: Cured epoxy or urethane adhesive may not come off without causing surface damage, resulting in the need to replace any damaged tile.) For tile or tread installations of all sizes, begin by sweeping the tiles with a medium-soft bristle push broom or dry mop. A scrubbing machine not exceeding a speed of 350 rpm and equipped with a 22 gauge flagged nylon brush can be used on tile. Brushes: Appropriate wet cleaning brushes are available to fit most floor scrubbing machines. It is important to use a flagged nylon (split ends or sanded ends of fibers) cleaning brush with open spaces and flexible brush ends to clean the high and low surfaces of Mannington rubber tile without stripping the natural migrating waxes off of the studs. Recommended wet cleaning brushes: Carlisle Sanitary Maintenance Products; Phone: Flo Pac Brush; or Cleaner: Prepare the recommended neutral cleaner the key to good maintenance. Neutral means a ph of 7 to 8 measured after the cleaner has been added to warm water. For moderate construction soil during the first cleaning operation, dilute exactly 4 ounces of cleaner per gallon of water. Remember, more is not better. Apply the cleaning solution to Mannington rubber flooring with a rayon mop or with a deck brush or hand brush. Allow the solution to stand for between 5 and 10 minutes. MAINENTANCE 126
127 M A I N T E N A N C E Mannington Rubber Tile and Stair Treads (continued) Maintenance Instructions On small installations, scrub the tile with the applied solution, using a hand brush, deck brush or scrubbing machine. Note that mopping alone will not work on rubber flooring. Brushing and scrubbing are an essential part of rubber floor maintenance. Wet vacuum or mop up the solution. On large installations, for large newly-installed areas, automatic scrubbing machines of various sizes can be used with one operator to simultaneously apply, scrub and remove solution. Again a 22 gauge, flagged nylon brush should be used for scrubbing. Mix 4 ounces of the neutral floor cleaner per gallon of warm water (or as recommended) and pour this solution into the automatic scrubber. Apply the solution to the floor with a mop or with the scrubbing machine with its vacuum system off. Allow the cleaning solution to remain on the tile for 5 to 10 minutes. Scrub again, but this time use the vacuum system to remove the spent solution. Remember, during the first month, scrub new tile weekly or as needed. After the first scrub, use a cleaner mix of 2 ounces per gallon of water. Cleaners: There may be other suitable sources of neutral cleaners. But Taski, a product from JohnsonDiversey, who has been working with rubber flooring since the 1940 s, seems to be the most suitable product we can recommend. They and their distributors are the current preferred source for flooring solutions and service. Taski can be secured through JohnsonDiversey at Stair Treads: Cleaning newly-installed Mannington rubber stair treads, whether round, square, safety or diamond designs, requires essentially the same procedures as for new rubber tile. First, remove excess installation adhesive with mineral spirits and wipe dry. Sweep the treads with a medium-soft bristle broom or dry mop. Next, prepare the recommended neutral cleaner, with a ph of 7 to 8, by diluting 4 ounces of cleaner per gallon of water. Apply the cleaner solution to the stair treads with a rayon mop or with a deck brush or hand brush. Allow the solution to stand for between 5 and 10 minutes. Scrub the treads with the applied solution, using a hand brush or a small portable scrubber. Then, remove the solution with a wet vacuum machine. Finally, wipe the treads down with a soft, absorbent hand towel. Wait 3 days until treads have finally cured before attempting to brush the tiles or treads for added luster. SECTION 2 Ongoing Maintenance After Its 30 Day Break-In Period Ongoing wet cleaning is virtually the same process as cleaning newly installed tiles and treads, except that Mannington rubber flooring is much easier to clean and will be more forgiving. Begin ongoing maintenance by thoroughly sweeping the tiles or treads with a push broom or mopping it with a dry mop. Mix a neutral floor cleaner with warm water. The dilution rate for light soil is only 2 ounces per gallon of water. For heavily soiled flooring, use only 3 to 4 ounces per gallon of water. Keep these measurements accurate. Remember, more is not better. Small and Medium Sized Installations: Apply cleaning solution with a deck brush or with a rayon mop. Let the solution stand for approximately 5 to 10 minutes before scrubbing. Do not allow it to dry. After 5 to 10 minutes, scrub the surface with a deck brush or single-disk scrubbing machine. Then remove the solution with a mop or wet vacuum. Large Installations: Use an automatic scrubber with a 22 gauge flagged nylon brush. An automatic machine reduces labor costs by using one operator to simultaneously apply, scrub then wet vacuum the solution. Apply cleaning solution with the machine, using vacuum and scrub operations simultaneously. MAINTENANCE Cleaning machines specifically designed for use on rubber flooring feature very powerful wet vacuums needed for three-dimensional flooring surfaces. Cleaning machines with strong vacuuming capabilities will help remove all traces of wetness. When using an automatic scrubber in heavily soiled areas, apply the solution and scrub with the machine in vacuum-off position. Let the solution stand for 5 to 10 minutes. Then, using no additional solution, rescrub with the vacuum on. Let the floor dry, and then check the luster level. Mannington rubber flooring should be clean and, when dry, have good luster. In succeeding weeks of cleaning, its luster will increase if the correct ph-balanced cleaner solution has been used and the tiles have been properly scrubbed and wet-vacuumed. 127
128 M A I N T E N A N C E Mannington Rubber Tile and Stair Treads (continued) After Mannington rubber flooring s 30 day break-in period, our natural migrating waxes will have emerged. Dry brushing is normally not necessary. However, if added luster is desired, dry brush with a natural bassine bristle brush. Dry polishing brushes include union fiber, Tampico or bassine bristle brushes. Small Area Polishing: For polishing small areas, hand-towel, using a soft bath towel wrapped around a push broom, or a small single-disk polishing machine with a bassine brush. Medium Area Polishing: Brush or dry-polish medium-sized areas with a single disk polishing machine of up to 350 rpm s equipped with a bassine natural bristle brush. This brush is specifically designed to be used dry. Large Area Polishing: For polishing larger areas, use an automatic scrubbing machine equipped with a dry bassine natural bristle brush. Precautions Do not use gasoline, turpentine or acetone for spot removal. Do not use abrasive scrubbing or buffing pads or steel wool. Do not use non-flagged brushes, which are too stiff for rubber tiles. Do not apply waxes or acrylics, except as instructed. Do not use strong solvent cleaners such as Lestoil, Top Job, Pine Sol, Spic n Span or similar products. SECTION 3 Special Maintenance Needs If Mannington rubber flooring has been subjected to improper maintenance procedures, the tiles and treads will look dull because their accumulated surface wax deposits have been stripped away. Tiles and treads in this condition will show tracking because Mannington rubber flooring s soil-releasing surface waxes have been removed by excessive scrubbing or chemical over concentration. Fortunately, our natural waxes will resurface within 30 days. To help restore Mannington rubber tile to its normal luster and condition, first dry-brush the tiles with a bassine natural bristle brush. However, if all of Mannington rubber flooring s surface wax has been removed, brush polishing will be nearly impossible because of brush resistance to the rubber tile. If this accidental over-cleaning has left the tiles stripped, or even dull and sticky, they will track soil. Use one application of Taski Wi-Wax and Taski Ombra. Both products are an acrylic, medium-luster reconditioning surface solution with a luster similar to Mannington rubber flooring. The products are resilient and will not flake off, unless the tile was not thoroughly cleaned. This surface reconditioning process will allow Mannington rubber flooring s natural waxes to automatically resurface in about 30 days. A coating of Wi-Wax or Ombra will wear off with normal foot traffic in 30 days and no further coatings should be needed. Application: After the tiles have dried thoroughly, use a rayon mop to apply one even coat of Taski Wi-Wax or Ombra and then let dry. For other Special Maintenance Situations, such as spot cleaning, gum, tar, black heel and scuff mark removal, and unneeded waxing, the following procedures are recommended. Spot Cleaning (water-soluble stains, milk, coffee, food, etc.): Spray-mist the tiles or treads with a gentle glass cleaner, such as Windex or Glass-Plus. When dry, buff the area with a soft dry towel to help restore luster. Gum Removal: To remove gum in large installations, use a hot water, high pressure washer, then vacuum the excess solution. For small areas, apply a gum remover, such as Disolve-It by Castex or Citrus Express. After the gum has softened, remove it with a wood, plastic or Teflon spatula. Wipe clean with an absorbent cloth. Some temporary dulling may result. If so, spray-apply a small amount of Ombra to the dulled area. Remove excess Ombra with just one wipe of a soft, absorbent towel. Mannington rubber flooring s built-in waxes in cleaned area will re-emerge within 30 days. Buff the dulled area to match Mannington rubber flooring s luster. MAINENTANCE Scuff and Black Heel Mark Removal: Black heel marks may appear on Mannington rubber tiles, usually when they are new or under 30 days old. Such marks can be removed with mineral spirits, leaving the cleaned spot temporarily duller on the surface. Spray or wipe Ombra on the spot, but use sparingly. Remove excess with one wipe of a soft, absorbent towel. Remember, new Mannington rubber flooring s built-in waxes will re-emerge within 30 days after installation, at which time it will be far less susceptible to black heel marks and scuffs. 128
129 M A I N T E N A N C E Mannington Rubber Tile and Stair Treads (continued) Tar Stain Removal: Tar can be particularly harmful to all rubber tile. It will permanently stain or yellow Mannington rubber flooring if not removed quickly with a soft, absorbent towel dampened with mineral spirits. Some temporary dulling may result. If so, apply a small amount of Ombra to the dulled area. Top Coating or Waxing: Applying floor finishes to Mannington rubber flooring to produce an artificial shine is unnecessary and generally ineffective. Mannington rubber flooring s natural internal migrating waxes will prevent ordinary acrylic waxes or top coatings from sticking to its surface. The cracked acrylic wax coating will look terrible and trap dirt. Stripping: If despite all instructions, an incompatible acrylic has been applied to Mannington rubber flooring, the topcoating should be removed using an appropriate stripper diluted for light or medium wax removal. A product called Taski Ice-It or similar stripper should be used. Apply the stripper to Mannington rubber flooring with a rayon mop and let stand for 5 to 10 minutes. Scrub with a deck scrub brush or a single-disk or automatic scrubbing machine equipped with a flagged 22 gauge nylon bristle brush. As an alternative, anything less in abrasiveness than a pink or beige pad can be used. Check results in a small area before proceeding. Remove spent solution with a wet vacuum. Then rinse with clean water. Once thoroughly dry, if tiles show some luster, as can be seen with older installations, dry brush the tile with a bassine natural bristle brush. If the tiles look clean, but are dull and sticky, apply one coat of Taski s Ombra with a rayon mop. The Ombra coating will slowly disappear with normal cleaning, and Mannington rubber flooring s waxes will soon re-emerge. Remember, Mannington rubber flooring does not need waxing of any kind. With patience, the flooring s natural luster will develop over time. Mannington rubber flooring in restrooms can be cleaned by applying 2 ounces of Profi cleaner per gallon of water with a single-disk scrubbing machine or deck brush, then hosing down the spent solution into a drain. Remove surplus solution by squeegeeing or wet-vacuuming. Quick High Luster Shortcut: Mannington rubber flooring cures in 30 days, at which time it becomes easier to brush and maintain its bright, natural luster. In some cases, a bright luster is needed immediately after installation. Use a standard nylon scrubbing brush, apply Profi cleaner at 6 ounces per gallon of warm water, scrub the tile, rinse with fresh water and let dry. Then, apply two coats of Taski Ombra on the tile with a rayon mop, letting the first coat dry before applying the second. High luster speed buffing of Mannington rubber flooring is possible, but only on the low vibration square profile (LVS), SimplySmooth or Sculptured profiles. This process uses a special tricycle style carriage for a high speed burnishing machine with a single disk. The machine is fitted with a soft white pad and is raised off the floor slightly so that the pad just kisses the tiles. It operates at speeds of up to 1100 rpm, versus the normal maximum of 350 rpm. This method provides a higher luster than with other buffing methods. Spray small amounts of water on the tiles if you feel it helps to develop luster. Remember, this process can be used only on the profiles listed above. MAINTENANCE Summary All of these maintenance recommendations are based on the best available data obtained through years of testing and field experience. However, because of variations in actual cleaners, equipment, applications or site conditions, the results may vary. Following these guidelines and recommendations will give you a good starting point. From there, your own experience and knowledge will help bring out the best results. It is our aim to help you maintain Mannington rubber flooring s luster through years of service without waxing. 129
130 M A I N T E N A N C E VCT and Premium VCT General Information These recommended maintenance procedures apply to Mannington Commercial VCT and Premium VCT products Essentials, Progressions, Touchstone and SafeWalks. Proper and regular maintenance is necessary to protect and prolong the life of the floor. A good maintenance routine involves the following: Frequent sweeping, mopping, or vacuuming to control loose soil and grit Prompt removal of stains and spills Polishing to protect the floor surface and add gloss. Always use a quality name brand product and follow manufacturer recommendations to ensure the best results. Restrict traffic when cleaning, waxing, or stripping due to the possibility of slipping. Use protective runways when moving heavy objects, even if equipped with wheels, to avoid causing adhesive displacement, marring, or gouging of the tile. SafeWalks flooring has an embossed surface embedded with grit which provides slip retardant properties. This unique surface requires close attention to the regular maintenance of this product. Using conventional commercial floor polishes helps minimize complications that can arise when cleaning an embossed surface. Do not use too much polish because it will reduce the slip retardant characteristics of the tile s surface. Maintenance for a Newly Installed Floor Do not wash or scrub the floor for at least 4 or 5 days after installation to allow the floor tiles to bond to the underlayment / subfloor. Keep heavy furniture and equipment off the floor for at least 48 hours to allow the adhesive to set. Sweep or vacuum thoroughly and remove any residual adhesive with a clean white cloth dampened with mineral spirits. Apply two coats of an acrylic floor polish to temporarily protect the floor until regular maintenance procedures can begin. Preparation for Commercial Use After the floor has been installed for 4-5 days, preparation for commercial use involves the following: 1. Scrub the floor using a good quality non-alkaline floor cleaner diluted per manufacturers instructions and a floor machine of low RPM equipped with a green or blue scrubbing pad. For SafeWalks, use a single-disc floor machine (300 rpm or less) equipped with a scrub brush and use a wet vacuum to take up the excess solution. 2. Heavily soiled or scratched floors may be stripped, following the same procedure as for scrubbing, but using a floor stripping detergent. 3. Thoroughly rinse the floor, being careful to avoid flooding the floor, and allow the floor to dry completely. 4. Apply 5 coats* of an acrylic floor polish, allowing sufficient drying time (at least 30 minutes) between applications. For SafeWalks, apply 2 coats* of acrylic polish. *NOTE: Maintenance conditions vary. Contact the polish manufacturer to determine the specific recommendations for polishing based upon your equipment, schedule, traffic, and desired gloss level. Regular Maintenance 1. Clean floor frequently with a treated (non-oily) dust mop or clean, soft push broom. Using walk-off mats (nonstaining types) at entrances to buildings can prevent grit from being tracked onto the surface of the floor. 2. Damp mop the floor as required, using a properly diluted, neutral-detergent solution. Light scrubbing with an automatic floor machine may be required in heavily soiled areas. Use a mop or wet/dry vacuum to remove all wet residue left on the floor. 3. Rinse the floor with clean water and allow to dry completely. 4. After damp mopping or light scrubbing, spray buffing or high speed burnishing may be performed to restore gloss. 5. Allow the floor to dry thoroughly before opening to traffic. MAINENTANCE NOTE: During cleaning, floors become wet and slippery. Caution wet floor signs must be displayed. 130
131 M A I N T E N A N C E VCT and Premium VCT (continued) Spray Buffing Spray buff only when a solid base coat of two coats of polish already exists on the floor. Spray buff using a diluted floor polish (7% 8% solids) or a spray buffing compound. Before the liquid is dry, buff with a floor machine equipped with a white or tan buffing pad or a soft brush at medium RPM. After buffing the liquid dry, a thin, glossy film remains which protects the base coat of polish, reducing the need for stripping. Heavy traffic areas may need extra coats of polish on a more frequent basis. High Speed Burnishing CAUTION: Operators of ultra high-speed burnishing machines should be well trained. Careless or improper use of these machines can result in severe and extensive damage to the floor. Ensure that the floor is free of all loose dirt and debris. High-speed burnishing utilizes a machine of RPM capacity. It is a dry buffing procedure performed on a floor already coated with at least four coats of polish specifically formulated for burnishing. This base coat should be periodically rebuilt by recoating to compensate for loss of finish from this operation. The machine should be operated in a straight line, with a push-pull method, rather than a sweeping motion. When the floor appearance no longer responds to high-speed burnishing, thoroughly clean the floor and apply gloss restorer, spray buff or recoat the original finish. Burnishing is not recommended for installations exhibiting telegraphing of subfloor irregularities or debris trapped under the floor (inadequate floor preparation). Use of high quality maintenance products and regular adherence to a quality maintenance program will greatly reduce the need for stripping. Strip floors only when necessary. Follow the manufacturer s label recommendations for proper dilution, use, clean-up, and disposal of stripper. Stripping CAUTION: High solvent content strippers (no-rinse / no-scrub) must NOT be used on tile floors installed less than two years old. Apply stripper liberally with a clean mop and allow it to penetrate into the floor finish for several minutes (without allowing it to dry). Scrub the floor with a single disc floor machine equipped with a red, green, or blue pad at low RPM. Remove all stripping solution with a squeegee and wet vacuum or a damp mop. Immediately rinse floor with clear water, remove rinse water with a squeegee and wet vacuum or damp mop. Allow the floor to dry completely, then reapply polish. MAINTENANCE 131
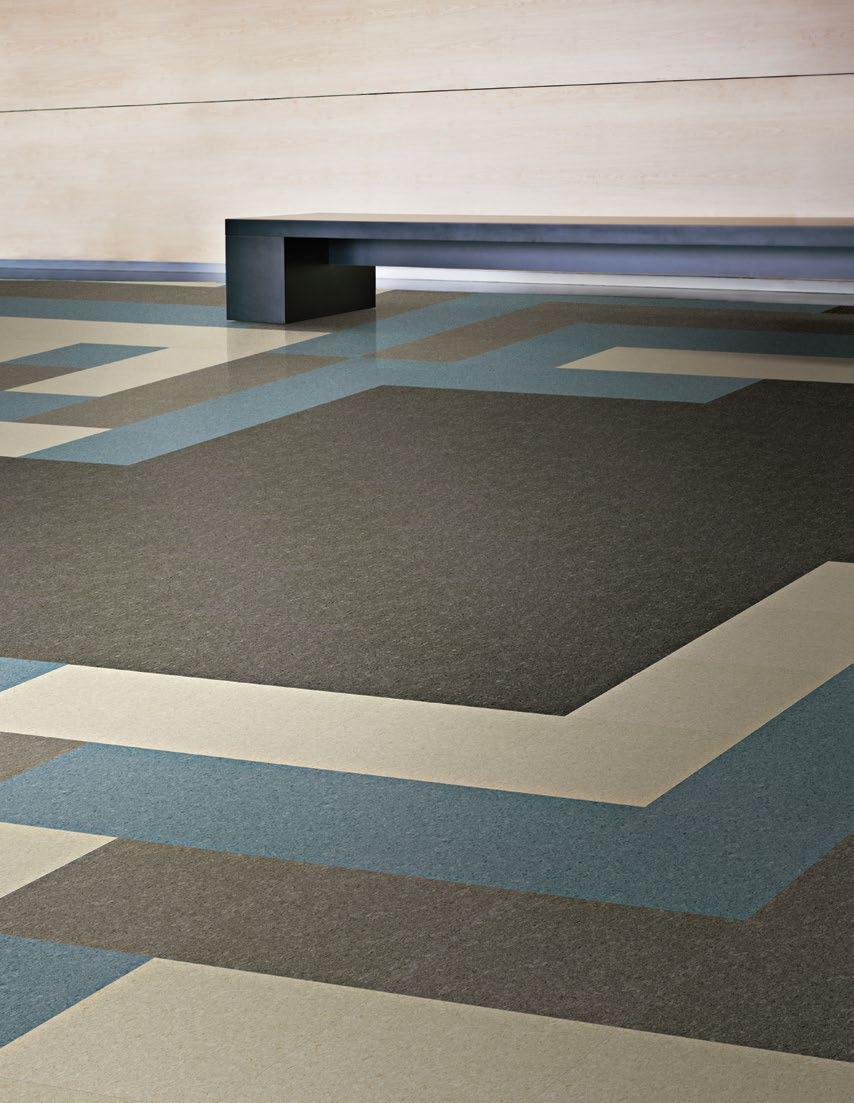
132 PROGRESSIONS 132