CERAMIC ROOF SOLUTIONS
|
|
|
- Marjorie Griffith
- 5 years ago
- Views:
Transcription

1 PLANUM


2 CERAMIC ROOF SOLUTIONS Single H fire supports that allow the tiles to be fired individually at high temperatures, obtaining perfect definition.
3 PERFECTION IS TO REACH THE TOP. La Escandella stands once again by the latest technology, heavily investing in a new production line designed to optimize the finish of its products and creating a Premium product range. Discover the new H-Selection line, made for excellence. H-Selection is the result of applying modern manufacturing processes in H-Cassette to a selection of our products, endowing them with numerous functional and aesthetic advantages and benefits. Excellent flatness High definition on each piece Low absorption Lifetime warranty Individual curing of each tile thanks to support in H. Excellent flatness with no contact points. It provides a perfect definition on each piece, made with gypsum moulds, providing a much finer texture. Higher resistance to ice and mould formation. Our 100 years of warranty ensure your peace of mind and demonstrate the quality of our manufacturing process.
4 PLANUM Higher resistance The clay composition together with the perfect pressing allows flexion higher than the required while only weighing 3.5 kg. Double interlocking The double interlocking -horizontal and vertical- allows the roof to be more watertight, ensuring its impermeability. Excellent flatness H-Cassette manufacturing provides a perfect finish to each product. High definition on each piece The gypsum moulds provides a perfect finish, obtaining a smoother texture, no contact points nor creases. Lower absorption (<5%) High quality clay together with high firing temperature mean higher resistance to ice and mildew. Cost reduction Its large format (11 units/m 2 ) and strapping every 5 units, as well as its packaging on pallets of 240 and 320 units, reduce installation costs. TECHNICAL CHARACTERISTICS Flexural Strength test (EN 538) Resistance > 1200N Water Impermeability (EN 539-1) Complies with level 1 Frost Resistance (EN 539-2) Complies 150 cycles Geometric Characteristics (EN 1024) Flatness / Straightness 1,5% Dimensions* Pieces /m 2 /sq. 11 / 101 Weight piece L: 444mm; W: 280mm; H: 32mm L: ; W: ; H: kg / 7.71 lbs Longitudinal fit ** 370 mm (± 6 mm) / (±0.23 ) Transversal fit ** 237 mm (+2 mm/-1 mm) / 9.33 (+0.08 ; ) Units per pallet 240 / 320 Laying Broken bond *The tile dimensions indicated in this chart allow a tolerance of approximately + /-2% **Theoretic value: this should be re-calculated on site with the tiles that are to be used. MIAMI DADE COUNTY APPROVED EN 1304 According to European standard EN EN EN 538 EN 1024 Test of frost resistance Impermeability Flexural strength test Geometric characteristics


5 PERFECTION AT THE FOREFRONT OF DESIGN


6 FINISHES TIRK RED KLINKER TIXK GREY KLINKER TIPK SLATE KLINKER TIYK GALAXY KLINKER


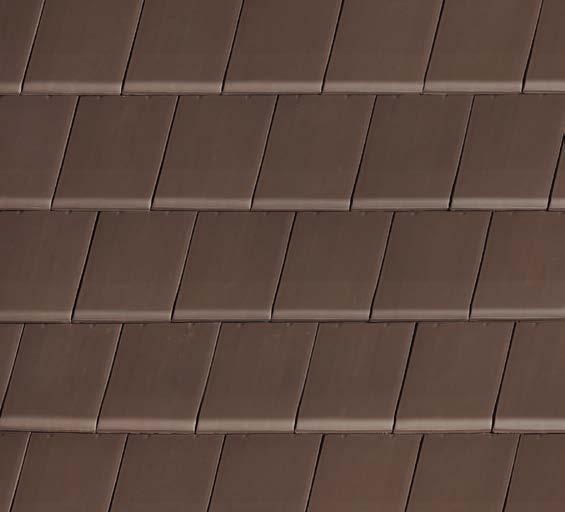

7 Inspiring Colours TIBUK BURGUNDY KLINKER TIJK JASPEE RED KLINKER TICEK PEPPER KLINKER TIBSK BLACKSTONE KLINKER TIMK BROWN KLINKER


8 FINISHES Design & colour variety for modern and vanguard architecture

9


")

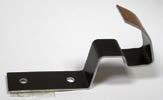
10 TECHNICAL ADVANTAGES 1 LOWER ABSORPTION AND HIGHER FROST RESISTANCE Water absorption on Klinker H-Cassette tiles is lower than 5%. Higher resistance to ice and mildew. 2 INTERLOCKING 45mm interlocking > Large drainage rib. Bigger watertightness. 3 NAIL HOLE Pre-hole (easy to be nailed) Less tile breakages when nailing. 4 HOOK ATTACHMENT Sawtooth. Easy hook fixing; one hook allows to fix 3 roof tiles at same time


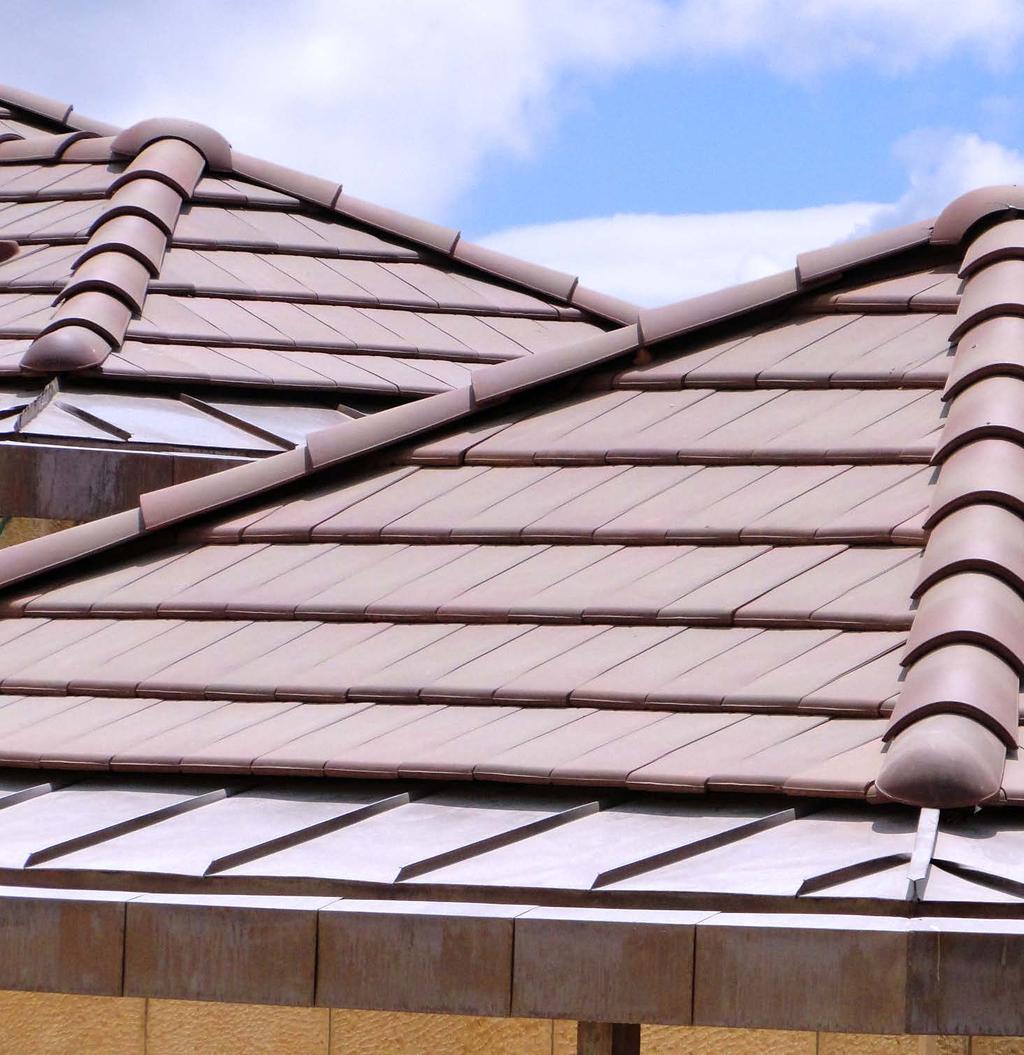
11 BEAUTY & DESIGN ALL IN ONE

12 LAID METHOD Planum roof tile can be laid on a continuous frame, which has to be completely flat in order to ensure the right laying of tiles and their fixing components (to avoid water-leaking); or on a discontinuous frame or battens, which will be fixed by building a batten counter batten deck or by fixing them directly to the frame. The laying of Planum roof tile is carried out by broken bond (also referred as cross bond) as follows: B5 B4 B3 C5 B2 B1 C6 C2 C7 C3 C1 A1 C8 C4 A4 A3 A2 A5 A. The starter course will begin with the Planum right side course (Rake trim - Q88*K) from the eave to the ridge. B. The starter course will begin with a full tile (B1). The tiles structuring the eave will have to overlap the side course and fit together one to another. C. The second course will be started with half tile (Q85*K) - (C1) and will be laid to provide the proper vertical exposure. This exposure is continued through each successive course. All joints of the second course and succeeding courses should be at the center line of the previous course, alternating half tiles (Q85K) and full tile at the start and at the end of each course.
 higher than all suceeding course battens to provide a vertical alignment and to assure a symetrical installation. +30mm / 1.18 b a a = 95 mm / 3.")
13 Planum roof tile Q85*K Planum Half roof tile Q88*K Planum right side course / rake Q89*K Planum left side course / rake 10 mm mm mm / mm mm d c c First course batten should be 30mm (1.18 ) higher than all suceeding course battens to provide a vertical alignment and to assure a symetrical installation. +30mm / 1.18 b a a = 95 mm / 3.74 b = 320 mm / 12.6 c = mm / d = 0-20 mm / (Depending on the slope)

14
15 INSTALLATION DETAILS RIDGE -Ridge tiles must be installed lap facing away from the prevailing winds, in order to assure water tightness. -Field tiles at top course should be secured directly either into the deck or top batten with stainless ring screw nails or similar. -All ridges and hips shall be covered with self adhesive Alu-Roll (La Escandella Aluminum roll for hip and ridges - CAM01) or similar approved breathable waterproof underlayment. Underlayment should be secured over the ridge nailer with non-corrosive roofing nails. -Apply ridge tiles with a minimum overlapping of 5 cm (2 ) throughout the ridgeline facing away from the prevailing wind-driven rain. HIP -Hip tiles must be installed in the same way as in the ridge. -Field tiles must be mitter cut parallel to the hip line and secured. -All ridges and hips shall be covered with self adhesive Alu-Roll (La Escandella Aluminum roll for hip and ridges - CAM01) or similar approved breathable waterproof underlayment. - Air should be able to flow through the ridge and hip area. Be sure not to close these off with mortar or similar. Closing them off could result in cracks, peeling off.., in freezing and thawing cycles. VALLEY -Both Valley and eave line channel are particularly vulnerable to water migration and leakage. Valleys should have a clear and unobstructed pathway for quick water drainage. -Install valley battens on each side of the valley crease. Alu-roll Valley (CAM18), or similar approved adhered waterproof valley underlayment, shall be laid vertically up all valleys in addition to other required underlayment that should be fixed by using glue, resin or similar. -Where valley intersects with ridge line, apply Alu-roll Valley (CAM18), or similar approved underlayment, which should be covered by the ridge tile. Valley should be extended along the eaves to overhang the fascia board by 5cm (2 ) or over the gutter. -Tiles should be laid parallel to the valley line, at same relative angle and should overhang the valley battens by at least 10 cm (4 ). -Tiles at each side of the valley crease should be laid to provide a minimum 15 cm (6 ) width gap (tiles should held back minimum 7.5 cm (3 ) from the center of the valley each way). -Valley tiles must be secured. -Proper Valley flashing installation is required to ensure water tightness in order to avoid cracks, peeling off,...


16 ACCESSORIES Q02*K Round ridge / Hip Q91*K Pyramid ridge-side course / Rake Q90*K Atica ridge 120º Q120*K Angular ridge 450mm *120mm / 4.72 *60mm / mm *72mm / mm mm mm mm 9.45 * 465mm mm 7.48 * 450mm mm * 460mm ,400 gr / 7.49 lbs 2.5 u./lm 4,600 gr / 9.92 lbs 2.5 u./lml 3,600 gr / 7.93 lbs 2.5 u./lm 3,600 gr / 7.93 lbs 2.5 u./lm Q04*K Round ridge end / Hip starter Q93*K Pyramid end ridge Q109*K Atica 120º hip / end ridge Q122*K Angular hip / end ridge 460mm mm mm mm mm * 220mm mm mm mm mm 9.84 * 70mm / ,600 gr / 7.93 lbs with Q02*K 3,500 gr / 7.71 lbs with Q91*K 2,900 gr / 6.39 lbs with Q90*K 3,300 gr / 7.27 lbs with Q120K Q83*K End cap round ridge Q92*K Pyramid end cap Q110*K Atica collar ridge Q124*K Angular end cap 305mm mm *88mm / mm mm mm mm mm 10 80mm mm 3.98 * 450mm mm ,600 gr / 5.73 lbs with Q02*K 2,900 gr / 6.39 lbs with Q91*K 3,500 gr / 7.71 lbs 2.5 u./lm 2,180 gr / 4.8 lbs with Q120*K


17 Q44*K Round 3 way ridge Q45*K Round 4 way ridge Q55*K Round 3 way ridge female Q94*K Pyramid triple ridge * 1 253mm mm * 2 474mm Ø 440 mm / Ø 445 mm / mm mm 8.78 * 1 * 1 400mm / * 2 442mm / * 2 * 1 465mm * 2 202mm ,600 gr / lbs with Q02*K 4,100 gr / 9.04 lbs with Q02*K 4,100 gr / 9.04 lbs with Q02*K 5,400 gr / 11.9 lbs with Q91*K Q111*K Atica 120º 3 way ridge Q123*K Angular 3 way ridge Q88*K Planum right side course / Rake Q89*K Planum left side course / Rake 460mm / mm / mm / mm / mm / mm mm mm mm 84mm mm mm mm mm * 90mm / 3.54 * 170mm mm ,720 gr / 8.2 lbs with Q120*K 3,720 gr / 8.2 lbs with Q120*K 2,800 gr / 6.17 lbs 2.7 u./lm 2,900 gr / 6.39 lbs 2.7 u./lm Q85*K Planum half roof tile Q86*K Planum ventilation roof tile Q87*K Planum chimney / Pipe tile 280mm / mm / mm mm mm *128mm / 5.04 * 155mm / mm mm mm / ,200 gr / 6.39 lb 3,500 gr / 4.85 lbs 4,000 gr / 8.82 lbs


18 ROOFING COMPONENTS La Escandella offers a wide range of non-ceramic accessories which help finish off any type of roof. From waterprofing to ventilation, fixing and batten installing, safety implementation and multiple profiles can be found here. (Ask for wider range in last Price List). CAM01 / CAMF1 Alu-Roll With Micro Cut CAM08 / CAMF8 Alu-Flex CAM09 / CAMF9 Alu-Roll Membrane CAM18 Alu-Valley Tape Width: Several sizes Colours: Red, paja, brown, black. Width: Several sizes Colours: Red, paja, brown, black. Width: Several sizes Colours: Red, brown, black. Width: 50 mm / 1.96 Colours: Red, black, brown. CAM65 / CAM21 / CAM52 / CAM53 Waterproof membrane CAM27 / CAM70 / CAM07 / CAM10 Ridge Tile Hook CAM05 / CAM010 / CAM51 Ridge Batten Bracket CAM14 Eaves Ventilation Comb Dimensions: 1,5 m x 50 m / 1.64 yd x yd Weight: several weights. Colours: Red, brown, black. Dimensions: Several sizes. Dimensions: 6cm x 1m / 2.36 x Colours: Red, black. CAM64 Metal clip clipped with a bumper CAM59 Metal clip for wood battens
19 TECHNICAL INFORMATION SLOPES / PITCHES The minimum pitch standard recommendations should always be followed (see values in the referral table). On all pitches below the standard recommended minimums, or in regions where ice dams may occur, a waterproof underlayment on the entire deck MUST be applied. Most problems with water-shedding roof installations occur from water that migrates through the joints of the tiles through capillarity action, wind-driven rain, and runoff or ice damming. Because of this possibility, the underlayment is critical to the success of the roof. WITHOUT UNDERLAYMENT WITH UNDERLAYMENT Gables < 6,5m 6,5m - 9,5m 9,5m - 12m Gables < 6,5m 6,5m - 9,5m 9,5m - 12m Protected Normal Exposed 45% / 24º 50% / 26º 65% / 33º 50% / 26º 55% / 28º 75% / 36º 55% / 28º 65% / 33º 85% / 40º Protected Normal Exposed 40% / 22º 45% / 24º 55% / 28º 45% / 24º 45% / 24º 65% / 33º 45% / 24º 55% / 28º 75% / 36º PROTECTED LOCATIONS: hollow area which is surrounded by hills that protect the hollow from the winds in all directions.. NORMAL LOCATIONS:: Flat area, plateau with minimal elevation changes. EXPOSED LOCATIONS: Places open to strong winds, coastal areas (up to 5 km / 3 miles from the shoreline), islands or narrow peninsulas, estuaries or closed bays, narrow valleys, isolated mountains, mountain passes and earthquake zones. Note: For hips MORE than 12m long (39.4 ), a waterproof underlayment on the entire roof deck MUST be applied and the ventilation underneath must be reinforced (check with the manufacturer). FIXATION The manner in which roof tiles are installed makes them a highly effective water shedding assembly that affords years of service and protection. The effectiveness of a tile roof system as a weather resistant assembly however depends on the proper installation of all the tile roof components, and installing them properly is critical to the performance of the installed system. 90º - 200% A B C D 0º - 0% A: 60º - 173% B: 45º - 100% C: 38º - 80% D: 14º - 25% E: 0º - 0% A: Every tile should be securely fastened (Nailed, screwed, clipped...) (60º / 203/4:12). B: As a minimum, each tile in every five proportion, should be secured with (10 gauge) non-corrosive ring shank nails or screws (45º / 12:12). C: Each tile hangs on the batten (held by the nib) (38º / 10:12). D: Each tile hangs on the batten, held by the nib. When mortar is used, back bed and face point with color matched mortar. Clean off all excess mortar from the face of the tiles. For Foam Adhesive, refer to local building codes. E: La Escandella recommended minimum slope requirements is 30% (4:12). VENTILATION Ventilation is one of key elements to assure a good hygrothermal behavior of the roof and preservation of the roof structure. The key to a good and well preserved roof is a good ventilated roof. Proper installation of Ventilation tiles combined with ventilated roof can result in energy savings, in a more energy efficient home. Air should be able to flow through the eave and ridge; be sure not to close these off with cement, mortar or similar. Eave and ridge areas should be protected to help minimize the access of birds and vermin infiltration. A free flowing ventilation area must be provided through the roof deck. This ventilation should be evenly distributed throughout the roof space to eliminate any dead air space. La Escandella recommends a minimum of 1 Flat/Alicantina ventilation tile (Q86K) for every 7 m 2 (1.32 vent tiles per 100 sq ft.) and with a minimum of 2 ventilation tiles per roof surface, installed on the upper part of the roof. Using a proper ventilation system is the best way to avoid moisture in a roof, that could cause peeling, cracking and other defects on the tile. NON-VENTILATED ROOF VENTILATED ROOF 8 1. Roof tile 2. Micro-ventilation void 3. Ventilation roof tile 4. Rafter 5. Heat insulation underlayment 6. Waterproof underlayment material 7. Frame 8. Eaves ventilation comb / bird stop 9. Attic La Escandella warranty will be honored when installation is in strict accordance with local building codes, particularly to those referring to the ventilation of the deck and minimum slope requirements. Clay roof tiles should always be installed in full compliance with the local building codes and good tiling practice. For each country, please refer to local building codes.


20 Colour Shall be Harmonized but clay tiles are a natural product and some shade variations between individual pieces enhance their beauty and should be expected. All Tiles should be blended regardless of the number of colours supplied. Colours of the tiles shown in this catalogue can not faithfully reflect the colours of the ceramic tiles. On their products, La Escandella has right to make changes in dimensions, fittings, weight & units per pallet, without previous notice. For more information, please contact your Sales Representative or our Customer Service. This catalogue, printed in July 2017, replaces the existing ones.