TECHNICAL MANUAL. TENLOC Panel Connector. Hidden Latch Connection for Precast Panels
|
|
|
- Roberta Holmes
- 5 years ago
- Views:
Transcription


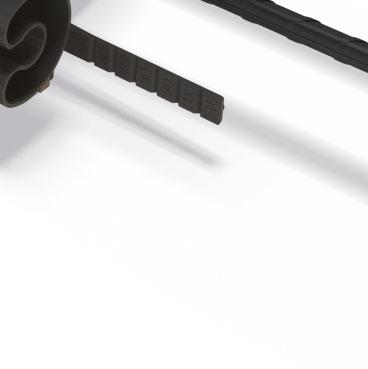

1 TECHNICAL MANUAL TENLOC Panel Connector Hidden Latch Connection for Precast Panels Version: Peikko Group 06/2018


2 TENLOC Panel Connector Fast connection for precast elements TENLOC Panel Connector is a system to create fast vertical connections between precast panels. The system consists of a latch box and an anchor box. On site, the concrete panels are placed in to installation position and connected in a short time using the locking mechanism. Vertical precast connections are finalized by grouting the recesses. Temporary load transferring connection already before grouting, which can be made later on Mount walls from the interior without scaff olding and less temporary bracing Connecting does not require welding on-site Ductile steel-to-steel connection Less grout material when using dry joints between the elements TENLOC Panel Connector is type approved and considers the most recent developments in the fastening industry. The product safety was approved in cooperation with LGA Bayern.
3 Contents About TENLOC Panel Connector 4 1. Product properties Structural behavior Temporary Conditions Final Conditions and grouting Application criteria Application limits and environmental conditions Positioning of the TENLOC Other properties Resistances Annex A - Reinforcement and additional reinforcement 14 A1 Continuous connection A2 T-connection and Corner connection A3 Supplementary reinforcement Installation of TENLOC Panel Connector 17 Installation of TENLOC Panel Connectors Precast Factory Installation of TENLOC Panel Connectors Construction Site System tolerances of TENLOC Panel Connector Revision: 002

 b) c) The TENLOC Panel Connector can also be used for connecting concrete columns and concrete walls (see Figure 2)")


4 About TENLOC Panel Connector 1. Product properties The TENLOC Panel Connector was developed for the connection of precast panels. It enables the fast and secure wall-to-wall connections in the vertical joint of a continuous wall, a T-wall connection, or a corner connection (see Figure 1). Figure 1. Wall-to-wall connection a) Continuous connection b) T-connection c) Corner connection. a) b) c) The TENLOC Panel Connector can also be used for connecting concrete columns and concrete walls (see Figure 2). Figure 2. Alternatives for column-to-wall connections. The intended use of the TENLOC Panel Connector is the tight connection of concrete precast panels. The permanent loading is approved by the type approval. The TENLOC Panel Connector will be positioned on equal level to enable the locking. It connects precast walls and columns in a vertical joint. Hereby it transfer systematically tension loads over the gap and lateral forces in parallel and perpendicular to the joint. The transmitting forces are declared principally stationary. 4 TENLOC Panel Connector

.")

.")


5 About TENLOC Panel Connector The system consists of two casting boxes, which are cast into two precast elements which should be connected. One casting box contains the latching mechanism which is connected to a U-anchor bar anchored in concrete (see Figure 3). The second casting box contains also a U-anchor bar in which the latching mechanism can lock into. The latching mechanism will be turned out of the box by using an Allen key, until it is touching the opposite U-anchor bar (see Figure 3). By continuous turning of the Allen key the installed locking mechanism is activated and the prestressing against the U-anchor bar on the opposite happens. To reach the planned capacity the hollow section of the casting boxes must be grouted with non-shrinking grout. Figure 3. TENLOC Panel Connector. Stickers Casting box with latching mechanism Casting box in second element U-Anchor bar U-Anchor bar Latch U-Anchor bar U-Anchor bar Crank (eccentric circle) Latch TENLOC will be delivered preassembled, to ensure easy handling and installation. This eases the mold installation in the precast factory and also on-site. After locking and pre-tensioning the locking mechanism by an Allen key the grouting procedure of the casting box section of the panel connector happens. Version: Peikko Group 06/2018 5
6 About TENLOC Panel Connector 1.1 Structural behavior The panel connector consists in respect to its bearing behaviour from two U-anchor bars (Position 7), the latch with pre-stressing mechanism, the grout and the concrete sections of the precast element (see Figure 4). The grout is injected by mortar injection into the bottom grouting opening Position 9, until it is squeezing out of the top grouting opening. Alternatively it is possible to inject the grout in the top grouting opening Position AT until it is squeezing out on the bottom grouting opening Position 9. Figure 4. Isometric view of the panel connector. AK 2 AT 1 Casting box 2 Casting box with TENLOC 7 U-anchor bar 9 top grouting opening AT bottom grouting opening AK cap with sealing The TENLOC Panel Connector is designed to bear the horizontal tensile forces of the wall. Tensile forces are transferred from the U-anchor bar through the locked latch to the U-anchor bar in the other wall element (see Figure 5). Figure 5. Structural behavior of the wall connection. U-Anchor bar U-Anchor bar Tensile force Tensile force Temporary Conditions During the installation the loads applied to the connection are created by dead weight of precast elements as well as inclination and wind loads. In erection phase elements shall be supported with one brace if element is connected from other end and with 2 braces if not connected (TENLOC Panel Connector not grouted but tightened). The TENLOC Panel Connector can transfer tensile forces in longitudinal direction of the concrete with tightened latch during the installation process. After finishing the installation the casting box must be grouted with the grout prescribed in the following chapter. It is possible to grout the casting box of one level in one process when slab is in place. 6 TENLOC Panel Connector
.")
7 About TENLOC Panel Connector Final Conditions and grouting The structural properties of the TENLOC Panel Connector in final stage can only be reached, when the recess will be grouted with non-shrinking grout (see Figure 6). The grout must be in line with German DAfStb regulation Manufacturing and application of cement bound concrete and grout edition November 2011 and must be applied with a grout injection tool. During the application a water ratio of 28% to 32% was proven well. Injection grouts available on market (e.g. Eurogrout Inject) can be used when they fulfil the subsequent criteria. Properties of the grout must follow DAfStb regulation and has to fulfil the following criteria: No specific manufacturer or brand Injection grout Consistency liquid Liquid grade f3 Shrink grade SKVM II low shrinkage Early hardening grade A f ck 30N/mm2 Figure 6. Grout for TENLOC Panel Connector. 1.2 Application criteria The TENLOC Panel Connector is designed for the use following the prescribed conditions with principally stationary forces. If the conditions can t be fulfilled, please contact our technical support Application limits and environmental conditions The TENLOC Panel Connector is designed to connect wall elements or wall-column connections. Within the scope of application defined resistances in three directions can be applied. The range of application for the TENLOC Panel Connector is defined as follows: Application within structures and a maximum of four storey buildings Application under exposure class of X0, XC1, XC2 and XC3 Application with principally stationary forces, no application for seismic or dynamic actions Application within the defined installation position with the additional reinforcement according system plan (see Figure 16) Application in vertical supported precast members when four or more TENLOC Panel Connectors are used in the joint. No application without corbel support when heavy gates are utilized (see Figure 7d). Figure 7. Support of gates and of openings with the TENLOC Panel Connector. a) b) c) d) Version: Peikko Group 06/2018 7
8 About TENLOC Panel Connector The following limits of application shall be considered: To guarantee robustness of the TENLOC element connection the vertical support of the elements and a minimum of 2 TENLOC Panel Connectors are mandatory for each joint A maximum of 7 TENLOC Panel Connectors are applicable for each joint Wall panels with a height of > 3750 mm are not permitted to be used in combination with TENLOC Panel Connector The element connector is not permitted to be used as fixation point for lifting and lashing The transport and installation pad of the latch must be removed straight prior to pre-tension the latch The element connector connects precast elements temporary without grouting the hollow section of the casting box The precast elements connected with TENLOC Panel Connector must be designed according to EN and the national annex The application of the TENLOC Panel Connector out of the scope or the limits of application is not covered by the type approval Positioning of the TENLOC The TENLOC Panel Connector is designed for use in reinforced concrete elements. The minimum wall thickness, die concrete cover and exposure class and the structural class are given into Table 1 and Figure 8. The minimum concrete grade for the application of TENLOC within precast walls is C20/25 or higher. The required concrete cover follows EN chapter (3) with Δc dev = 5 mm. If these conditions may not be satisfied, please contact your local Peikko Technical Support Sales for customdesigned TENLOC Panel Connectors. In case of deviating conditions contact the technical support team of Peikko. Table 1. Minimum wall thickness W t [mm] and minimum concrete cover c nom for standard TENLOC without supplementary reinforcement. Type of Connection Continuous Connection Corner- and T-connection Exposure class Concrete cover and minimum wall thickness [mm] c nom W t X XC1 20 XC2/XC3 35 (30*) 130 * when following the quality control according to DBV specification concrete cover and reinforcement. 8 TENLOC Panel Connector


9 About TENLOC Panel Connector Figure 8. Wall thickness W t and concrete cover cc. Continuous connection C c W t C c Corner connection and T-connection C c W t C c C c W t Connectors are placed in the joint between the concrete members. TENLOC Panel Connectors in vertical joints must consider the edge distances and be placed as close as possible to the upper and lower edge of the connection position. The required minimum spacing from the edges of the precast member is shown in Figure 10. Figure 9. Positioning indents at TENLOC Panel Connector. N 2 N Version: Peikko Group 06/2018 9
![About TENLOC Panel Connector Figure 10. Minimum vertical spacing between TENLOC s in concrete elements [mm]. Vertical position min. 150 min. 100 min. 250 min. 250 min. 200 min. 70 min.](/docs-images/93/112376311/images/10-0.jpg "70 min. 70 The horizontal positioning of TENLOC in the mould will be guaranteed by distance stripes on one side and by adapters on the other side of the recess.")
10 About TENLOC Panel Connector Figure 10. Minimum vertical spacing between TENLOC s in concrete elements [mm]. Vertical position min. 150 min. 100 min. 250 min. 250 min. 200 min. 70 min. 70 min. 70 The horizontal positioning of TENLOC in the mould will be guaranteed by distance stripes on one side and by adapters on the other side of the recess. The side distance will be arranged from the centre position of the recess. An indent placed in the centre of the casting box eases the positioning (see Figure 11). Figure 11. Correct horizontal position of TENLOC with help of indents on the casting box. Horizontal position W t Top side W t /2 10 TENLOC Panel Connector
11 About TENLOC Panel Connector 1.3 Other properties The individual parts of TENLOC Panel Connector are made of steel plates and reinforcing bars with the following material properties: Latch non alloyed steel EN U-anchor bar B500B DIN 488 Crank unalloyed steel EN The detailed dimensions of TENLOC Panel Connector are given into subsequent Table 2. The table dimensions of TENLOC Panel Connector are shown in Figure 12 and Figure 13. This enables a detailed planning procedure of the connection. The properties of the TENLOC Panel Connector are conditioned only if the non-shrink grout in the casting box has a cubic strength greater than 30N/mm2. The lengths of anchor bars are defined according to concrete grade C20/25 in good bonding conditions. Table 2. Dimensions [mm], weight [kg]. H cb [mm] 180 M 6 [mm] 99 T cb [mm] 60 M 7 [mm] 109 L R [mm] 440 N [mm] 51 T R [mm] 65 O [mm] 33 L cb,a [mm] 76 D o [mm] 17 L cb,b [mm] 81 D t [mm] 50 M 1 [mm] 49 H cb,2 [mm] 185 M 2 [mm] 59 L cb,2 [mm] 80 M 3 [mm] 69 L R,2 [mm] 440 M 4 [mm] 79 N 2 [mm] 56 M 5 [mm] 89 ϕ [mm] 10 Weight of both elements [kg] 1.8 P [mm] 30 Version: Peikko Group 06/
12 About TENLOC Panel Connector Figure 12. Dimensions of TENLOC with casting boxes element with latch mechanism. L cb,a Z Y T cb Z X Ø H cb D t D O H cb H cb Y X T cb N L cb,b O M 1 L R M 7 T R L R Figure 13. Dimensions of TENLOC s with casting boxes element with anchor bar. H cb,2 P L cb,2 N 2 T R N 2 M 1 M 2 M 3 M 4 M 5 M 6 M 7 12 TENLOC Panel Connector
13 About TENLOC Panel Connector 2. Resistances The TENLOC Panel Connector transfers tension and compression forces (N Rd ) and shear forces perpendicular (V Rd, ) and parallel (V Rd, ) to the joint. The values given here are for concrete elements from normal concrete with smooth concrete surface. The conditions as given in section 1.2 must be fulfilled and reinforcement in accordance with Annex A must be provided. The resistances of the TENLOC Panel Connector as given in the following Table 3 follow a design concept which is based on the following standards EN EN EN Table 3. Design values of resistance of the load directions. Tension Compression N Rd 24.4 kn/tenloc -8.9kN/TENLOC Shear parallel V Rd, 6.3kN/TENLOC Shear perpendicular V Rd, 4.0kN/TENLOC Displacement d y 11mm V Rd, V Rd, N Rd The interaction of capacities prescribed within this section is covered by the type approval. Each load direction must be considered separately. The following formula must be fulfilled at any time. N N Ed VEd, VEd, 1.0 V V Rd Rd, Rd, The normal force N Ed must be considered with its accidental. The loads in final condition results from the type approval. Within this bonds the TENLOC connection requires a design according to admissible resistances. Version: Peikko Group 06/
14 Annex A - Reinforcement and additional reinforcement Annex A Additional reinforcement Basically there are three types of connections, the continuous connection, the corner and the T-connection (see Figure 1). In all types of connections (continuous, T, and corner) the distance between the main reinforcement of the wall and the TENLOC U-Anchor bar must be equal to or less than four times the diameter of smaller reinforcement (see Figure 14). Figure 14. Location of the TENLOC in relation to the main reinforcement of the wall max 4Ø max 4Ø The required main reinforcement for the concrete member results from structural design. If not otherwise specified a minimum cross section of 1.88 cm2/m must be kept. For very thin elements with wall thicknesses of 100 mm up to 120 mm and a single central reinforcement wire mesh some circumferential rebar Ø10 mm must embrace the element edges. The following Figure 15 shows the principle of the reinforcement positioning. Figure 15. Embracing reinforcement Ø10 mm for element edges. Ø10 circumferential The supplementary reinforcement for TENLOC, which enables the load impact of tensile forces in the concrete element and which is delivered assembled with the item, consists of a rebar B500B Ø mm. The supplementary reinforcement must not be subject of any mechanical rework during the installation procedure. If damages should appear for any reason during the installation procedure on the supplementary reinforcement, it has to be replaced immediately by similar rebar diameter and anchoring length. 14 TENLOC Panel Connector
15 Annex A - Reinforcement and additional reinforcement A1 Continuous connection The continuous connection as shown which is matching with the conditions in Chapter 1.2 must be reinforced as given in the following Table 4. The exemplary installation situation is shown in the following (see Figure 16). A2 T-connection and Corner connection In T-connections and Corner connections the tensile forces acting on the U-Anchor Bar must be anchored to the opposite side of wall. A supplementary reinforcement according to Table 4 must be installed. The recommended shape, the diameter and the installation direction are shown in Figure 16. A3 Supplementary reinforcement The recommended shape and the diameter of the supplementary reinforcement is shown in Table 4 and in the system plan of Figure 16. It enables the local load impact to the affiliating concrete member. Table 4. Supplementary reinforcement for TENLOC Panel Connector. Rebar item Size Load direction Position 1 Ø x per TENLOC, already preassembled Position 2 Ø6 + 2x per TENLOC Position 3 Ø x per TENLOC Position 4 Ø x as stirrup (1-3 TENLOC s) 2x as stirrup (4-7 TENLOC s) Position 5 Ø x per TENLOC Position 6 Ø6 + 2x per TENLOC instead of Pos 3 Position 7 Ø6 + 1x per TENLOC Continuous connection T-connection Corner connection Version: Peikko Group 06/
16 Annex A - Reinforcement and additional reinforcement Figure 16. System plan with supplementary reinforcement. Position gezeichnet Projekt Datum Zeichnungs-Nr. Einbauteil Index 16 TENLOC Panel Connector

 2.")
17 Installation of TENLOC Panel Connector Installation of TENLOC Panel Connectors Precast Factory Installation of the TENLOC The TENLOC Panel Connector is placed into the reinforcement of the wall and attached to the mold with nails. The wall thickness must be minimum 100mm. Reinforcement as shown in Annex A must be considered. The U-Rebar in the anchor part is moved to the required position before installation. The TENLOC must be placed in the formwork into a precisely defined location. 1. In the Y direction: to the vertical axis of the wall (middle of the wall) 2. In the Z direction: according to the design (at least two element connections in the joint) Marks on each casting box facilitate the precise location of the TENLOC in the formwork. Figure 17. Axis orientation and marks on the casting box. Y X Z Y Z Marks Attention: The spacing of the side indent is different of the TENLOC casting boxes. Please consider the dimension for N and N 2 as given in Table 2 and in Figure 12 and Figure 13. Spacing strips and adapters (Figure 18) also serve to ensure the correct distance from the edge of the wall on each casting box. For more accuracy and better handling, the TENLOC Panel Connector can be adapted and spacing strips can be cut according to the required wall thickness. Figure 18. Adapters and spacing strips. Plug Adapters Spacing strips Version: Peikko Group 06/
18 Installation of TENLOC Panel Connector The spacing strips and adapters considers a maximum wall thickness of 220 mm. Bigger wall thickness requires extension of the adapter. Intermediate thickness values corresponding to Table 5 for the wall elements require linear interpolation of the spacing strips and adapters. Table 5. Element thickness with adapters [mm]. Thickness of precast element TENLOC Adapters Spacing strips 100 No adapters* Cut at mark mm adapter Cut at mark mm adapter Cut at mark mm adapter Cut at mark mm adapters Cut at mark mm adapters Cut at mark mm adapters No cut * Minimum thickness of wall is 100 mm. Casting box without adapters has dimension M 1 = 49mm + plug. EXAMPLE: Thickness of wall 180mm FIRST ELEMENT: Attach a 10 mm adapter and a 30 mm adapter to the casting box. Close with the end parts adapters. Place the TENLOC with adapters into the mold. Adapters with end parts must be placed on the mold. Attach the casting box to the mold with nails. Attention should be spend to dimension N starting from mold. Holes for nails TENLOC Panel Connector
19 Installation of TENLOC Panel Connector SECOND ELEMENT: Cut spacing strips at mark 90. Place the TENLOC into the mold. Attach the recess box to the mold with nails. Attention should be spend to dimension N 2 starting from mold Attention: The indents from both recess items with dimensions N and N 2 must align. This results in variating indent dimensions for each recess. Version: Peikko Group 06/
20 Installation of TENLOC Panel Connector Installation of TENLOC Panel Connectors Construction Site Erection of a precast wall The installation routine of the precast elements with the TENLOC Panel Connector will be prescribed step by step in the following for the construction site. Before installing concrete elements, place foam stickers on the TENLOC and remove the middle part. Precast elements must be erected in the correct position by the support of steel sheets, leveled and temporary supported with braces. The correct position of the precast element has to be double checked. After that a tolerance check in all directions as prescribed into following must happen. Tolerances in the X direction (horizontal) Tolerances in the Y direction (horizontal) Tolerances in the Z direction (vertical) X Y Z 20 TENLOC Panel Connector

 or from top through the top airhole opening.")
21 Installation of TENLOC Panel Connector The connection must be locked and tightened with an M10 Allen key. After the locking a check must happen if the lock is fully connected and tightened. If a shacking of the lock is still possible, the locking procedure must be repeated. The stability during the erection stage is now secured. The kidney shaped opening will be closed with the sealing cover. The hollow space in the TENLOC Panel Connector casting box must be grouted with non-shrinking grout (see Chapter 1.1.2). The grouting procedure can be executed either from the bottom through the kidney-shaped tension lock opening (drill of 10 mm necessary) or from top through the top airhole opening. The grouting mortar must have a maximum of 2.8 % to 3.4% of water. The precise dosage can be taken from the instructions on the packaging. The grouting process must be executed by hand with the help of a grouting injection tool. The openings must be sealed after grouting process ends to avoid the grout running out due to consistency issues. The connection is ready after grout hardening. Opening for grout Version: Peikko Group 06/
22 Installation of TENLOC Panel Connector System tolerances of TENLOC Panel Connector The TENLOC Panel Connector has system tolerances as given below. This gives a maximum of usability on the construction site and enables the precise alignment of precast members into correct position. X direction Y direction Z direction X Y Z Maximum tolerances of two walls in the X direction (horizontal): 5 mm Maximum tolerances of two walls in the Y direction (horizontal): ±5 mm Maximum tolerances of two walls in the Z direction (vertical): ±5 mm 22 TENLOC Panel Connector
23 Notes Version: Peikko Group 06/
24 Resources DESIGN TOOLS Use our powerful software every day to make your work faster, easier and more reliable. Peikko design tools include design software, 3D components for modeling programs, installation instructions, technical manuals and product approvals of Peikko s products. peikko.com/design-tools TECHNICAL SUPPORT Our technical support teams around the world are available to assist you with all of your questions regarding design, installation etc. peikko.com/technical-support APPROVALS Approvals, certificates and documents related to CE-marking (DoP, DoC) can be found on our websites under each products product page. peikko.com/products EPDS AND MANAGEMENT SYSTEM CERTIFICATES Environmental Product Declarations and management system certificates can be found at the quality section of our websites peikko.com/qehs