INSTALLATION GUIDELINE. Hertalan EPDM roofing and DPC systems
|
|
|
- Merilyn Dawson
- 5 years ago
- Views:
Transcription


1 INSTALLATION GUIDELINE Hertalan EPDM roofing and DPC systems
2
3 FOREWORD In the market for sealed roofing systems EPDM continues to be regarded as an innovative product. This is fairly surprising considering EPDM membranes have been used all over the world since the end of the 60 s as a roof covering. That makes it one of the most reliable products to choose. As Europe s first producer of EPDM membranes, Hertalan has been offering cutting-edge quality in durable roof and wall systems for over four decades. Hertalan supplies a 100% ecological material that is resistant to UV, ozone and other meteorological effects and features an exceptionally long life cycle. Despite the undisputed quality of its roof and wall systems, Hertalan continues to focus on improvements. With our own R&D facilities we are still, almost 50 years, able to innovate and to produce market-compliant systems. As an experienced project supervision partner we have all the knowledge required to provide a complete service, from concept to completion. As the central point of contact Hertalan offers a full-service package, not only at implementing level but also in areas including cost control for clients or the creation of aesthetic added value for the specifier. It therefore remains important to us to keep in contact with you to convince you of our knowledge and added value and to build up an ongoing relationship. This product manual contains our installation guidelines, system sheets and general information. These supersede all previous Hertalan installation guidelines and data sheets and have been adapted to the current state of technology. Please contact our UK office for the use of Hertalan products for any systems or uses that are not listed. Updates to the hertalan installation guidelines are available from our website You can also apply online for a website login code to accesss further information.hertalan updates the installation guidelines online. The English amendments and additions can be downloaded from our website You can apply via our website for a login code! Mansfield, January 2014 copyright: The texts included in this publication are subject to copyright. It is not permitted to copy or reproduce the text without the prior written approval of Carlisle Construction Materials Ltd.
4 CONTENT PAGE Foreword 1. HERTALAN EPDM ROOFING SYSTEM General Flat roof solutions with Hertalan Universal application instructions Connections with strange materials Specific hertalan easy weld application instructions T-joints hertalan easy weld Loose and ballasted roofing systems Seams Edge fixation Adhered roofing system Partial adhering Fully adhering Seams Edge fixation Mechanically fixed roofing system hertalan easy cover MF hertalan easy weld MF Seams Edge fixation ACCESSORIES Accessories Hertalan roofing systems Additional accessories Universal application instructions hertalan easy stick Seam 16
5 PAGE 2.4 hertalan flashing hertalan flash weld hertalan cover strip Seam Additional accessories Additional application instructions HERTALAN EPDM DPC SYSTEMS Façade applications Universal application instructions Specific application instructions hertalan S Hertalan EPDM strips hertalan ks96 adhesive sealant hertalan ks137 contact adhesive hertalan ks205 sprayable contact adhesive Seam hertaled Hertalan lead alternative hertalan ks96 adhesive sealant Seam 25 APPENDIX 1 WHICH HERTALAN EPDM ROOFING SYSTEM TO CHOOSE 27 APPENDIX 2 INSULATION MATERIAL 29 APPENDIX 3 MAINTENANCE AND CLEANING GUIDELINES 30 APPENDIX 4 SUBSTRATE 31 NOTES 33
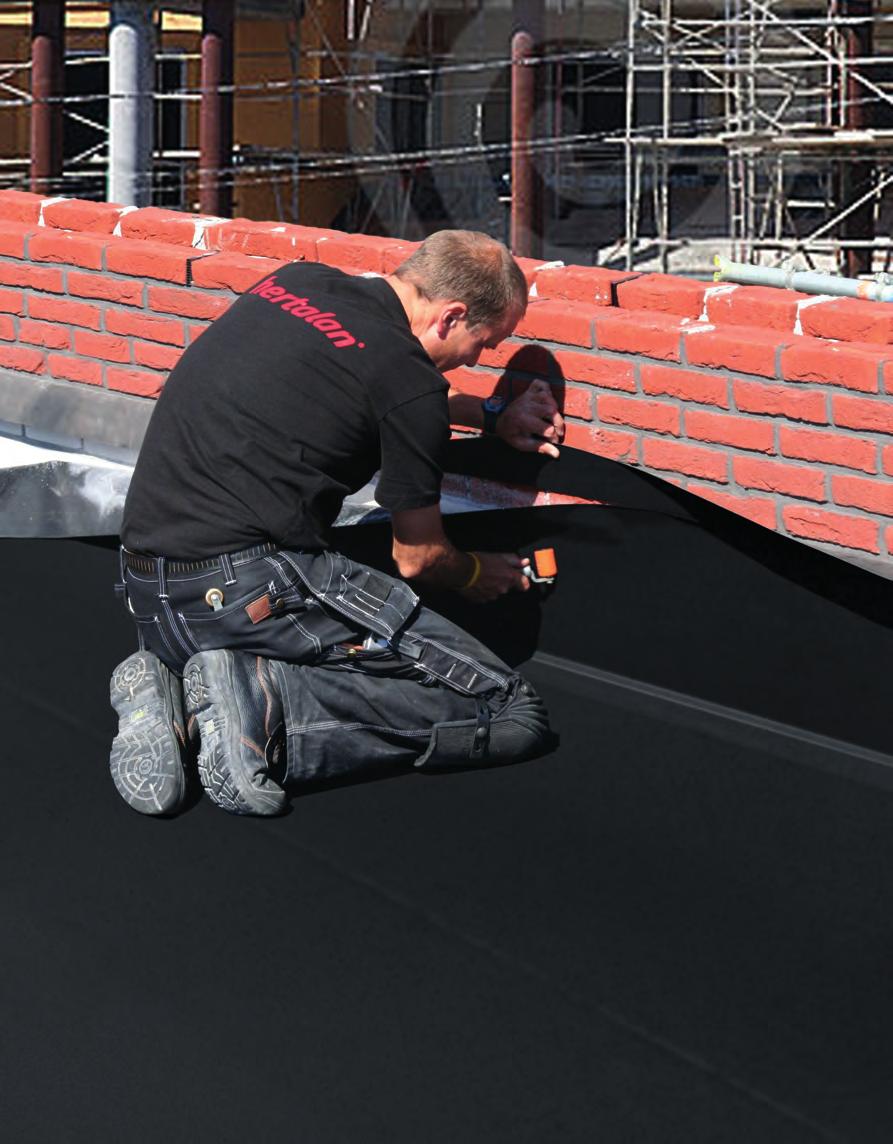
6 1 1. HERTALAN EPDM ROOFING SYSTEMS Flat roof solutions with Hertalan Hertalan has an extensive product portfolio of EPDM roofing systems and accessories which are suited for all types of roof surface and waterproofing systems, varying from traditional roofs to special roofing constructions. With hertalan easy cover and hertalan easy weld Hertalan offers you a comprehensive advanced range of roof covering systems, products and accessories. These systems are suitable for every type of roof: fully and partial bonded, ballasted, mechanically fixed. Depending on the roofing system, there are following options: 1) Roofing System construction 2) Roofing System 1. hertalan easy cover Unreinfored vulcanised EPDM roofing sheet or prefabricated membrane. 2. hertalan easy weld Fire retardant unreinforced vulcanised EPDM roofing sheet provided with alternating top and bottom side EW Welding band. 3. hertalan easy weld MF Fire retardant unreinforced vulcanised EPDM roofing sheet provided with alternating top and bottom side EW Welding band. Special for mechanically fixing Universal application instructions For the application of Hertalan EPDM roofing systems product specific guidelines exists. These must be followed to achieve a result that is perfectly waterproof and airtight. / Irrespective of which Hertalan roofing system is applied a secure fixation onto the roof eaves and upstands must be ensured. Roof eaves, details and upstands must be finished airtight. / Gutters and connected gutters (to the roof) have to be fully adhered with the EPDM. / If a roof surface is to be covered with more then one roof sheet or membrane, an overlap of the Hertalan materials must be made. / Hertalan EPDM roofing products are applied without naked flame and at a minimum surrounding and material temperature of 5 C. / All components of the Hertalan systems are adapted to each other and form a complete system. Only Hertalan approved adhesives and sealants are to be applied. / Every substrate on which the Hertalan EPDM roofing systems are applied, must be smooth, dry, clean and free of oil, grease and sharp objects. / Hertalan advises to apply a vapour control layer and thermal insulation. / Hertalan EPDM roll ideally should be unrolled at least 15 minutes before commencing application to the roof and stay like that to achieve a tension free product. The product must be applied tension free. / When ordering the correct size of membranes take into account that joints, upstands, gutters and such need extra material into relation with the roof surface. This means that the flattened roof surface must be measured and ordered.
7 2 / If on a roof surface more then one membrane is used, the hot bonding joints (the head seam) must be placed with at least 3 cm gap. / In case of a cross overlap a bevelled edge must be created in the top corner. / It is important to apply Hertalan EPDM roofing systems exclusively with clean materials and appropriate tools. / Existing roof surfaces must be checked to ensure there is a proper connection with roof construction. / In case of a bitumen surface all loose parts of bitumen, blisters and folds must be removed to achieve a smooth and sound surface. / Hertalan EPDM roofing systems may not be applied directly onto a surface of low melting bitumen or tar containing products. Preferably these kind of surfaces should be removed. If that isn t possible, a separation layer must be applied. / For green roof systems, all the seams have to be undertaken with hertalan easy weld products / In green roof systems we recommend to make compartments in the roof / In the case of a bitumen surface with green mineral, a primer must be applied. / To prevent any mechanical damages on an installed Hertalan EPDM roofing system, foot traffic should be limited. / For maintaining installations on the roof a designated pathway, to prevent mechanical damages, must be installed. / Hertalan EPDM sheet cannot be adhered onto non-faced polystyrene. This also applies to PVC, PIB, VEA, TPO, FPO and PE Connections with strange materials Object orientated connections with our EPDM products are recommended to check on own responsibility, whether they are functioning for their intended purposes. These are the following connections/adhesions: / PVC, PIB, VEA, TPO, FPO and PE. / Liquid polymers / Bituminous roofing sheets / Bituminous surfaces Specific hertalan easy weld application instructions / For further processing of our hertalan easy weld products, e.g. preparing seams with EW welding strips (green-on-black connection), hertalan cover strip, etc. after approx. 1-2 days of outdoor exposure. Roughening of the welded EPDM surfaces by means of a suitable Powerfile is required. / The existing surface area must first be cleaned with white spirit. / Then carefully roughen the surface area with a Powerfile and remove the dust with a hot air hand tool. / A green-on- black connection is only possible on a Hertalan EPDM which is produced after / hertalan easy weld seams must not be sealed off with any material. It is not allowed to use adhesive or sealant in combination with the EW welding bead. / Never use hertalan easy weld onto or over a joint that is created with hertalan ks137 or hertalan ks96.

8 3 / Before checking the seams, the hertalan easy weld must have cooled down. Inspection can be carried out with a special test pin or with a blunt awl. / When the T-joints are connected with hot-air, always use a EW rope as extra padding in the seam T-joints hertalan easy weld On the front side of a hertalan easy weld, there is no EW welding strip applied. For example at the T-joints; an overlap at the end is formed by two sheets, which in turn are overlapped by a continuous (smaller) sheet / In order to avoid capillary action, the thickness between the two membranes/sheets should be reduced. This can be done by using a Powerfile. However, first the areas should be cleaned with (preferably) with spirit... / It is important that at the location of the T-joint, the welding seam is compressed with a brass roller. This operation is activated until warmed EW again solidified.


9 / Transverse or T-joint connection between two hertalan easy weld roofing sheets can also be realized with a hertalan cover strip. 4

10 5 1.2 Loose and ballasted roofing systems Application instructions for hertalan easy cover roofing membranes, loose applied and ballasted (gravel and/or tiles) Seams Depending on the type of hertalan EPDM roofing system a seam can be achieved with adhesive or hot air. Instructions for preparing a seam with hertalan easy cover membranes, by adhering with hertalan ks137 and sealing with hertalan ks96. / Product: hertalan ks137 / Usage: approx. 500 gr/m 2 two-sided / Product: hertalan ks96 cartridge / Usage: approx. 7 m 1 pro cartridge one-sided / See universal and specific application instructions. / It is recommended to apply a membrane that fits as tight as possible. Apply the supplied membrane according to the enclosed instructions and be aware of good positioning of the membrane. / Following the sealing of the seams, all perimeters, edges and upstands must be adhered and installation of necessary details and rainwater outlets undertaken. / It is essential that the choice for the type and amount of ballast is determined according to a wind uplift load calculation. Hertalan technical department can provide this information. / At the end of the day all the work must be finished for protection against the elements. / On a dry and clean surface pull back the sheet for the seam by 150 mm. Keep clear the outer 20 mm and apply to both sides ks137 in an 80 mm wide band. / When the ks137 is touch dry, carefully close the seam without air pockets and compress the seam with a silicone roller. / Depending on weather conditions, apply no more adhesive than can be covered in 5-15 minutes.during high temperatures this open time will shorten. / Apply sealant ks96 into the outer 20 mm directly against the bonded section. Apply the roller onto the seam in both length and width so the sealant will be at least 1 mm thick. / Make a clean seam by removing the excess sealant.
11 6 Green roofs Instructions for preparing a seam with hertalan easy cover membranes, by hot air welding the EW cover strip onto Black EPDM (green-on-black) Edge fixation It is necessary to apply edge fixation to resist the peel off in case of significant wind uplift. Therefore we split the area in a horizontal part and the vertical area (edge or upstand). / Tool: hot air welding machine. / Temperature and welding speed: Depending on surrounding temperature / For determining the correct welding speed and temperature, first make a few metres of test welding. / Before checking the seams, the seam must be cooled down. Inspection can be carried out with a special test pin or with a blunt awl. / During welding the speed must be correct, this is checked visually by looking at the EW. A small bead of EW must appear from the seam. When the amount of EW is too high the speed must be increased. When there is no EW the speed must be decreased. / Before making large seams, fixate the EW cover strip onto the surface with some spot welds, created with the hot air hand tool. / Place the special welding nozzle between the sheets, creating a seam of at least 30 mm. / During welding with the machine put adequate pressure onto the cover strip with a silicone roller. During welding it is important that seam is pressed together. / Product: hertalan ks137 / Usage: approx. 500 gr/m 2 two-sided / Two sided adhesion with a minimum width of 270 mm. Provided that at least 120 mm against the upstand (vertical) and at least 150 mm at the surface (horizontal) must be applied. Preferably adhere the complete upstand (vertical area). / Pull back total required width of sheet, apply on both the EPDM and the surface ks137 with a brush (rotating movements) or a roller. / After drying, ks137 must be touch dry, put both sides carefully together without air pockets (prevent the forming of folds and tension in the sheet) and compress the adhered area with a silicone roller. / Depending on weather conditions, apply no more adhesive than can be covered in 5-15 minutes. During high temperatures this open time will shorten. / Product: hertalan ks205 / Usage: approx. 300 gr/m 2 two-sided
. / When working with a compressor, the condensation has to be drained first.")
12 7 / Two sided adhesion with a minimum width of 270 mm. Provided that at least 120 mm against the upstand (vertical) and at least 150 mm at the surface (horizontal) must be applied. Preferably adhere the complete upstand (vertical area). / When working with a compressor, the condensation has to be drained first. At the end of the day the compressor has to be blown off / Pull back total required width of the sheet, apply on both the EPDM and the surface ks205. At normal conditions do not apply ks205 on a larger area then can be covered in 20 minutes. / After drying, ks205 must be touch dry, put both sides carefully together without air pockets (prevent the forming of folds and tension in the membrane) and compress the adhered area with a silicone roller.time will shorten. / Product: hertalan ks205 / Usage: approx. 275 gr/m 2 two-sided application (incl. propellant) / Application is same as the refillable system. For the instructions of the pressurised cannister spray system, there is a specially formatted Instruction Manual.

13 8 1.3 Adhered roofing system Application instructions for hertalan easy cover membranes in an adhered roofing system. / See universal and specific application instructions. / Hertalan EPDM roofing sheets and membranes can be both partial and fully adhered with hertalan ks143. The maximum size of the membrane depends on the local situation. / Place the EPDM material, without large air pockets (prevent the forming of folds and tension in the membrane). / Continue with closing the overlaps, fixation of upstands, edges and such and install necessary details and rainwater outlets. / At the end of the day all the work must be finished for protection against the elements Fully adhering / Product: hertalan ks143 / Usage: approx. 300 gr/m 2 one-sided Partial adhering / Product: hertalan ks143 / Usage: approx. 225 gr/m 2 one-sided / Apply ks43 in beads every 80 mm (stripe pattern), the applied beads must have a diameter of approx. ø 8 mm. / Depending on temperature, wind and humidity the hertalan ks143 must be left uncovered for 5 to max. 20 minutes for evaporation of the solvent content. / Apply hertalan ks143 in beads every 80 mm (stripe pattern), the applied beads must have a diameter of appr. ø 10 mm (slightly more than partial adhering). / Directly after applying, spread the hertalan ks143 evenly on the surface with a fleece roller or appropriate tool. / Depending on temperature, wind and humidity the hertalan ks143 must be left uncovered for 5 to max. 20 minutes for evaporation of the solvent content. / Place the EPDM material, without large air pockets (prevent the forming of folds and tension in the membrane). A fully adhered system should have at least 90 % adhesion between the EPDM material and the roof surface. / Continue with closing the overlaps, fixation of upstands, edges and such and install necessary details and rainwater outlets. / At the end of the day all the work must be finished for protection against the elements.
14 Seams Depending of the type of hertalan EPDM roofing system seams can be achieved with adhesive or hot air. Instructions for preparing a seam with hertalan easy cover roofing sheets and membranes. Making a seam by adhering with hertalan ks137 and sealing with hertalan ks96. / Product: hertalan ks137 / Usage: approx. 500 gr/m 2 two-sided / Product: hertalan ks96 cartridge / Usage: approx. 7 m 1 pro cartridge one-sided / On a dry and clean surface pull back the sheet for the seam by 150 mm. Keep clear the outer 20 mm and apply to both sides ks137 in 80 mm wide band. / Depending on weather conditions, apply no more adhesive than can be covered in 5-15 minutes. During high temperatures this open time will shorten. / When the ks137 is touch dry, carefully close the seam without air pockets and compress the seam with a silicone roller. / Apply sealant ks96 onto the outer 20 mm directly against the bonded section. Apply the roller onto the seam in both length and width so the sealant will be at least 1mm thick. / Make a clean seam by removing the excess sealant Edge fixation It is necessary to apply edge fixation to resist the peel off in case of significant windload. Therefore we split the area in a horizontal part and the vertical area (edge or upstand). / Product: hertalan ks137 / Usage: approx. 500 gr/m 2 two-sided / Two sided adhesion with a minimum width of 150 mm to the horizontal surface and complete adhesion to any vertical upstand areas. / Pull back total required width of the sheet, apply on both the EPDM and the surface ks205. At normal conditions do not apply ks205 on a larger area then can be covered in 20 minutes. / After drying, ks137 must be touch dry, put both sides carefully together without air pockets (prevent the forming of folds and tension in the membrane) and compress the adhered area with a silicone roller. / Depending on weather conditions, apply no more adhesive than can be covered in 5-15 minutes. During high temperatures this open time will shorten. / Product: hertalan ks205 / Usage: approx. 300 gr/m 2 two-sided

15 10 / Two sided adhesion with a minimum width of 150 mm to the horizontal surface and complete adhesion to any vertical upstand areas. / When working with a compressor, the condensation has to be drained first. At the end of the day the compressor has to be blown off / Pull back total required width of the sheet, apply on both the EPDM and the surface ks205. At normal conditions do not apply ks205 on a larger area then can be covered in 20 minutes. / After drying, ks205 must be touch dry, put both sides carefully together without air pockets (prevent the forming of folds and tension in the membrane) and compress the adhered area with a silicone roller. / Product: hertalan ks205 / Usage: approx. 275 gr/m 2 two-sided application (incl. propellant) / Application is same as the refillable system. For the instructions of the pressurised cannister spray system, there is a specially formatted Instruction Manual.
16 Mechanically fixed roofing system Application instructions for the hertalan easy cover MF and hertalan easy weld MF roofing sheets in a mechanically fixed (MF) roofing system. / The amount of fasteners must be determined through the calculation of the expected wind load. / Place the fasteners as close as possible towards the hot-bonding seam. / On the roof edge the last fastener will be installed and the membrane is placed over the edge. Along the other edges of the roof area the membrane can be placed or an edge strip can be used. / Continue with adhering the overlaps, fixation of upstands, edges and install necessary details and rainwater outlets. / At the end of the day all the work must be finished for protection against the elements hertalan easy cover MF / See universal and specific application instructions. / Maximum size of a manageable MF membrane is approx. 7,5 x 20 m (W x L). / Place a suitable tube on the outer side of the membrane or sheet to be applied. / Roll the membrane onto the tube, to the point where assembly of the membrane starts. / Unroll the membrane into the direction of the lowest point of the surface, most likely the roof edge. During unrolling at fixed intervals a fitted flap appears that must be installed at the roof surface with suitable fasteners. / Hertalan accepts only certified installation systems with fasteners that have a wind resistance calculation value of at least 500 N hertalan easy weld MF / See universal and specific application instructions. / For a good hot air connection, the substrate should be sufficiently robust. / The hertalan easy weld MF sheet must be dry and clean. Position the first sheet at the roof and place the fastener (including the mechanical stress plate 80x40 mm) in the seam area of the sheet. / Hertalan accepts only certified installation systems with fasteners that have a wind resistance calculation value of at least 360 N. / The distance between the edge of the sheet and the MSP must be at least 10 mm, whereby the MSP must be placed as close as possible towards the EW welding bead. The MSP and the EW should not make contact.
17 12 / Position the second roofing sheet and fixate if required the hertalan easy weld roofing sheet onto each other with some spot welds. / A head-seam between two hertalan easy weld roofing sheets can be achieved with a hertalan cover strip. At a T-seam with the easy weld roofing sheet a strip of EW must be used to fill in the difference in height and extra fixation. / Application of T-joints and other connections require extra attention, see previously described techniques. / Application of T-joints and other connections require extra attention, see p. 2. / Continue with sealing the overlaps, fixation of upstands, edges and such and install necessary details and rainwater outlets. / At the end of the day all the work must be finished for protection against the elements Seams Instructions for preparing a seam with hertalan easy cover membranes, by adhering with hertalan ks137 and sealing with hertalan ks96. / When the ks137 is touch dry, carefully close the seam without air pockets and compress the seam with a silicone roller. / Depending on weather conditions, apply no more adhesive than can be covered in 5-15 minutes.during high temperatures this open time will shorten. / Apply sealant ks96 into the outer 20 mm directly against the bonded section. Apply the roller onto the seam in both length and width so the sealant will be at least 1 mm thick. / Make a clean seam by removing the excess sealant. Instructions for preparing a seam with hertalan easy weld MF roofing sheets. Durable joints are prepared by hot air welding the EW welding beads, making a so called green-onto-green joint. / Tool: hot air welding machine. / Temperature and welding speed: Depending on surrounding temperature. / Product: hertalan ks137 / Usage: approx. 500 gr/m 2 two-sided / Product:hertalan ks96 cartridge / Usage: approx. 7 m 1 pro cartridge one-sided / On a dry and clean surface pull back the sheet for the seam by 150 mm. Keep clear the outer 20 mm and apply to both sides ks137 in an 80 mm wide band. / For determining the correct welding speed and temperature, first make a few metres of test welding. / Before checking the seams is possible, the seam must cool down. Inspection can be carried out with a special test pin or with a blunt awl. / During welding the speed must be correct, this is checked visually by looking at the EW. A small bead of EW must appear from the seam. When the amount of EW is too high the speed must increased. When there is no EW the speed must be decreased.
18 13 / Before making large seams, fixate the hertalan easy weld onto each other with some spot welds created with the welding machine. / Place the special welding nozzle between the sheets, creating a seam of at least 30 mm. / During welding put adequate pressure onto hertalan easy weld with silicone roller. During welding it is important that seam is pressed together. Therefore apply a stabilization band at the seam Edge fixation It is necessary to apply edge fixation to resist the peel off in case of significant windload. Therefore we split the area in a horizontal part and the vertical area (edge or upstand). / Product: hertalan ks137 / Usage: approx. 500 gr/m 2 two-sided / Two sided adhesion with a minimum width of 150 mm to the horizontal surface and complete adhesion to any vertical upstand areas. / Pull back total required width of the sheet, apply on both the EPDM and the surface ks205. At normal conditions do not apply ks205 on a larger area then can be covered in 20 minutes. / After drying, ks205 must be touch dry, put both sides carefully together without air pockets (prevent the forming of folds and tension in the membrane) and compress the adhered area with a silicone roller. / Depending on weather conditions, apply no more adhesive than can be covered in 5-15 minutes. During high temperatures this open time will shorten. / Product: hertalan ks205 / Usage: approx. 300 gr/m 2 two-sided / Two sided adhesion with a minimum width of 150 mm to the horizontal surface and complete adhesion to any vertical upstand areas. / When working with a compressor, the condensation has to be drained first. At the end of the day the compressor has to be blown off. / Pull back total required width of the sheet, apply on both the EPDM and the surface ks205. At normal conditions do not apply ks205 on a larger area then can be covered in 20 minutes. / After drying, ks205 must be touch dry, put both sides carefully together without air pockets (prevent the forming of folds and tension in the membrane) and compress the adhered area with a silicone roller. / Product: hertalan ks205 (pressurised spray system) / Usage: approx. 275 gr/m 2 two-sided application (incl. propellant) / Application is same as the refillable system. For the instructions of the pressurised cannister spray system, there is a specially formatted Instruction Manual.
19 14 Instructions for making an edge fixation with hertalan easy weld roofing sheets. Method 1 / Install the hertalan easy weld directly over the roof edge or upstand. An extra mechanical fixation is not necessary. / Pull back the hertalan easy weld, to a minimum of 150 mm on the horizontal surface. Fully adhere this 150 mm and at least 120 mm against the upstand with hertalan ks137 or hertalan ks205. Preferably adhere the complete upstand (vertical area). / After drying, adhesive must be touch dry, put both sides carefully together without air pockets (prevent the forming of folds and tension in the sheet) and compress the adhered area with silicone roller. / Depending on weather conditions, apply no more adhesive than can be covered in 5-15 minutes. During high temperatures this open time will shorten. Method 2 / Place the hertalan easy weld roofing sheet towards the outside of the roof area and minimal 150 mm against the upstand. / Place at the horizontal area as close as possible to the upstand, at least every 250 mm a fastener with mechanical stress plate (80x40 mm). / Fully adhere the up going sheet against the upstand with hertalan ks137 or hertalan ks205. / Continue with covering the complete upstand and at least 150 mm of the horizontal surface with a hertalan easy weld roofing sheet (usually a strip of 700 mm is sufficient). Pay attention that the EW welding bead doesn t make contact with the installed fasteners. The fasteners (including the mechanical stress plate) must be at least placed 50 mm on the inside of the overlap. / With hot air the EW welding bead can be placed

20 15 2. ACCESSORIES 2.1 Accessories Hertalan roofing systems During application of the different Hertalan roofing systems, details must be integrated in the waterproofing layer. Special Hertalan accessories are developed to solve those situations. So you are assured of a complete and complementary EPDM roofing system. Depending on the roofing system, following accessories can be used: 1. hertalan easy stick A combination of an EPDM sheet with a self adhesive butyl based backing. 2. hertalan flashing Unreinforced unvulcanised EPDM rubber which is plastically deformable and will vulcanise in natural conditions. 3. hertalan flash weld Unreinforced unvulcanised EPDM rubber provided with EW layer, which is plastically deformable and will vulcanise in natural conditions. 4. hertalan cover strip Unreinforced vulcanised EPDM strip which is provided with a full backing surface layer of EW Additional accessories 5. hertalan rainwater outlet An outlet of PE fitted with a sleeve of unreinforced vulcanised EPDM, also available with EW welding strip. 6. hertalan prefab corners Unreinforced vulcanised EPDM internal and external corners, also available with EW welding strip. 7. hertalan rooflight connection strips Unreinforced vulcanised EPDM strips -incl. external corners for watertight installation of roof lights, also available with EW welding strip. 8. hertalan prefab site sleeve Unreinforced vulcanised EPDM site sleeve (square) for installing of roof details, also available with EW welding strip. 9. hertalan prefab pipe covers Prefab EPDM pipe covers incl. connection sleeve, also available with EW welding strip. 2.2 Universal application instructions Hertalan EPDM accessories are complementary components for installing Hertalan EPDM roofing systems. For the application the general and specific application instruction of the Hertalan EPDM roofing systems are applicable.
21 hertalan easy stick hertalan easy stick is extremely suitable for installing rooflights and gutters (both new and renovation). hertalan easy stick is self adhering and applied without naked flame. hertalan easy stick can be supplied in different widths (standard width is 1400 mm) with a roll length of 20 metre. Application instructions for hertalan easy stick. / See general and product specific instructions of Hertalan EPDM roofing systems. / The surface must be smooth, dry, clean, and free of oil, grease and sharp objects. Depending on the substrate, clean or degrease with white spirit or apply a bituminous primer or prime with hertalan ks137 contact adhesive (applied one-sided at substrate). / Remove the protective layer on the reverse side of hertalan easy stick, on larger areas remove layer part by part. Place hertalan easy stick onto the substrate and pay special attention to the connection at the periphery of the roof area. / To apply hertalan easy stick use a silicone roller, so the self adhering butyl layer becomes firmly bonded with the substrate. / At low application temperatures it is advisable to activate the butyl adhesive before installing the hertalan easy stick. This can be done by warming the EPDM side with hot air. Directly afterwards apply appropriate pressure with silicone roller Seam / Put two hertalan easy stick strips parallel (butt joint) together and press on with silicone roller. / Subsequently apply a strip of hertalan S with a minimum width of 100 mm (install with 2 beads of hertalan ks96 at both sides of the seam) or apply a hertalan cover strip. 2.4 hertalan flashing hertalan flashing is especially designed for internal and external corners where standard products do not fit, to create watertight solutions at abnormal corners or at a large openings in the roof surface. hertalan flashing is supplied on rolls in lengths of 5 metres and a widths of 300 mm. / See general and product specific instructions for hertalan EPDM roofing systems. / hertalan flashing should only be applied onto Hertalan EPDM with hertalan ks137 contact adhesive. / Mark the area where the hertalan flashing will be applied. Apply on both the reverse side of the hertalan flashing and the top side of the EPDM (substrate) hertalan ks137 and let it dry completely. / When the ks137 is touch dry, remove the protective layer from the top-side of the flashing. Fold the flashing in such a way that both sides with adhesive can not make contact. / Depending on weather conditions, apply no more adhesive than can be covered in 5-15 minutes. During high temperatures this open time will shorten.
.")
22 17 / Position the flashing with the side with ks137 against the upstand part and then place it towards the horizontal area. Place the welding nozzle of the hot air gun between the folded parts of the flashing. (do not warm up ks137 directly!). / If the flashing is warm enough, it can be stretched and secured onto the horizontal area. Seams in the rim area must be closed properly. Use a copper roller. / Subsequently use a silicone roller to firmly press on the flashing and apply a bead of hertalan ks96 to seal the edge of the flashing. Remove the excess sealant in order to make a clean seam. 2.5 hertalan flash weld hertalan flash weld is especially designed for internal and external corners where standard solutions do not fit and a weldable Hertalan EPDM substrate is available. hertalan flash weld is not suitable for application at pipe protrusions and outlets. hertalan flash weld is supplied on rolls in lengths of 5 metres and widths of 180 mm. / See general and product specific instructions for hertalan EPDM roofing systems. / hertalan flash weld is applied onto Hertalan EPDM with hot air. It is not allowed to use hertalan ks137 to install hertalan flash weld. / Prepare the flash weld in such a way that a welding strip of at least 35 mm remains on both sides of the seam. / Assemble a welding nozzle with pre-drilled holes onto the hot air gun. Preform the flash weld by warming up the top surface. Be careful not to overheat the product. / Fixate the preformed flash weld by spot bond welds onto the Hertalan EPDM membrane. Position the welding nozzle underneath the flash weld and fixate it by rolling over with a small (28 mm) silicone roller and use a copper roller for the rim area. / During welding a small green bead of TPE must become visible on the outside of the flash weld. Seams should never sealed with hertalan ks hertalan cover strip hertalan cover strip is especially designed for creating an adequate joint between two roofing sheets or a T-seam. hertalan cover strip can be supplied on rolls in lengths of 20 metre and widths of 120 or 180 mm. / See general and product specific instructions for Hertalan EPDM roofing systems. / hertalan cover strip and Hertalan EPDM sheet (as a substrate) must be smooth, dry, clean and free of oil, grease and sharp objects.
23 Seam / Put two hertalan easy stick plus strips parallel (butt joint) together or with an overlap and press on with roller. / Place the hertalan cover strip onto the seam and position it so that the seam is exactly in the middle of the hertalan cover strip (If more then one membrane is applied, the hot-bonding seams at the head side must be placed with at least 3 cm in between). / If a seam must be prepared between a hertalan cover strip and existing Hertalan EPDM roofing material (green-on-black connection), the existing surface area must first be cleaned with white spirit. / Then carefully roughen the surface area with a Powerfile and remove the dust with a hot air hand tool. This treatment must also be executed in case the joint can t be prepared on the same day (max. two days). / Fixate the hertalan cover strip every metre by making spot welds. Subsequently position the welding nozzle between the hertalan cover strip and the Hertalan EPDM material. Move the hot air gun with appropriate speed alongside the seam making a weld of at least 35 mm. / During welding proper pressure must be applied onto the hertalan cover strip with a silicone roller. A small green bead of TPE must become visible at the outside of the flash weld. If too much TPE is beside the seam, the working speed should be increased. / At a T-seam, at the spot of the hot-bonding seam of the membrane, a strip of EW (welding material) must be placed to fill the gap and for extra fixation. / Apply extra pressure by welding the hertalan cover strip onto the hot-bonding seam, by using a 5 mm wide copper roller. 2.7 Additional accessories Hertalan accessories are modified for direct application onto Hertalan EPDM material. The product range consists of a series of standard products, most kept on stock. Apart from that Hertalan offers the possibility for ordering different sizes or special designs. / See general and product specific instructions for Hertalan EPDM roofing systems. / Mark the position where the rainwater outlet, corner or other detail must be installed. / Apply on both the under side of the accessory and the topside of the EPDM substrate (marked area) hertalan ks137. A strip of 20 mm at the perimeter of the EPDM material and flap of accessory must be kept clear of adhesive. / The ks137 must be touch dry before both sides are assembled. Depending on weather conditions, apply no more adhesive than can be covered in 5-15 minutes. During high temperatures this open time will shorten. / Position the accessories onto the substrate, fitting the marked area. Make sure, if applicable that the materials in the area of the upstands are put together properly. Use a copper roller. The remaining surface can be pressed on with a silicone roller. / To complete the installation of the accessory, apply a bead of hertalan ks96 along the outside of the 20 mm adhesive free strip of the EPDM and substrate. Apply appropriate pressure with roller along the seam, so a layer of minimal 1 mm thick paste will form. / Make a clean seam by removing the excess sealant.
.")
24 Additional application instructions Additional application instructions for assembly of round roof accessories (pipes or such) with prefab or tailor made sleeve: / Mark the centre of the round area to be perforated onto the EPDM material. (Assuming the EPDM material is placed over the round accessory). / Mark a circle, with a diameter of 1/3 of the required roof opening, around the previous made marking, or a circle with a diameter that is 6 cm smaller then the needed roof opening, the largest option must be applied. / Punch the required opening into the EPDM material, larger openings can be made with scissors. Subsequently place the EPDM material over the accessory and pull it towards the fitted slab. / The tension created by the smaller opening in the EPDM material creates an upstand and watertight connection at the placed accessory. / A 150 mm EPDM upstand collar should be formed to conform to Building Regulations. / In case the used accessory has a rough surface (no watertight connection possible) or welding seam, pull back the upgoing EPDM and apply a bead of hertalan ks96 adhesive sealant. Unfold the EPDM and apply appropriate pressure with roller along the seam, so a layer of minimal 1 mm thick paste will form. / Make a clean seam by removing the excess sealant.

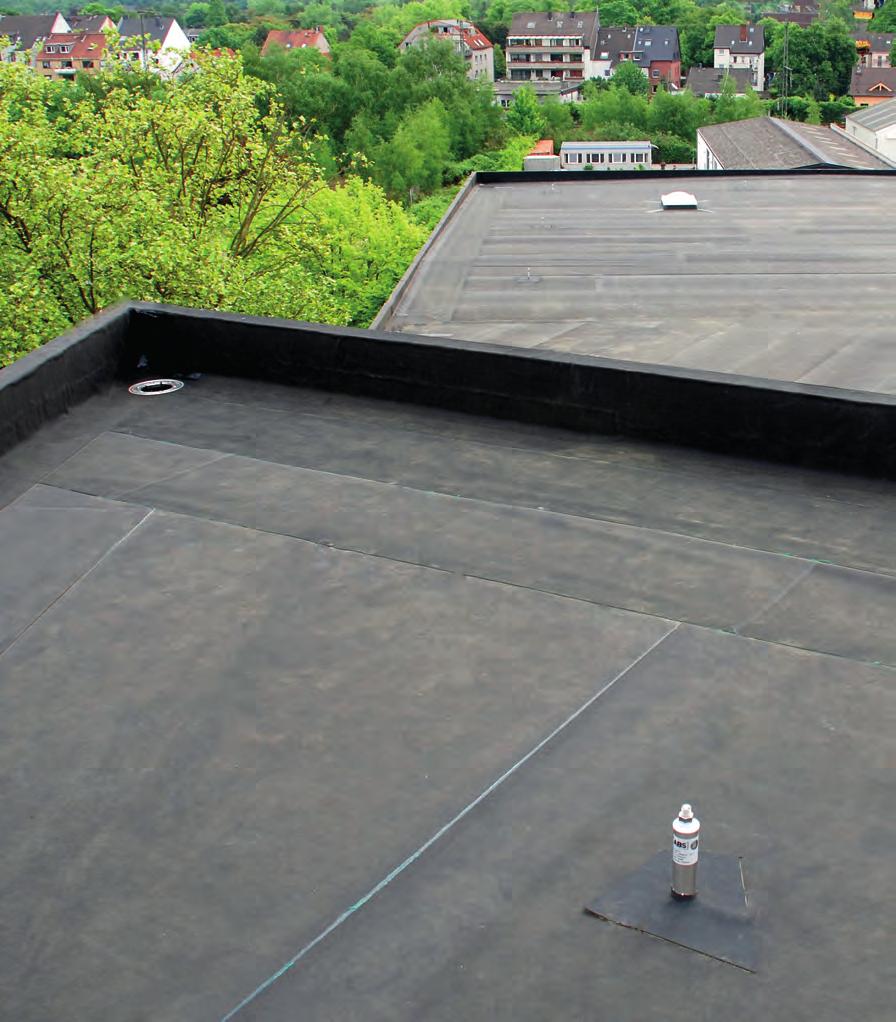
25 20 3. HERTALAN EPDM DPC SYSTEMS 3.1 Façade applications As a waterproofing system, EPDM has a favourable environmental impact, is water and air tight, shows no leaching, is recyclable, has long term flexibility and will not be affected by acids present in water. Furthermore EPDM has a long life expectancy and can be adhered onto almost all substrates with specially developed adhesives. These features make EPDM rubber products from Hertalan the ideal material for a water proofing barrier in building constructions. 3.2 Universal application instructions For applying Hertalan EPDM strips there are universal product specific application instructions. These must be followed to obtain a perfect wind and water tight result. / Hertalan EPDM façade systems are applied without naked flame and at a minimum surrounding and material temperature of 5 C. / All components of the Hertalan systems are adapted to each other and form a complete system. Only Hertalan approved adhesives and sealants are to be applied. / It is important to apply Hertalan façade systems with clean materials and appropriate tools. / In the constructive design, condensation behind the construction must taken into account. / Every surface in the construction where Hertalan EPDM façade systems are applied, must be smooth, dry, clean and free of oil, grease and sharp objects. Depending on the building construction, there are the following applications: 1. hertalan S Unreinforced vulcanised EPDM strip. 2. hertaled Composite material of vulcanised EPDM strip and 200 mm wide aluminium mesh metal reinforcement.
26 Specific application instructions / Adhering an EPDM strip (with hertalan ks96) on porous substrates, this substrate must first have a primer applied. The same applies to concrete surfaces which have shuttering oil. First roughen and then prime with a special hertalan ks96 primer. / If the EPDM strip is applied with adhesive on porous substrates (ks205 or ks137) you should first apply a layer of adhesive onto the substrate, this acts as a primer. When the priming layer is completely dry, the second layer can be applied to the substrate and the first layer applied to the EPDM. Once touch dry the two surfaces can then be connected. / hertaled lead replacement is not suitable for application onto roof tiles. 3.4 hertalan S Hertalan EPDM strips Hertalan S EPDM strips are suitable both for prefabricated applications in a working factory (such as panels, window frames, dormers, etc.) and directly on site (including use in cavity walls as an alternative to lead products, water rejecting barriers for details, etc.). The strips can be adhered onto almost all substrates using specially developed adhesives. The strips can be supplied in different widths (Max mm) with a roll length of 20 metre hertalan ks96 adhesive sealant Application instructions for hertalan S installed into a building construction with hertalan ks96. / Product: hertalan ks96 (pressurised spray system) / Usage: approx. 15 m 1 for a sausage of 600 ml / See universal and specific application instructions. / When an EPDM strip is installed on a porous surface a primer has to be applied first. This has also to be considered for concrete surfaces covered with shuttering oil. First roughen the surface a little bit and than apply the primer. (Use the hertalan ks96 primer). / Cut away the top 35 mm of the provided nozzle, so an opening with a 7 mm diameter is created.

27 22 / Apply the ks96 one sided in beads of Ø 7 mm, do not spread the ks96. / The number of beads applied depends on the size of the strip. Strips up to a width of 300 mm are applied with 1 bead. Wider strips should be applied with at least two beads. / Where hertalan S is applied onto a substrate that has height differences, corners and such, every level and corner must be fixated with a bead of ks96. / After applying several M 1 of ks96, place the hertalan S directly onto the first bead of ks96. / Use a silicone roller to put pressure onto the EPDM covered bead in such a way that a seam of approximately mm with a thickness of at least 1 mm is formed. / Handle the remaining beads of ks96 in the same way. Put pressure onto bead to form a mm wide seam with a thickness of at least 1 mm. / Make a clean seam by removing the excess of sealant hertalan ks137 contact adhesive Application instructions for hertalan S installed into a building construction with hertalan ks137. / Product: hertalan ks137 (pressurised spray system) / Usage: approx. 500 gr m 2 two-sided / See universal and specific application instructions. / Apply hertalan ks137 to both construction surface substrate and hertalan S. This is can be done with a brush (rotating movements) or for larger areas with a roller. / Allow both surfaces to dry, ks137 must be touch dry, put both sides carefully together without air pockets (prevent the forming of folds and tension in the EPDM) and compress the adhered area with a silicone roller. / Depending on weather conditions, apply no more adhesive than can be covered in 5-15 minutes. During high temperatures this open time will shorten.
28 hertalan ks205 sprayable contact adhesive / Product: hertalan ks205 / Usage: approx. 300 gr m 2 two-sided / See universal and specific application instructions. / hertalan ks205 is applied with a closed spray system. Apply adhesive to both the substrate and the hertalan S surface. / When working with a compressor, the condensation has to be drained first. At the end of the day the compressor has to be blown off / Pull back total required width of the sheet, apply on both the EPDM and the surface ks205. At normal conditions do not apply ks205 on a larger area then can be covered in 20 minutes. / After drying, ks205 must be touch dry, put both sides carefully together without air pockets (prevent the forming of folds and tension in the membrane) and compress the adhered area with a silicone roller. / Depending on weather conditions, apply no more adhesive than can be covered in 5-15 minutes. During high temperatures this open time will shorten Seam Creating sea m by adhering with hertalan ks137 and sealing with hertalan ks96. / Product: hertalan ks137 / Usage: approx. 500 gr m 2 two-sided / On a dry and clean surface pull back the membrane for the seam by 100 mm. Keep clear the outer 20mm and apply the ks137 in the 80 mm wide band. / When the ks137 is touch dry, carefully close the seam without air pockets and compress the seam with a silicone roller. / Depending on weather conditions, add no more adhesive than can be covered in 5-15 minutes. During high temperatures this open time will shorten. / Apply ks96 adhesive sealant onto the outer 20 mm directly against the bonded section. Apply the roller onto the seam in both length and width so the sealant will be at least 1mm thick. / Make a clean seam by removing the excess sealant. / Product: hertalan ks205 / Usage: approx. 275 gr/m 2 two-sided application (incl. propellant) / Application is same as the refillable system. For the instructions of the pressurised cannister spray system, there is a specially formatted Instruction Manual.

29 hertaled Hertalan lead alternative Hertaled is developed by Hertalan as a lead substitute for several applications such as cavity walls constructions, window frames and roof lights. Hertaled is a composite of hertalan S with a reinforcement of 200 mm wide aluminium mesh metal. The mesh metal makes it possible to shape and bend the hertaled into the required from. Hertaled can be supplied in 210, 450 and 650 mm on rolls of 6 and 12 metre hertalan ks96 adhesive sealant / Product: hertalan ks96 / Usage: ca. 15 m 1 for a sausage of 600 ml / See universal and specific application instructions. / The required width of the hertaled depends on the width of the cavity and the method of fastening onto the inner wall. / Position on the first layers of the outer wall the reinforced part of the hertaled. Place the hertaled in such a way that 150 mm is at the outside of the outer wall and 50 mm in the masonry joint of the outer wall. / Whilst working up the outer wall, care should be taken that no mortar or other debris falls into the cavity. / Shape or bend the 150 mm wide reinforced part of hertaled along the outer wall, in such away that it is tight against the wall. / Fixate the unreinforced part with 2 beads of hertalan ks96 against the inner wall and firmly roll over with a silicone roller. The unreinforced part can also be mechanically fixed with a suitable clamp strip against the inner wall at the correct height.
30 Seam / Product: hertalan ks137 / Usage: ca. 500 gr./m 2 two-sided / Product: hertalan ks96 / Usage: ca. 15 m 1 for a sausage of 600 ml / Position two hertaled strips against each other with a gap of 5 mm. / Apply onto the hertaled on both sides of the seam 80 mm of hertalan ks137. Take a 200 mm wide 0.75 mm thick strip of hertalan S EPDM and also apply ks137, leaving the outer 20 mm free of adhesive. / When the ks137 is touch dry, carefully place the hertalan S EPDM strip onto the hertaled and close the seam without air pockets and compress with a silicone roller. / Depending on weather conditions, add no more adhesive than can be covered in 5-15 minutes. During high temperatures this open time will shorten. / Apply ks96 adhesive sealant onto the outer 20 mm directly against the bonded section. Apply the roller onto the seam in both length and width so the sealant will be at least 1 mm thick. / Make a clean seam by removing the excess sealant. / Apply 2 beads of hertalan ks96 to both sides on the first 75 mm beneath the seam. / Take a 150 mm wide 0,75 mm thick strip of hertalan S EPDM and position this onto the seam so the ks96 is covered. / Apply appropriate pressure with a silicone roller so the ks96 becomes visible at the outside of the hertalan S strip. / Make a clean seam by removing the excess sealant Corner detail / In creating a corner detail don t make an over-lap with hertaled. Preferably use the prefab Hertalan internal and external prefabricated EPDM corners. The seam must be prepared as per the aforementioned described instructions.
31 26

32 27 APPENDIX 1 WHICH HERTALAN EPDM ROOFING SYSTEM TO CHOOSE 1. General A flat roof always consists of a support structure and a roof deck which combined are referred to as the substructure. This substructure is be decisive in the choice and method of attachment a Hertalan EPDM roofing system. 2.Definitions First, it is wise to elucidate several definitions / Supporting structure: these are the components of a building that acts as the structure supporting against external forces (e.g., wind, snow and dead load) discharging into the foundation. / Roof deck: has a function as a sealing layer and an insulating function against the heat and cold. The roof deck has a supporting function for the waterproofing and is sufficient to with stand foot traffic. / Substructure: the structural part of the roof which can help determine the choice of the roofing system. / Roofing Construction: these are all material layers above the substructure, such as a vapour barrier, thermal insulation and roofing system. / Roofing system: it consists of one layer EPDM roofing with all details and joints (connections). These can be determined according to the method of the substructure construction. 1) Roofing System construction 2) Roofing System 3. Standards and regulations Both the design of a roofing construction and the installation of a roofing system must meet strict requirements. These requirements are partially required by the market and partly by legislation (Building Regulations). Hertalan has a wide product range of EPDM systems and accessories, suitable for all general flat roof systems. With hertalan easy cover and hertalan easy weld, Hertalan offers a complete package of EPDM membranes, sheets and complementary accessories suitable for traditional non-ventilated flat roofs up to special flat roof structures such as loose laying with ballast or an adhesive or mechanical fixation according to wind load calculations. Hertalan has developed a wide range of accessories as solutions for specific details. The Hertalan EPDM accessories range consists of tools for installing Hertalan EPDM systems. This includes for example cover strips, flashing, flat roof drains, pipe covers, fixings, internal and external corners.


33 28 4. Roofing systems Hertalan has a wide product range of EPDM systems and accessories suitable for all general flat roof systems Loose laid and ballasted roofing system These can be applied under the condition that the substructure is capable of withstanding the extra weight of the ballast layer. Product choice: hertalan easy cover or hertalan easy weld Mechanically attached roofing system EPDM roofing membrane or sheet mechanically connected to the substructure. This type of system does not require a protective layer of gravel or a green roof. Product choice: hertalan easy cover MF or hertalan easy weld MF Partially adhered roofing system EPDM roofing membrane or sheet partially adhered to the substructure. This type of system does not require a protective layer of gravel or a green roof. Product choice: hertalan easy cover or hertalan easy weld Fully adhered roofing system EPDM roofing membrane or sheet fully adhered to the substructure. This type of system does not require a protective layer of gravel or a green roof. Product choice: hertalan easy cover or hertalan easy weld