Construction Site Inspections
|
|
|
- Rosamund Briggs
- 5 years ago
- Views:
Transcription

1 Construction Site Inspections Keep The Mud Out of The Creek Barry Tonning, Tetra Tech

2 Inspections help to identify and correct problems!

3 Inspection requirements Must inspect site every 14 days (LA) Some states require every 7 days Plan must be revised, if necessary, in 7 days Qualified personnel required Written inspection reports required Must keep reports for 3 yrs Report must be signed
 where runoff leaves the site Bare soil areas Slopes stabilized and bare Drainage system controls Housekeeping")
4 What will you be inspecting? SWPPP vs. field observations Discharge locations (sheet runoff, pipes, gullies, etc.) where runoff leaves the site Bare soil areas Slopes stabilized and bare Drainage system controls Housekeeping controls

5 Inspection reports Name of inspector Date of inspection Amount of rainfall Signature Scope of inspection Major observations Corrective actions taken
6 Inspector responsibilities Know the permit requirements Be familiar with local ordinances and state regulations Make sure the BMP plan matches actual field conditions Monitor rainfall and sediment and other runoff Conduct required inspections Fill out written inspection reports Sign reports (if authorized) Communicate findings to site manager

7 After the inspection... Communicate results to managers Repair failing BMPs Notify plan designers of findings BMPs that aren t working Places where BMPs are needed Amend SWPPP if necessary Keep inspection reports on file Some jurisdictions require that inspection reports be kept on file with the SWPPP for at least three (3) years after the date of inspection, or until one (1) year after permit coverage ends.

8 Inspections: Using the SWPPP and your field observations at the site A Storm Water Pollution Prevention Plan is a detailed plan that: Identifies potential sources of sediment and stormwater pollution at the construction site Describes practices to reduce pollutant runoff from the site Identifies procedures the operator will implement to comply with the terms and conditions of the NPDES permit

9 As previously noted, the SWPPP: Assesses the site Identifies protected areas Drainage ditches, creeks, etc. Mature trees & natural areas Lays out project phases Identifies erosion, sediment, & housekeeping controls Describes plans for inspections & maintenance

10 Poor construction site Silt fences down Construction exit needs to be maintained Mud in the street Site poorly graded Construction debris litters the site Generally poorly maintained

11 Very good construction site Maintained silt fences Site well graded Construction exit in good condition
12 Conducting the Field Inspection Controls for Bare Soil Areas Slope Protection Drainage System Controls General Housekeeping

13 What should be in site files? Stormwater Pollution Prevention Plan Permit-related records (NOI, etc.) Inspection reports Other federal/ state/local permits
 Silt fence or barrier below sloping sites")

14 Controls for bare soil areas Run-on controls (diversion, lined channel) Silt fence or barrier below sloping sites Soil stockpiles protected (seeded, fenced) Stabilized within 14 days if not being worked (except when ground is frozen)

15


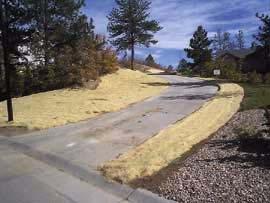
16 Protect bare areas by mulching or seeding
17 How much does mulch and grass help? Cover type Coverage rate Erosion reduction Hay or straw 1 ton/acre 87 percent Hay or straw 2 tons/acre 98 percent Grass 40 percent cover 90 percent Grass 90 percent cover 99 percent Erosion blanket All bare ground percent Stormwater regulations usually require seeding/mulching after 14 days if area is not being actively worked!

18 Wishful thinking...

19 Benching, seeding, & multiple silt fences to protect long slope
20 Sediment filters: silt fences, brush barriers, etc. Install below (downhill from) bare soil areas Make sure the filter catches all muddy runoff Use multiple filters on long slopes, every apart Put filters across slopes, on the contour Do not use straw bales unless faced by silt fencing on the uphill side Straw bales are not suitable for use as sediment filters on slopes or silt checks in channels

21 Breaking up long slopes with several short curved fence sections greatly increases sediment storage area Flow Flow

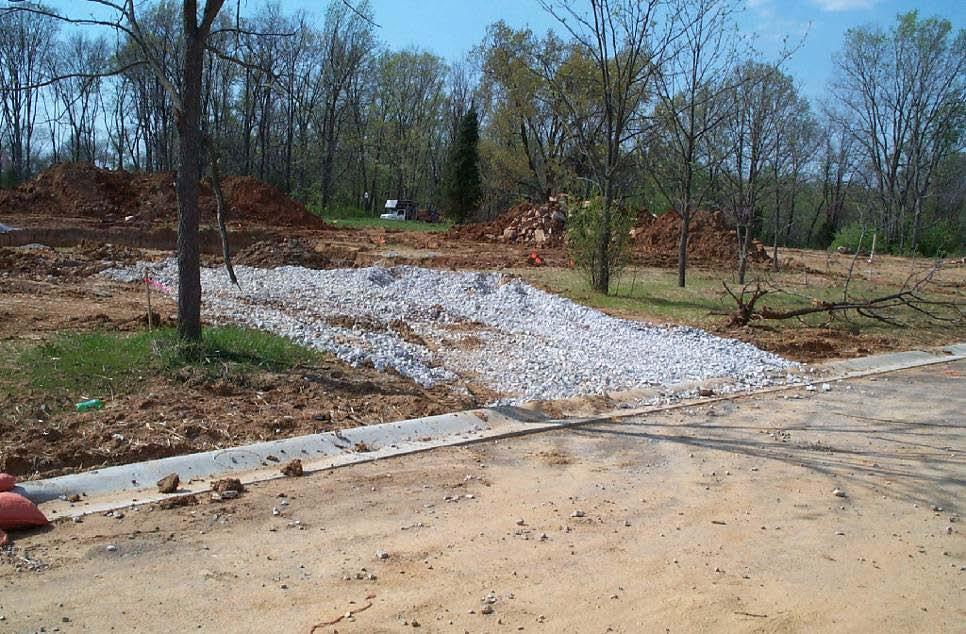
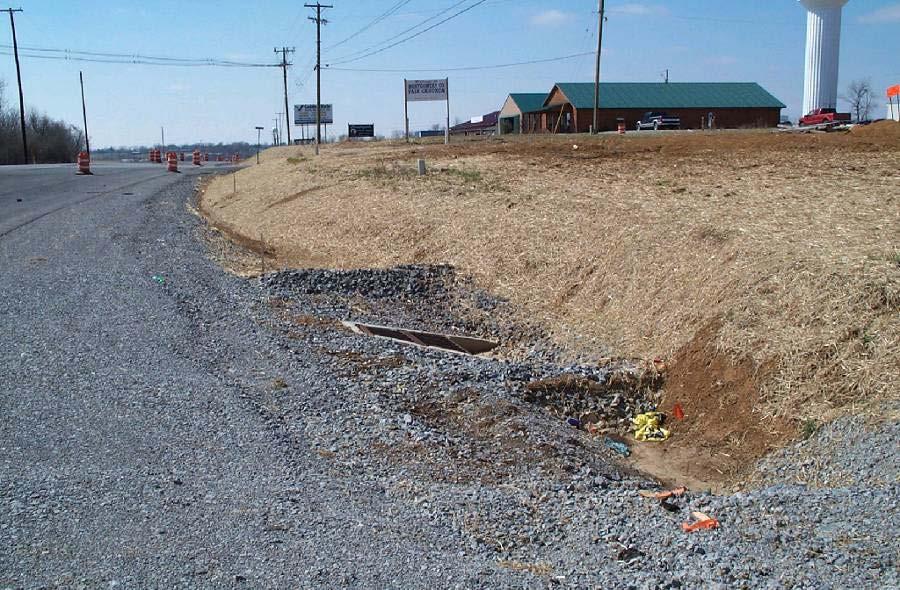
22 Rock filter as sediment trap
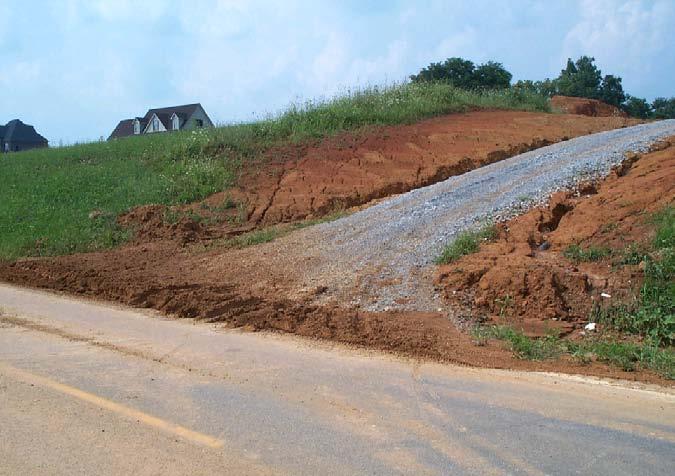
23 Slope protection Seed & mulch immediately after final grade Blankets on long slopes up to ~ 2:1 Turf mats on long slopes > 1:1 Temporary/permanent downdrains used to carry heavy flows down erodible slopes No visible, uncontrolled gullying on slopes

24 Drainage system controls Run-on diversions, lined pass-thru channels Protected inlets and outlets Channels lined, silt check dams installed Sediment traps and basins Vegetated buffers near waterways No muddy runoff entering streams, rivers, lakes, or wetlands
25 Protecting flow inlets & outlets Objectives for inlets & outlets: Inlets for storm drains and channels Pond up the runoff to settle & filter it Use rock berms, rock bags, or other items Storm drain & channel outlets Protect areas receiving discharge flows from erosion caused by flow velocities Use rock or turf reinforcement mats; seed heavily


26 Good application of silt fence and rock bags for inlet protection Lots of options available


27 Good inlet design & installation

28 Other inlet protection applications

29 Outlet Protection Excellent apron shape and rock mix for high velocity flows
30 Ditches and channels All ditches and channels need liners Liners can be: Grass with blankets or mats Riprap or flat rock Concrete Channels more than 50 long with slopes greater than 3% need silt check dams Silt checks can be made of: Rock (#2 channel lining) Rock bags (with #57s, 1/2 to 2/3 filled with rock) Commercial products (sediment dikes) Do not use silt fence or hay bales

31 Riprap, blanket, and turf mat liner for channel


32 Blanket & mat channel liners


33 Ditch check dams Constructed in channels to reduce runoff velocity and trap sediment Bottom of upper silt check is at the same elevation as the top of downstream check
34 Sediment traps & basins Designed & placed to pool runoff so sediment can settle out Install before grading/fill work begins! Seed immediately after construction Locate in swales or low-lying areas where flows are concentrated Do not place near flowing streams Outlets should be made of rock or pipe


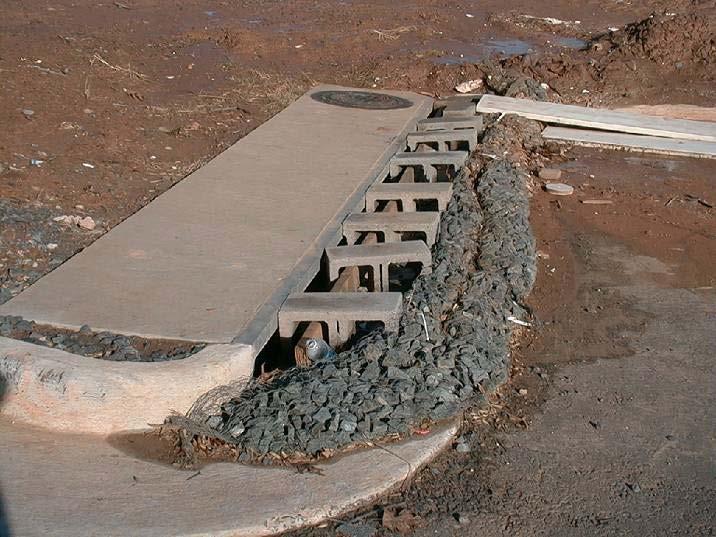
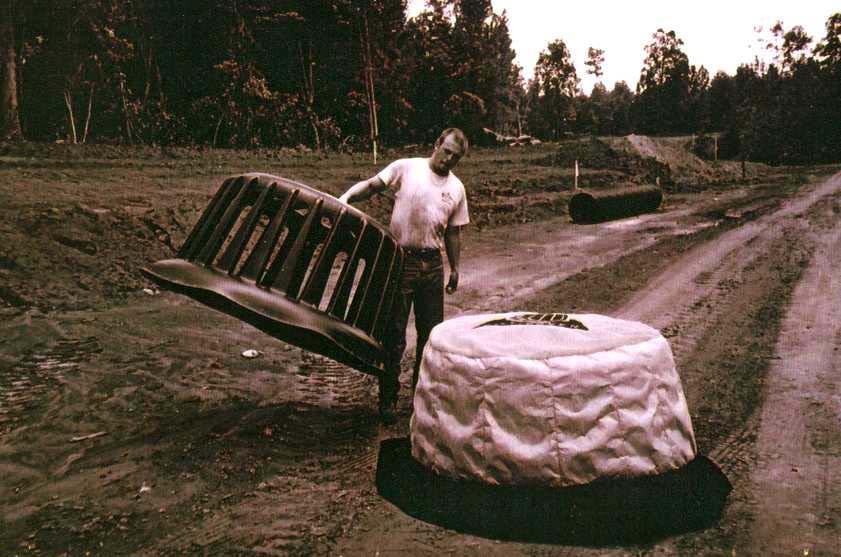
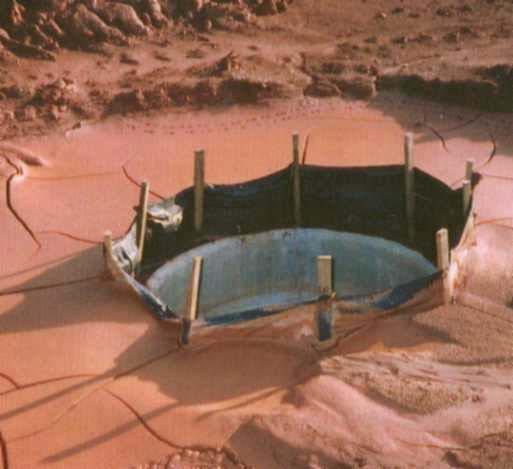
35 Protect riser during construction! * Wrap with filter fabric * Use rock inlet dam * Pile #57s around pipe


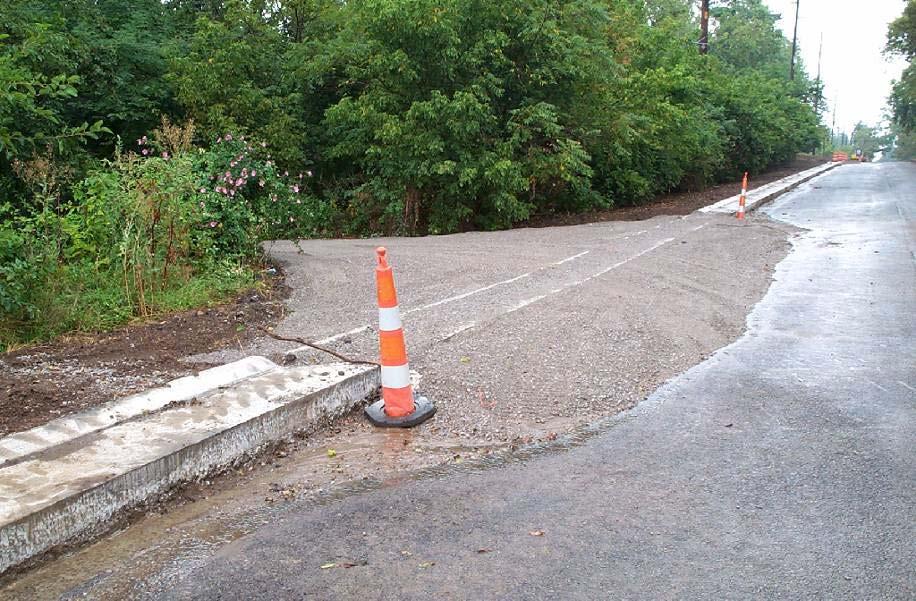
36 General housekeeping Mud tracking on roadways Fuel, oil, paint, hazardous waste mgmt Concrete washout sites Trash & debris management Sewage management Dust control (if needed)

37 Waste management Provide convenient, well-maintained toilet facilities

38 Establish proper building material handling and storage areas Building materials with runoff potential should be stored indoors or under cover


39 Designate concrete washout areas Or wash out material in formed-up areas ready for the next pour

40 Establish proper equipment/vehicle fueling and maintenance practices Your on-site fueling and maintenance area should have a spill kit Conduct vehicle fueling and maintenance activities in areas away from ditches Conduct maintenance on vehicles and equipment off-site if possible

41 Develop a spill prevention and response plan Note the locations of chemical storage areas, storm drains, ditches, and surface waters Specify how to notify appropriate authorities Describe the procedures for spill cleanup Identify personnel responsible for implementing the plan
42 After the inspection... Debrief the site manager Note the good, bad, & ugly Discuss deficiencies and how/when they ll be fixed Issue notice(s) of violation, if appropriate Follow up with written report