ON GUIDE I T A L L A T S
|
|
|
- Shannon Booker
- 5 years ago
- Views:
Transcription

1 INSTALLATION GUIDE
2 When long-term performance and speed of construction are concerns, ARES Retaining Wall Systems offer unmatched advantages. Tensar Geogrids The ARES Retaining Wall Systems owe their strength and durability to Uniaxial (UX) Geogrids, Tensar International s patented reinforcement geogrids. Due to their stiff interlocking capabilities, these geogrids stand the test of time, outperforming other commercially available geosynthetics. For more information, visit ARES Retaining Wall Systems > DOTs, Contractors and Engineers have long appreciated the many advantages of panel walls. Their wide range of appearances and finishes, combined with the simplicity and speed of construction, make them attractive when compared to other types of wall systems. Unfortunately, limitations imposed by the behavior of reinforcing materials and a very narrow and expensive range of acceptable backfill properties have restricted their use until the introduction of Tensar Geogrids. By mechanically connecting Tensar Geogrids with the advantages of panels, the fully integrated ARES Retaining Wall Systems now offer a high performance, cost-effective and aesthetic solution. This document is intended to provide the Owner, Engineer, Contractor and the Inspector with the guidelines and criteria required to facilitate construction and quality control of the ARES Precast Panel Retaining Wall System. No Metal No Corrosion With soil reinforcement that is 100% synthetic, ARES Retaining Wall Systems are proven concrete panel wall solutions that eliminate corrosion concerns. ARES Systems offer the cost advantages of an MSE retaining wall without the long-term consequences from exposure to chlorides, sulfates, low-resistivity soils or stray electric current potential. This makes the system the logical choice for hot backfill soils, transformer platform areas and electrified rail systems. As testimony to the durability of the ARES Systems, one of the first Tensar-reinforced panel walls was built as a seawall on the Gaspe Peninsula in Canada. After 20 years of North Atlantic storms and constant exposure to salt water, there are no signs of corrosion or deterioration of the soil reinforcement. In fact, some of the first ARES installations were instrumented and carefully observed to verify the effectiveness and long-term performance of the systems. As part of an FHWA study at the Tanque Verde project in Arizona, the Tensar Geogrid behind sections of one such ARES wall was excavated to validate its durability. Twenty-five years after the original installation, the walls continue to perform as designed with no maintenance issues. ARES Systems Components COMPONENT Tensar Geogrids Precast Panel Facing FUNCTION High-density, polyethylene (HDPE) structural geogrids internally reinforce the fill materials. Inert to chemical degradation, they can be used with different backfill materials, even crushed concrete. IMAGES TO COME Available in standard 5 ft x 5 ft (1.5 m x 1.5 m), 5 ft x 9 ft (1.5 m x 2.75 m), or can be customized for full height construction. Bodkin Connector HDPE Connector for high connection efficiency without the concern for corrosion. Full Engineering and Construction Services Detailing, design, site assistance and stamped drawings for each ARES project upon request.
 and has been utilized on hundreds of transportation and site development projects.")


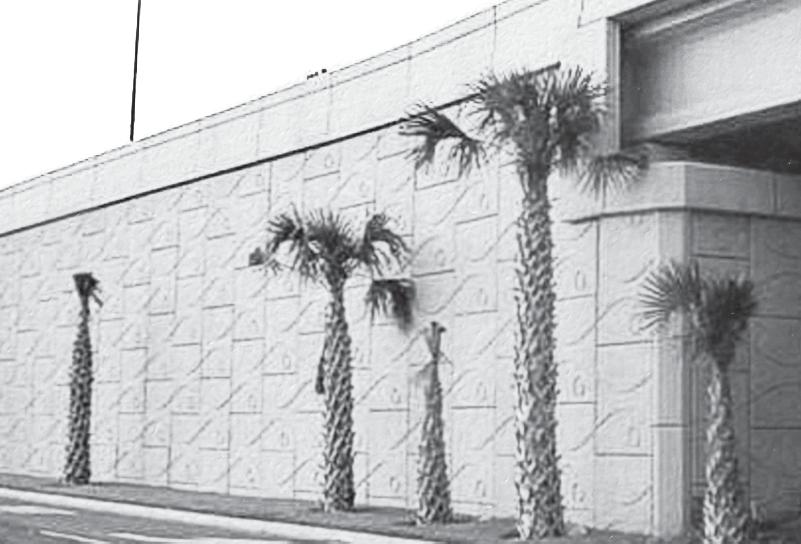
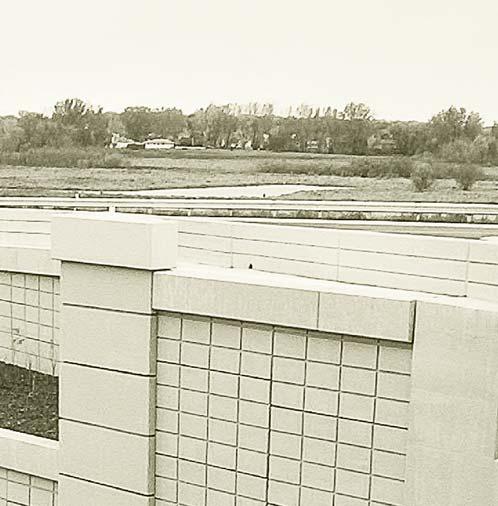
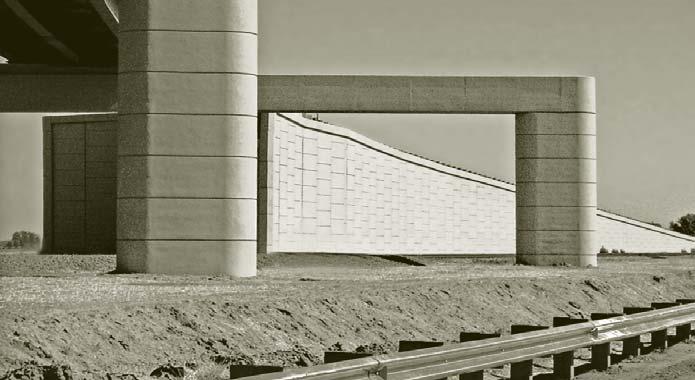
3 ARES Modular Panel System > The ARES Retaining Wall System is a time-tested, proven mechanically stabilized earth (MSE) wall solution. It has been evaluated by the Highway Innovative Technology Evaluation Center (HITEC) and has been utilized on hundreds of transportation and site development projects. The ability to utilize non-metallic earth reinforcement makes the system inert to chemical and electrical corrosion. The inert properties of Tensar Geogrids permit the use of reinforced zone backfill such as reclaimed concrete, slag, untreated ash and other backfill material which cannot be used with metallic reinforcement systems. The ability to use a wide range of backfills, including recycled materials, translates into greater economy and the potential for a sustainable design. ARES modular panel walls also offer designers a choice of textures and patterns to fit the architectural, structural and budgetary needs of any retaining wall project. The panels are cast with polymer tabs embedded in the rear face of each panel and then connected to the reinforcing geogrid. The 100% polymer connection assures load transfer to the geogrid reinforcement with no loss in design strength for the project s life. Contractors save time and labor costs when installing ARES modular walls. The standard ARES modular panels contain significant face area while the reinforcement is lightweight and easy to connect no nuts or bolts to tighten. Panels are offered in two basic sizes: 5 ft x 5 ft (1.5 m x 1.5 m) see Figure 1 below and 5 ft x 9 ft (1.5 m x 2.75 m) see Figure 2 below. However, the form used to create the panels can be easily modified when the Owner s needs dictate the use of a special sized panel. Tensar Uniaxial Geogrid Tensar Uniaxial Geogrid Panel Front Face Non-Woven Geotextile BODKIN CONNECTION Panel Front Face Non-Woven Geotextile BODKIN CONNECTION 3 in. (75 mm) (MIN.) GEOGRID EMBEDMENT INTO CONCRETE 3 in. (75 mm) (MIN.) GEOGRID EMBEDMENT INTO CONCRETE Figure 1 Figure 2 2

4 ARES modular panels provide significant face area while the Tensar Geogrid reinforcement is lightweight and easy to field connect. Responsibilities for Construction Compliance > The Contractor is responsible to provide construction in accordance with the contract documents and to coordinate the wall construction with related work. The Contractor is responsible for using the most recent set of approved construction drawings to perform the work and for verifying line, grade and offset needed to establish wall location according to the contract documents. The Contractor is responsible to monitor material supply and assure that adequate lead time is provided with each request for delivery and that ordered quantities are available to prevent construction delays. The Contractor is responsible to unload and inspect materials upon delivery to the job site, and to provide proper storage and protection of materials. The Engineer is responsible to enforce the requirements of the contract documents and the approved construction drawings. The Tensar technical advisor will be available at the start of the project to assist the Contractor in the coordination of the initial material delivery schedule and to advise the Contractor s project team of the recommended construction procedures within the scope of this manual. The Tensar technical advisor is not a member of the inspection or quality control staff on the project. Work provided by the Contractor includes: All wall site preparation and survey layout Forming and pouring the leveling pad Wall construction in its entirety Installation of the top-of-wall treatment where required If requested, services provided by Tensar International (TI) include: Wall construction drawings On-site technical assistance at the start of construction


5 Materials and Handling > Materials Supplied by TI Precast concrete facing panels of varying dimensions and with geogrid tabs extending from the back of the panels, all as indicated by the approved shop drawings. HDPE Tensar Uniaxial (UX) Geogrid soil reinforcements which are to be field cut by the Contractor to the various lengths required, and then attached by the Contractor to the embedded geogrid tabs extending from the back of the panels. Filter fabric to be placed on the back of each panel joint by the Contractor to retain the backfill. Delivery of these materials to the job site: panels, geogrid, filter fabric, bearing pads and bodkin bars as discussed above, and in full truckload quantities, where applicable, off loading scheduled by the Contractor. Any damage to the materials or discrepancies in quantities must be noted by the Contractor on the delivery ticket at the time of delivery and reported promptly to TI. The materials must be properly stored in such a manner and location to avoid damage or theft. Bearing pads to be placed by the Contractor on the horizontal joints between panels. Bodkin bars to be used by the Contractor for making the bodkin connection of the soil-reinforcing geogrid sections to the geogrid tabs extending from the back of the panel. 4
 > Materials, Tools and Equipment Provided by the Contractor: Materials and Tools Clamps Hardwood wedges 2 rakes for tensioning geogrid (Figure 3) 2 in.")
 spacer to set panel joint gap Nylon slings for unloading panels Cables with shackles to connect the lifting devices Devices for lifting of panels by the embedded lifting inserts Spray paint")
6 A Tensar representative can be available at the start of the project to advise on the recommended construction procedures. Materials and Handling (continued) > Materials, Tools and Equipment Provided by the Contractor: Materials and Tools Clamps Hardwood wedges 2 rakes for tensioning geogrid (Figure 3) 2 in. (50 mm) x 4 in. (100 mm) lumber for bracing, staking and fabrication of clamps, as well as threaded rod, washers and nuts ¾ in. (19 mm) spacer to set panel joint gap Nylon slings for unloading panels Cables with shackles to connect the lifting devices Devices for lifting of panels by the embedded lifting inserts Spray paint for marking geogrid and panels 2 crowbars, 4 ft (1.2 m) long 2 wrenches for clamp bolts Claw hammers Sledge hammer 4 ft (1.2 m) Level Brooms Chalk line Plumb bob Construction adhesive to attach the filter fabric to the panels at the joint: standard grade construction adhesive such as Pliobond PL400 Concrete and forming materials for leveling pad and top-of-wall treatments as required Backfill material A copy of the approved construction drawings 36.0" (0.9 m) STEEL PIPE HANDLE 48.0" (1.2 m) L ³ 8" ½"Ø DOWEL BAR (10 mm 13 mm) FRONT OF PRONG 1¼" 1½" ANGLE (32 mm 38 mm) 2.0" (M.) (50 mm) 8.50" (216 mm) (TYP.) 54.0" (1.4 m) 2.0" (MIN.) (50 mm) TAPER AND ROUND POINT FILL CONDITION L CLEAN SANDS OR STONES 10" (254 mm) SILTY MATERIALS 6" (152 mm) GRADED BASE 4" (100 mm) Sample Configuration of Steel Rake for Tensioning Geogrid Figure 3 Tensioning Rake


 wide, 6 in. (150 mm) thick panels. Equipment to transport the select fill to the wall site.")

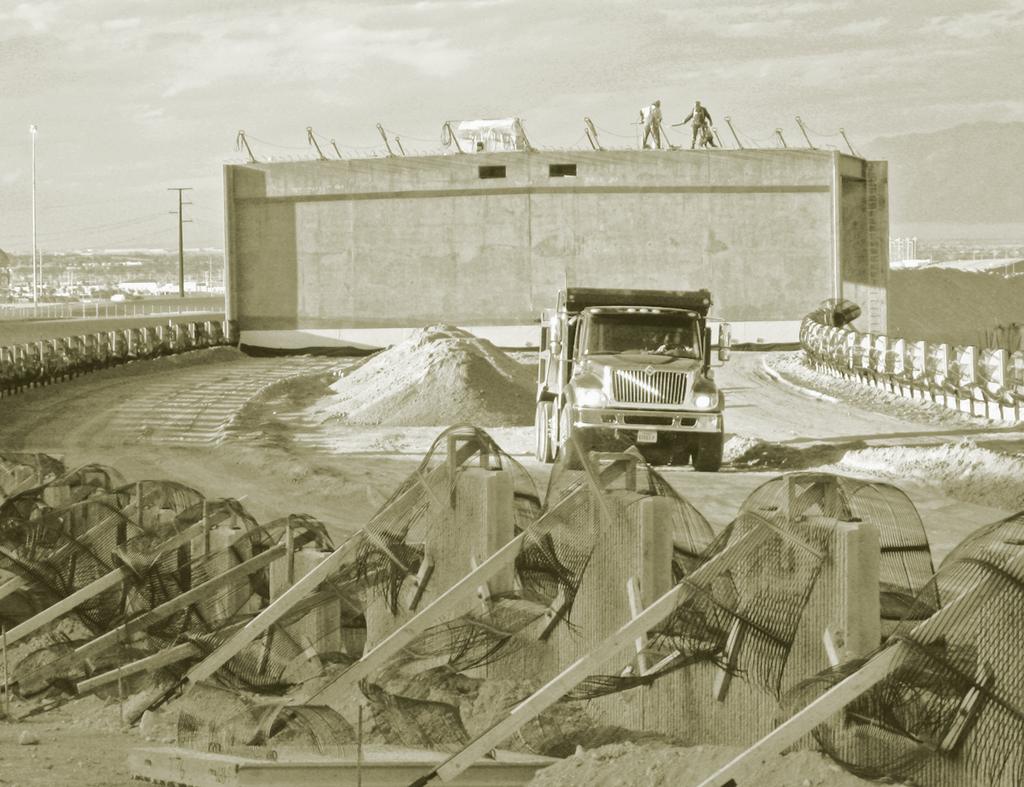
7 IMAGE TO COME Materials and Handling (continued) > Equipment Panel handling and setting equipment excavator, loader or similar equipment capable of properly lifting and placing the precast concrete facing panels. Note: Typical weight of largest standard panel type is approximately 3,000 lbs for projects using nominal 5 ft (1.5 m) wide panels, and approximately 5,500 lbs for projects using nominal 9 ft (2.75 m) wide, 6 in. (150 mm) thick panels. Equipment to transport the select fill to the wall site. Equipment, such as a rubber-tired loader and small track dozer, preferably with angle blade, for placing and spreading the select fill. Large, smooth-drum roller for mass compaction Small, hand-operated, vibratory plate tamper or roller for compaction within 3 ft (0.9 m) of the back face of wall panel. 6


8 ARES panels are usually delivered on flat bed trailers. The Contractor must provide a level, stable area to stage panels. Handling Materials Supplied by Tensar International > Precast Concrete Facing Panels It is the responsibility of the Contractor to schedule delivery of the panels in accordance with his schedule for erection. Proper coordination will help avoid delays by having the precasting performed in harmony with the wall construction schedule. Panels are normally delivered on flat bed trailers. The Contractor is responsible to provide tractor and trailer access to the wall site. The acceptability of this access is at the discretion of the driver or his employer. The Contractor is allowed one hour to unload each truck, unless specifically agreed otherwise in writing with TI. The Contractor must provide a level, firm and stabilized area to stage the panels. The Contractor must take care to protect the panels from staining due to rain splash or damage due to improper placement of the dunnage. The number of panels in a stack shall not exceed five 5 ft x 5 ft (1.5 m x 1.5 m) panels or four 5 ft x 9 ft (1.5 m x 2.75 m) panels. Delivery tickets are included with each shipment and indicate the panel types furnished in that load. It is the responsibility of the Contractor to confirm the accuracy of the tickets and to note any damage that is visible prior to accepting delivery. TI or its precaster must be notified immediately if any panels have been damaged. All dunnage is the property of TI or its precaster and should be stacked by the Contractor for loading on a subsequent panel delivery truck. Bearing Pads for Horizontal Joints between Panels Bearing pads will be delivered in cardboard cartons. The quantity of these cartons shall be noted on the delivery ticket and confirmed by the Contractor. The cartons shall be properly stored in a dry, secure location to prevent damage or theft. The dunnage shall be properly spaced to avoid uneven loading in the panel stacks.


 on each section of geogrid should be trimmed neatly to expedite making the connection")
9 IMAGE TO COME Geogrid Reinforcement Geogrid reinforcement shall be delivered in rolls and shall be labeled by type. These labels must be protected until the geogrid has been coded at the job site. The Contractor should retain for the Engineer any certifications included with the packing slip. The Contractor should immediately color code each of the geogrid types using spray paint on the edges and ends of the rolls. The Contractor may choose to highlight geogrid types on the approved construction drawings using corresponding colors. Figure 4 CUT LINE MEASURED LENGTH The Contractor is responsible for cutting the geogrid to length in the field. Precut geogrid should then be tagged for length and type. The first transverse bar (at the connection) on each section of geogrid should be trimmed neatly to expedite making the connection of the geogrid to the wall facing. Do not cut into the transverse bar of the geogrid (Figure 4). Filter Fabric The filter fabric will be delivered in rolls and must be covered to protect it from direct sunlight. 8


10 As with any wall system, the foundation is crucial to the performance of the wall s performance. Construction of the ARES Retaining Wall Systems > Excavation and Drainage Excavation will be performed to the lines and grades required for the installation of the entire wall system. Evaluation and approval of foundation suitability is the responsibility of the Owner s Engineer. Any foundation soils found to be unsuitable by the Owner s Engineer shall be removed and replaced with material suitable to the Engineer. The material shall be compacted to the density necessary to obtain the bearing pressure required by the contract documents, including the project plans and specifications. Proof rolling of the subgrade shall be performed as per the contract documents. The foundation is crucial to the performance of the ARES Systems. The drainage system shall be installed as required in the contract documents or approved construction drawings, if required. Cast-in-Place Leveling Pad Unless otherwise shown in the contract documents or approved in writing by the Engineer, the leveling pad shall consist of 6 in. (150 mm) thick by 12 in. (300 mm) wide unreinforced concrete which shall be formed and poured in place. The concrete strength shall be in accordance with the contract documents or a minimum of 2,500 psi (17 Mpa), whichever is greater. The leveling pad must cure a minimum of 12 hours prior to the placement of the panels. The leveling pad shall have formed sides and a smooth, level surface set to the grades as shown on the approved construction drawings and shall be finished such that the elevation variance is less than in. (3 mm) or -¼ in. (6 mm). A leveling pad that is not placed accurately will create problems with wall alignment and joint spacing during the erection process. Where steps in the leveling pad are shown on the approved construction drawings, the actual location of each step should be located and the bulkhead for the upper leveling pad step set back 9 in. (225 mm), nominal.
.")

11 After the concrete has cured and the forms are removed, lay out the front face of the wall and establish the location on the leveling pad by striking a chalk line at the front face of the bottom course of panels. For panels with an architectural finish, the location and chalk line should be based on the face of the structural, non-architectural portion of the panel, i.e., immediately behind the architectural relief (Figure 5). Panel Placement It is generally preferable to start a wall at the lowest leveling pad elevation and at the location of any fixed point such as a corner and/or existing structure. Remove the panels from the stack using proper lifting devices. Wood blocking must be placed at the bottom of the panel prior to lifting. This protects the face of the panel being lifted from being scarred by the lower panel. Prior to setting any panel, sweep off the top of the leveling pad or lower panel, and the bottom of the panel being set, to assure that no foreign material will potentially be trapped under the panel, which could affect horizontal level. Bearing pads are not required between the leveling pad and the panels of the bottom course. The alignment of the first course of panels will determine to a large degree the resulting appearance of the wall. Considerable attention must be paid to the setting and positioning of these panels. Recommended Location of Chalk Line on Leveling Pad Architectural Relief (if any) on Panel Structural Face of Panel Chalk Line on Leveling Pad Back Face of Panel Leveling Pad Figure 5 10
 > Below is the suggested sequence for placing panels on the bottom course.")
.")
12 Proper installation of the geogrid and select fill is critical to the alignment, appearance and performance of the ARES System. Construction of the ARES Retaining Wall Systems (continued) > Below is the suggested sequence for placing panels on the bottom course. It is important to note that the crane load should NOT be released prior to the step specifically calling for that action in the following sequence: Lower the panel into position on the leveling pad, using one person on each end of the panel. Using crowbars, position the base of the panel so that it matches the chalk line (see note on previous page regarding architectural finish). Use a spacer to assure that the ¾ in. (19 mm) space across the vertical joint is consistently provided between adjacent panels. Check the panel for horizontal level; shim or grind the leveling pad if required. Note: Shims shall consist of permanent material that will not deteriorate. Using a 4 ft (1.2 m) level with a predetermined blocking attached to one end, push the top of the panel back until the level reads plumb. (See Note on Panel Batter, page 13.) On the taller panels, install a header clamp at the center of the panel and brace and tighten the clamp securely. Drive a stake in front of the wall at the midpoint of the panel and about 4 ft (1.2 m) from the face. Nail the bottom of the brace into the stake. Check the batter and then nail a 2 in. (50 mm) x 4 in. (100 mm) brace to the header piece. On the half-panels, the header clamp and staking are not necessary; the half-panels should be held in place by clamping to the adjacent taller panels. At every vertical joint, position a clamp at the top of the half-panel (such that it will result in one clamp on either end of the half-panel) and loosely fasten it. The crane load may be released at this point. Tighten the clamps, pulling the half-panel to the same batter as the taller panel, and recheck the panels for alignment, batter and level. Drive hardwood wedges at the quarter points of the bottom front of the panel. Wedges may need to be stacked to engage the lip of a standard A panel. 5 ft x 5 ft panels 5 ft x 9 ft panels Bottom course: panels placed on leveling pad, positioned, aligned and battered, braced off to driven stakes, clamped and wedged.


13 Below is the suggested sequence for placing panels on all subsequent courses. It is important to note that the crane load should NOT be released prior to the step specifically calling for that action in the following sequence: Prior to placing a panel on a subsequent course, the panel below should be backfilled to the point that the uppermost layer of geogrid attached to it is covered with at least one lift of compacted fill. Check the batter of the panel below the panel being set. Constant attention to the amount of rotation that is occurring in the adjacent panels and compensating in the following panels will yield the best results. Place bearing pads on top of lower panel. Lower the panel into position on the bearing pads on the lower panel, using one person on each end of the piece. Using crowbars, position the panel and visually align it with the adjacent panels. Check that the ¾ in. (19 mm) space across the vertical joint is consistently provided between panels. Check the panel for horizontal level and shim if required. This is particularly important for taller walls to prevent alternate opening and closing of the vertical joints. Wedges may be temporarily placed in the vertical joints to maintain alignment until another panel is placed on top. Position and loosely fasten a clamp on each side of the new panel. The crane load may be released at this point. Set the batter on the panel. (See Note on Panel Batter, page 13.) Tighten both side clamps and recheck the panel for alignment, batter and level. The clamps should be checked during compaction and tightened if they become loose. Drive the hardwood wedges at the quarter points between the top of the lower panel and the bottom of the new panel to assist in maintaining batter, double-stacking wedges as necessary. These wedges should be checked during compaction and re-driven if they have become loose. 5 ft x 5 ft panels 5 ft x 9 ft panels Subsequent courses of panels placed, positioned, aligned, clamped, battered and wedged: all but the top course have been backfilled. 12
 in 4 ft (1.2 m),")


14 Construction of the ARES Retaining Wall Systems (continued) > An Important Note on Batter The amount of batter to which the panel is set is a function of the type, gradation and moisture content of the select fill. It is recommended that the batter in sands be initially set at 1 in. (25 mm) in 4 ft (1.2 m), and for coarser material be set at 3 4 in. (19 mm) in 4 ft (1.2 m). The batter on subsequent rows of panels should be adjusted based on the results of the previous courses of panels when they have been backfilled to the top. Note also, particularly in sand backfill, that the required batter tends to be less on panels with more than two layers of geogrid and spaced vertically less than 30 in. (0.75 m) apart. Guidance for determining and adjusting the batter is available from the Tensar technical advisor. Note: Failure to properly use wedges and clamps may result in excessive rotation of the panel. The lowest wedges in the column should be removed from the panels after three levels of wedges are in place. Failure to remove wedges at this time can make subsequent removal difficult and can cause spalling of the concrete. The vertical alignment of the overall wall should be checked daily using a plumb bob. Any adjustments to the unbackfilled batter of the panels should be made at this time to maintain the vertical wall tolerances as required by the contract documents. Placing the Joint Materials The Contractor should place the required bearing pads equally spaced along each horizontal joint between panels. The filter fabric is provided in a 12 in. (300 mm) wide strip and should be centered over all panel-to-panel joints and at special locations as shown in the contract documents where the wall abuts to other structures. The fabric should be slit around the embedded geogrid tabs. Prior to select fill placement, the filter fabric should be held in place with construction adhesive. Placement of the Geogrid Install the UX Geogrid called for on the approved construction drawings, using the type, width and length of geogrid shown for each location within the wall. Installation of the geogrid must be coordinated with the panel and fill placement. The geogrid must be connected to the panels using the bodkin connection as shown on the approved construction drawings. At the Contractor s discretion, prior to fill placement, the geogrid may be connected to the panels and then the geogrid may be temporarily flipped over the front face of the wall. The select fill shall be brought up to Geogrid connected and flipped over the wall face. Typical bodkin connections using 4.5 in. (114 mm) wide HDPE bodkin bars. UX Geogrid tabs extend from the panels on the left-hand side of the photo and are connected to UX soil reinforcing geogrids on the right-hand side.


15 Tensioning the geogrid: immediately prior to and during the initial placement of select fill, the geogrid must be tensioned. The worker on the right-hand side is using a tensioning rake stuck into the soil as a lever to pull against a transverse bar of the geogrid. Note the position of the rake and his feet allows his body weight to maintain good tension in the geogrid and the connection. the level of the geogrid connection after compaction and shall be compacted and level for the entire geogrid embedment length prior to placing the geogrid. The Contractor should take care to assure the level of the compacted fill is flush to the back face of the panel and up to the level of the geogrid connection. The geogrid shall not be placed on the grade until the necessary testing and acceptance of the in-place fill material has been obtained from the Engineer. The geogrid shall be positioned near perpendicular to the face of the panel and such that the tension is relatively uniform across the width of the connection and such that the geogrid lays flat on the grade for the entire embedment length. A tensioning rake is then inserted in front of one of the transverse bars furthest away from the panel and pushed down into the select fill. The geogrid is then pulled with sufficient force to remove all slack. Proper technique is important to apply and maintain proper tension (see photo above). While maintaining tension on the geogrid, select fill should be placed on the geogrid between the rake and the back of the panels (preferably immediately beyond the 3 ft (0.9 m) zone behind the panels). The rake may be withdrawn immediately after initial placement of about one cubic yard (.76 m 3 ) loose, nominal or more of select fill on the section of geogrid. Reinforcement Fill Placement Fill placement shall be performed in a manner that prevents the development of slack in the UX Geogrid. The select fill should be spread in a direction away from or parallel to the face of the wall. In this way, any slack that does develop will tend to be shoved toward the free end of the geogrid. Further care should be taken during fill placement to avoid shoving the geogrid sections and causing them to shift sideways. Place and compact the select fill in accordance with the approved construction drawings and the contract documents. The select fill shall be compacted to a minimum of 95% of the maximum dry density as determined in accordance with AASHTO T-99 or as required by the contract documents, whichever is more stringent. Unless otherwise directed by the Engineer, the select fill lift thickness shall not exceed 12 in. (300 mm) loose. The lift thickness allowed is at the discretion of the Engineer, provided the Contractor can meet compaction requirements and maintain proper alignment. 14
 > Static rolling is typically adequate for achieving the required compaction; heavy vibratory equipment may cause movement of wall")
 of the back face of the panel.")
 of fill is required between the tracks and the geogrid. Rubber-tired equipment may be operated directly on the geogrid, provided the subgrade is not pumping or rutting.")
16 Select fill is placed on the geogrid between the back of the panel and the tensioning rake. Construction of the ARES Retaining Wall Systems (continued) > Static rolling is typically adequate for achieving the required compaction; heavy vibratory equipment may cause movement of wall components and potential misalignment of the wall facing, particularly in sand fill. The actual procedure used should be determined based on field trial results. Only hand-operated lightweight compaction equipment shall be used within 3 ft (0.9 m) of the back face of the panel. Lightweight vibratory equipment and/or lightweight roller may be used for this purpose. Tracked construction equipment shall not be operated directly on the geogrid. A minimum of 6 in. (150 mm) of fill is required between the tracks and the geogrid. Rubber-tired equipment may be operated directly on the geogrid, provided the subgrade is not pumping or rutting. Turning of all equipment shall be minimized to prevent dislocation or damage to the geogrid. The equipment must travel slowly and with sufficient care to avoid dislocating the geogrid. At the end of each day, the Contractor must assure that the reinforced fill zone is compacted and graded to drain away from the face of the wall and that berms or ditches are in place and functioning to prevent the entrance of runoff into the wall construction site. Note: Proper installation of the geogrid and select fill is critical to the alignment, appearance and performance of the ARES Retaining Wall Systems. Care should be taken to assure that the geogrid is properly tensioned and select fill is properly placed. Wall Tolerances Unless otherwise noted on the approved construction drawings or in the contract documents, assure the following: Deviation in vertical and horizontal alignment does not exceed ¾ in. (19 mm) when measured with a 10 ft (3 m) straightedge. Offsets (measured perpendicular to wall face) at the joints between panels do not exceed ¾ in. (19 mm). Gaps at horizontal and vertical joints between adjacent panels are not less than ½ in. (12 mm) and not more than 1¼ in. (31 mm). Deviation in the final overall verticality of the completed wall (plumbness from top to bottom) does not exceed ½ in. per 10 ft (4 mm per m) of wall height. Compaction of the select fill in the reinforced zone: A vibratory plate tamp is being used to compact the 3 ft (0.9 m) zone behind the panels, and a static roller is being used to compact the remainder of the fill.


17 Definitions > Approved Construction Drawings The final wall drawings provided by TI to the Contractor for submittal to the Owner/Owner s Engineer and subsequently approved by the Owner/Owner s Engineer for construction. Contract Documents The agreement between the Owner and the Contractor including the plans and specifications, the conditions and provisions of the agreement, including any addenda and other modifications issued prior to or after the bid and the execution of the original contract. Contractor The individual, firm or corporation acting directly through its agents or employees to undertake the execution of the work under terms of the contract. Inspector An authorized representative of the Owner assigned to see that the workmanship and materials are in accordance with the terms of the contract. Owner The Owner of the project with whom a contract has been made for payment for the work performed under the terms of the contract. Plans The part of the contract documents consisting of the plans, profiles, typical cross-sections, working drawings and supplemental drawings, or exact reproductions thereof, which show the location, character, dimensions and details of the work to be performed. Engineer The Owner s representative with authoritative charge over the inspection and acceptance of the wall construction in accordance with the contract documents. 16


18 Definitions (continued) > Tensar Technical Advisor An authorized representative of Tensar International that is available on site at the start of the project to advise the contractor on recommended construction procedures within the scope of this document. This person is not an inspector or member of the quality control staff on the project. Specifications The part of the contract documents consisting of a description of the quality and quantity of the materials and workmanship that will be required of the Contractor in the execution of the work under the contract between the Owner and the Contractor. The ARES Systems Advantage For more than 25 years industry professionals have been using Tensar Geogrids to build economical, long-lasting structures. With clear advantages in performance, design and installation, ARES Systems offer a proven technology for addressing the most challenging projects. For more information on ARES Systems, call 800-TENSAR-1, visit or send an to info@tensarcorp.com. We are happy to supply you with additional information, system specifications, design details, conceptual designs, preliminary cost estimates, and much more. Work All work items to be performed by the Contractor under the terms and conditions of the contract that are necessary to fulfill the obligations of said contract.


19 18

20 Tensar International Corporation 5883 Glenridge Drive, Suite 200 Atlanta, Georgia TENSAR-1 Distributed by: 2010, Tensar International Corporation. Certain products and/or applications described or illustrated herein are protected under one or more U.S. patents. Other U.S. patents are pending, and certain foreign patents and patent applications may also exist. Trademark rights also apply as indicated herein. Final determination of the suitability of any information or material for the use contemplated, and its manner of use, is the sole responsibility of the user. Printed in the U.S.A. ARES_BRO_5.10