Installation Guide. PrivacyShield Outdoor Enclosure
|
|
|
- Lenard Wilkinson
- 6 years ago
- Views:
Transcription

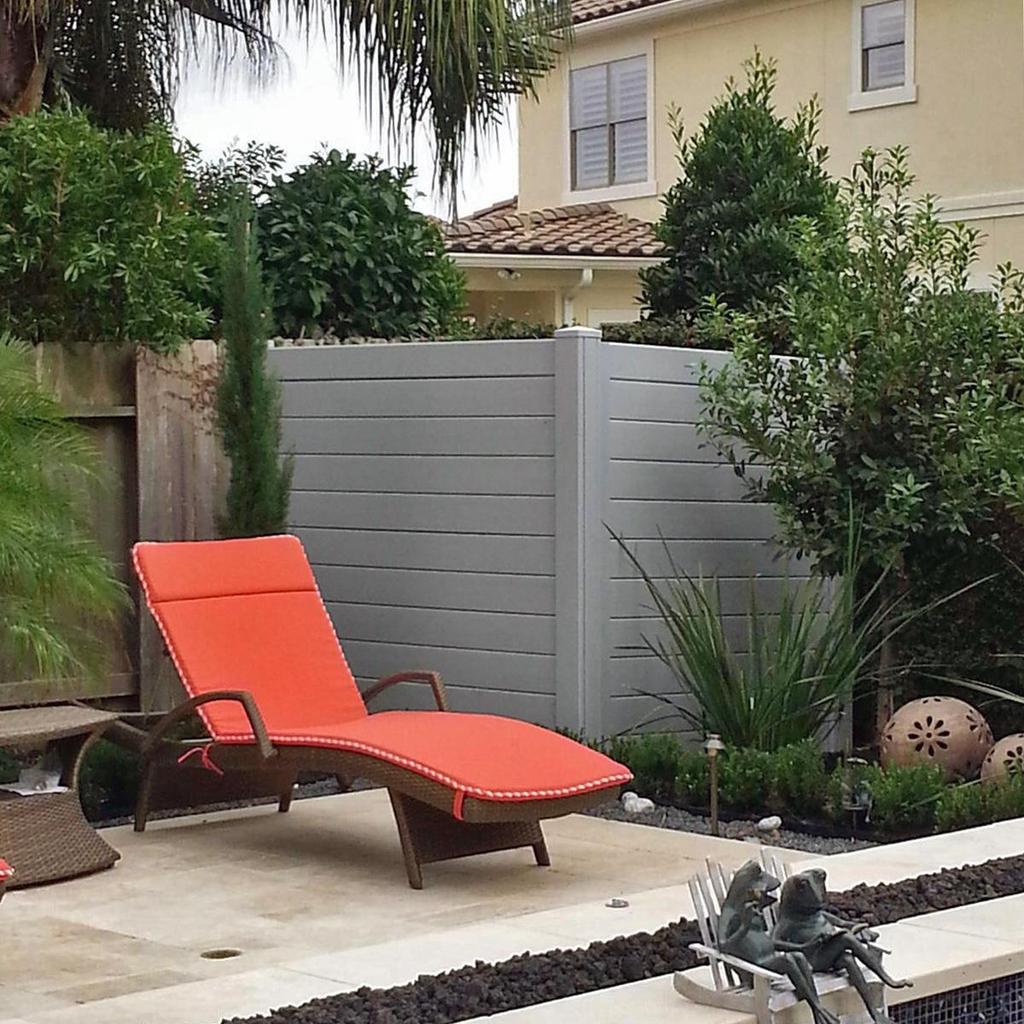
1 Installation Guide PrivacyShield Outdoor Enclosure
2 Table of Contents 1.0 Introduction Materials, Delivery & Tools Layout and Post Locations Foundations PVC Installation Introduction 1.1. PURPOSE The purpose of this manual is to provide the Installer the necessary information to install an PrivacyShield Outdoor Enclosure. The procedures explained in this manual are based on past experience, and are not intended to limit the installer to only these practices RESPONSIBILITY It is the responsibility of the installer to install the barrier properly. All quality control shall be the responsibility of the installer. The performance of the system is dependent on ensuring the material is installed properly and that no gaps are left in the wall or below the wall. It is the responsibility of the owner or installer to inspect all materials against the packing slip upon arrival to ensure a complete delivery in good order. Any damaged materials must be set aside and Acoustical Solutions shall be notified immediately. The design of foundations and post spacing is the responsibility of the installer and homeowner. Acoustical Solutions can provide suggested post spacing based on strength of the panel materials and the wind loads in the region the wall is to be erected, but ultimately it is the responsibility of the owner to ensure they meet all local design codes and ordinances in their area. At no time shall the owner or installer exceed the recommended spans or height limitations of the manufacturer of the materials. It is the responsibility of the owner or installer to ensure that the required clearance distance between the wall and the piece of equipment meets the requirements of the manufacturer for clearance distances clearance is common, but we recommend confirming what is required for your specific piece of equipment. The installer/homeowner is also responsible for checking for utilities locates before digging to prevent damaging any underground wires or pipelines. The website can be used for this service and has operations in most states. 2
 Rectangular Steel Tube Posts 2) PVC H Posts 3) PVC")
3 2.0 Materials, Delivery & Tools 2.1. COMPONENTS & MATERIALS SUPPLIED BY ACOUSTICAL SOLUTIONS 1) Rectangular Steel Tube Posts 2) PVC H Posts 3) PVC Acoustic Panels 4) PVC Long Leg U Channel 5) 1.7 x2.6 PVC Inserts 6) Post Caps 3
4 2.2 DELIVERY The material will typically be delivered via an LTL box truck with a lift gate. All material will be bundled together on one pallet for most projects. Unloading of the material bundle will be handled by the delivery carrier. It is recommended to unload and also store the material in a level area. 2.3 TOOLS REQUIRED 1) Shovel, Post Hole Digger 2) Four-foot level 3) String Lines 4) Compound miter saw with fine tooth blade (if needed to cut panels) 5) Drill 6) Wheelbarrow for mixing pre-bagged concrete 7) C clamps for bracing posts 8) Concrete trowel 9) Rubber mallet 2.4 MATERIALS TO BE PROVIDED BY INSTALLER: 1) Concrete for foundations 2) Stakes 3) 4-6 long nails 4) 2 x4 wood pieces long (for bracing posts when installed in wet concrete) 5) Self-tapping 1 ¼ long No. 8 galvanized screws 6) 12 (300 mm) length of sonotube for the top of each hole at the diameter of the proposed foundation diameter 3.0 LAYOUT AND POST LOCATIONS Make sure that you call and have utility locates done for all underground services before you begin layout or digging. Ensure the required clearances from the equipment are met before you begin to layout the wall. The manufacturer can provide this information to you The wall will end up approximately 2 closer to the piece of equipment from the center line of the posts, so be sure to add at least 2 to the minimum clearance required to the center line of the steel posts. The centerline of the steel posts should be laid out to ensure that panels if cut are not cut through the perforations and there is a minimum of 3 (75 mm) of non-perforated material at the end of the panel. To reduce the amount of cutting of panels, the chart below gives the center to center distance between the centerline of posts and foundations for a straight wall when panels are cut in half or using a 95.5 panel. Posts spacing can be larger or smaller than this, just additional cutting of panels will be required. Panel Size Actual Panel Size Cut Center to Center Distance for Steel Post/Foundation Dim A Center to Center Distance Required at Corner Dim B (½) / ¾ (½) / ¾ 4
5 (½) / ¾ ½ 97 ¾ * DIM B DIM A * A 95.5 span in the direction perpendicular to the post is not recommended. If there are corners in the wall, locate the locations of the corners first. Pull the string line along the outside or inside edge of where the wall is to go through these corner locations. Pull another string line perpendicular to the first in the location of the corners (again going through the centerline of the post). The perpendicular walls can be accurately laid out using the triangle principal. Make sure your sting lines extend past the length of the wall, so there is room to work. Mark the post locations as desired with the 4-6 nails in the ground below the string line, or using a 4-6 nail in the desired post locations. Tip: Once the post locations are laid out, the string lines can be removed, but DO NOT remove the stakes that hold the string line as the string line will be required again for post layout once the holes are dug. 4.0 FOUNDATIONS Do not install foundations in frozen soil or during weather that is wet or below freezing. Do not install concrete in temperatures below 50 degrees F (10 degrees C). A foundation must be dug for each post location. Foundation depth and diameter is the responsibility of the installer. The foundation must extend below depth of frost at a minimum to prevent movement of the wall due to frozen soils. In general, the larger the diameter of the foundation, the more capacity it has. At a minimum a 12 diameter foundation should be used. The depth depends on the quality of the soil as well as the local frost depth. Check with your local building department or building code for requirements. 5
6 Drill/dig the post holes in the locations as laid out. The center of the post should be as close to the center of the dug foundation hole as possible. In each hole, place the 12 length of sonotube and level them all to the same finished elevation. Secure these as necessary to prevent movement when the concrete is added to the foundation hole. Reinstate your string lines in place and relocate the center of your post locations on the string line. Tip: Tie a piece of twist tie at the centerline location of each post on the string line, so the location of each piece of steel tube steel can be accurately located. Mix enough concrete to fill one hole. Fill the hole with the concrete to the top of the sonotube. Take one of the steel posts and slide it into the wet concrete and center it on the string line mark denoting the center of the post location. The steel post should be long enough to extend to within 6 to the bottom of the hole and have enough length to extend to the top of the PVC post once installed. (i.e. if you have a 4 foot high fence, there should be 4 foot of post sticking out past the top of the concrete). Using the four foot level, level the post in all directions ensuring the center of the post stays in location. Secure the steel post into place using stakes, 2 x4 wood pieces and C clamps so they can cure. Steel post orientation is critical. The short face of the 2 ½ x 1 ½ post (i.e. the 1 ½ face) must be parallel to the front of the wall. At the corners, the post should be parallel to the main section of wall. Smooth the top of concrete around the post and across the top of the sonotube to a nice smooth finish with a slight slope away from the post. Ensure there are no low spots that water can gather and freeze and damage the finished concrete. Once the concrete cures, remove the bracing. This amount of time for concrete to cure can vary depending on the weather during installation and the type of concrete used. The concrete should be allowed to cure for a minimum of (7) seven days. 5.0 PVC INSTALLATION PVC H Posts - Once the steel posts are set and the foundations have cured, the PVC H Post can be placed over each steel post. Cut the PVC H post to length using a compound miter saw. Allow an additional 1 to the top of the H post. (i.e. if you have a 4 foot high fence, cut the H post at 4-1 ). The PVC H post slides over the steel post. Tip: The PVC H posts are thicker than what can be cut in one stroke on a compound miter saw. Cut as far through the post as you can and rotate 90 degrees to finish the cut. Tip: Because the posts are all likely the same length, set a jig up so all the posts end up the same length. 6
7 Long Leg U Channel - If there are corners in your surround, there is a need to attach a long leg U channel to the corner posts. The long leg U channel shall be cut approximately 1 shorter than the PVC H post. Attach the long leg U channel to the flange of the PVC H post as shown. Locate it on the PVC H post so it is in line with the panel pocket on the adjacent PVC H post. Screw it to the PVC H post using 1 ¼ self-tapping No. 8 screws every 6. Bottom Panel - Each section will begin with a solid Tuf-Barrier panel at the bottom. Cut the bottom panel as necessary using the compound miter saw ensuring there is approximately ¼ of space at each end of the panel once installed to allow for expansion and contraction of the PVC panels. At no time should this gap exceed ½. Install this panel with the tongue facing up. In-fill Panels and Cap Panel - Proceed with cutting the other panels to the length required the same as the bottom panel and install them one on top of the other. Ensure the perforated surface is pointing towards the noise source. Finish off each section with a top panel (no tongue on it). The panels should fit snuggly into each post and U-channel with a little play for expansion and contraction. Tip: When cutting the in-fill panels, set up a jig so you don t have to measure each one. 1.6x 2.7 Inserts - To finish off cut the 1.6x2.7 rectangular inserts the same length as the posts. Insert these into the end posts and corner posts where there are no panels to be placed into the space. Post Caps Add the cap to each of the top of the posts. These can be lightly tapped on using a rubber mallet if required. The caps can also be screwed into place if required. 7
MODULAR ACOUSTIC FENCING INSTALLATION GUIDE
 MODULAR ACOUSTIC FENCING WWW.QUICKBUILTSYSTEMS.COM.AU INSTALLATION GUIDE INTRODUCTION THE QUICKBUILT FENCE SYSTEM IS A SMARTLY DESIGNED MODULAR SYSTEM EASY AND FAST TO INSTALL AND COST EFFECTIVE. // THE
PV Mounting System 2703 SERIES 200 UL GROUND MOUNT SYSTEM. SnapNrack Residential PV Mounting Systems Code Compliant Installation Manual
 PV Mounting System 2703 SERIES 200 UL GROUND MOUNT SYSTEM SnapNrack Residential PV Mounting Systems Code Compliant Installation Manual Series 200 UL Introduction Series 200 UL Introduction SnapNrack Series
Installation Guide. Rain Screen Panel System
 Installation Guide Rain Screen Panel System Main Office 6860 South Abbott Road Orchard Park, New York 14127 tel 716.649.7490 toll free 1.888.214.3655 www.bostonvalley.com General Inquiries info@bostonvalley.com
INSTALLATION INSTRUCTION FOR ACOUSTIC ENCLOSURES
 INSTALLATION INSTRUCTION FOR ACOUSTIC ENCLOSURES Planning Hints and Notes 1. Review the erection drawings prepared specifically for the job. 2. Bill of materials contains complete list of parts supplied
INSTALLATION GUIDE PLEASE READ ENTIRE INSTRUCTION MANUAL BEFORE PROCEEDING!
 DURA - TRENCH INSTALLATION GUIDE This guide is intended to aide in the installation of Dura-Trench systems. There are many different applications and situations for the use of this product and the installation
SOUNDGUARD INSTALLATION MANUAL
 SOUNDGUARD INSTALLATION MANUAL WWW.ROOFSCREEN.COM 831 421 9230 Introduction... 2 This manual... 2 Application... 2 System Overview... 2 Components... 2 Face Panels... 3 Insulation... 3 Perforated Liner
Strengthened Soil Wall Construction Manual
 Strengthened Soil Wall Construction Manual This information has been prepared by Shaw Technologies, Inc. as an aid in constructing their Strengthened Soil Wall system. Final determination of the suitability
DETAIL INSTRUCTION No. 1
 BEFORE BEGINNING INSTALLATION, PLEASE READ THROUGH ALL INSTRUCTIONS. Uncrate shipment and check against packing list to insure all materials are included before beginning installation. If any discrepencies
SECTION 1208 CHAIN LINK FENCING DESCRIPTION
 SECTION 1208 CHAIN LINK FENCING 1208-1 DESCRIPTION This item covers the requirements for furnishing materials and constructing new chain link fences and gates in accordance with the details included herein
PORTA-FAB Cleanroom Wall Systems
 PORTA-FAB Cleanroom Wall Systems FABLINE FURRING 500 INSTALLATION INSTRUCTIONS IMPORTANT Porta-Fab Advises A Thorough Reading of These Instructions Before Beginning Installation. INTRODUCTION Porta-Fab
SCREEN PORCHES 101 DEVELOPMENT RESOURCES, INC Permit Requirements
 SCREEN PORCHES 101 DEVELOPMENT RESOURCES, INC. 320-226.5189 www.101developmentresources.com While every attempt has been made to insure the correctness of this handout, no guarantees are made to its accuracy
INSTALLATION INSTRUCTIONS FOR PLASCORE L2550 LINER WALL
 INSTALLATION INSTRUCTIONS FOR PLASCORE L2550 LINER WALL The following information is provided by Plascore, Inc., as a general guideline for the installation of the L2550 Liner Wall System. This information
INSTRUCTIONS AND GUIDELINES
 INSTRUCTIONS AND GUIDELINES NOISEBLOCK TM MODULAR PANEL SYSTEMS ENCLOSURES & PRESSURIZED PLENUMS PLANNING HINTS & NOTES: 1. Review the Kinetics Noise Control submittal and installation drawings and bill
DuraLife Capped Composite Decking Installation Instructions
 DuraLife Capped Composite Decking Installation Instructions Planning the design of the deck is the beginning of a successful project. 1. Read the application instructions carefully before starting the
PLEASE READ ENTIRE INSTRUCTION MANUAL BEFORE PROCEEDING!
 INSTALLATION GUIDE This guide is intended to aide in the installation of Dura-Trench systems. There are many different applications and situations for the use of this product and the installation procedures
DEXERDRY INSTALLATION INSTRUCTIONS - PAGE - 1
 DEXERDRY INSTALLATION INSTRUCTIONS - PAGE - 1 Tools and Items Needed Drill/power screwdriver 1/8 drill bit Table saw Circular saw with carbide-tip blade Rubber mallet Chisel or board straightener tool
Installation Guidelines
 815 NE 172 nd Avenue Vancouver, WA 98684 877-694-0141 Installation Guidelines Installation steps include job planning, layout, excavating and preparing the soil subgrade, applying geotextiles (optional),
Impression Graphic panels
 Impression Graphic panels Installation Guidelines 6003.I Rev. 02 8/15 Please Read Disclaimers: PLEASE READ ALL INSTRUCTIONS BEFORE BEGINNING INSTALLATION!! These guidelines are provided in good faith to
Resysta Gold and Platinum Decking Installation Guidelines
 Resysta Gold and Platinum Decking Installation Guidelines NOTE: Proper planning of the deck layout is essential for ease of installation of deck boards and deck components. Thoroughly read the following
OmniFlex 300 Plus Installation Instructions
 OmniFlex 300 Plus Installation Instructions IMPORTANT PortaFab advises a thorough reading of these instructions before beginning installation. INTRODUCTION Instructions should be read thoroughly and cross-referenced
3.0. For Home, Haven, Standard & Heavy Duty Series. Aluminum Prebuilt Fence ALUMFENCEA_BOM V3 2/14. Owner's Manual Installation Instructions.
 Aluminum Prebuilt Fence ALUMFENCEA_BOM V3 2/14 Owner's Manual Installation Instructions PLEASE READ OWNER'S MANUAL COMPLETELY BEFORE ASSEMBLING YOUR FENCE. ALL STATED SIZES ARE NOMINAL DIMENSIONS. For
AXIOM Building Perimeter System Assembly and Installation Instructions
 CEILING SYSTEMS AXIOM Building Perimeter System Assembly and Installation Instructions 1 GENERAL 1.1 Description Axiom Building Perimeter Systems (ABPS) is a pre-engineered perimeter solution to accomplish
ROOF MOUNT KIT OWNERS MANUAL
 ROOF MOUNT KIT OWNERS MANUAL Made in the USA by: Primus Wind Power, Inc. 938 Quail St. Lakewood, CO 80215 Phone: (303) 242-5820 www.primuswindpower.com AIR is a trademark of Primus Wind Power, Inc. ROOF
Infinity - Century Combination Installation Instructions Gelcoat & Solid Surface Bathware
 Tools and materials you might need for proper installation: Level Caulking gun Drill Scissors Jig saw or router Wood file or 180 grid sand paper 100% silicone caulking Clamps Galvanized screws (8) 1 bolts
MONUMENT SIGN INSTALL
 MONUMENT SIGN Quick & Easy Installs! We've refined our products to be as simple and easy to install as possible it only takes a maximum of 4 people to do. Don't have the time or the manpower? We offer
VERsacourt LED Light System Installation Instructions
 VERsacourt LED Light System Installation Instructions PART LIST TEE BAR ASSEMBLY 10 12 LIGHT ASSEMBLY (hardware included) EXTENSION COLLAR BASE POLE EXTENSION POLE ANCHOR PAGE 1 REQUIRED TOOLS AND MATERIALS
Traffic Safety Corporation
 Traffic Safety Corporation AC-PEDXPAD Pedestrian In-Pavement Detection Pad Installation Manual www.xwalk.com TSC Technical Support Center 888-446-9255 Tel: 916.394.9884 Fax: 916.394.2809 TSC-IM04 Rev.
INSTALLATION GUIDE. Please read all the instructions before you begin the installation. Improper installation will void warranty.
 INSTALLATION GUIDE I. Before You Start / Preparations Please read all the instructions before you begin the installation. Improper installation will void warranty. Important notice All wood based products,
Free standing Patio covers
 Free standing Patio covers Instructions provided by CoverKits.com Down load the standard instruction manuals applicable to the cover, Laguna, Lattice, solid Newport, insulated Traditional, or the Maxx
Retaining Wall Installation Instructions PART 1 RETAINING WALL GENERAL
 Retaining Wall Installation Instructions PART 1 RETAINING WALL GENERAL Work Included: Related Work All labor and material for the furnishing and installing of exterior stone landscaping wall. Masonry Contractor
ROOF MOUNT KIT OWNERS MANUAL
 ROOF MOUNT KIT OWNERS MANUAL Made in the USA by: Southwest Windpower, Inc. 1801 W. Route 66 Flagstaff, Arizona 86001 Phone: (928) 779-9463 Fax: (928) 779-1485 E-mail: info@windenergy.com Web: www.windenergy.com
Proudly Made in the U.S.A. 5-Year Warranty. Wayfinding Products
 5-Year Warranty Proudly Made in the U.S.A. Wayfinding Products Proudly Made in the U.S.A. Directional Bar Tile surface mount or cast-in-place replaceable (wet-set) Bar Tile and Guide Tile units shall be
Multi-Piece EasyStep Product Installation Instructions
 Tools/materials you might need for proper installation 6D galvanized screws 100% silicone caulking (See specific caulking recommendations) caulking gun shims tape measure 1/8 drill bit Phillips screw driver
ACCESSORY STRUCTURE Building permit information For 1 & 2-family dwellings
 ACCESSORY STRUCTURE Building permit information For 1 & 2-family dwellings Building Safety Department 400-2 nd Street South St. Cloud, MN 56301 (320) 255-7239 A building permit is required for any accessory
FOUR STRAND BARBED WIRE FENCE SPECIFICATIONS
 FOUR STRAND BARBED WIRE FENCE SPECIFICATIONS No set of fence specifications will cover all situations. The intent is to construct a good, serviceable fence. Practices and use of materials outlined below
ECONO 200 INPLANT OFFICE
 Warehouse Storage & Material Handling Equipment+ ECONO 200 INPLANT OFFICE INSTALLATION & ASSEMBLY INSTRUCTIONS American Surplus Inc. 1 Noyes Ave. East Providence, RI Phone: (800) 989-7176 Fax: (401) 434-7414
General Brick Installation Instructions
 Excellent Resource for Clay Paver Installation: http://www.bia.org/resources/clay-brick-pavers/clay-paver-informational- Resources These are general guidelines only. Check your paver manufacturer's recommendations
Paragraph Description Page No General Materials Concrete Masonry Work Altitude Valve Vault Cover 25-4
 City of Columbia Engineering Regulations PART 25: SPECIFICATIONS FOR ALTITUDE VALVE VAULT Table of Contents Paragraph Description Page No. 25.1 General 25-1 25.2 Materials 25-1 25.3 Concrete Masonry Work
Multi-Piece EasyStep Product Installation Instructions
 Tools/materials you might need for proper installation 6D galvanized screws caulking gun shims tape measure 1/8 drill bit Phillips screw driver cardboard china marker (or grease pencil) furring strips
Stretch Your Dollar Theme Designs Fire Pit
 Stretch Your Dollar Theme Designs Fire Pit Tools Garden gloves Garden hose String (5 length) Stake Hammer or rubber mallet 3 Mason Chisel Tape measure 2 level 4 level (most homeowners don t have. We don
SECTION CONCRETE FORMWORK
 SECTION 03100 CONCRETE FORMWORK PART 1 GENERAL 1.1 REFERENCES A. The following is a list of standards which may be referenced in this section: 1. American Concrete Institute (ACI): a. 117, Standard Specifications
Safety on Heights: Our Policy
 11/17/14 Safety on Heights: Our Policy Only volunteers over the age of 18 are allowed to work on heights of more than six feet off the ground. This includes all work on scaffolds. Only volunteers who are
Installation Manual. ArchCast Bridge. 3-Sided Precast Concrete Bridge Structure
 ArchCast Bridge 3-Sided Precast Concrete Bridge Structure Installation Manual Salem Location: 749 West Commercial Ave. Salem, IL 62881 (618) 548-1190 countymaterials.com Email: info@countymaterials.com
Fence Stone. Self locating Wall System
 Fence Stone Self locating Wall System Between wall panels End of walls at gate openings etc Internal & external right angles Do it yourself No bricklaying skills required Attractive & efficient For fences
Nortrax Section David Manchester Road, Ottawa NON-STRUCTURAL METAL FRAMING 16 May 2014 Page 1
 16 May 2014 Page 1 PART 1 GENERAL 1.1 DESCRIPTION This section specifies steel studs wall systems, shaft wall systems, ceiling or soffit suspended or furred framing, wall furring, fasteners, and accessories
SECTION ORNAMENTAL ALUMINUM FENCING
 SECTION 032300 ORNAMENTAL ALUMINUM FENCING PART 1 - GENERAL 1.1 RELATED DOCUMENTS A. Drawings and general provisions of the Contract, including General and Supplementary Conditions and Division 01 Specification
1 Exam Prep Prov Module: Vertical Formwork Questions and Answers
 1 Exam Prep Prov Module: 27308-14 Vertical Formwork Questions and Answers 1. The amount of formwork needed for a job can be influenced by. A. The size of the forming crew B. The project budget C. Materials
CONSTRUCTION SPECIFICATION FOR CHAIN-LINK FENCE
 ONTARIO PROVINCIAL STANDARD SPECIFICATION OPSS.PROV 772 NOVEMBER 2017 (Formerly OPSS 772, November 2012) Note: The PROV published in November 2017 replaces OPSS 772 COMMON, November 2012 with no technical
Foundation Manual. Part Number: Version: Updated: July 5, S. Meadows Pkwy. A-9, #329 Reno, NV
 Foundation Manual Part Number: 150002 Version: 1.22 Updated: July 5, 2009 748 S. Meadows Pkwy. A-9, #329 Reno, NV 89521 775-831-9463 www.mariahpower.com July 2009, Mariah Power, All Rights Reserved Dear
SECTION CURB RAMPS AND OTHER MINOR CONCRETE FACILITIES. Part 1 - General Work Included Related Requirements...
 SECTION 02530 CURB RAMPS AND OTHER MINOR CONCRETE FACILITIES CONTENTS: Part 1 - General... 1 1.01 Work Included... 1 1.02 Related Requirements... 1 1.03 Inspection And Tests... 1 1.04 Quality Assurance...
MagnumStone Specifications Gravity
 MagnumStone Specifications Gravity SPECIFICATION FOR MAGNUMSTONE GRAVITY MECHANICALLY STABILIZED EARTH SYSTEM PART 1: GENERAL.01Description The work consists of supplying and installing all aspects of
Low-Profile Multi-Piece Shower with blue, high-density polyurethane bottom
 INSTALLATION INSTRUCTIONS Low-Profile Multi-Piece Shower with blue, high-density polyurethane bottom 1050 This packet includes installation instructions for the Bestbath products shown below. (These instructions
Grizzly TM Part Number Spectrum Lane ~ Missoula MT ~
 Grizzly TM Part Number 21655 7100 Spectrum Lane ~ Missoula MT 59808 800.791.8056 ~ www.spectrumproducts.com 21655 Man Rev B You have purchased a Spectrum Products Grizzly starting platform. Providing the
TECHNICAL MANUAL V
 TECHNICAL MANUAL V.1.2 2018 PentalTek combines the strength and durability of a porcelain slab with sophisticated design and a refined palette. By utilizing innovative technology, we re able to expand
Retaining Walls. Made Easy
 Retaining Walls Made Easy Retaining Walls Made Easy! Contents Page 1 Contents Page 2 Foreword Page 3 Demolition Page 3 Removal Vegetation Page 3 Excavation Page 4 Reinforcement Steel Page 6 Concreting
Self Locating Wall System
 From... Self Locating Wall System For fences from low gardens to 2.2 metres high The revolutionary new DIY fence system incorporating purpose made pier blocks for: v Between wall panels v End of walls
Below-grade pours (such as foundations) can be done out of the chute of the concrete truck or conveyer, however using a pump is best.
 can be done out of the chute of the concrete truck or conveyer, however using a pump is best.") Concrete Placement Below-grade pours (such as foundations) can be done out of the chute of the concrete truck or conveyer, however using a pump is best. Above-grade pours require lifting equipment. Most
Concrete Placement Below-grade pours (such as foundations) can be done out of the chute of the concrete truck or conveyer, however using a pump is best. Above-grade pours require lifting equipment. Most
Site Preparation... 2
 TRUFIREWALLS INSTALLATION MANUAL This Installation Manual is intended to assist in the preparation and installation of TruFireWalls products manufactured by Oldcastle Enclosure Solutions. The TruFireWalls
Important: Before You Start
 Advantage ICF System Advantage ICF System TM Field Guide Important: Before You Start Does Your Building Inspector Know You Are Building with the Advantage ICF System? You are required to check with your
Installation Guide (888)
") BamDeck Pro360 Installation Guide (888) 788-2254 The Collection Decking Systems BAMDECK PRO360 5-1/2 Wide Plank Dims: 96 L x 5-1/2 W x 7/8 H BAMDECK PRO360 16FT. 5-1/2 Wide Plank Dims: 192 L x 5-1/2 W
BamDeck Pro360 Installation Guide (888) 788-2254 The Collection Decking Systems BAMDECK PRO360 5-1/2 Wide Plank Dims: 96 L x 5-1/2 W x 7/8 H BAMDECK PRO360 16FT. 5-1/2 Wide Plank Dims: 192 L x 5-1/2 W
SpaVault TM Installation Guide for Bullfrog Spas (7-10 x 7-10 x 38 )
") SpaVault TM Installation Guide for Bullfrog Spas (7-10 x 7-10 x 38 ) WARNING - When unpacking SpaVault, DO NOT discard styrofoam pieces, these are not packaging materials. Step 1 Excavation Important:
SpaVault TM Installation Guide for Bullfrog Spas (7-10 x 7-10 x 38 ) WARNING - When unpacking SpaVault, DO NOT discard styrofoam pieces, these are not packaging materials. Step 1 Excavation Important:
INSTALLATION CHECKLIST 2 ND EDITION. Fox Blocks Abbott Drive Omaha, NE
 Fox Blocks INSTALLATION CHECKLIST ND EDITION Fox Blocks Installation Checklist: ND Edition 6110 Abbott Drive Omaha, NE 6110-69-6 WWW.FOXBLOCKS.COM INSTALLATION CHECKLISTS The Checklists on the following
TECHNICAL MANUAL V
 TECHNICAL MANUAL V.1.4 2018 PentalTek combines the strength and durability of a porcelain slab with sophisticated design and a refined palette. By utilizing innovative technology, we re able to expand
Material Handling & Maintenance
 Material Handling & Maintenance Rotation should be first-in / first-out A. All material should be dated when received. Place date on right side corner of product. B. Temporarily remove older stock from
Anchor bolts ASTM F1554, Gr. 36 Wide flange beams ASTM A992, Fy = 50 ksi Misc. structural steel ASTM A36, Fy = 36 ksi
 STRUCTURAL NOTES MATERIAL STRENGTHS Structural Steel Reinforcing Steel Concrete Masonry Structural Lumber Anchor bolts ASTM F1554, Gr. 36 Wide flange beams ASTM A992, Fy = 50 ksi Misc. structural steel
Allure Aluminum Fencing
 Allure Aluminum Fencing Description: Allure aluminum fencing is a modular extruded aluminum fence finished with a high quality polyester finish. Designed for years of reliable, maintenance free service
CEILING & WALL SYSTEMS
 CEILING & WALL SYSTEMS Axiom Perimeter Trim Commercial Ceilings and Walls Solutions Guide Axiom Perimeter Trim AXIOM Trim The Axiom family of products provide functional and visual options in ceiling design.
LAMINATE GENERAL INSTALLATION INSTRUCTIONS FOR ANGLE-TO-ANGLE FLOORING
 LAMINATE GENERAL INSTALLATION INSTRUCTIONS FOR ANGLE-TO-ANGLE FLOORING WARNING Prior to installation, please ensure that the product received is the correct style and color as well as to the customer s
Single Post Anchor Part Number Spectrum Lane ~ Missoula MT ~
 Single Post Anchor Part Number 21700 7100 Spectrum Lane ~ Missoula MT 59808 800.791.8056 ~ www.spectrumproducts.com 21700 Man Rev B You have purchased a Spectrum Aquatics Single Post Anchor. Providing
INSTALLATION MANUAL KOCH
 INSTALLATION MANUAL KOCH TECHNICAL SYSTEMS GROUP PRE-FAB ACOUSTICAL/THERMAL PANELS AND ENCLOSURES GEORGE KOCH SONS, LLC TECHNICAL SYSTEMS GROUP 10 South Eleventh Avenue Evansville, Indiana 47744 812-465-9600
Multi-Piece Shower with Trench Drain
 INSTALLATION INSTRUCTIONS Multi-Piece Shower with Trench Drain (For models with standard pan) 105 This packet includes installation instructions for the Bestbath products shown below. (These instructions
Multi-Piece Shower with Trench Drain
 INSTALLATION INSTRUCTIONS Multi-Piece Shower with Trench Drain (For models requiring mud set) 1069 This packet includes installation instructions for the Bestbath products shown below. (These instructions
TRUSSCORE PVC INTERLOCKING LINER PANEL
 Project Number Page 1 of 6 TRUSSCORE PVC INTERLOCKING LINER PANEL NOTE: THESE MASTER SPECIFICATIONS ARE TO BE UTILIZED AS A GUIDELINE AND IT IS ADVISED THAT THE EDITOR CONTACT A DOMTEK BUILDING PRODUCTS
Gravity Wall. A force to be reckoned with... Gravity (SRW) segmental retaining wall systems are structures
 segmental retaining wall systems are structures") A force to be reckoned with... Gravity (SRW) segmental retaining wall systems are structures lower in height that use the FrogStone unit weight combined with gravel core infill to resist earth pressures
A force to be reckoned with... Gravity (SRW) segmental retaining wall systems are structures lower in height that use the FrogStone unit weight combined with gravel core infill to resist earth pressures
Proudly Made in the U.S.A.
 U.S. Patent No. 7,779,581 Proudly Made in the U.S.A. 24.000 21.600 9 - EQUAL SPACES 1.200 14.400 PART O.A. 36.000 27.429 PART O.A. B B 1.200 VIEW-D 1.250 TOP VIEW 34.286 15 - EQUAL SPACES SIDE VIEW SECTION
Hardscaping Installation Manual
 Hardscaping Installation Manual INDEX Installation of Pavers... 1 Installation of Meshed Flagstone... 2 Installation of Veneer Stone... 3 Sand Set Installation of Pavers 1. Preparing the ground Mark your
Gabions. Introduction
 Gabions Introduction 1. A gabion is a wire mesh cage or basket filled with stones. Gabions are useful in construction works, for example to protect earth embankments, to line channels, to manage or divert
HOW TO INSTALL PATIOS AND WALKWAYS STEP 2 STEP 1. For all Patios and Walkways. The base is the most important step in your patio and walkway projects.
 New Project (replacing grass/dirt) STEP 1 PREPARING YOUR PROJECT AREA Determine how much to excavate using the example below. Remove the grass to desired depth (skim rather than dig deep) and a few inches
NRDCA GUIDELINE FOR APPLICATION of CEMENTITIOUS WOOD FIBER ROOF DECK SYSTEMS
 NRDCA 600 - GUIDELINE FOR APPLICATION of CEMENTITIOUS WOOD FIBER ROOF DECK SYSTEMS The National Roof Deck Contractors Association (NRDCA) has prepared this document to provide, customers and installers,
FENCES. This hand out is for REFERENCE ONLY. For more details see specific code sections.
 Village of Vernon Hills Community Development Department 290 Evergreen Drive, Vernon Hills, IL 60061 Phone 847-367-3704 - Fax 847-367-2541 - http:// www.vernonhills.org FENCES This hand out is for REFERENCE
SECTION CHAIN LINK FENCES AND GATES (GALVANIZED) A. Fence framework, fabric, gates, and accessories.
 A. Fence framework, fabric, gates, and accessories.") SECTION 02830 CHAIN LINK FENCES AND GATES (GALVANIZED) 1.0 GENERAL 1.1 Section Includes A. Fence framework, fabric, gates, and accessories. B. Excavation for post bases; concrete footing for posts. C.
SECTION 02830 CHAIN LINK FENCES AND GATES (GALVANIZED) 1.0 GENERAL 1.1 Section Includes A. Fence framework, fabric, gates, and accessories. B. Excavation for post bases; concrete footing for posts. C.
DECK CONSTRUCTION REQUIREMENTS
 DECK CONSTRUCTION REQUIREMENTS Should you have any questions after reading the following information, please call the Building Inspection Department at 651-439-4439 to discuss the topics of concern. We
Installation Instructions for SuperFast Hurricane
 SuperFast Hurricane Installation Instructions for SuperFast Hurricane I. Before You Start / Preparations Please read all the instructions before you begin the installation. Improper installation will void
6032 SH 3P Residential Shower Installation Instructions Gelcoat & Solid Surface Bathware
 Tools/materials you might need for proper installation 6D galvanized screws 100% silicone caulking caulking gun acrylic latex caulk shims tape measure 1/8 drill bit Phillips screw driver cardboard china
Siding and Soffit Installation Guidelines
 Siding and Soffit Installation Guidelines email web phone 07 46 16 Longboard Siding & Soffit INTRODUCTION INSTALLATION GUIDELINES NOTE: These instructions are prepared for persons experienced in the field
CITY OF MOUNT DORA LIFT STATION CHAINLINK FENCE AND GATE SPECIFICATIONS
 CITY OF MOUNT DORA LIFT STATION CHAINLINK FENCE AND GATE SPECIFICATIONS PART 1 - GENERAL 1.01 SUMMARY A. Section Includes furnishing and installing chain-link fabric fence, gate, and appurtenances. 1.02
Cladding & Facade Installation Guide (888)
") TruOrganics Cladding & Facade Installation Guide (888) 788-2254 The Collection Decking Systems TRUORGANICS SQUARE EDGE 5-7/16 Wide Plank Dims: 192 L x 5-7/16 W x 7/8 H Available Colors SEDONA GLACIER DENALI
TruOrganics Cladding & Facade Installation Guide (888) 788-2254 The Collection Decking Systems TRUORGANICS SQUARE EDGE 5-7/16 Wide Plank Dims: 192 L x 5-7/16 W x 7/8 H Available Colors SEDONA GLACIER DENALI
Heavy Drop Gym Floor 2-1/2 Tile Installation and Maintenance Manual
 Heavy Drop Gym Floor 2-1/2 Tile Installation and Maintenance Manual Greatmats.com Toll free: 877-822-6622 117 Industrial Ave Fax: 715-825-4928 Milltown, WI 54858 info@greatmats.com TABLE OF CONTENTS BASE
State of Nevada Department of Transportation Materials Division
 State of Nevada Department of Transportation Materials Division METHOD OF TEST FOR MAKING AND CURING CONCRETE BEAM SPECIMENS IN THE FIELD AND FOR DETERMINING FLEXURAL STRENGTH OF CONCRETE USING SIMPLE
METALWORKS Torsion Spring
 METALWORKS Torsion Spring Assembly and Installation Instructions 1. GENERAL 1.1 Product Description MetalWorks Torsion Spring is a downward accessible aluminum ceiling panel available in standard 2' x
Building permits are not required for patios made of concrete or pavers on grade.
 DECKS CITY OF BEMIDJI BUILDING DEPARTMENT (218) 759-3573 www.ci.bemidji.mn.us This handout is intended only as a guide and is based in part on the 2007 Minnesota State Building Code, Bemidji City Ordinances
C.R. LAURENCE CO., INC. Intelli-Track SPS. Phase One - Installation Instructions
 Tools and Supplies: C.R. LAURENCE CO., INC. Intelli-Track SPS Phase One - Installation Instructions Ratchet Wrench with 4" Extension 9/16" Open-End Wrench (two required for suspension mounting) 9/16" Hex
MACHINE-LAY Installation Manual
 MACHINE-LAY Installation Manual PaveDrain Installation Manual Table of Contents Section 1: Base Preparation (pages 3 6) Section 2: Machine-Lay PaveDrain Blocks (pages 8 11) Section 3: Edge Restraints (pages
TABLE OF CONTENTS. 1.0 INTRODUCTION 1.1 Greenstone Structural Engineered Panels 1.2 Drawing and Element Numbers
 version 2.5 updated as of 08.04.2017 2 TABLE OF CONTENTS 1.0 INTRODUCTION 1.1 Greenstone Structural Engineered Panels 1.2 Drawing and Element Numbers 2.0 ASSEMBLY 2.1 Sequence of Assembly 2.2 Preparation
Revision Date: April 01, Premier Vinyl Enclosure
 Premier Vinyl Enclosure www.urbanindustries.com 53 Urban Industries, Inc. 2008 Tools The following tools are recommended for the installation of the Premier Vinyl Enclosure and roof. 1 2 Level 1 4 Level
KWiK N EZ Rigid Track Silicone System
 Page 1 of 6 PITTSBURGH CORNING KWiK N EZ Rigid Track Silicone System ASSEMBLY INSTRUCTIONS Introduction The KWiK N EZ Rigid Track Silicone System is the easiest way to install Pittsburgh Corning Thinline
PITTSBURGH CORNING ASSEMBLY INSTRUCTIONS. KWiK N EZ Rigid Track Silicone System for Thinline Series Glass Block
 Page 1 of 6 PITTSBURGH CORNING KWiK N EZ Rigid Track Silicone System for Thinline Series Glass Block ASSEMBLY INSTRUCTIONS Introduction The KWiK N EZ Rigid Track Silicone System is the easiest way to install
Proudly Made in the U.S.A. 5-Year warranty. Radius TacTile. cast-in-place Replaceable (wet-set) or surface mount.
 or surface mount.") 5-Year warranty Proudly Made in the U.S.A. Radius TacTile cast-in-place Replaceable (wet-set) or surface mount US Patents* *www.adatile.com/patents Radius TacTile cast-in-place Replaceable (wet-set) or
5-Year warranty Proudly Made in the U.S.A. Radius TacTile cast-in-place Replaceable (wet-set) or surface mount US Patents* *www.adatile.com/patents Radius TacTile cast-in-place Replaceable (wet-set) or
Multi-Piece Shower with Trench Drain
 INSTALLATION INSTRUCTIONS Multi-Piece Shower with Trench Drain (For models requiring cut-out in floor) 1062 This packet includes installation instructions for the Bestbath products shown below. (These
Octaform Quick Liner Wall & Ceiling Panels Guide Specification CAN Page 1
 Guide Specification CAN Page 1 This master guide specification Section is intended for use when specifying plastic panelling. This section includes performance, and descriptive type specifications; edit