STONE INSTALLATION GUIDE
|
|
|
- Olivia Welch
- 5 years ago
- Views:
Transcription
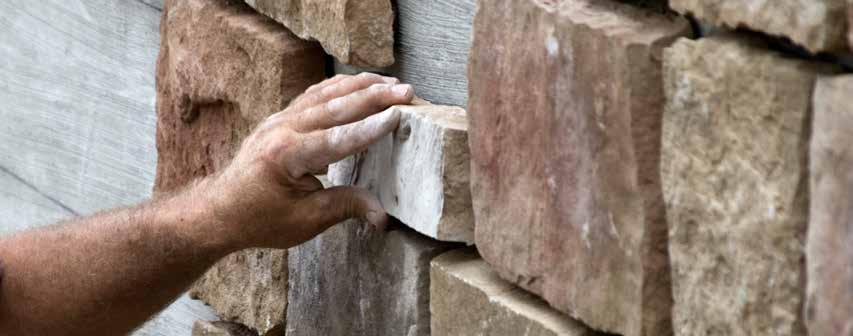
1 STONE INSTALLATION GUIDE
2 TOOLS NEEDED 1. Staple/Nail gun 2. Metal Shears 3. Measuring Tape 4. Masonry Hammer 5. Wheelbarrow 6. Pointed shovel 7. Mortar hoe 8. 12" rectangular trowel 9. Pointed trowel 10. Nippers 11. 4' level 12. Grout bag 13. Tuck pointer 14. Plastic bristled brush or whisk broom 15. Gloves 16. Dust Mask 17. Safety Glasses 18. Wet or Circular Saw with Carbide or Diamond Tip Blade STEP 1: Determining the Surface ProVia s stone products may be applied to any structurally sound load bearing wall surface. Non-load bearing walls may require alterations and we recommend you consult with a construction engineer. ProVia s stone may be applied directly to clean untreated porous concrete and masonry surfaces. Backup Wall System Sheathing/ Substrate Water Resistive Barrier * Walls/surfaces must be clean and free from release agents, paints, stains, sealers or other bond-break materials that may reduce strength of mortar adhesion. NOTE: The most current information available at Lath Type Lath Fasteners Setting Bed/Scratch Coat Concrete or CMU* Not Applicable Optional Optional Not Applicable See Mortar Table in Material Specs Exterior Wood or Steel Stud Framing; maximum spacing 16 in. (406 mm) Coursed Brick or Stucco Gypsum Wall Board Plywood OSB Fiber Board Cement Board Minimum two layers WRB *Optional for interior use Any approved lath Not Applicable Optional Any approved lath Corrosion resistant; minimum penetration 3 4 in. (19 mm) into wood framing member or 3 8 in. (10 mm) into steel framing member Corrosion resistant concrete screws, masonry nails, or powder actuated fasteners See Mortar Table in Material Specs See Mortar Table in Material Specs 2


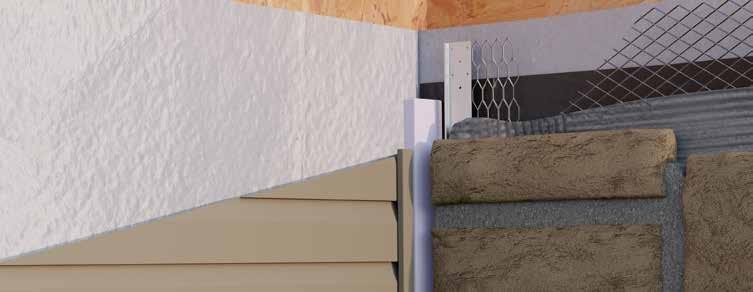
3 Wood and Concrete Applications Concrete Wall Lath (where necessary) Lath Fasteners - Type & Spacing Per ASTM C1063 Scratch Coat "Back-butter" the back of the stone with mortar before attaching to the scratch coat. Manufactured Stone Mortar Joint Weep Screed (where necessary) Wood Substrate Two Layers of WRB Lath Scratch Coat Lath Fasteners - Type & Spacing Per ASTM C1063 "Back-butter" the back of the stone with mortar before attaching to the scratch coat. Manufactured Stone Mortar Joint WRB Lapped Over Weep Screed Weep Screed 3

.")
4 STEP 2: Preparing the Surface Proper surface preparation is important for adhesion and keeping water infiltration to a minimum. Walls/surfaces must be clean and free from release agents, paints, stains, sealers or other bond-break materials that may reduce strength of mortar adhesion. Flashing, Casing Bead & Flashing Tape - a thin piece of material to prevent the passage of water into a structure from a joint. All flashing and flashing accessories must be corrosion resistant and integrated with the Water Resistant Barrier materials (if present). For exterior applications, flashing must be installed at all through-wall penetrations and at terminations of adhered manufactured stone veneer (ASMV) installations. One layer of house wrap covered by one layer of Water Resistant Barrier is acceptable. Flashing is not required for interior applications not exposed to water. Flashing - Preparing opening Make angle cuts at corners and fold up flap Sealant along head and sides only Extend up 6" Turn up 6" Patch corners Use moldable flashing, or cut and fold to form sill pan Peel-and-stick flashing tape 1. Cut modified "H" in housewrap 2. Install pan flashing and sealant 3. Install window and side flashings Seal tape to sheathing 4. Apply head flashing 5. Tape cuts over head flashing 6. Tape bottom of opening over 2 nd layer of WRB 4


5 Flashing - Inside corner Water Resistant Barrier 1 Water Resistant Barrier 2 Flashing, Flashing Tape or Casing Bead Flashing - Outside corner Water Resistant Barrier 1 Water Resistant Barrier 2 Flashing, Flashing Tape or Casing Bead Flashing - Adjacent material Water Resistant Barrier 1 Water Resistant Barrier 2 Flashing, Flashing Tape or Casing Bead 5


6 Flashing - Vertical Transition at a cased opening Water Resistant Barrier 1 Water Resistant Barrier 2 Casing Bead Flashing - On porch and stairs Water Resistant Barrier 1 Water Resistant Barrier 2 Flashing or Flashing Tape 6

 per manufacturer s")
 at the horizontal seams.")
7 Flashing - Header installation Water Resistant Barrier 1 Water Resistant Barrier 2 Flashing - adds strength and rigidity to the structure in addition to providing a matrix to which the mortar can adhere. Lath should be applied horizontally across the wall. Metal lath should be applied horizontally (perpendicular to framing, if present) per manufacturer s instructions, and should overlap a minimum of 1" (25mm) at the vertical seams and a minimum of 1 2" (13mm) at the horizontal seams. Inside and outside corners should be wrapped a minimum of 16" to the next stud (do not end lath at the corner of framing). 7
 in a wheelbarrow using pointed shovel.")


8 STEP 3: Applying the Scratch Coat Scratch Coat - The purpose of the scratch coat is to create a surface to which the stone can stick. Stone will not stick to bare wood. Mix thoroughly the appropriate mortar (refer to "Mortar" table in Material Specs) in a wheelbarrow using pointed shovel. Add approximately 2½ gallons clean, potable water to achieve a trowelable mixture. Spread mixture evenly over metal lath approximately 3 8" to 1 2" thick. After mortar is thumb print dry, scratch or score the surface horizontally to create a rough scratch coat that ensures a good bond when the stone is applied. STEP 4: Applying the Stone Corners and Flats If corner pieces are required, set them first by alternating the short and long leg of the corners on the wall. If the stone will not be grouted, they should be applied from the bottom up. If the stone is to be grouted, installation from the top down is best to keep the face of the stones clean. Install flat pieces starting from the corner pieces and work towards the center of the wall. Start at the top and work sideways and down to keep stones clean. Horizontal lines should be broken approximately every 6'. The presence of moisture is important to achieve good adhesion. Because of this, you may need to moisten the back of the stone along with the scratch coat so that the surface is damp, but free of standing water to ensure good adhesion. Using the same mixture as the bed/scratch coat, apply approximately ½" of mortar, covering the entire back of the stone. By using gentle pressure and a slight wiggling action while applying the stone to the bed/scratch coat, you will assure a good bond. The stone installation must achieve a minimum of 50 lbs. per sq. inch shear bond*. All cuts should be installed with the cut facing away from the entrance. Blend stones of different shapes and colors to achieve a desirable look. Where freeze/thaw conditions are rare, stone can be installed to grade. However, unwarrantable discoloration of stone touching the ground may occur. Where freeze/thaw conditions are common, stone should be installed a minimum of 2" above surfaces. This minimum can be reduced to 1 2" if the surface is a walking surface supported by the same foundations supporting the wall. * Check with the mortar manufacturer to ensure their mortar meets or exceeds ASTM C 91 requirements and meets minimum bond code requirements Walking surface supported by the same foundation Non-walking surface Joint Spacing The recommended grout joint of 5 8 inch will ensure 10 square foot wall coverage for most profiles, for more details visit ProVia.com. Actual grout joint may differ according to the installer s discretion. It is essential that the entire back of each stone be encapsulated with mortar to ensure a good bond. Dry Stacked Applications The stones should fit tightly against each other, however due to the unique shape of each stone, some gaps between stones may occur. If gaps between stones is a possibility, it is recommended to use a complimentary color mortar. It is essential that the entire back of each stone be encapsulated with mortar to ensure a good bond. Dry stacked applications are not recommended where freeze/thaw is common. 8


9 STEP 5: Grouting Finish Joint Procedure: Brushing Joints: Tip: The mortar should be firm enough not to stain stone. If the mortar is struck prematurely, the joint will look like toothpaste or appear creamy, wait for the mortar to dry more. Tip: Start at the top and work down to ensure a clean finish. Grouting the joints should be completed only after there is sufficient cure time of the manufactured stone. Grouting may be done with a grout bag, filling joints to the desired depth, ensuring that mortar is forced into all voids. Grout should be "thumb-print" hard before tooling the joints. When the desired firmness is reached, the use of a wooden striking tool carved just a little smaller than the joint width or metal margin trowel may be used. Press gently and smoothly as to fill grout voids and remove excess mortar to desired depth. When using a metal margin trowel, the joint must be scratched after striking to roughen joint surface. This can be achieved by turning the metal striking tool over and using the tip to scratch the joint. Brushing should be done within 2 hours after tooling the joints. The best way is with a clean whisk broom or any plastic bristled brush. Do not use a metal bristled brush. Do not let mortar set overnight before tooling or brushing and do not brush wet mortar, as it will smear. For more grouting techniques, visit provia.com/manufactured-stone/installation. Cleaning: Do not pressure wash, sandblast, use wire brushes or acids for cleaning. Instead, wet the wall thoroughly with water. Next, scrub the wall with tri-sodium phosphate solution using a stiff plastic bristled brush. Then, rinse the wall thoroughly. If you need further assistance, contact your dealer or Customer Service at Sealing: Sealing is unnecessary and an additional expense on most projects. However, a sealed surface is much easier to clean than an unsealed surface. If you have conditions that could discolor or stain the stone, sealing is an option that you may want to consider. Contact your dealer or Customer Service at for assistance. 9
10 Material Specs Water Resistive Barrier No. 15 felt complying with ASTM D226 for type 1 felt (15 pound felt is not the same product as No. 15 felt) Complying with ASTM E2556/E2556M Combination of two materials meeting these requirements Lath lb/yd self-furred metal lath meeting the requirements of ASTM C gauge woven wire mesh meeting the requirements of ASTM C1032 Welded wire lath meeting the requirements of ASTM C933 Fasteners Corrosion resistant staples, nails, and screws complying with ASTM C1063 Masonry or concrete walls Corrosion resistant - Concrete Screws - Powder Actuated Fasteners Wood framing 3 4 inch minimum penetration depth - Staples, Roofing Nails, Screws and Washers Metal framing 1 inch minimum penetration depth - Screws Weep Screeds and Casing Beads Minimum vertical attachment flange of 3.5 inches terminating behind WRB Metal - Thickness must be no less than inches (26 gage) Plastic - Thickness must be no less than inches (1.3mm) Mortar Application 1 If the surface area of an AMSV unit exceeds 1 ft 2 (0.1 m 2 ) or 24 in (610 mm) in any dimension, then install using setting bed mortar complying with ANSI A118.4 or ANSI A Requires a minimum nominal mortar joint thickness of 1 4 in (6.4 mm) around AMSV units. 3 Requires a fastening system designed by a professional engineer. AMSV units should not be subjected to pedestrian or vehicular traffic. NOTE: The most current information available at Application Based Setting Bed Mortar Recommendations 1 Type N Mortar Type S Mortar (ASTM C270 or ASTM C1714) (ASTM C270 or ASTM C1714) or ANSI A118.1 Mortar ANSI A118.4 or ANSI A Mortar Interior Applications Less than 10 ft (3 m) in height above finished floor Recommended Recommended Recommended All other interior applications Not Recommended Recommended Recommended Exterior Single Family Residential Applications Grouted 2 Not Recommended Recommended Recommended All other exterior single family residential applications Not Recommended Recommended Recommended Exterior Commercial Applications Less than 10 ft (3 m) in height above finished grade Not Recommended Recommended Recommended All other exterior commercial applications Not Recommended Not Recommended Recommended Special Applications Installed directly on cement board Not Recommended Not Recommended Recommended Non-vertical applications 3 Not Recommended Not Recommended Recommended 10
11 TIPS & SUGGESTIONS Caution Do not subject AMSV to direct or frequent water contact. For example, avoid allowing sprinklers to directly spray onto the surface. Also, downspouts or drainage pipes should be placed so that water is not frequently moistening the AMSV units. Do not subject AMSV to contact with de-icing materials, salt, or other harsh chemicals. Prolonged exposure to these conditions may discolor the AMSV or result in surface damage. NOTE: For more detailed installation instructions, visit our website Darker looking Stone ProVia s stone is packaged before the drying process is complete. As with natural stone, ProVia s stone will look darker if moisture is present. Therefore, examine the stone for moisture and if in doubt, place a few stones on an oven rack, in the middle of an oven at 160 degrees, for several hours. Allow them to cool before removing from the oven. The stone will lighten to its true color as moisture dissipates. If not, contact ProVia Customer Service. Draining Plane Systems ProVia s stone does not require the use of rain screen drainage plane systems although some building codes require this. Reference the MVMA Installation guidelines at Efflorescence A white residue that sometimes appears on masonry surfaces. As moisture makes its way through concrete, from the inside out, it may bring with it any soluble salts residing in the concrete or mortar. When the moisture evaporates, it leaves the soluble salts on the masonry surface. To clean efflorescence off a masonry surface, mix 1 part white vinegar to 5 parts clean water. With a soft bristled brush lightly scrub the masonry surface with the water/vinegar mixture. Do not use acids, power washing equipment or other cleaning agents to remove efflorescence. Expansion/Control Joints Do not span expansion or control joints with stone. Terminate stone at the expansion or control joint. These exist to relieve pressure and allow for movement in the structure. Flashing No weep screed is needed where there is flashing. To prevent leaks place Z-flashing above all openings in the stone area. Use flashing above brick instead of weep screed. Stains Paint use artists echo knife (looks like a scalpel). Gently lift paint splatter off. Coffee scrub with tri-sodium phosphate solution, rinse with water and cover with cat litter. Oil put paint thinner on the stain, scrub with small soft brush, cover with cat litter, flour or corn meal. Repeat process until stain is gone. For situations or applications not outlined in this manual, please refer to the most current edition of the MVMA Installation Guide and detailing options for compliance with ASTM C
12 To serve, by caring for details in ways others won t. It s not just our mission, but a way of letting our light shine every day at ProVia. We continually strive to put these words into action by providing unmatched quality and service. The P-icon symbolizes each employee s commitment to devoting the utmost care, pride and quality into each building product we manufacture it s The Professional Way. Doors Windows Siding Stone provia.com 2018 ProVia Z-MK /18
Installation Guide Wall Panels
 Installation Guide Wall Panels Jointless or Dry-Stacked Installation (Read Prior to installation) The MStone system is a jointless / dry-stacked installation where panels and corners fit tightly together
MOUNTAIN STONE Products
 MOUNTAIN STONE Products PRODUCT USERS GUIDE Mountain Stone Products P.O. Box 20308 42102 4301 Industrial Road Bowling Green, KY. 42101 (270) 796-6123 (270) 796-6131 (800) 781-0277 Local Fax Nationwide
OLD BRICK ORIGINALS KILN-FIRED THIN BRICK VENEER Installation Guide. RobinsonBrick.com
 OLD BRICK ORIGINALS KILN-FIRED THIN BRICK VENEER Installation Guide RobinsonBrick.com OLD BRICK ORIGINALS THIN BRICK VENEER Page 2 INTRODUCTION Check local building codes for proper installation guidelines
TABLE OF CONTENTS IMPORTANT INFORMATION. INSTALLATION GUIDELINES Revised 5/5/2017 REFERENCES...2
 TABLE OF CONTENTS REFERENCES...2 PROJECT PLANNING...2 Verify Site Conditions...2 Building Code Requirements...2 Estimating Quantities Needed...2 SURFACE PREPARATION...3-5 Weather Resistive Barrier...3-4
PART 1-SAWN THIN VENEER GENERAL
 PART 1-SAWN THIN VENEER GENERAL WORK INCLUDED: All labor and material for the furnishing and installing of exterior or interior stone building veneer. RELATED WORK: Masonry Contractor shall include building
GENERAL SHALE NATURAL THIN ROCK VENEER Installation Guide. GeneralShale.com
 GENERAL SHALE NATURAL THIN ROCK VENEER Installation Guide GeneralShale.com GENERAL SHALE NATURAL THIN ROCK VENEER Page 2 INTRODUCTION - TABLE OF CONTENTS Check local building codes for proper installation
CAPTURED STONE IMPRESSIONS' INSTALLATION GUIDE FOR MANUFACTURED STONE VENEER
 Table of Contents Preface...2 What you will need:...2 Surface Prep...2 Tools...2 Materials...2 Mortar Prep...3 Tools...3 Materials...3 Installation...3 Tools...3 Materials...3 Estimating the Amount of
Manufactured Stone Veneer Installation Guide
 ENVIRONMENTAL STONEWORKS Manufactured Stone Veneer Installation Guide Published: 8/14/2008 Revised: May 2015 Table of Contents Introduction 3 Workmanship 3 Building Code Requirements 3 Safety Requirements
Thin Architectural Splitface Block Veneer Specification Guide
 Thin Architectural Splitface Veneer System with AccuTab Technology R Thin Architectural Splitface Block Veneer Specification Guide Section 04711: Manufactured Concrete Veneer Use this specification guide
HammerStone Manufactured stone veneers for commercial & residential applications
 HammerStone Manufactured stone veneers for commercial & residential applications Veneer Stone Specification Guide Section 04711: Manufactured Stone Veneer Use this specification guide for each individual
Installation Guidelines for Adhered Natural Thin Stone Veneer
 Installation Guidelines for Adhered Natural Thin Stone Veneer Information included in these guidelines are intended for use with the brands of Natural Thin Stone Veneers (NTSV) distributed by CSI - All
Hardscaping Installation Manual
 Hardscaping Installation Manual INDEX Installation of Pavers... 1 Installation of Meshed Flagstone... 2 Installation of Veneer Stone... 3 Sand Set Installation of Pavers 1. Preparing the ground Mark your
Rectangular Area: 15 x 10 = 150 sq ft Triangular Area: 15 x 5 x ½ = 38 sq ft
 Thanks for allowing Impressions in Stone to fulfill your manufactured stone requirements! With proper installation in accordance with all local Building Code specifications, your stone surface should provide
Stone and Masonry Veneer
 Stone and Masonry Veneer R703.7 Stone and masonry veneer, general. Stone and masonry veneer shall be installed in accordance with this chapter, Table R703.4 and Figure R703.7. These veneers installed over
SECTION Fiber Reinforced Stucco 1
 CSI SECTION 09200 FIBER REINFORCED STUCCO PART 1 GENERAL 1.01 SUMMARY A. Section Description: Provided lath and plaster where shown on the Drawings, as specified herein, and as needed for complete and
INSTALLATION MATERIALS
 INSTALLATION GUIDE M A T E R I A L S 1 CONTENTS Through using this installation guide, all your projects using Koni Materials will finish exactly as you first visualized. This installation guide will go
TABLE OF CONTENTS OUR COMPANY. OUR PRODUCTS Popular Simulated Stone Styles Limestone - Rustic Ledgestone - Stacked Stone
 Technical Specs TABLE OF CONTENTS Welcome...1 Technical Data...2 Summary Tables...3-4 Workmanship...5 Surface Preparation...6-8 Fig. 1 Wall Assembly...9 Fig. 2 Typical Wall Section...10 Fig. 3 Foundation
OCS ONE COAT STUCCO A custom blend of Portland cement, sand, extenders, fiber reinforcement and modifiers.
 OCS ONE COAT STUCCO A custom blend of Portland cement, sand, extenders, fiber reinforcement and modifiers. Designed to save material by functioning as an exterior cladding in thicknesses ranging from 3/8
Application Instructions
 Application Instructions 3.01 INSPECTION A. Prior to the application of Master Wall Inc. Cemplaster Fiberstucco, the substrate shall be examined for compliance with the contract documents and Master Wall
SPECIFICATION GUIDELINE
 SPECIFICATION GUIDELINE Environmental Stoneworks Corporate Office 6300 East Stapleton Drive South Denver, CO 80216 Phone (303) 309-3040 Fax (303) 309-3059 www.estoneworks.com Environmental Stoneworks specification
Installation Guidelines for Adhered Concrete Masonry Veneer
 Installation Guidelines for Adhered Concrete Masonry Veneer Installation Guidelines for Adhered Concrete Masonry Veneer Page 1 Contents Definitions 3 Abbreviations 3 References 4 Summary Table 5 Workmanship
INSTALLATION GUIDE THE BEST PANEL COMPANY. 126 Old Highway 60 E Hardinsburg, KY Office: Rev.
 INSTALLATION GUIDE THE BEST PANEL COMPANY Rev. 4/17 126 Old Highway 60 E Hardinsburg, KY 40143 Office: 270-788-3535 www.bestpanelcompany.com Product description The Best Panel Company (BPC) panels are
SPECIFICATION GUIDELINE
 Environmental StoneWorks specification guideline should be used to assist design professionals in the preparation of projects. Edit and delete items that may not be applicable. Verify all referenced section
Installation Guide and Detailing Options for Compliance with ASTM C1780. For Adhered Manufactured Stone Veneer 5 Edition, 1 Printing
 Installation Guide and Detailing Options for Compliance with ASTM C1780 th st For Adhered Manufactured Stone Veneer 5 Edition, 1 Printing Table of Contents Masonry Veneer Manufacturers Association Definitions/Abbreviations...4
ICC-ES Evaluation Report Reissued November 2014 This report is subject to renewal November 2016
 ESR-1215* Reissued November 2014 ELDORADO STONE, ELDORADO BRICK AND ELDORADO ADOBE VENEERS 1.0 EVALUATION SCOPE Compliance with the following codes: 2015 International Building Code (IBC) 2015 International
STONEWRAP MANUFACTURED STONE VENEER - LUXURY MANUFACTURED STONE
 STONEWRAP MANUFACTURED STONE VENEER - LUXURY MANUFACTURED STONE Stonewrap manufactured stone is produced by replicating natural stone. They are lighter in weight in comparison to natural stone. Due to
Installation Guide and Detailing Options for Compliance with ASTM C1780. For Adhered Manufactured Stone Veneer 5 Edition, 1 Printing
 Installation Guide and Detailing Options for Compliance with ASTM C1780 th st For Adhered Manufactured Stone Veneer 5 Edition, 1 Printing Table of Contents Masonry Veneer Manufacturers Association Definitions/Abbreviations...4
BALLISTIC RESISTANT PLASTER ON CMU
 BALLISTIC RESISTANT PLASTER ON CMU Jobsite Considerations Temperature Ballistic Plaster shall be applied in ambient room temperatures between 55 F and 85 F (13 C - 30 C) with a minimum wall surface temperature
Brick Masonry. Best Practices Guide
 Brick Masonry Best Practices Guide 1. Brick 2. Brick Blending 3. Wall Ties 4. Flashing 5. Steel Lintels 6. Weep Holes 7. General Recommendations Content The information and suggestions contained in this
Inspection Fundamentals: Stucco & EIFS
 Inspection Fundamentals: Stucco & EIFS By Ben Gromicko To be able to identify the stucco system you must understand system components. You should understand the basic components of the most common stucco
WEIGHT PER PIECE (LBS.)
") PRODUCT DESCRIPTION DATA SHEET 04 73 19-US BASIC USE ProGUARD DP is intended to be installed over sheathing and waterproofing over steel or wood studs or over concrete masonry units or poured concrete
PRODUCT DESCRIPTION DATA SHEET 04 73 19-US BASIC USE ProGUARD DP is intended to be installed over sheathing and waterproofing over steel or wood studs or over concrete masonry units or poured concrete
2019 IAQA Annual Meeting
 Daniel Stih, CMC. CIEC Healthy Living Spaces Stanley Yeskolski CIEC, CMC Investigative Inspection Services Inc. 2 Purpose The presentation will provide a over view of: Installation Details Problem Areas
BULLETIN FROM THE FIRST COAST CHAPTER ICC~BOAF
 FIRST COAST CHAPTER INTERNATIONAL CODE COUNCIL (ICC) AND BUILDING OFFICIALS ASSOCIATION OF FLORIDA, INC. (BOAF) SERVING BAKER, BRADFORD, CLAY, DUVAL, NASSAU, PUTNAM, ST. JOHNS & UNION COUNTIES BULLETIN
Makers of Premium Manufactured Stone STONE FOR THE AGES THE MARK OF EXCEPTIONAL VALUE
 Makers of Premium Manufactured Stone STONE FOR THE AGES THE MARK OF EXCEPTIONAL VALUE MISSION We are committed to being our customers and our employees first choice while adding value to the company every
WHATEVER THE CHALLENGE, PHILLIPS HAS YOU COVERED.
 WHATEVER THE CHALLENGE, PHILLIPS HAS YOU COVERED. Build walls and ceilings with a strong base, sturdy reinforcements and much more with Phillips extensive line of high quality products. As a single source
MANUFACTURER S INSTALLATION INSTRUCTIONS
 BORAL STONE PRODUCTS LLC Build something great MANUFACTURER S INSTALLATION INSTRUCTIONS MANUFACTURER S INSTALLATION INSTRUCTIONS Building code requirements vary from area to area. Check with local authorities
CONCRETE STAIRS Note:
 With the increased use of concrete tile and stone over the past decade, there has been an increase in demand for installing concrete tile or stone on stairs. Historically, these types of installations
Design No. HI/BP PERIMETER FIRE BARRIER SYSTEM Hilti, Inc. ASTM E 2307 Table 1
 FIRESTOP JOINT SPRAY CFS-SP WB SILICONE JOINT SPRAY CFS-SP SIL F-RATING 2-HR. 2-HR. T-RATING -HR. -HR. APPLICATION THICKNESS PERIMETER FIRE BARRIER SYSTEM Hilti, Inc. ASTM E 2307 Table /8" WET FILM (/6"
installation guidelines
 installation guidelines Eldorado Stone Adopts New MVMA Comprehensive Installation Guide Eldorado Stone has been a charter member of the MVMA (Masonry Veneer Manufacturers Association) since 2006. The mission
Ultrakote Cementitious Finish System
 Part 1 GENERAL 1.01 SECTION INCLUDES A. Ultrakote exterior wall system: one coat stucco, acrylic primer, cementitious finishes and protective coatings. 1.02 RELATED SECTIONS 1. 2. 3. 4. 5. 6. 7. 8. 9.
GA APPLICATION OF GYPSUM SHEATHING
 1. Scope 1.1 This specification describes the minimum requirements for, and the methods of handling, storage, and application of, gypsum sheathing for use as a substrate for exterior claddings. 1.1.1 Exterior
GYPSUM BOARD AND PLASTER
 CHAPTER 25 SECTION 2501 GENERAL 2501.1 Scope. 2501.1.1 General. Provisions of this chapter shall govern the materials, design, construction and quality of gypsum board, lath, gypsum plaster and cement
SECTION SHEET MEMBRANE WATERPROOFING AND CRACK ISOLATION
 SECTION 093000 - SHEET MEMBRANE WATERPROOFING AND CRACK ISOLATION PART 1 - GENERAL This specification includes the sheet membrane used as waterproofing, vapor retarder, and crack isolation in conjunction
SUBJECT: NEW 2000 INTERNATIONAL RESIDENTIAL CODE (IRC) DATE:
 DATE:") IRC CODE UPDATES TO: RESIDENTIAL BUILDING CONTRACTORS FROM: GARY STABER, BUILDING OFFICIAL SUBJECT: NEW 2000 INTERNATIONAL RESIDENTIAL CODE (IRC) DATE: 6/1/2003 INTERNATIONAL RESIDENTIAL CODE (IRC) APPLICABILITY:
IRC CODE UPDATES TO: RESIDENTIAL BUILDING CONTRACTORS FROM: GARY STABER, BUILDING OFFICIAL SUBJECT: NEW 2000 INTERNATIONAL RESIDENTIAL CODE (IRC) DATE: 6/1/2003 INTERNATIONAL RESIDENTIAL CODE (IRC) APPLICABILITY:
manufacturer s installation instructions - methods to comply with ASTM C1780
 Suddenly stone is within reach manufacturer s installation instructions - methods to comply with ASTM C780 Boral ProStone Product Installation Instructions are available separately from your Dealer and
Installation Guide. for Adhered Concrete Masonry Veneer
 Installation Guide for Adhered Concrete Masonry Veneer Table of Contents Definitions/Abbreviations...3 References...3 Summary Table...4 Workmanship...6 Material Requirements...6 Surface Preparation...7
Product Guide Specification
 Product Guide Specification SECTION 04850 (04 40 00) NATURAL THIN VENEER STONE PART 1 GENERAL 1.1 SECTION INCLUDES Specifier Notes: Edit the following as required. A. Natural thin veneer stone for [exterior]
Installation Guide and Detailing Options for Compliance with ASTM C1780. for Adhered Manufactured Stone Veneer 4 th Edition 5 th Printing
 Installation Guide and Detailing Options for Compliance with ASTM C1780 for Adhered Manufactured Stone Veneer 4 th Edition 5 th Printing Table of Contents Definitions/Abbreviations...4 References...4 Summary
Gold Bond BRAND Gypsum Sheathing
 BRAND 09 06 29 16 00/NGC 43/NGC brand is a moisture-resistant sheathing installed on the outside of exterior framing as a substrate for exterior claddings. It is manufactured with a treated water-resistant
A. ASTM C190 - Test Method for Tensile Strength of Hydraulic Cement Mortars
 SECTION 04850 (04 40 00) MSI PRECAST STONE VENEER SYSTEM PART 1 GENERAL 1.1 SECTION INCLUDES A. MSI Precast Stone Veneer for exterior and interior vertical surfaces. 1.2 RELATED SECTIONS Specifier Notes:
Finestone Stucco Ultra Wall System
 Finestone Stucco Ultra Wall System Premium impact and puncture resistant, rain screen design cement plaster stucco system with enhanced water management Typical Details BLANK PAGE Finestone Stucco Ultra
Never use wire brushes, acid cleaners, power washers, bleach, paint remover or any other type of concrete cleaner.
 Frequently Asked Questions (FAQ s) Care and Maintenance What happens if Eldorado Stone is damaged? Small chips and cracks can be repaired using our Color Touch-Up Kit which includes easy-to-follow instructions.
Genesis Panel Systems LLC Dura-Max Brick Panel Siding Installation Instructions
 Genesis Panel Systems LLC Dura-Max Brick Panel Siding Installation Instructions Thank you for purchasing the Genesis Dura-Max Brick Panel system for your project. The system allows you to have the look
application instructions
 application instructions FOUNDATIONS 76 & 120 SERIES PRIMED PANEL SIDING ARCHITECTURAL COLLECTION REVERSE BOARD & BATTEN AND STUCCO PANEL SIDING General At the time of manufacture, siding meets or exceeds
Installation Guide and Detailing Options for Compliance with ASTM C1780
 Installation Guide and Detailing Options for Compliance with ASTM C1780 for Adhered Manufactured Stone Veneer 4th Edition 6thPrinting Table of Contents Definitions/Abbreviations...4 References...4 Summary
SIDER-BASE CONCENTRATE AAC/ MONOSIDERAL AAC THE ULTIMATE OLD-WORLD AERATED CONCRETE-AAC DECORATIVE STUCCO SYSTEM
 SIDER-CRETE, INC. 153 Regur Road Hawkinsville, GA 31036 USA Ph: 478.892.9800 www.sider-crete.com SIDER-BASE CONCENTRATE AAC/ MONOSIDERAL AAC THE ULTIMATE OLD-WORLD AERATED CONCRETE-AAC DECORATIVE STUCCO
Phone Fax
 Corporate Office 955 Whitefish Stage Road Kalispell, MT 59901 406-755-5717 Phone 406-755-5718 Fax Scale: None Last Revision 10-20-10 Corporate Office 955 Whitefish Stage Road Kalispell, MT 59901 406-755-5717
Installation Standard For TILE-LINED ROMAN BATH TUBS IAPMO IS (10) Wall Finish. (3) Test Required. (2) Waterproof. Tile. (8) Concrete Shell
 Wall Finish. (3) Test Required. (2) Waterproof. Tile. (8) Concrete Shell") Installation Standard For TILE-LINED ROMAN BATH TUBS IAPMO IS 2-2003 (9) Ceramic Tile Floor Set in Portland Cement Mortar Sub-Floor & Building Felt 2 x 6 Floor Furring Wood Floor Joists Deflection of floor
Installation Standard For TILE-LINED ROMAN BATH TUBS IAPMO IS 2-2003 (9) Ceramic Tile Floor Set in Portland Cement Mortar Sub-Floor & Building Felt 2 x 6 Floor Furring Wood Floor Joists Deflection of floor
1. WHAT IS THE DIFFERENCE BETWEEN 16/20, 20/30, MONTALVO, AND SANTA BARBARA FINISH?
 FAQs 1. WHAT IS THE DIFFERENCE BETWEEN 16/20, 20/30, MONTALVO, AND SANTA BARBARA FINISH? The difference in these unique finishes is the gradation of the aggregates to achieve a scope of finishes from course
LP SmartSide Perfection Shingle
 Application Instructions Fiber Substrate Lap Siding A A - Lap Siding ON SITE STORAGE Store off the ground well supported, on a flat well-drained surface. (Diagram 1a) Additional support may be required
Insulation. First Revison October DC14 Drainage Mat INSTALLATION GUIDE FOR RESIDENTIAL & COMMERCIAL APPLICATIONS
 Insulation First Revison October 2016 DC14 Drainage Mat INSTALLATION GUIDE FOR RESIDENTIAL & COMMERCIAL APPLICATIONS 1. General Information This Guide describes the use of Kingspan GreenGuard DC14 Drainage
Commercial Flashing Details
 This technical note illustrates many of the most common flashing details for commercial buildings. The purpose for flashing is to direct moisture to the exterior and in so doing, prevent moisture from
Guide Specification for the OSI QUAD Window and Door Flashing System
 Henkel Corporation 26235 First Avenue Westlake, OH 1-866-591-2178 www.ositough.com Guide Specification for the OSI QUAD Window and Door Flashing System Specifier Note: The purpose of this guide specification
Spec Master 5/7/ For each product requiring color and texture selection, provide full size samples.
 SECTION 04812 (042012) MECHANICALLY ATTACHED BRICK PART 1 - GENERAL 1.1 RELATED DOCUMENTS A. Drawings and general provisions of the Contract, including General and Supplementary Conditions and Division
SECTION PORTLAND CEMENT PLASTER (STUCCO) WITH ACRYLIC FINISH
 WITH ACRYLIC FINISH") SECTION 09 24 23 - PORTLAND CEMENT PLASTER (STUCCO) WITH ACRYLIC FINISH PART I - GENERAL 1.01 SECTION INCLUDES A. Building paper B. Lath and accessories C. Plaster materials D. Acrylic finish E. Exterior
SECTION 09 24 23 - PORTLAND CEMENT PLASTER (STUCCO) WITH ACRYLIC FINISH PART I - GENERAL 1.01 SECTION INCLUDES A. Building paper B. Lath and accessories C. Plaster materials D. Acrylic finish E. Exterior
CTIOA Field Report 82-2
 CERAMIC TILE INSTITUTE OF AMERICA, INC. 12061 Jefferson Blvd., Culver City, CA 90230-6219 CTIOA Field Report 82-2 SUBJECT: New Bricklike Tile Veneer Installation Procedures and Inspector's Checklist by
DIVISION 9 SECTION 09220
 PART 1: GENERAL 1.01. DESCRIPTION AND SCOPE A. Requirements contained within Division I (General Requirements) are applicable to the work required of this section. Provide labor, materials, equipment and
SRP-AirOutshield UV Issued:
 SECTION 07276: SRP-AirOutshield UV Ultra Violet (UV) resistant, Vapour Permeable Air Barrier Underlayment and Sheathing Membrane Guide Specification This specification is a guide only and may need editing
PERM-FLEX ASSEMBLY DIRECT APPLICATION TO CEMENTITIOUS SUBSTRATES MANUFACTURERS SPECIFICATION / SECTION 09960
 STUC-O-FLEX PERM-FLEX ASSEMBLY DIRECT APPLICATION TO CEMENTITIOUS SUBSTRATES MANUFACTURERS SPECIFICATION / SECTION 09960 PART 1 - GENERAL 1.01 DESCRIPTION Provide all labor, materials and equipment necessary
A. Environmental Limitations: Comply with ASTM C 840 requirements or gypsum board manufacturer's written instructions, whichever are more stringent.
 SECTION 092900 - GYPSUM BOARD PART 1 - GENERAL 1.1 RELATED DOCUMENTS A. Drawings and general provisions of the Contract, including General and Supplementary Conditions and Division 01 Specification Sections,
SECTION CEMENT BOARD SUPPORTED ADHERED MASONRY VENEER. 2. Installation materials including adhesives, mortars, and pointing mortars.
 (Specifier Note: The purpose of this guide specification is to assist the Specifier in correctly specifying cement board supported adhered masonry. The Specifier needs to edit these guide specifications
Product and System Specifications DuPont Flashing Systems
 DuPont Building Innovations March 2007 4417 Lancaster Pike Chestnut Run Plaza 721 Wilmington, DE 19805 1-800-448-9835 www.construction.tyvek.com Product and System Specifications DuPont Flashing Systems
Frequently Asked Questions
 Frequently Asked Questions January 2017 FAQ GENERAL Who is Anatoliy Stone Products? We have 40 years of combined experience in the stone manufacturing industry. Anatoliy Stone Products understands what
The better way to build TM. Installation Manual NAILBASE PANELS
 The better way to build TM Installation Manual PANELS November 2018 SIPs Installation Manual Table of Contents Topics General Requirements................................... 3 Materials..............................................
PATENTED. StoneFit Wall System WITH DRYFIT TECHNOLOGY
 PATENTED StoneFit Wall System WITH DRYFIT TECHNOLOGY StoneFit Wall System with DryFit Technology An innovative stone cladding solution that uses patented interlocking panels. Product Features REDUCED LABOR
XTREME-BOND INSTALLATION SYSTEM
 XTREME-BOND FOR THIN-STONE VENEER Weather-resistant resistant Superior bonding & flexural strengths Exceptional sag resistance Meets requirements of Type S mortar Pre-blended for quality consistency from
DUPONT TYVEK MECHANICALLY FASTENED AIR AND WATER BARRIER INSTALLATION GUIDELINES FOR BUILDINGS GREATER THAN 4 STORIES AND HIGH PERFORMANCE
 DUPONT TYVEK MECHANICALLY FASTENED AIR AND WATER BARRIER INSTALLATION GUIDELINES FOR BUILDINGS GREATER THAN 4 STORIES AND HIGH PERFORMANCE INSTALLATIONS OF ANY HEIGHT REVISION 6/18 Table of Contents Note...
g e m s t o n e MediaWall
 eldorado stone g e m s t o n e MediaWall the most believable architectural stone veneer in the world GETTING STARTED Suggested Locations Living Rooms Bedrooms Entertainment Rooms The unexpected combination
CTIOA REPORT
 CERAMIC TILE INSTITUTE OF AMERICA, INC. 12061 Jefferson Blvd., Culver City, CA 90230-6219 CTIOA REPORT 2002-4-25 SUBJECT: Direct Bond Thin Set Method Glass Mosaic Tile Over Exterior and Interior Portland
DuPont Tyvek Water- Resistive and Air Barriers Installation Guidelines
 DuPont Tyvek Water-Resistive and Air Barriers Installation Guidelines DuPont Tyvek Water- Resistive and Air Barriers Installation Guidelines FOR OPEN STUD CONSTRUCTION FOR BUILDINGS LESS THAN 5 STORIES
Installation Instructions Tuscan Field Applied Limestone Finish
 Installation Instructions Tuscan Field Applied Limestone Finish TS-107 Recommended Tools for Installation of Tuscan StoneWorx Finishes Variable Speed Drill capable of producing 1000 RPM s MX1 Mixing Paddle
PART 1 GENERAL MANUFACTURED STONE MASONRY
 SECTION 04 73 00 (04730) PART 1 GENERAL 1.1 SUMMARY A. Section Includes: 1. Simulated Stone B. Products installed, but not furnished, under this Section include the following: 1. Steel Lintel and Shelf
WEB BASED APPLICATION SPECIFIC INSTALLATION INSTRUCTIONS
 WEB BASED APPLICATION SPECIFIC INSTALLATION INSTRUCTIONS Face Seal Fin and Integral J-Channel Install Although all possible measures have been taken to insure the accuracy of the material presented, WIXSYS,
DIVISION: THERMAL AND MOISTURE PROTECTION SECTION: WATER RESISTIVE BARRIERS/WEATHER BARRIERS REPORT HOLDER: PAREX USA, INC.
 0 Most Widely Accepted and Trusted ICC ES Evaluation Report ICC ES 000 (800) 423 6587 (562) 699 0543 www.icc es.org ESR 2045 Reissued 01/2017 This report is subject to renewal 01/2019. DIVISION: 07 00
Installation Guide & Helpful Tips
 2008 Installation Guide & Helpful Tips Getting Started Material Calculations Pg.2 Environmental Considerations.Pg. 2 Tools Used Pg. 2 Preparation Substrates. Pg. 3 Project Work Area... Pg. 4 Weather Resistant
R-Matte Plus-3: Insulation for the Building Envelope
 Attic and Crawl Space Applications R-Matte Plus-3 may be applied to the interior face of stud walls or roof rafters within attics and crawl spaces to provide a layer of continuous insulation (ci). Simply
SECTION UNIT PAVERS
 PART 1 - GENERAL 1.1 SUMMARY A. Section includes the following: 1. Concrete pavers. 2. Detectable warning pavers. 3. Warning stripe pavers. 1.2 SUBMITTALS A. Product Data: For the following: 1. Pavers.
Ultra Wall System. CAD Detail Sets
 Ultra Wall System CAD Detail Sets Contents Page UWS-CM CAVITYMATE Ultra Contents 1-0 FOR: Details continuing on 1-1 thru 1-17 Cavity cut XPS board to fit between ladder tie masonry ties in CMU walls UWS-SL
DIVISION: MASONRY SECTION: MANUFACTURED BRICK MASONRY SECTION: MANUFACTURED STONE MASONRY REPORT HOLDER:
 0 Most Widely Accepted and Trusted ICC ES Evaluation Report ICC ES 000 (800) 423 6587 (562) 699 0543 www.icc es.org ESR 3685 Reissued 09/2017 This report is subject to renewal 09/2018. SECTION: 04 71 00
HCD DSA OSHPD 1 2 1/AC AC SS SS/CC
 CALIFORNIA BUILDING CODE MATRIX ADOPTION TABLE CHAPTER 25 GYPSUM BOARD AND PLASTER (Matrix Adoption Tables are non-regulatory, intended only as an aid to the user. See Chapter 1 for state agency authority
SECTION WOOD FRAMING. A. Includes But Not Limited To 1. Furnish and install wood framing and blocking as described in Contract Documents.
 SECTION 06110 WOOD FRAMING PART 1 GENERAL 1.1 SUMMARY A. Includes But Not Limited To 1. Furnish and install wood framing and blocking as described in Contract Documents. B. Products Installed But Not Supplied
U.S. EDITION RESIDENTIAL CONSTRUCTION DETAILS SAMPLE. A visual guide to construction detailing. Emma Walshaw
 RESIDENTIAL CONSTRUCTION DETAILS U.S. EDITION A visual guide to construction detailing Emma Walshaw Contents INTRODUCTION 4 PRINCIPLES OF CONSTRUCTION DETAILING 6 FOUNDATIONS 9 PRINCIPLES OF FOUNDATION
Jewel Stone. Decorative Concrete Overlay System. Part 1 GENERAL MANUFACTURER S SPECIFICATION
 SEPTEMBER 2016 Jewel Stone Decorative Concrete Overlay System MANUFACTURER S IFICATION 09 62 81 Part 1 GENERAL 1.1 RELATED SECTIONS.1 Specification 03 30 00 Cast-in-Place Concrete.2 Specification 09 70
PROJECT TITLE PROJECT NO: CONTRACT TITLE GRANT NO: UNIVERSITY OF CALIFORNIA, DAVIS DAVIS, CALIFORNIA
 The following standard specification is intended to be edited according to the specifics of the project. Brackets [ ] and areas shaded in gray [e.g. format] indicate requirements that are optional depending
Siding and Soffit Installation Guidelines
 Siding and Soffit Installation Guidelines email web phone 07 46 16 Longboard Siding & Soffit INTRODUCTION INSTALLATION GUIDELINES NOTE: These instructions are prepared for persons experienced in the field
Application Instructions for Dryvit Backstop NT For Use Beneath Claddings Other Than Dryvit EIFS
 Application Instructions for Dryvit Backstop NT For Use Beneath Claddings Other Than Dryvit EIFS CHECKLIST PRIOR TO THE INSTALLATION OF BACKSTOP NT - SMOOTH AND TEXTURE Project Conditions Maximum storage
SECTION FLEXIBLE FLASHING SYSTEM FOR MASONRY VENEER
 PART 1 - GENERAL 1.01 SUMMARY SECTION 07 65 00 FLEXIBLE FLASHING SYSTEM FOR MASONRY VENEER A. Section includes through wall masonry flashing system components for installation over sheathing where spray
Multi-Institutional Academic Health Science & Research Center Evansville, IN
 SECTION 061600 - SHEATHING PART 1 - GENERAL 1.1 RELATED DOCUMENTS A. Drawings and general provisions of the Contract, including General and Supplementary Conditions and Division 01 Specification Sections,
DuPont Tyvek Wall Underlay Install Guide
 DuPont Tyvek Wall Underlay Install Guide (For Residential & Light Commercial Buildings) Acceptable Solution to NZBC E2/AS1 New Zealand As at 1/4/15 Version 2 Subject to change without notice DuPont Tyvek
SECTION PORTLAND CEMENT PLASTERING
 SECTION 09 2400 PORTLAND CEMENT PLASTERING This section includes editing notes to assist the user in editing the section to suit project requirements. These notes are included as hidden text, and can be