SURFACE. Countertop Rock Top UV Application Manual
|
|
|
- Jesse Watts
- 5 years ago
- Views:
Transcription
1 519 SURFACE Countertop Rock Top UV Application Manual


2 EQUIPMENT AND SUPPLIES NEEDED Rock Top UV Safety Glasses CAP spray HVLP Turbine 3 or 4 stage model Acetone 3/16 Knap Roller (Recommended) Terry Cloth Towels 3M Respirator Plastic Quart Cup General Cleaning Rags Stir Sticks Fine Cone Filters Protective Rubber 3M Non Vac 5 Vacuum Sander 3M Hookit II 5 Backer Pad 3M Conversion Hookit II to Hookit 3M A10 Trizact 5 Sanding Disc


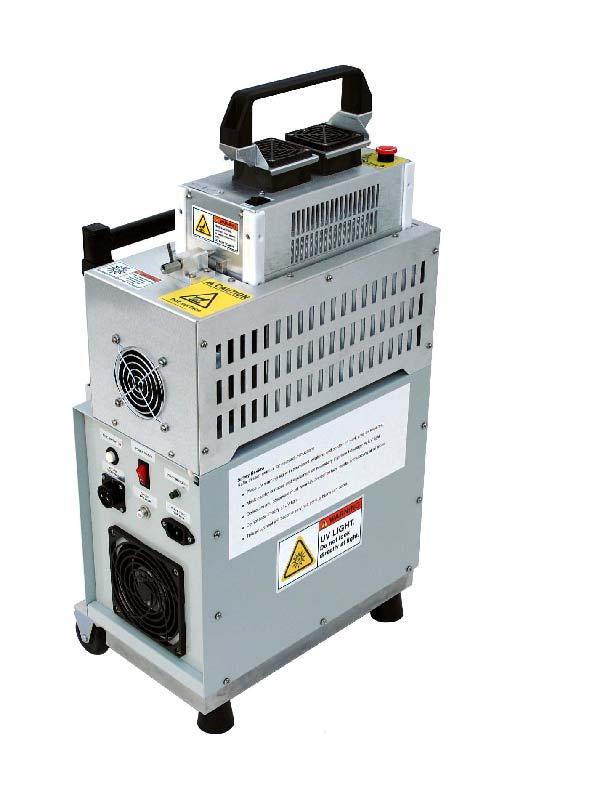
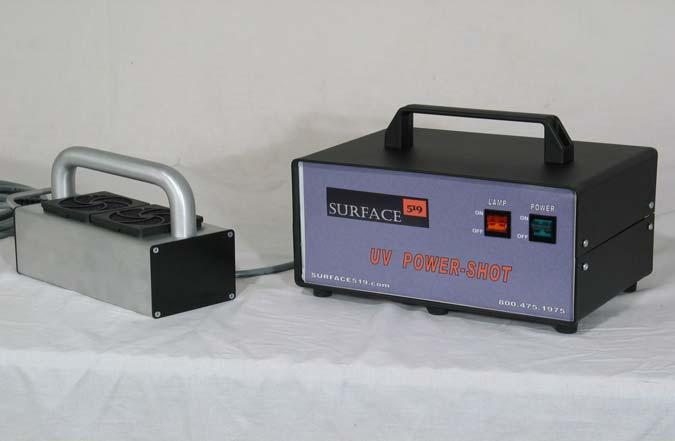
3 UV LIGHTS & EQUIPMENT NEEDED HID Mako Handheld HID Mako T Handheld Jelight Surface 519 Power Shot
4 Successful Sealing Start with a basic concept of doing your own testing. This is very crucial to your business and more importantly, to your reputation. Regardless of what sealer you use, or how the manufacturer or distributor tells you the product will perform, do your own testing. Doing so will give you confidence in knowing how the product you sell will succeed or fail because, let s be honest, every sealer has its strengths and weaknesses. It s important for you to know how each sealer performs and in different scenarios. For example, if a sealer manufacturer states a product will perform XYZ, does that mean that everyone who uses the sealer will get that exact result every time, in every situation? Absolutely not, and this is why. Take 20 applicators 10 using a roller and 10 using a spray system. Let s assume the rollers, substrate, spray equipment, and sealer is all the same. However, the results will differ due to the human element. Quite simply, some will roll heavier than others, some will spray at different distances than others, some will adjust the air and material loads, and some will use straight sealer while others dilute. So, the bottom line is that not only will each of these applications look different cosmetically, but they will also perform differently; which is why everyone should do their own testing using the application style that works for you. Rock Top UV is a great new product and overall is performing extremely well in a variety of applications across the world. The biggest benefit of Rock Top UV is that it is a single component, eliminating induction times, waste, etc. Another benefit is the ability cure the sealer the same day of application. Rock Top UV was designed with a very low build eliminating potential scratching. And repairs can easily be done. The list goes on. We receive calls daily from guys in the industry who are all doing things differently different application methods, different diluting, and different spray equipment. This is great! This is how we, as an industry, explore and push the limits of what a product is capable of within our budgetary constraints, of course. You can never assume, because of all the variables, that because one person uses a spray system and the other uses a roller with great success that you too will have success. So, DO YOUR OWN TESTING on sample pieces not live jobs. Figure out what method works best for you, or do whatever tweaking necessary to achieve your desired results. We ve all heard the analogy, slow down to speed up. This applies here. The sealing process is the last step, and generally the most common problem. So, don t rush this step or skip anything that is going to jeopardize the product s performance. We re all out here trying to make a living and we re constantly competing with turn around times. There are always new products that claim to advance our productivity and allow us to complete jobs in a shorter timeframe, for example new mixes that allow us to pop out of the mold in as little as four hours or the next day. This is great and we fully support the direction the industry is heading, however the reality of the sealing process is that it CANNOT be rushed, especially when it is the step in the process which seems to struggle the most. It s not often we hear of forming issues, melamine issues, cracking, colors, etc. It s pretty much all about sealing. So again, slow down. Don t push the last, most critical step of the entire process. And remember, you can t turn a gallon of sealer into five gallons in order to save money and expect great results. Consider the cost of using a high performance sealer verses an inexpensive one that we know will fail. A 50 square foot kitchen using a high performance sealer will cost about $.85 sq. ft. (or $43 total), an inexpensive sealer may run about $.50/sq. ft. (or $25 total). The savings is $18. Isn t the additional cost worth the expenditure if it eliminates call backs, which could eat away at your bottom line and compromise your reputation? No one wants a sealer that requires ongoing maintenance, so consider this concept as the paradigm of your business.

5 APPLICATION INSTRUCTIONS Rocktop UV is a topical coating that was designed with a very low build eliminating scratching opportunities but providing great stain protection. The product is applied using a spray system or roller. Once the material is applied you let the sealer air dry before curing with the UV light. Before curing you will use a Scotch brite pad to quickly dull the surface giving you a natural matt finish. If you choose a gloss simply cure with your UV light after material is fully dry 1) Let your concrete dry out at least 5 7 days after casting and at least 2 3 days after de molding. When wet grinding, let dry at least 24 hours after grinding. 2) Be sure to place slab up on blocks allowing air to circulate around piece freely. Placing the slab directly on melamine or table top traps moisture especially when wet grinding or acid staining. 3) Wet grinding A. Grind/polish surface to 200 grit which insures great adhesion B. Polishing over 200 is unnecessary but your choice C. Recycled glass mixes can stop at 200 as well. Glass will appear a bit hazy at 200 after polishing, however when Rock Top UV is applied it will pull all the clarity and depth of the glass. Dry sanding Sand to desired finish. Note: if using traditional sand paper change pads every 1 to 2 sq.ft. 4) Wipe off surface with straight acetone. Use 50:50 mix of acetone and water if a lot of sanding dust or shop dust has accumulated on surface. Note: Wipe with straight acetone directly after the 50:50 wipe 5) Keep area clean and dust free 6) Rock Top UV Material Preparation A. Using a stir stick, stir well 7) Immediately before spraying or rolling A. Do a straight acetone wipe B. Blow off slabs using air from a compressor or turbine unit. Using your hand, lightly rub the slab with a back and forth motion with the air right behind your hand. This will eliminate any dust or rag particles. Note: Be sure all moisture is out air lines

6 8) Spraying / Rolling A. Spraying is not the recommended choice i. Spray tip can be 1.4 or higher ii. Turbine HVLP sprayer is recommended as the air is not compressed and moisture in the line is never an issue iii. Spray a thin even coat to all edges. iv. Spray top using a consistent pattern leaving a thin even coat at 1 2 mils thick. B. Rolling i. 3/16 knap roller is recommended but use whatever works for you. ii. Using Duct Tape, wrap the roller and pull the duct tape off Iii. Pour Rock Top UV directly on slab generously. Quickly spread/roll material out with an even coat, back roll to a thin even coat of 1 2 mils thick. DO NOT APPLY OVER 1 2 mils 9) Air Dry A. Allow Rock Top UV to fully air dry using fans. Depending where you re located in the states. A low humidity environment is crucial to performance, temporary climate control may be necessary. The dry time could take anywhere from 1 hour to 3 4 hours. Climate controlled room will speed up the timeline. Do not put tops into direct or indirect sunlight or shop lights during dry time. 10) Matt Finish A. Once Rock Top UV is dry, take a gray or fine Scotch brite 3M pad (5 disc on a orbital works great) and dull or matt the sealer to the desired look. 11) Gloss finish A. No polishing treatment is necessary 12) Curing A. Using the recommended UV light and all necessary safety clothing and equipment begin to cure the sealer. The UV light should be approximately 2 inches above the surface B. Use cure rate of per minute C. Repeat step A going the opposite direction. D. Your counter top has been sealed 13) Second Coat A. Repeat steps 4 12 B. Two coats are recommended. Please note that no sanding is required for inter coat adhesion. A quick clean between coats is that s needed. C. Matt down first coat before curing if matt finish is desired. Shinny spots could appear during matting process on second coat. 14) Post Curing Finishes A. If dust or other particles were sealed in sealer, you can use the green and or blue trizact pads to remove.
7 ROCK TOP UV Benefits 1. Apply sealer and install same day 2. Natural looking appearance 3. Thin build reduces scratching possibilities 4. Great stain protection 5. Easy to apply and finish FIXING PIN/BUG HOLES IN ROCK TOP UV 1) Mix slurry or paste of the same color of concrete 2) Using a grout (tile) trowel, apply slurry or paste into holes leaving very little to sand off 3) Make sure to apply slurry or paste before sanding sealer 4) Sand off excess slurry or paste and level EAP 5) Repeat as needed 6) Repeat steps 7 and 8A or 8B in the application section
8 3M A35 Trizact 5 Sanding Disc Sanding Disc 519 SURFACE