INSTRUCTIONS FOR LAYING
|
|
|
- Alexandrina Osborne
- 5 years ago
- Views:
Transcription
 3395 752 100 Fax: + 49 (0) 3395 752 121 info@gefinex.com www.gefinex.com INSTRUCTIONS FOR LAYING Waterproofing")
1 PE moisture barriers are available in the following variants: PE 3/300 Original PE 3/300 Standard PE 3/300 RS Accessories system joint strip R300 system joint strip R300 Plus fixing tape sealing tape sealant and adhesive Issue February 2018 Gefinex GmbH Jakobsdorfer Straße 1 D Pritzwalk + 49 (0) Fax: + 49 (0) info@gefinex.com INSTRUCTIONS FOR LAYING Waterproofing


2 Technical laying details Detail 1: The Gefitas moisture barrier laid on the floor slab and up the wall ( Trough ) 1 Area of use The waterproofing of buildings on the floor slab through the prevention of rising damp and ground moisture as per the German standard DIN 18533/W1-E. The use of the Gefitas moisture barriers is regulated by the German standard DIN and general German construction appraisal certificates. The Gefitas system is monitored by the MPA Braunschweig material testing institute and reviewed for quality on an ongoing basis. Gefitas waterproofing membranes are standardised according to DIN EN 13967, categorised according to DIN EN in the building material class E, and bear the CE marking accordingly. Required work tools Craft knife, scissors, measuring stick, right angle tool, felt-tip pen, cloth for cleaning the adhesive surfaces. Preparation of the substrate In order to lay the waterproofing membrane, the substrate has to be pressure-resistant, level, free of surface pockets, burrs and harmful contaminants. The Gefitas waterproofing membrane is placed up against the damp proof course. The Gefitas system joint strip R 300 or R 300 Plus is attached with the integrated butyl adhesive strip onto the Gefitas waterproofing membrane and pulled up the wall. The system joint strip R 300 or R 300 Plus is not bonded with the wall. After completion of the floor screed and floor covering the overlap of the Gefitas system joint strip is cut away. The Gefitas waterproofing membrane can also be laid directly in a trough form. Corners are created here using the Gefitas fixing tape. The Gefitas waterproofing membrane, or the system joint strip R 300 or R 300 Plus, should protrude out above the surface of the floor screed so that the proper position of the Gefitas waterproofing membrane can be reviewed with a visual inspection. Once the floor covering has been completed the overlap can be cut off flush with the floor. 2 APPLICATION FOR FLOOR SLAB AND WALL
3 Technical laying details Detail 2: Laying the Gefitas moisture barrier with height adjustment Detail 3: The Gefitas moisture barrier directly on the floor slab 3 If the Gefi tas waterproofi ng membrane is laid on a height transition element, it has to be sealed with the damp proof course beforehand. This involves the Gefi tas R 300 system joint strip being attached to the damp proof course before instalment of the height tradition element. Then the height transition element can be introduced. The Gefi tas system joint strip R 300 is laid on this element; the Gefi tas moisture barrier is then placed up against the system joint strip R 300 and the overlap is bonded with the second adhesive strip of the system joint strip R 300. The height transition element has to be stable, safe to step on and laid across the full surface to ensure a neat and effective laying of the waterproofi ng membrane. Levelling granules or levelling screed are good examples of materials suitable for height adjustment. Please note that structural elements underneath the waterproofi ng membrane that are susceptible to moisture or corrosion need to be protected accordingly. To secure the Gefitas moisture barrier in position, it is attached with an overlapping joint to the damp proof course that lies underneath the outer and inner walls. This attachment can be carried out either on or beneath the damp proof course using the Gefitas sealing tape or the Gefitas sealant and adhesive. The floor screed can be laid directly on the Gefitas waterproofing membrane. In the planning and execution, the floor screed construction can be categorised as per DIN as screed on insulating layer. 4 APPLICATION WITH HEIGHT ADJUSTMENT APPLICATION FOR FLOOR SLAB
4 Technical laying details Detail 4: The Gefitas moisture barrier on the floor slab, under floating screed The insulation is laid directly on top of the Gefitas waterproofing membrane. Die Gefitas waterproofing membranes are free of harmful softening agents or other volatile substances, meaning that insulating material made from EPS can be laid directly. To ensure stability, the Gefitas waterproofing membrane is placed up against the wall and attached to this wall barrier with an overlapping joint. This attachment can be carried out either on or beneath the damp proof course using the Gefitas sealing tape or the Gefitas sealant and adhesive. Detail 5: Laying Gefitas with a damp proof course in the wall If damp proof course has been installed in the horizontal joint of the wall, the Gefitas system joint strip R 300 or R 300 Plus should be attached with adhesive to the Gefitas moisture barrier and carefully aligned up against the damp proof course. This attachment should be carried out using the Gefitas sealant and adhesive from the cartridge or the Gefitas sealing tape. 5 6 APPLICATION WITH FLOATING SCREED APPLICATION FOR DAMP PROOF COURSE IN THE WALL


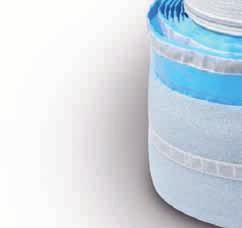
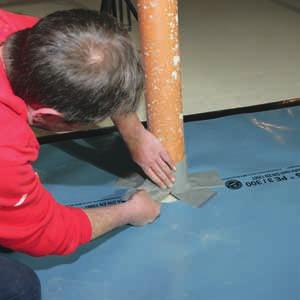
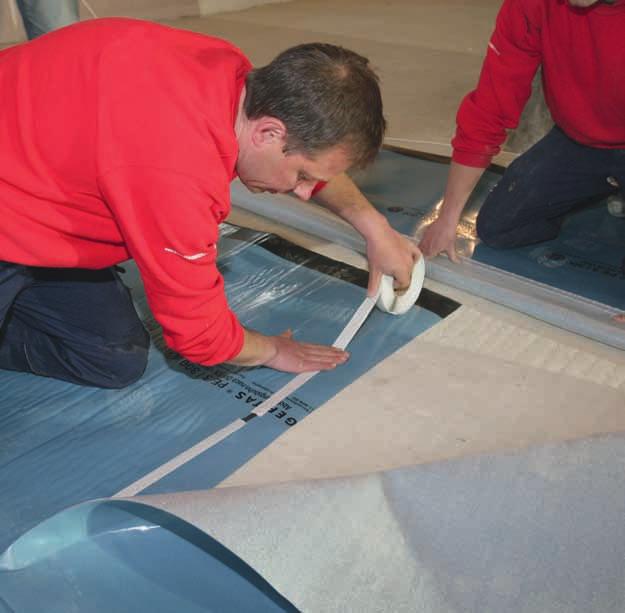
5 Gefitas laying steps based on the example of Detail 1 Trough 7 1. Roll out the Gefitas moisture barrier on the clean floor, place up against the damp proof course and lay with an overlap. 2. Lay the second membrane next to the first one with an overlap. The overlapping should be at least 5 cm. Then pull off the protective foil from the lengthwise adhesive strip running along the length of the membrane beginning from the middle, and attach to the membrane positioned underneath it. 3. This attachment should be carried out without any creases if possible. The black edge strip on the roll side of Gefitas 3/300 serves as an orientation tool here for neat adhesive bonding. 4. If there are any protruding elements, such as pipes, the Gefitas moisture barrier is laid up against and around them without any cavities using the elastic Gefitas fixing tape. The adhesive strips are placed on and pushed down here, without any tension, from the top downwards and with overlapping. 8


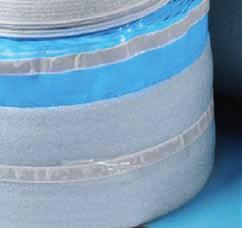
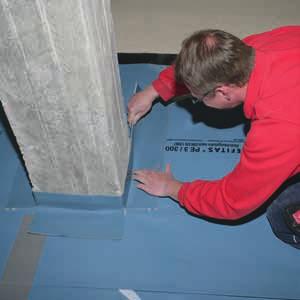
6 9 5. Once the Gefitas moisture barrier has been completely laid over the entire surface, the Gefitas system joint strip R 300 or R 300 Plus is applied. The strip is folded approx. 5 cm along its length so that it forms a foot. The foot is then placed onto the Gefitas moisture barrier and attached to the membrane. 6. Then cut the foot of the Gefitas system joint strip in the corners and lay around the perimeter. The corners can be secured using the elastic Gefitas fixing tape. Apply the adhesive tape and press down from the top downwards, without any tension. 7. After completing the laying of the floor screed and the covering, carefully cut away the overlap of the system joint strip using a craft knife. 10


")
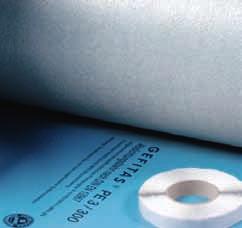
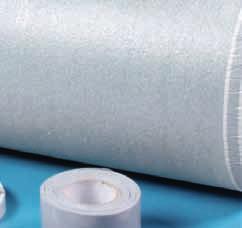


7 The waterproofing system moisture barrier moisture barrier moisture barrier as per DIN With a general structural certificate (AbP) With a general structural certificate (AbP) Radon-resistant certified PE 3/300 Original PE 3/300 Standard PE 3/300 RS Accessories 11 System joint strip R 300 System joint strip R 300 Plus Fixing tape Sealing tape Sealant and adhesive 12

8 Examples of use 13 14