Paving Stones and Retaining Wall Systems Made for the Northwest. ProductSelection 1(800)
|
|
|
- Rosalind Dorsey
- 5 years ago
- Views:
Transcription


1 Paving Stones and Retaining Wall Systems Made for the Northwest ProductSelection 1(800)


2 Built On A History Of Service From our beginning back in 1991, Western Interlock has been dedicated to providing our customers with a quality product and outstanding service. The journey begins in our production plant, where we have dedicated employees producing and sorting the products, fine tuning the process to give you the products that you deserve. Then we store and protect those products from the elements, so that when they get to our customers they are in good condition ready to hit the ground and become part of your special project. The second part of the journey is the people you meet along the way. Western Interlock s brand of customer service is not a department, it s an attitude. We have friendly and knowledgeable sales staff, yard personnel and delivery drivers that have been with the company for many years. Together we want your experience with us, our product, and your final project to exceed your expectations. Look for featured new products throughout this catalog. 2


3 Table of Contents Paving Stones Pages 4-31 Alpine Stone Pages 6-7 Alpine Rotundo Stone Pages 8-9 Camino Stone Pages Roca Camino Page 12 Arena Stone Page 13 City Square Page 14 Octo Stone Page 15 Holland Stone Pages Park & Plaza Stone Page Roca Park & Roca Plaza Stone Page Cobble Park & Cobble Plaza Stone Pages Granite Park & Granite Plaza Stone Pages Cobble Rotundo Stone Pages Holland Slimline Page 28 Slimline Page 29 VS-5 Drain Pave Pages Turf Stone Page 31 Retaining Walls Pages Chateau Wall Pages Slope Block Pages Tegula Garden Wall Pages Nursery Stone Page 40 Jumbo Nursery Stone Page 41 Fire Pit Kits Pages Accessories Page 44 Installation Guides Pages Paving Stones Pages VS-5 Drain Pave Page 47 Patterns Pages Borders Page 50 Chateau Wall Pages Slope Block Pages Tegula Garden Wall Pages Specifications Pages 51 & 58 Fire Pit Kit Installation Page 59 Gallery Pages (503) (360) Toll Free (800)


4 Camino Stone: Britewood Blend Granite Park & Plaza Stone: Jamestown Blend 4


 623-9084 (503) (360)")
5 Paving Stones Park & Plaza Stone: Columbia Blend (non-stock) Turf Stone Camino Stone & Cobble Rotundo Stone: Cambridge Blend (503) (503) (360) Toll Free (800)


6 Alpine Stone is a rugged paver emphasizing the character of the high mountains with its fractured surface and battered edges. Available in four sizes and several colors that complement Western Interlock Tegula Garden Wall and Chateau Wall ; Alpine Stone enables you to bring the look and feel of the mountain heights into the comfort of your own backyard. Alpine Stone Alpine Stone : Columbia Blend Alpine Stone : Columbia Blend Cambridge Blend Columbia Blend Jamestown Blend 6 Rainier Blend Willamette Blend
 70mm (2 3/4\") Large")
 70mm (2")
 3/4\") Small Square")

 108mm (4 1/4\") 70mm")

7 328mm (12 15/16") 328mm (12 15/16") 70mm (2 3/4") Large Square 328mm (12 15/16") 218mm (8 9/16") 70mm (2 3/4") Large Rec 218mm (8 9/16") 218mm (8 9/16") 70mm (2 3/4") Small Square Alpine Stone : Columbia Blend Alpine Stone : Willamette Blend 218mm (8 9/16") 108mm (4 1/4") 70mm (2 3/4") Small Rec Toll Free (800)


8 Alpine Rotundo Stone is a rugged new circle system that provides either a beautiful stand alone circular patio or intriguing inlaid patterns with Alpine Stone. Available in several colors that complement Alpine Stone, Tegula Garden Wall and Chateau Wall ; Alpine Rotundo Stone lets you bring the look and feel of the mountain heights into the comfort of your own backyard. Alpine Rotundo Stone Alpine Rotundo Stone : Rainier Blend Alpine Rotundo Stone : Jamestown Blend Cambridge Blend Columbia Blend Jamestown Blend 8 Rainier Blend Willamette Blend
 Dia. Circle Row 4: 117\" (9.75') Dia. Circle Row 5: 143\" (11.91') Dia. Circle Row 6: 169\" (14.08') Dia. Circle Row 7: 195\" (16.")
 Layout of Layers on Pallet Small XS XS C S S S S S S S S S Single Stone Large Rec 1 Layer = 1 Center, 2 X-Small 9 Small Number of Stones Needed to Complete")


9 Center X-Small Alpine Rotundo Specs Circle Row Diameters: Circle Row 0: 13" Dia. Circle Row 1: 39" (3.4') Dia. Circle Row 2: 65" (5.41') Dia. Circle Row 3: 91" (7.58') Dia. Circle Row 4: 117" (9.75') Dia. Circle Row 5: 143" (11.91') Dia. Circle Row 6: 169" (14.08') Dia. Circle Row 7: 195" (16.4') Dia. Height: 70mm (2.75 in.) Layout of Layers on Pallet Small XS XS C S S S S S S S S S Single Stone Large Rec 1 Layer = 1 Center, 2 X-Small 9 Small Number of Stones Needed to Complete Circle Rows Stone Sizes Row 0 a Row 1 a Row 2 a Row 3 b Row 4 b Row 5 b Row 6 b Row 7 b Center c X-Small c Small c Single Stone Large Rec Large Square a Requires 4 layers on pallet c These stones are not available individually b Requires 4 layers on pallet plus additional stones Alpine Rotundo Stone: Jamestown Blend Large Square Western Interlock pavers are made from natural materials and due to variables in the photographic reproduction process, the actual color of the stones may vary slightly. For a truly accurate representation, we invite you to stop by any of our retail facilities to see them in person. (503) (360) Toll Free (800)


10 The traditional cobble finish and many color choices give this stone an exciting array of possibilities, making it one of our most popular. Camino Stone is available in three sizes with old world charm and vivid pattern combinations that lend themselves well to beautiful project designs. Camino Stone Camino Stone Large Recs & Squares: Jamestown Blend Camino Stone Squares: Willamette Blend Boston Blend Britewood Blend Cambridge Blend 10 Charcoal Columbia Blend Earth Brown
 Large Rec 60mm (2 3/8\")")
 158mm (6 1/4\") 118mm (4")


11 238mm (9 7/16") 158mm (6 1/4") 60mm (2 3/8") Large Rec 60mm (2 3/8") 158mm (6 1/4") 158mm (6 1/4") Square 60mm (2 3/8") 158mm (6 1/4") 118mm (4 3/4") Small Rec Camino Stone Large Recs & Squares: Britewood Blend w/charcoal Border High Desert Blend Jamestown Blend Western Interlock pavers are made from natural materials and due to variables in the photographic reproduction process, the actual color of the stones may vary slightly. For a truly accurate representation, we invite you to stop by any of our retail facilities to see them in person. Northwest Slate Blend Pewter Willamette Blend (503) (360) Toll Free (800)


 158mm (6 1/4\") 60mm (2 3/8\")")

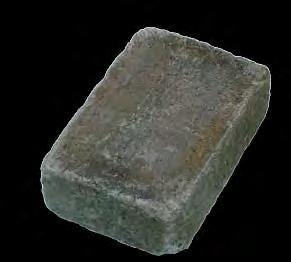
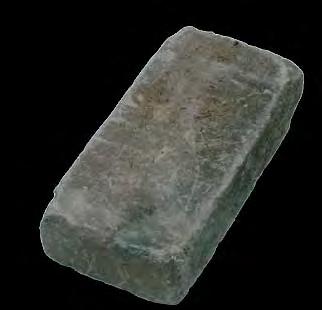
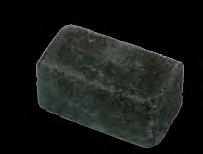
12 Roca Camino Stone offers a unique surface treatment produced by individually tumbling the stones. Roca Camino Stone has a broken edge with rugged good looks and is available in an array of colors. Roca Camino Stone is available in three sizes with old world charm and multiple pattern combinations that lend themselves well to beautiful designs. Roca Camino Stone 238mm (9 7/16") 158mm (6 1/4") 60mm (2 3/8") Large Rec 158mm (6 1/4") 158mm (6 1/4") 60mm (2 3/8") Square Camino Stone Large Recs & Squares: Willamette & Boston mixed on site (non-stock) 158mm (6 1/4") 118mm (4 3/4") 60mm (2 3/8") Small Rec 12 Columbia Blend Jamestown Blend


")
 Boston Blend 224 mm")
 Octo Edger")
13 Octo Stone is a unique shape combining an octagon with a small square, creating a pleasing combination. To facilitate laying along an edge, an edge stone is available. Other paving stones may be laid around the perimeter to enhance the appeal. Octo Stone Octo Stone: Willamette Blend Octo Stone: Boston Blend Octo Stone: Boston Blend 60mm (2 3/8") 224mm (8 13/16") 157mm (6 3/16") Boston Blend 224 mm (8 13/16") 110mm (4 5/16") 60mm (2 3/8") Octo Edger Willamette Blend Toll Free (800)


")


14 Another stone is the City Square, a smaller 6"x6" square. It looks well alone, or City Square also dovetails nicely with our Arena Stone in a half scale ratio. City Square Arena Stone w/ City Square: Earth Brown and Desert Tan City Square: Charcoal 149mm (5 7/8") 149mm (5 7/8") 60mm (2 3/8") Charcoal Desert Tan Western Interlock pavers are made from natural materials and due to variables in the photographic reproduction process, the actual color of the stones may vary slightly. For a truly accurate representation, we invite you to stop by any of our retail facilities to see them in person. 14 Earth Brown Pewter Western Red


 301mm (11 7/8\") 60mm (2 3/8\") Charcoal Desert")


15 One of the larger stones in our collection is Arena Stone, a simple 12"x12" square. Its bigger size is perfect for large plazas. Arena Stone can also be used in conjunction with City Square or individually as stepping stones. Arena Stone Arena Stone: Desert Tan Arena Stone w/ Holland Stone: Charcoal & Desert Tan mixed on site 301mm (11 7/8") 301mm (11 7/8") 60mm (2 3/8") Charcoal Desert Tan Western Interlock pavers are made from natural materials and due to variables in the photographic reproduction process, the actual color of the stones may vary slightly. For a truly accurate representation, we invite you to stop by any of our retail facilities to see them in person. Earth Brown Pewter Western Red (503) (360) Toll Free (800)


16 This traditional rectangular shaped stone can be used in historical and contemporary applications alike. The rectangular shape fits well in several laying patterns. Holland stone is also readily used as an accent stone in borders, headers or detail bands. Combine Holland Stone with our Park and Plaza Stones to add elegance and personality. Holland Stone Holland Stone: Boston Blend Holland Stone: Willamette Blend Boston Blend Charcoal Desert Tan Western Interlock pavers are made from natural materials and due to variables in the photographic reproduction process, the actual color of the stones may vary slightly. For a truly accurate representation, we invite you to stop by any of our retail facilities to see them in person. 16 Earthbrown Heritage Blend Pewter
 Standard Finish (2 3/8\")")
 80mm (3 1/8\") Also available")


 623-9084 (360) 878-9301")
17 198mm (7 7/8") 98mm (3 7/8") 60mm (2 3/8") Standard Finish 198mm (7 7/8") 98mm (3 7/8") 60mm (2 3/8") Roca Finish 198mm (7 7/8") 98mm (3 7/8") 80mm (3 1/8") Also available in 80mm (non-stock) Holland Stone: Pewter and Western Red w/ Charcoal border Western Red Willamette Blend Applications: Western Interlock pavers may be used for: Patios Walkways Pool Decks Malls Roof Decks Plazas Courtyards Streets Driveways and even Heavy Industrial Areas! Roca Charcoal Roca Pewter (503) (360) Toll Free (800)


18 Perennial favorites, Park and Plaza Stone have a flat top with a bevelled edge providing a measured contemporary look. With color combinations keyed to styles popular here in the Northwest, Park and Plaza Stone are sure to please. With a paver system that includes Park, Plaza and Holland Stones, you can mix and match to create the look you want for enduring appeal. Park & Plaza Stone Park & Plaza Stone: Boston Blend Boston Blend Desert Tan Park & Plaza Stone: Heritage Blend Applications: Western Interlock pavers may be used for: Patios Walkways Pool Decks Malls Roof Decks Plazas Courtyards Streets Driveways Western Interlock pavers are made from natural materials and due to variables in the photographic reproduction process, the actual color of the stones may vary slightly. For a truly accurate representation, we invite you to stop by any of our retail facilities to see them in person. Heritage Blend 18 Willamette Blend
 198mm (7 7/8\") 60mm (2 3/8\")")
 Park & Plaza Stone: Willamette Blend")

19 298mm (11 13/16") 198mm (7 7/8") 60mm (2 3/8") Plaza Stone 198mm (7 7/8") 198mm (7 7/8") 60mm (2 3/8") Park Stone Park Stone also available in 80mm (non-stock) Park & Plaza Stone: Willamette Blend Park & Plaza Stone: Willamette Blend (503) (360) Toll Free (800)


20 Roca Park and Roca Plaza Stone offer a unique surface treatment produced by individually tumbling the stones. Roca Park and Roca Plaza Stone have a broken edge with rugged good looks and are available in an array of colors. By using Roca Park, Roca Plaza, Roca Holland and Roca Rotundo Stones, you can mix and match to create the look you want for enduring appeal. Roca Park & Plaza Stone Roca Park & Plaza Stone: Columbia Blend Roca Park & Plaza Stone: Charleston Blend Cambridge Blend Charleston Blend Chinook Blend Western Interlock pavers are made from natural materials and due to variables in the photographic reproduction process, the actual color of the stones may vary slightly. For a truly accurate representation, we invite you to stop by any of our retail facilities to see them in person. 20 Desert Tan Jamestown Blend Pewter
 198mm (7 7/8\") 60mm (2 3/8\")")
 Roca Park & Plaza Stone: Cambridge Blend")

21 298mm (11 13/16") 198mm (7 7/8") 60mm (2 3/8") Roca Plaza Stone 198mm (7 7/8") 198mm (7 7/8") 60mm (2 3/8") Roca Park Stone Roca Park Stone also available in 80mm (non-stock) Roca Park & Plaza Stone: Cambridge Blend Roca Park & Plaza Stone: Jamestown Blend (503) (360) Toll Free (800)


22 Cobble Park & Cobble Plaza Stone have rounded edges with a flat top, giving them the look of a vintage European cobblestone street for a softer worn look than Roca. Cobble Park & Cobble Plaza Stone are available in a broad variety of colors and as part of a paver system that includes Cobble Park, Cobble Plaza and Cobble Rotundo Stones, you can create a look for enduring appeal. Cobble Park & Plaza Stone Cobble Park & Plaza Stone: Jamestown Blend Cobble Park & Plaza Stone: Cambridge Blend Cambridge Blend Charleston Blend Chinook Blend Western Interlock pavers are made from natural materials and due to variables in the photographic reproduction process, the actual color of the stones may vary slightly. For a truly accurate representation, we invite you to stop by any of our retail facilities to see them in person. 22 Jamestown Blend Pewter Williamsburg Blend
 Cobble Plaza Stone")
 Cobble Park Stone Cobble")

 623-9084 (360) 878-9301")
23 298mm (11 13/16") 198mm (7 7/8") 60mm (2 3/8") Cobble Plaza Stone 198mm (7 7/8") 198mm (7 7/8") 60mm (2 3/8") Cobble Park Stone Cobble Plaza Stone: Williamsburg Blend Cobble Plaza Stone: Chinook Blend (503) (360) Toll Free (800)


24 Granite Park and Granite Plaza Stone have a unique finish reminiscent of Cascade granite. They promise to provide you with an attractive appearance alternative, to complement the more natural look of Northwest landscaping. Granite Park & Plaza Stone Granite Park & Plaza Stone: Cambridge Blend Cambridge Blend Charleston Blend Granite Park & Plaza Stone: NW Slate Blend WARNING! Pavers with rough or profiled tops like Granite Park & Granite Plaza Stones are vulnerable to scuff marks and damage caused by plate compactors. Western Interlock recommends the use of a protective medium between the compactor and the stones. Ask us for details on appropriate materials and instructions. 24 Jamestown Blend NW Slate Blend
 Granite Plaza Stone 198mm (7")


 623-9084 (360) 878-9301")
25 298mm (11 13/16") 198mm (7 7/8") 60mm (2 3/8") Granite Plaza Stone 198mm (7 7/8") 198mm (7 7/8") 60mm (2 3/8") Granite Park Stone Granite Park & Plaza Stone: NW Slate Blend Granite Park & Plaza Stone: Jamestown Blend (503) (360) Toll Free (800)


26 Cobble Rotundo Stone is a circle system that provides either a beautiful stand alone circular patio or intriguing inlaid patterns with other pavers. Cobble Rotundo Stone is available in an old world cobble surface. Let your imagination soar with creative ways this striking paver can be added to your landscape, from sweeping curves to steps or full circles. Cobble Rotundo Stone Cobble Rotundo Stone: Special Order Blend Cobble Rotundo Stone: NW Slate Blend Britewood Blend Cambridge Blend Charleston Blend Columbia Blend 26 High Desert Blend Jamestown Blend NW Slate Blend Willamette Blend
 Layout of Layers on Pallet X-Small Small Medium Large Circle Row 0: 2 Center Stones - 8\" Diameter 1 Circle Row 1: 8 X-Small Stones - 23 5/8\" (1.")
 Diameter 2 Circle Row 4: 43 Medium Stones - 70 7/8\" (5.91') Diameter 2 Circle Row 5: 40 Large Stones - 86 5/8\" (7.")
 Diameter 3 Circle Row 8: 38 Medium & 38 Rectangle - 133 7/8\" (11.16') Diameter 4 Circle Row 9: 37 Large & 37 Rectangle - 149 5/8\" (12.")

27 Center 12 Layer Circle Kit Diameter: 3.8m (12.5 ft.) Area: 11.34m2 ( sq. ft.) Circumference: 11.93m (39.25 ft.) Height: 60mm (2.375 in.) Layout of Layers on Pallet X-Small Small Medium Large Circle Row 0: 2 Center Stones - 8" Diameter 1 Circle Row 1: 8 X-Small Stones /8" (1.97') Diameter 2 Circle Row 2: 16 Small Stones /8" (3.28') Diameter 2 Circle Row 3: 32 Medium Stones /8" (4.59') Diameter 2 Circle Row 4: 43 Medium Stones /8" (5.91') Diameter 2 Circle Row 5: 40 Large Stones /8" (7.22') Diameter 2 Circle Row 6: 48 Large Stones /8" (8.53') Diameter 2 Circle Row 7: 33 Medium & 33 Rectangle /8" (9.84') Diameter 3 Circle Row 8: 38 Medium & 38 Rectangle /8" (11.16') Diameter 4 Circle Row 9: 37 Large & 37 Rectangle /8" (12.47') Diameter 4 1 Requires 2 layers on pallet 2 Requires 8 layers on pallet 3 Requires 9 layers on pallet 4 Requires 12 layers on pallet Cobble Rotundo Stone: Jamestown Blend Rectangle Western Interlock pavers are made from natural materials and due to variables in the photographic reproduction process, the actual color of the stones may vary slightly. For a truly accurate representation, we invite you to stop by any of our retail facilities to see them in person. (503) Toll Free (800)


28 New this year is our classic Holland shape in a Slimline paver profile. It is a great option for overlays where height is a concern, or pedestrian areas which will never receive vehicular traffic. Holland Slimline mixes well with our other pavers and makes an excellent border for the Cobble Slimline. Holland Slimline Holland Slimline: Boston Blend Holland Slimline: Comparison to Holland Stone Boston Blend Charcoal 28 Jamestown Blend Pewter


29 Cobble Slimline has a traditional soft edged old world look. Its thinner profile is a great solution for overlays where height is a concern, or for areas which will never receive vehicular traffic. Cobble Slimline is an economical alternative to our regular paver line and its two available sizes give it a myriad of pattern options. Cobble Slimline Cobble Slimline: Columbia Blend Cobble Slimline: Jamestown Blend Cobble Slimline: Jamestown Blend Large Rec Square Columbia Blend Jamestown Blend Toll Free (800)


30 It is important for projects to avoid sealing the earth and yet guarantee stability while allowing for penetration of rain and storm water. VS-5 Drain Pave offers a solid surface that is similar to a standard paving stone while still maintaining the high level of water drainage. Most importantly, a water penetrating paving system provides storm water management, relieves overburdened drains and serves as an alternative to expensive sewer systems. VS-5 Drain Pave works well with 80mm Park and Holland Stones. VS-5 Drain Pave 198mm (7 7/8") 198mm (7 7/8") 80mm (3 1/8") US Patent Application #10/ VS-5 Drain is a registered trademark of SF Concrete Technology, Inc. VS-5 Drain Pave: Desert Tan VS-5 Drain Pave: Desert Tan VS-5 Drain Pave: Pewter & Charcoal 30


31 VS-5 Drain Pave also has advanced shift resistance features on five sides. The four vertical sides have vertical protrusions and recesses in the joint area, while the bottom has 8mm deep profiling, giving VS-5 Drain Pave a 54% greater shift resistance over a standard paver. Typical Cross Section of VS-5 Drain Pave Installation VS-5 Drain Pave ¼" #10 Leveling Layer ¾" Open Base Layer 8mm Anti-Shift Groove 2" Open Sub-Base Geotextile Fabric Turf Stone Preserving green space, reducing storm run-off and erosion control are the primary uses for Turf Stone. The stone is designed to provide 60% concrete surface with 40% open area. The open spaces allow ample space for planting grass or similar ground cover when filled. Turf Stone is perfect for the natural look of lawn with the hard wearing qualities of concrete. 600mm (23 5/8") 400mm (15 3/4") 100mm (4") Toll Free (800)


32 Chateau Wall : Sandstone Blend Tegula Garden Wall : Cambridge Blend 32


 623-9084 (360) 878-9301 Toll")
33 Retaining Walls Tegula Garden Wall : Sandstone Blend w/ Chateau Wall Charcoal Blend cap Tegula Garden Wall : Sandstone Blend Chateau Wall : Columbia Blend (503) (360) Toll Free (800)


34 Chateau Wall opens new horizons in free standing garden wall and small retaining wall options. With its versatile modular sizing and glue together construction, Chateau Wall is an easy way to creatively enhance your outdoor spaces. Each individual block is treated to give it a hand hewn old world look that complements the Northwest landscape. Available in four sizes and several colors that complement Western Interlock Roca style pavers, Chateau Wall s options are endless. Chateau Wall Chateau Wall : Sandstone Blend Chateau Wall : Charcoal Charcoal Charleston Blend Columbia Blend 34 Pewter Sandstone Blend


35 Chateau Wall : Columbia Blend Toll Free (800)


 300mm (11 7/8\") 143mm (5")

36 The easy to install Slope Block retaining wall system is an exceptional choice for retaining walls. It forms a sloping wall from 2 to 42 feet high*, with minimal excavation and backfill. Slope Block is a self-supporting segmented gravity retaining wall requiring no mortar, pins or steel reinforcement. Slope Block Slope Block : Pewter Slope Block : Desert Tan Applications Western Interlock walls may be used for: Retaining Walls Garden Walls Planters (Straight and Curved) and Water Features Desert Tan Pewter 305mm (12") 300mm (11 7/8") 143mm (5 5/8") 36 Sandstone Blend US Patent #4T11606 Slope Block and SF Slope Block are trademarks of SF Concrete Technology Inc * Engineering is required on walls over 4 ft high. Contact Western Interlock for details.


")
37 Slope Block : Sandstone Blend Slope Block : Pewter Slope Block : Desert Tan (503) (360) Toll Free (800)


38 Tegula Garden Wall features an old stone look that goes perfectly with Northwest landscaping style. You can create a variety of garden wall looks with the variety of colors. With Tegula, special corner stones are not required. You can add four and eight block columns for an attractive finishing touch. Tegula Garden Wall can be capped with our Roca Park and Roca Plaza Stones, or you can use Roca Camino Stone large rectangles. Tegula Garden Wall Tegula Garden Wall : Charleston Blend Cambridge Blend Charleston Blend Tegula Garden Wall : Sandstone 38 Chinook Blend Pewter Sandstone Blend


39 244mm (9 5/8") 180mm (7 1/8") 160mm (6 3/8") Tegula Garden Wall and SF-Tegula is a registered trademark of SF Concrete Technology Inc. Assembly device: US Patent #5,480,267 Tegula Assembly Device Applications Western Interlock walls may be used for: Retaining Walls Garden Walls Planters (Straight and Curved) and Water Features Tegula Garden Wall : Sandstone Blend Tegula Garden Wall : Sandstone Blend (503) (360) Toll Free (800)


40 Ruggedly reliable, Nursery Stone is built to last and has a unique appearance. The block s natural, rough-hewn appearance and beveled design allow you to create graceful curves and patterns that guide the eye to what lies beyond. Nursery Stone Applications Western Interlock walls may be used for: Retaining Walls Garden Walls Planters (Straight and Curved) and Water Features 203mm (8") 305mm (12") 101mm (4") Nursery Stone : Tan Nursery Stone : Tan Nursery Stone : Pewter Nursery Stone and Jumbo Nursery Stone are manufactured by: Cement Products, Inc. Redmond, OR Nursery Stone is a licensed trademark of WestBlock Systems. Patent# D433,158 **For installation instructions, go to page


 **For installation instructions, go to page 42.")
41 Providing the rugged performance you need and the aesthetics you crave, Jumbo Nursery Stone is ideal for landscape walls, terrace walls and meandering borders. Easily installed. Ideal for walls up to four feet high and taller terrace walls, Jumbo Nursery Stone blocks are lightweight and easy to handle. Jumbo Nursery Stone 305mm (12") 406mm (16") Jumbo Nursery Stone is a licensed trademark of WestBlock Systems. Patent# D433, mm (6") **For installation instructions, go to page 42. Jumbo Nursery Stone : Tan Jumbo Nursery Stone : Tan w/red Top Layer Toll Free (800)


42 Add some ambiance to your backyard setting and ward off the chill on cool evenings with a Tegula precut fire pit. Available in two sizes with an optional Rotundo patio extension kit, a Tegula precut fire pit kit is sure to add some spark to your outdoor space all year long. Fire Pit Kit Small 40" Dia. Medium Fire Pit: Sandstone Blend Medium 50" Dia. Medium Fire Pit: Sandstone Blend 42


 623-9084 (360) 878-9301 Toll Free")
43 Cobble Rotundo Stone: Columbia Blend w/ custom Columbia Blend Fire Pit Camino Stone: Cambridge Blend w/ custom Fire Pit Camino Stone: Jamestown Blend w/ custom Sandstone Blend Fire Pit (503) (360) Toll Free (800)


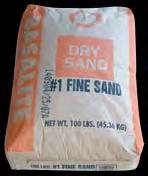

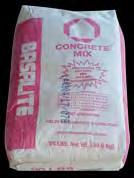
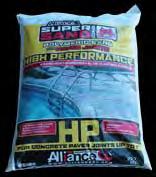


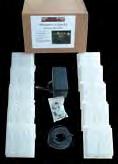


44 Installation Accessories Snap-Edge Atlas Fit Gloves Paver Installation Hammer MK Engine Powered Masonry Saw Paver Puller #1 Fine Sand Concrete Mix Type S Masonry Mortar Super Sand Polymeric Sand Sand Lock Additive NP1 Polyurethane Adhesive Super Wet Adhesive Angle Cutting Jig 44 Holland Light Kit 8 Piece Holland Light Kit 14 Piece New Age 6x6 Light Kit 10 Piece New Age 6x9 Light Kit 6 Piece Ratchet Tie Down Strap
45 Paving Stone Installation Western Interlock paving stones are easily installed by home owners. No prior experience is needed, just careful work and attention to detail. The following list of tools and materials will make your project possible and enable you to create the long lasting results you desire: Shovel Rubber Mallet Stakes/Stringline Level Snap-Edge Gravel Hand Tamper Plate Compactor Materials Needed: Gravel base: ¾" minus crushed rock; typically 4"-6" of compacted base should be used for light vehicular and pedestrian traffic, or 6"-12" for heavy vehicular or industrial traffic. When using a 4" base, 1 yard of gravel will cover 80 square feet. Bedding Sand: Coarse concrete sand is recommended. A uniform depth of 1" of sand is recommended. 1 yard of sand covers 200 square feet. Pavers: Determine the total square footage of your project (length x width = square feet) adding 5-10% for cuts and extra pavers that might be needed later. To estimate the number of pieces you will need, multiply the square footage by the pieces per square foot. (Square foot x Pieces per square foot = Total number of pavers needed) Edge Restraint: All exposed edges (not up against a permanent structure) must be restrained. Measure the linear feet of all exposed edges to determine the amount of edge restraint needed. Installation: 1. Measure and stake the desired area you intend to pave. Mark the outline of your project with stakes every 4-6" and at each corner; these stakes should be 6 outside from the edge of the planned area. Tie a string line at the level you want your finished project height. Typical Cross Section of Concrete Paver Installation SAND FILLED JOINTS PAVERS PLASTIC EDGE RESTRAINT CONCRETE SAND GRAVEL 2. Excavate 4"-6" beyond finished size, remove any loose dirt or sod to at least a minimum of 5"- 6" below the finished grade. This makes room for 3"-4" of compacted gravel, 1" of sand and 2 ³/₈" paving stones. The more time and effort you put into your base preparation, the better your paving stone project will look. 3. Compact sub-grade, backfill with crushed ¾ minus aggregate and compact again. Slope and grade are important for proper drainage. Assure a minimum of ¼" per foot drop, not to exceed ½" per foot. When finished with the base, it should be smooth and flat and reflect the final grade of your pavers. (503) (360) Toll Free (800)
 as guides, spread sand between rails and then use a straight wood 2\" x 4\" crossways to spread sand smooth and level to an even 1\" depth.")

, a diamond blade for a skill saw or a stone splitter.")
46 Installation Continued 4. Lay screed rails (1" outside diameter pipe or square tube) as guides, spread sand between rails and then use a straight wood 2" x 4" crossways to spread sand smooth and level to an even 1" depth. Remove the rails and fill in the voids left by the guides with sand and trowel smooth by hand or with the backside of a push broom. Don t walk on or compact the sand. 5. Determine your laying pattern. Starting in a square corner with a permanent edge, lay paving stones down lightly on the sand bed. Install rows of pavers checking with a string line every 4 feet or so, across the front of the laying edge to maintain a straight line. Stones may be marked with a wax crayon, and cut with a diamond blade wet saw (recommended), a diamond blade for a skill saw or a stone splitter. Try to keep cut pieces along the edges to a size of at least half of a full size paving stone. 6. Install plastic edge restraint (or similar product) along edges that are not up against a permanent structure. Edge restraint should rest on the compacted aggregate base and contain the sand and maintain the position of the paving stone. 7. Sweep pavers clean prior to compacting. Using a vibratory plate compactor, set the stones into the sand base. Start along the outside edge and work toward the center. This will level your paving stone project. 8. After compacting, sweep paver joints full of concrete sand and compact again. Efflorescence Efflorescence is a whitish powder-like deposit, common on concrete and masonry products, that normally will disappear over time with weathering. Although it may present an aesthetic concern, efflorescence will not affect the structural performance of pavers or wall systems. With proper maintenance, efflorescence can be removed and the original color restored. Through manufacturing techniques, Western Interlock attempts to reduce the likelihood of efflorescence. Sealer Sealing your paving stones is an option that does offer some advantages. Sealing enhances the color, increases stain resistance to oils, food, and vegetation; as well as stabilizing the joint sand to prevent wash-outs and weed germination. Sealers, however, are topical products and must be reapplied regularly (generally every 1-3 years). Efflorescence should be removed from the product prior to sealing. Without Sealer 46 With Sealer
47 VS-5 Drain Pave Installation Note: Geotextile is optional depending on the soil conditions, and is placed on the compacted soil sub-grade under the open graded base. Apply geotextile to the bottom and sides of the excavated area. Start laying geotextile at the top end of the drainage slope following down with overlapping joints of 24". Install all drain pipes, observation wells, overflow pipes in the base, depending on their location. Place, grade and compact 2" open aggregate for the sub base. The sub base is typically compacted to 6-8" lifts with a minimum 10-ton static roller. Make at least four passes with a maximum of 4" of aggregate per lift, with no visible movement in the sub base material when compaction is complete. Care must be taken to not damage the installed drain pipes during compaction and paving. Keep area where pavement is to be constructed free from sediment during entire job. Geotextile, base and bedding materials contaminated with sediment should be removed and replaced with clean materials. After sub base is compacted, apply 4" of ¾" open aggregate for the base material. Compact with the same process as the sub base material. The base is typically compacted with a minimum 10-ton static roller. Make at least four passes with no visible movement in the base material when compaction is complete. The elevation of the compacted surface should not deviate more than ± ½" over the length of a 10' straightedge. Screed 1-1½" of ¼"#10 aggregate as a leveling course. Do not compact this layer! Lay the paving stones on the leveling course in the patterns recommended by the manufacturer. Maintain straight pattern lines; use string lines if necessary. Cut pavers with a double bladed splitter or masonry saw to fill gaps at the edges of the paved area. Compact and seat the pavers into the bedding material by using a low amplitude (75-90 Hz) plate compactor capable of at least 5000 lbs. centrifugal compaction force. During laying, all pavers within 3' of the laying face must be left fully compacted at the end of each day. Sweep ¼-#10 into the openings, vibrating and compacting the pavers again until the material is ½" from the top surface. This will require two or three passes with the compactor. Do not compact within 3' of the unrestrained edge of the paving stones. Remove excess aggregate by sweeping pavers clean. The final surface elevations should not deviate more than ± ⅜" over the length of a 10' straightedge. The final surface elevations should be ⅛-¼" above adjacent drainage inlets, concrete collars or channels. VS 5 Drain Pave Installation Patterns Stack Bond Step Running Bond (503) (360) Toll Free (800)
48 Installation Patterns There are many patterns that you can use in the installation of paving stones. We have provided some basic patterns below. Keep in mind that Park, Plaza, Rotundo and Holland stones all module together, expanding your creative options. Basketweave Holland: 100% Holland Herringbone 90 Holland: 100% Holland (also works with any rectangular stone like Plaza & Camino large or small rectangles) 48 Linen Pattern Arena Stone and City Square: 80% Arena, 20% City Square
49 Running Bond Plaza: 100% Plaza (also works with any square or rectangular stone) * * * * * * Muster K Camino Large Recs and Squares: 73% Large, 27% Square (also works with Park & Plaza) *Use Large Recs to continue pattern in a larger area Step Running Bond Camino Large Recs, Squares and Small Recs: 46% Large Recs, 31% Squares, 23% Small Recs Step Running Bond Camino Large Recs and Squares: 60% Large Recs, 40% Square (this also works with Park & Plaza) (503) (360) Toll Free (800)
50 Border Patterns Borders are suitable for use as a creative decorative addition around the perimeter of any paving stone job. All of the border styles will work with every stone, although some combinations will require more cutting than others. Holland Soldier Course: This border is achievable with any rectangle stone like Holland, Plaza, Camino Large Rec, and Camino Small Rec. Holland Double Sailor Course: This border is achievable with any rectangle stone like Holland, Plaza, Camino Large Rec, and Camino Small Rec. 50 Camino Small Rec Double Soldier Course: This border is achievable with any rectangle stone like Holland, Plaza, Camino Large Rec, and Camino Small Rec.
51 Paving Stone Specifications Western Interlock paving stones are made from a low moisture concrete mixture. They are made under high pressure and high frequency vibration, producing a very dense stone, low in water absorption (less than 5%) and with a high PSI rating (above 8000 psi). They are designed to meet or exceed ASTM 936 and ASTM C (freeze/thaw) specifications. Stone Pcs/Sq Foot Lbs/pcs Pcs/ Layer Layers/ Pallet Pcs/ Pallet Sq Ft/ Pallet Lbs/ Pallet Alpine Stone Large Square Alpine Stone Large Rec Alpine Stone Med Square Alpine Stone Small Rec Alpine Rotundo Stone n/a various n/a Alpine Rotundo Single Stone n/a Arena Stone Camino Stone Large Rec Camino Stone Square Camino Stone Small Rec Capital Stone - 80mm City Square VS-5 Drain Pave Holland Stone Holland Stone - Roca Inter Stone Inter Stone - 80mm Octo Stone Octo Stone Edger Park Stone Park Stone - Cobble Park Stone - Granite Park Stone - Roca Plaza Stone Plaza Stone - Cobble Plaza Stone - Granite Plaza Stone - Roca Rotundo Stone n/a various Rotundo Stone - Roca n/a various Cobble Slimline Large Rec - 40mm Cobble Slimline Square - 40mm Holland Slimline Turf Stone Village Stone Village Stone - 80mm Village Stone Edger Village Stone Edger - 80mm Stock Non- Stock (503) (360) Toll Free (800)
52 Chateau Wall Installation 52 Chateau Wall is an easy to use retaining wall system that utilizes four different sized units which can be used individually or in combination. This unique product can be used for retaining walls, fences, columns and steps to produce a very unique satisfying project. Step 1: Planning Your Project Prepare a layout for your Chateau Wall project on paper. Projects that are over 3' high should use qualified advice or an engineer. Determine the face square feet of wall and any columns you will have. When calculating wall face square footage, remember that you will have at least 4" of the first layer of block buried below the finished soil height. Decide what block sizes you want to use and then use the pattern chart to calculate the quantity of each product size you need. Also consider the type of caps you would like to use. Mark out on the ground the parameters of the project. To help with curves, use a garden hose or PVC pipe. Use a string line to lay out long straight areas of the project. Step 2: Preparing the Base Excavate the soil 8" to10" below grade and at least 4" wider on each side than the blocks you are laying. Refer to the installation diagrams for details and better understanding on varied types of projects. With unstable soils, increase the depth of excavation as required to allow for a deeper base. Place ¾" minus gravel into the excavation area to a minimum depth of 4" to 6" and level it. Next, compact the gravel with a hand tamper or plate compactor. Make sure that you have a minimum of 6" of excavation behind the wall for gravel back fill. This may need to be increased, depending on soil type. Step 3: Positioning the Bottom Course Set the bottom course of block at the desired position on top of the prepared gravel. Using a large rubber mallet and a level, adjust the block until it is level, end to end, and front to back. Set the adjacent blocks in the same manner, using a string line or a level to keep long runs straight and flat. Step 4: Building and Backfilling Place two ¾" beads of Western Interlock approved flexible construction adhesive on top of the base course. Set the next course of block on top of the adhesive, offsetting the joints between the blocks on each consecutive course, and continue in this manner along the entire length of the wall. Retaining walls require a set back of ¾" per course to obtain the necessary set back angle. Accomplish this by using a square ¾" piece of wood or a tape measure to space each block back the required amount. Continue this process one layer at a time until the desired height is obtained. Retaining walls require backfill of ¾" minus gravel to within 6" of the finish height. Backfill and compact behind each course as the wall is built. Use a masonry saw to make any necessary cuts. Step 5: Finishing the Wall The Chateau Wall does not require a separate cap; however, there are several options if a cap is desired. Any of the Western Interlock paving stones that have a width of 8" or more can be used, as can any of the Chateau Wall blocks. Large post caps for columns are also available from Western Interlock.
53 Cap Stone 6" Compacted Gravel Backfill Flexible Adhesive Cap Stone Flexible Adhesive Crushed ¾" Minus Gravel Original Soil 6-8" Compacted Gravel Base Set Back Retaining Wall Chateau TM Wall ¾" Set Back Chateau TM Wall Non-Retaining Vertical Wall Crushed ¾" Minus Gravel Original Soil 6-8" Compacted Gravel Base Half Bond: 100% 400mm blocks w/ 1 or 2 200mm block starter blocks per course Bond: 50% 300mm, 33% 200mm & 17% 100mm blocks Bond: 35% 400mm, 40% 300mm, 20% 200mm & 5% 100mm blocks Random: Various 400mm, 300mm, 200mm & 100mm blocks w/ jumper blocks Four Block 20" Column Four Block 24" Column Column Tie In To Wall First Layer Second Layer First Layer Second Layer First Layer Second Layer (503) (360) Toll Free (800)

54 Slope Block Installation Slope Block is an easy do-it-yourself retaining wall. The individual blocks interlock together without any mortar or pins. Here are some helpful hints to enable you to achieve the beauty you desire in a retaining wall project. For more assistance, contact our helpful office staff. 54 **General installation guidelines apply to all lip-type retaining walls. Step 1: Planning Your Project Prepare a layout for your Slope Block retaining wall project. To help plan the number of blocks you will need for your project, multiply the face area times two to figure the number of blocks required. For help measuring curves, lay a garden hose along the proposed length of your wall; then straighten it out and measure its length. Step 2: Preparing the Base Excavate the soil in the location where the retaining wall is to be, assuring 6" of space on the rear side of the wall for gravel backfill. Dig a trench for the first course of stone 16" wide by 6" deep. Fill the first 3" to 4" of the trench with ¾" minus gravel and compact well, making sure that the gravel is level. Step 3: Setting the Bottom Course Set the first block on the gravel base. It will be necessary to dig out a small amount of the compacted base for the lip on the bottom rear of the block, so that the leveling portion of it is level in all directions. Settle the block into the gravel base, using a heavy rubber mallet to seat it firmly. Set adjacent blocks in the same manner, keeping them level with each other. Place ¾" minus gravel behind the first course and compact. Step 4: Setting Remaining Courses and Back Filling Set the next course, making sure that the joints do not line up with the previous course. Back fill with gravel and compact again before setting the next course. Place all the remaining courses until the wall has reached your desired height. As the courses rise, the wall will have a tendency to lean back. Use the compacted gravel back fill to keep it straight by tamping lightly behind the rear of the stones, maintaining the same vertical angle from top to bottom. Step 5: Finishing The Wall Set the top course and back fill to within 3" of the top. Finish back fill area with soil to the desired height. The top course can either be held in place by gravity, or fixed with an approved flexible adhesive. Slope Block can also be capped off with our Arena Stone held in place by mortar.

55 Corner Details Convex/Concave/Mitered Outside Radius Base Course Second Course Mitered Corners Base Course Second Course Inside Radius Typical Slope Block Installation Diagrams Notes: A drainage pipe can be used as shown in illustrations if there is a problem with excessive water in the retained area. The standard wall angle set back is 12 degrees. If a different angle is required, then the angle the first course is set at must be adjusted to accommodate the different angle. This angle is maintained as the following courses of stone and gravel are placed. Engineering is required on walls over 4' high. Call manufacturer for details. Cutting will be necessary for 90 degree corners and possible for the offsets on the different courses. U.S. Patent # Slope block and SF Slope 35 are trademarks of SF Concrete Technology, Inc. Existing Soil Base Course Second Course SF Slope Block TM Existing Soil SF Slope Block TM Granular Aggregate Granular Aggregate Drain Pipe Compacted Aggregate Footing Readi-Mix Concrete or Compacted Aggregate Drain Pipe Concrete Footing (503) (360) Toll Free (800)
56 Tegula Garden Wall Installation Tegula Garden Wall is an easy do-it-yourself decorative and retaining wall. Tiered walls, garden walls and planters (including those with curves and corners) are all easily installed. Step 1: Planning Your Project Prepare a layout for your Tegula Garden Wall project. To help you measure curves, lay a garden hose along the proposed path of your wall, then straighten it out and measure the length. Use the table below to help you plan the number of blocks you will need. Step 2: Preparing the Base Begin by digging a trench approximately 12" wide by 5-6" deep, and spread ¾" minus gravel into it. Use a hand tamper to compact the gravel to within 2" below the existing soil level. Make sure the base is level and flat and you are now ready to set the first course of block. (Refer to the diagrams) Step 3: Positioning the Bottom Course Set the bottom course of block at the desired position. Using a large rubber mallet and a level, adjust the block until it is level end to end and front to back. Set the adjacent stones in the same manner, using a string line to keep long runs straight. Step 4: Building and Backfilling Place an assembly device or small ball of mortar in the top groove of the bottom stone toward the back of the groove. Set each additional course in the same manner, insuring that each new block is resting on the two blocks below it. Align the assembly grooves for a retaining wall or alternate them for a free standing garden wall. (Refer to the diagrams) A retaining wall needs backfill behind each course to help with drainage. Backfill with crushed ¾" minus (3" minimum - see diagrams), compacting as you go. Continue laying additional courses and backfilling until the desired height is achieved. A masonry saw may be needed to cut the finishing edges depending on the project. Step 5: Finishing Wall Tegula Assembly Device Place Roca Plaza Stones on the top course, using a flexible construction adhesive. Other paving stones are available for cap stones if desired. Follow adhesive manufacturer s instructions for best results. Curves - Min. 7 Radius Wall & Four Block Column First Layer Eight Block Column First Layer Second Layer Four Block Column Wall & Eight Block Column First Layer 56 Second Layer First Layer Second Layer Second Layer
57 Cap Stone 6" Compacted Gravel Backfill Flexible Adhesive Cap Stone Flexible Adhesive TM Tegula Assembly Device or Mortar Tegula Garden TM Wall TM Tegula Assembly Device or Mortar Crushed ¾" Minus Gravel Tegula Garden TM Wall Original Soil Crushed ¾" Minus Gravel 6-8" Compacted Gravel Base Set Back Retaining Wall Non-Retaining Vertical Wall Original Soil 6-8" Compacted Gravel Base 6 3 8" MIN Flexible Adhesive Concrete Paver 2 3 8" (60 mm) minimum thickness Slight slope for drainage 6 3 8" Crushed ¾" minus Gravel Tegula Steps Side View Tegula Estimation Table Height in Inches Height in Courses 10' Long Wall 15' Long Wall 20' Long Wall 25' Long Wall 30' Long Wall 6.3" " " " " " 6 - MAX Tegula Garden Wall and SF-Tegula is a registered trademark of SF Concrete Technology Inc. Assembly device: US Patent #5,480,267 (503) (360) Toll Free (800)

58 Retaining Wall Specifications Western Interlock retaining walls are designed to provide a quality finished product. Professional or do it your-selfer, large or small; the variety of options offered are sure to provide an option that appeals to your style and takes care of your needs while meeting or exceeding industry specifications. Wall Block Pcs/Sq Foot Lbs/pcs Pcs/ Layer Layers/ Pallet Pcs/ Pallet Sq Ft/ Pallet Lbs/ Pallet Chateau Wall - 100mm Chateau Wall - 200mm Chateau Wall - 300mm Chateau Wall - 400mm Jumbo Nursery Stone Nursery Stone Slope Block Tegula Garden Wall Stock Non- Stock Tegula Garden Wall : Cambridge Blend 58

59 Fire Pit Kit Installation Western Interlock s all inclusive kit has all of the materials provided and it is designed so no cuts are needed for a quick and easy installation. We ve done all the work so that you can achieve professional results yourself! All you need is a rubber hammer, a level, gravel and a caulking gun. Step 1: Planning Your Project The first thing to do is to find a location that is clear and open, free from overhanging branches; as well 50' from any building for safety. Step 2: Preparing The Base A gravel base is best to support the weight of the Fire pit blocks. Excavate 3" and fill with ¾ minus gravel. Use a vibratory plate compact to get maximum compaction. This will insure that the fire pit will not settle. Step 3: Laying The Bottom Course The first course will lie on the gravel base. After each block is laid use a level on each block to make sure they are level from front to back and end to end. Use a plastic dead blow hammer to drive the block in to the base. If the block needs to be raised add gravel under the low side of the block and drive it in with the hammer and check the block for level. Take a longer level and check the Fire pit from side to side. Use a 2x4 board if the level is not long enough to go from side to side. The outside of the fire pit blocks should meet end for end. The inside will have small gaps between each block. Step 4: Building The Second Course After the first course is set and leveled use the adhesive cartridge supplied with the kit. Cut the end about half way down the nozzle and puncture the membrane in the end of the cartridge. Make sure the blocks are clean and dust free as possible. Use a broom to clean them off. Apply four quarter size dot on top of each block of the first course close to the edge of the groove so it does not squeeze out the sides. Place a block on top of the first course. Be sure that the lines are stepped for better appearance. The outside of the fire pit the block should meet end to end. There will be small gaps between the ends of the blocks on the inside of the Fire pit blocks. Step 5: Placing The Caps To Finish Off The Top After the second course is placed and adjusted. Make sure the caps are clean and as dust free as possible. Apply four quarter size dots to the top of the second course close to the groove. Place the caps around the top of the Fire pit and adjust them to fit as neatly as possible. You will have spaces between each cap to make the appearance look best. Step 6: Enjoying The Fire Pit Let the adhesive cure for 24 hours before use. Kick your feet up and melt the bottoms of your shoes. Get out the marshmallow and hot dogs. Have a friendly conversation with the family and friends and check out the stars if it is not raining. (503) (360) Toll Free (800)


60 Camino Stone: Pewter VS-5 Drain Pave : Columbia Blend (non-stock) Cobble Park & Plaza: Columbia Blend (non-stock) 60


")
61 Roca Rotundo Stone: Jamestown Blend Camino Stone: Britewood Camino Stone: Columbia Blend (503) Toll Free (800)


")

62 62 Camino Stone: Columbia Blend Roca Park & Plaza: Jamestown Blend Roca Holland Stone: Plum (special order) Holland Stone: Pewter, Charcoal and Green (non-stock) mixed on site


63 Roca Park & Plaza: Jamestown Blend VS-5 Drain Pave : Pewter (503) Toll Free (800)


64 Visit our new branch in Tumwater, WA Driveways Walkways Patios Fences Columns Retaining Walls Dealership WESTERN INTERLOCK, INC Rickreall Rd. Rickreall, OR Fassett St. Olympia, WA (800)