2004 Transportation Education Academy Activity:
|
|
|
- Martha King
- 5 years ago
- Views:
Transcription

1 2004 Transportation Education Academy Activity: Barge Design Water Transportation Educational Level: Middle School (7 th or 8 th grade)/high School Time to Complete: 3 to 5 hours (class periods) Standards Being Met: During the completion of this activity, the student will meet the following Standards for Technological Literacy: 1. Number 4, The cultural, social, economic and political effects of technology. 2. Number 6, The role of society in the development and use of technology. 3. Number 8, The attributes of design. 4. Number 9, Engineering design. 5. Number 11, Apply design processes. 6. Number 13, Assess the impact of products and systems. 7. Number 18, Transportation technologies. Activity Description: Students will review information about barge transportation technology and the environmental and political issues affecting it. Students will then develop a design for a barge type container following specifications. The barge design will be produced to scale by molding it out of plastic on a vacuum forming machine. The barge will be tested for capacity, floatation, maneuverability and the ability to meet the 9 foot draft requirement. Students will perform an evaluation of their design. Objectives: At the completion of this activity, students will be able to: 1. Describe the importance of barge technology in the transportation industry. 2. Identify environmental and political impacts of barge transportation. 3. Demonstrate basic design principles. 4. Design a product following specifications. 5. Apply basic math principles to real world situations. 6. Test and evaluate a barge design. 7. Develop an improved understanding of barge transportation technologies.


2 Group Size: This activity is best accomplished in small groups of two to four students. Background Information: The United States has over 10,000 miles of inland waterways that can be navigated for transportation. Through this system, barges and tow boats are used to move large quantities of goods between inland terminals on rivers and ocean ports in the Gulf of Mexico. Barge transportation is a highly economical method of transporting goods. A full barge tow consists of 15 units, 3 across and 5 long. Total length of the tow including the boat is 1100 feet. Each barge is 35 wide and 200 in length. A full barge tow (15 units) can transport approximately 900 semitruck loads of material. The rivers that are part of the inland waterway system decrease in elevation as they flow to the Gulf of Mexico. In some locations this change in elevation is substantial enough to cause rapids or small waterfalls. In order for barges to navigate these areas, a system of locks and dams has been built to allow the barges to be lowered or raised to meet the change in elevation. These locks are not large enough to accommodate a full tow of 15 barges. Tows must be separated in half and sent through the locks in two parts. This procedure requires several hours of extra time as the tow moves down the river. Transportation companies have requested that the Army Corp of Engineers lengthen these locks to accommodate a full barge tow. There is great opposition from many environmental groups. Somehow, a plan must be developed and implemented to overcome this problem. If locks cannot be enlarged, designs for larger barges or alternative barge shapes are needed so that the same amount of material can be shipped without having to send a full barge tow through the locks in two sections. There are limitations to solutions for this problem. Among these limitations are the 9 navigational depth that the barge channel is dredged to, size of the locks, height of bridges that cross the river, and power of the tow boat. Also, loading and unloading efficiencies must be considered. Another design consideration for barges is the ease at which they move and can be navigated through the water, especially into the current. Currently the standard barge design is a basic flat bottomed rectangle that is 35 wide and 200 long with a small downward taper on the front of the bow.
3 In this activity, students will develop alternative barge designs which will allow for ease of navigation and maximum cargo capacity. Barge designs will be built to a scale of 1 millimeter equals I foot. A mold will be constructed using wood or clay. The barge design will then be formed over the mold using plastic with a vacuum forming machine or aluminum foil. The barge model will then be tested by placing it in a water tank, loading it and pushing it to determine the amount of cargo it can hold and ease of navigation. Plastic tubing or similar round material can also be used for barge designs. Supplies, Tools and Materials: 1. Ruler (metric and standard) 2. Paper 3. Wood 4. Clay 5. Polystyrene sheets 6. Aluminum foil 7. Plastic pipe (PVC or ABS) 8. Pencils 9. Tin snips 10. Utility knife 11. Modeling knife for clay 12. Vacuum forming machine 13. Band saw 14. Sanders 15. Files 16. Sand paper 17. Felt tip pens or permanent marker 18. Large sink, gutters or water tank 19. Water 20. Sand or similar material 21. Towels 22. Beaker or measuring cup 23. Duct tape 24. Scale model of standard barge. Safety Precautions: 1. Wear safety glasses when using tools and machines. 2. Follow all safety rules when using tools and machines. 3. When using utility knife, cut away from your self. 4. Keep water off floors. Wipe up spills. 5. The vacuum forming machine is hot, be careful. 6. Ask instructor for permission to use power tools and machines. Procedure: 1. Form groups of 2 to 4 students. 2. Gather all required supplies (paper, pencils, wood, clay). 3. Review background information about barges. 4. Brainstorm barge design ideas (2 to 4). 5. Draw a detailed sketch of barge design. Use scale of 1mm = 1 foot. 6. Check the barge design with instructor. 7. Construct the mold for the barge design. Use clay or wood. Scale 1mm = 1 foot. 8. Have the mold approved by the instructor. 9. Review the instructions for the vacuum forming machine. 10. Ask the instructor for a sheet of plastic or aluminum foil.
4 11. Make the barge by using the vacuum forming machine for the plastic or hand forming the aluminum foil over the mold. 12. Trim excess plastic from the molded barge by using tin snips or utility knife. 13. Mark the 9 draft line on both sides of the barge. Use a permanent marker for this. Scale 1mm = 1 foot. 14. Place the barge in water. 15. Fill barge with sand or similar material until 9 draft line is on water level. 16. Slightly raise one end of the water tank or gutter. Note the travel path and stability of the barge. 17. Compare the travel path of your barge design to that of a standard barge. (Test the standard barge model.) 18. Empty the sand from the barge in a measuring cup or beaker. Record the amount. 19. Complete the barge test data sheet. 20. Repeat testing procedures for other barge designs. 21. Clean work area. 22. Return all tools and supplies. 23. Hand in all worksheets to the instructor. Evaluation and Assessment: See attached quiz and work sheets. Standard Barge: Width: 35 Length: 200 Height: approximately 20 (bottom of hold to top) Depth below water line when loaded: 9
5 BARGE DESIGN WORKSHEET CHECK OFFS: design approval mold approval DATA: amount of material barge held (9 draft line at water level) stability 1. tips or rocks easily 2. tips or rocks with some effort 3. little or no rocking maneuverability 1. moves straight 2. drifts to side 3. resists movement through water. DESIGN EVALUATION: 1. What are the overall dimensions (size) of your barge? 2. Does your barge hold more cargo than a standard barge? 3. What is the maximum number of your barges that can be put together in a tow? Remember, current lock and dam systems are designed to accommodate a maximum width of 3 35 barges. 4. Would your barge design enable the same amount of cargo, as carried in a standard 15 barge tow, to be shipped in fewer barges? 5. Does your barge move easier in the water than a standard barge? If so, would this help the tow boat work more efficiently and save fuel? 6. Describe several limitations that your barge designs may have.
6 BARGE DESIGN EVALUATION Carefully read each question and choose the correct answer. 1. A standard barge tow consists of barges. A. 15 B. 8 C. 10 D The maximum number of barges that can travel through a lock at one time is: A. 15 B. 6 C. 9 D When fully loaded, a barge sits feet below the water line. A. 9 B. 8 C. 6 D Currently, the main concern of barge shippers is: A. The size of barges B. Logs and debris in the river C. Curves in rivers D. Size of locks 5. A full barge tow can transport as much cargo as semi- trucks. A. 50 B. 100 C. 900 D A is the boat that moves barges along the river. A. tow B. tug C. pontoon D. cruiser 7. Explain why a barge cannot have a draft of greater than 9 feet.
7 8. List several factors that must be considered when designing a barge. 9. Describe 3 benefits of transporting cargo on barges. Describe 3 limitations of using barges for transporting cargo. 10. What were the two most important things you learned from completing this activity?

8 INSTRUCTIONS FOR VACUUM FORMING MACHINE 1. Make sure switch is in the off position. Plug power cord into wall outlet. 2. Place mold in the center of vacuum table. 3. Unclamp frame and set in a piece of plastic. Make sure the plastic covers the frame on all four sides. 4, Lower the outside part of the frame on the plastic and fasten clamps. Make sure frame covers all four sides of the plastic. 5. Swing the frame holding the plastic over the heating element. 6. Move the switch on the front of the machine to the heat position. 7. Heat the plastic until it softens. Test the plastic by taping it with a pencil on one corner. If the plastic is soft enough, you should see a ripple travel to the opposite corner. 8. When the plastic sheet is soft, move the frame over the mold. Carefully lower the softened plastic over the mold. Move the switch on the front of the machine to the vacuum position and hold on for 30 seconds so the plastic can form over the mold. 9. Allow the plastic to cool for a couple of minutes. When the plastic is cool, unclamp the frame and remove the molded sheet. 10. Trim the molded parts by using a tin snips or utility knife. 10. Unplug machine when finished and clean work area. Dispose of scrap pieces.
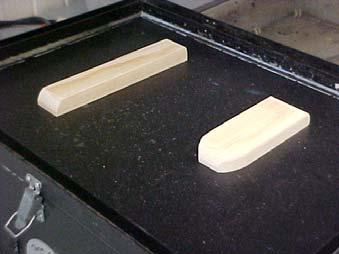
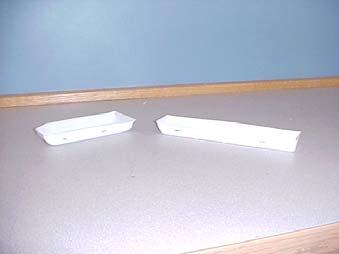

9 PICTURES