Erosion & Sediment Control (ESC) for Builders
|
|
|
- Victor Randall
- 5 years ago
- Views:
Transcription

1 Erosion & Sediment Control (ESC) for Builders City of Alexandria Contractor/Excavator Workshop April 30, 2009
2 Agenda Please Sign In Why We Are Here Plan/Permit Submittals Permitting Inspection/Enforcement Best Management Practices Comments, Suggestions and Questions
3 Materials and Handouts Presentation ti Permit Forms and Checklist Erosion and Sediment Control Ordinance Example Inspection Log Resources Best Management Practices (BMP s) Detail
4 Why Are We Here? Stormwater is becoming a bigger issue for everyone Federal, State and Local Regulators It s the Law Business & Industry Citizens Construction Industry


5 Why Are We Here? Eroding construction sites are a leading cause of water quality problems in Minnesota. For every acre under construction, about a dump truck and ahalf washes into a nearby lake or stream unless the builder uses erosion control.
6 Construction Sites: 0.5% of land area - 22% of sediment loading


7 What s the Issue? Stormwater picks up everything in its path Dirt Excess Nutrients Bacteria Debris Hazardous Wastes Heavy Metals
8 Problems Caused by Sediment Nuisance Growth of Weeds and Algae - Sediment carries fertilizers that fuel algae and weed growth. Dredging - The expense of dredging sediment from lakes, rivers and wetlands is paid for by taxpayers. Taxes Cleaning up sediment in streets, storm sewers and ditches adds extra costs to local government budgets.
9 Problems Caused by Sediment Lower Property Values - Neighboring property values are damaged when a lake or stream fills with sediment. Shallow areas encourage weed growth and create boating hazards. Poor Fishing Muddy water drives away fish like northern pike that rely on sight to feed. As it settles, sediment smothers gravel beds where fish like small mouth bass find food and lay their eggs. Soil particles in suspension can act like a sandblaster in a storm and damage fish gills.
10 Cumulative Impacts
11 Cumulative Impacts
12 Cumulative Impacts
13
14 Dollars & Sense Every $ not spent on erosion control is $15 to $20 spent on off-site impacts. The materials commonly needed to do the job are easy to find and relatively inexpensive straw bales or silt fence, fiber mats, bio-rolls, stakes, plastic tubes, rocks, gravel and grass seed. Putting these materials to use is a straightforward Putting these materials to use is a straightforward process. Only a few controls are needed on most small sites.


15 What is Sediment and Erosion Control? The use of various methods to reduce or eliminate i the amount of erosion, and resulting sediment loss, that can occur on a construction site when bare soil is exposed to rain and/or snowmelt.


16 Pay Now or Pay Later Sediment and erosion control practices, such as seeding and mulching, stabilize the soil and prevent costly and time-consuming site rework. It makes sense to do it right the first time to keep from having to come back to do the job over again.
17 First Things First Sediment results from Erosion. Therefore, if you effectively apply erosion controls as a first priority on any project, you will eliminate the need to deal with sediment control. =


18 Construction Pollution Sources
19 Permit Triggers Land Disturbing Activities iti land changes that t may result in soil erosion from water or wind and the movement of sediments into or upon waters including construction, clearing and grubbing. With Building Permit Application City Permit - ½ acre to 1 acre (Mini-SWPPP) State NPDES Permit (MPCA) - 1 acre or more (Full SWPPP)


20 Application Materials Application Checklist Inspection Form Staff will review the SWPPP for completeness, accuracy and effectiveness
21 General Permit Process Develop a Stormwater Pollution Prevention Plan (SWPPP) Submit a Notice of Intent (NOI) for NPDES Permit Implement the Plan Prevent most non-stormwater discharges Do not adversely affect critical habitats Report release of hazardous substances Conduct Regular Inspections Finalize the Project Submit Notice of Termination (NOT)
22 Who is the Permitee? Owner: responsible for compliance with the entire permit General Contractor: responsible for implementing what has been designed and is jointly responsible with the owner for application and termination submittals O d G l C t t t th C Owner and General Contractor together: Co- Permitees
23 What is a SWPPP Identifies potential sources of stormwater pollution at the construction site. Describes (written & graphic) practices to reduce pollutants in stormwater discharges from the site. Identifies procedures the operator will implement to comply with the terms of the construction general permit. Two Kinds: NPDES SWPPP & Mini-SWPPP
24 SWPPP Components Site Description Control Measures Inspections Maintenance Construction Sequence Scheduling Designers, Installer and Inspectors Need certification by 2010!!!
25 SWPPP Objectives Stabilize the site ASAP Protect slopes and channels Reduce impervious surfaces promote infiltration Control the perimeter of your site Protect receiving waters adjacent to your site Follow pollution measures Minimize i i the area and duration of exposed soils
 to be disturbed Spot elevations of proposed grades in relation to existing grades on the subject property and adjacent properties Drainage")

26 Mini SWPPP Projects disturbing ½ to 1 acre What Information Needs to Be Shown on the Mini SWPPP? Property boundaries Area(s) to be disturbed Spot elevations of proposed grades in relation to existing grades on the subject property and adjacent properties Drainage arrows depicting water movement Areas where finished slope will be steeper than 5:1 shall be noted Location and type of erosion/sediment control devices Location of storm drains, wetlands, sediment ponds and lakes Location of material stockpiles Plan for temporary site stabilization Plan for final site stabilization Rock entrance location Name of individual responsible for installation and maintenance of control devices
27 What YOU Need to Do Inspections of BMPs are required on a weekly basis and within 24 hours after each rain event greater than ½ inch. Designate a primary site contact t to be responsible for routine self-inspection and reporting. Complete inspection documenting the condition of BMPs installed at the project. Keep the erosion control plan or SWPPP and a written record of inspections at the site until the project is completed. Correct identified erosion control deficiencies as soon as possible. Modify erosion control practices, if BMPs are not functioning
28 Inspection Records Inspections required each week (every 7 days) and after each ½ inch rainfall SWPPP and inspection records must be kept on- site and provided at request SWPPP Containers


29 Inspection Records
30 City Inspections Small Projects At footing inspection to assure BMPs in place Around time of framing 14 day stabilization reminder At time of final be sure all area is stabilized before issuance of CO Randomly if the area has the potential/slope/features to become a problem
31 City Inspections Big Projects (Commercial) Before any digging or grading begins to verify that perimeter controls are in place At least every 2 weeks to verify BMPs and that site inspector has been conducting required inspection every 7 days or after.5 rainfall At the time of final stabilization ti before CO is issued Randomly if area has potential/slope/features
32 Enforcement Approach 1 st Step : Educate, educate, educate Last Resort: Chronic & Ongoing Stop work ordered for noncompliance Missed deadlines, litigation, other additional work MPCA Enforcement Administrative Penalty Orders Repair damage to adjacent properties
33 Common Plan of Development A "larger common plan of development or sale" is a contiguous area where multiple separate and distinct construction activities may be taking place at different times on different schedules under one plan. For example: If a developer buys a20-acre lt lot and builds roads, installs pipes, and runs electricity with the intention of constructing homes or other structures sometime in the future, this would be considered a larger common plan of development or sale. If the land is parceled off or sold, and construction occurs on plots that are less than one acre by separate, independent builders, this activity still would be subject to stormwater permitting requirements if the smaller plots were included on the original site plan. A city permit is required if ½ acre or more of land will be disturbed, regardless of the size of any of the individually-owned or developed sites.
34 Common Plan of Development Mr. Dee owns & develops 32 lots, gets NPDES general permit coverage for the whole subdivision, does mass grading, installs roads & utilities. Mr. Dee sells: lot 15 to Mr. Do-It-Myself lots 2-10 to Muddy Waters Homes lots 13, 14 & 22 to Speedy Builders *** Each buyer (and subsequent buyer) is held responsible for the sediment and erosion control on each individual lot (regardless of acreage) until final stabilization. All of the communal property like roads and storm ponds until the city or homeowners association takes over the responsibilit Th t i l t th i i l The new owner or operator can implement the original SWPPP or develop and implement their own.
35 Common Plan of Development Mr. Dee is still responsible for the permit requirements on the entire development and each individual lot (regardless of ownership) UNLESS coverage under the general permit is transferred to the individual buyer/builder. To transfer coverage: Each of these 3 buyers signs a separate subdivision registration form (MPCA). Mr. Dee amends the SWPPP plan to exclude those areas which have been sold. Each buyer applies for coverage under the general permit and amends the SWPPP plan for that property. p
36 Best Management Practices Generally 4 Categories: o Erosion Control Measure that prevent erosion and keep soil particles from entering stormwater o Sediment Control Methods of trapping eroded sediment o Site Management Methods to manage the construction ction site and construction ction activitiesities o Materials & Waste Management Methods to manage construction materials and wastes
37 Erosion & Sediment Control (ESC) Basics Apply perimeter control practices BEFORE beginning disturbance Minimize the extent and duration of erodible surfaces Stabilize disturbed areas ASAP Utilize erosion control and sediment control practices Keep runoff velocities low Establish and continue a maintenance and follow-up program even after active construction is complete
38 Best Management Practices The type and number of BMP s is dependant on the size, location and type of project. No one size fits all


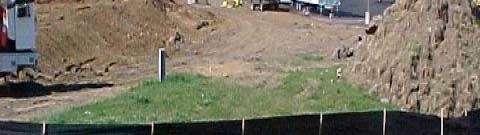
39 Silt Fence Silt fence is a geotextile screen used to pond storm water and allow sediment to settle out before the water migrates to catch basins, ditches, streams, or lakes. The screen is placed on the downslope side of a construction site, along the contour of the project topography, with enough room behind the silt fence to allow ponding to occur. At each end of the silt fence, the fabric must be directed up-slope so water does not flow around the ends of the material.
40 Silt Fence Installation Install prior to land disturbance. Install on downslope sides of site and parallel to the contour of the land. Extend ends upslope enough to allow water to pond behind. Bury 8-12 inches of fabric in trench. Inspect and repair once a week and after every ½-inch rain event. Remove sediment when 1/3 full Maintain until vegetation is established

41 Silt Fence - Maintenance Regular maintenance is needed to assure the silt fence continues to function properly: Inspect installation weekly and after each heavy rain Re-anchor where needed Remove accumulated sediment as necessary, to restore capacity Repair any tears in the geotextile material
42 Silt fences can t hold back mountains or rivers.


43 Construction Entrance A primary construction entrance should be identified for access to and from the construction A primary construction entrance should be identified for access to and from the construction site. This entry should be graveled to prevent sediment and soil from being tracked onto impervious surfaces by vehicles and heavy machinery.
44 Vehicle Tracking Pad A rock entrance at least 50 feet long must be installed. The rock needs to be a minimum 1 to 3-inch washed rock. The rock layer needs to be at least 6-inches thick. Geotextile fabric should be installed under the rock to prevent migration of stone into the underlying soils. Must be maintained throughout construction.


45 Concrete Washout A central controlled area should be established on the construction site so concrete A central, controlled area should be established on the construction site so concrete byproducts from concrete trucks and other equipment can be contained and disposed of properly, rather than being subject to runoff into catch basins or nearby waterbodies.
46 Concrete Wash Water Dispose of concrete wash water in an area of soil away from surface waters where soil can act as a filter or evaporate the water. Dispose of remaining cement. The NPDES Permit does not allow concrete-chute rinse water to come into contact with the ground. Wash water is alkaline and contains high levels of chromium, which can leach into the ground and contaminate groundwater. It can also runoff to a storm drain, which can increase the ph of area waters and harm aquatic life.
47 Concrete Washout Small Sites On sites disturbing less than one acre of land, common sense will prevail for concrete washout. Never wash on roadway, shoulder or ditch. Never wash where rinse water can flow into storm sewer, adjacent property or any waterway. Rinse water can be dumped on delivery site by making a depression in an excavated pile and containing the rinse water in that depression.
48 Concrete Washout Large Sites On projects disturbing over 1 acre, a temporary washout facility must be provided on site. The facility cannot be placed within 50-feet of a storm drain, open ditch or waterbody. The washout facility should be far enough away from the other construction traffic to reduce the likelihood of accidental damage and spills. On large sites with extensive concrete work, washouts should be placed in multiple locations for ease of use by concrete truck operators.
49 Construction Phasing Sequence construction activities so that the soil is not exposed for long periods of time. Schedule or limit grading to small areas. Install key sediment control practices before site grading begins. Schedule site stabilization activities, such as landscaping, to be completed immediately after the land has been graded to its final contour.
50 Material Storage Hazardous Materials: Oil, gasoline, paint and any hazardous substances must be properly p stored, including secondary containment, to prevent spills, leaks or other discharge. Restricted access to storage areas must be provided to prevent vandalism, Storage and disposal of hazardous waster must be in compliance with MPCA regulations.


51 Material Storage Solid waste: Collected sediment, asphalt and concrete millings, g, floating debris, paper, plastic, fabric, construction and demolition debris and other wastes must be stored and disposed of in accord with MPCA disposal requirements.
52 Soil Stockpiles Locate stockpile away from any downslope street, stream, lake, wetland, ditch or drainageway. Install silt fence at least 8-feet away from pile. All stockpiles should be temporary mulched to reduce erosion from wind and rain. All stockpiles to be on site longer than 3-weeks need to be stabilized (seeded).
53 Seeding and Mulching Straw, hay or cuttings of agricultural grasses and legumes can be used. Wood chips and aggregate can also be used. If disk anchoring will be used, the soil should be loosened before applying the mulch. Apply straw/haw at approximately 2 tons/acre such that 90% of the ground is covered. An even coverage must be obtained. Temporary mulch can be incorporated into the soil before permanent seeding and mulching take place.
54 Dewatering Dewatering or basin draining activities of turbid or sediment laden water WILL be discharged to a temporary or permanent sedimentation basin or treated with the appropriate p BMP prior to entering surface water.
55 Dewatering Dewatering or basin draining activities WILL NOT cause nuisance conditions, erosion in receiving channels or on downslope properties or adversely impact wetlands. Energy dissipation WILL be provided at all discharge points.
56 Storm Sewer Inlet Protection Protect storm sewer inlets with straw bales, silt fences, sand bags, g, or other equivalent barrier. After each rainfall that produces runoff, storm sewer inlet protection needs to be inspected. Sediment needs to be removed as needed. Inlet protection ti needs toremain in place until the contributing drainage area is stabilized.
57 Construction Details Dewatering: MNDOT is the Standard


58 Educate Your Subs!


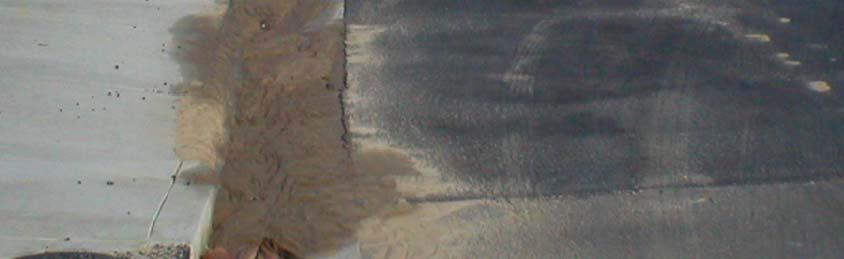
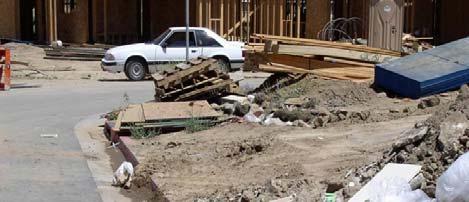
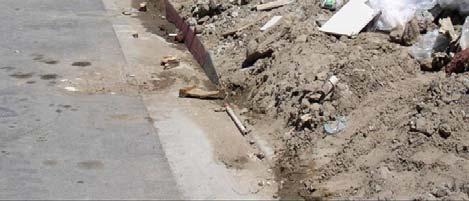
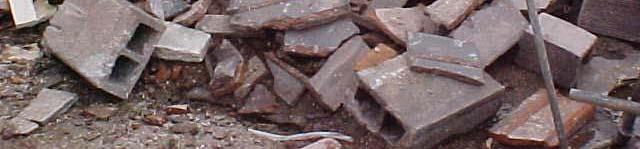
59 Good, Bad & Ugly


60 Good, Bad & Ugly
61 Good, Bad & Ugly


62 Good, Bad & Ugly
63 Good, Bad & Ugly


64 Good, Bad & Ugly


65 Good, Bad & Ugly
66 Good, Bad & Ugly
67 Good, Bad & Ugly
68 Good, Bad & Ugly


69 Good, Bad & Ugly
70 Good, Bad & Ugly


71 Good, Bad & Ugly
72 Good, Bad & Ugly
73 Good, Bad & Ugly
74 Questions/Comments