Developers: Michelle Hull Sam Malafronte Victoria Nassar Connor Sakowich
|
|
|
- Merry Rogers
- 5 years ago
- Views:
Transcription


1 This curriculum was designed and created by a social science research team at Worcester Polytechnic Institute based out of the Massachusetts Water Resource Outreach Center in Worcester, Massachusetts. The team worked in collaboration with the Massachusetts Department of Environmental Protection and the Central Massachusetts Regional Stormwater Coalition. This curriculum was specifically designed to satisfy the needs of the 5 th grade science teachers in the towns of Shrewsbury and Holden Massachusetts. Developers: Michelle Hull Sam Malafronte Victoria Nassar Connor Sakowich

2 Table of Contents Watershed Unit Curriculum...1 Table of Contents...2 Standards and Goals...3 Watershed Unit Outline Day Day Day Day Day Day Day Day 8.12 Day Day Watershed Lesson Plan Booklet Lesson Lesson Lesson Lesson Lesson Lesson Lesson Lesson Lesson Lesson

3 5th Grade Watershed Unit Massachusetts 2016 Standards Addressed: 5-ESS2-1 Use a model to describe the cycling of water through a watershed through evaporation, precipitation, absorption, surface runoff, and condensation. 5-ESS3-1 Obtain and combine information about ways communities reduce human impact on the Earth s resources and environment by changing an agricultural, industrial, or community practice or process ETS3-2 (MA) Use sketches or drawings to show how each part of a product or device relates to other parts in the product or device. Grade 5 Unit Goals: 1. Students will be able to explain the process of the water cycle. 2. Students will be able to model the process in which pollutants reach bodies of water and how it impacts the water cycle/ environment. 3. Students will be able to use maps and sketches to identify local watersheds and the bodies of water they flow to. 4. Students will be able to identify different materials and their effect on stormwater runoff 5. Students will be able to identify different designs that help protect Earth s resources and the environment. 6. Students will be able to explain the difference between sewer systems and stormwater systems. 7. Students will be able to model a catch basin system and explain its function. 3
4 4
5 Chapter The Water Cycle Day 1 Grade level: 5 Title of Topic Evaporation, Condensation and Precipitation Time Frame: mins Desired Outcome from Lesson: Students will be able to explain the process of the water cycle. Topic of Lesson: The water cycle is the process which water circulates between the Earths oceans, atmosphere and land. This cycle is made of precipitation, condensation, transpiration and evaporation. Students Goals of the Day: Students will be able to know the differences between precipitation, condensation and evaporation. Essential Vocabulary Hydrosphere- All the waters on the earth's surface, such as lakes and seas, and sometimes including water over the earth's surface, such as clouds. Precipitation- Rain, snow, sleet, or hail that falls to the ground. Condensation- Water that collects as droplets on a cold surface when humid air is in contact with it. Evaporation- The process of turning water from liquid into vapor. Groundwater- Water held underground in the soil or in pores and crevices in rock. Extended Vocabulary Runoff- Water from rain, snowmelt, or other sources that flows over the land surface. Geosphere- Any of the almost spherical concentric regions of matter that make up the earth and its atmosphere, as the lithosphere and hydrosphere. Atmosphere- The envelope of gases surrounding the earth or another planet. Biosphere- The regions of the surface, atmosphere, and hydrosphere of the earth (or analogous parts of other planets) occupied by living organisms. 5
6 Chapter The Water Cycle Day 2 Grade level: 5 Title of Topic Modeling the Water Cycle Time Frame: mins Desired Outcome from Lesson: Students will be able to model the process in which pollutants reach bodies of water and how it impacts the water cycle/environment. Topic of Lesson: Describe the water cycle through a model, demonstration or depiction. Students Goals of the Day: Students will be able to model and explain how water moves through the water cycle. Essential Vocabulary Hydrosphere- All the waters on the earth's surface, such as lakes and seas, and sometimes including water over the earth's surface, such as clouds. Precipitation- Rain, snow, sleet, or hail that falls to the ground. Condensation- Water that collects as droplets on a cold surface when humid air is in contact with it. Evaporation- The process of turning water from liquid into vapor. Groundwater- Water held underground in the soil or in pores and crevices in rock. Extended Vocabulary Runoff- Water from rain, snowmelt, or other sources that flows over the land surface. Geosphere- Any of the almost spherical concentric regions of matter that make up the earth and its atmosphere, as the lithosphere and hydrosphere. Atmosphere- The envelope of gases surrounding the earth or another planet. Biosphere- The regions of the surface, atmosphere, and hydrosphere of the earth (or analogous parts of other planets) occupied by living organisms. 6
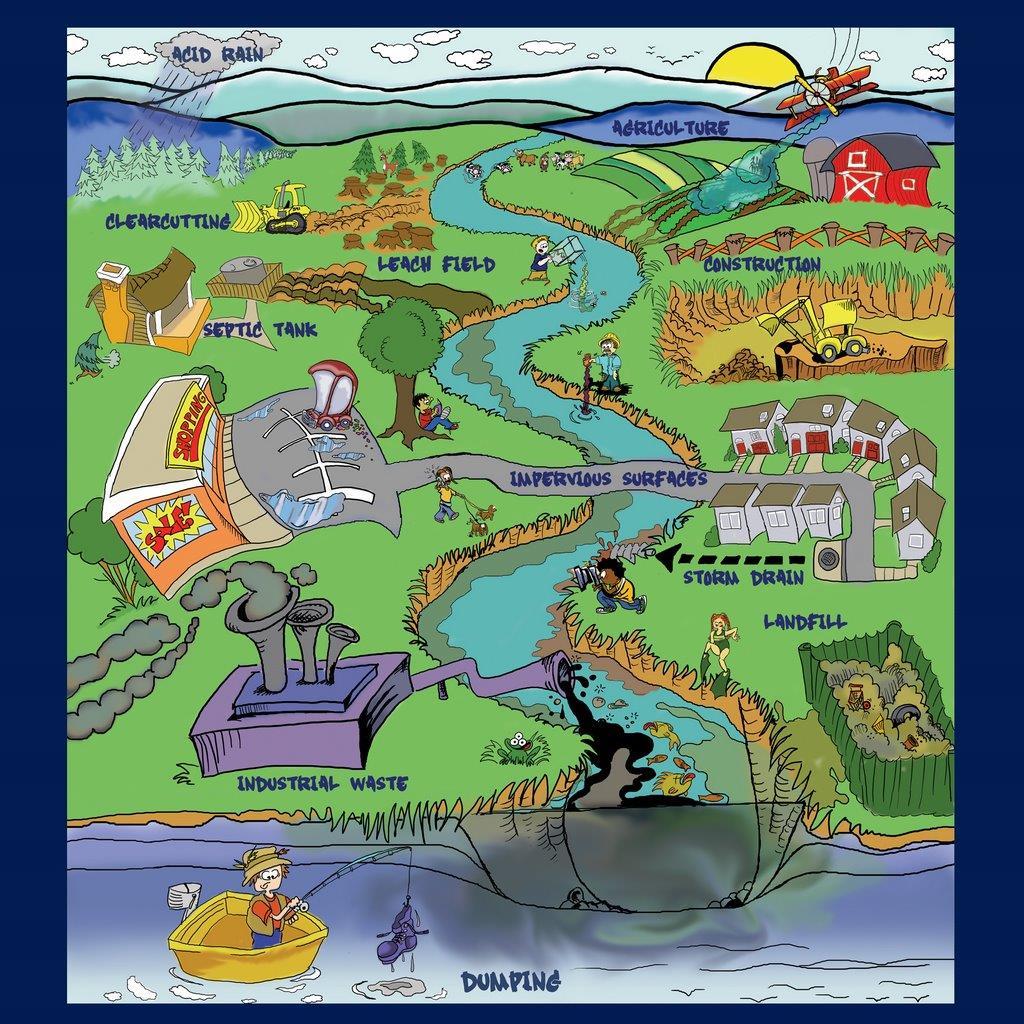
7 Chapter The Watershed Day 3 Grade level: 5 Title of Topic Pollution s Effect on Water Time Frame: mins Desired Outcome from Lesson: Students will be able to model the process in which pollutants reach bodies of water and how it impacts the water cycle/ environment. Topic of Lesson: There are many ways pollutants can enter bodies of water, the soil and the air. Students will learn the dangers human life can cause the watershed and why it is important to minimize pollution. Student Goals of the Day: Students will identify different pollutants and understand how they negatively affect human life and water quality. Essential Vocabulary: Groundwater- Water held underground in the soil or in pores and crevices in rock. Runoff- Water from rain, snowmelt, or other sources that flows over the land surface. Watershed- An area or ridge of land that separates waters flowing to different rivers, basins, or seas. Pollutant- a substance that pollutes something, especially water or the atmosphere. Extended Vocabulary: Non-point source pollution- When pollutants enter body of water or into the atmosphere not at a single location. Point source pollution- When pollutants enter a body of water or into the atmosphere at a single location. 7
8 Chapter Watershed Day 4 Grade level: 5 Title of Topic Mapping How Water Flows Time Frame: mins Desired Outcome from Lesson: Students will be able to use maps and sketches to identify local watersheds and the bodies of water they flow to. Topic of Lesson: As it precipitates, water flows downhill into bodies of water. Students will learn the importance of understanding and identifying your watershed and where your water comes from. Students Goals of the Day: Students will be able to explain and map how bodies of water connect to larger bodies of water in their watershed. Essential Vocabulary: Groundwater- Water held underground in the soil or in pores and crevices in rock. Runoff- Water from rain, snowmelt, or other sources that flows over the land surface. Watershed- An area or ridge of land that separates waters flowing to different rivers, basins, or seas. Pollutant- a substance that pollutes something, especially water or the atmosphere. Extended Vocabulary: Non-point source pollution- When pollutants enter body of water or into the atmosphere not at a single location. Point source pollution- When pollutants enter a body of water or into the atmosphere at a single location. 8
9 Chapter Watershed Day 5 Grade level: 5 Title of Topic Modeling a Watershed Time Frame: mins Desired Outcome from Lesson: Students will be able to use maps and sketches to identify local watersheds and the bodies of water they flow to. Topic of Lesson: As it precipitates, water and pollutants flow downhill to a watershed. Models and visuals will be used to convey the process it takes for water to make it into a watershed. Students Goals of the Day: Students will use a model to explain how water travels across a watershed, picks up pollutants and enters different bodies of water. Essential Vocabulary: A. Groundwater- Water held underground in the soil or in pores and crevices in rock. B. Runoff- Water from rain, snowmelt, or other sources that flows over the land surface. C. Watershed- An area or ridge of land that separates waters flowing to different rivers, basins, or seas. D. Pollutant- a substance that pollutes something, especially water or the atmosphere. Extended Vocabulary: Non-point source pollution- When pollutants enter body of water or into the atmosphere not at a single location. Point source pollution- When pollutants enter a body of water or into the atmosphere at a single location. 9
10 Chapter Stormwater Runoff Day 6 Grade level: 5 Title of Topic Urban vs. Rural Runoff Time Frame: mins Desired Outcome from Lesson: Students will be able to identify different materials and their effect on stormwater runoff. Topic of Lesson: Students will understand stormwater runoff, and how it is different in urban and rural environments. Students Goals of the Day: Students will understand and model the difference between pervious and impervious surfaces in an urban and rural environment. Essential Vocabulary: Stormwater Runoff- Rainfall that flows over the ground surface. Best Management Practice (BMP)- a type of water pollution control. Urban Environment- A human settlement with high population density and infrastructure of built environment. Urban areas are created through urbanization and are categorized by urban morphology as cities, towns, conurbations or suburbs. Rural Environment- Open land that has few homes or other buildings, and not very many people. Impervious Surfaces- Surfaces, such as asphalt, roofs, and sidewalks, where water cannot readily absorb into the ground. Pervious Surfaces- Surfaces where water can readily absorb into the ground. Extended Vocabulary: Rain Barrel- A water tank used to collect and store rainwater runoff, typically from rooftops via pipes. Rain Garden- A planted depression or a hole that allows rainwater runoff from impervious urban areas, like roofs, driveways, walkways, parking lots, and compacted lawn areas, the opportunity to be absorbed. Green Roof- A roof of a building that is partially or completely covered with vegetation and a growing medium, planted over a waterproofing membrane. 10
11 Chapter Title of Topic Stormwater Runoff Reducing Runoff with BMPs Day 7 Grade level: 5 Time Frame: mins Desired Outcome from Lesson: Students will be able to identify different designs that help protect Earth s resources and the environment. Topic of Lesson: Students will learn how runoff can be reduced through best management practices. Student Goals of the Day Students will understand what best management practices are and how they can naturally filter water. Essential Vocabulary: Stormwater Runoff- Rainfall that flows over the ground surface. Best Management Practice- a type of water pollution control. Urban Environment- A human settlement with high population density and infrastructure of built environment. Urban areas are created through urbanization and are categorized by urban morphology as cities, towns, conurbations or suburbs. Rural Environment- Open land that has few homes or other buildings, and not very many people. Impervious Surfaces- Surfaces, such as asphalt, roofs, and sidewalks, where water cannot readily absorb into the ground. Pervious Surfaces- Surfaces where water can readily absorb into the ground. Extended Vocabulary: Rain Barrel- A water tank used to collect and store rainwater runoff, typically from rooftops via pipes. Rain Garden- A planted depression or a hole that allows rainwater runoff from impervious urban areas, like roofs, driveways, walkways, parking lots, and compacted lawn areas, the opportunity to be absorbed. Green Roof- A roof of a building that is partially or completely covered with vegetation and a growing medium, planted over a waterproofing membrane. 11
12 Chapter Title of Topic Stormwater Runoff Engineering an BMP Day 8 Grade level: 5 Time Frame: mins Desired Outcome from Lesson: Students will be able to identify different designs that help protect Earth s resources and the environment. Topic of Lesson: Students will use a model, sketch, drawing, or other representation of a BMP to solve a stormwater runoff problem in an urban setting. Students Goals of the Day: Students will engineer a BMP model to incorporate into a scenario. Students will use scientific writing to back their reasoning for their design. Essential Vocabulary: Stormwater Runoff- Rainfall that flows over the ground surface. Best Management Practice (BMP)- a type of water pollution control. Urban Environment- A human settlement with high population density and infrastructure of built environment. Urban areas are created through urbanization and are categorized by urban morphology as cities, towns, conurbations or suburbs. Rural Environment- Open land that has few homes or other buildings, and not very many people. Impervious Surfaces- Surfaces, such as asphalt, roofs, and sidewalks, where water cannot readily absorb into the ground. Pervious Surfaces- Surfaces where water can readily absorb into the ground. Extended Vocabulary: Rain Barrel- A water tank used to collect and store rainwater runoff, typically from rooftops via pipes. Rain Garden- A planted depression or a hole that allows rainwater runoff from impervious urban areas, like roofs, driveways, walkways, parking lots, and compacted lawn areas, the opportunity to be absorbed. Green Roof- A roof of a building that is partially or completely covered with vegetation and a growing medium, planted over a waterproofing membrane. 12
13 Chapter Sewer System vs. Stormwater Day 9 Grade level: 5 Title of Topic The Two Separate Systems Time Frame: mins Desired Outcome from Lesson: Students will be able to explain the difference between sewer systems and stormwater systems. Topic of Lesson: Students will understand the stormwater system and sewer system, and how the different parts of each system work together. Students Goals of the Day: Students will be able to identify the different characteristics between a sewer system and a stormwater system. Essential Vocabulary: Catch Basin- A reservoir or well into which surface water may drain off. Grate- Prevents large debris from entering the catch basin. Outflow Pipe- The pipe in which stormwater is carried from the catch basin to a nearby body of water. Extended Vocabulary: Wastewater Treatment Plant- The process of removing contaminants from wastewater. It includes physical, chemical and biological processes to remove physical, chemical and biological contaminants. Sludge- The residual, semi-solid material that is produced as a by-product during sewage treatment of wastewater. Influent- The dirty wastewater that flows into a water treatment plant. Effluent- The cleaned wastewater or final liquid that flows out of a treatment plant. 13
14 Chapter Title of Topic Sewer System vs. Stormwater Catch Basin Model Day 10 Grade level: 5 Time Frame: mins Desired Outcome from Lesson: Students will be able to model a catch basin system and explain its function. Topic of Lesson: Catch basins are an integral part of stormwater runoff management. Using a small group experiment, students will create their own catch basin system. Students Goals of the Day: Students will be able to explain and model the function of each part of a catch basin. Essential Vocabulary: Catch Basin- A reservoir or well into which surface water may drain off. Grate- Prevents large debris from entering the catch basin. Outflow Pipe- The pipe in which stormwater is carried from the catch basin to a nearby body of water. Extended Vocabulary Wastewater Treatment Plant- The process of removing contaminants from wastewater. It includes physical, chemical and biological processes to remove physical, chemical and biological contaminants. Sludge- The residual, semi-solid material that is produced as a byproduct during sewage treatment of wastewater. Influent- The dirty wastewater that flows into a water treatment plant. Effluent- The cleaned wastewater or final liquid that flows out of a treatment plant. 14

15 Lesson Plan Booklet Correlating Curriculum Lesson Title of Lesson Page Day 1 1 Day 2 2 Day 3 3 Day 4 4 Day 5 5 Day 6 6 Day 7 7 Day 8 8 Day 9 9 Introduction to the Water Cycle Water Cycle Experiment Pollutions Effect on Water Enviroscape Demonstration Modeling a Watershed Impervious vs. Pervious Surfaces Best Management Practices Engineering a BMP for Stormwater Two Separate Systems Day Catch Basins 44 15
16 Lesson 1: Introduction to The Water Cycle Teacher Guideline Overview: One of Earth s four major systems is the hydrosphere. This system is made up of precipitation, condensation, transpiration and evaporation. Preparation Materials Blank Piece of Paper Note to Educator: Acting as a facilitator, force the students to derive the essential questions by asking triggering questions. Instruction: Have the students sit in groups of 3-5. Initially, have the students take 5 minutes and write down all the ways they use water. After some time has elapsed have students raise their hand and have them compile the ideas on the board. Have the students discuss with their groups if the water on Earth today is the same water dinosaurs used. Now let s do a scenario on the board, have a student come up and draw a body of water. Now start explaining that it is a warm summer day, and ask the class what is happening to the water? The student at the board can Phone a Friend if they do not know the answer. Have another student come up and draw a cloud above the body of water, and have them answer how this happened. This can be a group collaboration to get to the answer. Now have students explain what happens when a lot of condensation occurs and the water becomes heavy. Have the next student explain precipitation, and have them relate that the water comes full circle. Throughout this whole board exercise write the words Evaporation, Condensation and Precipitation on the board for the students to visualize what is being taught. Next pass out a blank piece of paper, have the students in each group draw their own water cycle. Make the students have as much detail as possible and give explanations of each part of the process. 16
17 Lesson 2: The Water Cycle Experiment Teacher Guideline Overview: One of Earth s four major systems is the hydrosphere. This system is made up of precipitation, condensation, transpiration and evaporation. Note to Educator: Acting as a facilitator, force the students to derive the essential questions by asking triggering questions. Force the students using their model to identify various parts of the water cycle. Preparation Materials Beakers for every group Small hard plastic cups (So they fit inside beaker) Boiling water Hair Spray Snow or ice Preparation: Collect snow or ice into a bowl, have a pot of boiling or hot water, have enough glass beakers for each group, have hard plastic cups that fit into the top of the beaker. Experimental steps: 1. Have the students break into small groups preferably of 3-4 kids. 2. On the board have questions which engage the students and put them in scenarios where evaporation and condensation and ask them which part of the water cycle it is in each scenario. 3. In each group, assign a material collector. (In more technologically advanced scenarios assign a photographer or videographer who will capture the experiment as it goes.) 4. Have the material collector get one beaker, and a plastic cup full of ice or snow. 5. Walk around with the boiling water and pour 50 ml into each beaker, then have the students place the plastic cup inside the top of the beaker (This should leave space between the plastic cup and the water in the beaker). 6. This is Part 1, have students make observations and write questions for each part. (In this part the students should observe water on the side of the glass as condensation, they might even see water droplets rush down the side of the glass as precipitation. Questions which cover these topics are also a good sign as students are questioning what is happening.) 7. Part 2 begins with having the material collector dump out the now warm water. 8. Once again, walk around and pour 50 ml of water in each beaker and have the students once again place the cup of snow or water into the beaker. 9. Then walk around and spray hairspray into each beaker, the condensed water will attach itself to the hair spray and create a cloud like feature. 10. Once this is done have the students remove the plastic cup from the beaker and watch the cloud of hair spray and also condensed water evaporate into the air. 11. Part 3 is the cloud when the plastic cup is removed. 12. Once the experiment is over, lead a group discussion which the students ask questions they developed throughout the experiment and also have them say where they saw each part of the water cycle (Condensation, evaporation and precipitation). 17
18 Lesson 2: Water Cycle Experiment Name: Directions: As you complete the experiment, fill out the table below with your observations from what you see happening inside the beaker. Part 1: Observations Questions Part 2: Observations Questions Part 3: Observations Questions 18
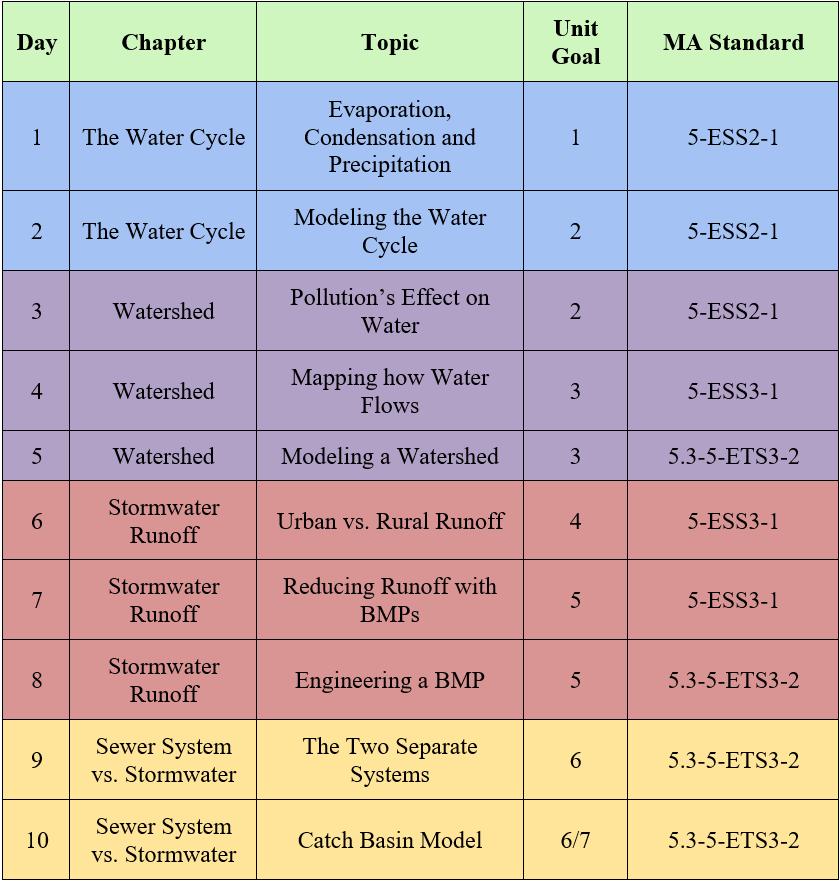
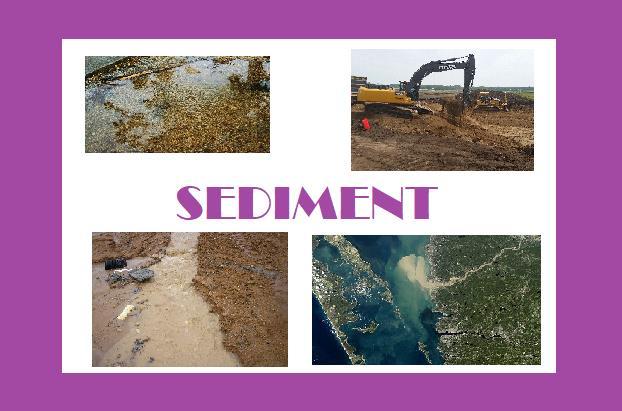
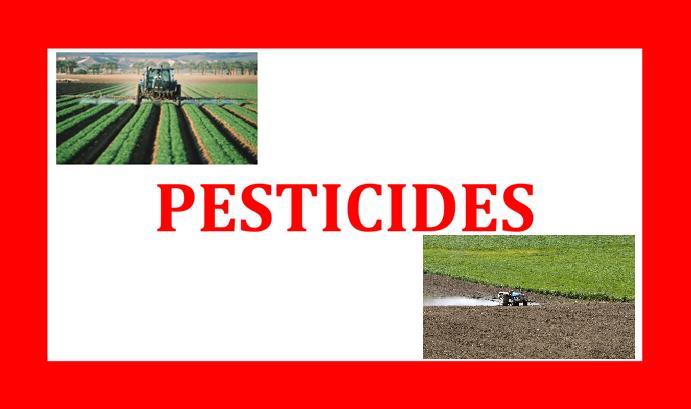
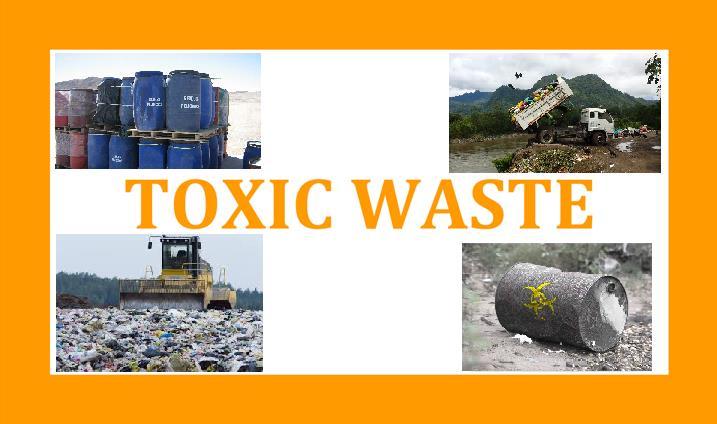
19 Lesson 3: Pollutions Effect on Water Teacher Guideline Overview: Youth will describe and identify the link between land use activities within a watershed and water quality. Note to Educator: Students will evaluate the quality of a water sample (a bag of skittles), graph their results, and form a hypothesis about the land use near the location their sample was collected. Experimental Steps: Teacher preparation 1. Divide the candy into the sandwich bags (you may want to manipulate the bags so that the assortment of candy represents a particular land use area by adding more of a certain type of pollutant, rather than relying on a random mix). PURPLE = Sediment RED = Pesticides GREEN = Fertilizers YELLOW = Oil and Gas ORANGE = Toxic Waste 2. Prepare one bag (30 pieces) per student or one bag per group of students. Each bag represents a water sample from a watershed. In class Preparation Materials Candy (skittles) Plastic sandwich bags Graph paper Colored pencils or crayons Pollutant labels 3. Ask students what a pollutant is. Tell them that each color of skittles represents a different kind of pollutant. You can use the visual aids provided to hang up in the classroom. PURPLE = Sediment RED = Pesticides GREEN = Fertilizers YELLOW = Oil and Gas ORANGE = Toxic Waste Discuss each of these pollutants with the students. Ask the students where the pollutants come from and the positive and negative impacts they have. 4. Distribute the graph paper to each student or group. Tell the students that they will be drawing a bar graph to show the number of pollutants found in their water sample. Show them the sample graph provided. Have the students label the x-axis with the pollutant types and the y-axis with the amount of pollutants. 5. Give each group a water sample. Tell the students to separate and count the number of each pollutant and graph them on the paper. Remind the students that they cannot eat the skittles until they are finished with their graph! 6. Ask the students to try and determine what activities are occurring in their watershed according to the water sample. For example, a water sample from an area with a lot of agricultural use may have more sediment, fertilizer, and pesticides. 19
20 7. Discuss how each water sample is different. While some samples might contain an abundance of one type of pollution, almost all types of pollutants can be found in every sample (even if they are small amounts). Discuss strategies to reduce pollution. How can the students do this on a large scale (in their community) or small scale (in their own home)? In the community: Talk to friends and neighbors about what they have learned Pick up trash in your neighborhood In the home: Encourage parents to fix leaky cars Talk to parents about using less fertilizers and pesticides Recycle items at home Do not dump oil, gas, or other pollutants in the storm drains 20
21 Lesson 3 Graphing Activity Sheet 21
22 Lesson 3 Continued. 22

23 23

24 24
25 25
26 Lesson 4: Enviroscape Demonstration Teacher Guideline Overview: Youth will describe and identify how water flows over impervious surfaces and takes pollutants to local bodies of water. Note to Educator: If looking to purchase Enviroscape table, contact your local DPW official or regional stormwater coalition. Students will be able to visualize and investigate how stormwater runoff travels on impervious surfaces. Experimental Steps: Teacher preparation Preparation Materials Enviroscape Baking Soda Food coloring Cocoa powder Water and spray bottle Cups Setup enviroscape by placing animals, houses and trucks on the landscape Fill spray bottle with water Make different pollutants by adding food coloring to flour Place pollutants in different cups and label each pollutant In class Describe the enviroscape to the students. Place pollutants in different areas on the landscape and describe them to the kids. Pose the question, What do you think will happen when it rains? Let kids work in groups to come up with answer Use spray bottle and spray the landscape Ask what they see. Why is the water flowing on the streets? Why isn t it being absorbed? Explain to the students the difference between pervious and impervious surfaces. Ask the students what the water flows into Ask them if they can come up with examples of each o Pervious: grass, dirt o Impervious: streets, roads (any pavement) Continue spraying until pollutants end up in river Ask the students if they can explain why this happened o Answer: stormwater runoff, water flows over impervious surfaces picking up pollutants on the roads, flowing down storm drains and entering local bodies of water. 26
27 Lesson 5: Modeling a Watershed Teacher Guideline Overview: Students will use maps and sketches to identify local watersheds and the bodies of water they flow to. Preparation Materials Handout Note to Educator: Google Earth will be used to show students a map of the watershed. After the lesson, they will complete an assignment to map their watershed. Warm Up 1. Ask if anyone lives in a watershed. Explain that everyone lives in a watershed once the class has a chance to answer. 2. Show Dr. Drain the Rain Brain Watershed 101 Video. This video is easily found on youtube.com by searching Dr. Drain the Rain Brain Watershed Write the word watershed on the board and brainstorm possible definitions of a watershed. 4. Once everyone has a chance to give input, explain that a watershed is an area or ridge of land that separates water flowing to a common body of water. Classroom Instruction 1. Open Google Earth on a projector or on student electronic devices and explain that (insert community) has its own watershed. 2. Ask students to share what body of water in the community they would like to look at first and type it into Google Earth. 3. Explore the geography of the community and show students the different bodies of water that lead into larger bodies of water in the community. 4. Explain that water flows from higher to lower elevation, using a topographic map to show how rivers and streams flow in the community. 5. Explore various locations of different climates and landmarks to show the difference in watersheds. Homework assignment: Draw a map of your neighborhood s watershed, starting at your house. Sketch the path of sanitary sewer systems in your neighborhood. Extra involvement: Contact your local Town Engineer and DPW representatives to give a presentation on Geographic Information System (GIS) mapping and to talk about water as a career. Evaluate Create a Google Form or a quick type of survey to quickly evaluate if the students comprehended the lesson taught. 27
28 Lesson 6: Impervious vs. Pervious Surfaces Teacher Guideline Overview: Urban and Rural environments have different effects on stormwater runoff, a main factor being the increased impervious surface in an urban environment. Note to Educator: Acting as a facilitator, force the students to derive the essential questions by asking triggering questions. Instruction: First break the students into groups of 3-5. Show Dr. Drain the Rain Brain Stormwater 101 Video. This video is easily found on youtube.com by searching Dr. Drain the Rain Brain Stormwater 101. Have two clear paint pans to demonstrate the difference between impervious and pervious surfaces (This can also be done in groups of 4). Cover one paint pan with soil, and the other with saran wrap. Ask the students what they think each pan represents. Now have a student come to the front of the class and pour 8 oz. of water on the top side of each pan. Ask a driving question of in which environment the water reached the bottom of the pan first. Why? (Explain to the students that these two pans represent different environments, one being a rural environment and one being an urban environment. The saran wrapped pan is the urban environment with a very high percentage of impervious surfaces. The soil pan represents a rural environment where water can infiltrate the ground.) Preparation Materials 2 Clear Paint Pans Enough Soil to Cover Paint Pan 2 8 oz. Cups of Water List of Example Pollutants Salt, sand Animal waste Fertilizer Oil, gas Garbage (Cigarettes, wrappers, etc...) Show the students two photos on the worksheet and pass out the worksheet, one being an urban setting, another being a rural setting: o Have the students investigate with their group and discuss the differences of what will happen when it rains. o Have the groups identify various things that create an increase/decrease in stormwater runoff in each environment. o Have the student s think of items stormwater runoff could pick up along its way to the storm drain in an urban environment. Extended Learning with Extra Time: o Now, pull up google maps on the board (Have the students pull it up on their tablets) and look at the aerial view of your school, have each group identify an impervious area (Parking lots, roofs, streets/sidewalks, compacted clay softball/baseball fields). As each group identifies an area, using google maps calculate the area of that space (Right click, measure distance, place points on each edge of the space) have the students write this area down it will be needed later. (This step can also be done with a printed out aerial view of the school with a grid placed on top of it to manually calculate the area.) o Once each group has an area specific to a space in the aerial view, have them identify some pollutants that could be found in that area. Next, explain how in a typical rain storm it can rain more than an inch. Using 1 inch of rain as the event, have the students calculate how many gallons of stormwater runoff is created by their impervious area on the schools lot. (Review volume formula L*W*H, 1 ft 3 to 7.48 gallon conversion, 12 inch to 1 foot conversion) 28
29 Lesson 6 Activity What will happen when it rains? Where does all the stormwater go? List sources that increase or decrease stormwater runoff. List pollutants that rainwater could pick up. 29
 into storm drains The stormwater goes into the storm drains and flows through pipes into a local body of water Water will infiltrate the")

30 Lesson 6 Activity Answer Key What will happen when it rains? Where does all the stormwater go? Water will flow from the roads, sidewalks, roofs (gutters) into storm drains The stormwater goes into the storm drains and flows through pipes into a local body of water Water will infiltrate the ground through absorption, Some water will flow on top of the grass into puddles or small ponds Stormwater will absorb back into the water table or flow naturally into bodies of water List sources that increase or decrease stormwater runoff. List pollutants that rainwater could pick up. Increase stormwater runoff- Sidewalks, roads, roofs, decrease in vegetation Water bottles, leaves, trash, salt and sand, oil and gas Decrease stormwater runoff- The open space and vegetation will allow absorption Fertilizers, paint, animal waste 30

31 Lesson 6 Extended Learning Activity This is an example of an aerial view used in the extended learning part of the lesson. By using Google Earth find an aerial view of your own school. Screen shot this view using the snipping tool, once you have the picture place a grid table on top of the picture to do this activity manually. 31
32 Lesson 7: Best Management Practices Teacher Guideline Overview: Students will learn how runoff can be reduced through best management practices. Note to Educator: Students will be given a worksheet and have to determine where best management practices can counteract pollution. Warm-up 1. Play video one 1 (Rain Gutter) ask the students what they see and what is happening a Now play video 2 (Rain Barrel) a Ask the students again what is happening 4. Explain to the students that what they see is a rain barrel, a barrel used to collect and store rain water runoff, typically from rooftops via pipes. 5. Explain that a rain barrel is an example of a best management practice, a type of water or pollution control. The rain barrel is an example of pollution control because it collects pollutants from gutters on rooves and can be used as irrigation that naturally gets filtered in the ground. It also prevents water from turning into runoff and further flowing across impervious surfaces. Classroom Instruction 1. Ask if they can describe what best management practices are. a. A BMP is a type of water pollution control 2. Ask if they can think of examples of best management practices 3. Pass out the handout attached. 4. Have children work in groups of 3-4 to locate different causes of pollution 5. Bring entire class back together and ask the students to share their discoveries 6. Ask students how these pollutants enter the water 7. Introduce different pollution controls 8. Show pictures of different BMPs in BMP PowerPoint. a. Ask students what they think the picture is b. Then tell them Evaluate Preparation Materials Handout Create a Google Form or a quick type of survey to quickly evaluate if the students comprehended the lesson taught. Some example questions to include in the Exit Ticket are listed below: Do rain barrels collect stormwater from roofs of buildings? Do you think more BMP s for stormwater should be implemented? Which BMP for stormwater runoff would you install in a parking lot? Which BMP allows stormwater to soak into the soil and has plants that use some of that water? 32


33 Lesson 7: List of Best Management Practices Bio Swale- landscape elements designed to concentrate or remove debris and pollution out of stormwater runoff water. Rain Garden- is a garden of native shrubs, perennials, and flowers planted in a small depression, which is generally formed on a natural slope. It is designed to temporarily hold and soak in rain water runoff that flows from roofs, driveways, patios or lawns. Rain Barrel- is a water tank used to collect and store rain water runoff, typically from rooftops via pipes. Bio Swale- landscape elements designed to concentrate or remove debris and pollution out of stormwater runoff water. 33


34 Permeable Pavers- a method of pavement that allows water to filter through. Signage- Making people aware of where pollutants flow too. Aggregate Strip-a material or structure formed from loosely compacting rocks. 34
35 35
36 Lesson 8: Engineering a BMP for Stormwater Teacher Guideline Overview: To combat stormwater runoff Best Management Practices are implemented. (Including rain barrels, rain gardens, swales, green roofs, silt fences, permeable pavement) Note to Educator: Acting as a facilitator, force the students to derive the essential questions by asking triggering questions. Preparation Materials Printed out handouts Instruction: Read the students the two scenarios on top of each handout. Have half the class work on scenario one and have the other work on scenario two (Pass out each handout). Have the students discuss some BMP s for each scenario in their groups, lead a discussion on each scenario that gives the students ideas of which BMP to design. Next, have the students engineer (Draw) the whole scenario including their BMP with labels of parts. Then using the following guiding questions have the students scientifically write about their own BMP: o What BMP did you choose and why? o How do the parts of your BMP work with one another? o What is the significance of the BMP s location in the scenario? o Explain how your BMP will help mitigate the stormwater runoff issues. 36
37 Name: Lesson 8: Engineering a Best Management Practice 1. Farmer Joe owns a farm at the very top of a hill overlooking a town. This farm includes many animals, chemically treated plants, and loose soil. There was a large rainstorm last week and the stormwater runoff carried fertilizer, chemicals, animal droppings, and soil to a river nearby. Farmer Joe calls you, the Town Engineer, for help to prevent polluting the storm water runoff in future storms. Engineer a Best Management Practice model to incorporate into a scenario. Use scientific writing to back your reasoning for your design. Bonus: Draw your design! 37
38 38
39 2. Lawyer Laura lives in an apartment building in the highly populated city of Boston, MA. Downhill from her apartment is an office building with a large parking lot. The entire path from Lawyer Laura s apartment to the parking lot is made of streets and sidewalks. People in the city walk their dogs without picking up after them, drop food wrappers, and do not clean up oil spills from their cars. There was a large rainstorm last week and pollutants were carried by the stormwater runoff down storm drains that drain directly to the Boston Harbor. Lawyer Laura calls you, the Town Engineer, for help to prevent polluting the storm water runoff in the future. Engineer a BMP model to incorporate into a scenario. Use scientific writing to back your reasoning for your design. 39
40 Bonus: Draw your design! 40
41 Lesson 9: Two Separate Systems Teacher Guideline Overview: Students will learn differences between sanitary sewer systems and stormwater collection systems, the parts of each system, and how they relate to one another. Note to Educator: Students will watch a short video on a catch basin and complete a worksheet identifying characteristics of each system. Preparation Materials Handout Warm-up 1. Show Dr. Drain the Rain Brain Catch Basin 101 Video. This video is easily found on youtube.com by searching Dr. Drain the Rain Brain Catch Basin Ask students what this is. a. Reiterate that a catch basin is a reservoir or well into which surface water may drain off. Classroom Instruction 3. Ask students if the catch basin is the same place that wastewater goes (water from your showers, sinks) a. It is not, they are separate! b. Explain that this is only for stormwater runoff and that the sludge shown is from pollutants that stormwater runoff collects before it goes down storm drains 4. Explain that a sanitary sewer is a system of underground pipes that carries sewage from bathrooms, sinks, and other plumbing components to a wastewater treatment plant where it is filtered, treated and discharged. 5. Hand out the worksheet for students to work on in groups of Have students share their answers once groups are done. Evaluate Create a Google Form or a quick type of survey to quickly evaluate if the students comprehended the lesson taught. 41

42 Name: Lesson 9: Stormwater Systems and Sanitary Sewer Systems Below is a picture of a stormwater system and a sanitary sewer system. The parts of each system are labeled with numbers. 1: This is where this system starts. Water flows from here to the next part of the system. What is this? 2: This is where this system starts. Water flows from here to the next part of the system. What is this? 3: What type of pipe is this? (Hint: the type of the pipe is the same as the type of the system!) 4: Where is this water going to? 5: Where is this water going to? 6: What type of pipe is this? (Hint: the type of the pipe is the same as the type of the system!) 42
43 Answer Key: 1. Household plumbing (sinks, bathroom, kitchen) 2. Catch basin/storm drain 3. Sanitary Sewer 4. Wastewater treatment plant 5. Natural water bodies 6. Stormwater 43
44 Lesson 10: Catch Basins Teacher Guideline Overview: Youth will use models to describe how water flows through a catch basin and to reduce pollution. Note to Educator: Students will build a model of a catch basin, understand common pollutants in storm water runoff and how they arrive in catch basins, and explore methods to reduce pollution. Experimental Steps: Teacher preparation 1. Before this experiment, assign students to bring materials from home that could be used to clean polluted water. Examples include sponges, coffee filters, and screens. 2. Cut holes into the side of the plastic cups that the straws will fit snugly into. In class: Preparation Materials Plastic cups Straws Green and brown food coloring Three brown, dry twigs One cup of a mix of soil, sand, leaves and pebbles ¼ cup vegetable oil 1 cup of food scraps and food wrappers 1 cup yard waste - grass clippings, leaves, nuts and small sticks 1 cup paper waste shredded newspaper, cardboard, tissues and paper One copy of list of seven scenarios A long stick or yard stick Materials brought from students homes to clean up the water Draw or show a picture of a catch basin to the class and ask the following questions: Q: What is this? A: A catch basin Q: Where are these typically found? A: At the point where a street gutter discharges into a sewer. Q: What do they do? A: Catch and retain matter that would not pass readily through the sewer. Explain that the class will now make a catch basin. 1. Pass out one cup and two straws to each group of students. 2. Instruct students to place the straw into the holes in the cups. Explain that these straws represent the pipes of the catch basin. Have the class discuss each part of the catch basin and their function. 3. Have students take turns reading descriptions of each pollutant to the class while a student from each group should drop the pollution into the catch basin. 4. Stir the contents as each pollutant is added. 5. Ask students to describe how the quality of the water changed during the activity. Ask what they think happens to each type of pollution in the real world. 6. Discuss the definition of nonpoint source pollution and explain that the pollution in the lesson are examples of nonpoint source pollution. 7. Ask students if nonpoint source pollution impacts the environment. Explain that it effects if people can drink, swim, and fish in the water and that it can be harmful to the animals and plants that live in or near water. 44
45 8. Homework assignment (Assigned Beforehand): a. Students should create a method that would remove pollutants from stormwater. Students should bring materials to class and test their methods in their catch basins. b. Award a prize or certificate for best method. c. Explain that the best method is to prevent pollution, not remove it afterwards. Eight Pollutants (below) Pollutant 1: Mix 2-3 drops of green food coloring with the water in one of the bottles. Empty this green water into the catch basin. Explain that this represents chemicals sprayed onto plants to drive away or kill insects. Pollutant 2: Add the mix of soil, sand, leaves and pebbles. This represents soil, sand, leaves, and pebbles that are swept away by a heavy flow of water during erosion. Pollutant 3: Empty the vegetable oil. This represents automobile oils that leak from cars or are dumped during car maintenance and are carried to local surface water bodies. Pollutant 4: Add the paper waste. This represents trash and litter that is swept by stormwater runoff down storm drains. Pollutant 5: Add grass clippings. This represents the waste grass clippings turn into when they are not properly disposed of and left to rot until they are swept down storm drains by stormwater runoff. Pollutant 6: Add twigs or playdoh logs. This represents pet waste that is left on roads or lawns that stormwater runoff will wash down storm drains. Pollutant 7: Add food scraps and food wrappers. These represent food trash and wrappers from people who do not throw away their trash. Pollutant 8: Mix 2-3 drops of brown food coloring. This represents fertilizer and weed killer chemicals that are swept into storm drains by stormwater runoff. 45