CONVEYOR SYSTEMS GENERAL OPERATIONAL MANUAL
|
|
|
- Florence French
- 5 years ago
- Views:
Transcription
1 CONVEYOR SYSTEMS GENERAL OPERATIONAL MANUAL TRANSFER BAG CLOSING WIRE MESEH BAG FLATTENER 90 DEGREE POWER CURVE INCLINE 230 Series Auger Packer Rev. C OF 19
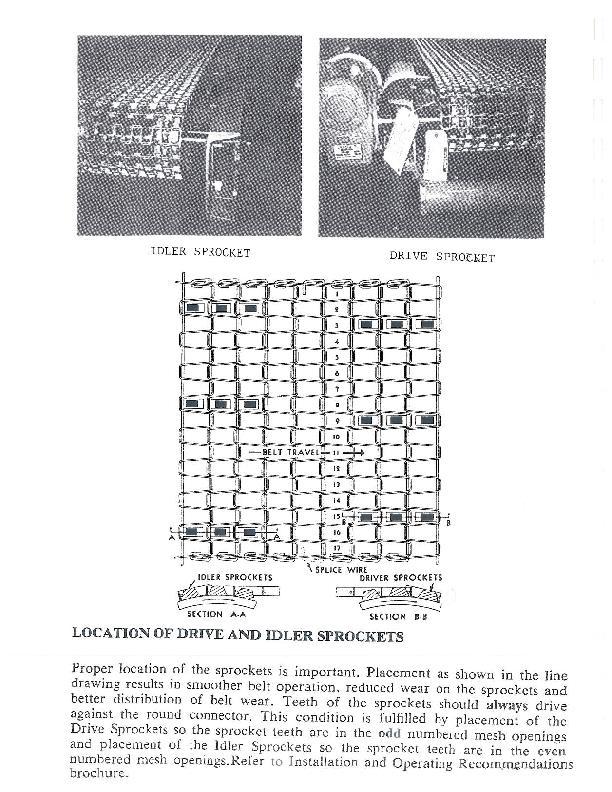
2 INFORMATION & OPERATIONAL NOTES FOR CONVEYORS When conveyor is first uncrated check oil in gear drive Grease bearings Make sure tension on belt is tight On a Daily Basis with Regular Operation Check for wear on belt and that lacings are secure Check for wear on rollers Maintain grease in bearings and gear drive Operational Information Wire mesh conveyors ALWAYS pulls TOWARD the gear drive, moving down the length of the conveyor toward the motor/reducer. Position your conveyor so this direction runs smoothly in your location. DO NOT WIRE THE CONVEYOR TO RUN IN THE OPPOSITE DIRECTION. Wire mesh is designed to push/pull on specific rods. Rewiring the motor to move in the opposite direction push strain on units not designed for the pressure. Check the belting on a regular basis for stress on the steel rods that connect the mesh and provide spaces for the sprockets to push/pull the belting. 2
3 Table of Contents Contents Page Introduction. 2 Installation 2 Leveling 2 Lubrication 3 Belt 3 Motor Torque Arm Adjustment... 3 Adjustments. 3 Speed 3 Fixed Drive 3 Mechanical Variable Speed System.. 3 Belt Take Up. 3 Maintenance 3 Speed Reducer.3 Bearings... 3 Belts. 3 Options. 4 Tip Bar. 4 Tip Fence Degree Kicker.. 4 Replacement Parts & Illustrations Standard Conveyor Components (NO ILLUSTRATION) 24 Wide Positive Tracking Components (NO ILLUSTRATION) Full Pallet Conveyor Feeder Accelerator Conveyor Line Roller Conveyor (Accumulator) Slider Bed Conveyor Gravity Conveyor Incline Flattener Conveyor Horizontal Flattener Conveyor Reject Conveyor 3
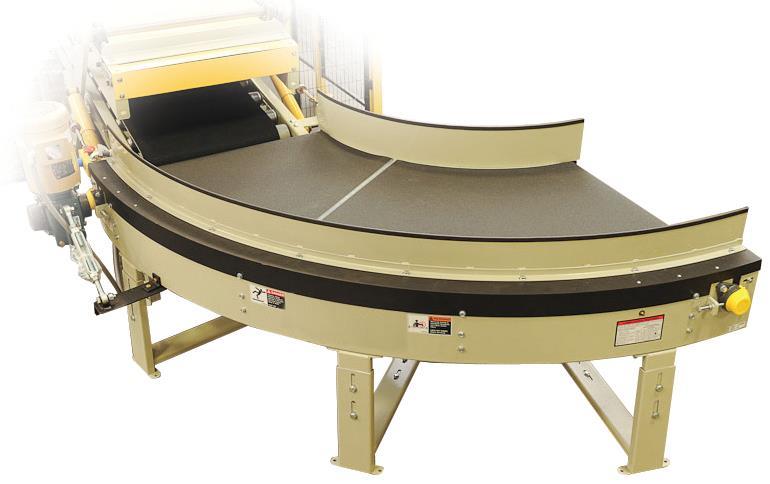
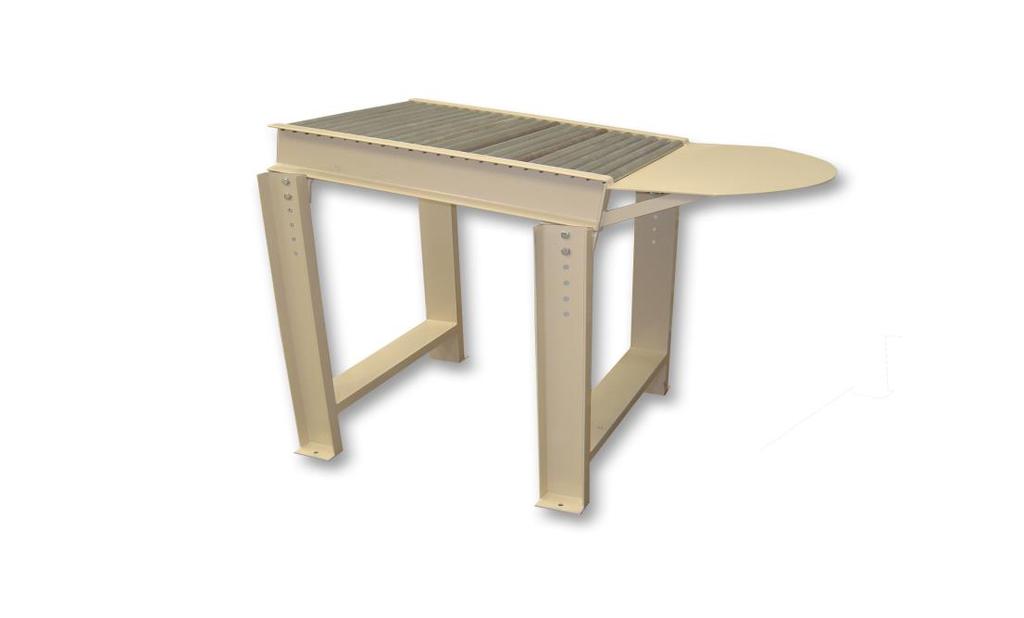
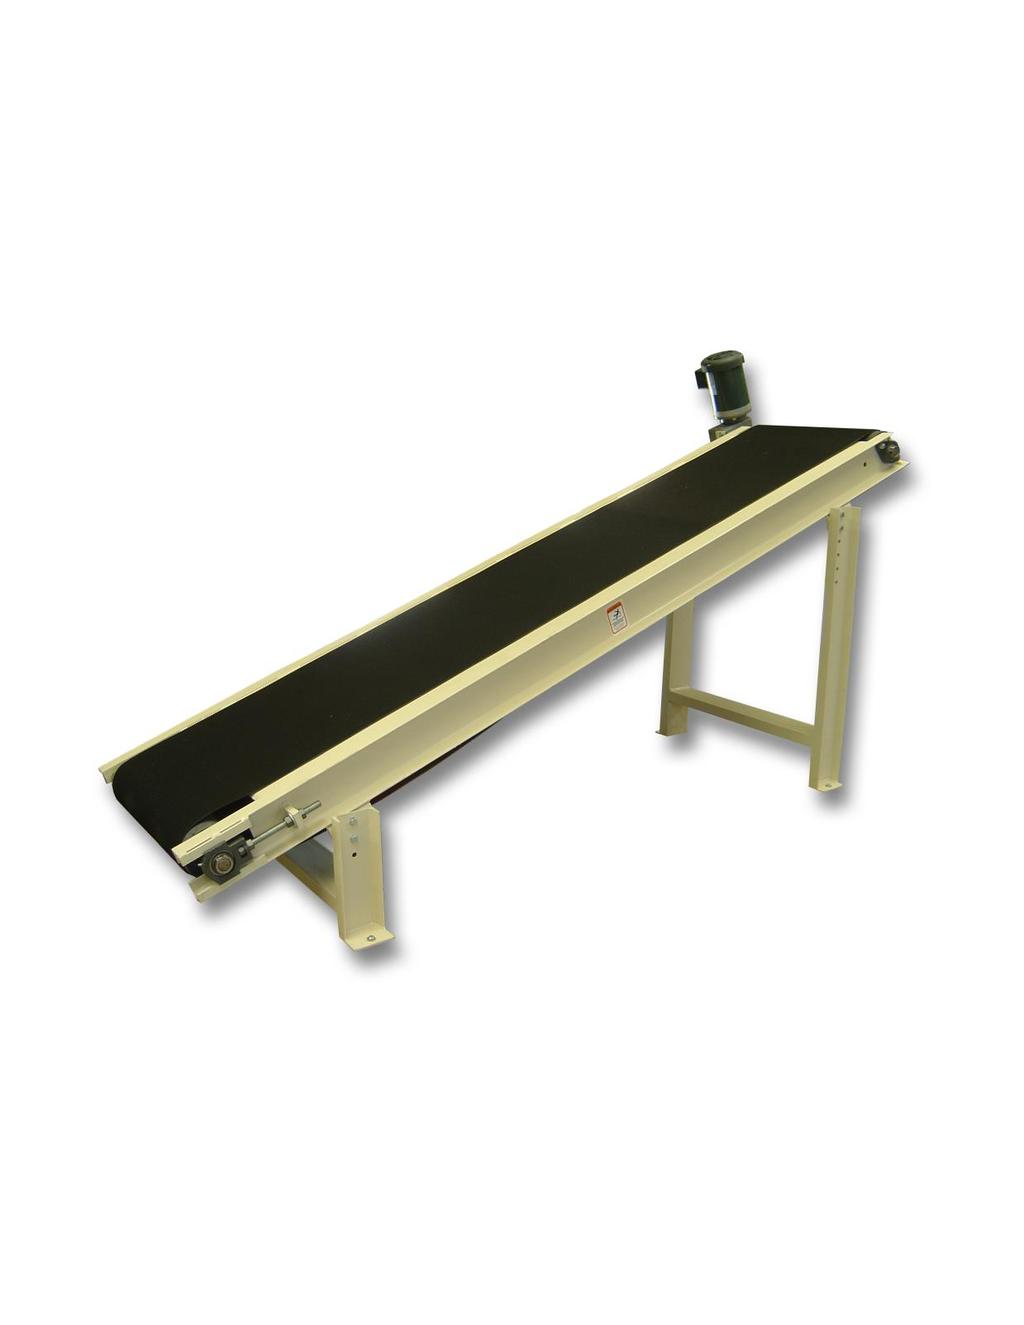
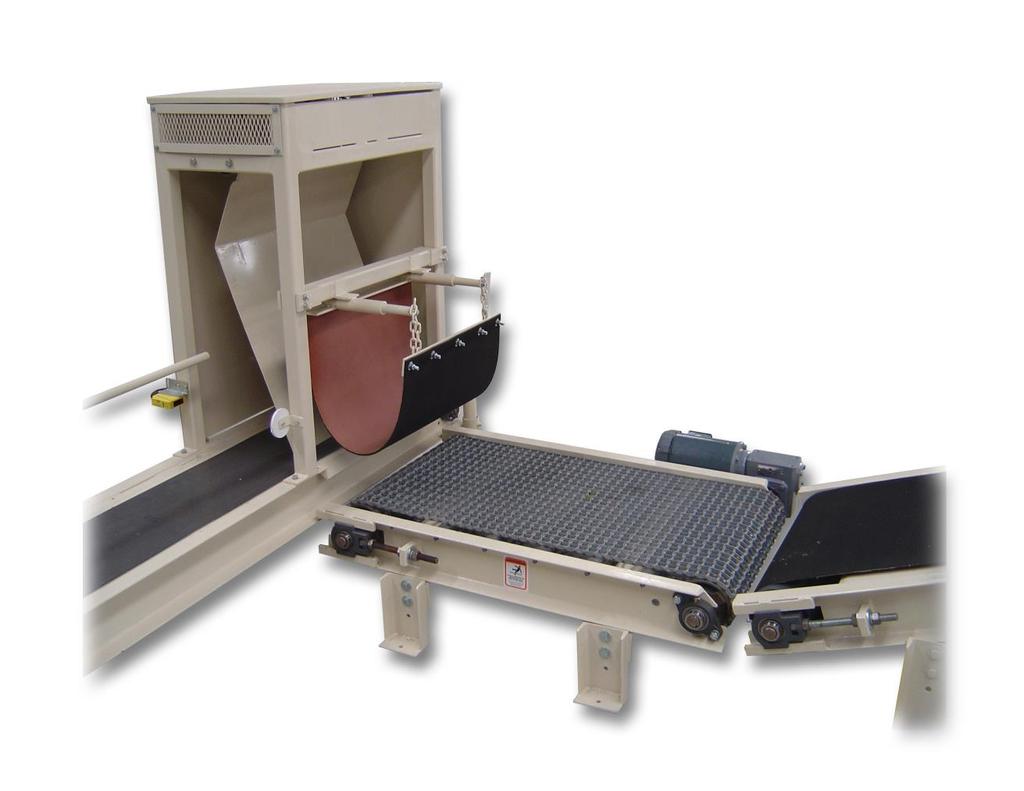
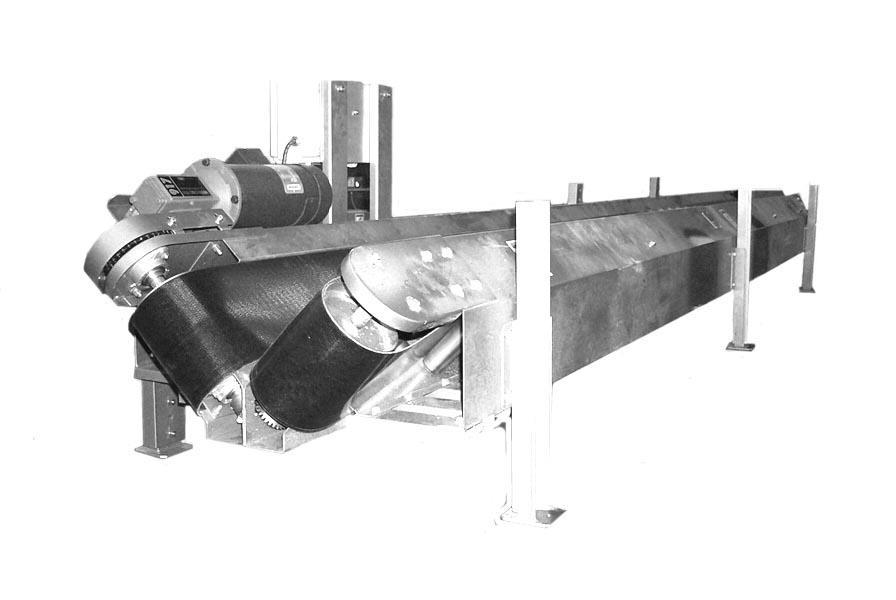
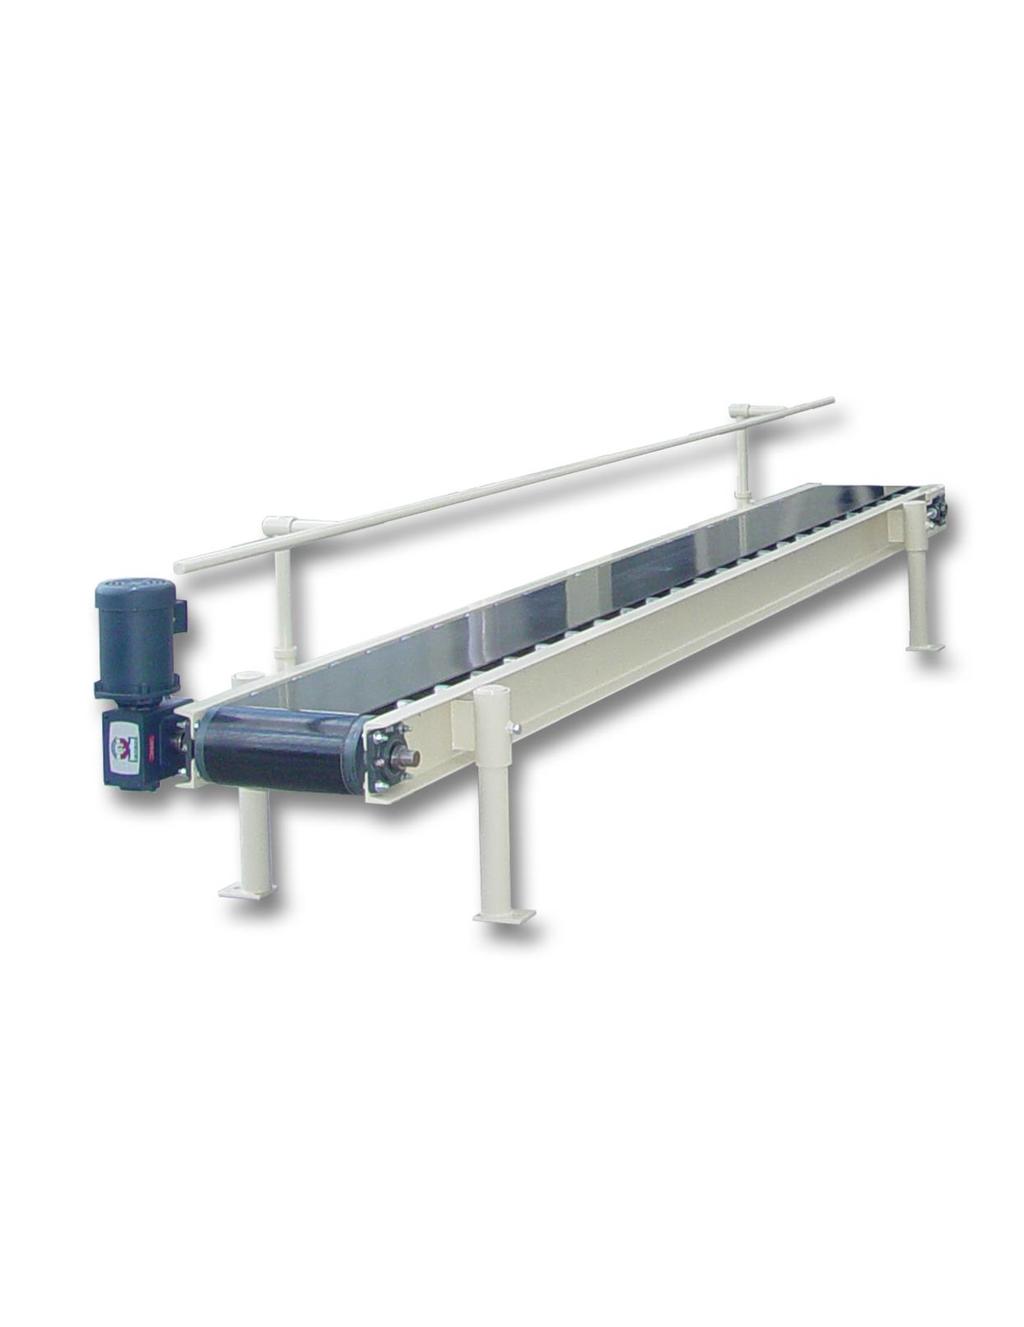
4 CHOICE BAGGING EQUIPMENT CONVEYOR MANUAL Introduction The Choice Bagging Equipment Conveyor Series, has been designed for the safe and efficient movement of filled bags around the Manufacturing Facility. This manual should be read thoroughly to insure the safe and proper installation, start up, and operation of the C.B.E. conveyor. Prior to shipment each conveyor is thoroughly tested for proper operation. With careful installation and preventative maintenance, the C.B.E. conveyor will provide trouble-free and dependable operation. This manual covers all models of the Choice Bagging Equipment Conveyors. A. Packer Conveyor Receives filled valve bags from the filling machines and moves them away from the filling area. B. Closer Conveyor Moves the filled Pinch Bottom bags through bag closing machines. C. Transport Conveyor Receives bags from a Packer or Closer conveyor and transports them to various locations around the plant. D. Live/Roller Accumulator Conveyor Accumulates a series of filled bags on live rollers awaiting transport to another operation. E. Full Pallet Conveyor Receives full pallet from a palletizer or a bulk bag filler and moves them down stream. F. Gravity Receives full pallet from either the palletizer or bulk bag filler and is a non motorized conveyor. G. Horizontal Flattener Receives bags from a Packer or Closer conveyor and will elevate the bags to a higher elevation (up to 20 degree incline) H. Incline Flattener Receives bags from a Packer or Closer conveyor and will elevate the bags to a higher elevation. I. Feeder/Accelerator Usually receives bag from the accumulator conveyor and feeder to the palletizers. J. Slider Usually used in conjunction with a check weigher. K. Positive Tracking A short conveyor with a V-Groove on the underneath side of the belt to allow the belt to run true. L. Reject A pivoting style conveyor that works with a check weigher and/or metal detector. This conveyor rejects the bag that is either under or over weigh or a bag that contains metal. Please note which model conveyor you have purchased when referring to his manual. Individual conveyor model characteristics will be mentioned separately. Installation 4
5 Even though Choice Bagging Equipment Conveyors are relatively simple machines to install, a few checks and precautions at installation will decrease the possibility of problems later. Leveling The conveyor is equipped with adjustable legs for height change due to floor irregularities etc.. Adjust the legs of the conveyor to the proper height required to keep the conveyor level. (This does not apply to inclined conveyors.) Lubrication Insure there is adequate lubricating oil in the reducers of the conveyor. Refer to the manufactures recommended oil for the maximum torque requirements. Insure the vent hole is clear. If a solid vent plug is furnished, remove the solid vent plug and replace it with the vent plug supplied with the reducer. Belt Install the conveyor belt, if not already installed, as loose as possible, but still tight enough so no belt slipping occurs. See Figure 1. After the electrical wiring is completed, the conveyor should be run without a load on the belt. This will enable the belt racking to be properly adjusted. See Figure 2. Maintenance Motor Torque Arm The Packer/Transport conveyors are equipped with a shaft mounted motor. Adjust the torque arm turn buckle or the torque arm bracket to insure the motor is in a horizontal position Speed Reducer Periodically, insure the reducer is filled with the proper oil as per manufactures specifications. For all other maintenance, refer to the manufactures maintenance bulletin to insure conformance to the maker s requirements. Bearings The end bearings on the conveyors are factory sealed and have been lubricated before shipment. Periodically, the bearing should be checked for contamination and re-greased to prevent damage. The environment of the conveyor will dictate the frequency of re-greasing the bearings. (The dirtier the environment, the sooner the bearings should be checked.) 5
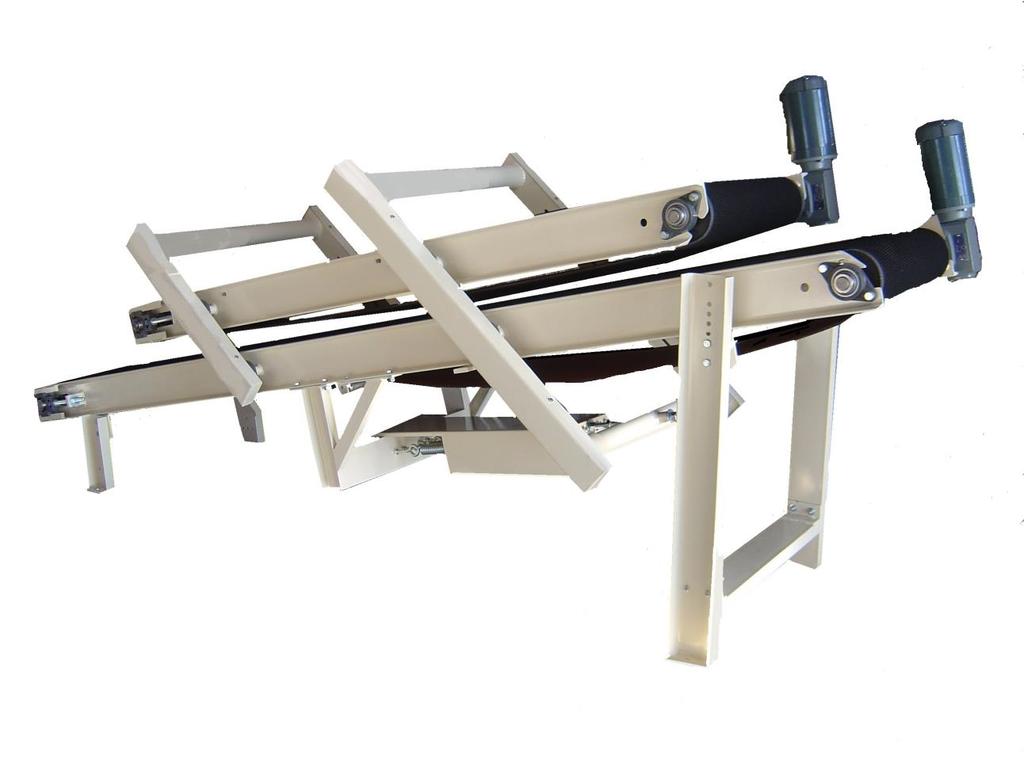
6 Belts Check the belt periodically for wear and alignment. Bag belt alignment will quickly cause the belt to wear unevenly. If the belt needs alignment adjusting, refer to Figure 1 and 2, to aid in re-aligning the belt. Options Tip Bar The Tip Bar is provided when the bag is exiting one conveyor onto another and needs to be tipped over in the process. The tip bar may be adjusted using the holes provided at the end of the conveyor. See Figure 5. The tip bar should be adjusted properly when the front of the bag lands on the tip bar and the back of the bag flips over the tip bag. Tip Fence The Tip Fence is provided for the conveyor receiving a bag from the conveyor with a tip bar. The fence simply stops a tipped bag from flipping over the side o the conveyor onto the floor. The tip fence should be placed on the side of the receiving conveyor, directly in front of the tip bag of the sending conveyor. 90 Degree Kicker The 90 Degree Kicker is used on closer conveyors when it is necessary to transfer a standing upright bag, to a transport conveyor running 90 degrees (perpendicular) to the closer conveyor. 6
7 7
8 8
9 9
10 10
11 11
12 12
13 13
14 14
15 15
16 16
17 17
18 18
19 19