ubooks User Guide Table of Contents Login
|
|
|
- Patrick Burke
- 5 years ago
- Views:
Transcription
1 Table of Contents Login Org. Management 1.1 Org. Profile Manage Roles Users Digital Signature Manage CA Configuration 2.1 Additional Field Configuration Document Number Generation Template Selection Masters Management 3.1 Supply Master Supplier Master Customer Master Unit of Measure (UOM) Setup GL Accounts Data import 4.1 Import Data Export Data Other Transactions 5.1 Record Expenses Manual Journal Opening Balance Manage Inventory Supply Adjustments Manage Orders 6.1 Sales Order Purchase Order Branch Transfer Sales Transactions 7.1 Sales Transaction Sales Return Sales Credit note Sales Debit note Cash Sales
2 8. Purchase Transactions 8.1 Purchase Transaction Purchase Return Purchase Credit note Purchase Debit note Point of Sales (POS) 9.1 Point of Sale (POS) POS Return POS Config POS Posting Import / Export Transactions 10.1 Import Transaction Export Transaction Payments 12. E-Way bill 13. Reports 11.1 Payments Receipts Advance Payments Advance Receipts Registration process for NIC Credentials E-Way bill generation in ubooks E-Way bill amendment Accounting reports Journal Report Account Transactions Trial Balance Profit and Loss Account Balance Sheet MIS Reports Trade Receivables Trade Payables Inventory Valuation Summary Cash/Bank Book Bank Reconciliation 2
3 14.1 Bank Reconciliation Cleared/Uncleared queue Offline Functionality
4 Log in Once User receives the login credentials to respective id from ubooks, User should log in to ubooks with o User name o Password o Company code. Click on Sign in will display with change Password screen. Enter the new password and click on Save. After log-in the Main screen displays Organization, Location, Branch, User name and Last logged in time in the Header area. Multiple tiles display with Masters, Transactions, Reports and GST Returns 4


5 1. Org. Management Organization Management tile is to maintain 1. Org Profile Under Organization displays locations and branches 2. Manage roles. 3. Users. 4. Digital Signature. 5. Manage CA. 1.1 Org. Profile In this screen, displays locations and branches created and user can add location under the organization and create branch under a location, Navigation Click Org. Management Org. Profile 5
6 Location: To add a new location, Click on Add Location. Manage Branches: To add Branches to locations, click on the respective location screen with Location information appears scroll down under Manage Branches, click on Add Branches. 1.2 Manage Roles: Navigation Org. Management Manage Roles Once the users are created and assign roles. Click on Manage roles list will be displayed of List of Roles will be displayed. To create a new Role, Click on New Role button Enter the Role Name and Role description if any Under Roles Permissions block check on each screen and Check the box with what type of controls are assigned to the user like Create, Update, Delete, View and Print Here we can expand each screen level and allocate access controls to the defined role. Click on Save to save the Roles. 6


7 1.3 Users: Click on Users, displays list of users created. Navigation Org. Management Users Create users who are authorised to access ubooks Click on add user. Enter the required fields, along with username and password. Roles (created under Manage Roles) can be assigned for single/multiple locations to the user from the drop-down list. 7

8 1.4 Digital Signature: Add digital signature for transactions like Sales invoice, when printing option to opt for digital signature. To update the digital signature, authenticate the signature via USB Token. Once the USB token authentication is done, Click on new sign in digital signature screen. Select the token type, click on browse and select the signature from the system. Enter the digital signature details. Under Valid in, select the required screens from the pop-up menu. 1.5 Manage CA: Using this screen user can even maintain the charted accountant for your business. Navigation Org. Management Manage CA Once user clicks on Manage CA, user will be navigated to Associate tax practitioner details screen. 8


9 User can select the Tax practitioner /CA from the dropdown in Tax practitioner / CA Name field. Note: All the CA s who will get registered as a Tax practitioner in ubooks portal will be displayed in the dropdown. Once the Tax practitioner /CA is selected, Name and will be pulled from the total and displayed here. Then user can grant access controls to CA to access the application for filing. 9


10 If in case CA is not available in the list for selection, user can invite their own CA by inviting the CA to ubooks. User need to click on Invite option. Then user should enter the name and Id of the CA to send the invitation and click on invite. Once user clicks on invite, an invitation will be sent to CA through asking them to register in ubooks portal. 2. Configuration: Configuration tile allows: 1. Additional Field Config. 2. Document Number Generation. 3. Template Selection. 2.1 Additional Field Config: Navigation: Configuration Additional Field Config. ubooks is provided with pre-defined fields, create or add additional fields for Transactions To add a new filed e.g. Vehicle No in Sales Invoice. Click on New Config in Field Details screen, enter the required information like Field Name, Field Type, Field Data type and Screen name. Select Is Printable for print 10
11 2.2 Document Number Generation: ubooks is provided with pre-defined Document Number series for each Transaction and Master. Option to setup user-defined Document Number Series is provided. To create Document Number Series Generation: Navigation: Configuration Document Number Generation o Click on New o Enter the details for Document Number Type, Master Type, Prefix, Starting No, Number of Digits, Suffix, Reset type, Date Format. o Once the details are provided, In Preview displays the sample format 2.3 Template Selection: Using this screen user can select the invoice template from the pre-defined template list, in which format the invoice should be printed. Navigation: Configuration Template Selection 11

 2.")
12 Once user clicks on Template Selection, user will be navigated to the template list page. User have an option to preview the template, for that user need to click on template. Once user finalize the template, click on save option to save the template. 4. Masters Management: Master management tile allows to maintain Masters of an Organization. 1. Supply Master (Item/Services) 2. Supplier Master 3. Customer Master 4. UOM (Unit of Measure) 5. Setup GL Accounts Note: Masters can either be manually entered or Imported from MS Excel in required format 12

13 3.1 Supply Master (Item / Service master): Create Supply Master the Organization deals with. Supply master can be created with Stock or Service type master Navigation: Masters Management Supply Master Click on Supply Masters will display the list of Supply created in this screen Click on Add New Supply to create a Supply type Item or Service Supply Information: Select the type of Supply Goods or Service. Enter the details in below said fields. A. Supply type B. Supply Code C. Supply Name D. Unit Group E. Stock Unit (UOM) F. Supply Type G. Supply Category H. HSN Code I. HSN Description Select the type of Supply Goods or Service. Supply code can be manual, or system generated configured in Document Number Generation. Unit Group is the combination of unit of measures. Select the required unit group to assign. Segregate the supply based on its nature like Finished Goods, Raw material, packing material, semi-finished goods, Trading goods, Capital Goods For Service related supply Supply Category will be applicable. User should select the supply type. Enter the MRP of the item. 13
 Is Active Supply: allow active or de-activate the stock item in transactions If the item/service is saleable, then user need to select the opton.")

14 Is Stockable: allows to maintain the stock Is Saleable Item: allows to sale the item in Sales Invoice screen Include Stock Valuation: allows to calculate the stock value (default method is Periodic Weighted Average) Is Active Supply: allow active or de-activate the stock item in transactions If the item/service is saleable, then user need to select the opton. Enter HSN/SAC code to the supply for tax calculation. Assigning of HSN / SAC code is done in two ways A. Enter the HSN Code manually and click on Search HSN, when result is displayed with multiple options, Click on the required code. B. Click on key button to manually select from Section, Chapter, Header and Sub- Header as per GST norms. Based on the criteria specified in above steps tax percentage is populated in Selected Schedule Rate Overwrite the Tax percentage, Check the option Override Tax Rates 14

15 Enter the default information for Sales and Purchases A. Sales Unit Price: Enter the default price which should appear when making a Sales or Purchases B. Sales Account: Select the default Sales Account from the drop-down list which should appear when making a Sales or Purchases C. Default Saleable qty: Enter the default quantity which should appear when making a Sales or Purchases D. Sales UOM: Select the default UOM, by default the UOM selected earlier will appear here, we can overwrite the new UOM 3.2 Supplier Master: If user wants to add the suppliers/vendor in the system, User can add/save in supplier master. Once user clicks on supplier master, all the list of suppliers which are already existing in the system will be displayed, and if user wants to create a new supplier record in the system, user should click on NEW SUPPLIER Tab. 15

16 3.2.1 Add New supplier screen: Supplier code can be either entered manually by the user, or user can define a serial number using document number generation as mentioned in document number generation. User should enter all the mandate fields which are indicated in star like Registered supplier name, Registration status and payment terms. Payment terms - User should enter the number of days and select the applicable from date - invoice generation date or delivery date. User need to select the constitution, class/activity, Is business entity and Is Body corporate, if the suppliers is providing any of the supplies which falls under RCM. If user wants to copy the same supplier as customer, then select the option Copy Supplier as Customer. User can also save the banking information of the supplier. 16
17 Once the registration details are entered, used should enter the registered address (Location) along with the GSTIN number. If the branch information is same as Location then select the option Same as Billing Address, the same address will be copied as Branch/Shipping information. User can add multiple branches under the locations by selecting option Add Shipping address. 17

18 3.3 Customer Master: If user wants to add the customer in the system, User can add/save in customer master. Once user clicks on customer master, all the list of customers which are already existing in the system will be displayed, and if user wants to create a new customer record in the system, user should click on NEW CUSTOMER Tab Add New customer screen: Customer code can be either entered manually by the user, or user can define a serial number using document number generation as mentioned in document number generation. User should enter all the mandate fields which are indicated in star like Registered customer name, Registration status and payment terms. Payment terms - User should enter the number of days and select the applicable from date - invoice generation date or delivery date. User need to select the constitution, class/activity, Is business entity and Is Body corporate, if the customers is providing any of the supplies which falls under RCM. If user wants to copy the same customer as customer, then select the option Copy Customer as Customer. User can also save the banking information of the customer. 18

19 Once the registration details are entered, used should enter the registered address (Location) along with the GSTIN number. If the branch information is same as Location then select the option Same as Billing Address, the same address will be copied as Branch/Shipping information. 19
 When user wants to use the unit of measures only for transactions and filing, user can use the default groups and units directly from supply master, if in case user wants to")
20 User can add multiple branches under the locations by selecting option Add Shipping address. 3.4 Unit of Measure (UoM) When user wants to use the unit of measures only for transactions and filing, user can use the default groups and units directly from supply master, if in case user wants to use different unit of measures for items and conversion units for inventory effect, user should create a UoM group and assign the conversion values to the units. Below are the steps to create UoM Group and Assign the conversion values to the Units. Step 1 > In the Home screen, user should click on UoM option under Master s Management Step 2 > Click on New Group option. In the Creation screen, Name the UoM group and update the Base Unit for this group. Base unit is the unit which measures and shows the inventory and all the conversions will be calculated based on Base Unit. (Base Unit Will always considered as 1) 20


21 User can even define their convenient name to Base unit by clicking on plus symbol displayed beside the base unit field. User should define all the conversion units with which they may deal. User can select the units from the dropdown if they are comfortable with Standard UoM s, if not user can enter their own unit name and assign the reporting name from the drop down for GST Filing. User should enter the conversion value of the units to Base unit considering the base unit value = 1 as shown in the below screen. Note: When the unit of measure value is bigger than the base unit, user need to enter the value in decimals like 0.01 etc. Click on save. 21
22 Once the UoM group is created, user needs to link this group and respective unit to the item / service while creating in the supply master. Select the unit group and the stock unit in supply master. Whatever the stock unit is selected in the supply master will show the available quantity in that unit. 3.5 Setup GL Accounts: To manage accounting effects in the transactions, user should setup the general ledgers in ubooks. To set up the GL Accounts, user should click on setup GL Accounts under master s management. User will be navigated to Accounts list, where user can see the GL accounts which are previously created. Click on new Account to create a new GL. Select the Account type under which user needs to create a GL account. Enter the GL / Account code. Enter the Account Name, if required user can also enter the description. Then click on save to save the record 4. Data Import: 4.1 Import Data Import data (Masters/Transactions) from external sources. Before Importing of data, download the templates from ubooks 22
23 Navigation Data Management Data Import / Export, click on Download Import Templates, will prompt to save the location, select the path to save the templates and click on Save. E.g., here we select Desktop Update the templates with required fields, to import into ubooks. Note: Fields marked in Red colour are mandatory fields After the data is ready in templates. To Import the data Navigation: Data Management Data Import / Export, Click on Import option o In Select Type select the required template to upload the data, for e.g., select Supply. Enter the location where the updated templates are stored or Click on upload button An Open dialog box appears with path to select the location where updated templates are saved Click on Import button to upload the data, ubooks will prompt whether the data is successfully uploaded or not and shows the path where the log is stored. 4.2 Export Data Export Data option can be used to export the data from ubooks to any other external sources. User should select Export option and then select the type (Any transaction or master). Select from date and to date and click on export. Select the path or location and enter file name, click on Save. 23

24 5. Other Transactions 5.1 Record Expenses Record Expenses screen records all the cash/cash equivalents expenses which cannot be recorded via purchase transactions. Navigation: Other Transactions Record Expenses In this screen will display list of expenses created. To record a new expense, click on New Expense. Enter Expense Number, Date of the transaction. Select from Account from where amount is paid. Select the party name if required. Enter the Invoice/ Bill Number, if any. Enter Notes, if any. In Expense List, under the head Expense Account select the Ledger. In Description field enter remarks In Amount field amount. Click on Save to save the transaction. Note: User can record multiple expenses in Expense List area in a single transaction. 24

25 5.2 Manual Journal: Record all the transactions which do not fit in Sales /Purchase transactions and record expenses. Navigation: Other Transactions Manual Journals In Journal list screen, displays list of journals created. To create a new entry, Click on New Journal. In new journal screen, enter Journal date Enter Journal number Enter Notes/Comments In Accounts Field select the Ledger In Description field, enter notes or comments In Debits field enter the amount In Credits field enter the amount When both debit amount and credit amount are equal, then ubooks will allow to save journal entry. Note: User can update multiple entries in the liner level in a single journal. 5.3 Opening Balance: Enter Opening Balance for Ledgers for beginning of another accounting period, to record for the first time. Navigation: Other Transactions Opening Balance 25

26 Once user clicks on opening balance, ubooks will navigate the user to record opening balance screen. List of Ledgers created under setup GL accounts will be displayed here Select the opening balance date. Enter the Opening Debit balance or Opening credit balance for required Ledgers Click on save 5.4 Manage Inventory: Enter the Opening stock for the items Navigation: Other Transactions Manage Inventory In Manage Inventory screen, select the date and select the required branch for updating the opening stock After the branch is selected, ubooks will display items Sorting method of Stock item can be done based on Item code of Item Name, Click on the header to sort data In List of items displayed, enter the opening stock i.e. Quantity (Available quantity) and Price for item Click on save 26


27 After the opening stock is entered and saved, updated stock can be viewed in Defined Opening Stock, which is available below Opening Stock 6. Manage Orders Manage orders tile contains the following screens 1. Sales Order 2. Purchase Order 3. Branch Transfer 6.1 Sales Order If user wants to record the purchase orders raised by their customer or to record and track the orders received from the customers user can record using sales orders. Navigation: Manage Orders Sales Order New Order 27


28 Once user clicks on sales Order, user can see the list of orders which are previously created. If user wants to generate/record new Sales Order, Click on new Order. In new order screen, user can see the pre/user-defined number series for sales order and sales order date. In Order From - User organization details will be pre-populated like Location, Branch and GSTIN. User can enter the PO number and PO date if any. User should select the delivery date and payment terms along with the applicability of the payment terms. In Order To User should select the following details. Party type as B2B or B2C party name Location - Once the location is selected, party ID will be populated. Ship to address - if in case items needs to be delivered to different shipping address. 28

29 Based on ship to state the place of supply will be pulled and tax type will be calculated either as Interstate (IGST) or Intrastate (CGST & SGST). The contact ID will be displayed in send invoice to field. However, user can add an additional if required. Once the header information is added, user can enter the item information by clicking add item. Select the supply Name/Code. If the item falls under any exemption, enter the exemption code Below details can be pulled from the masters if user enters the data completely while se. Description HSN/SAC Quantity UOM Unit price Respective Account where the posting should happen. User can provide liner level discount if required by selecting percentage based or amount based. Based on HSN/SAC code the Tax rate and amount will be pulled by the system either in CGST & SGST or IGST. If the RCM is applied on the transaction, then user can see the tax value in place of RCM. Cess can also be applied for all cess related items. User can add multiple line items in a sales order. 29
30 Once the items are added user can see the total taxable amount, Total GST amount, Total Cess Amount and Total value of the order. Then User can save the order by clicking on save or save it as draft by selecting option save as draft. User has the option to cut the Order to invoice with the navigation (Generate Invoice). User should click on Generate Invoice option, Reduce the quantity of invoice if in case user is supplying less quantity than order quantity and save the invoice. User can generate another invoice for the remaining quantity. 6.2 Purchase Order If user wants to issue the purchase orders to the suppliers or to record and track the purchases ordered to the supplier s user can record using purchase orders. Navigation: Manage Orders purchases Order New Order Once user clicks on purchase Order, user can see the list of orders which are previously created. If user wants to generate/record new purchase Order, Click on new Order. In new order screen, user can see the pre/user-defined number series for purchase order and purchase order date. 30

31 In Order From - User organization details will be pre-populated like Location, Branch and GSTIN. User can change the PO date if required. User can enter the quotation number and quotation date if any quotation is received against it. Payment terms can be selected based on party selection, however user can also change the payment transaction based on requirement. The contact ID will be displayed in send invoice to field. However, user can add an additional if required. Place of Supply can be shown based on location of the organization. In Order To User should select the following details. Party type as B2B or B2C party name Location - Once the location is selected, party ID will be populated. Ship to address - if in case items needs to be delivered to different shipping address. Based on ship to state the place of supply will be pulled and tax type will be calculated either as Interstate (IGST) or Intrastate (CGST & SGST). 31

32 Once the header information is added, user can enter the item information by clicking add item. Select the supply Name/Code. If the item falls under any exemption, enter the exemption code Below details can be pulled from the masters if user enters the data completely while se. Description HSN/SAC Quantity UOM Unit price Respective Account where the posting should happen. User can provide liner level discount if required by selecting percentage based or amount based. Based on HSN/SAC code the Tax rate and amount will be pulled by the system either in CGST & SGST or IGST. If the RCM is applied on the transaction, then user can see the tax value in place of RCM. Cess can also be applied for all cess related items. User can add multiple line items in a purchase order. Once the items are added user can see the total taxable amount, Total GST amount, Total Cess Amount and Total value of the order. 32
.")
33 Then User can save the order by clicking on save or save it as draft by selecting option save as draft. User has the option to cut the Purchase Order to Purchase Invoice with the navigation (Generate Invoice). User should click on Generate Invoice option, Reduce the quantity of invoice if in case user is receiving less quantity than ordered quantity and save the invoice. User can generate another invoice for the remaining quantity. 6.4 Branch Transfer: User can transfer the goods / items from one branch to another branch using branch transfer screen. Once user clicks on Branch transfer, user will be routed to the Branch transfer list screen, where user can see all the transfers crested previously. If user wants to create new invoice, user should click on New Transfer option. Navigation: Manage Orders Branch Transfer New Transfer Once user is navigated to new transfer screen, user can see the draft Transfer document number and transfer document date. 33


34 User should select the transfer type first, whether the transfer is with in the GSTIN or to a different GSTIN. Then user should select the source details. Source location is always current location and user have an option to select the source branch from the list. Based on source location source GSTIN will be displayed and it is by default current location GSTIN. User can add comments if required in the comments section. Once source details are completed, user should select the destination details like Destination Location ubooks will display only current location as destination location if user select the transfer type as same GSTIN. If User want to select a different location, then user need to select the transfer type as Different GSTIN. Note: When user select the transfer type as Same GSTIN Delivery challan will be generated after saving the record but when the transfer type is selected as Different GSTIN a tax invoice will be generated after saving the record. Then user should select the destination location. Once the destination location is selected, user should select the destination branch under that location. Based on destination location destination GSTIN will be displayed. Once the header information is entered, user should click on add item option to add the line to select the item. Select the list of items which needs to be transferred. Note: Before adding the item, please check the available quantity. If the available quantity is less than transferring quantity ubooks will not allow you to proceed. 34


35 User should select the batch number, if the item is purchased in batches. Once the batch number is selected, system will display the manufacturing and expiry date of the item. User can see the item description after the expiry date field, user have an option to edit / change the description field. System will pull the HSN code from the supply master and based on HSN code tax rate will be calculated automatically. User can see the available quantity of the item for the reference, so that user can avoid entering the exceed quantity in transfer quantity field. Then user should enter the transfer quantity User can change the UoM of the item if required. User should enter the value of the total line which is getting transferred. Once all the items are added, user can click on save to save the transfer. User can also draft this transfer, if any changes needs to be done in that. 7. Sales Transactions: Sales Transaction tile is to maintain 1. Sale invoice. 2. Sale Return. 3. Sale Credit Note. 4. Sale Debit Note. 5. Cash Sales 35

36 7.1 Sale invoice: An Invoice is a commercial document issued by a seller to a buyer, relating to a sale transaction and indicating the products, quantities, and agreed prices for products or services the seller had provided the buyer. Navigation: Sales Transactions Sale Invoice New Sale Once user clicks on Sales Invoice, user can see the list of invoices which are previously created. If user wants to generate new invoice, Click on New Sale. In new Invoice screen, user can see the pre/user-defined number series for sale invoice and sale invoice date. In Invoice From - User organization details will be pre-populated like Location, Branch and GSTIN. User can add the sales order number and date if existing against it however, if the user is creating the invoice from sales order screen then the SO number and date will be pulled from that screen. User should enter the delivery date if required. Payment terms will be displayed based on party selection, however user can also change the payment terms based on agreement. Due date of the invoice is calculated based on payment terms in days either by invoice date or delivery date. The contact ID will be displayed in send invoice to field. However, user can add an additional if required. 36

. If user add any additional fields in additional field configuration for sale invoice, those fields can be found in Additional Info.")
37 In Invoice To User should select the following details. Party type as B2B or B2C party name Location - Once the location is selected, party ID will be populated. Ship to address - if in case items needs to be delivered to different shipping address. Based on ship to state the place of supply will be pulled and tax type will be calculated based on place of supply either as Interstate (IGST) or Intrastate (CGST & SGST). If user add any additional fields in additional field configuration for sale invoice, those fields can be found in Additional Info. Once the header information is added, user can enter the item information by clicking add item. 37
38 Select the supply Name/Code. If the item falls under any exemption, enter the exemption code Below details can be pulled from the masters if user enters the data completely while se. Description HSN/SAC Quantity UOM Unit price Respective Account where the posting should happen. User can provide liner level discount if required by selecting percentage based or amount based. Based on HSN/SAC code the Tax rate and amount will be pulled by the system either in CGST & SGST or IGST. If the RCM is applied on the transaction, then user can see the tax value in place of RCM. Cess can also be applied for all cess related items. User can add multiple line items in a Sale Invoice. User can also add the terms and conditions in terms and conditions field. Instructions is only for internal reference, it will not get printed in the invoice. Once the items are added user can see the total taxable amount, Total GST amount, Total Cess Amount and Total value of the order. Then User can save the order by clicking on save or save it as draft by selecting option save as draft. Once the invoice is saved, user can see the preview of the invoice. User can record payment, generate credit note, debit note and returns, e-way bill using more option on the preview. 38
39 If user wants to print the invoice, user should click on preview and then save, print or invoice copy. User can also record receipt using record payment option. When user clicks on record payment system will navigate the user directly to payments screen along with the customer information and payable amount for that invoice. User can change the receivable amount if received partial payment Payment date is transaction recording date and user should select the mode of payment, deposited to, reference number if any, transaction type and notes if any. 7.2 Sale Return: Once user clicks on Sales Return, user can see the list of return transactions which are previously created. If user wants to generate new Return, Click on New Sale Return. 39
40 In return screen, user can see the pre/user-defined number series i.e. sale return and sale return date. In Return By: User should select the following details. Party type as B2B or B2C party name Location - Once the location is selected, party ID will be populated. Select / Enter the invoice number against which the return needs to be created. Based on invoice, invoice date will be shown. In Return To: User organization details will be pre-populated like Location, Branch and GSTIN. User should select the reason for issuing the return / Credit / Debit Notes. 40
41 In the liner level user can see all the items added against the selected invoice. First user should enter the return quantity in the line items which needs to be received by the supplier as return and select the lines for which changes have been made. Once the lines are selected, system will calculate the Taxable amount, GST, Cess and Total of the return value. Save the return transaction to generate a credit note against return. 41
42 User can also cancel the transaction by clicking on cancel. 7.3 Sale Credit note: Once user clicks on Sales Credit note, user can see the list of return transactions which are previously created. If user wants to generate new Sales Credit note, Click on New Sales Credit note. In Sales Credit note screen, user can see the pre/user-defined number series i.e. transaction number and transaction date. In Issued By: User should select the following details. Party type as B2B or B2C party name Location - Once the location is selected, party ID will be populated. Select / Enter the invoice number against which the return needs to be created. Based on invoice, invoice date will be shown. In Receiver: User organization details will be pre-populated like Location, Branch and GSTIN. User should select the reason for issuing the return / Credit / Debit Notes. 42
43 In the liner level user can see all the items added against the selected invoice. User can see the actual price (Actual unit price of the item at the time of invoice issued), credit amount (If any credit note raised for some value) and differential amount (Differential value user should enter to create a credit/debit note per item). Then select the line in which the differential value is entered. Once the lines are selected, system will calculate the Taxable amount, GST, Cess and Total value. Save the return transaction to generate a credit note against return. 43
44 User can also cancel the transaction by clicking on cancel option. 7.4 Sale Debit note: Once user clicks on Sales Debit note, user can see the list of return transactions which are previously created. If user wants to generate new Sales Debit note, Click on New Sales Debit note. In Sales Debit note screen, user can see the pre/user-defined number series i.e. transaction number and transaction date. In Issued By: User should select the following details. Party type as B2B or B2C 44

45 party name Location - Once the location is selected, party ID will be populated. Select / Enter the invoice number against which the return needs to be created. Based on invoice, invoice date will be shown. In Receiver: User organization details will be pre-populated like Location, Branch and GSTIN. User should select the reason for issuing the return / Credit / Debit Notes. In the liner level user can see all the items added against the selected invoice. User can see the actual price (Actual unit price of the item at the time of invoice issued), debit amount (If any debit note raised for some value) and differential amount (Differential value user should enter to create a credit/debit note per item). Then select the line in which the differential value is entered. Once the lines are selected, system will calculate the Taxable amount, GST, Cess and Total value. 45
46 Save the return transaction to generate a credit note against return. User can also cancel the transaction by clicking on cancel option. 7.5 Cash Sales: Cash sales are sales made against cash. It is where the seller receives the cash consideration at the time of delivery, Unlike credit sales. Once user clicks on Cash sales, user can see the list of invoices which are previously created. 46


47 Navigation: Purchase Transactions purchases Invoice New Purchase If user wants to generate new invoice, Click on New Sale. In new Invoice screen, user can see the system defined draft number series for cash sales and cash sales date. In Invoice From - User organization details will be pre-populated like Location, Branch and GSTIN. User can add the sales order number and date if existing against it however, if the user is creating the invoice from sales order screen then the SO number and date will be pulled from that screen. User should enter the delivery date if required, however it is optional field and system will take the transaction date as delivery date. Payment terms will be displayed based on party selection, however user can also change the payment terms based on agreement. Due date of the invoice is calculated based on payment terms in days based on invoice date or delivery date. User can enter any information in reference field if that needs to be printed in the invoice. 47

48 The contact ID will be displayed in send invoice to field. However, user can add an additional if required. User should select the mode of payment. By default, system will pick cash as payment method. In Invoice To User should select the following details. User can directly search the party name and click on search to get/pull the party information. If there are multiple parties with similar name, the first party will be displayed in party name field, however user can select the required party from the dropdown. If the party is not available in the customer master, user can directly add the party while billing by just clicking on plus symbol beside search option. User should enter the party name, Registration status and GSTIN number (if registered) as mandate fields while creating new customer. User can add the complete address if the customer needs to be stored with complete information. 48

49 Once the party is selected below details will be displayed in the billing screen. Party type as B2B or B2C party name Location - Once the location is selected, party ID will be populated. Ship to address - if in case items needs to be delivered to different shipping address. Based on ship to state the place of supply will be pulled and tax type will be calculated based on place of supply either as Interstate (IGST) or Intrastate (CGST & SGST). If user add any additional fields in additional field configuration for sale invoice, those fields can be found in Additional Info. Once the header information is added, user can enter the item information by clicking add item. Select the supply Name/Code. If the item falls under any exemption, enter the exemption code Below details can be pulled from the masters if user enters the data completely while se. Description HSN/SAC Quantity UOM Unit price Respective Account where the posting should happen. 49

50 User can provide liner level discount if required by selecting percentage based or amount based option and provide the figure. Based on HSN/SAC code the Tax rate and amount will be pulled by the system either in CGST & SGST or IGST. If the RCM is applied on the transaction, then user can see the tax value in place of RCM field instead of CGST, SGST and IGST. Cess can also be applied for all cess related items. User can add multiple line items in a cash Sale Invoice. User can also add the terms and conditions in terms and conditions field. Instructions is only for internal reference, it will not get printed in the invoice. Once the items are added user can see the total taxable amount, Total GST amount, Total Cess Amount and Total value of the order. Then User can save the order by clicking on save or save it as draft by selecting option save as draft. Once the invoice is saved, user can see the preview of the invoice. If user wants to print the invoice, user should click on preview and then save, print or invoice copy. 8. Purchase Transactions: Purchase Transaction tile is to maintain 1. Purchase invoice. 2. Purchase Return. 3. Purchase Credit Note. 4. Purchase Debit Note. 5. Self-Invoice. 8.1 Purchase invoice: A purchase invoice can be used to record the supplies bought and how much was paid for it and how much still needs to be paid. Navigation: Purchase Transactions purchases Invoice New Purchase 50

51 Once user clicks on Purchase Invoice, user can see the list of invoices which are previously created. If user wants to generate new invoice, Click on New Purchase. In new Invoice screen, user can see the pre/user-defined number series for Purchase invoice and Purchase invoice date. In Invoice From - User should select the following details. Party type as B2B or B2C party name Location - Once the location is selected, party ID will be populated. Ship to address - if in case items needs to be delivered to different shipping address. If user add any additional fields in additional field configuration for Purchase invoice, those fields can be found in Additional Info. In Invoice To User organization details will be pre-populated like Location, Branch and GSTIN. User can add the Purchase order number and date if existing against it however, if the user is creating the invoice from Purchase order screen then the PO number and date will be pulled from that screen. User should enter the supplier invoice number and supplier invoice date as mandate (Purchase Bill Number). User can enter the delivery date if required. Payment terms can be selected based on party selection, however user can also change the payment transaction based on requirement. Due date of the invoice will be calculated based on payment terms in days based on either invoice date or delivery date. 51
52 The contact ID will be displayed in send invoice to field. However, user can add an additional if required. Based on ship to state the place of supply will be pulled and tax type will be calculated either as Interstate (IGST) or Intrastate (CGST & SGST). Once the header information is added, user can enter the item information by clicking add item. Select the supply Name/Code. If the item falls under any exemption, enter the exemption code Below details can be pulled from the masters if user enters the data completely while se. Description HSN/SAC Quantity UOM Unit price Respective Account where the posting should happen. User can provide liner level discount if required by selecting percentage based or amount based. Based on HSN/SAC code the Tax rate and amount will be pulled by the system either in CGST & SGST or IGST. If the RCM is applied on the transaction, then user can see the tax value in place of RCM. Cess can also be applied for all cess related items. User can add multiple line items in a Purchase Invoice. Once the items are added user can see the total taxable amount, Total GST amount, Total Cess Amount and Total value of the order. Then User can save the order by clicking on save or save it as draft by selecting option save as draft. 52
53 User has the option to cut the Purchase Order to Purchase Invoice with the navigation (Generate Invoice). User should click on Generate Invoice option, Reduce the quantity of invoice if in case user is receiving less quantity than ordered quantity and save the invoice. User can generate another invoice for the remaining quantity. 8.2 Purchase Return: Once user clicks on Purchase Return, user can see the list of return transactions which are previously created. If user wants to generate new Return, Click on New Purchase Return. In return screen, user can see the pre/user-defined number series i.e. sale return and sale return date. In Return By: User should select the following details. Party type as B2B or B2C party name Location - Once the location is selected, party ID will be populated. Select / Enter the invoice number against which the return needs to be created. Based on invoice, invoice date will be shown. 53

54 In Return To: User organization details will be pre-populated like Location, Branch and GSTIN. User should select the reason for issuing the return / Credit / Debit Notes. In the liner level user can see all the items added against the selected invoice. First user should enter the return quantity in the line items which needs to be received by the supplier as return and select the lines for which changes have been made. Once the lines are selected, system will calculate the Taxable amount, GST, Cess and Total of the return value. 54
55 Save the return transaction to generate a credit note against return. User can also cancel the transaction by clicking on cancel. 8.3 Purchase Credit note: Once user clicks on Purchase Credit note, user can see the list of credit transactions which are previously created. If user wants to generate new Purchase Credit note, Click on New Credit note. In Purchase Credit note screen, user can see the pre/user-defined number series i.e. transaction number and transaction date. In Issued By: User should select the following details. Party type as B2B or B2C 55

56 party name Location - Once the location is selected, party ID will be populated. Select / Enter the invoice number. Based on invoice, invoice date, supplier invoice number and supplier date also will be shown. In Receiver: User organization details will be pre-populated like Location, Branch and GSTIN. User should select the reason for issuing the return / Credit / Debit Notes. In the liner level user can see all the items added against the selected invoice. User can see the actual price (Actual unit price of the item at the time of invoice issued), credit amount (If any credit note raised for some value) and differential amount (Differential value user should enter to create a credit/debit note per item). Then select the line in which the differential value is entered. Once the lines are selected, system will calculate the Taxable amount, GST, Cess and Total value. 56
57 Save the return transaction to generate a credit note against return. User can also cancel the transaction by clicking on cancel option. 8.4 Purchase Debit note: Once user clicks on Purchase Debit note, user can see the list of debit transactions which are previously created. If user wants to generate new Credit note, Click on New Debit note. 57
58 In Sales Credit note screen, user can see the pre/user-defined number series i.e. transaction number and transaction date. In Issued By: User should select the following details. Party type as B2B or B2C party name Location - Once the location is selected, party ID will be populated. Select / Enter the invoice number against which the return needs to be created. Based on invoice, invoice date, supplier invoice number and supplier date also will be shown. In Receiver: User organization details will be pre-populated like Location, Branch and GSTIN. User should select the reason for issuing the return / Credit / Debit Notes. 58
59 In the liner level user can see all the items added against the selected invoice. User can see the actual price (Actual unit price of the item at the time of invoice issued), debit amount (If any debit note raised for some value) and differential amount (Differential value user should enter to create a credit/debit note per item). Then select the line in which the differential value is entered. Once the lines are selected, system will calculate the Taxable amount, GST, Cess and Total value. Save the return transaction to generate a credit note against return. 59

60 User can also cancel the transaction by clicking on cancel option. 9. Point of Sale Point of Sale tile is to maintain 1. Point of Sale (PoS). 2. PoS Return. 3. PoS Config. 4. PoS Posting. Point of sale is a place where the retail transactions are carried out. ubooks has point of sale screen which helps user to generate retail invoice with ease. 9.1 Point of Sale: 60


61 Navigation: Point of Sale Transactions Point of Sale New Once user clicks on Point of Sale, user can see the list of PoS invoices which are previously created. If user wants to generate new invoice, Click on New. In new Invoice screen, user can see the pre-defined number series for PoS invoice which is draft number and PoS invoice date, once the user saves the invoice then only user defined series will be generated. User can search the customer either with customer name or customer mobile number in customer details tab. If the customer is new and not available in customer master, user can click on plus symbol beside customer name and add customer with customer name and mobile number. User can also add the id as optional. 61


62 User can add the item in two ways, one is same as sale invoice by clicking on add item user can add the item and the second way is select the dropdown under the menu bar and select the item which needs to be added. Then select the batch number if item is procured in batches along with quantity, unit price, UoM, discount and click on add to add it to the item list. 62


63 Once the items are added to the billing screen, user can see the Taxable amount, CGST & SGST, Cess and Total value. In the left bottom user should select the mode of payment and the receipt amount to complete the payment process. When user select the mode of payment as bank, card number is mandate field. User can enter the last 4 digits of the card for reference. When selected credit note, user should select the open credit note for deducting the bill amount. User have the option to select multiple payment methods to nullify the billing amount and generate a invoice. Once the payment process is completed, user can click on save and print option and generate invoice. User can save the invoice or take a print of it by using the menu options. User also have Hold, Recall, Cancel, Return, New bill while billing using the menu bar as below. 63


64 9.2 POS Return: Once user clicks on PoS Return, user can see the list of return transactions which are previously created. If user wants to generate new Return, Click on Return in the billing screen. User will get a popup with transaction number and transaction date, under that user can select the bill number for which the return transaction should be created. Bill date is pre-populated as today s date User should select the reason for Issuing and click on Get to get the selected record. 64


65 User will be routed to the billing screen along with the selected record. User should check/select the line item in which the return needs to be accepted and update the return quantity. Based on quantity selection the taxable value, CGST & SGST, Cess and total will be updated. 65

66 Then user can click on save and print and option to generate a credit note. User can either save or print the credit note 9.3 POS Config Setting: Using this option user can configure the accounting effect for the transactions made using ubooks POS. 66
67 User should click on POS Config option to open the PoS accounts config screen from the main menu. User should select the default cash account and Default bank account for which the posting should be affected. Note: All the Cash accounts created under Cash and Cash equivalents will be shown in Default cash account and all the bank accounts created under Cash and Cash equivalents will be shown in Default Bank account selection. User should also select default sales account and PoS credit account from the dropdown. Note: All the accounts created under revenue from operations will be shown in default sales account and All the accounts under liabilities will be shown under PoS credit account. Then user should also select the frequency selection, whether the posting should be affected either day wise or monthly wise. Then click on save to save the configured information. 9.4 PoS Posting: Using this screen user can post the data based on date selection. Once the PoS configuration is saved, user can see the setting in PoS posting screen. If user wants to change any configuration settings, user can click on update option. Then user should select the date range (from date and to date) and select the posting type as PoS posting. Then click on Save & Generate to save the accounting effect. 67

68 10. Import / Export Transactions: Import / Export Transactions tile is to maintain 10.1 Import Transactions Export Transactions Import Transaction: When user is imposing or purchasing goods/services from outside India then the transaction will be treated as Import transactions. Navigation: Import / Export Transactions Import Transactions New Purchase Once user clicks on Import Transaction user can see the list of import transactions previously created. 68

 - if in case items needs to be delivered to different shipping address. User should enter the foreign currency and exchange rate.")
69 Click on New Purchase button to create a new Import purchase. In Import purchase screen user can see the pre-defined import transaction number and transaction date. In Invoice From - User should select the following details. Party type as B2B or B2C party name Location - Once the location is selected, party UIN will be populated. Ship to address (Branch) - if in case items needs to be delivered to different shipping address. User should enter the foreign currency and exchange rate. In Invoice To User organization details will be pre-populated like Location, Branch and GSTIN. User can add the Purchase order number and date if existing against it 69
70 however, if the user is creating the invoice from Purchase order screen then the PO number and date will be pulled from that screen. User should enter the supplier invoice number and supplier invoice date as mandate (Purchase Bill Number). User can enter the delivery date if required. Payment terms can be selected based on party selection, however user can also change the payment transaction based on requirement. Due date of the invoice will be calculated based on payment terms in days based on either invoice date or delivery date. As it is an inter country transaction IGST will be applied irrespective of supplier selection. User should also enter the Bill of entry number bill of entry date. Once the header information is added, user can enter the item information by clicking add item. Select the supply Name/Code. If the item falls under any exemption, enter the exemption code Below details can be pulled from the masters if user enters the data completely while setting up the masters. Description HSN/SAC Quantity UOM Unit price Respective Account where the posting should happen. User can be recorded the discount at liner level if required by selecting percentage based or amount based. Based on HSN/SAC code the Tax rate and amount will be pulled by the system. 70

71 As it is an international transaction, only IGST is applied. If the RCM is applied on the transaction user can see the tax value in place of RCM. User should record percentage of basic custom duty levied on the transaction, so that system will calculate the value of it. User should also record the percentage of Social Welfare Surcharge in percentage column and the system will display the surcharge value. If user wants to override the tax rate for any item, then click on override tax option and change the tax rate. User can add multiple lines in purchase bill. User can also add instructions if required in instruction field. User can see the following things in the bottom of the import purchase screen. Total supply value Any additional charges Basic customs duty value Social Welfare Surcharge value Taxable amount GST Cess Total value of invoice. Then Save / Save as draft import transaction Export Transactions: When the user is selling the items / services to a different country, then it is considered as export. Navigation: Import / Export Transactions Export Transactions New Export 71


72 Once user clicks on Export transaction, user can see the list of invoices which are previously created. If user wants to generate new export invoice, Click on New Export. In new Invoice screen, user can see the pre/user-defined number series for export invoice and transaction date. In Invoice From - User organization details will be pre-populated like Location, Branch and GSTIN. User can add the sales order number and date if existing against it. System will show the delivery date as creation date, if user wants to change then change the date by selecting the calendar. Payment terms can be selected based on party selection, however user can also change the payment transaction based on requirement. Due date of the invoice will be calculated based on payment terms in days based on either invoice date or delivery date. The contact ID will be displayed in send invoice to field. However, user can add an additional if required. User should select the export type is with payment of GST or Without payment of GST (Is it under bond). User should also enter the Exchange currency and Exchange rate with INR. 72

73 In Invoice To User should select the following details. Party type as B2B or B2C party name Location - Once the location is selected, party ID will be populated. Ship to address - if in case items needs to be delivered to different shipping address. For export transactions the place of supply is always Inter Country. System will pick the shipping country name from the masters. User should enter the shipping bill number and shipping bill date. Once the header information is added, user can enter the item information by clicking add item. Select the supply Name/Code. If the item falls under any exemption, enter the exemption code Below details can be pulled from the masters if user enters the data completely while se. Description HSN/SAC Quantity UOM Unit price Respective Account where the posting should happen. User can provide liner level discount if required by selecting percentage based or amount based. Based on HSN/SAC code the Tax rate will be pulled by the system, based on place of supply as it is a inter country transaction IGST will be applied. If the RCM is applied on the transaction, then user can see the tax value in place of RCM. 73
74 Cess can also be applied for all cess related items. User can add multiple line items in a Sale Invoice. Once the items are added user can see the total taxable amount, Total GST amount, Total Cess Amount and Total value of the order. Then User can save the order by clicking on save or save it as draft by selecting option save as draft. User has the option to cut the Purchase Order to Purchase Invoice with the navigation (Generate Invoice). User should click on Generate Invoice option, Reduce the quantity of invoice if in case user is receiving less quantity than ordered quantity and save the invoice. User can generate another invoice for the remaining quantity. 11 Payments: 11.1 Payments: When user wants to record payment made to any of the parties that may be supplier or customer, that can be recorded in Payments. Navigation: Payments Payments New Payment Once user clicks on payments, all the payments recorded previously will be listed. If user wants to record a new payment, click on New Payment. 74
75 User can see a draft payment number As it is a multi-user system, once the transaction is saved, then only a permanent number will be generated. User should select the party i.e. supplier. Payment date will always transaction date, if user wish to change it they can do that. User should select the mode of payment by Bank or by cash (Cheques and DD s also considered as bank). Once user select the payment mode, all the ledger accounts created under that will be displayed in paid through field. Then user should enter the total payable amount to the selected party. Then select the transaction type Transaction happened through NEFT/IMPS/RTGS/Cheque/DD. User can enter the reference number of that particular transaction. User can enter the notes if required. Based on party selection all the invoices created against the party will be displayed in the liner level. User can select multiple invoices in multiple lines and allocate the amount to it. Once the invoice is selected, user can see the total amount of the invoice, Paid amount (if already paid partial / full amount), Due amount (remaining amount) and payment amount (Allocated amount to be paid in this transaction). Once the total amount is allocated to single/multiple invoice user save / Save as draft the payment. 75

76 User can also print the payment transaction in the below format. 76

77 11.2 Receipts: When user wants to record receipts made by any of the parties that may be supplier or customer, that can be recorded in Receipts. Navigation: Payments Receipts New Receipt Once user clicks on Receipts, all the Receipts recorded previously will be listed. If user wants to record a new Receipts, click on New Receipts. User can see a draft Receipt number As it is a multi-user system a draft number will be generated once user opens any transaction, once the transaction is saved, then only a permanent number will be generated. User should select the party i.e. supplier. Receipt date will always transaction date, if user wish to change it they can do that. User should select the mode of Receipt by Bank or by cash (Cheques and DD s also considered as bank). Once user select the Receipt mode, all the ledger accounts created under that will be displayed in paid through field. Then user should enter the total payable amount to the selected party. Then select the transaction type Transaction happened through NEFT/IMPS/RTGS/Cheque/DD. 77

78 User can enter the reference number of that transaction. User can enter the notes if required. Based on party selection all the invoices created against the party will be displayed in the liner level. User can select multiple invoices in multiple lines and allocate the amount to it. Once the invoice is selected, user can see the total amount of the invoice, Paid amount (if already paid partial / full amount), Due amount (remaining amount) and Receipt amount (Allocated amount to be paid in this transaction). Once the total amount is allocated to single/multiple invoice user save / Save as draft the Receipt. User can also print the receipt transaction in the below format. 78

79 11.3 Advance Payments: When user wants to record advance payment made to any of the parties that may be supplier or customer, that can be recorded in Advance Receipts. Navigation: Payments Advance Payments New Adv Payments Once user clicks on Advance Payments, all the payments recorded previously will be listed. If user wants to record a new Advance Adv Payments, click on New Advance Payments Once user clicks on New Advance Payments, user can see the pre-defined Advance payment number and Advance Payment date. In Advance Payment From: User Org details will be displayed as below. Advance Payment By: Org Name GSTIN: Branch: Shipping location Advance Against: Goods / Services or Any purchase Order 79


80 Advance Payment To: Supplier details will be selected as below. Party Type Party Name Location Party ID Branch Place of Supply Payment Details: Mode of Payment By cash / Bank Deposited To GL Accounts created under that bank / cash Total Advance payment amount Automatically taken from the liner data. Reference Number User should enter the ref number. Item Details: Once the header information is added, user can enter the item information by clicking add item. Select the supply Name/Code. 80

81 If the item falls under any exemption, enter the exemption code Below details can be pulled from the masters if user enters the data completely while se. Description HSN/SAC Quantity UOM Unit price Based on HSN/SAC code the Tax rate and amount will be pulled by the system either in CGST & SGST or IGST(As per GST there is no tax applicable for advance payments as of now). Cess can also be applied for all cess related items. User can add multiple line items in a Sale Invoice. Once all the items are added user can allocate the amount in place of advance amount allocation. Once the amounts are allocated, user can see the total amounted collected, Cess amount (If applicable) and the total amount collected from the party in the bottom. User can Save / Draft the transaction Advance Receipts: When user wants to record advance payment made to any of the parties that may be supplier or customer, that can be recorded in Advance Receipts. Navigation: Payments Advance Receipts New Adv Receipt Once user clicks on Advance Receipt, all the payments recorded previously will be listed. If user wants to record a new Advance Adv Receipt, click on New Advance Receipt. Once user clicks on New Advance Receipts, user can see the pre-defined Advance receipt number and Advance Receipt date. 81
: User organization state Advance Against: Goods /")

82 In Advance Receipt From: User Org details will be displayed as below. Advance Received By : Org Name Branch: Shipping location GSTIN : GSTIN Number Place of Supply (State): User organization state Advance Against: Goods / Services or Any purchase Order Advance Received From: Supplier details will be selected as below. Party Type Party Name Location Party ID Ship To Receipt Details: Mode of Receipt By cash / Bank Deposited To GL Accounts created under that bank / cash Total Advance receipt amount Automatically taken from the liner data. Reference Number User should enter the ref number. Item Details: 82

83 Once the header information is added, user can enter the item information by clicking add item. Select the supply Name/Code. If the item falls under any exemption, enter the exemption code Below details can be pulled from the masters if user enters the data completely while se. Description HSN/SAC Quantity UOM Unit price Based on HSN/SAC code the Tax rate and amount will be pulled by the system either in CGST & SGST or IGST (As per GST there is no tax applicable for advance receipts as of now). Cess can also be applied for all cess related items. User can add multiple line items in a Sale Invoice. Once all the items are added user can allocate the amount in place of advance amount allocation. Once the amounts are allocated, user can see the total amounted collected, Cess amount (If applicable) and the total amount collected from the party in the bottom. User can Save / Draft the transaction. 12 E-Way Bill: 11.1 Registration process for NIC credentials: If user want to generate a E-Way bill, user need to register in E-Way bill NIC- National Information Centre for user ID and Password. 83


84 User needs to register in the following website - to get the NIC Credentials. Click on registration and select E-Way Bill Registration. Enter the GST Registration number of the organization and the Captcha code displayed in the page. User will be redirected to the below page for registration. 84


85 Click on registration button to proceed as shown in the screen below. Then user should select Add/New option for new registration. I. Select the GSP Name from the dropdown list. II. Enter the user name and Password. 85

86 III. Reenter the User name and Password to confirm. Click on Add to add the registration details. Once it is successful user can use the user name and password in NIC E-Way bill to create E-Way bills. Note: User should generate user ID and Password in NIC portal for each GSTIN and the same can be used in ubooks E-Way Bill Generation in ubooks: First user needs to configure the NIC credentials in ubooks. To configure user needs to click on NIC Config. Then user should enter the User name, Password, Re-Enter password and save the details. 86
87 Once the NIC configuration is done, user can generate E-Way bills from the invoice. Note: The login details (username and password), which are generated in E way bill portal. After creating the invoice, click on more option and select generate E-Way bill option. Then the system will redirect the user to E-Way bill screen. System pulls invoice and item information. User should select the following details in E-Way bill screen. i. Transportation Mode 87

88 ii. Transporter Distance iii. Vehicle No iv. Vehicle Type v. Transporter ID vi. Transporter Name vii. Transporter Invoice number viii. Transporter document Date Once all the information is entered, click on Get E-Way bill option to generate E-Way bill. Once the E-Way bill is generated, user can get the bill information under this screen. Once the E-Way Bill is generated from ubooks it will get updated in the invoice, so that user can print and use the invoice copy for shipping of goods. 88

89 11.3 E-Way Bill Amendment: If user want to amend/change the E-Way bill, only vehicle number can be changed by selecting the option Update E-Way Bill. Apart of vehicle number anything needs to be changed, user needs to cancel the E- Way Bill and generate a new one. 13 Reports: 12.1 Accounting Reports Journal Report: Navigation: Accounting Reports Journal Report New Report Once user clicks on Journal Report user will be routed to the date selection screens. In this screen user should select the from date and to date and then click on GET option. 89


90 Then user can see the journal transactions happened in the selected date range in chronological order. User can see the invoice number, Debit/Credit amounts against each transaction. User can click on total of each transaction/entry and can be routed directly to the respective invoice for further information. User has an option to select number of transactions / entries to be appeared per page in the bottom of the screen. User can switch to next / previous page by selecting the arrow mark at the end of the bottom line. User can take a print of the report by selecting print option Accounting Transactions: 90

91 Navigation: Accounting Reports Accounting Transactions New Report Once user clicks on Accounting Transactions user will be routed to the date selection screen. In this screen user should select the from date and to date and then click on GET option. Then user can see the Account transactions happened in the selected date range in chronological order. User has the option to set the filter for the selected accounts. User can see the Transaction number, Party Name, Transaction number, transaction type and Debit/Credit amounts against each transaction. User can click on total of each transaction/entry and can be routed directly to the respective invoice for further information. 91
92 Trial Balance Navigation: Accounting Reports Trial Balance New Report Once user clicks on Journal Report user will be routed to the date selection screen. In this screen user should select the from date and to date and then click on GET option. User can see the balance of each account as of the selected date and the total of all account balances. 92
 New Report Once user clicks on Profit and Loss report, user will be routed to the date selection screen.")
93 User has an option to click on amounts to navigate to the respective account transaction (Ledger). From Account transaction user can even route to the respective invoice Profit and Loss: Navigation: Accounting Reports Profit and Loss (Schedule III) New Report Once user clicks on Profit and Loss report, user will be routed to the date selection screen. In this screen user should select the from date and to date and then click on GET option. 93

94 User will get all the profit and loss statement for the selected date range. User should click on the note number of each P&L Account item to see the total accounts under the selected item. User can navigate to the Account Transactions of respective account by clicking on the amount against selected account. From Account transaction user can even route to the respective invoice Balance Sheet: Navigation: Accounting Reports Balance Sheet (Schedule III) New Report Once user clicks on Balance Sheet Report, user will be routed to the date selection screen. In this screen user should select the from date and to date and then click on GET option. 94

95 User will get all the Balance Sheet statement for the selected date range. User should click on the note number of each Balance Sheet item to see the total accounts under the selected item. User can navigate to the Account Transactions of respective account by clicking on the amount against selected account. From Account transaction user can even route to the respective invoice User Reports 95

96 MIS Reports: Navigation: User Reports MIS Reports Select Report Once user clicks on MIS Reports user will be routed to the date and report type selection screen. User should select the from date and To date. User can select the multiple locations, if user need a report for multiple locations. Select the report type Type of report which user wants to generate. Click on generate option to generate the report. Then user can see the report in report viewer. User can download / save the report in any format by selecting the format type. 96


97 Trade Receivables: Navigation: User Reports Trade Receivables New Report Once user clicks on Trade Receivables Report, user will be routed to the date selection screen. In this screen user should select the from date and to date and then click on GET option. User will get all the Trade Receivables for the selected date range. User has an option to click on amounts to navigate to the respective account transaction (Ledger). 97
98 User can navigate to the respective invoice by clicking on the amount in account transaction screen Trade Payables: Navigation: User Reports Trade Payables New Report Once user clicks on Trade Payables Report, user will be routed to the date selection screen. In this screen user should select the from date and to date and then click on GET option. User will get all the Trade Payables for the selected date range. User has an option to click on amounts to navigate to the respective account transaction (Ledger). 98


99 User can navigate to the respective invoice by clicking on the amount in account transaction screen Inventory Valuation Summary: Navigation: User Reports Inventory Valuation Summary New Report Once user clicks on Inventory Valuation Summary Report, user will be routed to the date selection screen. In this screen user should select the from date and to date and then click on GET option. User can see the list of items, quantity available and inventory Asset value of the items in the report. 99


100 User can navigate to inventory transactions directly from the report just by clicking on inventory value and from inventory transactions user can even navigate / view respective transaction if required. User can take a print of the reports by clicking on print option. 14 Bank Reconciliation: Bank reconciliation tile allows to maintain two screens. 1. Reconciliation 2. Cleared / Uncleared report 14.1 Reconciliation: A bank reconciliation is the process of matching the balances in an entity's accounting records for a bank account to the corresponding information on bank statement. The goal of this process is to ascertain the differences between the two, and to book changes to the accounting records as appropriate. Navigation: Bank Reconciliation Reconciliation Once user clicks on Reconciliation, system will navigate the user to the reconciliation screen. 100

101 User should have a physical copy of bank statement for which reconciliation needs to be done. Then user should select the bank account from the dropdown from select account field. Note: All the accounts created under Cash and Cash equivalents with type as bank will be displayed in select account field. User should select the from date and to date (Reconciliation period) and click on submit. Then system will pull all the records between the selected period for the selected account. User can sort the list of records dates wise, so that user can cross verify all the records with the details like amount, check/neft/imps/rtgs number with the physical statement. When the record matches with the physical statement, user needs to enter the bank date and move to the next transaction. User have an option to copy the transaction date to bank date for all the records at once using check box. If user finds any mismatch records/transactions, he can click on date column and clear the date. 101


102 Based on bank date for the selected transactions, balance as per company books will be calculated and displayed. User should enter the balance as per bank book in debit column or in the credit field if the amount is negative. Then ubooks will calculate and show you the variance amount which is mismatch value between company books and bank books. User can recheck the transactions based on variance amount and reduce the variance amount by adding the missing records in the transactions and updating the bank date to it. Then user can click on reconcile to move all the reconciled transactions to cleared queue Cleared/Uncleared Report: Once the reconciliation is done, user can check the records in cleared/uncleared queue. 102


103 All the reconciled records will be pushed to cleared queue, and all the pending records will be moved to uncleared queue. User have an option to move uncleared record to cleared queue by updating the bank and click on clear option. 15 Offline Functionality: As ubooks is a desktop-based SaaS model application which allows user to work even in offline i.e. in the absence of internet connectivity also. Note: Before synchronising to offline, user should check whether the 3 pre-requisites are installed in the system or not. Listing below are the 3 pre-requisites, 1. Microsoft SQL Server Compact 103
104 2..Net Framework or Higher (Available by default with OS) 3. Microsoft Sync Framework version 2.1 Attaching the screen shot below for user reference. Supported transactions for offline functionality: Sales Transactions 1. Sale Invoice 2. Sale Return 3. Sale Credit Note 4. Sale Debit Note Purchase Transactions: 1. Purchase Invoice 2. Purchase Return 3. Purchase Credit Note 4. Purchase Debit Note Payments: 1. Payments 2. Receipts 3. Advance Payment 4. Advance Receipt Manage Orders 1. Sales Order 2. Purchase Order Supported Masters and Configurations for offline functionality: Org. Management 1. Org. Profile 2. Manage Roles 3. Users Configurations 1. Additional Field Config 2. Document Number Generation 3. Template Selection Masters Management 1. Supply Master 104
 to switch to offline mode.")
105 2. Supplier Master 3. Customer Master 4. Setup GL Accounts How to proceed for offline mode: There are two ways for user to shift to offline mode from online. 1. User should click on Live option present on ribbon (top of the screen) to switch to offline mode. Once user clicks on live option, ubooks will start synchronising the server data to offline database and this process will take 2-3 minutes depending on the data size. Then ubooks will show the list of transactions synchronised and the colour of the ribbon changes to maroon colour. 105


106 Once all the transactions are synchronised, user can start using ubooks even in the absence of internet connectivity. When user has the connectivity again, user should click on the same button to switch to online/live mode. Even for switching to online mode ubooks will take 2-3 minuets for synchronising local data to server database. 2. Other way of switching to offline mode is - User can click on Synchronization option under Data Management tile. Then user should click on Offline-Sync option to synchronise the server data to local database. ubooks will display all the synchronised data, then user start working in the online mode. Note: The colour of the ribbon will change to black when ubooks is in online mode. 106
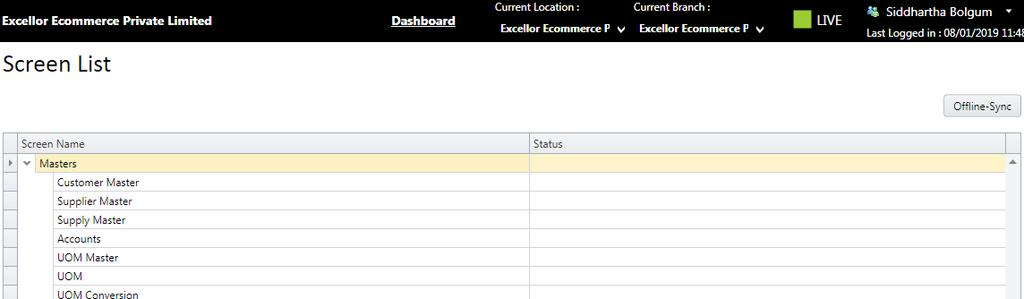
107 107