HARBORTOUCH HOSPITALITY USER GUIDE. Harbortouch Technical Support: or
|
|
|
- Esmond Tate
- 5 years ago
- Views:
Transcription


1 HARBORTOUCH HOSPITALITY USER GUIDE
2 INDEX EMPLOYEE FUNCTIONS: Clocking In/Logging In Clocking Out Beginning a Transaction Payment Options Host Mode Customer Database List View Ticket Functions Item Functions Page 1 Page 2 Page 3 Page 5 Page 7 Page 8 Page 9 Page 10 Page 11 MANAGER FUNCTIONS: Accessing the Manager Screen Using the Daily Report End of Day Process Reopening Tickets & Refunding Items Accessing Advanced Reports Creating/Editing Jobs Creating/Editing Employees Creating/Editing Discounts Creating/Editing Void Reasons Creating/Editing Menu Creating/Editing Sections Modifying Labor Updating Fresh Sheet Enabling Credit Card Pre-Authorization Page 12 Page 12 Page 13 Page 14 Page 16 Page 17 Page 18 Page 19 Page 20 Page 21 Page 23 Page 24 Page 25 Page 26


3 EMPLOYEE FUNCTIONS CLOCKING IN/LOGGING IN PLEASE NOTE: Users will be automatically clocked in for their shift when they log in for the first time. From the main log in screen, type your four digit PIN. After entering the PIN, a dialog box appears with a list of jobs. Touch the appropriate job for the employee logging in. A dialog box may ask the user to select a cash drawer (if the terminal has a cash drawer). There is an option called I am not using a cash drawer for employees that doesn t need access to a cash drawer for employees to perform their job. Select the appropriate cash drawer option. This completes the clock in process. PAGE 1


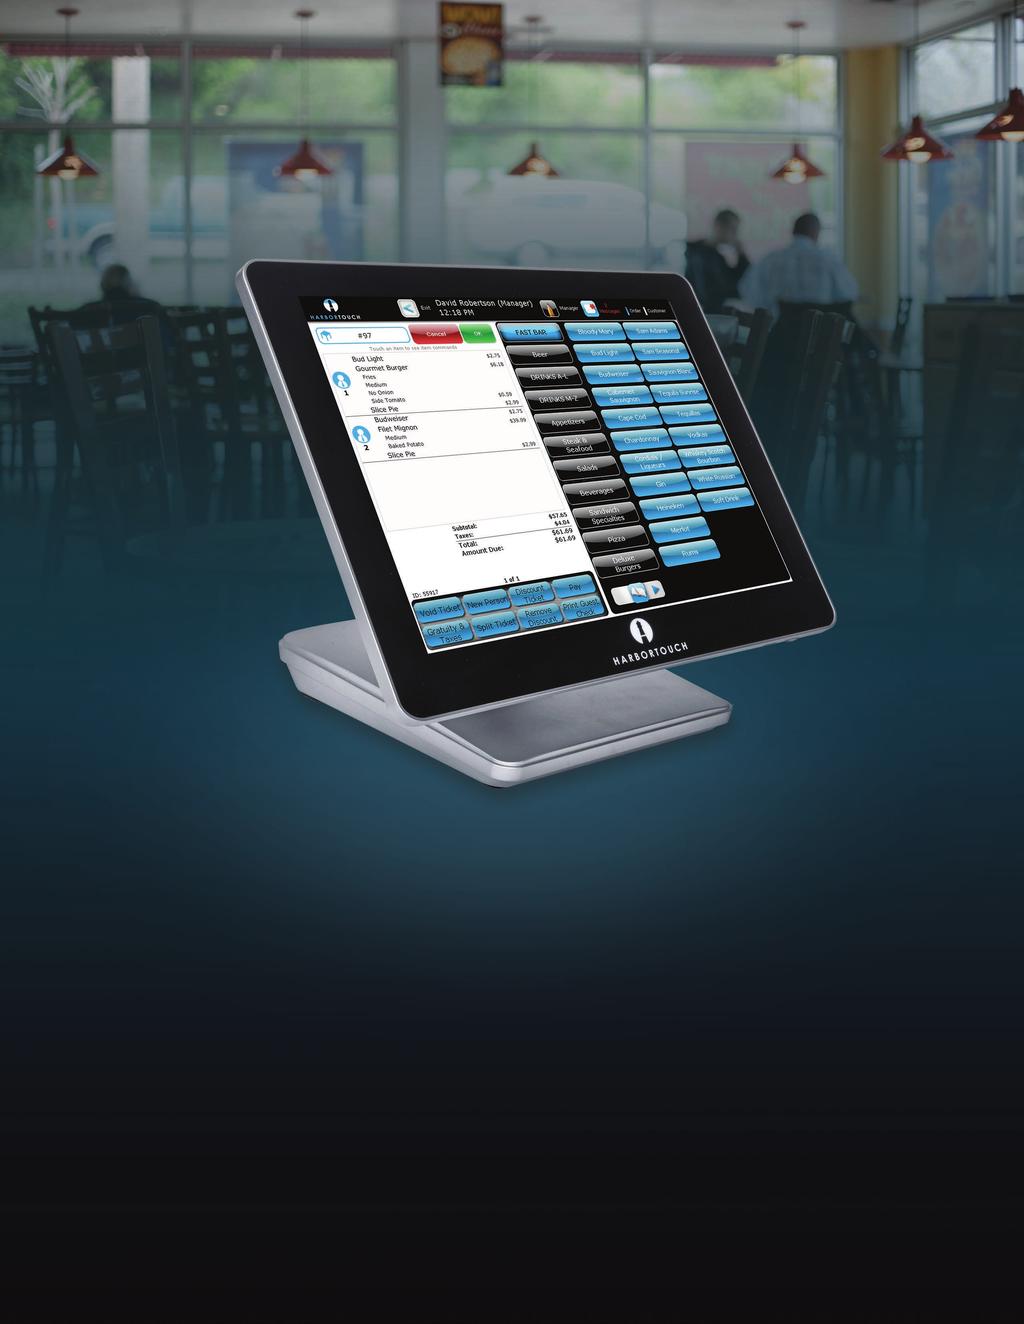
4 EMPLOYEE FUNCTIONS EMPLOYEE FUNCTIONS CLOCKING OUT BEGINNING A TRANSACTION Select Personal Page in the top right corner of the ticket screen. There are alternate methods to begin a transaction intuitively following each transaction type. The simplest method is selecting an item on the right side of the ticket screen. This will automatically create a new ticket and you can continue adding items to it. For counter-based and other fast-paced environments: If Fast Pay is enabled, the most common cash totals will be displayed at the bottom of the ticket. You can simply click on one of these options to quickly close out the ticket. Select Clock Out. Press the green OK button to confirm the order, or if you would like to assign this ticket to a table or section, select the section screen located in the top left of the ticket. Declare tips if necessary. Select Clock Out or Clock Out and Print. From the section screen, a table or section (such as delivery) may be selected. If you would like to assign a custom name to the call when the order is ready or associate with a customer for easier memory, select Custom Name. PAGE 2 PAGE 3


5 EMPLOYEE FUNCTIONS EMPLOYEE FUNCTIONS BEGINNING A TRANSACTION (CONTINUED) PAYMENT OPTIONS Enter a custom name of your choice and select OK. You may select OK on the section screen to return to the ticket. This method is commonly used in counter service and bar environments. If Fast Pay is enabled (enabling Fast Pay is covered later in this guide), the most common cash totals will be displayed at the bottom of the ticket. The Fast Pay options will always display exact change, then the lowest total if paid in singles, fives, tens, or twenties. You can simply click on one of these options if appropriate. This method is used commonly for counter-based transactions. Alternatively, you can select New Ticket in the bottom left of the ticket screen. The section screen will appear and you will be prompted to select the table and number of customers seated. This method is commonly used in dining environments. Alternatively, you can select Pay on the bottom of the screen. If credit card pre-authorization is enabled, you can also swipe a card at any given time (no need for a ticket to be open). You will be prompted whether you would like to pre-authorize the credit card for the standard authorization amount. Once you select Yes, a ticket will be created. On the Pay screen, shortcuts are available on the left and right sides of the number pad. The shortcuts or the number pad can be used to enter an amount if using multiple tender types. Otherwise, selecting the tender type without an amount will enter the exact amount. PAGE 4 PAGE 5


6 EMPLOYEE FUNCTIONS EMPLOYEE FUNCTIONS PAYMENT OPTIONS (CONTINUED) HOST MODE Host mode allows the host or hostess to manage the available tables in the restaurant. To access this functionality, select Host in the top right of the ticket screen. If credit is selected, the system will prompt to enter a credit card number. This can be accomplished using the on screen number pad or by swiping a credit card. By default, Create/Open Tickets is selected. In this mode, a new ticket will automatically be created when you touch an open table. If you touch an active/seated table, that table s ticket will automatically open. To enter tip at the time of sale, re-open the ticket and select Pay. You may select Enter Tip on the left side to modify the tip amount. Then select Finalize to complete the transaction. By choosing Select One or Select Multiple or Select All, you can access additional options for each table. If you select a clean table in this mode, you can then press New on the right side to create a ticket for that table. If you select an active/seated table, you can select Open, Print or Pay to view the ticket, print the ticket or complete payment. If you select a dirty table, you can mark it as clean. For tickets that were pre-authorized, the credit card authorization will list the total amount of the ticket as the payment amount. You may add the tip and finalize the transaction without needing to retrieve the customer s credit card. However, if the total amount is higher than the pre-authorized amount, you will be at an increased risk for charge backs. In this case, you should void the original pre-authorization and swipe the card again to re-authorize. PAGE 6 PAGE 7
.")


7 EMPLOYEE FUNCTIONS EMPLOYEE FUNCTIONS CUSTOMER DATABASE LIST VIEW Selecting Customer in the top right corner of the ticket screen will open your customer database. You may select a customer or search for a customer using any information you have stored (name, phone number, address, membership ID). The customer will be selected automatically if scanning or swiping a membership card, or if receiving a call from the phone number associated with the customer (if caller ID is installed). Introduction List View provides higher level control over multiple tickets at once. The functions available in List View are primarily used to transfer control in delivery or dining operations and to handle payments. Open Ticket This function will open the selected ticket. Pay with Cash This function will close all selected tickets tendered with cash for the exact amount. To create a new customer and track purchase history and loyalty rewards, the only information needed is a name. The membership ID can be used to assign a membership card using a barcode or magnetic strip data. After the customer is selected, their most commonly ordered items will be available at the bottom of their customer record. The POS will automatically sort the items by quantity ordered and track all common modifications of the items. You can simply select one of these items to begin a new order and make any modifications needed. Assign Tips This function allows tips to be quickly added at the end of the night. Transfer to Me This function is used to take control of a ticket. This is commonly used by servers taking over a shift or seating a customer from the bar. Transfer to... This function is used to transfer control of a ticket to another staff member. This is commonly used to assign orders to drivers. Print Delivery Info This function will print all information tracked on the customer on the kitchen ticket. This is useful in very low volume delivery environments that do not have a specified driver. If the environment uses drivers, this function would be set up to trigger automatically when the ticket is assigned. Print Guest Checks This function will print guest checks for all selected tickets. Combine Tickets This function is used to combine tickets in cases where they were mistakenly separated or a tab is being paid for by another customer. PAGE 8 PAGE 9
.")
8 EMPLOYEE FUNCTIONS EMPLOYEE FUNCTIONS TICKET FUNCTIONS (CONTINUED) ITEM FUNCTIONS When you first create a ticket, the most common cash totals will be displayed at the bottom of the ticket (If Fast Pay is enabled). Upon re-opening a ticket or beginning a transaction using the new ticket function for dining transactions, the following ticket functions will be displayed at the bottom of the ticket replacing the Fast Pay options. Void Ticket This function displays all available void reasons in the POS for reporting purposes. Gratuity & Taxes This function allows the standard gratuity or taxes to be manually added or removed from transactions. New Person This function adds an additional seat position to the table. This can be used to assist an expediter or to separate ownership of items on the ticket. Split Ticket This function will prompt to split the ticket based on the customers selected. Tickets may be split in one of three ways: 1. Split selected people to one new ticket This can be used to place two people at a table of 12 on their own ticket and leave the remaining 10 together. 2. Split selected people to new tickets This can be used to separate 2 people onto 2 separate tickets at a table of 12 and leave the remaining 10 together. 3. Split all people to new tickets This can be used to separate all 12 people to their own tickets regardless of who is selected. Discount Ticket This function will prompt to select a discount that applies to the entire ticket. Remove Discount may be used if the wrong discount is accidentally applied. Print Guest Check This function will manually print a guest check from the receipt printer. By selecting an item on the ticket, the item management functions will appear. Repeat This function will duplicate all selected items. This can be used to repeat a round of drinks for all customers on the ticket, or repeat a complicated pizza or sandwich order. Remove Item This function will remove the selected item from the ticket. If the item has been committed to the kitchen, the system will prompt for a void reason for reporting purposes. Quantity & Price This function will modify the quantity or price of the selected item. Discount Item This function will list all available discounts in the POS that apply to the selected items. You may remove a discount if selected by mistake using Remove Discount. Move Item This function allows an item to be transferred from one customer to another. This is commonly used if an item was mistakenly placed on the wrong tab, or the customers decided to change how they plan on splitting tickets. Share Item This function will prompt to choose the fraction of ownership between customers and automatically update the price. This allows for items such as an appetizer sampler to be easily split between multiple customers on their ticket. Special Request This function allows you to enter any uncommon requests for the kitchen using the on-screen keyboard. Kitchen Hold This function allows a server to prevent an item from printing in the kitchen. This gives the server control of the timing of items in the kitchen. PAGE 10 PAGE 11
, then select Remove Cash Drawer.")
9 MANAGER FUNCTIONS MANAGER FUNCTIONS ACCESSING THE MANAGER SCREEN END OF DAY PROCESS Select Manager in the top function bar on the ticket screen. Select Cash Drawer from the bottom of the ticket screen (when a ticket is not selected), then select Remove Cash Drawer. USING THE DAILY REPORT Each option on the manager screen includes each manager section includes an explanation of the functionality available. If tips are accepted, ensure your staff is trained to finalize all credit card transactions when the transaction is completed. If you have any checks that have not been finalized, it is recommended to add tips and finalize them at this point. Credit card transactions will not batch out until they are finalized in the system. You can view whether any transactions are still pending finalization either in the default ticket view or list view. Select All Tickets in list view to see all employees tickets. Please note: All finalized transactions will automatically batch out at 3:00 am daily. If any checks are not finalized at this point, they will not be on the day s credit card batch. If you would like to change the settlement time, please contact Harbortouch Technical Support at or possupport@harbortouch.com. To access the Daily Report, select Daily from the manager screen. By default, the daily report will display all of your business sales and operations information from the start of your business day to the current time. The start and end time or date can be changed in the top left corner of the daily report screen. This report can also be used to spot check an employee at any time. By selecting a driver or server in the bottom left, then selecting Selected Users, the report will update to display their sales information. If you scroll down a short distance to Cash Due Restaurant, you can view how much the employee has in their pocket for their driver/server bank at any time. Once all tickets are finalized, review the Tender Detail (All) report to ensure tip amounts are accurate. To display this report, go to Reports from the manager screen and then select Auditing, and then Tender Detail (All). Once on this screen, select Show in the top right corner. This report will display all transactions and tips sorted by tender type. Review all transactions under credit, and if any are inaccurate, record the ticket ID number from the column on the left. Using the ticket ID number, recall the ticket under Manager > Tickets. Once the ticket is reopened, the tip can be adjusted from the payment screen. PAGE 12 PAGE 13


10 MANAGER FUNCTIONS MANAGER FUNCTIONS END OF DAY PROCESS (CONTINUED) REOPENING TICKETS & REFUNDING ITEMS (CONTINUED) Next, return to the manager screen and select Daily. You may print your daily report by pressing the Print button at the bottom of the screen. Select Adjust Over/Short on the right side. You will see the record of the Remove Cash Drawer function you performed. Select this record and select Record to track cash over or short. PAGE To refund a transaction that has not yet been settled, reopen the ticket from the ticket screen and remove the items being refunded. Select Pay and the amount to refund will be displayed at the top. Once the amount has been refunded, select the payment on the left and select Yes to remove. Select cash or credit to finalize the ticket for the updated amount. REOPENING TICKETS & REFUNDING ITEMS If a completed ticket must be reopened at a future date or time, select Tickets from the manager screen. To refund a transaction that has already been settled, select Credit Refund from the manager screen. A message is displayed stating that the transaction will not be attached to a ticket. This is because the transaction has already been processed. Select OK. Enter the dollar amount that will be refunded and select OK. Swipe or enter the credit card information and select OK. A receipt for the transaction will print and the refund will be complete. Filtering options are available at the bottom of the screen to simplify your search. Once the ticket that should be reopened is found, select Reopen. The system will state that the ticket was reopened under the person who closed the ticket. The ticket can be accessed by this user or a user with access to All Tickets. PAGE 14 PAGE 15


11 MANAGER FUNCTIONS MANAGER FUNCTIONS ACCESSING ADVANCED REPORTS CREATING/EDITING JOBS Select Report from the manager screen to access the 100+ base reports in the POS. To edit an existing job, select it and then press Edit. To create a new job, select New. The dropdown can be used to filter the reports available. Once a report is selected you may further modify the date ranges using the options on the right. Save Favorite can be used to rename reports and add them to the favorites category. Select Show Report to populate the data. Jobs allow for the interface of the POS to be customized based on the job role being performed during a shift. To create or edit a job, select Jobs from the manager screen. All reports can be printed or exported to.xls,.pdf,.rtf, or.csv format. Most third-party accounting software will require a.csv file for import. PAGE 12 Each job requires a name and a pay rate (0 can be used if this job is not tracked for labor purposes). Along the left side are many customization options based on job. Fast Pay is commonly enabled for cashiers, bartenders, and other users handling fast cash transactions. PAGE 16 PAGE 17

, a PIN code for logging in, a job, and a first and last name (this name appears on reports).")
.")

12 MANAGER FUNCTIONS MANAGER FUNCTIONS CREATING/EDITING EMPLOYEES CREATING/EDITING DISCOUNTS To create a new employee or edit an existing employee, select Employees from the manager screen. To create a new discount or edit an existing discount, select Discounts from the manager screen. To edit an existing employee, select the employee and then press Edit. To create a new employee, select New. To edit an existing discount, select the discount and then press Edit. To create a new discount, select New. To add an employee, enter a user name (this name appears on receipts), a PIN code for logging in, a job, and a first and last name (this name appears on reports). On the right side you may select the employee s POS permissions. At the bottom right you may use the security template dropdown to select All or All Non-Management to simplify your selections. Each button on the POS can be turned on or off per each individual employee. To create a discount, enter a name and an amount (the amount can be a percentage, dollar amount, or a forced price). All other functionality on the page is optional for further customization. Other available functions include the following: The dropdown menus in the top right allow you to restrict the items or groups to which a discount applies. The filters at the bottom of the screen allow you to limit the discount to certain days/times. This is commonly used for happy hours. If you want the discount to automatically apply during the selected time periods, you must also check Apply this discount automatically. Require employees to enter a reason when applying this discount. Select whether the discount can apply to an entire ticket, individual items, or both. PAGE 18 PAGE 19


13 MANAGER FUNCTIONS MANAGER FUNCTIONS CREATING/EDITING VOID REASONS CREATING/EDITING THE MENU To create a new void reason or edit an existing void reason, select Voids from the manager screen. To edit the menu, select Menu from the manager screen. To edit an existing void reason, select the reason and then press Edit. To create a new void reason, select New. The only information required is a name. A report detailing which void reasons were used when a void was performed by each employee can be found under the audit category in the report section. By selecting the appropriate option from the navigation buttons on the left of the screen, you can create or edit Screen Categories, Item Groups, Menu Items, Choice Sets, Choices, Revenue Classes and Taxes. The first option is Screen Categories. Select an existing category and press Edit or press New to create a new screen category. To create a screen category, the only information required is name. Make sure Manually Selected Contents is selected. The next option is Item Groups. Select an existing group and press Edit or press New to create a new item group. The only information necessary is a name. Prices should not be added to Item Groups. Screen Categories are the groups in which menu items are displayed on the POS. Item groups are used to organize items for reporting and printing purposes. It is very common for item groups to be the same as screen categories. If this is how you want to set up your system, you should create an item group to match every screen category you create. From the Menu Items section, you can edit an existing menu item by selecting it and pressing Edit or create a new item by pressing New. Menu Items require a name, revenue class for tax purposes, item group and screen category to define where the item is displayed on reports and the ticket screen, and a price. Choice sets can be assigned in the top right if available. Additional options are available at the bottom for further customization. PAGE 20 PAGE 21


14 MANAGER FUNCTIONS MANAGER FUNCTIONS CREATING/EDITING THE MENU (CONTINUED) CREATING/EDITING SECTIONS From the Choice Sets section, you can edit an existing choice set by selecting it and pressing Edit or create a new choice set by pressing New. Choice Sets only require a name. Prepend (the checkbox in the bottom right corner) and Override Choice Pricing (to set an upcharge on each of the choices) are the most common options used. After saving a new choice set, selecting Edit will offer a new option for attaching the choice set to multiple items at the bottom of the screen. To edit the restaurant sections, select Sections from the manager screen. From the choices section, you can edit an existing choice by selecting it and pressing Edit or create a new item by pressing New. Choices require a name and can be attached to multiple choice sets using the Is Part of These Choice Sets dropdown. If the choice is in a choice set where all choices are a different price you may place an upcharged price in the top right. If the choice is a different price from a choice set that sets the price, you may select to override the choice set price. To create a new section, select Add New Section on the left. The Edit Sections screen allows you to customize how the interface responds when a ticket is opened or assigned to this section. Select Layout on the right to create and arrange tables for your dining sections. You can select from a variety of table shapes and sizes to reflect your restaurant layout. PAGE 22 PAGE 23


15 MANAGER FUNCTIONS MANAGER FUNCTIONS MODIFYING LABOR UPDATING THE FRESH SHEET Select Labor from the manager screen. Select Fresh Sheet on the manager screen to view the items on the fresh sheet. Items can be double tapped or you can use the blue arrow buttons in the center of the screen to move items on or off the fresh sheet. You can set the quantity threshold that must be reached before a particular item is visible on the fresh sheet by selecting Edit. Use the filters at the bottom and right of the screen to review your shifts. The shift can be deleted, clocked out, or edited to change the amount of break time tracked or the start and end time. The quantity remaining can be found on the main login screen to conveniently update cashiers and servers throughout the day. The quantity can also be found in the bottom right corner of the menu item button. If an item is no longer available, the button will be displayed in black with a large red X and a quantity of zero. When selected, it will explain that the item cannot be ordered until the fresh sheet is updated. PAGE 24 PAGE Harbortouch Payments, LLC. All rights reserved.

16 ENABLING CREDIT CARD PRE-AUTHORIZATION Select System from the Manager Screen. Then select Credit, then Advanced Setup. Check the box next to Allow credit cards to be authorized ahead of time. In the Standard Authorization Amount field, enter the dollar amount you will pre-authorize on the credit card. This amount should be high enough that your customers will not commonly exceed the amount but low enough that it will not seem unnecessary and upset your customers. $20 - $30 is common in many environments while $50 - $75+ is common in higher priced establishments or night clubs. Click OK when finished. Note: When a credit card payment is finalized for 20% or more over the pre-authorized amount, the transaction is flagged and has a high risk of becoming a charge back. If your transactions are commonly more than 20% higher than the preauthorized amount, you should increase your pre-authorization amount to reduce this risk. It is highly recommended to void the original pre-authorization and run the credit card again for any transactions that exceed the pre-authorized amount. PAGE 26
17 HT1805_ TECHNICAL SUPPORT
HARBORTOUCH ECHO USER GUIDE HARBORTOUCH SUPPORT LINE:
 HARBORTOUCH ECHO USER GUIDE INDEX EMPLOYEE FUNCTIONS: Clocking In/Logging In Logging Out Calculator, ECR and POS Mode Beginning a Transaction Item Functions Ticket Functions Payment Options Refunding a
NorthStar Club Management System. Retail Point of Sale (RPOS) Version General Users Guide RPOS
 Version General Users Guide RPOS") Retail Point of Sale (RPOS) Version 2.3.0 RPOS-12052006 December 05, 2006 Copyright Statement Except as otherwise specifically noted, NorthStar Technologies, Inc. reserves the right to change all or part
Retail Point of Sale (RPOS) Version 2.3.0 RPOS-12052006 December 05, 2006 Copyright Statement Except as otherwise specifically noted, NorthStar Technologies, Inc. reserves the right to change all or part
Retail POS Manual. User Guide - Table of Contents Fall Edition
 2016 - Fall Edition Retail POS Manual User Guide - Table of Contents Overview Use Case(s) Accessing the Tool Opening a Ticket Navigating the POS Screen POS Main Button Functionality Lookup Item Remove
onepos Management Console Manual Version 3.4
 onepos Management Console Manual Version 3.4 onepos Manager Console Manual - Version 3.3-1 Copyright (c) 2001-2012, onepos, LLC All rights reserved. Except as permitted under the copyright act of 1976,
Aldelo Touch User Manual
 2 Aldelo Touch User Manual Copyright 1997 2014 Aldelo, LP. All Rights Reserved. PUBLISHED BY Aldelo, LP 6800 Koll Center Parkway, Suite 310 Pleasanton, CA 94566 Copyright 1997-2014 by Aldelo, LP All rights
Foreword. Sales Associates Managers
 Foreword This book is a pocket guide for using the Register module for the InfoTouch Store Manager. It outlines the basic steps and procedures for processing sales, from the beginning to the end of a day.
Penny Lane POS. Basic User s Guide
 Penny Lane POS Basic User s Guide Penny Lane POS Basic User s Guide - Contents PART 1 - Getting Started a) Powering on the Equipment 2 b) Launching the System 2 c) Float In/Float Out 2 d) Assigning Cashier
Business Software Solutions. BPA Restaurant Delivery Professional Quick Start Guide
 Business Software Solutions BPA Restaurant Delivery Professional Quick Start Guide Contents Initial System Startup... 3 Defining Employees... 4 Creating Your Menu... 5 Adding Product Information to Your
onepos Management Console Manual Version 5.0
 onepos Management Console Manual Version 5.0 onepos Manager Console Manual - Version 5.0-1 Copyright (c) 2001-2016, onepos, LLC All rights reserved. Except as permitted under the copyright act of 1976,
Daily Operations Guide
 Daily Operations Guide Detailed Overview of The Reports in The Envision Software I Day-to-Day Operations Guide Table of Contents Part I Welcome to Envision Cloud 1 Part II Daily Operations 2 1 Clocking
Copyright Wolf Track Software
 Copyright 2009. Wolf Track Software No part of this publication may be reproduced in any form, by Photostat, Microfilm, xerography, or any other means, which are now known, or to be invented, or incorporated
Table of Contents.
 Quick Start Guide Table of Contents Equipment Setup and Break-Down 1-2 Processing a Sale 3 Payment Types 3 Tax Change 3 Scanning Items 4 Price Checks 4 Voids 4 Returns 4 Reprints 4 Gift Certificates 5
Register App Training Guide
 Register App Training Guide Outline 01 Making an Order: Page 3 02 Editing Order Details: Page 11 03 Using UPC and Barcode Scanner: Page 20 04 Executing a Transaction: Page 23 05 Customer Screen and Receipts:
POS Support Manual 01/10/2013
 POS Support Manual 01/10/2013 The purpose of this document is to give complete instructions on how to use the POS module of Infusion software. This document should be read in conjunction with the Infusion
Deltek Touch Time & Expense for Vision. User Guide
 Deltek Touch Time & Expense for Vision User Guide September 2017 While Deltek has attempted to verify that the information in this document is accurate and complete, some typographical or technical errors
Point of Sale Quick Reference
 Eagle Point of Sale (POS) Quick Reference January 2012 This manual contains reference information about software products from Epicor Software Corporation. The software described in this manual and the
TurboCASH Business Class
 TurboCASH Business Class Guide to Point-of-Sales Philip Copeman The following icons have been placed on specific places throughout the documentation: Keyboard access Press the F1 key when focussed on screens
MicroSale Version 9 Discounts, Gratuity, & Maintenance
 MicroSale Version 9 Discounts, Gratuity, & Maintenance Discounts may be applied either to the entire order or to individual items on the order. You may select a discount for a percentage off, amount off,
ONE BUSINESS - ONE APP RESTAURANT VERSION USER MANUAL
 ONE BUSINESS - ONE APP RESTAURANT VERSION USER MANUAL 1 TABLE OF CONTENTS GETTING STARTED WITH SHOPBOX CREATE A PROFILE 4 CREATE YOUR RESTAURANT 4 HOW TO CREATE, EDIT AND DELETE ROOMS AND TABLES 6 CREATE
Table of Contents.
 Quick Start Guide Table of Contents Equipment Setup and Break-Down 1 2 Processing a Sale 3 Payment Types 3 Tax Change 3 Scanning Items 4 Price Checks 4 Voids/Returns 4 Reprints 4 Gift Certificates 5 All
Terminal Verification Checklist - NSPOS X
 May 4, 2017 Release 2017.1.X Table of Contents Overview... 1 Verification Steps... 2 User Interface... 2 Finding Items... 3 Transaction Processing... 3 Reports Functionality... 4 NetSuite ERP Integration
User Manual. Before plugging, starting or setting up your new terminal for the point of sale, please read carefully this User Manual
 User Manual Before plugging, starting or setting up your new terminal for the point of sale, please read carefully this User Manual Copyright This publication, including pictures, illustration and software,
Virtual Terminal User Guide
 Virtual Terminal User Guide Table of Contents Introduction... 4 Features of Virtual Terminal... 4 Getting Started... 4 3.1 Logging in and Changing Your Password 4 3.2 Logging Out 5 3.3 Navigation Basics
Table of Contents. Welcome to igo Figure...1 About this Guide...1 What does igo Figure do?...1 What is Expected of Me?...1
 Table of Contents Overview Welcome to igo Figure...1 About this Guide...1 What does igo Figure do?...1 What is Expected of Me?...1 Chapter 1: The Basics Clocking In and Out...3 In Case of Problems...3
ALDELO POS Training Manual
 ALDELO POS Training Manual Aldelo POS Training Manual PUBLISHED BY Aldelo, LP 6800 Koll Center Parkway, Suite 310 Pleasanton, CA 94566 Copyright 1997-2014 by Aldelo, LP. Second Edition All rights reserved.
Performing End of Day
 One Blue Hill Plaza, 16 th Floor, PO Box 1546 Pearl River, NY 10965 1-800-PC-AMERICA, 1-800-722-6374 (Voice) 845-920-0800 (Fax) 845-920-0880 Performing End of Day In order to close out a day at your store
VeriFone VX QUICK REFERENCE GUIDE
 QUICK REFERENCE GUIDE VeriFone VX This Quick Reference Guide will guide you through understanding your terminal s functionality and navigation, and will help you with troubleshooting. INDUSTRY Retail and
Deltek Touch Time & Expense for GovCon 1.2. User Guide
 Deltek Touch Time & Expense for GovCon 1.2 User Guide May 19, 2014 While Deltek has attempted to verify that the information in this document is accurate and complete, some typographical or technical errors
COMMON TRANSACTIONS AND FUNCTIONS
 ENTERING ITEMS MANUAL ENTRY UPC/SKU/Description Select QUANTITIES (+/-) OR ITEMS. Enter UPC, SKU, or item description in ITEM field. Select desired item in window on right of screen. USE HOT KEYS Hot keys
ClubSelect Accounts Receivable Special Charges Overview
 Webinar Topics Special Charges Billing... 2 Special Charges... 4 Special Credits... 8 Surcharges... 13 Calculate Automatic Billing Plans... 18 Special Charges Billing ClubSelect AR allows you to easily
REVERSE PAYMENTS. Note: Payments made using In-Store Credit cannot be reversed
 The Reverse Payment feature allows many mistakes made in transactions to be easily reversed. The Payment Reversal attempts to automatically refund or void out the selected payment. Note: Payments made
One Blue Hill Plaza, 16th Floor, PO Box 1546 Pearl River, NY PC-AMERICA, (Voice) (Fax)
 (Fax)") One Blue Hill Plaza, 16th Floor, PO Box 1546 Pearl River, NY 10965 1-800-PC-AMERICA, 1-800-722-6374 (Voice) 845-920-0800 (Fax) 845-920-0880 DELIVERY TRACKING Delivery and driver tracking functionality
One Blue Hill Plaza, 16th Floor, PO Box 1546 Pearl River, NY 10965 1-800-PC-AMERICA, 1-800-722-6374 (Voice) 845-920-0800 (Fax) 845-920-0880 DELIVERY TRACKING Delivery and driver tracking functionality
MANAGING POS SALES. Sign In
 MANAGING POS SALES Sign In 1. Enter your PIN. 2. Select Sign In. Home Screen The Home screen is displayed when you first open the POS. Use the Home screen to do the following: Access the Journal. Open
Manager Dashboard User Manual
 Manager Dashboard User Manual Manager User Guide The Manager User Guide is designed to provide a supervisor or a manager with step-by-step instructions for their daily tasks. Although every database will
Torex ABS-POS POS User Guide
 Torex ABS-POS POS User Guide Torex ABS-POS POS User Guide Date: 9 th January 2008 Copyright 2005, 2016, Oracle and/or its affiliates. All rights reserved. This software and related documentation are provided
Pocket Salon Booking. salonbiz.com
 Pocket Salon Guide Pocket Salon is a tool for your guests to carry your salon in their pocket! The app allows them to view, confirm, and manage their visits anytime, anywhere however they want. Logging
CashierPRO Retail Systems Inc. Release Note
 Version 4.0.9.3-02/17/16 MAJOR ENHANCEMENTS: Moneris Integration for Home Hardware Stores. Includes processing of Debit and Credit transactions communicating directly with a Moneris Pinpad. Allows for
GREYHOUND EXPRESS. User Guide. August Version 3.0. Greyhound EXPRESS - User Guide
 GREYHOUND EXPRESS User Guide August 2007 Version 3.0 Greyhound EXPRESS - User Guide Registered Trademarks Greyhound, the Greyhound "running dog, the Greyhound running dog and shield, the Greyhound running
Welcome to. Enterprise Manager. Sodexo: GM/Manager Manual
 Welcome to Enterprise Manager Sodexo: GM/Manager Manual Last Updated: January 2012 Table of Contents Signing into Enterprise Manager... 3 Introduction to Enterprise Manager... 4 Store Selection... 5 Adding
Sage What's new. March 2017
 Sage 300 2017 What's new March 2017 This is a publication of Sage Software, Inc. 2017 The Sage Group plc or its licensors. All rights reserved. Sage, Sage logos, and Sage product and service names mentioned
Connecting Time Matters/Billing Matters and QuickBooks. 35*45 Consulting - Global 7 Second System
 Why Choose QuickBooks... 3 Why Use Billing Matters... 3 Question to Ask... 3 Getting Started in Billing Matters... 4 Getting Started in QuickBooks... 11 Linking Billing Matters and QuickBooks... 14 Using
Users Manual BLITZKASSE GastroExpress for Android
 2016 v2.1 Users Manual BLITZKASSE GastroExpress for Android Dear Customer, Thank you for placing your trust in us by purchasing our POS system. For any questions and suggestions concerning our POS system,
01/18/2018 Blackbaud Altru 4.5 Tickets US 2018 Blackbaud, Inc. This publication, or any part thereof, may not be reproduced or transmitted in any
 Tickets Guide 01/18/2018 Blackbaud Altru 4.5 Tickets US 2018 Blackbaud, Inc. This publication, or any part thereof, may not be reproduced or transmitted in any form or by any means, electronic, or mechanical,
Retek Sales Audit 11.0 User Guide
 Retek Sales Audit 11.0 User Guide Corporate Headquarters: Retek Inc. Retek on the Mall 950 Nicollet Mall Minneapolis, MN 55403 USA 888.61.RETEK (toll free US) Switchboard: +1 612 587 5000 Fax: +1 612
HealthEquity Employer Portal Guide HealthEquity All rights reserved.
 HealthEquity Employer Portal Guide 2013-2015 HealthEquity All rights reserved. INTRODUCTION 09 ACCESSING PENDING PAYMENTS 01 LOGIN PROCESS 09 MODIFYING EMPLOYER INFORMATION 01 ADDING INSURANCE INFORMATION
Using the Commonwealth Bank EFTPOS terminal with QuickPOS
 Q U I C K P O S S U P P L E M E N T Using the Commonwealth Bank EFTPOS terminal with QuickPOS This special supplement shows you how to set up and use QuickPOS with the Commonwealth Bank s EFTPOS terminal.
Dealer Business System (DBS) Helping Dealers do business AMSOIL INC. 5/16/2014
 Helping Dealers do business AMSOIL INC. 5/16/2014") Dealer Business System (DBS) Helping Dealers do business AMSOIL INC. 5/16/2014 Table of Contents Activation... 6 Business Information... 6 Shipping Setup... 6 Charge Shipping on Pickup Orders: Checking
Dealer Business System (DBS) Helping Dealers do business AMSOIL INC. 5/16/2014 Table of Contents Activation... 6 Business Information... 6 Shipping Setup... 6 Charge Shipping on Pickup Orders: Checking
Editing an Existing Account on an Invoice Payment Creating a New Account on an Invoice Payment... 47
 ebilling User Guide Table of Contents About This Guide Chapter 1 ebilling Basics... 6 Getting Started with ebilling... 6 Logging into ebilling... 6 Working with the ebilling Home Page... 8 Updating Your
Contents OVERVIEW... 3
 Contents OVERVIEW... 3 Feature Summary... 3 CONFIGURATION... 4 System Requirements... 4 ConnectWise Manage Configuration... 4 Configuration of a ConnectWise Manage Login... 4 Configuration of GL Accounts...
Copyright Aldelo, LP All Rights Reserved.
 Aldelo POS User Manual PUBLISHED BY Aldelo, LP 6800 Koll Center Parkway, Suite 310 Pleasanton, CA 94566 Copyright 1997-2017 by Aldelo, LP. All rights reserved. No part of the contents of this book may
CommBank Small Business app User Guide
 CommBank Small Business app User Guide CommBank Small Business app user guide 2 Contents Welcome to the CommBank Small Business app 4 CommBank Small Business app in 5 easy steps 4 We re here to help 4
Oracle Hospitality Reporting and Analytics Advanced
 Oracle Hospitality Reporting and Analytics Advanced User Guide Release 8.5.0 E65823-01 September 2015 Oracle Hospitality Reporting and Analytics Advanced User Guide, Release 8.5.0 E65823-01 Copyright 2000,
Point Of Sales. Below is the step to enable Optimum Point Of Sales module. Step 1. As shown in the figure, click the menu from the ribbon bar.
 Point Of Sales Below is the step to enable Optimum Point Of Sales module. Step 1 As shown in the figure, click the menu from the ribbon bar. Step 2 Select the Modules item form the drop down list. 1 P
Memberships Guide. Detailed Overview of The Reports in The Envision Software
 Memberships Guide Detailed Overview of The Reports in The Envision Software I Envision Cloud Memberships Guide Table of Contents Part I Introduction 1 Part II Setup Membership Programs 1 1 Membership General
Payroll Processing User Guide. isolved. Payroll Processing Guide
 isolved Payroll Processing Guide Table of Contents My Payroll Processing Calendar... 2 Next Scheduled Payroll... 2 Client Run Schedule... 3 Payroll Entry Setup... 4 Time Entry Templates... 4 Client Time
Authorize.Net Mobile Application
 Authorize.Net Mobile Application Version 3.3.1 for ios and Android User Guide November 2017 Authorize.Net Developer Support http://developer.authorize.net Authorize.Net LLC 082007 Ver.2.0 Authorize.Net
TableService BarTabs Delivery/ QuickService
 POS TouchScreen POS Wireless Handheld POS PERIPHERAL DEVICES Caller ID Devices Cash Drawers Coin Dispensers Customer Displays Debitek Card Readers Fingerprint Readers Kitchen Display Units Liquor Control
EXAM - MB Microsoft Dynamics AX 2012 R3 Retail exam. Buy Full Product.
 Microsoft EXAM - MB6-701 Microsoft Dynamics AX 2012 R3 Retail exam Buy Full Product http://www.examskey.com/mb6-701.html Examskey Microsoft MB6-701 exam demo product is here for you to test the quality
Sage 300 Retail Management by InfoCentral
 Sage 300 Retail Management by InfoCentral Sage 300 Retail Management by InfoCentral Sage 300 Retail Management is a fully featured Point of Sale Solution that offers tremendous flexibility and enables
Using PAYD Pro Plus for Gift Cards
 Using PAYD Pro Plus for Gift Cards (10/17) For more information and assistance: Web: moneris.com/support-paydproplus-mobile Toll-free: 1-855-423-PAYD (7293) Record your Moneris merchant ID here: Contents
WEB POS USER GUIDE. Phone: Extension Version 2.0. Magento Compatibility: CE 2.0.
 support@magestore.com sales@magestore.com Phone: +1-415-954-7137 WEB POS USER GUIDE Extension Version 2.0 Magento Compatibility: CE 2.0 yright (c) 2009 2016 www.magestore.com 1 Table of Contents 1. INTRODUCTION...
VIRTUAL TERMINAL USER GUIDE
 VIRTUAL TERMINAL USER GUIDE VERSION 17.2 NOVEMBER 2017 COPYRIGHT 2007-2017 GLOBAL PAYMENTS INC. ALL RIGHTS RESERVED. RELEASE NOVEMBER 2017 The Virtual Terminal User Guide contains proprietary information.
EmpowerTime Supervisor User Guide Table of Contents
 EmpowerTime Supervisor User Guide Table of Contents Supervisor Quick Guide. 1-2 Timecard Edits...3 Daily Tasks - Dashboard...4 Absences 5-6 Time Off Requests. 7-8 Approving Employee Timecards.9-10 Exceptions...
User Guide Veezi Loyalty. Vista Entertainment Solutions
 User Guide Veezi Loyalty Vista Entertainment Solutions 2016-05-02 Copyright Notice Copyright 1996-2016 Vista Entertainment Solutions Ltd. All rights reserved. Veezi is a Registered Trademark of Vista Entertainment
Consignee Guide. Version 1.8
 Consignee Guide Version 1.8 TABLE OF CONTENTS 1 Welcome to FlashConsign.com...6 2 Your Consignee Account...7 2.1 Creating a Consignee Account...7 3 Creating a Consignment Sale...10 3.1.1 Consignment Sale
Eagle Business Management System - Manufacturing
 Eagle Business Management System - Manufacturing Table of Contents INTRODUCTION...1 Technical Support...1 Overview...2 CREATING A BATCH...5 Creating a Simple Manufacturing Batch...5 Using Inventory Components
mpos 4.6 Quick Start Guide
 mpos 4.6 Quick Start Guide Disclaimer This document and its contents, including, but not limited to, screen shots, dates and functional content expressed herein are believed to be accurate as of its date
CONVERGE MOBILE User Guide - Android
 How to take payments with the Converge Mobile app? CONVERGE MOBILE User Guide - Android Version 1.4 CONTACT 4576 Yonge Street, Suite 200, Toronto, ON M2N 6N4, Canada DOWNLOAD Google Play 2017 Elavon Canada
Create the rewards you want to offer to your customers, when you want to offer them.
 Contents Fanfare Overview... 3 Accessing the Business Dashboard... 5 Things to Remember... 6 Navigating the Fanfare Business Dashboard... 7 Reports... 7 Members... 17 Loyalty... 20 Promo Cards... 22 Terminal...
Inventory Control Receive Inventory from McKesson
 ................................................................................................... Inventory Control Receive Inventory from McKesson Pharmacy Technology Solutions Issued July 2014 Downloading
PayAnywhere and Phone Swipe.
 Training Guide PayAnywhere and Phone Swipe. Accept Visa, Mastercard, American Express, Discover and PayPal. Ability to connect printer, cash drawer, and barcode scanner. Works with Apple ios and Android
PAYD Pro Plus In-Store Solution
 PAYD Pro Plus In-Store Solution Getting Started Guide (11/17) Need help? Web: moneris.com/support-paydproplus-instore Toll-free: 1-866-319-7450 Record your Moneris merchant ID here: Contents Introduction...3
Millennium. Release Notes. April 2013 Update. Version
 Millennium Release Notes April 2013 Update Version 2013.1.33 Copyright Information 2013 Millennium by Harms Software Inc. All rights reserved. Every effort has been made to ensure that the information
Cash Transactions Tracking System 8300
 1950 Hassell Rd. Hoffman Estates, Illinois, USA 60169-6308 Telephone: (847) 397-1700 User Guide Cash Transactions Tracking System 8300 June 2005 Cash Transactions Tracking System (8300) User Guide Notes
Data Exchange Module. Vendor Invoice Import
 Data Exchange Module Vendor Invoice Import Information in this document is subject to change without notice and does not represent a commitment on the part of Dexter + Chaney. The software described in
Contents OVERVIEW... 3
 Contents OVERVIEW... 3 Feature Summary... 3 CONFIGURATION... 4 System Requirements... 4 ConnectWise Manage Configuration... 4 Configuration of Manage Login... 4 Configuration of GL Accounts... 5 Configuration
TouchBistro V Release Notes Page 1
 What's New in TouchBistro 7.2.7 TouchBistro 7.2.7 is only available for ipads running ios 10 (and subsequent updates). See below for important steps you need to take if you have the any of the following
3M Ariba Light Account Network Collaboration for Suppliers
 SAP Training Source To Pay 3M Ariba Light Account Network Collaboration for Suppliers External User Training Version: 1.0 Last Updated: 31-Aug-2017 3M Business Transformation & Information Technology Progress
GETTING STARTED GUIDE
 CONFIGURATION GETTING STARTED GUIDE Chuck Atkinson, Inc. www.capretail.com, Sales@CAPretail.com, Support@CAPretail.com Sales (800) 826-5009, Support (817) 560-7007 Monday - Friday, 8:30am-5:30pm Central
We have now introduced a new layout when you first load up the app as can be seen in the image below.
 Dean Taxis New App User Guide After lots of testing and customer feedback sessions, Dean Taxis is pleased to announce its new and improved booking app. This will be getting rolled out over the next week
ONESolution Accounts Payable Special District User Guide
 ONESolution Accounts Payable Special District User Guide SunGard Public Sector 1000 Business Center Drive Lake Mary, Florida 32746 Phone: (800) 695-6915 Fax: (407) 304-1005 Web site: http://www.sungardps.com
Links Modular Solutions Version Release Notes
 Links Modular Solutions Version 9.9.7 Release Notes Prepared by: Andrew Preston Quality Assurance Officer August 2012 1 Table of Contents Overview... 5 POS Changes... 6 Ability to input Client, Customer
Discounts, Gratuity and Maintenance
 Discounts, Gratuity and Maintenance MicroSale enables your restaurant to offer many different types of discounts, specials, and coupons. You may have specials for a specific time and up to a certain date,
Deltek Touch for Maconomy. Touch 2.2 User Guide
 Deltek Touch for Maconomy Touch 2.2 User Guide July 2017 While Deltek has attempted to verify that the information in this document is accurate and complete, some typographical or technical errors may
AMI AutoAGENT Shop Floor Manager
 AMI AutoAGENT Shop Floor Manager Contents Introduction... 2 Introduction... 3 What's In This Manual... 4 Symbols and Conventions... 5 Shop Floor Manager Navigation Tips... 6 Part 1: Shop Floor Manager
Version Software User Guide
 06 Version 0.0. Software User Guide Long Range LLC. 6 Tannery Street Franklin, NH 05 Table of Contents Introduction Features... Included... Installation 5 Migrating Your Personal Access File... 7 Set Range
Contents OVERVIEW... 3 CONFIGURATION... 4
 Contents OVERVIEW... 3 Feature Summary... 3 CONFIGURATION... 4 System Requirements... 4 ConnectWise Manage Configuration... 4 Configuration of Manage Login... 4 Configuration of GL Accounts... 5 Configuration
user guide phone 2014 by Sysco. All rights reserved.
 user guide phone 2014 by Sysco. All rights reserved. welcome to sysco counts Time is money in the foodservice business and every second counts literally! Sysco Counts simplifies taking inventory and ordering
Robinson Manufacturing Company, Inc. College Concepts, LLC. Vendor Shipment Management System (VSMS)
") Robinson Manufacturing Company, Inc. College Concepts, LLC. Vendor Shipment Management System (VSMS) http://lansa.robinsonmfg.com/vsms User Documentation 03-10-2017 1 Contents Introduction Key Features...
Robinson Manufacturing Company, Inc. College Concepts, LLC. Vendor Shipment Management System (VSMS) http://lansa.robinsonmfg.com/vsms User Documentation 03-10-2017 1 Contents Introduction Key Features...
Contents Page. Waiter s functions Pg 3
 Updated 29 th Aug 08 Contents Page Waiter s functions Pg 3 1. Applications for new & existing members Pg 4 2. Ticket redemptions Pg 4 3. Accumulation of loyalty points Pg 6 4. Manual accumulation: a. power
Data Exchange Module. Vendor Invoice Import
 Data Exchange Module Vendor Invoice Import Information in this document is subject to change without notice and does not represent a commitment on the part of Dexter + Chaney. The software described in
MARKET LINE COMPUTERS TOTAL RENTAL USER MANUAL
 MARKET LINE COMPUTERS TOTAL RENTAL USER MANUAL CONTRACT FUNCTIONS... 4 OPENING A NEW RENTAL CONTRACT... 5 CREATING A RENTAL RESERVATION... 6 RESERVATIONS... 7 LONG-TERM CONTRACTS... 8 CREATING A QUOTE...
QUICKBOOKS ONLINE ACCOUNTANT. QuickBooks Online Certification Training Guide
 QUICKBOOKS ONLINE ACCOUNTANT QuickBooks Online Certification Training Guide QuickBooks Online Certification Training Legal Notices 2017 Intuit Inc. All rights reserved. Intuit, the Intuit logo, QuickBooks,
TECHNOSOFT, INC. Inquest Version 5. QuickBooks Data Sharing
 TECHNOSOFT, INC. Inquest Version 5 QuickBooks Data Sharing INQUEST VERSION 5 QuickBooks Data Sharing TECHNOSOFT, INC. 71 WENDY LN SOUTH KINGSTOWN, RI 02879 401.284.2959 www.technosoftinc.com 2002-2008
Leading up to your event Event night backup support Register your event for Text2Bid qcheck account and USB card readers...
 Conduct the Event Prepare, Practice, and Conduct Leading up to your event... 2 Event night backup support... 2 Register your event for Text2Bid... 2 qcheck account and USB card readers... 2 Night of event
Enhanced Loyalty Program Using Your Terminal for Loyalty
 Enhanced Loyalty Program Using Your Terminal for Loyalty For Moneris HiSpeed 6200 and Moneris Mobile 8200 Contents Enhanced Loyalty............................... 2 Loyalty card entry options.......................
Contents OVERVIEW... 3
 Contents OVERVIEW... 3 Feature Summary... 3 CONFIGURATION... 4 System Requirements... 4 ConnectWise Manage Configuration... 4 Configuration of Manage Login... 4 Configuration of GL Accounts... 5 Configuration
How to Create a Non-PO Invoice in Ariba. 3) Select Non-PO Invoice from the Create drop-down menu:
 Select Non-PO Invoice from the Create drop-down menu:") 1) Log in to Ariba: https://ar.admin.washington.edu/aribabuyer/uw/login.asp 2) Click the Invoicing tab 3) Select Non-PO Invoice from the Create drop-down menu: 2) Click on the Invoicing tab 3) Select Non-PO
1) Log in to Ariba: https://ar.admin.washington.edu/aribabuyer/uw/login.asp 2) Click the Invoicing tab 3) Select Non-PO Invoice from the Create drop-down menu: 2) Click on the Invoicing tab 3) Select Non-PO
I. Click on Sales Person to change employee making sale. Helpful hint: Having correct employee is important if sales are commission-based.
 SELL TAB Chapter 4 I. Click on Sales Person to change employee making sale. Helpful hint: Having correct employee is important if sales are commission-based. II. Create Record of Customers. Customer name
User s Manual. esims Web. Synthes Information Management Suite.
 User s Manual esims Web. Synthes Information Management Suite. Table of Contents Navigation and Interface Structure of the User Interface 1 Getting Around 2 Search and Edit Search 3 Cycle Count Recording