Reports Accounts Payable Reports - 10h...93 Generate a Sales and Use Tax Report - 10h...96 AP Supplier Liability Aging Report - 10h...
|
|
|
- Scott Lindsey
- 5 years ago
- Views:
Transcription
1 ACCOUNTS PAYABLE
2 Table of Contents Vouchers Approving Vouchers - 10a... 5 Budget Checking a Voucher Ad Hoc - 10a... 7 Creating a Quick Invoice - 10a... 8 Entering Regular Vouchers - 10a...11 Posting Vouchers in Batch -10f...15 Unmatching an Voucher- 10g...17 Vouchering a Quick Invoice on Demand - 10a...19 Entering Adjustment Vouchers - 10a...21 Closing a Voucher - 10f...23 Creating Template Vouchers - 10a...26 Creating Recurring Payments / Voucher Contracts...30 Correcting Accounting Entries in (Journal Voucher)...34 Refund Voucher Build & Processing Running the Voucher Build for Payroll Federal Tax Vouchers - 10a...48 Sending Asset Information to the PreAM Interface Table - 10a...60 Changing Tax Applicability on a Voucher Payments Create a Payment via Express Payment - 10h...69 Pay Cycle Status - 10h...71 Posting Payments - 10h...73 Processing Escheated Payments - 10h...74 Rejecting and Resetting a Pay Cycle - 10h...78 Re-Printing AP Check Run - 10h...82 Running a Pay Cycle - 10h...83 Cancelling a Payment - 10h...89 Reports Reports - 10h...93 Generate a Sales and Use Tax Report - 10h...96 AP Supplier Liability Aging Report - 10h...98
3 Suppliers Update Supplier Direct Deposit - 10h...103
4 Vouchers 10 Page 4
5 Approving Vouchers - 10a Purpose: Use this document as a reference for how to approve a voucher in ctclink Audience: AP Staff Navigation: Main Menu > > Vouchers > Approve > Approve Voucher 1. Enter appropriate information into the Voucher ID field. 2. Click the Search button. 3. Use the Approval page to view and modify the approval status of selected vouchers. 4. The Approval Information group box displays the current approval status of the voucher: Pending, Approved, or Denied. Before you approve a voucher, you can also view voucher line and distribution line information on the Line Information page and the Charge Information page. In case you want to reject the voucher, change the approval status to Denied. Page 5

6 5. If you do not have authorization to approve the voucher, you will receive an error message when you click the Save button. 6. Click the Approved option. 7. Click the Save button. 8. You have reviewed and approved the selected voucher. The voucher is now approved and ready for the payment process. Page 6
7 Budget Checking a Voucher Ad Hoc - 10a Purpose: Use this document as a reference for budget checking a voucher in ctclink. Audience: staff A voucher must be budget checked before it can be posted. The following procedure describes budget checking a single voucher on demand, but budget checking can also be performed in batch. Budget Checking a Voucher Navigation: Main Menu > > Vouchers > Add/Update > Regular Entry 1. From the Voucher page, click the Find an Existing Value tab. 2. Conduct a search to find the voucher you wish to budget check. For example you might search where: 1. Business Unit = Your business unit will default 2. Entry Status = Postable 3. Clickthe Search button. 4. Select a voucher to budget check. 5. Click the Invoice Information tab. 6. Select Budget Checking from the Action dropdown. 7. Click the Run button. 8. When the process is complete, click the Summary tab. 9. Verify that the Budget Status is Valid. Page 7
8 Creating a Quick Invoice - 10a Purpose: Use this document as a reference for entering basic invoice data using the Quick Invoice component. Audience: Any Staff who receive an invoice and want to begin processing it. If you receive an invoice and want to begin processing it immediately, you can use the Quick Invoice Entry component. Enter data from the paper (or electronic) invoice and an Accounts Payable (AP) staff member will check the data and generate a voucher from it. Creating a Quick Invoice Navigation: Main Menu > > Vouchers > Add/Update > Quick Invoice Entry 1. From the Quick Invoice Entry page, click the Add a New Value tab. 2. On the Add a New Value page enter the following information: 1. BusinessUnit The value should default. 2. VoucherID Leave the default value of NEXT (unless local business practice dictates otherwise). 3. SupplierName OR ShortSupplierName OR SupplierID One of the fields must be entered. Click the lookup button for one of these fields to search for the supplier. Conduct a search (such as Supplier Name Contains Fitness for example) to limit the number of suppliers returned. Select a supplier from the search results. The Supplier Name, Short Supplier Name, and Supplier ID fields will be populated based on your selection. 4. InvoiceNumber This is a required field. Enter the invoice number provided by the supplier. 5. InvoiceDate This is a required field. Enter the date from the invoice. 6. GrossInvoiceAmount Enter the total amount due including all line amounts, freight, taxes and miscellaneous charges. 7. EstimatedNo.ofInvoiceLines Enter the number of invoice lines or leave the default value. 8. FreightAmount Enter if applicable. 9. SalesTaxAmount Enter if applicable. 10. EnteredVATAmount Leave the default value. 11. MiscChargeAmount Enter if applicable. 12. TransactionCurrency Leave the default value. 13. Origin Enter or select ONL (On Line Entry). 14. QuickInvoiceTemplate Leave the default value equal to Simple. 3. Clickthe Add button. Page 8

9 4. The values you entered on the Add a New Value page will be transferred onto the Quick Invoice page. 5. In the InvoiceLines section, enter values to represent each of the supplier's invoice lines. Note: The number of lines that appear by default is controlled by the Estimated No. of Invoice Lines from the Add a New Value page. Use only those you need (there is no need to delete unused lines) and add lines as you need them (using the icon). Enter the following values: 1. Amount Enter the line amount. If you entered amounts on the Add a New Value page there may already be a value in the field; update it as needed. 2. GLUnit This value should default. 3. Description Enter a description. 4. The remaining fields represent the chartfield string. Whether you enter any chartfields is a matter of local business practice. Page 9
10 6. Click the Calculate button (near the top of the page) to insure that your data balances. The system will sum all line amounts, add any freight, tax, or miscellaneous charges entered, and compare the resulting value to the Gross Amount entered. The value of the Difference filed should be zero. If it isn't, verify the values you entered. 7. If you entered chartfield data, click the EditCombinations button (near the top of the page). The system will insure that the individual chartfield values are valid and represent a valid combination. If there are errors you will get an error message. 8. Click the Save button. A unique Voucher ID is assigned. AP staff will review the data and run the Voucher Build process to generate a working voucher from the Quick Invoice data. Page 10
11 Entering Regular Vouchers - 10a Purpose: Use this document as a reference for how to enter regular vouchers into ctclink Audience: AP Staff Navigation: Main Menu > > Vouchers > Add/Update > Regular Entry 1. Enter the appropriate information into the Short Supplier Name field. 2. Enter the appropriate information into the Invoice Number field. 3. Enter the appropriate information into the Invoice Date field. 4. Enter the appropriate information into the Gross Invoice Amount field. 5. Enter Sales tax or Freight or Miscellaneous details, if applicable. 6. If you do not have any Tax make sure to check the Tax Exempt checkbox, otherwise Use Tax will accrued. 7. Click the Add button. 8. Use the Invoice Information page to enter invoice information, including invoice header information, non-merchandise charges, and voucher line and distribution information. 9. Keep the Accounting Date as default or enter the specific Accounting Date if applicable. 10. Enter the appropriate information in the Pay Terms field. The payment term default. 11. Use the Distribute By field to determine the distribution method, either Amount or Quantity. The default is Amount only. If Distribute By is "Quantity" then enter the appropriate information in the Quantity and UOM fields. Page 11

12 12. Enter the appropriate information into the Description field, if Item Details information is unknown. 13. Enter the ChartField distribution details that will be charged with the expense coded on the distribution line. 14. Use the GL Unit field to enter or select the General Ledger business unit that will be charged with the expense coded on the distribution line. 15. Use the Account field to allocate this charge to an account within your organization. In this example, the charge is assigned to the Entertainment/Meal account. Enter the desired information into the Account field. 16. Click the Payments tab/link. 17. Use the Payments page to change the payment schedule, schedule multiple payments, schedule direct payment to an alternate supplier and supplier location, record a manual payment, or create an express payment. 18. The Remit to field displays the supplier ID of the remit to supplier for the payment. The system enables you to override the default choices for remit to supplier, location, and address. Note: Please make sure that Remit to Address appears correctly as this is the address that is going to print in Check. If the address is not correct here, please correct the address. 19. Use the Bank field to specify the bank from which the payment is issued. The values for this field appears by default from the control hierarchy, but you may override these settings. Page 12

13 20. Use the Account field to specify the bank account from which the payment is issued. The values for this field appears by default from the control hierarchy, but you may override these settings. 21. Use the Method field to specify a payment method for the voucher. 22. Use the Handling field to select a payment handling code. Each payment handling code has a sort sequence related to it that determines the order in which it prints. Checks are printed according to the sort sequence in ascending order: the lower the sort sequence number, the higher the sort priority. 23. The Netting field displays the status for the netting auto selection process. 24. Use the Action field to specify the payment action. Choose from: Schedule, Record, Cancelled, Escheated or Prepaid. 25. Click the Voucher Attributes tab/link. 26. Use the Voucher Attributes page to view and, if applicable, override the default transaction currency processing, the match status, the voucher approval setting, voucher processing options, tax group, and accounting instructions. Where applicable you can also pay unmatched vouchers and access SBI (Self Billing Invoice), prepayment, and Letter of Credit information on this page. 27. Use the Template field to identify the accounting entry template that is associated with this voucher. The accounting entry template controls the offset accounts such as: sales tax, freight, and discount accounts. 28. The Status field displays the current matching status of the voucher. You can change the match status, but what you can change varies depending on where the voucher is in the matching process. 29. Use the Source list to specify the source of the currency exchange rate. 30. Use the Approval list to set the approval status of the voucher. 31. Click the Save button. Page 13

14 32. Notice that the Voucher ID changes from NEXT to a number generated by the system when you save your information. Three new tabs also appear after clicking save. These tabs display information related to the voucher. 33. You have successfully entered a regular voucher. Page 14
15 Posting Vouchers in Batch -10f Purpose: Use this document as a reference for posting vouchers in batch in ctclink. Audience: staff After a voucher has been approved, budget checked and matched, it is eligible for posting. You can post vouchers on demand from the Voucher's Invoice Information page. This guide will help you post vouchers in batch. Posting Vouchers in Batch Navigation: > Batch Processes> Vouchers> Voucher Posting 1. Create or select a Run Control: 1. Enter a value for Request ID 2. Enter a Description 3. Set the Process Frequency to Always Process 4. Select a Voucher Option (Post Business Unit or Post Voucher for example) 5. Set the Prepayment Application Method to Invoicing Supplier 2. Configure the Post Voucher List (by specifying a business unit or selecting vouchers for example). Page 15

16 3. Click the Run button. 4. Select the PS/AP Voucher Posting process. Page 16

17 Unmatching an Voucher- 10g Purpose: Use this document as a reference for Unmatching an voucher in ctclink. Audience: Finance Staff Note: Only vouchers in a Matched or Manually Overwritten status are eligible for UnMatching. Running the matching process for a voucher locks certain fields from edits and UnMatching a voucher will unlock those fields for you to edit again. You will need to re-run the matching process for the voucher after making those edits before it can continue to be processed. Navigation: Main Menu Review Info Voucher Match Workbench Matching Workbench 1. Enter search information to find the voucher you want to unmatch 2. Click Search (Search Results will appear on same page) UnMatching a Voucher 1. Check the UndoMatch box for the voucher(s) to unmatch 2. Select UndoMatching in the Action dropdown list 3. Click Run Page 17


18 NOTE: Clicking the Run button may redirect you to the Process Monitor. Once the process has completed successfully, you can return to the now UnMatched voucher for editing you will notice that those Invoice Information fields that were locked after the voucher was Matched are now available for editing. **Once edits have been made to the targeted voucher, you will need to re-run Matching for that voucher before it can continue to be processed. Page 18
19 Vouchering a Quick Invoice on Demand - 10a Purpose: Use this document as a reference for building a voucher from a Quick Invoice in ctclink. Audience: staff The Voucher Build process can create vouchers from many sourcesof information, including Quick Invoice. Because the Quick Invoice component will likely be used by non-finance staff and faculty (if it is used at all) it is important to check the resultant voucher for completeness and accuracy. Vouchering a Quick Invoice Navigation: Main Menu > > Vouchers > Add/Update > Quick Invoice Entry 1. From the Quick Invoice Entry page, click the Find an Existing Value tab. 2. Conduct a search to find the Quick Invoice you wish to voucher. For example search criteria may be: 1. Business Unit = Your business unit will default 2. Build Status = Build Voucher 3. Voucher Source = Quick Invoice Page 19


20 3. Clickthe Search button. 4. Select a Quick Invoice voucher. 5. Click the Line Details button to review the invoice lines. 6. Complete the ChartField strings that represent the Distribution Lines of each Invoice Line. 7. Save. 8. From the Action menu select: 1. Voucher Build. 9. Click the Run button. 10. Make the sure process runs to completion. 11. Navigate to Main Menu Vouchers Add/Update Regular Entry. 12. From the Voucher page, click the Find an Existing Value tab. 13. Enter the Voucher ID into the Voucher ID search field and click Search. 14. Complete the voucher.save. Page 20

21 Entering Adjustment Vouchers - 10a Purpose: Use this document to enter adjusted vouchers for within ctclink Auidence: Finance/ Navigation: Main Menu > > Vouchers > Add/Update > Regular Entry 1. Click drop down menu in Voucher Style field and choose Adjustments. 2. Enter valid value in Short Supplier Name field. 3. Enter valid value in Invoice Date field. 4. Click Add. The Invoice Information page enables you to enter or view invoice information, including invoice header information, non-merchandise charges and voucher line and distribution information. The Pay Terms page is populated with default payment terms. Some of the default terms are: 30/60/90EM, Next Month, Net30 and EOM. 1. Enter valid value in the Voucher ID field. 2. Click the Copy to Voucher button. 3. Enter valid value in Total field. 4. Enter valid value in the Description field. 5. Enter valid value in the Line Amount field. Page 21

22 6. Enter valid value in the Merchandise Amt field. 7. Us the GL Unit field to enter the General Ledger business unit that will be charged with the expense coded on the distribution line. 8. Click Save. Page 22
23 Closing a Voucher - 10f Purpose: This QRG demonstrates how to close a voucher using ctclink. Audience: staff. Close vouchers when you want the remaining liability to be "written off" the supplier balance and the voucher to be considered complete. For example, say you have items in dispute and you and the supplier have agreed that you will not make a payment on these items. Close the voucher to credit the expense accounts and debit the liability accounts for the portion of the voucher that remains unpaid. To close a voucher, the voucher must be: Unmatched Posted Not selected for payment Not fully paid Closing a Voucher Navigation: > Vouchers > Add/Update > Close Voucher Begin by navigating to the Close Voucher page. 1. Select the menu. 2. Select the Vouchers menu. 3. Select the Add/Update menu. 4. Select the Close Voucher menu. Enter the desired information into the Business Unit and Voucher ID field. 5. Select the Search button. Page 23

24 As stated above, to close a voucher, the voucher must be: Unmatched Posted Not selected for payment Not fully paid Use the Mark Voucher for Closure option to indicate that this voucher is to be closed with the next posting run for this business unit. 6. Select the Mark Voucher for Closure option. A message will will come up; choose Yes. This will restore the encumbrance and re-open the PO. Another window will appear to restore the encumbrance, select the PO and select OK. 7. Add Comments if needed for detail description. 8. Select the Save button. Page 24

25 You have successfully marked a voucher for closure. After marking the voucher for closure, you will run voucher posting to create the accounting entries to relieve the liability. End of Procedure. Page 25
26 Creating Template Vouchers - 10a Purpose: Improve data entry efficiency by creating template vouchers using ctclink. Audience: staff. If you receive multiple similar vouchers from a supplier, you can set up a Template Voucher to improve data entry efficiency. You can use a voucher for a particular supplier as a model for other vouchers that you will enter in the future for that supplier by creating a template voucher. Creating a template voucher saves you lots of keystrokes. A template voucher is never paid or posted. It is a model for other vouchers. After you create and save the template voucher, it is available for use during the entry of other vouchers for the specific supplier. Creating Template Vouchers Navigation: > Vouchers > Add/Update > Regular Entry This takes you to the Voucher Page. Because you are creating a new template, you will use the Add a New Value tab to enter your data. 1. Enter Business Unit. Notice Voucher ID is unpopulated with NEXT; once you Save, it will assign a new number. 2. Select the Voucher Style list and select Template Voucher. 3. Enter the desired information into the Supplier ID field. Make sure you have correct Supplier Location. 4. Select the Invoice Date field. Enter the desired information into the Invoice Date field. 5. Select the Gross Invoice Amount field. Enter the desired information into the Gross Invoice Amount field. 6. Enter the Tax Details; otherwise, you have you make Voucher as Tax Exempt. 7. Select the Add button. Page 26

27 Use the Invoice Information page to enter or view invoice information, including invoice header information, non-merchandise charges, and voucher line and distribution information. The Pay Terms field displays the default payment terms. These terms are populated from the Payables default hierarchy. 8. Scroll to the right side of the page and select the Template link. Use the Template ID field to enter a descriptive title for your template so that you can easily search and reference this template in the future. 9. Enter the desired information into the Template ID field. 10. Enter the desired information into the Description field. 11. Select the OK button. Page 27
28 Use the Distribute By list to select the distribution method: Amount or Quantity. If Distributed By is Quantity then enter the desired information into the UOM and Quantity field. 12. Select the Description field. Use the Description field in the Invoice Lines grid to enter a description of the charges related to vouchers created using this template. 13. Enter the desired information into the Description field. 14. Enter ChartField details in distribution line details. If you have multiple lines then enter distribution details for each lines. 15. Select the Add multiple new rows button if needed. Enter the desired information into the field. 16. Select the OK button. Because you are dividing the expense between three departments, you need to adjust the amount on the first distribution line. Next, save the voucher template and proceed to creating a new voucher by using the voucher template. 17. Select the Save button. Page 28

29 18. Select the Regular Entry link which will put you back on the Voucher page. 19. Enter the desired information into the Supplier ID field. 20. Select the Add button. 21. Select the Expand section button. 22. Select the Copy From list. Use the Copy From list to select the template voucher. 23. Select the Go link. Use the Voucher Template page to select a template to copy. Use the Template ID field to enter or search for the ID you assigned to the voucher template. 24. Enter the desired information into the Template ID field. 25. Select the Copy from template button. 26. Select the Invoice No field. Enter the desired information into the Invoice No field. 27. Select the Invoice Date field. Enter the desired information into the Invoice Date field. Enter the rest of your details in this Voucher, if you have any. OR you can change your any details here because this data is coming from template Voucher which have created earlier. 28. Select the Save button. Notice that the Voucher ID field changes from NEXT to a number generated by the system when you save your information. You have successfully created a template voucher and used it to create a new regular voucher. End of Procedure. Page 29
30 Creating Recurring Payments / Voucher Contracts Purpose: using ctclink. To set-up recurring voucher contracts to streamline recurring payment process Audience: staff. In the course of paying obligations, businesses often make recurring payments. You can save time by creating Recurring Voucher Contracts for vouchers that are prepaid repeatedly. Items such as rent, utilities, lease payments, and regular shipments are often made to the same vendors for consistent amounts As with all invoices, these regular invoices require vouchers for payment. ctclink lets you automate the creation of recurring vouchers. A recurring voucher contract is a template to create vouchers. Creating Recurring Payments/Voucher Contracts With recurring voucher contracts, you must specify the supplier, voucher line, and distribution items for a recurring voucher. You must also define the contract information, including the start date, an optional end date, voucher schedules, AP Business Unit, and gross amounts. If desired, you can also define withholding, discount, and VAT information. Each supplier can have one or more voucher contracts. After you save a voucher contract, you can expand it into a recurring voucher. You can then load the expanded voucher into a table for viewing, validating, and editing. These are vouchers that are now available for payment, adjustment, and posting. Navigation: Procurement Contracts > Add/Update Contracts 1. Enter Set ID. 2. The Contract ID will auto-populate with NEXT until subsequent pages are completed and saved. 3. Select the Contract Process Option list. 4. Select the Recurring Voucher list item. 5. Select the Add button. Page 30
31 Use the Contract Entry - Contract page to create a base voucher. Use the Supplier ID field to select the supplier for the contract. 6. Select the Supplier ID field. Enter the desired information into the Supplier ID field. If required, enter the desired information into the Master Contract ID field. Use the Maximum Amount field to enter a value that specifies the total amount this contract should not exceed. The total released amount of all lines plus the amount released for open items must not exceed this amount. This value is expressed in the contract header currency. 7. Enter Begin Date and Expire Date. 8. Enter the desired information into the Maximum Amount field. Use the Invoice Number field to enter an invoice number that will be associated with every voucher in this contract. The invoice number must not be more than 12 characters. For voucher contracts, the system adds an ID extension consisting of a hyphen and 1 to 3 digits to uniquely identify the vouchers. 9. Enter the desired information into the Invoice Number field. Use the AP Business Unit field to enter the ctclink Payables voucher contract business unit for the vouchers. Only lines with distributions defined on the Voucher Distribution Information page that match this business unit can be released. 10. Enter the desired information into the AP Business Unit field. 11. Enter the desired information into the Accounting Entry Template field. Page 31
32 12. Enter the desired information into the Payment Terms ID field. Use the Basic Date Type list to select what date is used to calculate the voucher due date and discount due date, if applicable. This is a voucher-related field used in combination with payment terms. 13. Select the Basis Date Type list as Inv Date. Use the Gross Amount field to enter the gross amount for the contract. This is required for voucher contracts and only applicable to voucher and general contracts. The sum of all contract line amounts, plus miscellaneous charges and voucher contract charges (freight, sales tax) must equal the gross amount. 14. Enter the desired information into the Gross Amount field. 15. Enter the desired information into the Sales Tax field. 16. Enter the desired information into the Line Description field. 17. Enter UOM and Category details. 18. Enter the desired information into the Merchandise Amt field. 19. Select the Voucher Distrib button. You use the Contract Entry - Voucher Distribution Information for Line 1 page to set up one or more distribution lines for each contract line, based on the AP business unit. When you release a contract line to a voucher, the system copies distribution lines to the voucher line. 20. Enter the Voucher Distribution details. 21. Select the OK button. 22. Enter a Category by selecting the search icon. 23. Enter a Description for this contract. 24. Select the Save button. The Contract ID is created. 25. Change the status to Approve. 26. Select the Save button. 27. Select the Contract Releases link. Use the Create Releases page to generate a schedule for the series of vouchers, and create the releases of the vouchers. Based on Release requirement, you can set up Release dates, Frequency and Duration. In step 2, verify the Release Default details. Make sure that Supplier location is correct. Use the Interval list to set the interval at which a voucher should be created for this contract. Valid values include Annually, Monthly, Weekly, and Daily. If you select the intervals of Weekly or Monthly, use the On The field to indicate the day of the week or month on which the voucher should be created. Page 32
33 Use the Every field to define whether the voucher should be created each year, day, week, or month, or every two, three, four, and so on years, months, weeks, or days. Use the Times option to set the number of releases. 28. Select the Times option. Enter the desired information into the Times field. 29. Select the Populate button. Notice that the Release Template grid displays the releases you scheduled. 30. Select the Stage button to stage qualifying vouchers. A release can be staged for approved contracts only. Once you have staged Vouchers then you can review the staged Vouchers by selecting Review Releases tab. 31. Select View All on the Review Stage Releases tab. The number of tabs will correspond to Times number selected. For example, if you selected 12 times or 1 year, there should be 12 voucher lines. Voucher amount should also total to maximum total contract amount. 32. Select the OK button. 33. Select the Save button. You have successfully created a recurring voucher contract. End of Procedure. Note: After this, to Create Voucher, you need to run the Voucher Build Process with processing option as "Process Contract". Then select the appropriate Business Unit and Contract ID. Contract Voucher Action would be "Build Voucher". Then select Run. Important Note: If Voucher release is future dated then make sure that Payable Business definition has Contract Release date option is marked as No Date. If this is current date then you won't be able to release future dated Vouchers. Page 33
34 Correcting Accounting Entries in Accounts Payable (Journal Voucher) Purpose: Journal vouchers are used to adjust accounting entries for vouchers that have been posted and paid, and whose payments have been posted. Audience: AP Specialist/AP Manager Scenario: A Voucher has been created using an incorrect Chartfield string, and is posted and paid. All other information on the voucher is correct. To avoid making a manual General Ledger entry, which would result in General Ledger and Payables being out of sync, or unposting the voucher, correcting the voucher and then reposting the voucher and payment, we simply enter a Journal voucher in Account Payable. On the journal voucher, we reverse the amount to the incorrect Chartfields and add the amount to the correct Chartfields. This will keep the General Ledger and Payables in sync. Example: Voucher (BU WA220) has been entered incorrectly with project ID , and is posted, paid and GL distributed. The project ID should be Therefore, to correct the project ID we will create Journal Voucher in AP module. Navigation: > Vouchers > Add/Update > Regular Entry > Add a New Value tab Step 1: Create a Journal Voucher In order to create a Journal Voucher, you must first know the Voucher ID and the Supplier associated with that Voucher. Page 34
35 Business Unit: BU defaults to specific value for each user. Voucher ID: Defaults to NEXT. The system sequentially numbers the voucher. DO NOT CHANGE. Voucher Style: Select Journal Voucher. Supplier ID: Enter the Supplier ID that is identical to the original voucher to be corrected. Make sure Supplier location is correct. Invoice Number: Enter the invoice number as entered on the original voucher and add the suffix of JV. Invoice Date: Enter the same invoice date as entered on the original voucher. Click Add. Step 2: Invoice Information Tab 1 The Invoice Information header populates with the values entered on the Add and Search page including the Journal voucher style. Total: Journal Vouchers are zero amount vouchers. Related Voucher: Enter the voucher ID with incorrect accounting entries to associate it to the journal voucher. The field is optional, but it should be populated to maintain an audit trail and to be able to search for it using the Related Voucher field on the Add and Search page. Accounting Date: Use the current date, unless otherwise specified (Example: Year-end adjustments) Note: You cannot lookup the Related Voucher until you have selected the correct Page 35

.")
36 Supplier. Only Vouchers containing your selected Supplier will appear in this lookup. If Voucher does not appear, double check to make sure you have the correct Supplier selected. Step 3: Invoice Lines and Distribution Lines Description and Line Amount: Enter if applicable. The total of journal lines must net to zero. Distribution Line 1: Populate the first distribution line to reverse the accounting entry that was recorded incorrectly on the associated voucher. Select the checkbox in the Copy Down column to clone values in the distribution line to newly inserted distribution line(s). Select the plus sign icon to add additional distribution lines Enter number of rows to add Select OK Amount and ChartField Values: Correct value(s) cloned from the distribution line with the Copy Down feature, or enter the values in the distribution line(s) Select Save Page 36


37 Note: The sum of all amounts on the Journal Vouchers must be equal to zero. If an adjustment is needed in the amount of the Voucher, an Adjustment Voucher must be created. Step 4: Submit for Approval Select Submit Approval Step 5: Journal Voucher Summary Page The journal voucher will be selected for Approval, budget checking and posting; however, no payments will be created since the voucher has a zero balance. Page 37
38 Step 6: Voucher Post Post the Voucher either through online or batch. Once it is posted, the Post Status will show as Posted. Also, note that the Journal generator process must be run in order to move the accounting entries in GL. Page 38
39 Refund Voucher Build & Processing - 10 Purpose: Use this document to assist in voucher build request, voucher build errors, and budget checking in ctclink. Audience: Finance/Accounts Receivable Staff PeopleSoft Payables generates refund checks for PeopleSoft Receivables. The Receivables Refund Application Engine process (AR_REFUND) populates the voucher staging tables with refund voucher data for processing by the Voucher Build process. Voucher Build Request PeopleSoft Payables provides the Voucher Build process to build vouchers in batch from various source transactions. The Voucher Build process comprises two subprocesses, pre-edit and voucher edit. The pre-edit subprocess builds skeleton voucher record sets from limited information that you enter online using the Quick Invoice Entry component or the Summary Invoice Entry component, or that it retrieves from other sources. After the pre-edit subprocess builds voucher record sets successfully, it calls the voucher edit subprocess to complete these record sets. Navigation: Main Menu > > Batch Process > Vouchers > Voucher Build 1. On the Find an Existing Value tab, enter the Run Control ID. 2. Click Search. Page 39

40 On the Voucher Build tab, enter the following required fields: 3. Request ID - Enter an ID that comprises any combination of characters 4. Description - Enter a description that comprises any combination of characters 5. From Date - Leave Blank 6. To Date - Leave Blank 7. Assign Invoice ID - Unchecked 8. Assigned Invoice Date - Unchecked 9. Process Option - Business Unit 10. Voucher Sources - New Voucher Data 11. Business Unit - Enter College Business Unit 12. Voucher Build Interfaces - Receivables Customer Refunds 13. Publish Voucher Messages - Optional 14. Click Run to initiate the process. Page 40

41 A Process Schedule Request window will appear. The Voucher Build (AP_VCHRBLD) application engine name will default selected. 15. Click OK to initiate the process scheduler request. 16. Click on the Process Monitor link to review the process status. Page 41


42 17. Click on the Refresh button until the Run Status is noted as Success and the Distribution Status is noted as Posted. 18. Click on the Go Back to Voucher Build Request link. Page 42
43 19. Click on the Process Messages tab to review the Voucher Build messages. **NOTE** If there were any voucher build errors, the message will indicate that X Vouchers(s) Staged with Pre-Edit Errors. Review the section Voucher Build Errors on how to review and fix the error(s). Page 43
44 Voucher Build Errors Use the Build Errors page to review a log of any voucher errors that occur during a voucher build processing run. Link to pages are available where you can view error details and correct errors. Errors that are logged include both pre-edit errors and recycled vouchers. Navigation: Main Menu > > Batch Processes > Voucher > Voucher Build 1. On the Find an Existing Value tab, Search for the Voucher Build Run Control ID. 2. On the Build Errors tab, click on the Error Messages icon. Page 44
45 3. Review the Header Error messages. 4. Click on the Correct Errors link. 5. Make the necessary changes to correct the error on the Quick Invoice Entry page. 6. Select the Voucher Build action. 7. Click on the Run button to initiate the voucher build process. Page 45

46 Sales/Use Tax Applicability The Account Receivable refunds require that the Customer account be linked to a Supplier account in order for the voucher build process to build the refund in the correct voucher style of Regular Voucher. Since Supplier accounts are global between all of the colleges and may be used for other business related transactions, the Supplier may be set up as a Sales/Use Tax Applicability. If the Supplier is set up as a Sales/Use Tax Applicable entity, the voucher must be marked as Tax Exempt. Navigation: Main Menu > > Vouchers > Add/Update > Regular Entry On the Find an Existing Value tab, enter valid values for the following required fields: 1. Business Unit - Enter the College Business Unit ID 2. Invoice Date - Options to filter searcher parameters 3. Voucher Source - Receivables Customer Refunds 4. Click Search and select the applicable voucher search result. Page 46


47 1. On the Invoice Information tab, check the Tax Exempt box. 2. Select Budget Checking for the Action. 3. Click Run to proceed with the Budget Checking progress. 4. Submit the voucher for approval. Page 47
48 Running the Voucher Build for Payroll Federal Tax Vouchers - 10a Purpose: Use this document as a reference for how to run the process for Running a Voucher Build for Payroll Federal Tax Vouchers. Audience: AP Staff Payroll Federal Tax Voucher PeopleSoft HCM Payroll generates a voucher for federal tax payroll deductions collected from employee paychecks for a specified payroll period. Payroll data is stored in the PAY_NA_TAX_LIAB table. After the Extract AP Federal Taxes process is completed, Payroll tax liabilities is reflected on the AP side and payment can be made. Voucher Build Request PeopleSoft Payables provides the Voucher Build process to build vouchers in batch from various source transactions. The Voucher Build process comprises two subprocesses, pre-edit and voucher edit. The pre-edit subprocess builds skeleton voucher record sets from limited information that is retrieved from other sources. After the pre-edit subprocess builds voucher record sets successfully, it calls the voucher edit subprocess to complete these record sets. Navigation: Main Menu > > Batch Process > Vouchers > Voucher Build 1. Enter information into the Run Control ID field on the Find an Existing Value or Add a New Value tab. Page 48
49 2. Complete the following fields: 1. Request ID - Enter an ID that comprises any combination of characters 2. Description - Enter a description that comprises any combination of characters 3. From Date - Leave Blank 4. To Date - Leave Blank 5. Assign Invoice ID - Unchecked 6. Assigned Invoice Date - Unchecked 7. Process Option - Business Unit 8. Voucher Sources - New Voucher Data 9. Business Unit - Enter College Business Unit 10. Voucher Build Interfaces - Payroll Interface 11. Publish Voucher Messages - Optional 3. Click the Run button to initiate the process. Page 49

50 4. A Process Schedule Request window will appear. The Voucher Build (AP_VCHRBLD) application engine name will default selected. 5. Click the OK button to initiate the process scheduler request. 6. Click the Process Monitor link to review the process status. Page 50


51 7. Click on the Refresh button until the Run Status is noted as Success and the Distribution Status is noted as Posted. 8. Click on the Go Back to Voucher Build Request link. Page 51
52 9. Click on the Process Messages tab to review the Voucher Build messages. **NOTE** If there were any voucher build errors, the message will indicate that X Vouchers(s) Staged with Pre-Edit Errors. Review the section Voucher Build Errors on how to review and fix the error(s). Page 52

53 Voucher Build Errors Use the Build Errors page to review a log of any voucher errors that occur during a voucher build processing run. Link to pages are available where you can view error details and correct errors. Errors that are logged include both pre-edit errors and recycled vouchers. Navigation: Main Menu > > Batch Processes > Vouchers > Voucher Build 1. Search for the Voucher Build Run Control ID. Page 53

54 2. Navigate to the Build Errors tab. 3. Click on the Error Messages icon in the bottom left hand corner of the Details section. 4. Review the Header Error messages. 5. Click on the Correct Errors link. Page 54


55 6. Make the necessary changes to correct the error on the Quick Invoice Entry page. 7. Select the Voucher Build action. 8. Click on the Run button to initiate the voucher build process. Voucher Review & Approval The Federal Tax Payroll voucher will populate with the chartfield distribution created when the PAY_NA_TAX_LIAB table was populated with payroll deduction data. In order to process payment for the voucher, the voucher needs to be budget checked and submitted for approval. Page 55
56 Navigation: Main Menu > > Vouchers > Add/Update > Regular Entry 1. Complete the following fields on the Find an Existing Value tab of the Voucher page: 1. Business Unit Enter the College Business Unit ID 2. Invoice Date Options to filter searcher parameters 3. Supplier ID Enter the V supplier ID for the Internal Revenue Service 2. Click the Search button and select the applicable voucher search result. 3. Navigate to the Invoice Information tab. 4. Check the Tax Exempt Box. 5. Verify the Pay Terms 00 - Due Immediately. Page 56

57 6. Select the Budget Checking action. 7. Click the Run button to proceed with the Budget Checking process. 8. Submit the Voucher for Approval. **NOTE** The voucher must be approved before the payment information can be updated. Voucher Payment Options The Internal Revenue Service receives payments through a manual process outside of the ctclink PeopleSoft system. The pay cycle will not be utilized for the payroll Page 57
58 federal tax payment. After the Federal Tax voucher is approved, the payment options must be updated or order for voucher to NOT PROCESS through the pay cycle. Navigation: Main Menu > > Vouchers > Add/Update > Regular Entry 1. Complete the following fields on the Find an Existing Value tab of the Voucher page: 1. Business Unit - Enter the College Business Unit ID. 2. Invoice Date - Options to filter searcher parameters. 3. Supplier ID - Enter the V supplier ID for the Internal Revenue Service. 2. Click the Search button and select the applicable voucher search result. **NOTE** The voucher must be approved prior to updating the payment options information. Navigate to the Payments tab. 3. Enter the information below into the Payment Options section of the Payments tab. 1. Bank - Verify that the bank code is correct (should default automatically). 2. Account - CHCK 3. Method - MAN 4. Message - Optional 5. Pay Group - Leave Blank 6. Handling - Regular Payments 7. Action - update to Record a Payment 8. Pay - Full Amount 9. Payment Date - updates automatically to the current date Page 58

59 10. Reference - Enter the Internal Revenue Service payment confirmation number. Page 59
60 Sending Asset Information to the PreAM Interface Table - 10a Purpose: Use this document as a reference for sending asset information to the Pre-AM Interface table in ctclink. Audience: Financial Asset Manager, Facilities Asset Manager After you create purchase orders and vouchers, you use the Load Assets Request process to send asset information from ctclink Payables to the Pre-AM Interface table. Navigation: Main Menu > > Batch Processes > Extracts and Loads > Load Assets Request Sending Asset Information to the Pre-AM Interface Table 1. Enter an existing Run Control ID or click the Add a New Value tab on the Load Assets Request page to add a new value. 1. Enter a meaningful Run Control ID for the accounting entry creation process in the Run Control ID field. Note: A Run Control ID is an identifier that, when paired with your User ID, uniquely identifies the process that you are running. The Run Control ID defines parameters that are used when a process is run. These parameters ensure that when a process runs in the background, the system does not prompt you for additional values. 2. Click the Add button. Page 60
61 2. Use the Load Assets Requests page to enter the request parameters. These parameters will be used to define the processing rules and data to be included when the process is run. 1. Enter an appropriate value in the Request ID field. 2. Enter an appropriate description in the Description field. 3. Use the Process Frequency drop-down button to select the Always Process option. 4. Use the Process Option drop-down button to select the Process Business Unit option. 5. Enter or select the appropriate business unit in the Business Unit field. 6. Click the Run button. Page 61
62 3. Use the Process Scheduler Request page to enter or update parameters, such as server name and process output format. 1. Use the Server Name drop-down button to select the appropriate processing server for the request. Note: You can leave the Server Name field blank. 2. Click the OK button. Note: A Process Instance number appears. This number helps you identify the process you have run when you check its status. 4. Click the Process Monitor link. Page 62

63 5. Use the Process List page to view the status of submitted process requests. Note: The process has finished successfully when the Run Status column indicates Success. Page 63
64 Changing Tax Applicability on a Voucher - 10 Purpose: Use this document to change tax applicability on a voucher within ctclink. Audience: staff Vouchers have two primary places where tax applicability (i.e., Sales Tax Applicable, Use Tax Applicable, Tax Exempt) can be set or modified at the Header level and at the Line level. This means you can assign an entire voucher Tax Exempt by making it exempt at the Header level, or making individual voucher lines Tax Exempt while leaving the rest of the voucher lines Sales Tax Applicable. Changing Tax Applicability at the HEADER LEVEL Navigation: > Voucher > Add/Update > Regular Entry 1. Select Add a New Value tab. 2. Enter Business Unit if it is not defaulted. 3. Select the Add button. Page 64
65 4. Select the Invoice Information tab. 5. To mark an entire voucher as Tax Exempt, check the "Tax Exempt" check box. Page 65

66 Changing Tax Applicability at the LINE LEVEL Navigation: > Vouchers > Add/Update > Regular Entry 1. Select the Add a New Value tab. 2. Enter Business Unit if it is not defaulted. 3. Select the Add button. 4. Select the Invoice Information tab. 5. Scroll down to the Invoice Line you would like to change the Tax Applicability for and select the Sales/Use Tax link text on the right side of the Invoice Line box. Page 66
67 NOTE: This linked text will not appear (or will disappear when you select it) if the voucher has been marked as Tax Exempt in the Header section. 6. Use the Sales/Use Tax Applicability drop down list to set the tax applicability for the chosen line. The main options used are Item is Exempt, Sales Tax Applicable and Use Tax Applicable. The other options for Direct Pay and Purchaser is Exonerated are specific exception cases for why something should be tax exempt; they have the same result as Item is Exempt, not calculating tax for the that line. The tax rate used for Sales Tax Applicable lines is based on the Ship To Location set for the chosen line; Use Tax Applicable lines are automatically set to the state Use Tax rate. End of Process. Page 67
68 Payments 10 Page 68
69 Create a Payment via Express Payment - 10h Purpose: Use this document as a reference for creating an Express Payment in ctclink. Audience: staff There are many payment creation methods available in ctclink. This guide will help you create an Express Payment. Express Payments run an immediate pay cycle. Note that you can only work with one or more vouchers from a single supplier at a time and only one payment to that supplier can be generated. Creating an Express Payment Navigation: > Vouchers > Add/Update > Regular Entry 1. On the Voucher page, click the Find an Existing Value tab. 2. Enter a Voucher ID or search for a voucher to pay via Express Payment. 3. Click the Search button and select a voucher. 4. Click the Payments tab. 5. Click the Express Payment link. 6. In the Select Voucher section, first select a Server and then click the Create Payment button. 7. In the Pay Cycle Status section, click the Refresh button until the Status changes from Running to Approved 8. If you want to review the Trial Register: 1. Click the Trial Register link. Page 69
. 9.")
70 2. Create or select a run control. 3. Select the standard Pay Cycle provided by SBCTC. 4. Click the Run button. 5. Select the Trial Register process and click the OK button. 6. Click the link to Report Manager. 7. Click the Administration tab. 8. Click the PDF job output representing the AP Trial Payment Register (it will open in a new window). 9. Click the Go back to Trial Register link to return to the Run Control page. 10. Click the Pay Cycle Manager link to return to the Pay Cycle Manager. 9. In the Pay Cycle Results section, there will be a process row with a description of Produce Positive Payment File. On that row, select a Server. The Output Destination will default. 10. Click the Process button. 11. In the Pay Cycle Status section, click the Refresh button until the Status changes from Running to Formatted. 12. A third process, Produce Positive Payment will then be available. Click the Process button to produce the positive payment file. 13. Back in the Pay Cycle Status section, click the Refresh button until the Status changes to Completed. Note that payments must be posted refer to the Posting Payments QRG. Page 70
71 Pay Cycle Status - 10h Purpose: Use this document as a reference for evaluating Pay Cycle Status in ctclink. Audience: staff Status Approved Certified Completed Confirmed Created Exceptions Formatted New No work Printed Rejected Reset Restarted Running Selected Staged To Be Certified Meaning This status is not applicable to ctclink. We do not approve Pay Cycles. This status is not applicable to ctclink. For U.S. federal agencies only. The Pay cycle is finished. You can start payment selection again using the next payment dates. You have successfully confirmed that the payment references are correct on the Confirm Payment Reference page. Payments are ready to print. If EFT payments are being processed, the files are ready to format or be sent through the approval process. Pay Cycle exceptions exist. The formatting process for the positive payment file has finished successfully. When you create a pay cycle, its status is New. No payments have been selected or created for processing. Payments are printed or data has been written to a file. The Pay Cycle has been rejected. The Pay Cycle has been reset. Payment Selection can be run again. The Pay Cycle has been restarted and is ready for Payment Creation. One of the Pay Cycle processes is currently running. Payment selection has finished successfully. Payment selection has finished successfully and Draft payments have been successfully staged. This status is not applicable to ctclink. For U.S. federal agencies only. Page 71
72 Home > PeopleBooks > PeopleSoft Enterprise Payables 9.1 PeopleBook > Processing Pay Cycles Page 72
73 Posting Payments - 10h Purpose: Use this document as a reference for posting payments in batch in ctclink. Audience: staff After successfully completing a pay cycle you must post the payments. Batch Posting Payments Navigation: > Batch Processes > Payment > Payment Posting 1. Select or create a Run Control: 1. Enter a Request ID 2. Enter a Description 3. Change the Process Frequency to Always Process 4. Set the Post Payment Option to Post Bank Account 5. Complete the Post Payment List using your district's bank details 2. Click the Run button. 3. Select the PS/AP Payment Posting process and click OK. Page 73
74 Processing Escheated Payments - 10h Purpose: Use this document as a reference for how to Process Escheated Payments in ctclink. Audience: Staff This topic demonstrates how to process escheated payments. Occasionally, an organization issues a check to a vendor, but the vendor does not deposit it. Perhaps the vendor goes out of business. Whatever the reason, the check becomes stale-dated. When users identify a check as stale dated, it is informational only. When users decide to escheat a stale-dated check, they must return to the Payment Escheatment page and select Escheated instead of Stale Dated Payment. Stale date should be done when a check is first selected to be worked. In order to escheat a check, the school must first make an effort to contact the person the check was written to. This usually happens sometime between months from the date of the check. Stale dating a check does not create any GL entries and is reversible. Payables enables you to reclassify the stale-dated check to an escheat liability account by debiting cash and crediting escheatment liability. When users escheat payments, they enter an escheatment date. The system uses the date to control the accounting date for the escheatment entry. Payment posting treats an escheated payment like a voided payment except that there is no option to close or restate the voucher liability. Escheating happens when the check is going to be remitted to the state. So, first you escheat the check and second you create a new voucher for that payment to be sent to the state. The new voucher would be coded the same as the escheatment, but in reverse as it clears out this account. Escheating a check creates GL entries and is not reversible. When you escheat a payment, you then select options to run just the Payment Posting process (AP_PSTPYMNT), or both the Payment Posting and Journal Generator process (FS_JGEN). Navigation: Main Menu > > Payments > Cancel/Void Payments > Escheat Payments 1. On the Payment Escheated page enter appropriate Bank SetID. 2. Enter the appropriate information into the Bank Code field. Example Enter "BOFA" for Spokane. 3. Enter the appropriate information into the Bank Account field. Example Enter "CHCK". 4. Enter the appropriate information into the Payment Reference field. Example Enter " ". 5. Select correct Payment Method from list item for that Payment. Example: for this Payment, the method was System Check. Page 74

75 6. Click the Search button. 7. The Payment Escheatment page enables you to escheat payments. 8. Select the Escheated Check option. Date Escheated will default to Current date. You may change this Date. Remember Date Escheated is the Accounting Date for Escheatment Process. Page 75

76 9. Enter the appropriate information into the Description field. Enter "Verified with bank contact that this check has not been cashed". 10. Select the Save button. 11. You have just completed the Processing Escheated Payments topic. Below is a summary of the key concepts of this topic: Escheated payment processing gives users the ability to reclassify stale- dated payments. Escheating payments transfers the payment from a cash account to an Escheated liability account. Payment posting treats an escheated payment like a voided payment except that there is no option to close or restate the voucher liability. Validation and Verification Once Payment is Escheated and Payment post process run, you can check the payment tab in Voucher. It will says Payment Escheated. Page 76

77 You may also check the Accounting Entries for Escheatment Process. Page 77
78 Rejecting and Resetting a Pay Cycle - 10h Purpose: Use this document as a reference for how to reject and reset a Pay Cycle in ctclink. Audience: Finance Staff Note: There may be instances where the Payment Creation step of a Pay Cycle is performed unintentionally, resulting in the wrong payments being moved forward in the overall Pay Cycle process. When this occurs, two major actions can be taken to start the Pay Cycle over. While these actions can be done independently, this particular scenario requires the two actions be performed in the following order: 1. Rejecting a Pay Cycle through Pay Cycle Approvals 2. Resetting a Pay Cycle through Pay Cycle Manager To demonstrate this scenario, we are starting with a Pay Cycle where both the Payment Selection and Payment Creation processes have been run for payments we did not want to process. Rejecting a Pay Cycle through Pay Cycle Approvals Navigation: Main Menu > > Payments > Pay Cycle Processing > Pay Cycle Manager 1. The Pay Cycle Status shows Approved and the option to perform a Pay Cycle Reset is grayed out on the Pay Cycle Manger page. The first action necessary to correct the Pay Cycle Status is Rejecting a Pay Cycle. 2. Some colleges are setup to not have any extra approvals when a Pay Cycle is run. Because of this, Pay Cycles go directly to an Approved status after the Payment Creation step is completed. Page 78
79 Rejecting an Approved Pay Cycle Navigation: Main Menu > > Payments > Pay Cycle Approvals > Pay Cycle 1. Select the current Pay Cycle to be rejected on the Pay Cycle Approval page. 2. Once the appropriate Pay Cycle appears, click the Reject button, then the Save button. 3. Once the Pay Cycle has been rejected, navigate back to the Pay Cycle Manager (Main Menu Payments Pay Cycle Processing Pay Cycle Manager) for that Pay Cycle to see the status has now been set to Rejected. 4. The Pay Cycle Reset option has now been enabled. Page 79
80 Resetting a Pay Cycle through Pay Cycle Manager Navigation: Main Menu > > Payments > Pay Cycle Approvals > Pay Cycle 1. To reset a Pay Cycle, select a server and click the Reset button from the Pay Cycle Manager. 2. After the Reset has been initiated, click the OK button when the pop up Message appears. Page 80
81 3. Once the Reset has finished running, the Pay Cycle status shows as Reset. Any payments previously selected or created for processing are removed from the selection. 4. The Pay Cycle is now back to step one of the process and the Payment Selection process is available to be re-run. Page 81

82 Re-Printing AP Check Run - 10h If you have a payment cycle that does not print, you can restart the process. This will only work if you have not done any other processes in between. Purpose: Use this document to Re-Print checks. THIS PROCESS CAN ONLY BE DONE IF NO OTHER PROCESSES HAVE BEEN DONE SINCE CHECKS WERE RUN. IF CHECKS HAVE BEEN RUN, THE PAY CYCLE AND SEQ NUMBER WILL NOT BE AVAILABLE FOR SELECTION. Audience: Finance Staff Navigation: Main Menu Payments Pay Cycle Processing Check Restart 1. Make sure that you enter the Pay Cycle and Seq Number from the pay run. 2. In the Details section, click the Select box. 3. In the Reference Number, select the Re-Print using same reference. 4. Click Process. Page 82
83 Running a Pay Cycle - 10h Purpose: Use this document as a reference for running a pay cycle using the Pay Cycle Manager in ctclink. Audience: staff There are several payment creation methods available in ctclink. This guide describes running the standard pay cycle ad hoc using Pay Cycle Manager. Process Payments via Pay Cycle Manager Navigation: > Payments > Pay Cycle Processing > Pay Cycle Manager 1. Select the standard Pay Cycle provided by SBCTC. 2. Click Search to enter the Pay Cycle Manager page. 3. Click the Selection Criteria link to enter the Payment Selection Criteria component. Page 83

84 4. On the Dates page, in the Pay Cycle Selection Dates section, either: 1. Update all of the dates manually OR 2. Select increment values and click the Increment button to update all dates simultaneously. 5. Click the Save button. 6. Click the Pay Cycle Manager link at the top of the page to return. 7. Click the Refresh button and verify the Pay Cycle dates. 8. The Details section displays different process steps that can be run. Initially the Payment Selection process can be run separately, or in combination with Payment Creation. On the Payment Selection row, select a Server and click the Process button. Page 84


85 9. In the Pay Cycle Status section, click Refresh until the Status changes from Running to Selected. 10. Click the Summary link to view the number of payments selected and their total amount. 11. Click the Pay Cycle Details link and click the Search to review vouchers selected for payment. 12. Click the Pay Cycle Manager link to return. 13. Next, run the Payment Creation process. In the Details section on the Payment Creation row, select a Server and click the Process button. 14. In the Pay Cycle Status section click Refresh until the Status changes to Approved. Page 85

86 To (optionally) review the Trial Register: 15. Click the Trial Register link (near the top of the page). 16. Create or select a run control. 17. Select the standard Pay Cycle provided by SBCTC. 18. Click the Run button. 19. Select the Trial Register process and click OK. 20. Click the link to Report Manager. 21. Click the Administration tab. 22. Click the PDF job output representing the AP Trial Payment Register (it will open a new window and display the report). 23. Click Go back to the Trial Register link to return. 24. Click Pay Cycle Manager to return. Page 86

87 25. After payments have been selected and created, available output processes are displayed one at a time in the Pay Cycle Results grid. 1. There are several available output processes, resulting in varying process buttons. The first available will be the Print Checks process. Make sure there is a selected Server and that the Output Type is Web. 26. Click the Process button. 27. In the Pay Cycle Status section click Refresh until the Status changes to Confirmed. 28. A second process, Format Positive Payment is now available. Make sure a Server is selected and click Process. 29. In the Pay Cycle Status section click Refresh until the Status changes to Formatted. 30. A third process, Produce Positive PaymentFile is now available. Make sure a Server is selected and click Process. 31. In the Pay Cycle Status section click Refresh until the Status changes to Completed. 32. Navigate to Review Info Payments Payment. 33. Search for your payments. For example, enter the Bank SetID and Pay Cycle and click Search. Note the payments associated with the recent run of the pay cycle. Page 87

88 34. From the Payment Details tab In the Payment Inquiry Result grid, click a Reference ID to review payment reference information. Note: Payments must next be posted. Refer to the Posting Payments QRG for instructions. Page 88

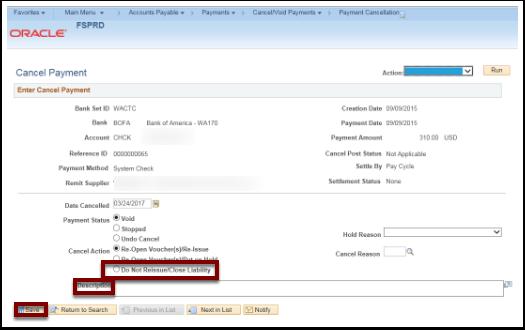
89 Cancelling a Payment - 10h Purpose: Use this document to cancel a payment. Audience: Finance Staff/ Staff Navigation: Main Menu > > Payments > Cancel/Void Payments > Payment Cancellation 1. Enter valid value in the Bank Code field. 2. Enter valid value in the Bank Account field. 3. Enter valid value in the Payment Reference field. 4. Click the Payment Method list and choose System Check list item. 5. Click Search. Use the Cancel Payment page to cancel payments, reverse a cancellation, or view previously canceled payments. Use the Date Cancelled field to enter the payment cancellation date if different than the current system date. Use the Payment Status options to change the payment status. NOTE: After posting you cannot undo the cancellation. Page 89
90 Use the Cancel Action options to specify if vouchers can be re-opended after cancellation. 6. Click the option best suited for your needs: Cancel Action Options Include: Re-Open Voucher(s)/Re-issue: Use to reselect the scheduled payments and reissue them the next time you run a pay cycle, assuming that the vouchers meet the selection criteria for that pay cycle. IMPORTANT: If you reopen and reissue the voucher, the existing schedule payment will be cancelled in the Payment Posting process and a new schedule is added. NOTE: If you decide to reopen vouchers and reissue, remember that you must run the Payment Posting process twice to record the reversal before those vouchers are available for a new payment selection. You can undo your cancellation, as long as the canceled payment is not posted. Re-Open Voucher(s)/Put on Hold: Use to reopen the scheduled payments, but places the reopened scheduled payments on hold for your review. Select this option if you need to perform additional investigation or revise voucher information before proceeding with payment. A pay cycle process does not select the scheduled payments until the hold is removed on the Payments page of the Voucher component. If you select this value, you must also select a reason code in the Hold Reason field. Do Not Reissue/Close Liability: Use to cancel the payment and close any liabilities associated with it. The amount of the liability to close is calculated as the amount of unpaid liability remaining. The system takes into account whether the business unit is accounting at gross or net. The Payment Posting process identifies the voucher as process manual close, and the amount of the outstanding liability is reversed the next time the Voucher Processing process runs. Cancel Reason: Specify a cancel reason for payment cancellations. Hold Reason: Specify a hold reason for payment cancellations placed on hold. The system defaults this hold reason into the cancelled payment's new payment schedule. Select from the following: Accounting, Amount, CCR Expire (Central Contractor Registry supplier expiration), Cntrct Ret (contract return), Goods, IPAC (Intra-Governmental Payment and Collection System), Other, Quantity, and With hold (withholding hold). 7. Enter valid value in the Description field. 8. Click Save. Page 90
91 Page 91
92 Reports 10 Page 92
93 Reports - 10h Purpose: Use this document as a reference for running AP report in ctclink. Audience: Staff The following table lists reports available in PeopleSoft Payables and vetted by the ctclink Reporting & Analytics team (as of ). Please refer to the Reporting team's SharePoint site for up-to-date information. Report ID / Name Payment Archive Report BIP Voucher Archive Selection Payment Aging by Bank Payment History by Bank Payment History By Method Payment Register Trial Register Withholding Calculation Description Payment Archive Report BI Publisher APX6001 Voucher Archive Selection Payment Aging by Bank Payment History by Bank Report Payment History By Method Payment Register Report Trial Register Report Withholding Calculation Navigation Main Menu>>Accounts Payable>>Reports>>Archiving>>Payment Archive Report Main Menu>>Accounts Payable>>Reports>>Archiving>>Voucher Archive Report Main Menu>>Accounts Payable>>Reports>>Payments>>Payment Aging by Bank Main Menu>>Accounts Payable>>Reports>>Payments>>Payment History by Bank Main Menu>>Accounts Payable>>Reports>>Payments>>Payment History by Pay Method Main Menu>>Accounts Payable>>Reports>>Payments>>Payment History by Payment Main Menu>>Accounts Payable>>Reports>>Payments>>Trial Register Main Menu>>Accounts Payable>>Reports>>Payments>>Withhold Calculation Page 93
94 Report ID / Name Open Prepayment Report Prepayments Settlements Payment Aging Report -Supplier Payment History By Supplier AP/GL Account Recon Report Report ID / Name AP/GL Journal Recon Report Summary AP/GL Open Liability Detail AP/GL Open Liability Payables Open Liability Description Open Prepayment Report Prepayments Settlements Payment Aging Report - Supplier Payment History By Supplier Report AP/GL Account Recon Report Description AP/GL Journal Recon Report Payables AP/GL Liability Account Reconciliation Report Detail version of the AP/GL Open Liability Account Reconciliation Report. Payables Open Liability Report Navigation Main Menu>>Accounts Payable>>Reports>>Prepayments>>Open Prepayments Main Menu>>Accounts Payable>>Reports>>Prepayments>>Prepayment Settlements Main Menu>>Accounts Payable>>Reports>>Supplier>>Payment Aging by Supplier Main Menu>>Accounts Payable>>Reports>>Supplier>>Payment History by Supplier Main Menu>>Accounts Payable>>Reports>>Voucher Reconciliation>>AP/GL Account Recon Request Navigation Main Menu>> >> Reports>> Voucher Reconciliation>> AP/GL Journal Recon Request Main Menu>> >> Reports>> Voucher Reconciliation>> Open Liability Reconciliation Main Menu>> >> Reports>> Voucher Reconciliation>> Open Liability Reconciliation Main Menu>> >> Reports>> Voucher Reconciliation>> Payables Open Liability Page 94
95 Report ID / Name Supplier Liability Aging Match Exceptions Posted Voucher Voucher Register 1099 Withholding to Send Detail Withhold 1099 Report Job Wthd Voucher/ Supplier Mismatch Supplier Audit Log Description Supplier Liability Aging Report Match Exceptions Report Posted Voucher Listing Voucher Register 1099 Withholding to Send Detail Creates the 1099 IRS Electronic File Withholding Mismatch Report Supplier Audit Log Navigation Main Menu>> >> Reports>> Voucher Reconciliation>> Supplier Liability Aging Main Menu>> >> Reports>> Vouchers>> Match Exceptions Main Menu>> >> Reports>> Vouchers>> Posted Voucher Main Menu>> >> Reports>> Vouchers>> Voucher Register Main Menu>> Suppliers>> 1099/Global Withholding>> 1099 Reports>> 1099 to Send Detail Main Menu>>Suppliers>>1099/Global Withholding>>1099 Reports>>Withhold 1099 Report Job Main Menu>>Suppliers>>1099/Global Withholding>>General Reports>>Wthd Voucher/ Supplier Mismatch Main Menu>>Suppliers>>Supplier Information>>General Reports>>Supplier Audit Log Page 95
96 Generate a Sales and Use Tax Report - 10h Purpose: Use this document as a reference for how to run the Sales and Use Tax Query in ctclink. The report will show accrued tax information. Audience: Staff Generating a Sales and Use Tax Report Navigation: Reporting Tools> Query> Query Viewer 1. On the search page of Query Viewer Search By Query Name begins withctc_sut_detail_report. 2. Click Search. 3. Click either the HTML or Excel link for the query named CTC_SUT_DETAIL_REPORT. 4. A new window will open and you will be prompted for the following: 1. BusinessUnit 2. FromDate 3. ToDate Page 96

97 5. Click View Results. 6. Vouchers that match your search criteria will be displayed along with a Sales and Use Tax Code, Tax Rate, Amount, and Description. Page 97

98 AP Supplier Liability Aging Report - 10h Purpose: Use this document as a reference for creating the AP Supplier Liability Aging Report Audience: Staff The BI Publisher Report provides a system delivered report that summaries outstanding vouchers based on the defined aging cycles with aging time periods that specify a numerical range representing days, weeks, and so forth. Aging cycles are used in Supplier Liability Aging (APY1408) reports. Navigation: Main Menu > > Reports > Voucher Reconciliation > Supplier Liability Aging 1. Enter the Run Control ID in the Find an Existing Value or Add a New Value tabs. 2. Click the Search button. 3. Complete Report Request Parameters on the Supplier Liability Aging page. 1. As of Date - Enter todays date 2. Aging Cycle ID - MONT 3. As of Date Type - Indicate if the date is based on Invoice Date or Accounting Date 4. Aging Basis Date - Net Due Date 5. Select the Include Unrecorded Liabilities checkbox Page 98

99 6. Select the Include Prepayment checkbox 7. Select the Include Unmatured Drafts Paid checkbox 8. Select the Include Available Discount checkbox 9. Business Unit Option - Value 10. Enter College Business Unit 11. Supplier Select Option - Select All Suppliers 12. Currency Options - Base Currency 13. Report Supplier By - Invoice Supplier 14. Report Group By - Business Unit/Supplier 15. Detail or Summary - Detail 4. Click the Run button to initiate the process. 5. A Process Schedule Request window will appear. 6. Select the Vendor Liab Aging Data & Report (Process Name APY1408) PSJobs to initiate the process to load the information into a reporting stating table and will initiate the Supplier Liability Aging BI publisher report. 1. Type - Web 2. Format - PDF 7. Click the OK button to initiate the PSJob process scheduler request. Page 99

100 8. Click on the Report Manager link. 9. Click on the Administration tab to view the status of the Process Scheduler and to access the Supplier Liability Aging report. Page 100


101 10. Click the Refresh button until the Supplier Liab Aging Data Loading and APX1408-APX1409.pdf status yields a status of Posted. 11. Click on the APX1408-APX1409.pdf to open and review the Supplier Liability Aging report. Page 101
Reports Accounts Payable Reports - 10h...98 Generate a Sales and Use Tax Report - 10h...101
 ACCOUNTS PAYABLE Table of Contents Vouchers 10... 4 Approving Vouchers - 10a... 5 Budget Checking a Voucher Ad Hoc - 10a... 7 Creating a Voucher from a PO... 8 Creating a Quick Invoice - 10a...13 Entering
Voucher Build Request
 Running the Voucher Build for Payroll Federal Tax Vouchers - 10a Purpose: Use this document as a reference for how to run the Accounts Payable process for Running a Voucher Build for Payroll Federal Tax
Purpose: Journal vouchers are used to adjust accounting entries for vouchers that have been posted and paid, and whose payments have been posted.
 Correcting Accounting Entries in Accounts Payable (Journal Voucher) Purpose: Journal vouchers are used to adjust accounting entries for vouchers that have been posted and paid, and whose payments have
International Institute of Tropical Agriculture
 ORACLE FINANCIALS USER GUIDE International Institute of Tropical Agriculture Accounts Payable Author: Oracle Implementation Team Creation Date: October 27, 2001 Last Updated: October 27, 2001 Control Number:
Bridge. Billing Guide. Version
 Bridge Billing Guide Version 2.5.112 Table of Contents Page i Table of Contents Table Of Contents I Introduction 2 Managing Bill To Parties 3 Creating a New Bill to Party 3 Viewing and Navigating Bill
Accounts Payable Enter a non-po voucher
 Business Process 1. To enter vouchers for invoices not associated with a Purchase Order (PO). (Invoices matched to Purchase Orders should be sent to the Business Office for entry.) 2. To add Asset information
Campus Vouchers NEW VERSION: 8/28/2014
 Campus Vouchers NEW VERSION: 8/28/2014 Table of Contents 1 Campus Vouchers 3 Understanding Campus Vouchers 5 Creating a Campus Voucher 7 Running a Voucher Inquiry 21 1 1 Campus Vouchers 1 Campus Vouchers
eprocurement and GeorgiaFIRST Marketplace
 eprocurement and GeorgiaFIRST Marketplace User s Guide for Accounts Payable Information Technology Services Version 1.1 Last Updated: 10/16/2012 Table of Contents Table of Contents Table of Contents...
Working with Voucher Templates
 Working with Voucher Templates VERSION: March 2018 Creating a Template for Vouchers What Is a Voucher Template? You have the option to create templates for vouchers you create on a regular basis, such
REQUISITIONS, PURCHASE ORDERS, AND REVIEWING PAYMENT INFORMATION
 REQUISITIONS, PURCHASE ORDERS, AND REVIEWING PAYMENT INFORMATION TABLE OF CONTENTS OVERVIEW... 2 CREATE A REQUISITION... 2 CREATE A BLANKET REQUISITION... 15 CREATE A REQUISITION FOR THE COMPUTER DEPOT...
3M Ariba Light Account Network Collaboration for Suppliers
 SAP Training Source To Pay 3M Ariba Light Account Network Collaboration for Suppliers External User Training Version: 1.0 Last Updated: 31-Aug-2017 3M Business Transformation & Information Technology Progress
Summit A/P Voucher Process
 Summit A/P Voucher Process Copyright 2010 2 Contents Accounts Payable... 4 Accounts Payable Setup... 5 Account Reconcile Protection.... 5 Default Bank Account... 5 Default Voucher Method - Accrual Basis
Accounts Payable Release 2015
 Accounts Payable Release 2015 Disclaimer This document is provided as-is. Information and views expressed in this document, including URL and other Internet Web site references, may change without notice.
Welcome to the course on the working process across branch companies.
 Welcome to the course on the working process across branch companies. In this course we will review the major work processes across branch companies. We will start with the intercompany trade process.
How to Configure the Initial Settings in SAP Business One
 SAP Business One How-To Guide PUBLIC How to Configure the Initial Settings in SAP Business One Applicable Release: SAP Business One 8.8 European Localizations English July 2009 Table of Contents Introduction...
Oracle ERP Cloud Period Close Procedures
 Oracle ERP Cloud Period Close Procedures Release 13 O R A C L E W H I T E P A P E R A U G U S T 2 0 1 7 Table of Contents Introduction 8 Chapter 1 Period Close Dependencies 9 Chapter 2 Subledger Accounting
PeopleSoft General Ledger 9.1 Journal Processing Training Manual Contact Information:
 PeopleSoft General Ledger 9.1 Journal Processing Training Manual Contact Information: SpearMC Consulting, Inc. 1-866-SPEARMC info@spearmc.com www.spearmc.com TABLE OF CONTENTS PURPOSE... 4 CHAPTER 1 -
Sage 100 ERP 2015 What s New
 Sage 100 ERP 2015 What s New Global Enhancements Migration Changes If you are converting data for a company using the Purchase Order module, a message appears asking if you want to retain purchase order
Landed Cost Version 7.2
 Star System Solutions Pty Ltd Landed Cost Version 7.2 User Guide elanded Cost About This Guide iv Landed Cost Definition v Landed Cost Data Flow vi Chapter 1: Landed Cost Utilities 1 Configuration 2 Task
CHAPTER 3: GENERAL JOURNALS
 Chapter 3: General Journals CHAPTER 3: GENERAL JOURNALS Objectives Introduction The objectives are: Explain the General Journal entry and posting system. Create and post General Journal entries. Describe
Data Exchange Module. Vendor Invoice Import
 Data Exchange Module Vendor Invoice Import Information in this document is subject to change without notice and does not represent a commitment on the part of Dexter + Chaney. The software described in
Table of Contents 9.2 Training Materials For New Users. Table of Contents 1
 HSC - Requisitions Purchasing Contact: 405-325-2811 Website: www.ou.edu/purchasing Table of Contents 9.2 Training Materials For New Users Table of Contents 1 Create Requisitions Maintain Requisition Page
Table of Contents 9.2 Training Materials For New Users. Table of Contents 1
 HSC - Requisitions Purchasing Contact: 405-325-2811 Website: www.ou.edu/purchasing Table of Contents 9.2 Training Materials For New Users Table of Contents 1 Create Requisitions Maintain Requisition Page
REQUISITIONS, PURCHASE ORDERS, AND REVIEWING PAYMENT INFORMATION USER GUIDE
 REQUISITIONS, PURCHASE ORDERS, AND REVIEWING PAYMENT INFORMATION USER GUIDE Please note: This user guide is intended for online use, and has a number of embedded links. Printing of these documents is discouraged,
CHAPTER 4A SALES ORDERS MAINTENANCE
 CHAPTER 4A SALES ORDERS MAINTENANCE Chapter 4A Maintenance...1 Sales Order Maintenance...2 Sales Order Maintenance...3 Creating a New Sales Order...5 Manually Creating a New Sales Order...5 Copying an
Purchase Requisitions and Receiving
 Purchase Requisitions and Receiving VERSION: February 2018 Table of Contents About the Purchasing Process 3 Working With Requester Preferences 5 Creating a New Purchase Requisition 9 Reporting a Misuse
Utilit-e Insight Getting
 2018 User Group Meeting June 4-7, 2018 Utilit-e Insight Getting Started with GL, AP, AR By: Amy Kuhlmann & Heather Fineran Date: 6/4/2018 Page: 1 Table of Contents Getting Started with the General Ledger...
Invoice Manager Admin Guide Basware P2P 17.3
 Invoice Manager Admin Guide Basware P2P 17.3 Copyright 1999-2017 Basware Corporation. All rights reserved.. 1 Invoice Management Overview The Invoicing tab is a centralized location to manage all types
Accounts Payable Users Guide
 Accounts Payable Users Guide Updated 05/28/2014 Page 1 of 9 Accounts Payable The accounts payable application is used to enter records that require cash disbursement (computer check, manual check, virtual
Data Exchange Module. Vendor Invoice Import
 Data Exchange Module Vendor Invoice Import Information in this document is subject to change without notice and does not represent a commitment on the part of Dexter + Chaney. The software described in
Question: 1 Which four statements are true about modifying a payment batch? (Choose four.)
") Question: 1 Which four statements are true about modifying a payment batch? (Choose four.) A. You can create a zero-amount payment for a supplier site. B. You can remove all invoices for a particular supplier
Question: 1 Which four statements are true about modifying a payment batch? (Choose four.) A. You can create a zero-amount payment for a supplier site. B. You can remove all invoices for a particular supplier
Payroll Guide Guru Guide Version
 Payroll Guide Guru Guide Version 2017.01.13 Copyright 2017 PeopleGuru, Inc. All rights reserved. Information in this document is subject to change without notice. The software described in this document
MRI General Ledger for Web Operational Training Guide Version 4.2
 MRI General Ledger for Web Operational Training Guide Version 4.2 2012 MRI Software LLC. Any unauthorized use or reproduction of this document is strictly prohibited. All Rights Reserved. 2012 MRI Software
HealthEquity Employer Portal Guide HealthEquity All rights reserved.
 HealthEquity Employer Portal Guide 2013-2015 HealthEquity All rights reserved. INTRODUCTION 09 ACCESSING PENDING PAYMENTS 01 LOGIN PROCESS 09 MODIFYING EMPLOYER INFORMATION 01 ADDING INSURANCE INFORMATION
1 About Deskera ERP 9. 2 Getting Started with Deskera ERP 10
 Table of Contents 1 About Deskera ERP 9 2 Getting Started with Deskera ERP 10 2.1 Basic Settings 11 2.1.1 Create Users 12 2.1.2 Manage Application Access 13 2.1.3 Configure Company Settings 14 2.1.4 Import
Customer Relations Advisory Council
 OVERVIEW Recently the Project Management Office for ufbridges established a new team to implement PeopleSoft s Receivables, Billing, and Contracts for non C&G transactions. While these applications are
Accounting Master Update for Version 14.2
 Accounting Master Update for Version 14.2 Date: October 2014 From: MACC s Product Development Team Re: Version 14.2 Release The following enhancements have been made to the Accounting Master software application.
Contents OVERVIEW... 3
 Contents OVERVIEW... 3 Feature Summary... 3 CONFIGURATION... 4 System Requirements... 4 ConnectWise Manage Configuration... 4 Configuration of Manage Login... 4 Configuration of GL Accounts... 5 Configuration
MONTH END CLOSING INSTRUCTIONS FOR ACTUALS LEDGER
 MONTH END CLOSING INSTRUCTIONS FOR ACTUALS LEDGER Revised by Financial Operations 05/20/2009 Month End Closing Instructions for ACTUALS Ledger CONTENTS: OVERVIEW 3 HELP 5 DETERMINING IF A BUSINESS UNIT
Fiscal Year-End 2017 Sub-Module Cleanup and Processing. epro, Purchasing, Accounts Payable, Travel & Expenses
 Fiscal Year-End 2017 Sub-Module Cleanup and Processing epro, Purchasing, Accounts Payable, Travel & Expenses (This page is left blank for printing purposes.) TABLE OF CONTENTS Submodule Transaction Overview...
Sage 100 Direct Deposit. Getting Started Guide
 Sage 100 Direct Deposit Getting Started Guide This is a publication of Sage Software, Inc. 2017 The Sage Group plc or its licensors. All rights reserved. Sage, Sage logos, and Sage product and service
Printed in the USA by: clubsystems group, inc.
 Copyright 2012 All rights reserved. This book is for the use of the clients and customers of clubsystems group, inc. in conjunction with their software. This book may not be duplicated in any way without
Contents OVERVIEW... 3
 Contents OVERVIEW... 3 Feature Summary... 3 CONFIGURATION... 4 System Requirements... 4 ConnectWise Manage Configuration... 4 Configuration of a ConnectWise Manage Login... 4 Configuration of GL Accounts...
Table of Contents 9.0 Training Materials For New Users. Table of Contents 1
 HSC - Requisitions Purchasing Contact: 405-325-2811 Website: www.ou.edu/purchaing Table of Contents 9.0 Training Materials For New Users Table of Contents 1 Create Requisitions Maintain Requisition Page
QUICKBOOKS PRO 2008 WORKSHOP 5: PART A MARS COMPANY
 QUICKBOOKS PRO 2008 WORKSHOP 5: PART A MARS COMPANY Recording Transactions in the Sales, Receive Pay Bills, Purchases, and Pay Bills Journals This workshop adds to QuickBooks skills learned in Workshops
The Construction Manager. Reports Catalog
 The Construction Manager Reports Catalog The Construction Manager Reports Catalog Published November 2004 Geac Commercial Systems, a division of Geac Enterprise Solutions, Inc. makes no warranty of any
ClubConnect Accounts Payable Understanding Invoice and Check Types for Easy Processing
 ClubConnect Accounts Payable Understanding Invoice and Check Types for Easy Processing Webinar Topics Invoices... 3 Special Invoice Situations... 3 Prepaid Invoices... 3 Reciprocal Club Invoices... 8 Invoices
Ariba Network Online Invoice Guide
 Ariba Network Online Invoice Guide Introduction Regions Financial Corporation Specifications Your Ariba Network Account Invoices Accessing Your Account Account Navigation Account Configuration Settlement/Remit-To
What s New in PBS v12.04 by Module
 What s New in PBS v12.04 by Module System-wide Features Check Reconciliation Order Entry Manufacturing Accounts Payable General Ledger Purchase Order Data Import Manager Accounts Receivable Inventory Control
PENTAGON2000 Software, Inc.
 1 Accounting Introduction PENTAGON2000 Software, Inc. The Pentagon Financials is an Accrual Based accounting system, by which every Sale or Purchase flows via Accounts Receivable and Accounts Payable.
Purchasing. Section 10 Purchase Orders. Purchase Orders can be entered directly into the PO Entry pages without using LDS emarket.
 Purchasing Section 10 Purchase Orders Purchase Orders can be entered directly into the PO Entry pages without using LDS emarket. Creating a Purchase Order This section contains information on how to enter
Vilden Associates, Inc. Accounts Receivable. Manual
 Vilden Associates, Inc. Accounts Receivable Manual 1 ACCOUNTS RECEIVABLE MENU... 3 Cash Receipts Entry... 4 Adjustment Entry & Processing... 10 Processing a Batch Inquiry... 12 Creating a New Batch...
Vendor Returns Quick Reference
 Vendor Returns Quick Reference Occasionally, parts need to be returned to the vendor for various reasons. The part may need repair, the wrong part was shipped to the distributor, the parts are obsolete,
PeopleSoft Requisition Manual Using the PeopleSoft Requisition System
 PeopleSoft Requisition Manual Using the PeopleSoft Requisition System V8.9 September 2014 Table of Contents OBJECTIVES... 3 OVERVIEW... 3 CUSTOMIZING SCREEN... 4 MODULE 1: ENTERING A REQUISITION... 5 Navigating
Getting Started Guide
 Getting Started Guide OAS Freight v 3.2 Welcome Thank you for selecting OAS Freight. This guide is designed to help you become familiar with the OAS Freight software. This guide is not designed to be a
Getting Started Tutorial
 Getting Started Tutorial Welcome This tutorial will introduce you to the main functions of your MYOB accounting software. You can use this tutorial with the current versions of MYOB Accounting, MYOB Accounting
Call: Peoplesoft Financial Course Content:35-40hours Course Outline PURCHASE ORDER
 Peoplesoft Financial Course Content:35-40hours Course Outline PURCHASE ORDER Overview of Purchasing Purchasing Table setup Establishing a PO Business unit Creating a PO Business unit Purchasing processing
New for 2009! Detecting and Correcting with the Client Data Review Feature
 Chapter 17 New for 2009! Detecting and Correcting with the Client Data Review Feature Introduction: Features and Benefits Starting a Client Data Review Customizing the Client Data Review Center Account
Contents OVERVIEW... 3
 Contents OVERVIEW... 3 Feature Summary... 3 CONFIGURATION... 4 System Requirements... 4 ConnectWise Manage Configuration... 4 Configuration of Manage Login... 4 Configuration of GL Accounts... 5 Configuration
University of Maine System
 University of Maine System Accounts Payable/Purchasing Inquiries Reference Manual UMS Financials Page 1 of 44 Inquiries Reference TABLE OF CONTENTS 1 Introduction...3 2 Requisitions and Receiving Inquiries...3
High Country Snowmobile
 High Country Snowmobile Level I 1 st Web Based Edition Transactions For December 4-10 Page 1 BEGIN THE HIGH COUNTRY SNOWMOBILE PROGRAM When you have: 1. Printed and carefully read Getting Started With
CSULB Finance Inquiry & Reports Training Manual - CFS 9.2
 CSULB Finance Inquiry & Reports Training Manual - CFS 9.2 Last Revised: 04/30/14 Table of Contents Page Overview...1 1.0 ChartFields...2 1.1 Chart Of Accounts... 2 2.0 General Ledger...4 2.1 General Ledger
3 Customers. Chapter LEARNING OBJECTIVES
 Chapter 3 Customers LEARNING OBJECTIVES 1. Restore data from Exercise 2-2. This backup was made on page 89. (Refer to the Read me box on page 55, Do I need to restore?) 2. Go to the Customers & Sales Navigation
Sage ERP Accpac 6.0A. SageCRM 7.1 I Integration Update Notice
 Sage ERP Accpac 6.0A SageCRM 7.1 I Integration Update Notice 2011 Sage Software, Inc. All rights reserved. Sage, the Sage logos, and all Sage ERP Accpac product and service names mentioned herein are registered
International Institute of Tropical Agriculture
 ORACLE GL USER MANUAL ORACLE FINANCIALS USER GUIDE International Institute of Tropical Agriculture General Ledger Author: Oracle Implementation Team Creation Date: October 22, 2001 Last Updated: Control
Contents OVERVIEW... 3
 Contents OVERVIEW... 3 Feature Summary... 3 CONFIGURATION... 4 System Requirements... 4 ConnectWise Manage Configuration... 4 Configuration of Manage Login... 4 Configuration of GL Accounts... 5 Configuration
COUPA SUPPLIER PORTAL
 COUPA SUPPLIER PORTAL PO Backed Invoice Supplier Guide Copyright 2016 Coupa Software Inc. All Rights Reserved. v.01.20180417 Table of Contents (CSP)... 2 Registering for CSP... 2 Updating Your Company
Sage ERP Accpac Online 5.6
 Sage ERP Accpac Online 5.6 Integration Resource Guide for Sage ERP Accpac And Sage CRM (Updated: December 1, 2010) Thank you for choosing Sage ERP Accpac Online. This Resource Guide will provide important
Vision Municipal Solutions. How To Guide. Payroll
 Vision Municipal Solutions Payroll Shane O Neill 12/7/2010 Organizational Groups Posting Paychecks Invoices Nacha Run Banking Services Employee Paychecks Vendor Checks Direct Deposit Checks Forms Issue
PeopleSoft PO BILLING--> Peoplesoft FSCM Course Content details
 Peoplesoft FSCM Course Content details BILLING--> Maintain customers Enter bills online Create consolidated bills Work with billing interfaces Create recurring bills Copy a group of bills Research bills
Sage ERP Accpac 6.0A. SageCRM 7.0 I Integration Update Notice
 Sage ERP Accpac 6.0A SageCRM 7.0 I Integration Update Notice 2010 Sage Software, Inc. All rights reserved. Sage, the Sage logos, and all Sage ERP Accpac product and service names mentioned herein are registered
ConnectWise-Sage 50 Accounts User Guide
 ConnectWiseSupport@mobiusworks.com www.mobiusworks.com ConnectWise-Sage 50 Accounts Version 3.0.0.7 September 11, 2015 Table of Contents Table of Contents... 2 INSTALLATION AND CONFIGURATION... 4 Introduction...
Chapter 3 Inventory. Objectives. QuickBooks Tools for Tracking Inventory
 Chapter 3 Inventory Objectives After completing this chapter, you should be able to: Activate the Inventory function (page 47). Set up Inventory Items in the Item list (page 48). Use QuickBooks to calculate
C o n n X T i m e s h e e t s TIMESHEETS IMPLEMENTATION MANUAL VERSION ConnX Pty Ltd 1 of 206
 TIMESHEETS IMPLEMENTATION MANUAL VERSION 5.2 2005-2018 ConnX Pty Ltd 1 of 206 Copyright 2005-2018 ConnX Pty Ltd ABN 46 108 567 960 Reproduction in whole or in part by electronic, mechanical or chemical
CALENDAR & FISCAL YEAR END CLOSING PROCEDURES
 CALENDAR & FISCAL YEAR END CLOSING PROCEDURES MICROSOFT DYNAMICS GP RELEASES GP 2013, GP 2015 and GP 2016 Date: 11/30/17 Page 1 CONTENTS CALENDAR & FISCAL YEAR END CLOSING PROCEDURES... 1 General Tips
100: Accounts Receivable-
 100: Accounts Receivable- Overview To Select the : OPTION 101: Apply Payments to AR Introduction To Apply a Payment to a Customer Account: Layout for Apply Payments to AR Selection screen: To Record a
Microsoft Dynamics GP. Shipping Documents
 Microsoft Dynamics GP Shipping Documents Copyright Copyright 2011 Microsoft Corporation. All rights reserved. Limitation of liability This document is provided as-is. Information and views expressed in
How to Create a Non-PO Invoice in Ariba. 3) Select Non-PO Invoice from the Create drop-down menu:
 Select Non-PO Invoice from the Create drop-down menu:") 1) Log in to Ariba: https://ar.admin.washington.edu/aribabuyer/uw/login.asp 2) Click the Invoicing tab 3) Select Non-PO Invoice from the Create drop-down menu: 2) Click on the Invoicing tab 3) Select Non-PO
1) Log in to Ariba: https://ar.admin.washington.edu/aribabuyer/uw/login.asp 2) Click the Invoicing tab 3) Select Non-PO Invoice from the Create drop-down menu: 2) Click on the Invoicing tab 3) Select Non-PO
Financial System Procurement. Reference Guide
 Financial System Procurement Table of Contents How to use this... 4 Introduction to Procurement... 5 Module Objectives... 5 Unit I: General System Process... 6 Unit Objectives... 6 Chapter 1: General System
Version Table of Contents
 Table of Contents 1. CLUB ADMINISTRATORS/ MANAGERS... 8 1.1 CLUBHOUSE... 8 1.1.1 Group Home... 8 1.1.2 Club Home... 8 1.1.3 Course Home... 9 1.1.4 Customer Home... 9 1.1.5 Gopher Notes... 9 1.1.6 Contact...
Aviation Specialties Unlimited 1. Contract (Fixed Price Contract)
") Aviation Specialties Unlimited 1. Contract (Fixed Price Contract) Overview Key Setup Setup Customer Setup Quote Create Sales Order Setup Contract (Project) Setup Advance Billing (Deposit) Acquire Inventory
Aviation Specialties Unlimited 1. Contract (Fixed Price Contract) Overview Key Setup Setup Customer Setup Quote Create Sales Order Setup Contract (Project) Setup Advance Billing (Deposit) Acquire Inventory
PBS v12.04 contains many new enhancements and fixes. This document explains the benefits and features of the enhancements by module.
 What s New in PBS v12.04 by Module System-wide Features Check Reconciliation Order Entry Manufacturing Accounts Payable General Ledger Purchase Order Data Import Manager Passport ACA Accounts Receivable
SAGE ACCPAC. Sage Accpac ERP. Converting from Simply Accounting by Sage
 SAGE ACCPAC Sage Accpac ERP Converting from Simply Accounting by Sage 2008 Sage Software, Inc. All rights reserved. Sage Software, Sage Software logos, and all Sage Accpac product and service names are
Nimble Team NIMBLE ACCOUNTING LLC 200 MOTOR PKWY #26, HAPPAUGE, NY, 11788, USA
 Nimble Team NIMBLE ACCOUNTING LLC 200 MOTOR PKWY #26, HAPPAUGE, NY, 11788, USA Part - I: Setting Up Your Business with Nimble Accounting Chapter 1: Corporation Setup -----------------------------------------------------------------------------------------------06
A/R Billing Invoices
 Overview A/R Billing Invoices DPHS Version 7.0 Accounts Receivable billing invoices are entered and posted in batches. Navigate to Accounts Receivable>Billing Page 1 of 10 B Data Entry The Data Entry menu
PeopleSoft Requisition Creation
 Purchasing > Requisitions > Add/Update Requisitions PeopleSoft Finance version 8 vs. version 9 Top Menu Features p. 1 Removing the Top Menu Features p. 1 Description page Put the Main Menu back on the
tyuiopasdfghjklzxcvbnmqwertyuiopas
 qwertyuiopasdfghjklzxcvbnmqwertyui opasdfghjklzxcvbnmqwertyuiopasdfgh jklzxcvbnmqwertyuiopasdfghjklzxcvb nmqwertyuiopasdfghjklzxcvbnmqwer QuickBooks Instructional Manual MiraCosta College tyuiopasdfghjklzxcvbnmqwertyuiopas
ACCOUNTING TRAINING. Training. About Centerbase Accounting Chapter 1. Introduction. Requirements
 Introduction Chapter 1 Introduction Requirements Feature Overview Centerbase Accounting integrates fully with our existing billing features to provide a truly all in one solution for law firm financials.
Microsoft MB6-871 Exam Questions & Answers
 Microsoft MB6-871 Exam Questions & Answers Number: MB6-871 Passing Score: 700 Time Limit: 180 min File Version: 40.2 http://www.gratisexam.com/ Microsoft MB6-871 Exam Questions & Answers Exam Name: Microsoft
Enhancements in Spectrum Last Updated: April 5, 2018
 Enhancements in Spectrum 14.24 Last Updated: April 5, 2018 Status: Thunderbirds are GO! AP BI BI BI BI CM JC JC JC MM PO PO PO PR PR PR PS ST ST ST Use Tax Report Supports Work Orders Deep Linking New
MSI Accounts Payable Version 7.5
 MSI Accounts Payable Version 7.5 User s Guide Harris Local Government 1860 W. Winchester Road, Ste 204 Libertyville, IL 60048 Phone: (847) 362-2803 Fax: (847) 362-3347 Contents are the exclusive property
How do I Reconcile MCPS Invoices?
 How do I Reconcile MCPS Invoices? Overview Purpose This document explains how schools can reconcile Montgomery County Public School (MCPS) invoices to requisitions charged to their cash account and to
Nexsure Training Manual - CRM. Chapter 12
 Nexsure Training Manual - CRM Audits In This Chapter Adding an Audit Updating the form Invoicing the Audit Tracking the Audit Posting the Audit Adding an Audit Audits are processed on policies where an
Central Processing includes administrative tasks that must be completed to process the travel expenses of an employee.
 Contents **Note: If you need to run Pay Cycle for expense payments more than once during the day, you must run the processes listed as Automated Overnight manually. Central Processing Overview... 1 Process
Overview Procurement Card Monthly Process Flow...3
 Table of Contents Page Overview...2 1.0 Procurement Card Monthly Process Flow...3 2.0 ProCard Month End Reconciliation & Adjustments...4 2.1 ProCard Adjustments... 4 2.1.1 ProCard Adjustment Page Display
HOW INTEGRATION WORKS...3
 Contents INTRODUCTION...1 How to Use This Guide... 1 Software Editions Supported... 2 HOW INTEGRATION WORKS...3 INTEGRATION RULES... 4 INTEGRATION SETTINGS... 8 Send Settings... 8 Get Settings... 9 Account
SPECTRUM+ SYSTEM. Accounts Payable. Regular Voucher Entry. User Guide for Departments. PeopleSoft Version 9.2. Revised 9/16/2015.
 SPECTRUM+ SYSTEM Accounts Payable Regular Voucher Entry User Guide for Departments PeopleSoft Version 9.2 Revised 9/16/2015 1 P age Table of Contents What is Accounts Payable?... 2 The Payables Process