Projects/Bidding/Estimating
|
|
|
- Joel Thomas
- 5 years ago
- Views:
Transcription
1 /////////////////////////CLIP Pro/////////////////////////////////////////////////////////////////////////////////////////////////////////////////////////////////////////////////////////////////////////////////////////////////////////////////////////////////////////////////////////////////////////////////////// Contents Vander Kooi and Assoc. System of "Multiple Overhead Recovery"... 3 Tutorial for making an estimate in Projects... 4 Setting up the basics...37 A: Set Up Vendors...37 B: Set up user defined descriptions...38 C: SET UP INVENTORY...40 Assigning Part Numbers...40 Setting Up A Project...42 Reports...53 Daily Routines Set up the project work orders for your crews After selecting you will can send it to the printer or to the screen Send your crew out with the work order Set up project bank:...62 Overview on the Record Work Screen Add projects into the Project Bank Recording The Work Post the projects to history During the process check and evaluate the progress Posting History to Journal Print Bills...75 Importing inventory from Excel...76 Working with DIG (Design Imaging Group)...79 Projects Tutorial-1
2 /////////////////////////CLIP Pro//////////////////////////////////////////////////////////////////////////////////////////////////////////////////////////////////////////////////////////////////////////////////////////////////////////////////////////////////////////////////////////////////////////////////////////// Projects Tutorial-2
3 /////////////////////////CLIP Pro/////////////////////////////////////////////////////////////////////////////////////////////////////////////////////////////////////////////////////////////////////////////////////////////////////////////////////////////////////////////////////////////////////////////////////// Projects Projects is a powerful, accurate tool that helps you to know how much to bid on a proposal for construction work. You will have a list of all the materials, labor and assemblies that you use in your company. You will set up your customers with the name and addresses of all the customers that you might give estimates and proposals to. Once this initial set up is done, you will be able to crank out proposals very easily and accurately, knowing that you will make money on any project you bid on. These proposals are then printed out on work orders for your crews. When they bring back the work orders you can record these items as being done and track your costs, overhead and profit. You can compare proposed amounts to actual amount used. Vander Kooi and Assoc. System of "Multiple Overhead Recovery" CLIP Software worked closely with Vander Kooi and Assoc. (VKA) to develop Projects to easily accommodate their system of bidding and estimating. VKA offers classes, workshops and personal consulting to companies that want to become more profitable. By tracking all of your costs and classifying them into the various categories, VKA helps you come up with your Multiple Overhead Recovery System (MORS) numbers. The MORS will tell you exactly how much overhead you need to recover on the four areas of any estimate, i.e..: Materials, Labor, Equipment and Subcontractors. CLIP software has also developed a system to figure these numbers out. This system, MORS, is only available through VKA or CLIP software and includes consultation from VKA to make sure that the numbers will be accurate in your situation. A typical example of MORS numbers would be 10% on Materials, 70% on Labor, 15% on Equipment and 5% on Subcontracts. This means that if I have a total project that includes all four of these items, I would add 10% to my materials cost, 70% to my labor cost, 15% to my equipment cost and 5% to my subcontractors cost to help defray overhead. On top of that I would add 15% for profit. The breakdown would look something like this: Landscape Job Materials Cost $ Add 10% Equals $ Labor Cost $ Add 70% Equals $ Equipment $ Add 15% Equals $ Sub-Cont. $ Add 5% Equals $ Total Costs...$1, Add 15% Profit...$1, Customer's price As long as your Overhead Recovery numbers are correct, you will guarantee a profit at the end of the year while remaining as competitive as you can or want. This system is much better than the "shoot from the hip" system that a lot of people use such as tripling your materials cost or doubling your subcontractors costs. These other methods work, if they work at all, by chance. If you have a job with a high cost on materials, your bid will be way out of line. On the other hand if you have a job with low materials cost, your bid will be low and you will lose money on that job. You have to remember that you are a service company and what you are really selling is labor and knowhow. Labor is where you will make or break the bank. Because labor is so important to us, we also need to track "general conditions" (or hidden items) that the customer will not see but are a real cost to us. A good example of a general condition is travel and set up time. If the property where the work will be performed on is a long distance away (30-45minutes) and we will be sending a crew of three employees and it takes two days to Projects Tutorial-3
4 complete the job, we need to add 45 minutes times 3 men times 4 trips (two round trips) or 9 man hours. Since our average cost per man hour on that crew is $12.00 that means we will need an additional ($ plus 70% in labor costs) $ We would not want to show this to the customer on the bid, but it is a very real cost and therefore must be paid by the customer. The way this is handled is to distribute the extra travel time throughout the bid so that the price reflects the additional costs of travel but it is not broken out as an individual item for the customer to see. Now our new bid is $1, (old cost ($1,544.90) plus the travel time cost $ plus 15% for profit. As you use Projects, you will see that we accommodate this system very well. Projects is powerful enough to use other systems of estimating and bidding as well. We, at CLIP Software believe that the VKA system is one of the best available and will help guarantee your profits from year to year. Tutorial for Setting up Projects Before you can begin to make up estimates and proposals for your customers in Projects, you need to set up your vendors, your stock types, Please reference later in the manual for detailed instructions on how to set all these lists up. For the purpose of this tutorial we will only use the options that come shipped with CLIP. Tutorial for making an estimate in Projects Lets make up an estimate in Projects just to show you how fast, accurate and easy it is. To use this example, we will create a proposal for a customer that wants us to install a flower bed and plant a tree. Enter the items we will use into the Inventory Note: To use any items to build a project, they first have to exist in inventory. We need to create all the parts that we will need. When we analyze what parts will be needed for this proposal we can actually see that there are a good number of parts needed: 1. Flowers 2. Mulch 3. Peat moss 4. A tree 5. Three stakes 6. Some string 7. Labor 8. Travel time Some of these items can be viewed as part of an assembly. For example, we could create an assembly called "plant tree" that included the string, the stakes, the labor, and the peat moss. We will do that, but first we need to add each of these parts to our inventory. Open the Inventory - Inventory Data Entry screen to begin.


5 The first item is blank, since we initially do not have anything in our inventory database. Entering the Flower Enter the Part Number. It is important that you have a method for assigning part numbers. It will be much easier later on to be able to identify a part easily by its part number. For Example, if we were to enter the flowers here, we could put them in as "AN" for annuals, then the name "ZINNIA" and then the size "4". Now we would know easily that a 4 inch Zinnia is ANZINIA4.
6 /////////////////////////CLIP Pro//////////////////////////////////////////////////////////////////////////////////////////////////////////////////////////////////////////////////////////////////////////////////////////////////////////////////////////////////////////////////////////////////////////////////////////// Set the class type as "PLANT", Set the tax type to "D" (No sales tax). Set the description to "Zinnias 4 Inch Potted". If you have set up your vendors in CLIP, you can choose the vendor for this part, if not, just leave it blank. Stock type would be "STOCK" meaning that this item is a stock item that needs to come from inventory. A "TIME" part is one that is not inventoried but is spent on the job. The stock unit answers the question; "How are they packaged?" You could enter a "24pc Flat" or "5 gallon". The unit measure is "How is it counted?". This could be EA or LBS or some other measurement. The Exp Unit is a special field for exporting the inventory to PlanScape and other Landscape design programs. Ignore it for now. Entering the Costs We need to enter all the costs associated with this part. Materials Cost - Enter the direct cost of purchasing this product. If you pay your sales tax up front and do not charge it to your customer, enter the cost including the sales tax because it is a real cost to you. Markup for materials - This mark up pays for part of the overhead needed to perform work. If you are using the Vander Kooi method, you will have a percentage that you will use for all materials. This will normally be 10%. CLIP will figure out the materials total line item. Labor cost - Labor can be set up as a separate item (part number) or it can be included within a part. We recommend that you keep the labor as a separate Projects Tutorial-6
7 /////////////////////////CLIP Pro/////////////////////////////////////////////////////////////////////////////////////////////////////////////////////////////////////////////////////////////////////////////////////////////////////////////////////////////////////////////////////////////////////////////////////// item/part and include it as an assembly part or enter it into your project as a separate item. For this example, we will not enter labor included on the part. Equipment cost - Equipment and labor are very similar. We will not enter equipment costs for this item. Sub-Contractor's costs - There are no subcontractors for this item so we will not enter any. Other costs - There are no other costs so we are finished with these costs. Hide from Customer - This will not be a "general conditions" part, so we will not be hiding it from the customer. Price and Markup First, we will enter the normal quantity ( usually 1 )that will be used for this item. This quantity will be changed when we actually make up a project, but at least it will default to this value until we change it. Mark up each - For markup, we are shooting for 15% markup on all items, so we will enter a "15" here and then choose the "%" radio button. This changes our price to the customer to $7.59. Notice that we have a $0.99 margin on each flower. This is 15% of the cost. Save the changes and get ready to enter the tree. Projects Tutorial-7
8 /////////////////////////CLIP Pro//////////////////////////////////////////////////////////////////////////////////////////////////////////////////////////////////////////////////////////////////////////////////////////////////////////////////////////////////////////////////////////////////////////////////////////// Entering the tree Adding a new part To add a new part, press the "Add" button. Press enter on your keyboard to select the Zinnias as our pattern. This will copy all of the information from Zinnias down to the new part helping us with some of the data entry. Enter the Part Number. A part number for labor could be "TRAWEEPW" for Tree - Assembly - Weeping Willow Tree. Set the class type as "PLANT", Set the tax type to "D" (No sales tax). Set the description to "Weeping Willow Tree - 5 gallon Assembly". Stock type will be "ASSEMBLY". Unit Type will be "5 Gallon" The unit measure (How is it counted?) will be "Each". Entering the Costs We will enter the materials cost for the Tree. Your screen should look something like this: Enter the normal quantity (1) and the percent mark up (15%). Save your changes and get ready to enter the mulch. Projects Tutorial-8
9 /////////////////////////CLIP Pro/////////////////////////////////////////////////////////////////////////////////////////////////////////////////////////////////////////////////////////////////////////////////////////////////////////////////////////////////////////////////////////////////////////////////////// Entering the mulch Adding a new part To add a new part, press the "Add" button. You will now see a list with the previous part number in it. CLIP uses patterns extensively throughout the program. These patterns help you enter information quickly and easily. Press enter on your keyboard to select the Zinnias as our pattern. This will copy all of the information from Zinnias down to the new part helping us with some of the data entry. Enter the Part Number. A part number for mulch could be "MUSHHW" for Mulch-Shredded-Hardwood Set the class type as "MATERIAL", Set the tax type to "D" (No sales tax). Set the description to "Shredded Hard Wood Mulch". If you have set up your vendors in CLIP, you can choose the vendor for this part, if not, just leave it blank. Stock type will be "STOCK" meaning that this item is a stock item that needs to come from inventory. The stock unit (How part is packaged?) will be "3 CUFT" for 3 Cubic foot bags or "LOOSE" if you purchase it in bulk. The unit measure (How is it counted?) will be "CU FT" for cubic foot. Entering the Costs We will enter the materials cost for Mulch. Your screen should look something like this: Save your changes and prepare to enter the peat moss. Projects Tutorial-9
10 /////////////////////////CLIP Pro//////////////////////////////////////////////////////////////////////////////////////////////////////////////////////////////////////////////////////////////////////////////////////////////////////////////////////////////////////////////////////////////////////////////////////////// Entering the peat moss Adding a new part To add a new part, press the "Add" button. Press the down arrows on your keyboard to select the mulch. The mulch and the peat moss are very similar. Press enter on your keyboard to select the mulch as our pattern. This will copy all of the information from "mulch" down to the new part helping us with some of the data entry. Enter the Part Number. A part number for labor could be "MUPEETMO" for Mulch - Peat Moss. Set the class type as "MATERIAL", Set the tax type to "D" (No sales tax). Set the description to "Peat Moss". Stock type will be "STOCK". Unit Type would be "Cubic Ft" The unit measure (How is it counted?) will be "CU FT". Entering the Costs We will enter the materials cost for the Peat Moss. Your screen should look something like this: Enter the normal quantity (1) and the percent mark up (15%). Save your changes and get ready to enter the stake. Projects Tutorial-10
11 /////////////////////////CLIP Pro/////////////////////////////////////////////////////////////////////////////////////////////////////////////////////////////////////////////////////////////////////////////////////////////////////////////////////////////////////////////////////////////////////////////////////// Entering the stake Adding a new part To add a new part, press the "Add" button. Press enter on your keyboard to select the Zinnias as our pattern. This will copy all of the information from Zinnias down to the new part helping us with some of the data entry. Enter the Part Number. A part number for labor could be "MTSTAKE" for Materials - Stake. Set the class type as "MATERIAL", Set the tax type to "D" (No sales tax). Set the description to "2.5' Stake". Stock type will be "STOCK". Unit type would be "EACH" The unit measure (How is it counted?) will be "Each". Entering the Costs We will enter the materials cost for the Stake. Your screen should look something like this: Enter the normal quantity (1) and the percent mark up (15%). Save your changes and get ready to enter the string. Projects Tutorial-11
12 /////////////////////////CLIP Pro//////////////////////////////////////////////////////////////////////////////////////////////////////////////////////////////////////////////////////////////////////////////////////////////////////////////////////////////////////////////////////////////////////////////////////////// Entering the string Adding a new part To add a new part, press the "Add" button. Press the down arrows on your keyboard to select the stake. The stake and the string are very similar. Press enter on your keyboard to select the stake as our pattern. This will copy all of the information from "stake" down to the new part helping us with some of the data entry. Enter the Part Number. A part number for labor could be "MTSTRING" for Materials - String. Set the class type as "MATERIAL", Set the tax type to "D" (No sales tax). Set the description to "Tie String". Stock type will be "STOCK". Unit Type would be "Linear Ft" The unit measure (How is it counted?) will be "FT". Entering the Costs We will enter the materials cost for the String. Your screen should look something like this: Enter the normal quantity (1) and the percent mark up (15%). Save your changes and get ready to enter the labor. Projects Tutorial-12

13 /////////////////////////CLIP Pro/////////////////////////////////////////////////////////////////////////////////////////////////////////////////////////////////////////////////////////////////////////////////////////////////////////////////////////////////////////////////////////////////////////////////////// Entering the labor Adding a new part To add a new part, press the "Add" button. Press enter on your keyboard to select the Zinnias as our pattern. This will copy all of the information from Zinnias down to the new part helping us with some of the data entry. Enter the Part Number. A part number for labor could be "LAB01" for Labor type 1. The reason for using various labor part numbers is that you might have different costs for different types of labor. You could even create a labor part for each employee and get even more accurate in your costing. Set the class type as "TIME". Set the tax type to "D" (No sales tax). Set the description to "Labor". There are no vendors for labor unless you want to set up each employee in the data base and use them as a vendor for their own rate. Stock type will be "TIME" meaning that this item does not come from inventory. The unit measure (How is it counted?) will be "HRS" or hours. Entering the Costs We will enter the materials cost for Labor. Your screen should look something like this: When you hit the Labor button you are asked to Enter the Average Crew Rate and then the % of mark up for labor burden. This formula is used in conjunction with most estimating principals taught be consultants. If you choose not to use this then put cost of the crew/man in the crew rate and the put 0 in the labor burden. Labor burden % normally refers to all the costs related to an employee besides their hourly wage. This includes taxes, work-mans comp, vacation and sick time and other items. Projects Tutorial-13

14 /////////////////////////CLIP Pro//////////////////////////////////////////////////////////////////////////////////////////////////////////////////////////////////////////////////////////////////////////////////////////////////////////////////////////////////////////////////////////////////////////////////////////// Notice the option of "Include labor In MU" on the labor line. What this means is that when making the mark up on the final run, do we want to treat the labor costs in the same way as we treat the other costs or do we want to mark up the other costs and then just add the labor cost on top of that. In most cases the answer would be to add the labor costs and then mark it up. There are exceptions to every rule and that is why this option is here. When in doubt, place a "Y" here. Enter the normal quantity and the percent mark up (15%). Save your changes and get ready to enter the Travel Time. Entering the Travel Time Adding a new part To add a new part, press the "Add" button. Press the down arrows on your keyboard to select the labor. The labor and the Travel Time are very similar. Press enter on your keyboard to select the Labor as our pattern. This will copy all of the information from "labor" down to the new part helping us with some of the data entry. Enter the Part Number. A part number for labor could be "LBTRAVEL" for Labor Travel Time. Set the class type as "LABOR", Set the tax type to "D" (No sales tax). Set the description to "Labor Travel Time". Projects Tutorial-14

15 /////////////////////////CLIP Pro/////////////////////////////////////////////////////////////////////////////////////////////////////////////////////////////////////////////////////////////////////////////////////////////////////////////////////////////////////////////////////////////////////////////////////// Stock type will be "TIME". Unit type will be "HRS" The unit measure (How is it counted?) will be "HRS". Entering the Costs We will enter the labor cost for Travel Time. Your screen should look something like this: Notice the option of "Hide from Customer". You will probably want to mark this with a "Y" because we do not need to show this to the customer. What this means is that when making up the proposal, CLIP will take the cost of this item and reallocate it to the other labor costs. This is a sure way of making sure that you include all of your costs into the final proposal and yet you do not show this particular item to your customer. Enter the normal quantity and the percent mark up (15%). Save your changes. Creating a new assembly Adding a new part To add a new part, press the "Add" button. This new part will be an assembly. An assembly is a part that consists of various parts and quantities. In this case we will create an assembly called "Plant a Tree". This assembly will include a tree, three stakes, some peat moss, some mulch and labor. By creating this assembly we can use it over and over again in various projects and never have to worry about making sure we included everything necessary to plant a tree. The main difference between an assembly and a part is that the stock type is listed as an ASSEMBLY. This means that you cannot enter the costs in directly to the assembly since it is made up of parts. All the costs are calculated from Projects Tutorial-15

16 /////////////////////////CLIP Pro//////////////////////////////////////////////////////////////////////////////////////////////////////////////////////////////////////////////////////////////////////////////////////////////////////////////////////////////////////////////////////////////////////////////////////////// the parts. Press Escape on the "Copy from Pattern Screen" because we will want to add a blank here. Enter the Part Number. A part number for this assembly could be "TRAWEEPW" for Tree - Assembly - Weeping Willow. Set the class type as "PLANT", Set the tax type to "D" (No sales tax). Set the description to "Weeping Willow - 5 Gallon Assembly". Stock type will be "ASSEMBLY". Unit type will be "EACH" The unit measure (How is it counted?) will be "EA". Now press the "SAVE" button to register the Assembly. Projects Tutorial-16

17 /////////////////////////CLIP Pro/////////////////////////////////////////////////////////////////////////////////////////////////////////////////////////////////////////////////////////////////////////////////////////////////////////////////////////////////////////////////////////////////////////////////////// Assembling the Part After Saving the changes, press the "Assemble" button. You will be asked if you want to add parts, press "Yes". You will be presented with all the parts that we have entered so far. Use the arrows to move up and down and use the space bar to mark the items you want included in this assembly. Projects Tutorial-17

18 /////////////////////////CLIP Pro//////////////////////////////////////////////////////////////////////////////////////////////////////////////////////////////////////////////////////////////////////////////////////////////////////////////////////////////////////////////////////////////////////////////////////////// Use the Space Bar to select the items Press Enter on your keyboard to add the items after selecting. Projects Tutorial-18

19 /////////////////////////CLIP Pro/////////////////////////////////////////////////////////////////////////////////////////////////////////////////////////////////////////////////////////////////////////////////////////////////////////////////////////////////////////////////////////////////////////////////////// You will now be able to place the quantities into each item that makes up the assembly. Entering the Costs All the costs will be entered in automatically as soon as we assemble it. Press the "Assemble" button. Projects Tutorial-19
20 /////////////////////////CLIP Pro//////////////////////////////////////////////////////////////////////////////////////////////////////////////////////////////////////////////////////////////////////////////////////////////////////////////////////////////////////////////////////////////////////////////////////////// We entered the following quantities: 1 hours of labor 3 stakes 1 cubic foot of Peat Moss 12 feet of string 1 weeping willow Now press the Edit button and change the quantity to 1 and you will see the costs for the assembly. Mark it up by 15% and we will have a price. Projects Tutorial-20 Save your changes. Lets go over what we just did: 1. We created a number of parts a. Flowers b. Mulch c. Peat moss d. A tree e. Three stakes f. Some string g. Labor h. Travel time 2. We created an assembly called Planting a Willow tree that includes a tree, labor, stakes, string and peat moss. All of these are just items in our inventory that give us the ability to use them in our projects later on. We are now ready to actually create a proposal for a customer.

21 /////////////////////////CLIP Pro/////////////////////////////////////////////////////////////////////////////////////////////////////////////////////////////////////////////////////////////////////////////////////////////////////////////////////////////////////////////////////////////////////////////////////// Create a new project for your new Customer To create new project, press the "Projects" button from the customers File Maintenance screen. You will be presented with a blank list of the projects for this customer. Press the "Add Project" button. Since this is the first project you are setting up, there are no patterns to choose from. Again, CLIP makes extensive use of Patterns as ways to save you a lot of work and maintain consistency throughout your system. As you create new projects, you will be able to copy these to the new customers and then just adjust the variables and create a new bid very quickly. Press the "Yes" button to create a blank project. Projects Tutorial-21
22 /////////////////////////CLIP Pro//////////////////////////////////////////////////////////////////////////////////////////////////////////////////////////////////////////////////////////////////////////////////////////////////////////////////////////////////////////////////////////////////////////////////////////// Enter the pertinent information into the Project header: You can choose from any of the options in the pull down for what type of project this is. For this example, choose "LANDSCAPING". Projects Tutorial-22

23 /////////////////////////CLIP Pro/////////////////////////////////////////////////////////////////////////////////////////////////////////////////////////////////////////////////////////////////////////////////////////////////////////////////////////////////////////////////////////////////////////////////////// Choose the status of "Estimated" because you are only in the estimating stage. As you progress through the different stages of the process, you can change the status and enter the date. Later you can see the steps by pressing the "History" button. Place a date in the "Phone Customer on:" field to remind you to call the customer back at some time in the future. Enter the Crew number and the salesman's initials. Projects Tutorial-23

24 /////////////////////////CLIP Pro//////////////////////////////////////////////////////////////////////////////////////////////////////////////////////////////////////////////////////////////////////////////////////////////////////////////////////////////////////////////////////////////////////////////////////////// Press the "Project Notes" button. Each project can have notes associated with it, just like a job. These notes can be entered from the main project screen and are for the Customer, for the Crew, just internal to you, or for the work order. Save your changes and get ready to enter the items. Press the "Add Items" button to construct the bid. Projects Tutorial-24
25 /////////////////////////CLIP Pro/////////////////////////////////////////////////////////////////////////////////////////////////////////////////////////////////////////////////////////////////////////////////////////////////////////////////////////////////////////////////////////////////////////////////////// Now we need to mark all the parts that we want to include in this project We will want to include the following: Labor - for the mulch bed Travel Time - for the project Shredded Hard Wood Mulch - for the flower bed Weeping Willow Assembly - This will include the stakes, the peat moss, the tie string and the tree. You can use the space bar to "X" off the ones that we want. Projects Tutorial-25

26 /////////////////////////CLIP Pro//////////////////////////////////////////////////////////////////////////////////////////////////////////////////////////////////////////////////////////////////////////////////////////////////////////////////////////////////////////////////////////////////////////////////////////// Press "Enter" after you have marked the items to include. Now CLIP will take you through each item you checked off and ask you for quantities. You can adjust the quantities later on or if you know them now, enter them here. By entering one of everything except the mulch, we entered 3 qty of mulch we have the following: Projects Tutorial-26

27 /////////////////////////CLIP Pro/////////////////////////////////////////////////////////////////////////////////////////////////////////////////////////////////////////////////////////////////////////////////////////////////////////////////////////////////////////////////////////////////////////////////////// We can quickly see what our margin is in line with all the prices for each category of costs. We can adjust any amount that we do not think is correct by simply highlighting the item in question and either double click on it or press the "See Details" button. Projects Tutorial-27


28 /////////////////////////CLIP Pro//////////////////////////////////////////////////////////////////////////////////////////////////////////////////////////////////////////////////////////////////////////////////////////////////////////////////////////////////////////////////////////////////////////////////////////// If you press the "Extended List" button, you can see the item list in expanded form. Now it is time to create a proposal or estimate for the customer. Press "Return" from this screen to go back to the Project list box. Projects Tutorial-28 This is where we can print out the information for the customer. Press the "Print" button.

29 /////////////////////////CLIP Pro/////////////////////////////////////////////////////////////////////////////////////////////////////////////////////////////////////////////////////////////////////////////////////////////////////////////////////////////////////////////////////////////////////////////////////// There are a number of options on this screen. 1. Reports a. Proposal The proposal is what you will give to your client. All of the options specified on the right hand side of the screen can be used with the proposal. Print one out and notice each column. Each column corresponds with the option. B. Load List The load list will summarize all the parts needed to complete the job. This takes into account all of the assemblies as well as the parts themselves. For example: the Weeping Willow assembly included 3 stakes. If we had changed the quantity to 2, the load list would show that we needed 6 stakes, 3 for each. C. Profit/Loss The Profit/Loss report shows you a quick sketch of the costs and mark ups for each and every part. This is especially good for comparing the project/bid with the plan from Vander Kooi. D. Analysis It shows you an analysis of the amount bid vs. the amount used. This is a true job costing report that will tell you how close you came to your bid. Projects Tutorial-29

30 /////////////////////////CLIP Pro//////////////////////////////////////////////////////////////////////////////////////////////////////////////////////////////////////////////////////////////////////////////////////////////////////////////////////////////////////////////////////////////////////////////////////////// 2. Output When you have chosen the report(s) you desire, you can now press the "output" button to begin the report generation process. You have various options for printing the report. A. To Print This option sends the report to your printer. B. To Screen This option will show you the report on the screen. It is a good idea to see it on screen before printing it to make sure you have everything in place. C. To ASCII file This option will send the report to a TXT file, useful for importing into other software such as a word processor or spread sheet. B. To DataBase This option will send the information to a DBF file that can be used with FoxPro, Access or Excel. C. To Excel Sheet This option will send the information to an Excel spread sheet, allowing you to manipulate the numbers even more. 3. Options Most of these options have to do with the proposal. Experiment with them and you will soon get the right combination for your customers. Projects Tutorial-30

31 /////////////////////////CLIP Pro/////////////////////////////////////////////////////////////////////////////////////////////////////////////////////////////////////////////////////////////////////////////////////////////////////////////////////////////////////////////////////////////////////////////////////// Hide from Customer. Remember the option to Hide from Customer? We used it with the Travel time. The total for our project is: $ and it includes travel time. When we print out the proposal for our customer the travel time item disappears and the money for travel ($33.72) has to be redistributed to the other labor items. Projects Tutorial-31


32 /////////////////////////CLIP Pro//////////////////////////////////////////////////////////////////////////////////////////////////////////////////////////////////////////////////////////////////////////////////////////////////////////////////////////////////////////////////////////////////////////////////////////// The proposal will look like this: If we uncheck the "Hide from customer" on the travel time, the total remains the same, but the travel time will be listed as an item. Other uses for "Hide from customer" include Load/Unload time, Call/Contact time, Difficulty rating... and others. Projects Tutorial-32


33 /////////////////////////CLIP Pro/////////////////////////////////////////////////////////////////////////////////////////////////////////////////////////////////////////////////////////////////////////////////////////////////////////////////////////////////////////////////////////////////////////////////////// Print out an analysis of the project The analysis can be used to guide your foreman on how many and how much time to spend on each step of the job. Print out the Load List for the crew The load list is to make sure that your foreman loads all the necessary materials for this job before leaving the yard. You can sort by various types. Projects Tutorial-33

34 /////////////////////////CLIP Pro//////////////////////////////////////////////////////////////////////////////////////////////////////////////////////////////////////////////////////////////////////////////////////////////////////////////////////////////////////////////////////////////////////////////////////////// The report can be used to check off the items or you can print it to fax to your supplier for the latest pricing. Projects Tutorial-34
35 /////////////////////////CLIP Pro/////////////////////////////////////////////////////////////////////////////////////////////////////////////////////////////////////////////////////////////////////////////////////////////////////////////////////////////////////////////////////////////////////////////////////// Print out Profit/Loss Report The profit/loss report breaks down all of your costs into the 4 main categories and gives you the total number of hours required for this job. This Ends the Tutorial part of the manual that explains how to make a bid. The reference section goes into some more details and teaches you how to record the work as it is completed. Projects Tutorial-35
36 /////////////////////////CLIP Pro//////////////////////////////////////////////////////////////////////////////////////////////////////////////////////////////////////////////////////////////////////////////////////////////////////////////////////////////////////////////////////////////////////////////////////////// Reference Step 1: Set up your Projects module for use A: Set Up vendors. This involves entering your vendors that supply the items required for a project. The vendor list is maintained in the customer database. To add a vendor, use the customer add screen under the File Maintenance menu selection; Make sure to check the box labeled vendor in add new customer screen. Once vendors are added, you have a Rolodex for tracking suppliers of project items B: Set up user defined descriptions. CLIP comes shipped with some common items you might need, such as unit measure and item category (Trees, Plants, Shrubs, etc.), but you can expand these lists via from the Projects - Project Setup menu option C: Set up inventory. You need to create a database of all the materials and labor needed to complete a project. The inventory database allows you to: create a time and materials database for your project, track vendors, categorize parts, and set your profit margins to make sure you are making money. There are three ways to enter data into the inventory database: 1. Manually If you enter items manually, you will need to establish a numbering scheme to assign part numbers. Assign the part numbers so that they can be found easily. Time spent now will save you a lot of headaches later. 2. Import from DIG's LandQuote CLIP will import inventory lists from Design Imaging Group (DIG). This is a landscaping design program which can be purchased through Sensible Software Inc. 3. Import from Drafix's Pro Landscaping CLIP will import inventory lists from Drafix's Pro Lanscaping program. This is a landscaping design program which can be purchased through Sensible Software Inc. Both programs allow you to design the project and then send over the items to projects for the Bid to be generated and priced out. NOTE: Your inventory is a list of available items to choose from. It does not actually maintain an inventory level. Step 2: Setup a project Proceed through the eight stages of the project 1. Lead- Anyone that has called in requesting an estimate 2. Estimated- Projects that you are putting together 3. Proposed- Projects that have been submitted to the customer 4. Approved- Customer has approved the proposal 5. Scheduled- Project is scheduled but not started yet 6. In Progress- Project in progress 7. On Hold- You have placed the Project on hold for some reason 8. Finished-Project is finished Projects Tutorial-36

37 /////////////////////////CLIP Pro/////////////////////////////////////////////////////////////////////////////////////////////////////////////////////////////////////////////////////////////////////////////////////////////////////////////////////////////////////////////////////////////////////////////////////// Step 3: Perform Daily Routines A: Setup work orders. Allows you to select which items you will be working on at a particular time. B: Record work. Allows you to record work done for each item, either in piece meal or totally as it is completed. You are able to adjust your estimates to reflect actual quantities and dollars, and then bill whatever you want to charge. Then you can post work/items to the customer s project history and then to their billing and work history. Step 1 Setting up the basics A: Set Up Vendors C: Customer follow up. Allows you to keep track of what customers you have scheduled to call. Enter all your suppliers, vendors, subcontractors, etc. in file maintenance. The customer database is multipurpose in that it can store customers, vendors and estimates. Select vendor as type. Please note that one contact can be either a vendor, a customer, and estimate or all or any two of the options. Estimate is not used at this time, but we foresee using it for a future enhancement. Projects Tutorial-37

38 /////////////////////////CLIP Pro//////////////////////////////////////////////////////////////////////////////////////////////////////////////////////////////////////////////////////////////////////////////////////////////////////////////////////////////////////////////////////////////////////////////////////////// B: Set up user defined descriptions Project Class Types: used to specify broad types of projects (i.e. construction, landscaping, etc.) Item Class Types: used to categorize the inventory item (i.e. plants, trees, supplies, irrigation, etc.) Projects Tutorial-38

39 /////////////////////////CLIP Pro/////////////////////////////////////////////////////////////////////////////////////////////////////////////////////////////////////////////////////////////////////////////////////////////////////////////////////////////////////////////////////////////////////////////////////// Item Unit Types: used to specify the units of measurement you will be using for each item in inventory (i.e. gallon, each, foot, etc.) Stock Types: normally you will only use parts & time in this field. You could however use this field to make sub categories of item class types. (I.e. flowering under the type of plant) If you select time, Projects will not let you edit fields pertaining to parts. Projects Tutorial-39

40 /////////////////////////CLIP Pro//////////////////////////////////////////////////////////////////////////////////////////////////////////////////////////////////////////////////////////////////////////////////////////////////////////////////////////////////////////////////////////////////////////////////////////// C: SET UP INVENTORY You need to set up your base inventory items. Anything that you will need (including labor) to complete the project should be set up as an inventory item. You will be able to adjust these items on an individual project basis without affecting this initial setup. A good idea would be to gather all the parts and labor from your last few estimates and use this as a base inventory. (Remember that you can import a complete inventory from LandQuote(DIG) or from an Excel file, if you would rather start out with a ready-made inventory and add your own items later.) Setup your inventory from the projects - inventory - inventory data entry pull down from your main screen. Select add. You can copy from a pattern item or hit escape key to make a new one. There are two ways to do this: Recommended: Make an inventory item for each part and then make a separate inventory item for labor. This will allow you to specify the proper tax type for each item and will also allow you to track your project more precisely. This also allows you to mark up items at different rates and allows better reports. It also will keep things more organized in the long run. Optional: If you are not concerned about the tax (maybe labor and parts are the same tax rate) you could enter a corresponding labor figure to do this job. An example might be if you are planting a tree and you can to assign a labor that corresponds to this item. On the other hand if you are putting in a patio and want to set up bricks as an inventory item. You may decide to price each one out and mark it up. It would be almost impossible to come up with a labor figure per each brick. In this case you would use the above method. Assigning Part Numbers You will be assigning your own part numbers. Make them meaningful. You can use alpha as well as numeric to devise these. An example may be to start all your plant inventory part numbers with a P. When Clip does a find it uses these as the search criteria. Remember that case counts. A N is different than a n. We have found that a lot of our customers use all capitols for easy tracking. Below is a reccomended naming convention used by a few of our customers. Projects Tutorial-40

41 /////////////////////////CLIP Pro/////////////////////////////////////////////////////////////////////////////////////////////////////////////////////////////////////////////////////////////////////////////////////////////////////////////////////////////////////////////////////////////////////////////////////// Begin each part with one of the the following two prefixes and a dash after it TD- Deciduous Trees TE- Evergreen Trees SD- Decidouus Shrubs SE- Evergreen Shrubs PR- Perennials AN- Annuals HG- Hard Goods LA- Labor EQ- Equipment SR- Snow Removal IS- Irrigation Supplies SC- Subcontractors #1 Materials: This is the cost or price you pay to the vendor. #2 % Overhead Recovery: This is the percentage the materials cost that you use to recover overhead. This % should not be randomly made up but based on a system. Professional systems made for the industry are available. If you do not use this, just leave it as a blank or 0. Projects Tutorial-41
42 /////////////////////////CLIP Pro//////////////////////////////////////////////////////////////////////////////////////////////////////////////////////////////////////////////////////////////////////////////////////////////////////////////////////////////////////////////////////////////////////////////////////////// #3 Labor: The cost of labor is figured out by multiplying average crew wage x % of labor burden. This formula is used in conjunction with most estimating principals taught by consultants. If you choose not to use this then put cost of the crew/man in the crew rate and put 0 in for the labor burden. Labor burden % normally refers to all the costs related to an employee besides their hourly wage. This includes taxes, work-mans comp, vacation and sick time and other items. #4 Units: This is where you enter the number of units associated with this item. Normally this will be 1 when you are setting up the master inventory. You can combine labor with material; however, it is better accounting practice to separate labor from material. #5 Include in mark up: If you are combining a part with labor do you want to mark up the labor using the same markup as the part. Otherwise you can mark up labor manually #6 Equipment: This is the cost of equipment. You have the choice to include this in the markup ( normally you will ). Remember it is recommended that you create a separate inventory for each piece of equipment to have the most accurate bid. You will most likely want to hide this amount from the customer. #7 Sub Contractor s cost: This is the cost that the subcontractor charges you for his services involved in this project. You may choose not to use this but mark it up using the markup sheet. Again you should make this a separate inventory item. #8 Other Costs 1-4: This is where you would place other costs that might apply to this item but are not covered in the other categories. These items must contain overhead recovery already and will be marked up. #9 Hide from Customer: This is an extremely powerful feature. It allows you to make the most accurate bid possible by allowing you to including items such as travel time, set up, load trucks, price out all the equipment needed and many others. These items you would not want to show the customer but the costs must be included in the bid. If you have Hide form customer marked as Yes. The Price to Customer field will be distributed proportionally to all items that contain labor on your bid. If you only have one labor item the total amount will go there. This "inflated" amount will only show when you print out the customers bid. All your work sheets and reports will show you all the items, hidden or not. Step 2 Setting Up A Project A project is a one time job that involves both labor and materials. A customer can have an unlimited number of projects. You can add projects in the same way you add jobs to the customer. Select or Create a Customer for This Project The program starts from the customer s main screen with the <Projects> button. This button will take the user to a list of the projects already created for the customer or allow the user to add a new project. The Project Pick Box is similar to the Job Pick Box. It has buttons for Add, Delete, See Detail, and Return. Projects Tutorial-42


43 /////////////////////////CLIP Pro/////////////////////////////////////////////////////////////////////////////////////////////////////////////////////////////////////////////////////////////////////////////////////////////////////////////////////////////////////////////////////////////////////////////////////// You can choose from other projects as patterns to save you time in setting them up If you are adding a new project you will be sent to the details screen to fill out the information or if you are copying from a previous project you can select See Details. Projects Tutorial-43

44 /////////////////////////CLIP Pro//////////////////////////////////////////////////////////////////////////////////////////////////////////////////////////////////////////////////////////////////////////////////////////////////////////////////////////////////////////////////////////////////////////////////////////// Status History will display the dates of each of the six steps of the project Start adding items to your project. Press the Add Items button. There are two ways to find and item that you have in your list. 1. Use the <F> key to find by part number. Then type the part number and CLIP will automatically search for the part. When you are on the item you want, press <enter> to return to the first screen. Then press the <space bar> to mark the item(s) to be added. 2. Use the Edit feature to find by part name ( located on the very top of your screen ). Select Find. You can type in either the complete part name or the first few letters to get you to the section of the inventory you are looking for. When you are on the item you want, press the <space bar> to mark the item(s) to be added. After you have finished marking all the items needed, press the <enter> key. If you do not have the item in your inventory list you can create a new one on the fly. The screen below lists items from the Inventory data file. If you need an item that is not yet in the inventory, press the <C> key. This brings up the add screen for inventory. When you add an item to the inventory database and press the <return> button, CLIP will prompt you to enter the quantity of the item that you created. After items are added into the project you can go in and edit them. Projects Tutorial-44

45 /////////////////////////CLIP Pro/////////////////////////////////////////////////////////////////////////////////////////////////////////////////////////////////////////////////////////////////////////////////////////////////////////////////////////////////////////////////////////////////////////////////////// Projects Tutorial-45

46 /////////////////////////CLIP Pro//////////////////////////////////////////////////////////////////////////////////////////////////////////////////////////////////////////////////////////////////////////////////////////////////////////////////////////////////////////////////////////////////////////////////////////// Item Detail The Price Calculation Area: When an item is brought into a project it is a copy of the master item of all its information and pricing. Each item has a detail sheet that came from the inventory file. This gives you total flexibility to adjust each cost and price for each item regardless of what is in your inventory. You can adjust the unit cost to prevailing price. You might want to change the Mark up and price to the customer, depending on the project and your specific needs. Note: Changing any information on an item on a project does not change it back in the master inventory Projects Tutorial-46

47 /////////////////////////CLIP Pro/////////////////////////////////////////////////////////////////////////////////////////////////////////////////////////////////////////////////////////////////////////////////////////////////////////////////////////////////////////////////////////////////////////////////////// This area shows the price to the customer. You can adjust the prices and quantities of this item for this specific project. Qty: First enter the quantity of this item that you will use in this project. Mark Up: Each: Enter the amount you wish to mark up. Then choose either a dollar or a percentage ($ or %) markup. If you enter a 5, do you want to mark it up by 5 percent or by 5 dollars each? Price to Customer: This is the price to your customer. You can manually adjust this price. Cost calculation Area: This area shows the total cost to you and cost margin. If the cost margin is negative, it will cost you more to do this job than the money you will make. Projects Notes: Projects Tutorial-47

48 /////////////////////////CLIP Pro//////////////////////////////////////////////////////////////////////////////////////////////////////////////////////////////////////////////////////////////////////////////////////////////////////////////////////////////////////////////////////////////////////////////////////////// Each project can have notes associated with it, just like a job. These notes can be entered from the main project screen and are for the Customer, for the Crew, just internal to you, or for the work order. When you have constructed a project with all the items in it, with all the mark ups done and you are sure that you are making profit on each item, you are ready to print out the proposal and present it to the customer. Projects Tutorial-48


49 /////////////////////////CLIP Pro/////////////////////////////////////////////////////////////////////////////////////////////////////////////////////////////////////////////////////////////////////////////////////////////////////////////////////////////////////////////////////////////////////////////////////// You can print out a proposal from the Print button. There are a few options on the print button. Proposal: Use this to print out a bid for the customer. Remember that the prices will be different then in the project in CLIP depending if you have chosen to hid items from the customer. Load List: This can be used for sending out a list to your vendor for pricing or ordering (See also the materials usage report from the projects menu) and it can also be used for your employees to load the truck so nothing is forgotten. Projects Tutorial-49
50 /////////////////////////CLIP Pro//////////////////////////////////////////////////////////////////////////////////////////////////////////////////////////////////////////////////////////////////////////////////////////////////////////////////////////////////////////////////////////////////////////////////////////// Profit Loss: Shows a breakdown of costs and overhead recovery by category Projects Tutorial-50
51 /////////////////////////CLIP Pro/////////////////////////////////////////////////////////////////////////////////////////////////////////////////////////////////////////////////////////////////////////////////////////////////////////////////////////////////////////////////////////////////////////////////////// Analysis: is for you to check your work and make sure that you are creating a profitable project. Projects Tutorial-51
52 /////////////////////////CLIP Pro//////////////////////////////////////////////////////////////////////////////////////////////////////////////////////////////////////////////////////////////////////////////////////////////////////////////////////////////////////////////////////////////////////////////////////////// After the customer approves the Bid go to the customers Project and change the project status to Scheduled. Unless you change it to Scheduled it will not show up latter on when you want to record the work as done. The Scheduled and the Finished status are the only two that actually drive the program. The rest are for your information. Projects Tutorial-52


53 /////////////////////////CLIP Pro/////////////////////////////////////////////////////////////////////////////////////////////////////////////////////////////////////////////////////////////////////////////////////////////////////////////////////////////////////////////////////////////////////////////////////// Reports Work Projections Work projections allows you to print out the schedule for a future date. Use this report to see what is coming up and what man power you will need. (See sample reports) Project Status Report To view projects in various stages use the Status Report Projects Tutorial-53

54 /////////////////////////CLIP Pro//////////////////////////////////////////////////////////////////////////////////////////////////////////////////////////////////////////////////////////////////////////////////////////////////////////////////////////////////////////////////////////////////////////////////////////// Materials Usage This report is great for a nursery fax sheet for getting current prices on a project or combined projects., this also allows you to see how much of an item has been used through using multiple filters. Projects Tutorial-54

55 /////////////////////////CLIP Pro/////////////////////////////////////////////////////////////////////////////////////////////////////////////////////////////////////////////////////////////////////////////////////////////////////////////////////////////////////////////////////////////////////////////////////// As you select the Item Class, Project, or Materials you will shown items and projects that meet your Status and Date filters. You can choose what you want by using the space bar. This feature allows you to combine parts that are used multiple projects and give you one fax out sheet for your vendor. You can even narrow it down by Vendor and Item Class. Projects Tutorial-55
56 /////////////////////////CLIP Pro//////////////////////////////////////////////////////////////////////////////////////////////////////////////////////////////////////////////////////////////////////////////////////////////////////////////////////////////////////////////////////////////////////////////////////////// Work Projections - Sample Report Projects Tutorial-56
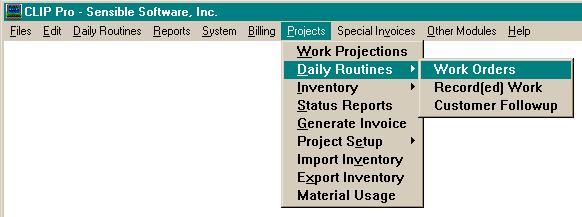
57 /////////////////////////CLIP Pro/////////////////////////////////////////////////////////////////////////////////////////////////////////////////////////////////////////////////////////////////////////////////////////////////////////////////////////////////////////////////////////////////////////////////////// Daily Routines Now that you have made a bid and received approval we must now continue on and get the work done. The daily routine steps are as follows: 1. Set up the project work orders for you crews 2. Print the project work orders out 3. Send the crews out 4. Setup the Project bank 5. Add projects into the Project bank 6. Recording the work 7. Post the work to history 8. During the process check and evaluate the progress 9. Post history to journal 10. Print bills 1.Set up the project work orders for your crews. Select the status, date range for the projects you wish to choose from. By selecting the "project type" check box you can add the additional sorting option of project type. You can select the whole project or individual inventory items from each project that you will be using that day. To select individual items use the check box "Choose Individual Project Items". It is recommend you do not use this function when you are first learning. It can get very confusing of which items you have added. You also can edit the work order header this screen. Projects Tutorial-57
58 /////////////////////////CLIP Pro//////////////////////////////////////////////////////////////////////////////////////////////////////////////////////////////////////////////////////////////////////////////////////////////////////////////////////////////////////////////////////////////////////////////////////////// Projects Tutorial-58

59 /////////////////////////CLIP Pro/////////////////////////////////////////////////////////////////////////////////////////////////////////////////////////////////////////////////////////////////////////////////////////////////////////////////////////////////////////////////////////////////////////////////////// After hitting the "Continue" Button you are shown a list of projects that meet the sorted criteria. Select the projects you wish to print work orders for by using the spaces bar to tag them. Hit "enter". Projects Tutorial-59


60 /////////////////////////CLIP Pro//////////////////////////////////////////////////////////////////////////////////////////////////////////////////////////////////////////////////////////////////////////////////////////////////////////////////////////////////////////////////////////////////////////////////////////// If you selected the option for individual project items you will be prompted to select the individual items for printing. Use the space bar to tag the items and the Enter key to process. NOTE: It is recommended while learning the program not use the "Choose Individual Project/Items feature. 2. After selecting you will can send it to the printer or to the screen Projects Tutorial-60

61 /////////////////////////CLIP Pro/////////////////////////////////////////////////////////////////////////////////////////////////////////////////////////////////////////////////////////////////////////////////////////////////////////////////////////////////////////////////////////////////////////////////////// 3. Send your crew out with the work order 4. Setting Up The Project Bank Projects Tutorial-61

62 /////////////////////////CLIP Pro//////////////////////////////////////////////////////////////////////////////////////////////////////////////////////////////////////////////////////////////////////////////////////////////////////////////////////////////////////////////////////////////////////////////////////////// 4. Set up project bank: The project bank in Projects is different then that of the regular work bank that you are used to. The loaded project bank can be viewed from the Review Work Bank button. The project bank allows you to easily find only the inventory items you are using by being able to scroll through them when recording work. This saves you the time of looking through a possible long list of items you have. Overview on the Record Work Screen Projects Tutorial-62

63 /////////////////////////CLIP Pro/////////////////////////////////////////////////////////////////////////////////////////////////////////////////////////////////////////////////////////////////////////////////////////////////////////////////////////////////////////////////////////////////////////////////////// 1. Setup Project Bank: Allows you to add items to the work bank. Projects can be partially loaded or all items can be loaded. All work is recorded through this button. 2. Review Project Bank: Allows to view what you have recorded so far but not posted yet. This is where you can view to project bank. 3. Post Work to History: After you record work you will want to post it to the projects history so that when you print out new work orders the quantities used will be updated. 4. Edit Work History: Allows you to make adjustments to the recorded work before you post it to the journal and becomes part of the customer s history. 5. Post History to Journal: Puts items form the project history into the customer s history (journal) and actually charges it to their account. You may choose to post all the items at one time or parts at a time. The Invoice module will allow you to select the items to bill. If you do not have the Invoice module only post items that you want to bill as what you post will be show on their monthly bill. 6. View Posted Work: Allows you to check the history of various projects. Projects Tutorial-63

64 /////////////////////////CLIP Pro//////////////////////////////////////////////////////////////////////////////////////////////////////////////////////////////////////////////////////////////////////////////////////////////////////////////////////////////////////////////////////////////////////////////////////////// 7. Evaluate Project: Allows to you to select a project and review details on it. Each time you "Setup Project Bank" you will prompted with two questions. 1. Normally answer "No" to this. Answering Yes deletes the work bank and all the items that are loaded. There are few cases that you want to delete it all and start over. 2. Normally answer "Yes" to this. This tells projects to take any work that you have recorded and post it to the history file. This is necessary to give up to date work orders should you choose to update and print them on a daily bases. Even if nothing has been recorded hitting Yes will not hurt anything. You will just be told that there was nothing to record. 5. Add projects into the Project Bank The first time you go in to the Setup Projects Bank or if have chosen to delete the Work Bank you will shown a list of projects that you can add. Choose the correct one and it will active the work bank. After you have done this you can then use the A (Add) button to add additional projects into the project bank. Use the "Enter" key to select the project. Projects Tutorial-64


65 /////////////////////////CLIP Pro/////////////////////////////////////////////////////////////////////////////////////////////////////////////////////////////////////////////////////////////////////////////////////////////////////////////////////////////////////////////////////////////////////////////////////// You will then be shown all the items that are on the project. 6. Recording The Work NOTE: Projects must be in the Scheduled stage ( in the Customer's File Maintenance) otherwise they will not show up for recording work. You will now see a list of projects that are in the work bank. A project must be in the work bank in order to record work done for it. There are two main ways to record work and both of these have many other options tied to Projects Tutorial-65

66 /////////////////////////CLIP Pro//////////////////////////////////////////////////////////////////////////////////////////////////////////////////////////////////////////////////////////////////////////////////////////////////////////////////////////////////////////////////////////////////////////////////////////// them. The method you use depends on the size of the project, how long it will take, how many changes are need to the actual quantities used, etc. You should experiment with both ways to see which will work best for you. You can decide to record the work done when the project is totally complete or on a daily bases. Projects can work either way. First Method: Allows you to mark each item one at a time. Find the item that you want to record quantities for and hit the Enter key. You will be brought to the following screen. Note: If you have times assigned with each inventory item is very difficult to use this method to record work because it is impossible for your workers to keep track of times on every single item. ( i.e. 10 min to plant tree, 3 min to plant bush ) If the inventory does not have a stock type of "Time" you are prompted to fill in the Used This Time as well as hours, foreperson and # of crew members. You normally will be recording the Start and Stop time as the same because you will be recording all the labor used under the Labor inventory item. If this item has a stock type of "Time" you would not be able to get to the "Used This Time" but you can still override the "Man Hours This Time" Projects Tutorial-66

67 /////////////////////////CLIP Pro/////////////////////////////////////////////////////////////////////////////////////////////////////////////////////////////////////////////////////////////////////////////////////////////////////////////////////////////////////////////////////////////////////////////////////// If this item is done and you will not be using anymore of it you can select the Finished button or Projects will prompt you when you Save. Note: Do not lie to yourself. Enter the real quantities used. There are 5 possibilities that could happen with quantities used: 1. You actually used the exact amount that you bid and the customers price is fine. Answer: In this case you only need to record the actual to equal the bid. 2. You used more of the item then bid but you do not want to charge the customer for the extra. Answer: Use the "Adjust Bill" button 3. You used more of the item and do want to charge the extra to the customer. Answer: Record the actual quantity and Save. You will told that the quantity does not match. Choose "yes" to save. 4. You used less of the item and do not want to change the customers price. Answer: Use the "Adjust Bill" button. 5. You used less of the item and do want to pass on the discount. Answer: Record the actual quantity and Save. You will told that the quantity does not match. Choose "yes" to save. Adjust Bill Projects Tutorial-67

68 /////////////////////////CLIP Pro//////////////////////////////////////////////////////////////////////////////////////////////////////////////////////////////////////////////////////////////////////////////////////////////////////////////////////////////////////////////////////////////////////////////////////////// Enter the "Extended Target Price" that you want to charge. Change the Bill Qty to the number you want to bill. Select "Calc Bill Qty" and it will adjust the Unit Price to match the Unit Price x Qty=Ext Price OR Change the Bill Unit Price to the price you want to charge per unit. Select the "Calc Bill Unit Price" and it will figure out how many units you need to bill out to come up with the desired total. Projects Tutorial-68

69 /////////////////////////CLIP Pro/////////////////////////////////////////////////////////////////////////////////////////////////////////////////////////////////////////////////////////////////////////////////////////////////////////////////////////////////////////////////////////////////////////////////////// Adjust Overhead This function allows you to adjust overhead. Normally this is need when the quantity used is more then the quantity bid and you don't want to charge yourself the overhead associated with the extra items. If left unchanged your profit/loss report would show significantly less profit then the job really is. Enter the quantity that you want to charge overhead on. When you select Return you will be prompted if you want to adjust the price to the customer. Projects Tutorial-69

70 /////////////////////////CLIP Pro//////////////////////////////////////////////////////////////////////////////////////////////////////////////////////////////////////////////////////////////////////////////////////////////////////////////////////////////////////////////////////////////////////////////////////////// After recording the quantity or making any adjustments to the bill or overhead select "Save" If the quantity does not match the Bid you will be prompted. This is normal if the item is not finished. Select Yes to save.. If the quantity does match the Bid you will be prompted. If you answer Yes the item Finished button will be automatically checked off. You now have two choices: 1. To add additional Projects/items into the project bank from the same project select Return. To add other projects into the project bank select "Return" then " Escape" to view the list of other projects. 2. If an item has been added into the project bank anytime previously you can use the scroll buttons to get to the next item you need to record work for. If all the items have been marked as finished you will be prompted to Projects Tutorial-70

71 /////////////////////////CLIP Pro/////////////////////////////////////////////////////////////////////////////////////////////////////////////////////////////////////////////////////////////////////////////////////////////////////////////////////////////////////////////////////////////////////////////////////// mark the project as finished. Do not do this unless you are sure all the pricing and quantities are correct. Once it is marked as Finished it can not be changed back. Second Method: Allows you to mark multiple items done at one time and use a grouping function. The <G> (group record) option works similar to Clip's group recording of work. It allows you to mark items done very quickly and easily. It also allows you to make some adjustments to pricing and quantity. This is meant for recording all the work at the end of a project. For items that have labor over multiple days using method one may be the best Projects Tutorial-71

72 /////////////////////////CLIP Pro//////////////////////////////////////////////////////////////////////////////////////////////////////////////////////////////////////////////////////////////////////////////////////////////////////////////////////////////////////////////////////////////////////////////////////////// Use the "Add Items to Group" to select the items you want to include Button Options: Distribute Times: After entering the Start and Stop Times. Select the Distribute Times to proportionately spread the total time over all items that contain labor. Edit Qty and Hrs: Allows you to manually adjust time distributed times and change the quantities used that did not match the original bid Adjust Billing Price: Allows you to change the bill quantities and the pricing. 7. Post the projects to history After recording all the new work you will want to post it to history. Posting to history will take today's recorded quantities and add them to what has been recorded before to give you a new accurate count. This will also update your "Profit/Loss" and "Evaluate Project" reports. New work orders can then be printed to reflect the updated information. Note: Each day you record additional quantities for an item it creates a separate posting to the history. You will have an option when you select "Post History to Journal" to combine all like items together to prevent many line items of the same part on the bill. You are able to view and modify items that have posted to history by using the "Edit Work History" button for the Main Record Work screen. When you Return out of recording work you are automatically prompted to post work to history. You should answer "Yes" Projects Tutorial-72
73 /////////////////////////CLIP Pro/////////////////////////////////////////////////////////////////////////////////////////////////////////////////////////////////////////////////////////////////////////////////////////////////////////////////////////////////////////////////////////////////////////////////////// 8. During the process check and evaluate the progress As you update the quantities you can print out accurate "Profit/Loss" and "Evaluate Project" reports. You can determine how much labor has been used so you can closely monitor possible overages. 9. Posting History to Journal Items that are in Project history will stay there indefinitely until they are manually posted to the customers account for billing. Projects Tutorial-73


74 /////////////////////////CLIP Pro//////////////////////////////////////////////////////////////////////////////////////////////////////////////////////////////////////////////////////////////////////////////////////////////////////////////////////////////////////////////////////////////////////////////////////////// When you are done with a project or section of a project and want to send it over to the customers account for billing use the "Post History to Journal". You will be shown all the items that have been posted to the project history. Use the space bar to select the items you want to post. After selecting you can post it by hitting the "Enter" key. Because each time you a record an item it creates a separate journal entry line you will probably want to use the "Consolidate Multiple Item Entries" option so that all of one item is billed at one time. Projects Tutorial-74 Select Post It


75 /////////////////////////CLIP Pro/////////////////////////////////////////////////////////////////////////////////////////////////////////////////////////////////////////////////////////////////////////////////////////////////////////////////////////////////////////////////////////////////////////////////////// Verify the posting date. 10. Print Bills If this is an Invoice type customer you will be prompted if you want to generate an invoice. If you choose no you can still generate an invoice from either within the customers File Maintenance screen or from the Generate Invoice option on the Projects menu pull down. See the Invoice Manual for further instructions. Projects Tutorial-75


76 /////////////////////////CLIP Pro//////////////////////////////////////////////////////////////////////////////////////////////////////////////////////////////////////////////////////////////////////////////////////////////////////////////////////////////////////////////////////////////////////////////////////////// If this a balance forward type customer the posted work will go to the customers history. The project name will be shown with the dollar amount. The items will appear as notes under this. Importing inventory from Excel You can import your inventory if you can get the list into Excel. Ask your supplier for this list. This could save you many hours of data entry. Make a backup before attempting the import. If you are importing multiple lists make a backup after each sucessful import otherwise you may have to start from scratch. You should import one Vendor at a time because you can only assign one vendor per import session Open your inventory list in Excel. Projects Tutorial-76
77 /////////////////////////CLIP Pro/////////////////////////////////////////////////////////////////////////////////////////////////////////////////////////////////////////////////////////////////////////////////////////////////////////////////////////////////////////////////////////////////////////////////////// Go through the spread sheet to see what is provided. Find the following columns that correspond to the items below. All additional columns must be erased for the import. Arrange the data into the following columns in the exact same order as shown Class Botanical Name Description Part Number Cost Unit Size ***** IMPORTANT NOTES: 1. You must have a Part Number filled in 2. You must have a Description filled in 3. You cannot have $ signs in the Cost column 4. You must remove the column heading names before importing 5. You must have column for all the above items even if some of the non required fields are left blank 6. You cannot have any quotes or commas in the fields. Quotations are commonly used for inches. In Excel you can use the Find and Replace command to eliminate these if they are present Getting an Error 43 on importing indicates that something is wrong with the data setup Use the "Save As" in excel and save it as a.csv type of file. You can name it anything you like. Projects Tutorial-77


78 /////////////////////////CLIP Pro//////////////////////////////////////////////////////////////////////////////////////////////////////////////////////////////////////////////////////////////////////////////////////////////////////////////////////////////////////////////////////////////////////////////////////////// Go into Projects/Bid Right and select the Projects/Import Inventory. Find the file you just made. Projects Tutorial-78
79 /////////////////////////CLIP Pro/////////////////////////////////////////////////////////////////////////////////////////////////////////////////////////////////////////////////////////////////////////////////////////////////////////////////////////////////////////////////////////////////////////////////////// Select the defaults that you want. Select Continue. The inventory will now be added. You can run the import as often as you like. It will only add new items to the list.. Working with DIG (Design Imaging Group) Importing the Inventory list from DIG. A quick way to start your inventory is to use the inventory already in LandQuote. You can export their inventory by Starting LandQuote Press the Inventory button Projects Tutorial-79


80 /////////////////////////CLIP Pro//////////////////////////////////////////////////////////////////////////////////////////////////////////////////////////////////////////////////////////////////////////////////////////////////////////////////////////////////////////////////////////////////////////////////////////// Press the "Export" button Projects Tutorial-80 Press the button to export the entire inventory


81 /////////////////////////CLIP Pro/////////////////////////////////////////////////////////////////////////////////////////////////////////////////////////////////////////////////////////////////////////////////////////////////////////////////////////////////////////////////////////////////////////////////////// Choose a temporary directory. We suggest you have a C:\TEMP for these types of uses. Enter a new name for the file or just accept the default of PLAN.CAT. When the export is done, you will be returned to the inventory item screen. Exit LandQuote. Start up CLIP and go to the File Maintenance function and enter at least one of your Vendors (a nursery, Home Depot or some other vendor.) Make sure that the Vendor option is clicked on the lower part of the screen. Projects Tutorial-81


82 /////////////////////////CLIP Pro//////////////////////////////////////////////////////////////////////////////////////////////////////////////////////////////////////////////////////////////////////////////////////////////////////////////////////////////////////////////////////////////////////////////////////////// Now go back to the Projects Menu and choose the "Import Inventory" function. Choose "Import Inventory" Find the catalog that you Exported from Land Quote. Ours is in the C:\TEMP directory Projects Tutorial-82


83 /////////////////////////CLIP Pro/////////////////////////////////////////////////////////////////////////////////////////////////////////////////////////////////////////////////////////////////////////////////////////////////////////////////////////////////////////////////////////////////////////////////////// Select the catalog that you exported and press the Select button. Now you will enter the defaults to be used with the new inventory. Press the Vendor button to see the vendors that you have set up in CLIP. Press Enter on the one you wish to select. This will be the Vendor that will be assigned to all the new items imported into your CLIP system. Enter the default Tax Code, the default mark up amount and method (either percentage or a straight mark up), the default quantities and the default credit and debit codes if you are using either CLINKER or QBLink. Projects Tutorial-83
84 /////////////////////////CLIP Pro//////////////////////////////////////////////////////////////////////////////////////////////////////////////////////////////////////////////////////////////////////////////////////////////////////////////////////////////////////////////////////////////////////////////////////////// The tax type of D means no taxes added to this item, the tax type of L means add tax at the Labor Rate, the M tax type means tax at the Materials Rate. (For more information on Tax Types see the CLIP manual.) The markup is your standard mark up over cost. Enter a number and then click on either the % radio button or the $ one. If you enter a 10 and click on the % radio button, the default markup will be 10% over cost. If you enter a 10 and press the $ radio button each item will be marked up by $ The most common way to use this in the import function is to mark it up by %. The quantity is the default quantity that you want these new items to have. The safest bet is to place a 1 in this field. If you know that most of the time you will be using 5 of these items you can enter a 5. You can also change this after the import is done. If you are using either QBLink or CLINKER, you will enter a credit and debit account number for these items. As you can see we defaulted it to Sales Construction and Accounts Receivable. These are just the defaults for the new items that will be imported. You can go through them afterward and change any of these fields for the occasional exception. If you press the Cancel button, you will be returned to the menu. If you press the Continue button, CLIP will import the items from the LandQuote catalog into your CLIP inventory. This process can be time consuming the first time you run it. If there are 6,800 records, it could take up to minutes on a fast machine. Since CLIP only imports records that do not already exist in your inventory file, the next time you run this, it would go a lot faster. Projects Tutorial-84


85 /////////////////////////CLIP Pro/////////////////////////////////////////////////////////////////////////////////////////////////////////////////////////////////////////////////////////////////////////////////////////////////////////////////////////////////////////////////////////////////////////////////////// NOTE: When importing, you can import over and over again and CLIP will not import the same item twice. This allows you to import, not only the LandQuote inventory but other inventories that you might find from other programs or from other CLIP users. Once you get to this step, you have successfully imported your inventory into CLIP. You can look at the inventory by going to the projects menu and choosing Inventory/Inventory Data Entry. Projects Tutorial-85

86 /////////////////////////CLIP Pro//////////////////////////////////////////////////////////////////////////////////////////////////////////////////////////////////////////////////////////////////////////////////////////////////////////////////////////////////////////////////////////////////////////////////////////// You can now see how our defaults were placed in the file. The default vendor is Interface Systems. The default quantity is 1, the default mark up is 10%. Since this part had no amount in LandQuote, no cost has been entered in. You can now edit the fields to make this a customized inventory for your company. Exporting your CLIP Inventory to PlanScape When you have imported your inventory into CLIP and changed it according to your needs, you can then export it to be used with PlanScape. PlanScape uses a Catalog file that ties into the symbols that are placed on the plan. By exporting CLIP s inventory to a catalog, you can use PlanScape with CLIP s catalog. As you draw the plan and drop symbols that are related to part numbers in CLIP s inventory, PlanScape will keep track of how many of what items you are using and will be able to export this materials list to a QTU file. You can then go back into CLIP, create a new project for a customer and import the qtu file and a project will be assembled automatically from your drawing in PlanScape. Step 1 Export your inventory from CLIP to a catalog file Clip will only export items that have an "Export Unit" filled in Projects Tutorial-86
87 /////////////////////////CLIP Pro/////////////////////////////////////////////////////////////////////////////////////////////////////////////////////////////////////////////////////////////////////////////////////////////////////////////////////////////////////////////////////////////////////////////////////// If you leave this field blank, CLIP will not export this item. This is handy if you want to limit the amount of items in the catalog to be used with PlanScape. Make sure that you only place unit measures that are acceptable to PlanScape in this field. If you enter unacceptable unit measures, PlanScape will give you a General Protection Fault. The acceptable measurements as of this writing are: EACH EACH SQUARE INCH SQIN SQUARE FOOT SQFT SQUARE YARD SQYD SQUARE CENTIMETER SQCM SQUARE METER SQMT LINEAR INCH LNIN LINEAR FOOT LNFT LINEAR YARD LNYD LINEAR CENTIMETER LNCM LINEAR METER LNMT Now Export your inventory to a catalog. Use the Projects/Export Inventory option off of CLIP s Main Menu Projects Tutorial-87


88 /////////////////////////CLIP Pro//////////////////////////////////////////////////////////////////////////////////////////////////////////////////////////////////////////////////////////////////////////////////////////////////////////////////////////////////////////////////////////////////////////////////////////// You will now choose a directory to drop the new catalog into. We use C:\TEMP for this. Press the Select button and CLIP will export the inventory to a catalog in the directory you chose. It will be named CLIP.CAT. Step 2- Relate the symbols to the catalog items Start up Planscape and open your drawing Projects Tutorial-88

89 /////////////////////////CLIP Pro/////////////////////////////////////////////////////////////////////////////////////////////////////////////////////////////////////////////////////////////////////////////////////////////////////////////////////////////////////////////////////////////////////////////////////// Pull down the File Menu and choose the Fetch Model menu choice. Choose the Plant Model Now you will see the Plant symbols. Projects Tutorial-89


90 /////////////////////////CLIP Pro//////////////////////////////////////////////////////////////////////////////////////////////////////////////////////////////////////////////////////////////////////////////////////////////////////////////////////////////////////////////////////////////////////////////////////////// Click on the Use Catalog check box Press the Cat. Button and choose the CLIP.CAT that CLIP created when it exported the inventory. Projects Tutorial-90


91 /////////////////////////CLIP Pro/////////////////////////////////////////////////////////////////////////////////////////////////////////////////////////////////////////////////////////////////////////////////////////////////////////////////////////////////////////////////////////////////////////////////////// Now choose a symbol that you will use on your drawing. We will use the plant symbol. Press the "Load" button Projects Tutorial-91

92 /////////////////////////CLIP Pro//////////////////////////////////////////////////////////////////////////////////////////////////////////////////////////////////////////////////////////////////////////////////////////////////////////////////////////////////////////////////////////////////////////////////////////// Choose the inventory you want it related to by pulling down the category and the name pull downs We will choose the Amethyst Flower / 6 pot. Projects Tutorial-92
93 /////////////////////////CLIP Pro/////////////////////////////////////////////////////////////////////////////////////////////////////////////////////////////////////////////////////////////////////////////////////////////////////////////////////////////////////////////////////////////////////////////////////// Press the Okay button Now drag the Plant symbol to where you want it on your drawing. This symbol on this drawing represents the Amethyst 6 pot flower. As long as you duplicate this item on the drawing, it will retain its relationship with the Amethyst 6 pot. If you use a new symbol from the model list, you will have to Load it with the inventory item each time you place a symbol from the model onto your drawing Projects Tutorial-93
94 /////////////////////////CLIP Pro//////////////////////////////////////////////////////////////////////////////////////////////////////////////////////////////////////////////////////////////////////////////////////////////////////////////////////////////////////////////////////////////////////////////////////////// We have duplicated this symbol three times to produce 4 Amethyst 6 pot flowers on the drawing. We are now finished with producing the drawing in PlanScape Step 3 Export a quote file from PlanScape Now choose the File/Materials/Export Materials from the main menu of PlanScape Projects Tutorial-94

95 /////////////////////////CLIP Pro/////////////////////////////////////////////////////////////////////////////////////////////////////////////////////////////////////////////////////////////////////////////////////////////////////////////////////////////////////////////////////////////////////////////////////// Place the Quote file in a temporary directory (C:\TEMP) and name it something that you will remember (such as the customer s name). You are finished with PlanScape. You can now go back into CLIP. Step 4 Create a new project for your customer in CLIP In File Maintenance you should choose your customer and press the Projects button. Create a new project to receive the bill of materials from PlanScape. Projects Tutorial-95