LIFETIME W A R R A N T Y
|
|
|
- Suzan Greene
- 5 years ago
- Views:
Transcription
1 RESIDENTIAL LIFETIME

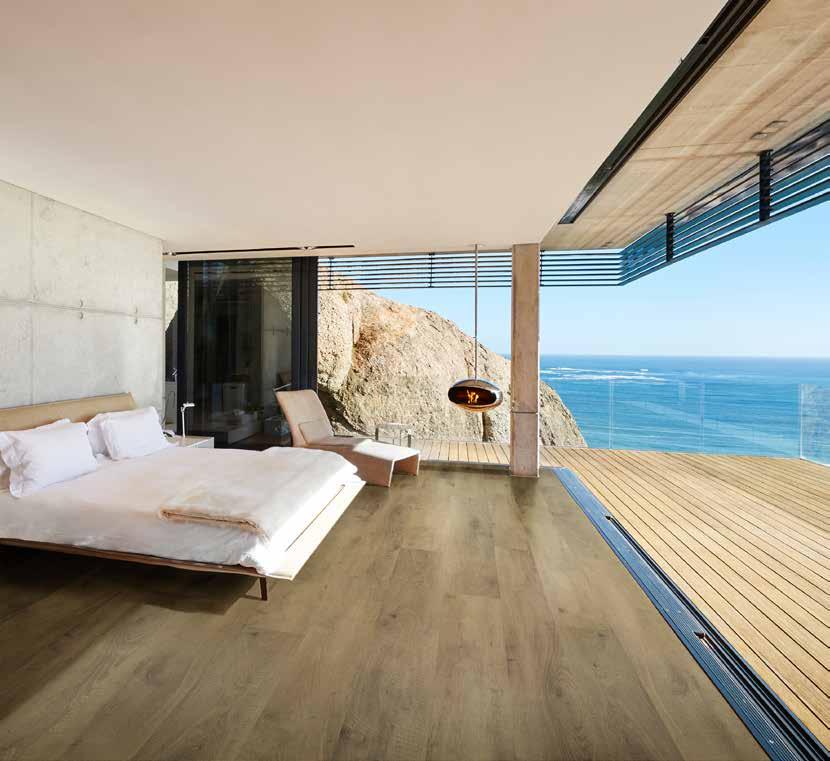
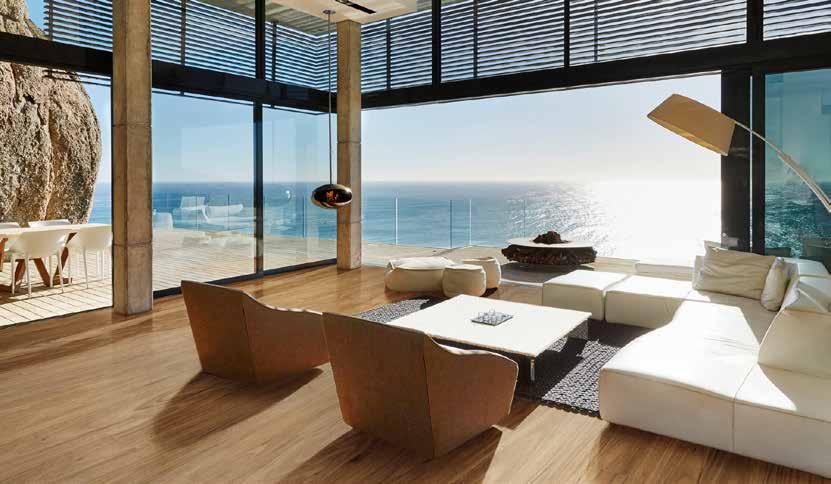
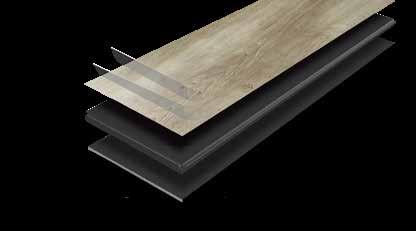
2 WHAT MAKES ABODE EXTRAORDINARY? Abode solid-core luxury planks can be selected for any room in the home. SUN PROOF FADE PROOF HEAT PROOF WARP PROOF WATER PROOF EASY TO INSTALL Abode uses the TIGHT LOCK Installation method. No glue is used. Planks CLICK together tightly on the long side and DROP into place on the short side, to give a water tight seal that doesn t warp or lift. SUB-FLOORS Abode can be installed over most surfaces such as tiles with grout lines, particleboard and chipboard. Because planks are thick and rigid, there s no show through (telegraphing).* Abode planks do not require acclimatisation before laying, making installation, quick, clean and easy. * uneven floors require floor preparation. Please refer to our installation instructions. PERFORMANCE Abode solid core planks feature a multi-layer quartz enhanced urethane coating which provides exceptional resistance to heavy foot traffic, indents, scratches and scuffs. They provide excellent acoustic benefits making them ideal where noise dampening is needed. In addition, Abode floors are heat and cold proof, water, sun and fade proof, scratch and impact proof. Abode is an exceptional product. SAFE & SUSTAINABLE The solid-core of Abode is free from ortho-phthalates, plasticizers and other harmful content. The TIGHT LOCK installation method is chemical, glue and dust free. Abode are a certified product (Reach - CE - PROP 65 - Floorscore - VIC A+ - DIBT) Plank Size Classic Plank Size Wide board Thickness Wear Layer 176 x 1813mm 223 x 1813mm 5.50mm 0.55mm

3 signaturesunplank

4 KEY FEATURES ABODE LOOSELAY LVT TRADITIONAL LAMINATE Sun-proof (withstands direct sunlight) 4 4* 7 Will not warp or deform >80 degrees Water-proof (can be installed in bathrooms) Suitable in rooms with floor to ceiling windows Suitable for bathrooms & laundries Resistant to indentation Sound absorbent - BCA Acoustic compliant Built in underlay Core is free of harmful content and plasticizers Suitable to be laid over tiles No acclimatisation necessary No telegraphing (show through) Installs on areas up to 400m 2 without transition gaps Lays directly over chipboard Fast & easy TIGHT LOCK install ( floating floor ) *Installed with permanent adhesive Uneven floors require sub-floor preparation when there is a height variation more than 3mm over 1m EXTRA HEAVY DUTY Water Proof Fade Proof Scratch Resistant Stain Resistant Anti Bacterial Pet Proof EASY Tight Lock Install signaturesunplank

5
6 RESIDENTIAL LIFETIME


7 NSW Blackbutt ABODERG1644 QLD Spotted Gum ABODERG1640 NSW Spotted Gum ABODERG1641 Tablelands Spotted Gum ABODERG1642 QLD Blackbutt ABODERG1643 TECHNICAL SPECIFICATIONS Plank Size 176 x 1813mm Total Thickness 5.50mm Wear Layer 0.55mm Wear Layer Treatment Quartz enhanced PUR coating Surface Natural embossed, true to life oak boards Edge Design Micro V groove 4 sided Fire Rating ISO kw/m 2 critical radiant flux Slip Rating R9 / P2 Underfloor Heating Suitable for water based systems Planks per Box 7 pcs/box (2.23m 2 ) Installation Method Tight Lock - no underlay - min. floor prep required Warranty Lifetime Residential, 15 Yr Commercial 50º CELSIUS HEAT Abode has been tested and certified to comply with strict indoor quality emission requirements. RESIDENTIAL LIFETIME COMMERCIAL 15 YEARS EXTRA HEAVY DUTY Scratch Resistant Stain Resistant Anti Bacterial EASY Tight Lock Install signaturefloors au nz signaturefloors.com.au signaturefloors.co.nz Terms & Conditions: Specifications are subject to manufacturing tolerances and may be changed without prior notice. Dye lots may vary in colour from sample and between production lots. All product purchases are subject to Signature Floorcoverings Standard Terms & Conditions of Sale. Please refer to our Installation Guideline, Maintenance Manual and Warranty Document for further clarification. This warranty is in addition to and does not affect your statutory rights. Our goods come with guarantees that cannot be excluded under the Australian Consumer Law/NZ Consumer Guarantees Act You are entitled to a replacement or refund for a major failure and compensation for any other reasonably foreseeable loss or damage. You are also entitled to have the goods repaired or replaced if the goods fail to be of acceptable quality and the failure does not amount to a major failure. Please refer to our warranties on: /2018

8 RESIDENTIAL LIFETIME


9 Lulea Oak ABODERG543 Floro Oak ABODERG545 Tromso Oak ABODERG539 Vardo Oak ABODERG540 Boden Oak ABODERG542 Malmo Oak ABODERG544 TECHNICAL SPECIFICATIONS Plank Size 223 x 1813mm Total Thickness 5.50mm Wear Layer 0.55mm Wear Layer Treatment Quartz enhanced PUR coating Surface Natural embossed, true to life oak boards Edge Design Micro V groove 4 sided Fire Rating ISO kw/m 2 critical radiant flux Slip Rating R9 / P2 Underfloor Heating Suitable for water based systems Planks per Box 6 pcs/box (2.43m 2 ) Installation Method Tight Lock - no underlay - min. floor prep required Warranty Lifetime Residential, 15 Yr Commercial 50º CELSIUS HEAT Abode has been tested and certified to comply with strict indoor quality emission requirements. RESIDENTIAL LIFETIME COMMERCIAL 15 YEARS EXTRA HEAVY DUTY Scratch Resistant Stain Resistant Anti Bacterial EASY Tight Lock Install signaturefloors au nz signaturefloors.com.au signaturefloors.co.nz Terms & Conditions: Specifications are subject to manufacturing tolerances and may be changed without prior notice. Dye lots may vary in colour from sample and between production lots. All product purchases are subject to Signature Floorcoverings Standard Terms & Conditions of Sale. Please refer to our Installation Guideline, Maintenance Manual and Warranty Document for further clarification. This warranty is in addition to and does not affect your statutory rights. Our goods come with guarantees that cannot be excluded under the Australian Consumer Law/NZ Consumer Guarantees Act You are entitled to a replacement or refund for a major failure and compensation for any other reasonably foreseeable loss or damage. You are also entitled to have the goods repaired or replaced if the goods fail to be of acceptable quality and the failure does not amount to a major failure. Please refer to our warranties on: /2018
10 Signature Floors Installation Guidelines FOUR KEY POINTS TO REMEMBER 1. Acclimatisation Providing the site is not below 5 C or above 40 C there is no need to acclimatise the planks. The product only requires acclimatisation outside of these temperatures. 2. Sub-floor The planks can be installed over most existing hard floorcoverings, when installed over ceramics, grout lines should not exceed 4mm in width or depth. Carpet, cork and other rafting floors are not suitable substrates. Sub-floor preparation is vital for an excellent floor appearance and good installation. The sub-floor must be hard, flat, smooth, clean, dry, and free from defects and fit for purpose and have less than ±3mm over 1000mm deflection. Concrete substrate moisture should not exceed 95%RH when tested in accordance with ASTMF 2170 in-situ probe The use of additional underlays is not approved. 3. Expansion gap A minimum 6mm perimeter gap must be kept against all permanent walls and fixings. And extend to 10mm when the length of an area exceeds 18 lineal meters. The planks can be installed in areas up to 400m² without the need for transitional trims. The planks must be installed as a floating floor, the floor should not be adhered, nailed or pinned in any way to the sub-floor or structure, and fixed cabinetry must not be built over. The use of caulking compounds and silicone is not recommended. 4. Installation Any intense irregularities in the sub-floor may affect performance. Ensure the side length of the boards are engaged first by tapping the boards sideways as you go. Only use a rubber mallet to engage the short ends of the boards. Failure to properly line up the end joint and attempting to force it in while out of alignment could result in permanent damage to the end joint. Signature Floorcoverings Pty Ltd. PO Box 1122 Epping 3076 VIC Australia. 13 Wurundjeri Drive Epping 3076 VIC Australia t f ABN
11 ABODE INSTALLATION GUIDELINE Document ID: Revision No: 03 Date modified: 6/07/2018 General conditions A good preparation is essential for a smooth installation. Abode can be installed on concrete, timber, ceramic and many other sub-floors. Abode must be installed as a floating floor, the floor should not be adhered, nailed or pinned in any way to the sub-floor or structure, and fixed cabinetry must not be built over. The use of additional underlays is not approved. It is possible to install Abode over floors incorporating underfloor heating, provided it is built into the substrate, and must be insulated to ensure surface temperature does not exceed 27 C. It is recommended on a new concrete slab that the heating is operational for several days prior to installation to reduce moisture in slab. Three days prior to installation, lower to 18 C. 24 hours post installation, gradually increase in increments of 3 C per day until it reaches the maximum operating temperature of 28 C before being turned back to its normal household temperature. Temperature should not be adjusted by more than 3 C per 24 hour period. Abode can be installed over most existing hard floorcoverings. When installed over ceramics, grout lines should not exceed 4mm in width or depth. Carpet and cork are not suitable substrates. A minimum 6mm perimeter gap must be kept against all permanent walls and fixings. And extend to 10mm when the length of an area exceeds 18 lineal meters. Post installation of skirtings or the use of scotia is recommended to cover expansion gaps. The use of caulking compounds and silicone is not recommended. Substrate preparation Sub-floor preparation is vital for an excellent floor appearance and good installation. The sub-floor must be hard, flat, smooth, clean, dry, free from defects and fit for purpose and have less than ±3mm over 1000mm deflection. If required, a suitable levelling compound should be used to ensure that no irregularities impact the finished floor. However, the selection of suitable materials, including smoothing and levelling compounds and any ancillary products is dependent upon the end use of the completed flooring and must be agreed by the supplier of the preparative materials and the flooring contractor. Any proprietary materials used for floor preparation must be used in accordance with the manufacturers recommended instructions. Because our product is waterproof the sub-floor moisture will not affect the floor itself. Excessive sub-floor moisture may result in smell or mould below the flooring. Concrete substrate moisture should not exceed 95%RH when tested in accordance with ASTMF The finished appearance of an Abode floor will be as good as the quality of the base over which it is installed. Any intense irregularities in the subfloor may affect performance. Site Conditions Abode performs to its specifications when laid at room temperature between 10 o C 40 o C., and only requires acclimatisation outside of these temperatures. It is preferable that the packs are stored lying flat, stacked squarely and away from vents and direct sunlight. It is recommended that you block out windows where direct sunlight streams in onto the floor to allow for continuity across the whole area to be laid during installation. Preparation 1. Before installation, check all panels in daylight for possible defects or discrepancies in colour or shine. 2. Check that the tongue and groove of the Abode profile is free from dirt and undamaged. 3. For best results, mix at least two packs when fitting to avoid repetitions in the pattern. It is also preferable only to use material from the same batch in a single room. 4. The surface beneath the floor must be sufficiently prepared in advance to guarantee successful fitting of the floor covering. In particular, it must be clean, dry, smooth and firm. Warranty Warranty and cleaning and maintenance information is available in our Abode Care Guide & Warranty document from your place of purchase and Signature Floors website Important Floor installation should not begin until the installer has assessed and approved the sub-floor and conditions. Step-by-step fitting instructions Abode is a floating floor. The panels should not be glued or fixed to the surface below or pinned to perimeter walls. The flooring must be installed leaving a perimeter gap of 6mm for all rooms, fixed furniture and fittings. For surfaces larger than 400m² or a single wall or run be longer than 20 linear metres, an expansion joint will be required. Please contact Signature Floors for advice. 1


 next to the door molding and as shown in the figure. Then slide the plank under molding.")


12 ABODE INSTALLATION GUIDELINE Document ID: Revision No: 03 Date modified: 6/07/2018 Installation Procedure 1. Undercut all timber door jambs prior to commencement, and allow adequate expansion of minimum 6mm. 2. After thoroughly cleaning the sub-floor, you should begin laying from left to right. Place the plank 6mm from the left wall. Use spacers between the wall and the plank. 3. Second Plank, first row. Drop the plank and gently press down the end with a rubber mallet so it firmly locks into the previous plank until both are at the same height. Make sure both planks are perfectly aligned. NOTE: If you notice both planks aren t at the same height or are not well locked together, please follow the disassembling instructions as later described in this document. Disassemble and check if any debris stuck inside the lock is obstructing. 9. To lay the last row: position a loose board exactly on top of the last row laid. Place another board on top, with the tongue side touching the wall. Draw a line along the edge of this board, to mark the first board. Cut along the edge of this board to mark the first board. Cut along this line to obtain the required width. Insert this cut board against the wall. The last row should be at least 50mm wide. 10. Holes for pipes: measure the diameter of the pipe and drill a hole that is 20mm larger. Saw off a piece and lay the board in place on the floor. Then lay the sawed-off piece in place. 11. Door molding and skirting - lay a board (with the decorative side down) next to the door molding and as shown in the figure. Then slide the plank under molding. WARNING: FAILURE TO PROPERLY LINE UP THE END JOINT AND ATTEMPTING TO FORCE IT IN WHILE OUT OF ALIGNMENT COULD RESULT IN PERMANENT DAMAGE TO THE END JOINT. 4. At the end of the first row, leave an expansion gap of 6mm to the wall and measure the length of the last plank to fit. 5. To cut the plank, use a simple utility knife and straight edge, and with the top side facing up, cut heavily and several times on the same axis. The knife will not go through the surface but make a deep cut. You can then lift one half of the plank using your other hand to hold down the second placing it very close to the cut. The plank will split naturally. With small and intricate cuts, it may sometimes be beneficial to use a Coping saw or electric Jigsaw. 6. Start the second row with the leftover cut part of the last plank of the previous row. This small plank should measure at least 30cm. Otherwise, use another plank that should be cut in two. The end joints of each adjoining row should not be closer than 20cm to each other. 7. Click the long side of the plank into the previous row and place it tight to the short end of the previous plank with an angle of 30. Drop the plank and gently press down the end with a rubber mallet so it firmly locks into the previous plank until both are at the same height. Make sure both planks are perfectly aligned. NOTE: If you notice both planks aren t at the same height or are not well locked together, please follow the disassembling instructions and check if any debris stuck inside the lock is obstructing. Helpful Hint - After finishing the installation of every row, use scrap pieces and a small hammer or rubber mallet to gently tap the planks into the click of the previous row to make sure they are tightly clicked together and make sure there is no gap between the long side of the planks installed. ANY GAPPING CAN COMPROMISE THE WHOLE INSTALLATION. 8. After 2-3 rows. Adjust the distance to the front wall by leaving an expansion gap of 6mm. Always ensure that the end joints are staggered at least 20cm, both when in the same row as when from one row to the next one. Disassembling Separate the whole row by lifting it up delicately at an angle. To separate the planks, leave them on a flat surface and slide them apart. If planks do not separate easy, lifting the closest plank to you slightly by 5-10 will assist when sliding them apart. 2