Mounting and Project Planning. Professional Solar Mounting Systems Mounting and Project Planning
|
|
|
- Leslie Malone
- 5 years ago
- Views:
Transcription


1 Professional Solar Mounting Systems Mounting and Project Planning
2 This guide will provide you with instructions for project planning and mounting of Schletter Solar Mounting Systems. Schletter Systems are made of high quality durable components, and offer solutions to most mounting scenarios with engineering of customized products to fit your needs. Please note that correct selection, mounting, and installation of the components affect the integrity of the photovoltaic system. The PV system should only be installed by certified, experienced photovoltaic installation companies. Schletter personnel are readily available for consultation for the application and mounting of your PV system. CONTENT DESCRIPTION SYSTEM PAGE General Application Information 3 System Characteristics 4 Fastening Systems for Tiled and Shingle Roofs Roof Hooks 5 Various Roof Types Corrugated Composite Roof Hanger Bolts, FixT/FixE 7 Trapezoidal (U-shaped) Sheet Metal Roof Fix2000, FixT, Vario FixV 8 Standing Seam roofs Standing Seam Clamps, FixPlan 9 (and system roofs) Elevation Elements Standard Support Designs Support XL, Profi, Light 10 Special Support Designs SolTub, SolCube 12 Windsafe, AluLight Combined Construction Vertical Continuous Beam CompactVario 13 Forms Horizontal Continuous Beam CompactGrid 14 Without Continuous Beam CompactDirect Yield Optimization for Trapezoidal FixZ-7 15 Sheet Metal Roofs System Mounting Pitched Roof Standard, GridNorm 14 Flat Roofs 18 Façades and Awning Façades 20 Application Suggestions Framed Modules 21 for Module Mounting Unframed Modules 22 Module Adhesive Plates OptiBond 22 Special Systems Industrial membrane roof IsoTop 23 Special dimensioning for flat roofs Windsafe Carport Park@Sol Ground mount FS System / PVMax3 Accessories Anti-theft device SecuFix / SecuFix2 24 Cable management Lightning and over voltage protection Important Suggestions Safety and Liability 26 Additional Mounting Over Voltage and Additional Lightning Information 27 Information 2 2 / 12 / 28

3 General Application Information Efficient, simple mounting saves time and costs 10 year warranty provides customer confidence and reliability Modular design solves mounting issues with custom configurations for individual products Useful calculation tools and support programs save time during the planning process to create a customized racking system and initial offer Complete documentation and statical dimensioning charts allow optimum and cost-efficient plant planning In addition to this mounting instruction guide, please ask your local sales representative for more information on the following tools in order to obtain further mounting and project planning assistance. System calculations program-aided load calculations, drawings, and charts give important direction on dimensioning and individual statical verifications. In addition to the mounting instruction, the examples given in the system calculations have to be diligently considered. System Overview brochure offering various system combinations and possible solutions including: The Klick system, cross beam connector system, universal roof fastening elements, elevation elements for flat roofs, system mounting, façade fixation, module mounting, special systems, accessories and lighting, over voltage and cabling. Component Overview covering the available components in a pictorial arrangement of attachments, clamps, rails, systems, accessories, and hardware. An auto-calculator using Microsoft Excel which facilitates the PV system rack configurations, dimensioning including price calculation, and parts list creation. Schematic pictorials provide mounting information. Product sheets and application suggestions contain further system specific information, mounting examples, and new developments. On the Internet, all current information is always available for download. In the U.S. visit and in Canada visit for more information. Load determination / superimposed load calculation for simple project planning, allows customers access to locationspecific load determinations and load calculation software. Certifications and Associations (NAED, ASES): We meet the highest quality standards of solar racking systems, and are continually working to improve our product application development and standards. We partner and interface with solar industry installers across the Americas. See also general summaries and mounting issues as described in: Laminate mounting Module mounting Facade mounting Flat roof mounting Grounding PV plants and lightning protection 3 / 28


, serve as variable fastening locations. Downwards, towards the roof, the rail is attached to a roof hook with the KlickTop system.")

4 System Characteristics In the development of the mounting system, it is important to consider system safety, durability, and mounting times. Further factors are the universal compatibility and utilization of standard components, such as bolts, nuts, and other hardware. Such components are demonstrated below. The Klick System The fastening points for the module clamps can be chosen at any location by means of square nuts into the aluminium duct of the rail. Using an M8 quality steel nut, clicked in at any location of the rail, spares the tedious sliding of the nuts over the entire rail length. Cross Beam System The standard cross beam (purlin rail) is the interface between roof fastening device and module attachment, as well as cross rail to cross rail in a cross beam grid system. Upwards, in direction of the module square nuts (Klick System), serve as variable fastening locations. Downwards, towards the roof, the rail is attached to a roof hook with the KlickTop system. (Note, the KlickTop on the Roof Hook will face the opposite direction. The rail will hang down.) The Roof Hook arrives with the Klick Assembly loosely tightened. The bolt is tightened from the top when the rail is set in place. The KlickTop component can also be used to mount cross rails running perpendicular to each other. There is a slight variation in the KlickTop hardware when used in the cross rail application. Universal Fastening Elements For use on a variety of roofs, including: Asphalt shingle Tiled roof Trapezoidal sheet metal roof Corrugated roof Sandwich roof Standing seam roof Schletter uses only high grade durable materials including certified aluminium, quality steel, and rubber formed parts made of vulcanized UV resistant materials. The fastening fixtures offered are universally applicable to pitched roofs, slanted roofs, and elevations. Schletter s engineering and design staff will assist in finding the best fastening element for each application. 4 4 / 12 / 28
. Tools: Ratchet wrench with 13 mm socket wrench and a drill with 6 mm pilot bit.")

5 Fastening Systems for Various Roof Types Tiled and Shingle Roofs With grooved tiled roofs or asphalt roofs, standard roof hooks are available. For special tiled forms, alternative roof hooks are available (please also take a look at the component overview). Tools: Ratchet wrench with 13 mm socket wrench and a drill with 6 mm pilot bit. If using impact driver, use caution not to over tighten. Refer to Tool List. Determination of the position of the rail The rails should be positioned approximately 1/4 of the module height away from the lower and upper module edge (see module manufacturer s documentation for more information). The position of the support rails for module rows above of each other must be aligned to the tile rows. Rails must be installed parallel to tile configuration (perpendicular to rafters). Choice and arrangement of roof hooks Roof hooks are arranged vertically according to the intended cross beam positions and north-south directions. Adjustable roof hooks are available for height adjustment in case of uneven roofs. If the substructure does not give any suitable attachment locations for support rails, often a cross rail system is recommended. For more information, see section on GridNorm on page 18 of this document. Attachment of roof hooks The covering tile is lifted and set aside. The bar of the roof hook aligns over a rafter and lies in the hollow respectively in the flat area of the pan tile. A distance of 3 5 mm / inches must be maintained between roof hook and tile. Therefore, at the bottom plate of the roof hook, an appropriate distance piece has to be applied (plywood or metal distance pieces item nr mm / inches which are available as accessories). The roof hook is fastened to the rafter with at least 2 lag bolts, 8 mm / 0.31 inches, at least two thirds of the entire screw length must be pre-drilled. Make sure that at least 70 mm / 2.76 inches of the lag bolts have a grip in the rafter. Reference design documentation for further information on bolt depth. Screw lengths of 80 mm / 3.15 inches for non-decked roofs and screw lengths of 120 mm / 4.72 inches for decked roofs have been well-proven. Only use bolts allowed by system specification. Replace covering tile. 5 / 28
6 Calculation Notes Bearing profiles: The maximum span widths of the bearing profiles for the respective wind and snow loads can be calculated using the Schletter Excel calculator program (contact us for program access) and verified by engineering. On pitched roofs, the span widths of the profiles is not the limiting factor in most cases (Example: Profi or Solo 05 span 1.6 m / 63 inches in case of normal snow loads). With standard applications, the profiles should not cantilever for more than 0.4 m / inches at the sides. Roof hooks: Use the Roof Hook Calculator (contact us for program access) to determine if the dimensioning of the roof hooks is sufficient. This is doubly important where high wind and snow loads are a factor. It is generally recommended to use a roof hook on every rafter in order to distribute the load more evenly over the roof. In case of high snow loads, sheet metal substitute tiles are generally recommended, because due to the individual statical dimensioning, it might happen that the roof hooks put pressure on the tiles. The required number of roof hooks per square foot of module area can be found using Schletter s Excel calculation program, or by contacting our engineering department. The required information on local wind and snow loads is provided by our load determination service, which is available on the Internet. When dimensioning the number of required roof hooks, it may be necessary to consider a higher number of roof hooks for the edge and corner areas of the roof. In the edge areas, one roof hook onto each of the first two rafters is generally recommended in order to compensate for the higher stresses caused by wind loads. Weather Protection When roof hooks are applied on sloping and flat roofs, the installer of the photovoltaic power plant can be held responsible for weather protection due to the installation. Therefore, tile producers only guarantee a limited water protection. The Tile Roofing Institute, sets standards that roofing installers as well as PV installers, need to adhere to which ensure that certified roofing methods and codes are followed. Schletter provides flashing and installation guidelines that coincide with the Tile Roofing Institute Installation Guides. Schletter recommends the use of poly-urethane caulk or silicone sealant where the roof membrane is penetrated, such as with a screw or bolt, and to apply self sealing adhesive membrane product, at the roof attachment or an EPDM gasket at roof attachments with washers. 6 6 / 12 / 28


7 Corrugated and Trapezoidal Sheet Metal Roofs For corrugated or trapezoidal (u-shaped) sheet metal roofs, use the fastening sets consisting of a special hanger bolt with EPDM sealing and a mounting plate. Usually, a fastening set with a hanger bolt M12 x 300 mm / 11.8 inches, M12 x 200 mm / 7.9 inches is recommended. For special types of attachments with reduced horizontal distances, M10 x 200 mm / 7.9 inches is available. Tools, drill diameter: Hanger bolts M10: combination wrench with wrench size 15, power screwdriver with 7 mm / 0.28 inch insert. Wood is pre-drilled with a diameter of 7 mm / 0.28 inches; the roof is pre-drilled with a diameter of 15 mm / 0.59 inches. Hanger bolts M12: combination wrench with wrench size 18, power screwdriver with insert 9 mm / 0.35 inches. Wood is pre-drilled with a diameter of 8.5 mm / 0.31; the roof is pre-drilled with a diameter of 16 mm / 0.63 inches. See Tool List. The fastening of mounting sets The roof cladding is drilled through at the appropriate locations, making sure that such locations are not situated in the water-bearing valleys of the sheet metal, but rather on the top areas of the plate profile. By pre-drilling, the fastener bolt penetrates the rafter or the purlin. The hanger bolt should be completely screwed into the wood. Screw in the hanger bolt in such a manner that only the metric thread stands out of the roof cladding, and if possible a bit of the shaft, as a seating for the gasket. Greasing the screw makes the process easier. Creation and check of the sealing For sealing, the rubber gasket is pushed down as far as possible and slightly pressed onto the roof cladding with the flange nut. Alignment of mounting plates In the case of cross rails, an upwards arrangement of the plates is recommended. In the case of vertical rails, the plates should be arranged according to the symmetrical load distribution and screwed with flange nuts. See section on System Mounting on page 22 to The number of fastening location spots per square meter of module area has to be dimensioned according to the calculations of the local wind and snow loads. Due to the position of the roof cladding, a fixation to the vertical rafters is not possible in many cases. If screwing to the cross purlins or to the cross battens is intended, usually a vertical rail position is required. In this case, it should be checked if the modules can be fixed vertically onto two vertical rails, thus the optimum rail combination regarding structural calculations with the minimum of required rails is possible. Fastening Elements FixE Universal fastening system for corrugated roofs Mounting instruction and additional suggestions for FixE (available for wood and steel) 7 / 28

 provides an unquestionably simple and swift fastening solution. The screws must not spin free of grip during the mounting process (use a depth-stop). A minimum thickness of.5 mm / 19.")


8 Trapezoidal (U-shaped) Sheet Metal Roofs For trapezoidal and overlapping roofs, fastening to the substructure (for example, with hanger bolts, see previous section) is generally preferable due to the unknown structural characteristics of the sheet metal roof. When this is not possible (for example, selfsupporting trapezoidal sheet metal roofs or sheet metal roofs made of overlapping elements), Fix2000 (There is a mounting example with KlickTop found below) provides an unquestionably simple and swift fastening solution. The screws must not spin free of grip during the mounting process (use a depth-stop). A minimum thickness of.5 mm / 19.7 mil steel sheet metal and.8 mm 31.5 mil aluminum sheet metal is required for use with the Fix2000. The roof must have sufficient load bearing reserves to support the additional load of the photovoltaic installation The fastening of the trapezoidal sheet metal must be able to absorb the additional wind suction forces (a roof-parallel PV power plant does not increase the uplift forces) In case of overlapping elements, a sufficient adhesive force between the layers must be applied See System Mounting on page 22 to continue. Fix2000 application Review datasheet for measurements on Fix2000 Calculations The Fix2000 fastening elements must be able to transfer the exact load forces to ensure reliable system calculations. For Fix2000 calculations, the wind load is more relevant than the snow load. The snow load upon the power plant is transferred into the roof by all the ribs of the sheet metal; due to a slight elastic deformation, the ribs between the clamps are also loaded. The cross rails should be arranged vertically to the ribs. It is essential for the wind load to transfer and that the trapezoidal sheet metal is sufficiently attached to the substructure. Only if this has occurred can the mounting of the Fix2000 take place. Only by using an adequate amount of Fix2000 elements will the adhesive force of the clamps to the sheet metal according to the calculations take place. Individual verifications for the load transfer into the sheet metal are required. Usually, a horizontal distance of m / inches between the clamps is sufficient for this to occur; more clamps should be placed at the edges. Tilted systems on Fix2000 are only recommendable when the adhesive force of the sheet metal can definitively be verified. Please see the application suggestions for Fix2000 for additional product information. For Trapezoidal Sheet Metal FixT : Universal fastening system for trapezoidal sheet metal roofs. VarioFixV : Standard stock item that works with all u-shaped sheet metal roofs, cutting installation time. See product sheets for each system. 8 8 / 12 / 28


 Positioning of standing seam")


.")

9 Standing Seam Roof, Sheet Metal Roofs The fastening takes place by means of special standing seam clamps, onto which the cross rail profile is screwed. Various designs are available for different types of roof systems. An alternative to the standard clamps is the FixPlan for direct attachment into the substructure A Standard KalZip, Bemo Zambelli Series 465 Zambelli Baur.500 Fischer KlipTec Alternative.: FixPlan See mounting instruction for FixPlan Tools: Ratchet wrench 13 plus insert 13, torque wrench, if necessary power screwdriver with torque setting Alternative: FixPlan, tools as needed for corrugated roof kit mounting (see above) Positioning of standing seam clamps. The clamps are arranged vertically according to the required cross rail positions. In case of horizontal applications the following has to be considered: One clamp should be positioned on each standing seam. The cross beam should not bear more than a maximum of 0.4 m / inches to the left and right. Fastening of standing seam clamps. The clamp is put on the seam and loosely tightened. The alignment is completed when the cross rails are fastened. The clamp must be shifted onto the seam as far as possible. See section on System Mounting on page 22 for more information. Please Note: Torque for the clamp screws of the standing seam clamp should be 11 lbs./ft (15 Nm). Rule of thumb: Fasten tightly with a short ratchet. When fastening the PV power plant onto sheet metal roofs, the roof cladding must be able to absorb the wind load. Careful review should be performed by the installer on the installation site to ensure the roof has proper support. ATTENTION: With system roofs (for example Kalzip), the standing seams must not be altered in shape when the clamps are tightened to make sure that the roof sheeting is not blocked in case of thermal expansion. 9 / 28
10 Elevation Systems for Flat Roofs Standard Support Designs Flat roof supports are used if the installations can be screwed directly onto the roof decking or onto concrete weights placed upon the roof. Using screw sizes M10 and M12, there are special washers available which offer more flexibility. The Light Support Series offers light weight and cost-efficient designs for modules from approximately 0.8 m 1.6 m / inches. Light 10/13/15 The Profi Series is intended for applications where high snow loads are expected. Example include: Module heights: Profi 15: ca. 1.3 m 1.7 m / inches; Profi 22: up to ca. 2.2 m / 86.6 inches XL Flat Roof Support is especially designed for large modules or two rowed mounting of modules, up to 3.6 m or inches Special sizes are available upon request. Contact us regarding more information on the optimal support design. The preassembled supports are unfolded and screwed by means of socket head screws sized M8 and self-locking nuts size M8. For the connection to the fastening element, usually oblong holes (13 mm / 0.51 inches) with adapter plates 10 mm are available, according to the individual design. Bottom beam hole distances A B Light U07 1 m item no LightU m item no Light U m item no Profi U m item no / /- 0, / / / ,66 +/- 0, / / Note: Do diagonal struts respective tensile struts have to be checked individually? No if the support is tightly attached; for example with concrete or FixT Yes if the row is not horizontal; for example east/ west roof, elevation to the south 010 / 12 / 28


11 Special Support Designs The modularity of the Schletter system allows for multiple combinations with different fastening and loading possibilities. The following highlights some of the systems offered. SolTub Loading with gravel or concrete blocks Good load distribution on the roof Different tray widths available All metal construction If necessary, a roof surface protection mat could be required depending on roof surface. See product sheet on SolTub for more information Windsafe Considerable reduction of the required load calculations Wider span widths of the rails bearing the modules are possible Decreases the required load capability of the roof structure With lower superimposed loads, the system prevents overturning and/or up-lift in high wind situations The Windsafe system is designed modularly. Because of the system s unique wind deflector, verification of structural safety is possible and allows for lower loads than conventional systems. In case of metal sheets for standard support systems, the mounting is completed with three sheet metal screws per strut. One is screwed in the upper quarter of the sheet metal height and one screw in each of the two lower quarters of the sheet metal height. See product sheet on Windsafe for more information AluLight Standard stock item, reduces cost to produce using high volume manufacturing Reduces pounds per square foot of roof loading Works with most PV modules Adding to a history of proven system designs, the AluLight features quick and easy installation for flat roof installations. Like all Schletter products, the AluLight works with most photovoltaic modules while completely enclosing them in rows at a fixed 12 degree angle. Proper roof fasteners and concrete slabs incorporated into the system ensure the AluLight trough sits securely and in-line making it ideal for exacting high-wind conditions where load weight is a concern. See product sheet on AluLight for more information 11 / 28
. Therefore, the continuous beams are installed vertically to the roof construction (using CompactVario or CompactGrid).")

12 Combined Construction Forms The benefit of using compact module support construction is the enhanced integration of the roof construction in the calculated arrangement of the module elevation and load distribution into the roof structure (usually by continuous beams). Therefore, the continuous beams are installed vertically to the roof construction (using CompactVario or CompactGrid). If it is possible to screw the supports directly to the roof structure (using CompactDirect), the span of the module beam must be aligned to the distances of the roof structure when carrying out the statical calculation planning. CompactVario Schletter s CompactVario is a flexible module elevation system for both flat and pitched roofs, ideally suited for bridging wide purlin distances. A complete series of double groove profiles DN0-DN2,5 are available as distribution rails in north-south direction, offering the most economic solution. See mounting instructions for CompactVario This construction is designed requiring no drilling at the installation site. A wide range of fastening elements for different roof systems is available. Please also consider: Product sheet FixT (trapezoidal/u-shaped and overlapping roofs) Product sheet FixE (corrugated sheet metal) First define the positions of the continuous rails, then mount according to the fastening element instructions (FixT, FixE, Fix2000 etc.) When mounting cross rails, the lower groove of the rail comes with standard screws with square screw heads sized M10 x 25 mm / 0.98 inches. Insert the screws into the corresponding holes in the fastening elements. Screw them with M10 flange nuts. Click in the square nuts M10 into the upper groove and attach the fittings using hexagon head screws M10 x 20 mm / 0.79 inches. Measurement X with support series 07: Light 1.0 m = 811 mm / inches Light 1.3 m = 965 mm / 38.0 inches Light 1.5 m = 1360 mm / inches Profi 1.5 m = 1360 mm / inches Unfold the supports and assemble them using socket wrench and M8 screws with M8 self-locking nuts. The next step is to screw the cross rails onto the supports using standard square head screws M10 x 25 mm / 0.98 inches and M10 flange nuts. See section on Module Mounting on page 22 for more information. 212 / 12 / 28


13 CompactGrid The CompactGrid continuous rail system offers an excellent solution for mounting elevated PV power plants where the roof structure is inclined to the east or west. The application of our well-proven, double-grooved mounting rails makes it possible to optimize the support distances and to transfer the loads evenly and safely into the roof cladding or substructure. The installation of diagonal strut kits prevents any potential twisting of the module rows. In combination with the fastening elements, Schletter offers individual solutions to meet our customers needs. See CompactGrid mounting instructions for more details. As with the CompactVario, connecting CompactGrid to the substructure is performed using our industry proven FixT connectors. The distances of the continuous beams must be altered to correspond with fastening element holes as closely as possible. In certain circumstances the support must be adapted to the fastening system distance by drilling an additional hole (10 mm). The support attachment is done by clicking in the square nuts into the upper groove of the rail and screwing them with hexagon screws M10 x 20 mm / 0.79 inches, using the required insertion plates (see below). Potential twisting of the module rows is prevented by the installation of diagonal strut kits. CompactDirect With some elevated systems, the distances of the module rows are directly determined by the shade distances. In such cases, a load distribution beam is required for an unimpeded arrangement of the module rows while fitting the most modules on the PV power plant. Roofs that are aligned in east-west direction with purlins in north-south direction often allow direct mounting of the supports. In these cases the flat roof supports are directly attached to the roof (i.e. rafters) using hanger bolts or the FixT/FixE fastening systems. Regardless, the connection point must be as close as possible to the assemblage points of the supports. All standard support systems from Schletter are suitable for this method. Contact your local representative for more information. 13 / 28

14 FixZ-7 When attaching modules to U-shaped (trapezoidal) sheet metal roofs, the FixZ-7 offers the maximum power yield by slightly elevating the modules in order to capture the most solar energy. See the FixZ-7 for more detailed information. The system is ideally designed for module heights from about m / inches and setting angles from 5 7 degrees. For technical reasons, FixZ-7 is only suitable for framed modules in portrait (vertical) mounting positions. The setting angle depends on the position of the clamp locations, positioned at a range from 1/4 to 1/5 of the module height (also reference module manufacturers recommendation). Because of load calculation parameters, mounting on fastening elements other than the Fix2000 KlickTop (Kalzip clamps, roof hooks, etc.), is only possible with an additional bottom layer of rails (cross rail combination). Moreover, only the KlickTop-attachment can be used for the fastening to the system rails. Please review the mounting suggestions for the Fix2000, referencing the distances to the roof edges which must be adhered to which are 1.5 m / 59.1 inches at the sides and 1.2 m / 47.2 inches at both the northern and the southern roof edge. With the FixZ-7 design, the module frame itself is integrated into the support system. The special FixZ-7 profiles are designed for a module inclination of an additional 5 7 degrees (in relation to the roof surface). Therefore, the mounting positions of both the front beam and the back beam have to be determined according to the module height. While mounting the modules, it is very important not to twist the frames, which is why mounting with the FixZ-7 is only possible with framed modules. Distance to module height Rows to shade destance 414 / 12 / 28

. IMPORTANT! Due to thermal expansion, ensure that the rows are not too long. Long, continuous rows should be subdivided.")
15 System Mounting After the fastening elements are mounted, the next step is to apply the cross beams and/or rails. Pitched Roof Mounting: Cross Beam Mounting With classic pitched roof fastening, two rows of roof hooks and or other roof fastening elements are attached to the supporting roof substructure. The cross beam profile is mounted onto these profiles. Two cross beam profiles bear one module row, which is aligned and fastened to the cross beams by means of end and middle clamps. Usually, the modules are mounted vertically (portrait). IMPORTANT! Due to thermal expansion, ensure that the rows are not too long. Long, continuous rows should be subdivided. Schletter s auto-calculator provides suggestions on thermal expansion. On tiled roofs, a maximum length of about 20 m / 787 inches, on sheet metal roofs without the possibility of thermal equalization, a maximum length of about 10 m / 394 inches is common. If plug-in connectors are installed in profiles with cable ducts, drainage drilling should be made in the cable ducts. Note: Within a module combination, connection of rail/beam profiles is only to be carried out with fixed screw connections. Tools: Combination 15 mm wrench with 6 mm / 0.24 inches. 15 / 28
 into the groove of the cross beam rails and arrange them at approximate distances.")

 for tiled and pan tiled roofs: Use height adjustable hooks or use underlayments with fasteners.")
16 Screw and align the cross beams on the fixation spots Insert the screws (usually M10 x 25 mm / 0.98 inches hexagon head respective square head) into the groove of the cross beam rails and arrange them at approximate distances. Then insert the first piece of the cross beam (starting with the first screw) in the attachment row (roof hooks, corrugated roof fasteners, standing seam clamps). The best way to do it is to secure the first screw with a nut at the roof attachment, then lift the rail at a slight diagonal inserting screw by screw and secure them each with a nut DO NOT TIGHTEN at this point. If necessary, extend the cross beam rail with a connector plate. How to even out different heights on roofs. a) for tiled and pan tiled roofs: Use height adjustable hooks or use underlayments with fasteners. b) for corrugated or trapezoidal (U-shaped) sheet metal roofs: Adjust the mounting plate at the hanger bolt by adjusting the fastening nuts. c) for standing seam roofs: if necessary, use underlayments and appropriate screws. Next, the lowest rail should be aligned straight. After fastening the lower row of rails, the other rails are attached, ensuring that the rails at the sides are aligned to the roof covering. Important: Make sure that the side rails are aligned at a 90 angle. If this does not occur, the rails in the complete module field cannot be aligned in one direction! To achieve the right angle, use the means of number triples. For example: 60, 80 cm / 23.6, 31.5 inches result in a diagonal of 100 cm / 39.4 inches) After aligning all cross beam rails, screw down all connection screws tightly. Use only special nuts with locking teeth. If the installation is supposed to be integrated in the lightning protection of the building, pay special attention to the hint in this paragraph! All screws of the substructure have to be fastened tightly and double checked. Continue module Mounting Suggestions on page 22. Tip: If the wiring is to be installed within the cable duct, water accumulations have to be avoided. This can be done by a suitable alignment or also by drilling individual holes at the lowest spots of the cable duct. When plugs are installed in the cable duct, this has to be especially considered! 616 / 12 / 28
 should be used when the substructure does not offer fastening locations for cross rails.")
17 GridNorm with KlickTop for Cross Rail Mounting Can be assembled with cost-efficient standard rails Flexible mounting options Can be combined with all Schletter system components Works with cross-rail connector KlickTop for reduced mounting times Tip: The cross rail mounting (regardless of the mounting system) should be used when the substructure does not offer fastening locations for cross rails. The intention of cross rail mounting is not to reduce the number of required roof hooks for certain module arrangements. The number of required roof hooks per square meter is determined by the structural requirements and is NOT influenced by the mounting systems that are applied. In typical applications, Schletter recommends the use of standard mounting systems, which offer quick and efficient attachment of the cross rails to the substructures. When this isn t an option, the GridNorm cross rail system is ideal for instances where the substructure has poor fastening locations or the position of the cross rails must have improved alignment to the module rows. Examples of such applications are the module mountings on all trapezoidal (u-shaped) sheet metal roofs with only horizontal battens or the horizontal (landscape) mounting of modules on pantiled roofs with unfavorable row partition. Suggestions for using GridNorm: Arrangement: Usually, the bottom profiles are arranged vertically from the eaves to the ridge and attached onto the fixation spots (roof hooks, corrugated roof kits, etc.). Then the cross beam profiles are arranged onto the vertically mounted profiles in suitable distances to the module. The cross rail connector KlickTop is tightened from above with a socket head screw. Profile distances and span widths: The allowable distances of the profiles and support spots can be looked up in the system structural calculations. It also has to be considered that the minimum number of fixation spots per square meter must be maintained. Calculation and compilation: Similar to the typical standard system, GridNorm can be compiled using the Schletter Excel auto-calculator. Contact us for more information. Conventional cross rail mounting: In addition to GridNorm mounting, the VA plate may also be used as a cross rail connector. See Component Overview brochure for more information. 17 / 28

18 Flat Roof Mounting With flat roof elevations, usually a row of vertically arranged modules is fixed onto a pair of cross beams. The pair of cross beams is mounted onto a row of supports. Most supports are available in different settings. For example, in Germany degrees gains the optimum annual utilization ratio for grid-connected plants. In island locations, 45 degrees can optimize the yield in the winter months, while 20 degrees can be used as an additional elevation on slightly inclined flat roofs. The cross beam profiles are attached onto the support elements. Usually, two cross beam profiles bear one module row, which is aligned and fixed to the cross beams by means of end clamps and middle clamps. Special alignments of modules are also possible. A variety of supports allows for the adaptation to different conditions. Tip: As a tool for determining row distances, an automatic shade calculator is available at The calculations for all supports must be done while considering the boundary conditions (building height, snow/wind load zone, module height, etc.). The allowable support distances can be found in the system specifications. Verification that the roof can safely bear the additional loads of the mounting system, PV panels, and potential snow loading MUST BE performed. This is ultimately the responsibility of the installer. Wind load must be considered with all systems, though it is even more important where elevated forces can occur at the attachment locations. When supports are combined with fastening elements (for example, supports on hanger bolts, clamps, etc.), the verification of structural safety has to be carried out within the framework of atypical calculations, because such cases usually cannot be listed in the system schematics. Moreover, a structural verification of the construction conditions on the installation site must be completed. If fastening by ballasted loads, the required loads can be looked up in the system shop drawing. It is essential that the roof substructure can bear both the additional load of the PV plant and the required loadings! The structural calculations for the supports usually refer to vertical loads and not individual lateral and tilt stabilities. For example, it has to be determined on a case by case scenario, if the support combinations require stabilization by means of additional diagonal struts, or the like. With tight roof claddings, often only a fastening by ballasting without penetration of the roof cladding is possible. In these cases, special care should be taken to ensure no stone or gravel remains under the loadings, potentially damaging the roof cladding (a mat for the protection of the roof cladding is recommended). 818 / 12 / 28
19 Mounting System Steps Tools: Extended socket wrench 15 mm / 0.59 inches Mount the supports and arrange them on the roof area The distance between supports must be determined according to the site conditions (building height, snow load, wind load, module height). In normal cases 1.6 to 1.8 m / 63 to 70.9 inches are typical. The cantilever of the cross beam should be 0.4 to 0.5 m / to 19.7 inches at most. Only in the case of mounting on concrete material: Screw the supports individually onto the elements. Arrange the supports in a row Fasten the cross rails loosely onto the supports Insert the screws into the groove of the cross rail profile and arrange them according to the support distances. Loosely fasten the first cross rail profile (starting with the first screw) in the first support. Then arrange all supports one by one in a row. Connect the cross beam with a connector plate to the lower side. After aligning all cross beam rails to the supports, tightly screws completely. Only use self locking nuts. If the installation is supposed to be integrated into the lightning protection of the building, please review the last section in this document. Bring the rack in the right position, if necessary All screws of the substructure have to be tightened and carefully checked (M8: 15Nm; M10: 40Nm) Cross beam mounting The next step is to screw the cross beam onto the supports using the appropriate sized screws, M10 x 25 mm / 0.98 inches and M10 flange nuts or through the use of the Klicktop. See Module Mounting on page 22 for more information. 19 / 28
.")


20 Awning and Façade Attachment Façade fastening represents a special case of module mounting where the mounting is usually attached to vertical walls. For power plants in visible areas, the fastening elements can also be delivered with a specially processed surface (for example, anodized or powdercoated). Please note: anodized or coated elements are only conductive to a limited extent (capacity charge, lightning protection). See general Mounting Suggestions on page 21 Draft a sketch of the plant configuration and determine the desired positions of the façade supports. The cross beams should not cantilever more than 0.4 m / inches at the left and at the right. The maximum support distance is determined by statistical dimensioning charts. Mount bottom beams Module rail and hook into the strut, secure with screw Check the position of the cross beams according to the module height. The cross beams should be positioned in a distance about 1/4 1/5 of the module height from the upper and lower edge of the module. The position of the connector boxes must be considered! It is necesary to check if the drilling at the supports are suitable for the modules used. If not, please make an inquiry for façade supports with special measurements Check the substructure and choose a suitable fixation system. Make sure that both the substructure and fasteners can support the loads (especially in case of both wind and snow loads). Heavy-duty anchors or adhesive anchors are recommended. If necessary, the fastening locations must be integrated into the power plant structural calculations. Levelling and mounting of the supports of a row. In order to align the supports, the two outermost elements are attached in the same height (horizontal alignment by means of a level or laser measuring). Stretch a cord between the external supports from the top corner to the bottom corner and align the inner supports to the cord (if necessary, use underlayments). Screw the cross beam onto the façade supports and align. Insert the screws (usually M10 x 25 mm / 0.98 inches) into the groove of the cross beam rail and arrange at approximate distances. Then insert the first part of the cross beam (starting with the first screw) into the outermost rail. The best way to do that is by securing the first screw at the support with a nut, lifting the support slightly, and then inserting the screws one by one and securing with nuts do not tighten yet. If the walls are uneven, corrections can be made by using underlayments at the fastening side of the façade support or by using underlayments between the support and the cross beam (if necessary use longer screws). Extensions of the cross beams are possible by means of cross beam connectors, aligning the lower rail until straight. After fastening the lower rail, attach the upper rail. The alignment at the sides must be exact and at right angles. After aligning the cross beam rails, screw all connection screws completely and securely. Only use special nuts with locking teeth. If the power plant is designed with the lightning protection of the building, review additional information on page 28 of this manual. Tighten all screws completely. Continue with Module Mounting on page / 12 / 28
 as the cabling is prepared.")


.")
21 Module Mounting Suggestions Framed Modules Preparation of the mounting of the modules Cabling to the module rows must be prepared. Keep in mind the necessary steps for lightning protection (page 28) as the cabling is prepared. For module cabling, at the end of string cables, suitable plugs/sockets for the individual module types must be mounted. Connect the first module as specified by the manufacturer followed by the other modules. Click in the square nuts into the upper groove of the cross beam rail in approximate distances by means of the click-in component (item #430024). Loosely place the first two end clamps at the end of the cross beam rail. Then apply the first module and fit them loosely with the end clamps (the end clamps should be positioned 2 mm or more away from the edges of the cross beams). Now align the first module to the cross beam (use a cord, auxiliary device available as an accessory). Mounting of the module rows After aligning the first modules, one middle clamp per cross beam rail is loosely fixed to the according cross beam. Then the next module is loosely clamped, shifted under the module clamp, and fastened. The next middle clamp is attached accordingly. The cables can be placed in the cable duct of the rail, securing them to the cross beam by means of UV resistant cable straps. Tighten all module attachment screws and check each one a second time. End cap: If desired, the cross beam rails can be finished with an end cap (for Solo and Profi ). 21 / 28


22 Frameless Modules The Schletter laminate module clamping system is specifically designed to accommodate the requirements of frameless (laminate) modules. Consisting of a two-part clamp suitable for clamping laminates from 3 14 mm / inches in thickness. Each middle clamp has a corresponding end clamp. The clamps are designed in such a manner that the module only has direct contact to rubber on all sides, including the front side. The result is a frameless module with no direct clamping to metal parts. Laminate mounting general suggestions Product sheet LaminatEco Product sheet LaminatGS Mounting of the clamps: Mounting end clamps and middle clamps is done in the same manner as the mounting of normal clamps for framed modules. See previous page. Mounting of safety hooks: With pitched roofs, frameless modules can be tightened, however it is recommended to use a safety hook. With each of the lower module clamps, the safety hook is applied resulting in the certainty of the module not sliding from position. The safety hook is shifted under the module clamp and attached by means of the clamp screw after the respective module is aligned. In case of two-part middle clamps, it is important not to over tighten the module clamps. For frameless modules with very narrow edges, use caution to avoid covering too much of the module with the clamp. For such narrow edge modules, it is recommended to use distance strips when mounting. Logically such strips increase the distance between modules, resulting in the need for longer rails. If using the Schletter auto-calculator, take this added distance into consideration. As the distances between the modules become bigger due to the distance strips, it has to be made sure that longer rails are ordered and installed. The results of the auto-calculator have to be corrected in such cases. With larger laminates or in case of cross mountings, the laminate must have additional support in the middle, between the clamps using support rubber or underlying sheet metal (available upon request). OptiBond Statically optimized for big module surfaces Minimum assembly time Anti-theft device Cross mounting with LaminatEco Shim for LaminatEco to heighten the support area 222 / 12 / 28 The pressure to reduce cost is constant for most when considering the installation of solar power plants. Because of this, preferential technology continues to lean towards thin film modules. The result are modules that have large surfaces with double glass construction. With this size increase, suitable fastening systems must be applied in order to maintain product integrity. For Schletter, one way to accomplish a secure hold on thin-film modules is with OptiBond. Developed by Schletter GmBH and several module producers, in order to connect such modules quickly and efficiently. OptiBond works in conjection with an adhesive (not sold by Schletter) that is placed on the OptiBond plate, which inturn is adhered to the back of the module. Review OptiBond product sheet for more information.


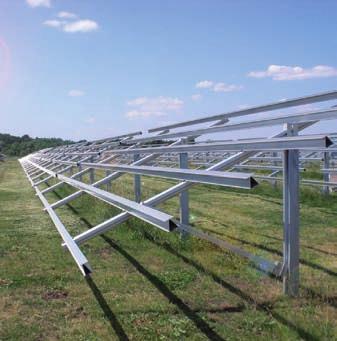
23 Special System Considerations IsoTop Industrial Roof Support widths of up to 10 m / 394 inches are possible Direct load transfer into the supporting structure of the building We will assist you in the planning of the project Usually the constructions are optimized in such a manner that only a few fastening points in big distances are necessary. These penetration points can be welded by the roofer reliably and inexpensively; thereby the liabilities are clearly separated. Product sheet IsoTop Special Project Plannings for Flat Roofs Windsafe Considerable reduction of the required load calculations Wider span widths of the rails bearing the modules are possible Decreases the required load capability of the roof structure With lower superimposed loads, the system prevents overturning and/or up-lift in high wind situations The Windsafe system is designed modularly. Because of the system s unique wind deflector, verification of structural safety is possible and allows for lower loads than conventional systems. See product sheet on Windsafe for more information AluLight Windsafe AluLight Reduces pounds per square foot of roof loading Works with most PV modules Standard stock item which reduces production cost using high volume manufacturing Adding to a history of proven system designs, the AluLight features quick and easy installation for flat roof installations. Like all Schletter products, the Alulight works with most photovoltaic modules while at a fixed 12 degree angle. Proper roof fasteners and concrete slabs incorporated into the system ensure the AluLight trough sits securely and in-line making it ideal for exacting high-wind conditions where load weight is a concern. See product sheet on AluLight for more information Park@Sol Park@Sol Parking areas with solar car ports offer a welcome completion for the extensive use of photovoltaic utilization of photovoltaic electricity generation. See brochure on Park@Sol System FS Ground Mount Systems The open area FS System is individually planned for the respective installation site. Besides the pile-driving technology of the FS system, PvMax3 is available as a system with concrete foundations. See additional datasheets and mounting instructions for FS/PvMax3 PvMax3 23 / 28


24 Accessories Anti-theft Device Schletter SecuFix is simple in an unparalleled manner and can be added to a system at any time. The SecuFix can be removed only with power tools in a substantial amount of time. SecuFix consists of an ordinary socket head screw and a stainless steel ball at an exact diameter for the specified system. After installing the SecuFix, no other connections or changes can occur. All SecuFix screws are secured by simply hammering in the SecuFix metal ball. SecuFix will work in any PV plant design. Hammer in Screw cannot be unscrewed with Reopening (e.g. in case of the metal ball normal tools! damaged modules): Due to the very narrow middle clamp, Cut a groove and loosen the loosening using pliers is not possible. screw with a big screw driver SecuFix2 is the logical extension of the SecuFix system. An additional protection of the flanks results in a further considerable improvement of this security system. SecuFix2 has to be regarded as an addition to securing the module clamp connections and of course can be combined with other concepts (plant surveillance, etc.) in an advantageous manner. Important hint: We explicitly point out that all mechanical safety measures generally are only a delay and not a prevention of theft and therefore have to be combined with other precautions. Lightning Protection and Grounding For the integration of anodized module frames for potential equalization the following components can be used: Middle clamp with grounding pin (series 430) replacing standard middle clamp Grounding Conductor Plate (GCP, item #430036) in combination with standard middle clamps is ETL listed. The lightning protection clamp (item #430035) can be used for the internal potential equalization in the rack (for example vertical connection of all cross beams with aluminium wire 8 mm / 0.31 inches). A connection to an existing lightning protection system (according to lightning protection concept) is possible with this clamp. 424 / 12 / 28


25 Cable / Wire Management A variety of cable management options are available to enhance attractiveness of attaching wires and cables to the underside of the mounting system. For detailed information, please review the Components Overview. Inverter Mounting Cable Ducts Cable Clamps Cable Clamps Tool List 25 / 28
26 Important Safety and Liability Information Electric Installation Suggestions on electric installation are generally not the subject of this guide. However, the general suggestions listed below should to be considered: Installation and connections may only be carried out by a certified electrician Relevant regulations and suggestions on safety must be considered When water is present, electronic installations should not occur High direct voltages arise at the series of connections of modules, which can be life threatening in case of direct contact. Working on the Roof When performing any type of work on a roof, including flat roofs, the relevant accident prevention regulations must be considered. Installers should always employ safe practices when working on roofs. Always check with local municipalities for safety regulations. Exclusion of Liability This instruction gives reasonable suggestions on mounting the fastening system by Schletter Inc. In addition to these suggestions, the installation contractor has to consider the relevant regulations and the generally accepted rules of technology. The suggestions on dimensioning given in this instruction are only suggestions gained from practical experience; the suggestions on dimensioning from the individual system calculations are mandatory. The installation contractor is responsible for the dimensioning of the plants. Schletter Inc. provides the related suggestions in the system calculations. The Schletter company is not liable for suggestions on dimensioning given in commercial offers, as not all technical determining factors (snow load zone, building height, wind loads, etc.) can be aligned. We will be glad to assist you in your detailed planning. The installation contractor is responsible for the mechanical durability of the installed interface connections at the building surface, and especially for water tightness. The components produced by Schletter are designed according to the loads that are to be expected. The Schletter company is not liable if the installed components are handled in an inappropriate manner. Schletter Inc. grants a voluntary 10 year product warranty on all racking systems, if the following conditions are fulfilled: Correct handling, dimensioning according to the statical framework requirements (unless there is a separate agreement), normal conditions regarding environment and surrounding. This applies for the environmental conditions that have to be considered according to DIN For example: The product durability that is to be expected is considerably higher than the durability of the photovoltaic modules. As statical dimensioning for all power plants, consideration of all possible environmental conditions is not possible. Such considerations are carried out according to the regulations of the valid norms, we generally recommend an insurance against natural hazards. 626 / 12 / 28
27 Additional Mounting Information Lightning and Over Voltage Lightning and over voltage protection are generally not the subject of this guide. As such, we recommend the guidance of outside professionals who are experts in such matters. The following general suggestions may assist in planning. Grounding and lightning protection for PV plants Discussions with the end-user (customer) should occur as to whether measures should be taken towards lightning protection (arresters, conductions, etc.) and/ or measures of inward lightning protection. Special caution is required when plants are installed on roofs that already have external lightning protection. In these cases, the customer must be informed. Generally the PV plant should be installed with a sufficient separation distance to existing lightning protection systems. In this case, the potential equalization of the PV rack must be implemented independently from the lightning protection system. This is also the case for sheet metal roofs. If the separation distances cannot be maintained due to the construction conditions, the rack can alternatively be connected to the lightning protection system according to the lightning protection standard. This must be done at several locations (for example, using lightning protection clamp item #430035). In this case it has to be considered that all components of the interior lightning protection have to be lightning-proof. Literature: Guides on lightning protection, as well as suggestions on the complete dimensioning of PV plants can be found in the planning file Photovoltaic Plants published by the DGS. Cable Laying In regards to the protection of the plant from close lightning strikes, the cable laying is of primary importance. Damage to the plant (for example the destruction of the inverters by overvoltage) is often caused by induction voltage in the module wiring. A lightning strike close to a PV plant has a very high current flow. This current flow (respectively its temporal change di/dt) induces an induction voltage into the looped circuit that is formed by the module wiring installed on the roof. Looped circuits should be avoided as much as possible when planning the racking system, string partition, and cable laying. After running poor better through the modules that are connected in series, the module wiring should be led back in the same module string and re-enter the roof at the exit spot. For the return path along the module rows, the cable duct at the cross beam rail can be used. 27 / 28


28 Schletter Canada, Windsor Ontario How to contact us Schletter, Inc. Tucson, Arizona 828 / 12 / 28 Martin Hausner President / CEO Direct: Fax: Cell: Tucson, Arizona U.S.A. martin.hausner@schletter.us Ryan Kelly General Manager, Canada Direct: Fax: Cell: Windsor, Ontario Canada ryan.kelly@schletter.ca Schletter, Inc E Farnum Place Tucson, AZ USA Tel: Fax: mail@schletter.us Schletter Canada, Inc Devon Drive Windsor, Ontario N8X 4L3 Canada Tel: Fax: mail@schletter.ca For a comprehensive and competent consulting during the planning of your plant and for questions concerning logistics and order processing, our staff members are available Monday through Friday from 7 am to 5 pm. Schletter Inc., 2011, I400001, V2