Fitting instructions
|
|
|
- Joseph Reeves
- 5 years ago
- Views:
Transcription
1 Fitting instructions
2 2-3 TABLE OF CONTENTS
3 Introduction 4 General fitting instructions 5 CLIMAFLEX accessories 6-7 Insulating during pipe fitting 8 Insulating after pipe fitting Angles Alternative solution for angles 14 Pipe elbows (commercially available pipe elbows) 15 Pipe elbows T-shaped branches Alternative solutions for T-shaped branches Distributors/ Pipe ends 23 Distributors/ Pipe ends 24 Insulatingsupport clamps 25 Taps 26 CLIMAFLEX XT 27 Larger pipe diameters 28 Multi-layer insulation 29 CLIMAFLEX STABIL 30 CLIMAFLEX SYSTEM 31 Notes 32
4 4-5 Introduction Insulation is no simple task: the aim is to guarantee not only real, permanentprofitability, but also an optimum ratio between quality/price/insulation capacity. The real professional today is a consultant and expert.to help the professional to carry out this task, NMC sa has designed a complete system of pipe shells, sheets and accessories for professional pipe insulation: CLIMAFLEX, CLIMAFLEX XT, CLIMAFLEX STABIL and CLIMAFLEX SYSTEM. This brochure has been written specially for professionals. It is designed to serve as an example of how to apply professional insulation materials. NMC UK Ltd. Tafarnaubach Industrial Estate UK - NP22 3AA Tredegar, South Wales Phone: Fax: enquiries@nmc-uk.com Homepage:
5 General fitting instructions The fitting instructions set out describe the most common insulation jobs and how to carry them out correctly. They apply to both existing and new piping installations. Here are some practical points: Tool: perfectly sharpened knife or cutter, punches corresponding to the common pipe outer diameters, mitre box with template, flat brush with short, stiff bristles, tape measure. Adhesive: be sure to use only NMC-FIX. The adhesive is spread thinly on both surfaces. After insulation work, wait 36 hours before putting the heating on. Working temperature: in order to guarantee that the adhesive holds properly, do not work below + 5 C. Knives and cutters: take accurate measurement, allow 3 to 4% with CLIMAFLEX and upset when laying, to stop the CLIMAFLEX shrinking in length; insulate heating pipes only when they are cold; cut the CLIMAFLEX to size using a mitre box. Cleanliness of materials: make sure that CLIMAFLEX is clean both inside and outside. Rinse off any dirt sticking to the pipes, and then dry the pipes off. You can use Insul 3005 in order to clean the insulation pipe. Paint: CLIMAFLEX can be painted with most of the latex and emulsion paints.
 1 inch rule 2) Punches (Ø 12 to 60 mm) 3) 1 large knife 4) 1 set of templates for cutting elbows to the correct angle (for all Ø")
6 6-7 CLIMAFLEX accessories The fitting kit has been specially developed for the professional processing of CLIMAFLEX and CLIMAFLEX XT. It contains: 1) 1 inch rule 2) Punches (Ø 12 to 60 mm) 3) 1 large knife 4) 1 set of templates for cutting elbows to the correct angle (for all Ø up to114 mm)
7 NMC-FIX adhesive (universal adhesive): on the basis of polychloroprene, available in cans of 200 ml, 500 ml, 1000 ml and 2500 ml. CLIMAFLEX PVC self-adhesive tape: 33 m roll, 30 mm wide. CLIMAFLEX clips: as an aid to installation for pressing temporarily after sticking awkward areas such as T-shaped branches, elbows, valves, welding or soldering points. Available in bags of 100. CLIMAFLEX PE self-adhesive tape: available in 50 mm x 3 mm x 10 m rolls. Uses: seams, screwed fittings, valves, tank outletsand all awkward areas. CLIMAFLEX fabric tape: grey, 50 mm x 50 mm.

8 8-9 Insulating during pipe fitting CLIMAFLEX can be simply pulled over the pipe. For elbows, simply pull the CLIMAFLEX over the elbow (longitudinal slit on the inside of the elbow).

9 The individual CLIMAFLEX pipe sections are stuck firmly on the cut surfaces with NMC-FIX immediately after adjustment.

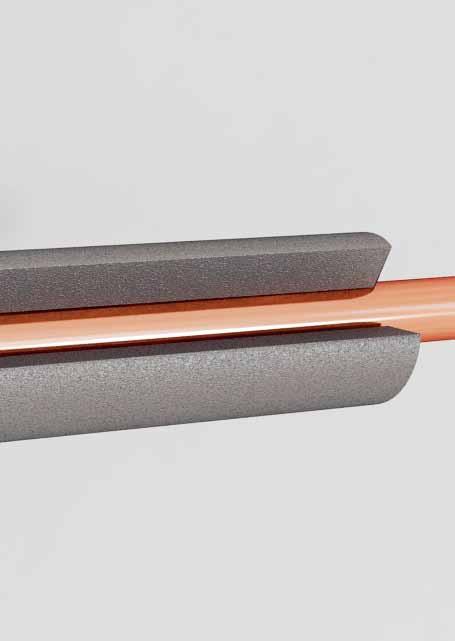
10 10-11 Insulating after pipe fitting CLIMAFLEX is pre-slit. Simply separate with the knife or thumb lengthwise fit round the pipe, spread the two surfaces of the slit with a thin coat of NMC-FIX, and press the insulation together after allowing the regulation time for the adhesive to dry (finger test). For problem areas, such as screwed fittings, we recommend fastening with a few clips.

11 For larger insulation thicknesses, we recommend making an additional slit on the inside of 2/3 of the insulation thickness. This makes the material easier to open up, glue and fit.

12 12-13 Angles Cut the CLIMAFLEX at a 45 - degree angle using a mitre box stick with NMC-FIX

13 slit open the piece of insulationthus formed on the inside apply and stick firmly with NMC-FIX.
, apply it")
14 14-15 Alternative solution for angles Insulate as far as the elbow. Make the angle (with inside diameter = outside diameter of the insulation), apply it and stick firmly.
 Measure the outside")

15 Pipe elbows (commercially available pipe elbows) Measure the outside diameter of the insulation required press down with the template provided in the slit area

16 16-17 Elbows and start to cut at the right outer point. Make counter cuts in the same position. Cut exactly the same at every further point, giving 5 segment cuts. Glue on the inside

17 slit open the piece of insulation thus formed, apply and stick firmly with NMC-FIX.


18 18-19 T-shaped branches In the case of T- shaped branches, cut a T at a 45 - degree angle

19 slit open on the inside apply and stick firmly with NMC-FIX.
, apply it and")
20 20-21 Alternative solution for T-shaped branches (1) Insulate as far as the T shape. Make the T shape (with inside diameter = outside diameter of the insulation), apply it and stick firmly.
 Punch out the T- shaped")

21 Alternative solution for T-shaped branches (2) Punch out the T- shaped branches using the punch in the slit area slit open, apply and stick firmly with NMC-FIX.
")

22 22-23 Alternative solution for T-shaped branches (2) Make a saddle cut in the counterpart and stick firmly with NMC-FIX.
23 Application tips for problem areas In problem areas such as valves, T- shaped branches, screwed fittings, etc., press in CLIMAFLEX clips as an aid to installation in the slit area.


24 24-25 Distributors / Pipe ends Simply punch out the required inside diameter press onto the pipe end and glue with NMC-FIX.

25 Insulating support clamps Apply insulation on both sides as far as the clamp and wrap round with CLIMAFLEX PE selfadhesive tape up to the insulation level. Adjust insulation to larger dimensions and stick firmly with NMC-FIX.
26 26-27 Valves Wrap up the valve body with CLIMAFLEX PEself - adhesive tape up to the insulation level apply larger pipe insulation and stick firmly. Alternative: Use CLIMAFLEX SYSTEM (see page 31).
27 CLIMAFLEX XT Fit CLIMAFLEX XT round the pipe, tear off both protective sheets simultaneously and press the insulation together. The pieces of pipe are stuck firmly after adjustment on the cut sides with NMC-FIX.


28 28-29 Larger pipe diameters For larger pipe diameters, use CLIMAFLEX Roll. Measure the pipe with CLIMAFLEX sheet strips and transfer to CLIMAFLEX sheet. Cut to size, apply and stick firmly.

29 Multi-layer insulation Where there are several layers of insulation, make sure that the adhesion seam is offset and the upper layer is stuck to the lower one at the pipe ends.

30 30-31 CLIMAFLEX STABIL The CLIMAFLEX STABIL range includes a fitting aid which stands a few millimetres above the pipe and allows CLIMAFLEX STABIL to be drawn over it with no problems.


31 CLIMAFLEX SYSTEM Using the compatibility list, choose the CLIMAFLEX SYSTEM insulation cap that matches the tap. (You may need to adjust it with a cutter and punch). Place the insulation cap round the tap and close with the spring washer. CLIMAFLEX up to the insulation cap.
32 32-33 Notes
33
34 34-35

35 NMC UK Ltd. reserves the right to adapt the product range or its technical properties to the latest state of knowledge at any time without notice. All indications in these documents are given to the best of our knowledge. If you have any questions regarding these technical details, please contact NMC UK Ltd. Tafarnaubach Industrial Estate. Printing or reproduction, even if only in part, is permitted only with our express consent. NMC sa Responsible publisher: NMC sa Gert-Noël-Straße Eynatten - Belgium

36