S-212 Wildland Fire Chain Saws
|
|
|
- Denis Hubbard
- 5 years ago
- Views:
Transcription

1 S-212 Wildland Fire Chain Saws Unit Unit 2 2 Chain Saw Maintenance and Operation 02-1-S212-EP

2 Chain Saw Components The bar and chain are the most important parts of your chain saw. Clean Bar Sharp chain Less fatigue & greater safety 02-2-S212-EP

3 Types of Saw Chain Chipper Chisel Semichisel 02-3-S212-EP

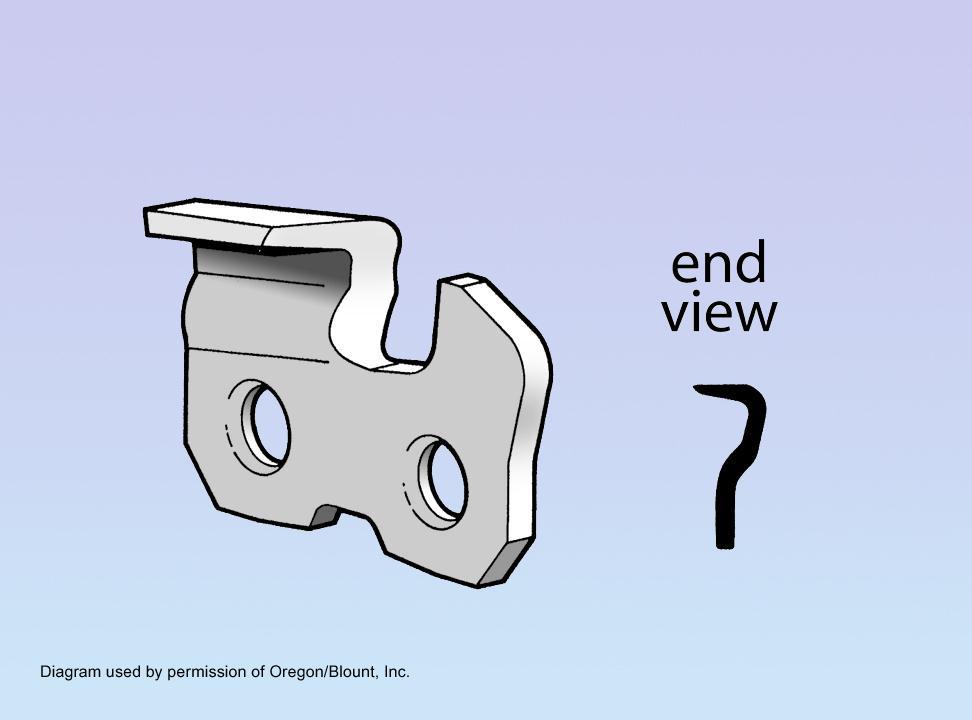
4 The Cutter and Depth Gauge top plate cutting corner side plate rivet hole depth gauge heel gullet toe 02-4-S212-EP

5 How a Cutter Works Depth gauge determines depth of cut Top plate chisels away fibers Cutting corner severs cross grains 02-5-S212-EP
6 Chipper 02-6-S212-EP
7 Chisel 02-7-S212-EP
8 Semichisel 02-8-S212-EP

9 Parts of the Chain left-hand cutter tie strap right-hand cutter drive link 02-9-S212-EP


10 Drive Link Draws oil from bar groove to lubricate the chain, and the tang fits into the sprocket to be driven by the powerhead S212-EP

11 Cutter sequences Standard Semiskip Skip or Full Skip S212-EP

12 Bar Markings Pitch Bar length Number of drivers S212-EP

13 Types of Guide Bars Solid Tip Bar Sprocket Tip Bar S212-EP

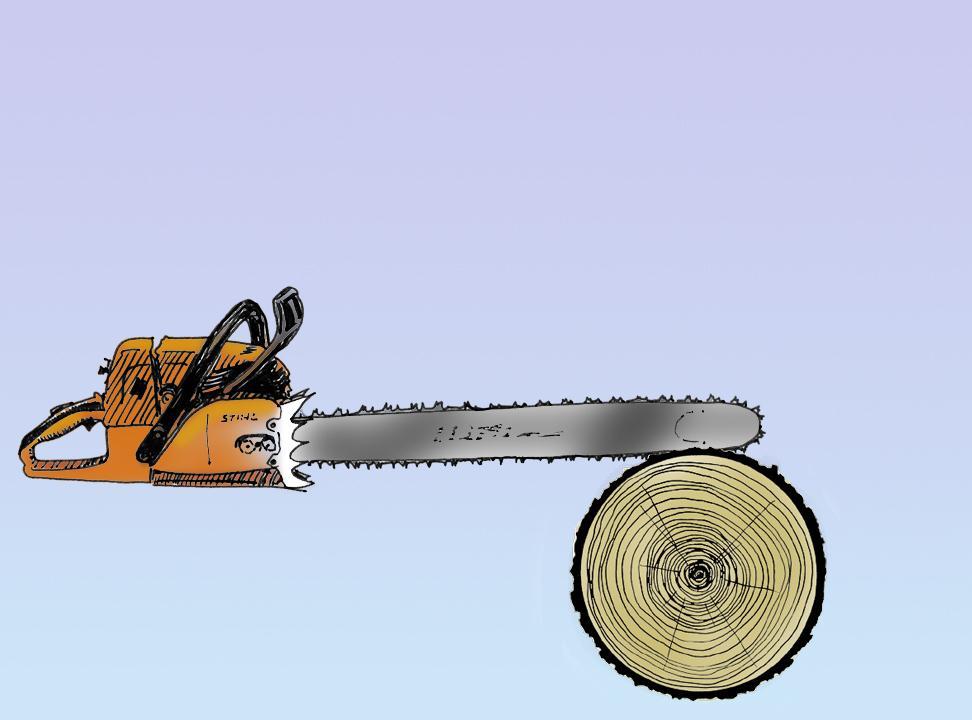
14 Parts of the Chain Saw hand guard front handle Cooling fins muffler Tension adjustment screw throttle interlock dogs chain throttle trigger Guide bar Bar studs rear handle clutch drum Chain catcher S212-EP

15 Clutch and Flywheel Bearings Needle bearings Clutch Assembly S212-EP

16 Parts of the Chain Saw Safety information Gunning mark Air filter cover Oil tank On/off switch & choke Throttle interlock Flywheel/fan Magneto Fuel tank Throttle trigger S212-EP

17 Sprocket and Clutch Cover Bar Stud Chain Tensioner Sprocket Clutch cover S212-EP

18 Carburetor Carburetor Choke Tuning screws S212-EP

19 Tuning Adjustment Screws Idle High Low S212-EP
20 Guide Bar Maintenance Guide bar problems in the bar rails are generally caused by: Incorrect chain tension Lack of lubrication Improper cutting techniques Normal wear S212-EP

21 Poor Rail Conditions CORRECT INCORRECT CORRECT INCORRECT S212-EP
22 Poor Rail Conditions Blue discoloration Check bar groove Wear just behind the nose S212-EP

23 Chain Tension Turn the saw off! Wear protective gloves. Wait until bar and chain have cooled before adjusting the tension S212-EP
24 Adjusting Chain Tension on solid nose bar Disengage the chain brake. Loosen the bar nuts on the side of the saw. Pull the nose of the bar up and keep the nose up as you adjust the tension. Turn the guide bar s adjustment screw until the bottoms of the lowest tie straps and cutters just touch the bottom of the bar S212-EP


25 Adjusting Chain Tension on a solid nose bar Still holding the nose up, tighten the rear bar nut, then the front bar nut. Pull the chain by hand along the top of the bar several times from the engine to the tip. The chain should feel snug, but pull freely S212-EP

26 Guide Bar Maintenance Remove the bar and chain for inspection and cleaning. Check the bar for wear: uneven rails, flared edges, cracks, damage requiring service. Clean the chain groove and oil holes. Start at the tip with the bar tool and clean toward the base. Oil holes must be clean. The sprocket nose should spin freely. Grease the roller tip S212-EP

27 Remove and Clean Air Filter Take care not to damage the filter. Gently tap the filter against a hard surface. Don t rub or scrape it. Do not clean the filter with saw fuel. Follow the manufacturer s recommendations for cleaning the air filter and determining whether it needs to be replaced S212-EP
28 Muffler, Spark Arrester & Plug Check the muffler and spark arrester. Replace the spark arrester screen if it has any holes. Remove the spark plug. Check for fouling. The tip of the plug should be beige, not black. The plug should be dry. Check the plug weekly when the saw is in frequent use S212-EP
29 Power Head Inspect the power head for loose bolts and damage: tighten the bolts or repair the power head if necessary. Check the handlebars for loose bolts or cracks. Check the dogs for loose or bent bolts. Check the antivibration mounts. Look for cracks in the rubber. Excessive movement of the engine or a loose feeling when the saw is shaken indicates loose or broken mounts S212-EP

30 Replace Bar and Chain Rotate the bar so that it wears evenly. Check for proper alignment of the bar with the bar studs, tension adjuster, and oiler. Check the chain tension. The chain should be adjusted so that it doesn t hang from the bar but still turns freely. Check the chain brake to ensure it is operating properly S212-EP

31 Chain Maintenance The chain must be correctly sharpened. The depth gauges must be set correctly. The chain must be correctly tensioned. The chain must be well lubricated S212-EP
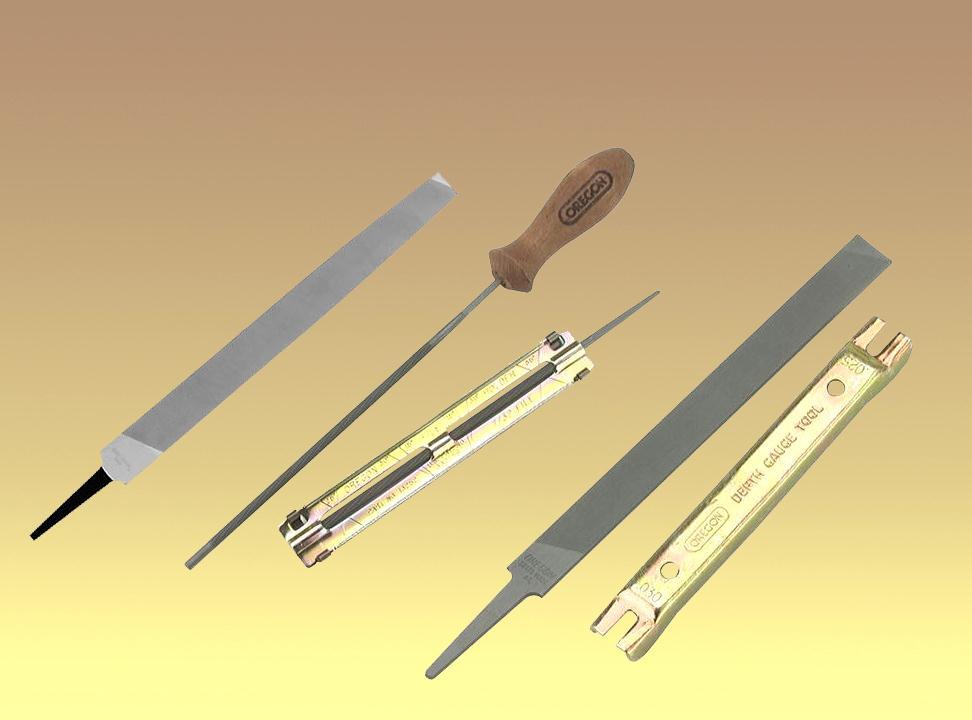
32 Chain Filing S212-EP

33 Depth Gauge The depth gauge rides on the wood and controls the depth at which the cutting corner bites into the wood S212-EP

34 Top-Plate Cutting Angle S212-EP

35 Cutter Maintenance Terms S212-EP

36 Sharpening Cutters with a Round File Be sure that the chain is tensioned properly. Maintain the correct topplate angle. Sharpen cutters on one side of the chain first. Keep the length of all cutters equal S212-EP

37 Setting Depth Gauges S212-EP
38 Saw Transportation: Vehicle Keep the bar and chain covered with a chain guard. Properly secure the chain saw to prevent it from being damaged and to prevent fuel from spilling. Never transport a chain saw or fuel in a vehicle s passenger compartment S212-EP

39 Saw Transportation: by Hand When carrying the saw for short distances, set the chain brake. When carrying the saw more than 50 feet, shut the saw off and carry it without touching the chain, muffler, and dogs. When carrying the saw on your shoulder, wear proper PPE, and watch out for the sharp chain and dogs S212-EP

40 Personal Protective Equipment hearing protection bar cover fire shirt wedges hard hat eye protection gloves fire shelter axe fire pants saw chaps protective boots S212-EP
41 Safe Chain Saw Starting Drop-starting a chain saw is strictly forbidden. Maintain a secure grip on the saw at all times. Always start the saw with the chain brake engaged. Start the saw on the ground or where it is firmly supported S212-EP

42 Starting Saw on the Ground Set the chain brake. Place the saw on firm ground in an open area. Announce you are STARTING UP. Grip the front handlebar firmly with your less-dominant hand S212-EP

43 Starting Saw on the Ground Place the toe of your right foot into the rear handle and press down. Pull the starting rope with your dominant hand until you feel resistance. Give a strong, brisk pull. Gradually return the starting rope to the housing. DO NOT allow the starting rope to snap back S212-EP
")
44 Operational Safety Show saw w/full wrap handlebar (don t know what kind of saw that is) S212-EP
45 Handling the Saw Never operate a chain saw with one hand. Chain saws are designed for right-hand operation. Place your fingers tightly around the handle and the handlebar. Never operate a chain saw with the throttle lock engaged. Maintain cutting area control. Make sure that the saw chain does not contact any material such as rocks or wires S212-EP
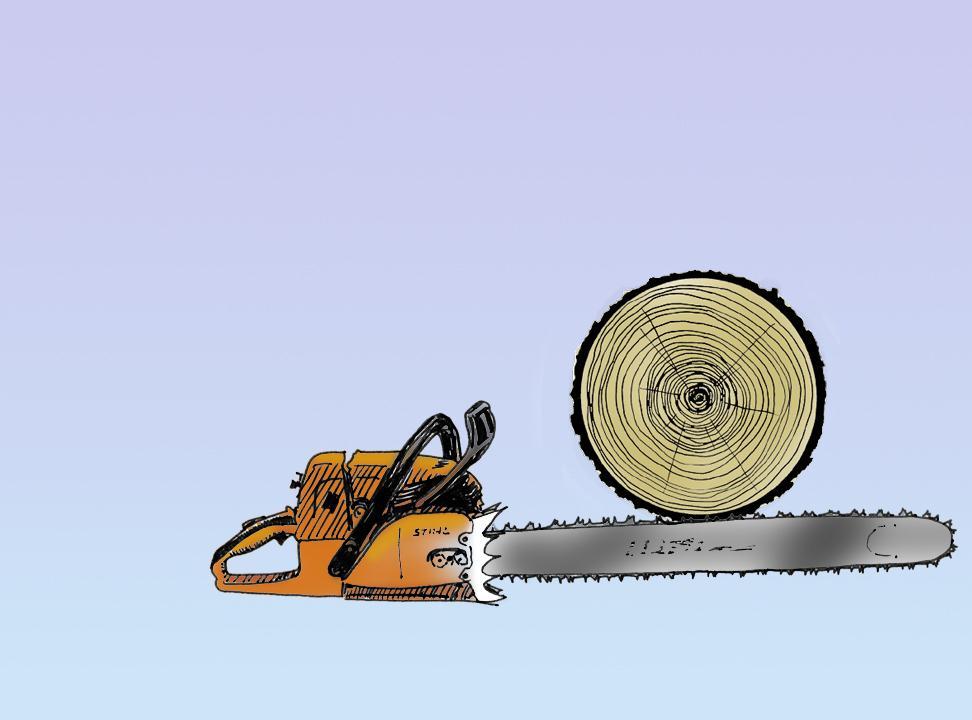
46 Kickback Reactive Forces Pushback Pull-in S212-EP
47 Kickback During kickback, the bar is forced up and back in an uncontrolled arc toward the sawyer S212-EP
48 Kickback S212-EP
49 Avoiding Kickback Hold the saw securely with both hands. Know where the bar nose is at all times. Never let the bar tip contact rocks, wires or objects other than wood. Never cut with the power head higher than your shoulder. Never overreach. Pull the saw smoothly out of the cuts S212-EP
50 Avoiding Kickback Cut one log at a time. Stand to the side of the kickback arc. Use caution when entering the bar into a partially completed cut. Use a correctly sharpened and tensioned chain at all times. Watch the kerf and the log for any movement that may pinch the chain. Use low kickback chain S212-EP
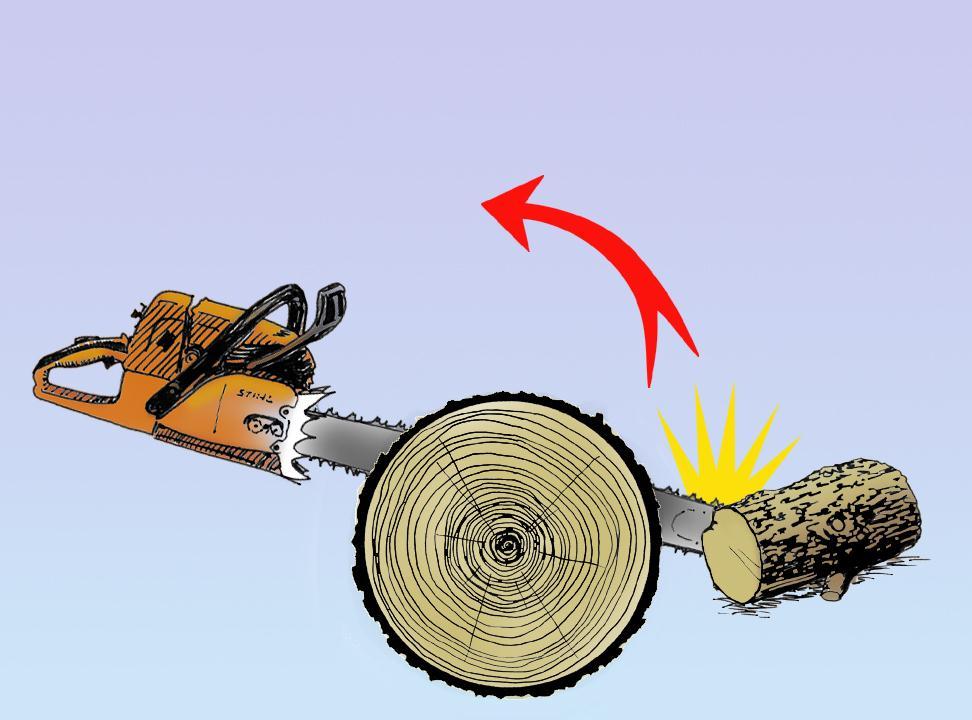
51 Pushback Pushback occurs when the chain on the top of the bar is suddenly stopped by contacting another object or by being pinched. The chain drives the saw straight back toward the sawyer S212-EP

52 Pushback S212-EP
53 Avoiding Pushback Only cut with the top of the bar when necessary. Watch the kerf and the log for any movement that may pinch the top of the bar. Do not twist the bar when removing it from a boring cut or underbuck S212-EP
54 Pull-In Pull-in occurs when the chain on the bottom of the bar is caught or pinched, and suddenly stops. The chain pulls the saw forward S212-EP

55 Pull-In S212-EP
56 Avoiding Pull-in Always start a cut with the chain moving at half or near full speed. Watch the kerf and the log for any movement that may pinch the bar. Use wedges to keep the cut open S212-EP

57 Additional Tools Axes Axes are used to remove bark from trees and to drive wedges during felling and bucking S212-EP

58 Wedges Wedges are essential tools for safe felling and bucking. They provide a way to lift the tree, preventing the tree from sitting back when it is being felled. Wedges also reduce binds on the saw when bucking S212-EP
 safety container. Transport large quantities in an approved safety can.")
59 Fuel and Oil Containers The most commonly used fuel and oil container is the twochambered (DOLMAR type) safety container. Transport large quantities in an approved safety can S212-EP

60 Fueling a Chain Saw Allow the saw to cool for at least 5 minutes before refueling. Fill the saw on bare ground or on some other noncombustible grounded surface. Immediately clean up spilled fuel. Refuel outdoors and at least 20 feet from any open flame or other sources of ignition S212-EP
61 Fueling a Chain Saw Fill the gas tank first, then the oil tank. Do not over fill the fuel or oil tanks. Hand tighten the fuel and oil tank caps. Be careful not to cross thread them! Do not start the saw closer than 10 feet from the fueling area S212-EP
62 Peaveys and Cant Hooks blunt end Cant hook point on end Peavey S212-EP
63 Review Unit 2 Objectives 1. Identify basic chain saw parts nomenclature, maintenance, tuning, troubleshooting and chain saw safety features. 2. Demonstrate field maintenance tasks required for chain saw operation. 3. Demonstrate chain saw starting and handling procedures. 4. Demonstrate the use of tools that support field chain saw operations S212-EP

64 Parts of the Chain Saw decompression valve handlebar hand guard muffler throttle interlock throttle trigger chain Guide bar rear handle clutch & sprocket chain catcher oiler adjustment screw chain tensioner chain sprocket cover S212-EP

65 hand guard & chain brake Parts of the Chain Saw handlebar starter grip chain bar muffler on/off switch trigger throttle interlock dogs oil filler cap fuel filler cap rear handle S212-EP