Forrest Terrace, Abbotsford, BC V2S 1G7 Tel: Fax: Website:
|
|
|
- Edwin Gilmore
- 5 years ago
- Views:
Transcription


1 Forrest Terrace, Abbotsford, BC V2S 1G7 Tel: Fax: Website: SIMMS Inventory Management System General Ledger Manual Table of Contents SIMMS Setup Menu General Ledger First Steps Banking Chart of Accounts Creating New Accounts Choosing an Account ID Editing an Account Establishing the Default Accounts Changing the Accounting Period Working with the GL Program Beginning Balances Screen Sales Screen
2 How Invoices are Reflected in Your Sales Journal Reversing an Invoice (CREDIT MEMO) Purchases Menu How Receipts of Goods reflect in your Purchase Journal Reversing a Receipt of Goods (DEBIT MEMO) Inventory Menu Item Category Inventory Adjustments and Kits Inventory Items RMA RTV Budgeting Financial Reports General Journal Report General Ledger Report Trial Balance Report Working Trial Balance Report Balance Sheet Report Income Statement Report Income Statement Budget Variance Report General Ledger Account Summary Report Daily Transaction Register Report Budget Report End of the Month Procedure End of Fiscal Year Tools Import from EasyPay Generating the CSV File Import CSV Data into the SIMMS General Ledger Important SIMMS Software Contact Information
3 SIMMS Setup Menu Even if you work with the GL only, it is necessary to go through the SIMMS Setup menu. After you created your items in item inventory screen, you can go ahead and enter the quantities you will start your activity with. In that case, you have to enter quantities on hand in the Tools>Stock Information window that opens. The window that opens is used for adjusting inventory on hand, but for this time only, we can use it to enter the quantities you have on hand at the beginning of your activity. After you choose a location, click Adjust, enter the initial quantity on hand, click Save, then keep entering the quantities for your entire inventory. At the end, go to Inventory>Inventory Valuation Report and confirm that all your quantities and prices are correct. The total value of inventory, from all your locations should equal the total value of inventory that you entered in the Beginning Balance screen. Units of Measure, Shipping Methods, Global Settings, Pricing and Discounts and Tax Codes/Schedules should already be set up during your initial company setup procedure. General Ledger For any type of business, regardless of its size, most concerns are related to the accounting for Sales, Purchases and Inventory. The General Ledger consists of several menus: Setup, menu, main menu, end of fiscal year menu and financial reports menu. Set-up menu includes Current Accounting Period, Chart of Accounts, Default Information and GL segments. First Steps In order to create your own company using SIMMS-GL, start from Administration>Company Manager, then, click New. A screen should show up prompting you to introduce the company name, in our case GL Demo. The company name can contain up to 20 characters. If this is your first company, close the window asking for imports. If not, check mark your options, click Import, then follow the steps outlined in the Setup step-by-step screen. To move from screen to screen, click Next. Go to Modules>General Ledger>General Ledger again, and you will get to SIMMS General Ledger Setup Wizard.


4 From now on, please proceed with care, because these steps are crucial for the accuracy of the accounting information that you will obtain. Click Next, and you will be asked to choose the Chart of Accounts that better matches your needs. For demo purposes, we will be using the Service Company Simplified Chart of Accounts. Again, click Next, and you will be taken to another screen where you can see the Chart of Accounts you will be working with.
5 Please note the blue underlined section at the bottom of the page. By double clicking it, you can define accounts segments now, or, if this sounds a little too complicated for the moment, go forward and come back later to this task, through Accounts Segments menu. Defining Account Segments If you wish to establish segments for your accounts, please double click the blue underlined text now. Otherwise, you will be able to access the segments only after you define all your default accounts. How the Define Accounts Segments screen works: For every account, or just for some of them, you might realize that you need some subaccounts. Example:
6 For instance, if you are a toy retailer, you may have divided your store into more sections, depending on the children s ages: toys for Babies, toys for Toddlers, toys for Kids, 4-5 year-olds, etc. For each of these sections, you might have subsections: educational toys, exotic animal toys, summer fun toys, and travel time toys. For each of these subsections, you have toys from different brands. It will be useful if you could know the revenue that each of these toy categories generates, and inside of each category, which brand you sell more of. The Accounts Segments screen allows you to do just that. Each account number can have up to 30 numerical characters. Here is a possible structure of your income accounts: Account type Category Subcategory Brands Sales income Toys for kids 4 to 5 years old Educational Toys Binary Arts Creativity for Kids Educational Insight Felt Kids Leap Frog In order to do that, you need 4 segments, each 5, 5, 3, and 3 characters long. The GL is not yet open, but it will be as soon as we complete the information in the Default Accounts screen. Before that though, an important (but optional) step is to define Accounts Segments. To define account segments means that you have the possibility to break down a 30 characters long account number into as many subaccounts as you wish. From the drop down segments menu, choose 4. The length of the segments will show by default, but after you write the description, you can also change the segment length, according to your needs.

7 After you override the length and enter the description for each segment, the segment screen should show as follows: Save your work by clicking the small disk icon, and preview the work you have done. If everything is fine, click the Save button. It will take a little time, so be patient until the saving process is done, than you can click the Exit button. Going back to the Chart of Accounts screen, you will be able to enter the Account ID that you need. Type in a description, then click Save.


8 After you have finished defining your accounts segments, click Next, and you will see another screen asking you about the accounting period structure that you would like to use. Unless you have specific needs, monthly accounting periods are the most frequently used. Please make the selection you wish and then click Next.

9 The next screen will require the start date of your fiscal year and the first accounting period you will be entering data for. Please choose carefully, following the examples below. If you make a mistake, you will not be able to return to this screen unless you create your company again. If you made a mistake, go in into the Company Manager menu, choose delete, and then create a new company. The start date of your fiscal year can be the beginning of the year, or the beginning of the month of previous year, depending on your needs. If January 1 is the beginning of your current fiscal year, then choose 1 as first accounting period if the first month you wish to enter data for is January. If you would like to enter data for the month of May, choose accounting period 5. If your fiscal year starts in the previous year, October 1 for instance, choose beginning fiscal year October 1, 20, and as first accounting period choose number 10, if October is the first month you wish to enter data for. If beginning fiscal year is October 1, 20, and you wish to enter data beginning with February, choose accounting period 2, and so on. New default information has been added for Customers and Sales, as well as for Vendors and Purchases

10 From now on in GL, you can access only the Chart of Accounts by double-clicking any blue underlined account. If you access any other menu in GL, you will see the empty screen below. If you try to close it, a message warns that you have to complete all the information required in order to access the GL. The Finance Charges section has been added to allow them to be applied in Accounts Receivable (and/or given in Accounts Payable). Banking Access the General Ledger Banking screen by clicking Modules menu>general Ledger>Banking.


11 Click the Deposits button to access the Banking Deposit List screen: Click the New button to enter new bank deposit entries into the system, or click the View button to preview previouslymade deposits. Click the Bank Accounts button to access the Banking Accounts screen: Click the New button to enter new bank accounts into the system, or click the Edit button to edit accounts already entered in the system. Click the Transfer Funds button to access the Transfer Funds List screen:


12 Click the New button to create a new transfer of funds, or click the Edit button to edit fund transfers already entered in the system. Click the Checks button to access the Manual Check Entry screen: Click the New button to write a new check, or click the Open button to view checks already entered in the system. Click the Cash button to access the Cash Purchase List screen: Click the New button to add to the Cash Purchase list, or click the Edit button to alter cash purchases already entered in the system.

13 Click the Credit Cards button to access the Credit Card Charges/Credits List screen: Click the New button to add to the Credit Card Charges/Credits list, or click the Edit button to alter credit card charge purchases already entered in the system. Click the Reconcile button to access the Choose Banking Account screen: Select the account to be reconciled from the dropdown list, and then click the OK button to reconcile the account. Click the Reconcile Credit Card button to access the Choose Banking Account screen: Select the credit card account to be reconciled from the dropdown list, and then click the OK button to reconcile the account. Chart of Accounts The Chart of Accounts is the starting point of any accounting application, so please double-click any blue underlined account in the above screen and you will be taken there.


14 The Chart of Accounts screen allows you to create new accounts, edit the existing ones, delete the accounts you do not need, and save the changes made. You also can print the Chart of Accounts and when you have finished your work, simply close the screen. Creating New Accounts In order to create new accounts, click New. You will have to choose an account ID, account description, and an account type. Choosing an Account ID From the drop down menu, choose an account type, then choose a number within the range, according to the following chart: Account Type Range Assets

15 Liabilities Equity Income (Revenue) Cost of Sales Operating expenses Other income and expenses Enter the description of the account and make sure the account is active. The only time you would want an account be inactive is when you no longer want to use that account anymore, and choose another one that reflects better than the previous one your needs. At that time, you will make the old account inactive, and create a new one that will be active. NOTE: After you enter the data, the accounts and the data they contain cannot be deleted. Editing an Account If during the process of creating or adjusting the Chart of Accounts you noticed that you made a mistake, you can correct it anytime, by using the Edit function. Make sure you save your work. Please note: It is always a good idea to print the Chart of Accounts before you start entering data. That way, an accidental

16 little error can be easily corrected, without the tedious work of discovering an error in the middle of your work. Establishing the Default Accounts The Default Accounts are a vital part of SIMMS General Ledger. You have to establish them very carefully, because the accuracy of the information you will get depends on how accurately these accounts have been established. In order to enter the accounts in the Default Accounts screen, you have to double-click, one-by-one, each account in the screen above. You will be taken to the Chart of Accounts screen. When you find the left account, double-click it, and it will automatically show in the Default Screen. For the inventory section of your Default Accounts, you will have to establish to which account your revenue from sales will go, your inventory account, a cost of sales account and a freight account. The inventory section in the Default Accounts is connected with the Inventory menu of your GL program. For the RMA section, you have to establish an inventory RMA account and three accounts of Cost of Sales type: Cost of Sales Scrap, Cost of Sales Operation, Cost of Sales RMA. The RMA section is specific to SIMMS-GL program, and stands for Return Merchandise Authorization. NOTE: Even if your business is not a manufacturing one, you still have to introduce the information required; otherwise you will not be able to open the GL. These accounts have already been established in your Chart of Accounts you only have to double-click on them in order to have them in the default screen. The Customers and Sales section is connected with the Sales menu of your GL accounting program. You have to enter again the account where your sales revenue will go, an account where you will collect money on account (accounts receivable type), an account where you will collect cash from your sales, and an account that will collect the sales discounts you will be giving to your customers. The Vendors and Purchases section is connected with the Purchasing menu of the GL program. For this section, you will have to enter an inventory account, an account from which you will write checks for payments for your purchases
17 (accounts payable type), and an account from which you ll make cash payments. Also a Purchases Discounts account is required for collecting the purchase discounts that you will receive. The General Ledger section requires only a rounding account. This account is used to collect the corrections that the accountant might have to make in case some errors appear in the financial statements. Retained Earnings, an account of equity type, is commonly used in such cases. After you have entered all these accounts in the Default Accounts screen, click Save. Now you can access all the GL menus. Changing the Accounting Period Even if you chose the Accounting Period 1, and then decided to start doing accounting from the month of May, as long as you stay in the same fiscal year, you can change your accounting period by going to General Ledger>Change Accounting Period. While you are in that screen, select the current accounting period and then exit. You can now start entering transactions for the current month. NOTE: If you change the accounting periods, your beginning balances still have to reflect the previous accounting period s ending balances. Working with the GL Program Beginning Balances Screen To access the Beginning Balances screen, go to Modules>General Ledger>Chart of Accounts. Please notice the Beginning Balances arrow in the left corner. Click on the arrow and you will be taken to this screen.

18 From the drop down menu, choose the accounting period that you wish to enter data for. The beginning balances to be entered are the ending balances in your accounts for the previous accounting periods. If this is a new company for you and you did not need to do accounting yet, you should enter amounts for only the accounts that you know the values for, e.g. amounts for cash accounts and inventory (on the assets side), amounts to be paid (for the liabilities section), and capital amounts (for the equity section). Also, enter your expenses in the proper accounts, and revenues (if any). At the end of this section, you should have the debit amounts equal with the credit amounts. Assets and Expenses column should be interpreted as Debit. Liabilities, Income and Equity should be interpreted as Credit. You should save each entry you make. At the end, total amounts on the left side should equal total amounts on the left side, or, in other words, Debit should equal Credit. While you work in this screen, you can correct any amounts, any time, but you should go to the next step only if you have debit amounts and credit amounts equal. NOTE: It is always a good idea to print your Beginning Balances report.

19 As you can see, we entered the inventory as a total value. In order to enter detailed information about inventory, you need to go to Setup menu>categories (please see SIMMS Setup).

20 Sales Screen The Sales screen gathers all the information from your invoices in the Sales Journal and information about your cash sales in the Cash Receipts Journal. From this menu, you also have access to General Ledger, helping you to easily monitor the changes in your accounts. The Default accounts in this screen are the same that you chose in the main Default Accounts screen. How Invoices are Reflected in Your Sales Journal Anytime you invoice one of your customers, the transaction goes automatically through the Sales Journal, debiting Accounts Receivable for that specific customer, and crediting Inventory, Sales Taxes, (e.g. GST & PST), and Freight Expenses. If your customer pays on the spot, you can use the Quick Payment screen to receive the money. A cash transaction is automatically created for your Cash Receipts Journal. If the customer pays later, you can receive the payment through Accounts Receivable screen. Once the payment is made, the accounting entry is also created for your Cash Journal. Below is an example of an invoice for ABC School and the payment received for that invoice within the discount period:

21 Reversing an Invoice (CREDIT MEMO) In conformity with accounting standards and procedures, an invoice cannot be deleted; it only can be reversed. An invoice is reversed for two main reasons: either to correct a mistake or, more frequently, to give credit to a customer for returning all or some of the items s/he bought. An invoice is easily reversed. If after you clicking Save, you realize you do not need the invoice, just click Return and you can receive back one or more of the items. Click Save once you are finished. Please see the screen below:


22 The return is subsequently reflected in the Sales Journal, as shown below (follow the transaction for ABC School): Purchases Menu The Purchases Menu gathers all the information from your receipt of goods in the Purchases Journal, and the information about cash payments in the Cash Disbursements Journal. From this menu you also have access to General Ledger, helping you to easily monitor the changes in your accounts. The Default accounts in this screen are the same that you chose in the main Default Accounts screen.
 and Freight. If you pay on the spot, you can use Quick Payment screen.")
23 How Receipts of Goods reflect in your Purchase Journal Whenever you buy something from your vendors, the transaction goes automatically through the Purchases Journal, crediting Accounts Payable for that vendor and debiting Inventory, Sales Taxes (GST & PST, for example) and Freight. If you pay on the spot, you can use Quick Payment screen. A cash transaction is automatically created for your Cash Disbursements Journal. If you pay later, you can do so through Accounts Payable module. Once the payment is made, the accounting entry is also created for you in the Cash Disbursements Journal. Purchases Journal Cash Disbursements Journal

24 Reversing a Receipt of Goods (DEBIT MEMO) In conformity with accounting standards and procedures, a receipt cannot be deleted; it only can be reversed. A receipt is reversed for two main reasons: either to correct a mistake or, more frequently, to receive credit for the merchandise you bought and returned. The receipt of goods is easily reversed. If after you click Save you realize you do not want the Receipt of Goods, click Return and you can receive back either one or more items that you bought. Then click Save. Inventory Menu Click Modules menu>general Ledger>Inventory, and go to the next screen. The Inventory menu offers the possibility to work with item categories, inventory adjustments and kits, inventory items, RMAs and RTVs, (Returned Merchandise Authorizations and Returns to Vendors), and to generate reports about these activities.

25 Item Category This tab allows you to see the categories you created in the SIMMS main set-up menu, and also integrate new categories. As you can see, you can edit these categories in terms of sales, Inventory and Cost of Sales accounts. This gives you the capability to have different categories of items reflected in specific Sales, Inventory and Cost of Sales accounts. Inventory Adjustments and Kits


26 As the name of this screen shows, there are two screens that offer information in this window. INVENTORY ADJUSTMENTS WINDOW provides information about the items that you adjusted the quantity for, the adjustment date(s) and the name of the person who did the adjustment(s). KIT BUILDING WINDOW gives information related to quantity and cost of materials required to build a kit, cost of work necessary to assemble the kit, and the scrap value of kit (if disposed of). Inventory Items

27 The Inventory Items screen offers information about the items you have in your inventory and a history of sales for a certain item. Also the Edit feature allows you to have different items, other than main items of inventory, reflected in the specific sales, inventory and cost of sales accounts. RMA RTV RMA-RTV is a section specific to SIMMS-GL. The transactions for this section are entered through the Service / Return module. This screen allows you to see the transaction ID, item description, the RMA type, (please see Service / Return Manager for a list off all transactions possible, you also can see the date, and the Client or Vendor for which the repair of service has been performed. If you want to see the reports created through RMA-RTV section, go to Reports then click RMA Journal. The accounting entries work with the Inventory RMA account for the Assets side, and Cost of Sales accounts for the cost reworking, scrap, and operations. Budgeting You can assign budgeted spending limits to accounts configured in the G/L, helping you control spending. The following limits exist: o When you create P/Os, the funds will be reserved from the allotted budgeted amount for the affected G/L accounts utilized for items of course the item order cost will not exceed the pre-defined budgeted amount set for the G/L account. o Once you receive a P/O Invoice, the amounts are then removed from the allowed budgeted amount (reducing the

28 amount of budgeted funds available for the effected G/L accounts). The reserved amounts for the related P/O get released and the amounts show as spent in the Spent column of the related GL budget. o There is a grid available in budgeting to show what the available funds are at any given time for a specified GL account. o There is a way to transfer left-over budget amounts set for one G/L account to another G/L account, decreasing the amount available from one and increasing it in the other. o If P/Os are voided (deleted) without being received, the amount reserved in the budget for the related P/O is reversed. o If a P/O is edited then the amount reserved in the budget for the related P/O is reversed and then re-established with the new amounts saved with the adjusted P/O. o If a receipt of goods is completed along with a receipt of invoice without importing from a P/O, the amount on the receipt of invoice shows on the spent column of the budget related to the G/L accounts affected. Financial Reports The program provides the user with a wide variety of useful and detailed reports. Click the General Ledger>Financial Reports and you will see the selection bellow. Each of these reports can be printed for a specific day, month, or a specific time range. Also, you have access to Inventory Adjustments Journal, Kits Building Journal, RMA Journal and GL. General Journal Report After selecting the date range for the report, click the print button to view the results:

29 General Ledger Report After selecting the date range for the report, any desired account filters and whether to suppress any zero balances, click the Print button to view the results:

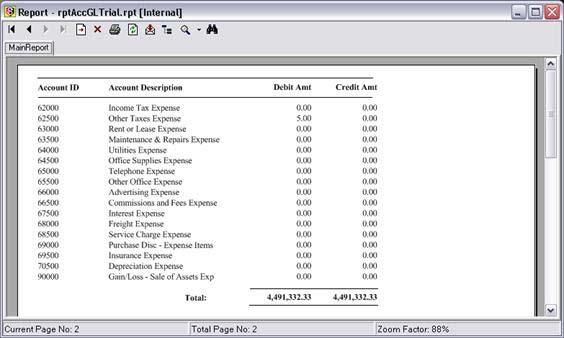
30 Trial Balance Report After selecting the date range for the report and whether to suppress any zero balances, click the Print button to view the results: Working Trial Balance Report After selecting the date range for the report and whether to suppress any zero balances, click the Print button to view the


31 results: Balance Sheet Report After selecting the date range for the report and whether to suppress any zero balances, click the Print button to view the results: Income Statement Report After selecting the date range for the report and whether to suppress any zero balances, click the Print button to view the results:


32 Income Statement Budget Variance Report After selecting the date range for the report and whether to suppress any zero balances, click the Print button to view the results: General Ledger Account Summary Report After selecting the date range for the report, any desired account filters and whether to suppress any zero balances, click the Print button to view the results:


33 Daily Transaction Register Report After selecting the date range for the report, click the Print button to view the results: Budget Report After selecting the date range for the report, any desired account filters and whether to suppress any zero balances, click the Print button to view the results. End of the Month Procedure

34 Any time you change the accounting period (you close one month and you are ready to start the new month), the revenues and expenses accounts will have their balance changed to zero, in order to be ready to accept the data for the new month, while the balance sheet accounts will be cumulative. The program does it automatically, so you only have to be careful when you change the accounting period from one month to another. End of Fiscal Year In order to close your fiscal year, please follow the five listed steps (seen below). Also, consider very carefully the warning message. Print all your necessary documents, then click the Done button. Tools Import from EasyPay Extracting the Information from EasyPay Generating the CSV File The CSV file (Comma-Separated Values) file from EasyPay is required for SIMMS to import the information. 1. Log into EasyPay. 2. From the Periodic menu, select General Ledger. 3. Select the GL button from the Easy Pay Main form. 4. From the Main menu, click Select GL then click AccPac for Windows.


35 5. From the General Ledger menu, select Edit Accounts. 6. For each department and each tab from the Edit GL Accounts form you must fill all account number columns with SIMMS GL accounts and then click the Apply button. In such case where you have the same information for two or more departments, you can use the Duplicate option. 7. From GL main menu, go to Create Entry screen, fill the information and click the OK button to generate the CSV file, which is necessary to import the data into SIMMS. NOTE: In case you wish to verify the setting(s), access the General Ledger/Print Entry screen Import CSV Data into the SIMMS General Ledger


36 1. From the SIMMS main screen, select the Modules menu>general Ledger>Tools>Import from EasyPay. 2. Click the Open EasyPay File ( CSV) button and select the CSV file just generated from EasyPay, then click the Open button.


37 3. Once you are satisfied with the accuracy of the process, then click the Import in General Journal button. NOTE: In the instance that there are blank GL accounts or Easy Pay GL accounts that do not have correspondents in SIMMS, a message will display and the import will be halted. This concludes the basic concepts and setup requirements of SIMMS General Ledger Module. Important SIMMS Software Contact Information Forrest Terrace, Abbotsford, BC V2S 1G7 Tel: Fax: Website: sales@kcsi.ca Sales Phone sales@kcsi.ca Support Phone support@kcsi.ca Fax Accounting Phone colleen@kcsi.ca