Proteus MMX Enhancements (3.7)
|
|
|
- Dorthy Wilkinson
- 5 years ago
- Views:
Transcription


1 Proteus MMX Enhancements (3.7)
2 Contents 1. Working Hours tab added in employee module... 2 Add Working Hours Labor Planner added in Personnel module Time Zone is removed from Users and added in Facilities... 6 How to Access Time Zone in Facilities Shift page is changed in Settings... 9 How Shift Based Scheduling Works PM Schedules added in Labor Load Balancing, under Work Orders...16 How to Access PM Schedules, Under Work Orders...16 How Labor Load Balancing Works...17 Explanation of (%) Value Contracted Vendor and Contracted Price columns added in Parts in Inventory module How to Access Contracted Vendor and Contracted Price Columns Default Employee tab added in Asset module...21 How to Access the Default Employee Tab...21 How the Default Employee Feature Works Tax Rate (%) field added in Requisition and Purchase Order...25 How to Access Tax Rate (%) in Requisitions...26 How to Access Tax Rate (%) in Purchase Orders...27 The Use of the Access Tax Rate (%) Field Show Parts from part master list checkbox added in Stockroom Parts lookup list in Requisitions and Purchase Orders...30 How to Access Show Parts from part master list Checkbox...30 How This Feature Works Profile Image added in Stockroom Parts...34 How to Access Profile Image in Stockroom Parts Contracted Vendor icon added in Vendor tab in Stockroom Parts...37 How to Access the Contracted Vendor Feature...37 How to Use the Contracted Vendor Feature Work Order Masters Template added in Work Orders module How Work Order Masters Template Works...43

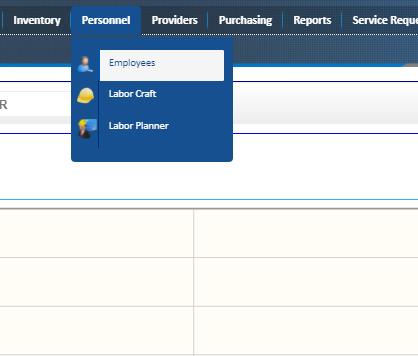
3 Enhanced Points in MMX Working Hours tab added in employee module To Access Working Hours: 1. Go to the Personnel module 2. Click on Employees, from the drop-down menu 3. Select an employee s record from the Navigator 4. Click the Edit icon 5. Click on the Working Hours tab (located next to the Attachments tab)
4


5 5 Add Working Hours: To Add Working Hours: 1. Toggle the days in which the employee works by clicking or un-clicking the checkboxes located to the left of the listed days. 2. Enter a Start Time and Stop Time for the selected days. You ll do this by clicking the clockicon, located to the right of the Start Time and Stop Time entry fields. 3. Once you ve entered the day(s), start time(s), and stop time(s), you ll click the Save icon.
 2.")
6 NOTE: You can view the total number of hours an employee is available for a given week by looking at the Total available hours per week box, located below. (*See arrow for reference, in the picture above) 2. Labor Planner added in Personnel module.


7 Labor Planner Module: 3. Time Zone is removed from Users and added in Facilities. Users:

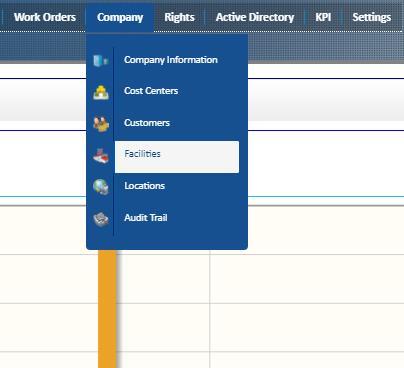
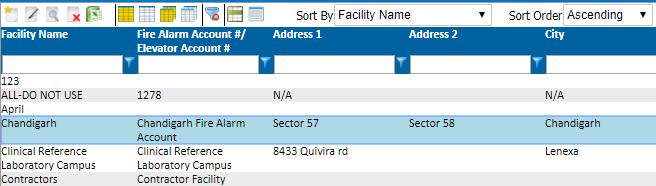
8 Facilities: How to Access Time Zone in Facilities: 1. Go to the Company module 2. Click on Facilities, from the drop-down menu 3. Select a facility record from the Navigator 4. Click the Edit icon 5. Locate the Time Zone field (located directly above the Notes field)
9


10 4. Shift page is changed in Settings. How Shift Based Scheduling Works: In Shift based scheduling, we maintain shifts for scheduler activation. Scheduler services would be activated in given shift time. Step1: Go to Settings >> Work Orders >> Shifts

11 Step 2 -- Add Shift: Click on Add button: Select any given shift or click on Add button to create your own shift for your facility.

12 Here you can give your shift a name, select a facility from the drop-down (we can select multiple facilities). Only selected facilities can use this shift. After giving the Start Time and Stop Time click on Save button. As we click on the Save button it ll give you an alert, telling you that the record was successfully submitted. Click the Close button.

13 Now select your shift from shift drop down. As we select shift from drop down, facility and shift time (Start Time and Stop Time) will populate in Read-Only mode.

 Add Shift Members: Click on Add button in shift")
14 You can modify/ delete your shift by selecting shift from the below screen and then clicking on Modify to edit the shift or Delete to remove the shift. (II) Add Shift Members: Click on Add button in shift members:

15 Here, you can add multiple shift members by selecting employees, then clicking on the Save button. After saving the selected members, the names of those members will populate in the Shift Members field. The number in the upper-right corner, displays the total number of members assigned to the shift.
 In the last step, you must create a Work Order Master, using the shift in which we want our scheduler active.")
16 We can delete shift members by clicking on Delete button after selecting them. Step3 -- Last Step: If Shift Scheduling setting is OFF, then it ll work like it did previously. Otherwise you must follow the steps below: (I) In the last step, you must create a Work Order Master, using the shift in which we want our scheduler active. (II) Add schedules, that schedule will be activated at shift Start Time on schedule type (daily/weekly/monthly/yearly).

17 5. PM Schedules added in Labor Load Balancing, under Work Orders. How to Access PM Schedules, Under Work Orders: 1. Go to the Work Orders module 2. Click on Labor Load Balancing, from the drop-down menu 1 2
18 How Labor Load Balancing Works: PM schedules are included in the Labor Load Balancing process, based upon their activation date. Load will be based upon the estimated hours for each task in which employees are assigned in the Work Order Master. Go to the Work Order module and select Labor Load Balancing. In above bar chart, green represents available time for the employee, after the time deductions have been considered. These values are taken from tasks, estimated hours in work orders, and the hours defined for each employee. Red represents committed time for the employee. The hours showing in the above screen is the estimated hours of the task that we have added in Task & Labor, at time of work order creation. Explanation of (%) Value: Employee s Working Hours = 10AM to 6PM (8 hours) Task Estimated Hours = 4 The Employee only worked 4 hours; so, the employee s consumption or (%) value is half of his working hour means (50%). Thus, the bar chart will be half red and half green. In layman s terms, green shows free time and red shows working time. For percentage value, it s a must that working hours associated with that employee are selected in Task & Labor at time of work order creation. This is because percentage value is calculated by the employee s working hours and is given a task estimated time. If the working hours are
 Click on employee image: As we click on an employee s image, all work orders associated with that employee will be shown. If it shows Job No., it means that it was created by a work order master.")
19 not entered, then bar will be green. (This is because the shift isn t associated with the employee.) Click on employee image: As we click on an employee s image, all work orders associated with that employee will be shown. If it shows Job No., it means that it was created by a work order master. For work order, Work Order No. will be displayed. We can easily drag a work order from the selected employee and drag it to another employee. The process of dragging and dropping the work order, will affect the bar chart. Click on bar: As we click on the bar, only that date s work order description will show.


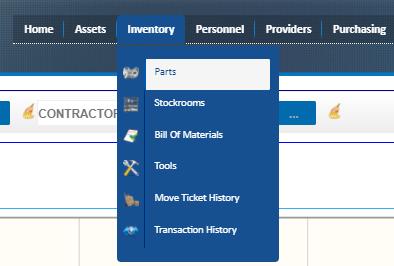
20 6. Contracted Vendor and Contracted Price columns added in Parts in Inventory module. How to Access Contracted Vendor and Contracted Price Columns: 1. Go to the Inventory module 2. Click on Parts, from the drop-down menu 3. Use the scroll bar at the bottom of the Navigator to scroll right. Contacted Vendor and Contacted Price are located at the end of the page, once you have scrolled as right far right as possible
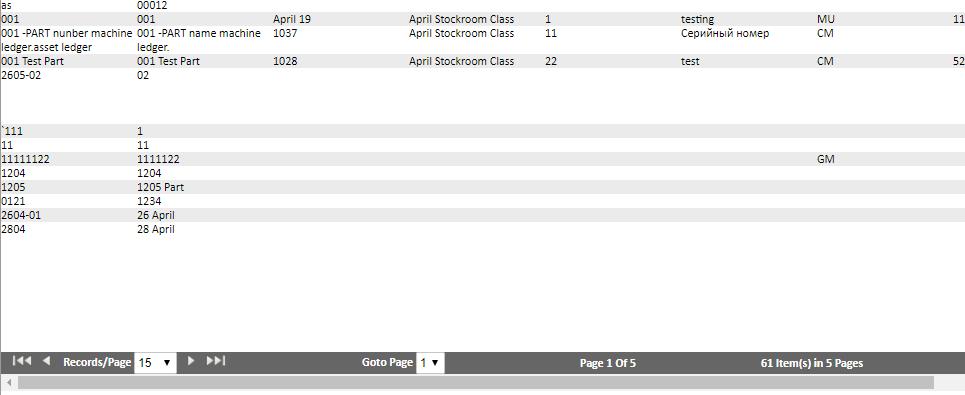
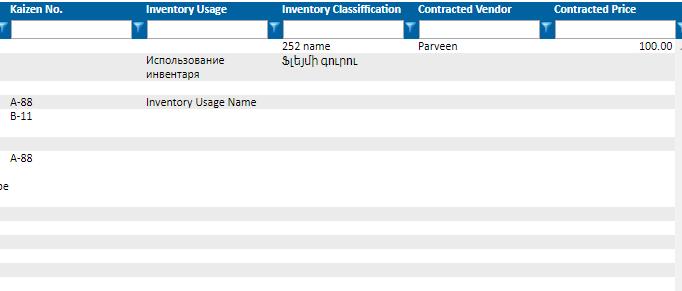
21 1 2 3


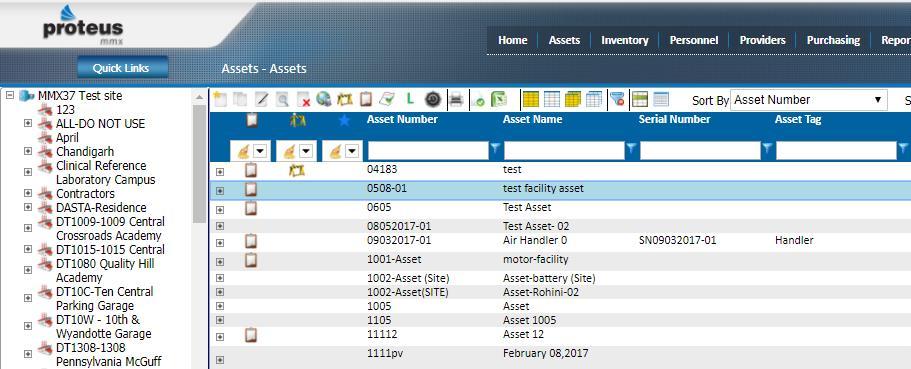
22 7. Default Employee tab added in Asset module. How to Access the Default Employee Tab: 1. Go to the Assets module 2. Click on Assets, from the drop-down menu 3. Select an asset record 4. Click the Edit icon 5. Click the Default Employees tab, located to the right, next to the BACnet tab 1 2
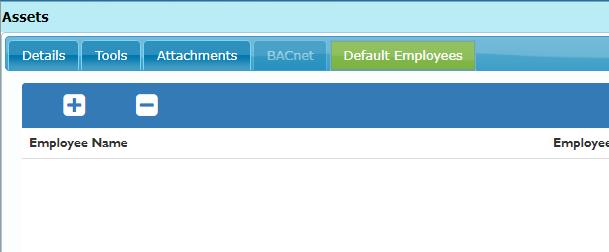
23 4 3 5


24 How the Default Employee Feature Works: Step 1. Go to the Assets module and click on Assets from the drop-down menu. Step 2. Create or Edit any asset and then go to the Default Employees tab. Step 3. Add or Delete employees by clicking on + or button.


25 As we click on + button, a window will populate with the employees that have labor crafts assigned to them. Only employees with labor crafts associated with them will be shown. Here we can select multiple employees, but there will be one default employee. The first selected employee from employee window will be the default employee and later you can change default employee by simply hovering mouse to that employee, here we can see Set As Default button, click on it, and the default employee is changed.
 as target and save it.")

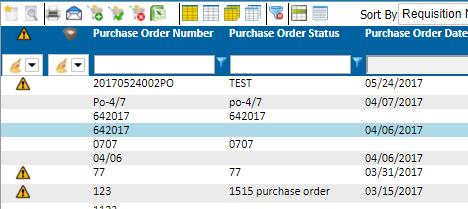
26 At time of work order creation, select an asset (that has default employee) as target and save it. Then the default employee will be associated automatically in the Task and Labor tab of that work order. 8. Tax Rate (%) field added in Requisition and Purchase Order.


27 How to Access Tax Rate (%) in Requisitions: 1. Go to the Purchasing module 2. Click on Requisitions from the drop-down menu 3. Select a requisition record 4. Click the Edit icon 5. Navigate to the bottom of the Details page to locate the Tax Rate (%) field (located above the Notes field.)
28 5 How to Access Tax Rate (%) in Purchase Orders: 1. Go to the Purchasing module 2. Click on Purchase Orders from the drop-down menu 3. Select a purchase order record 4. Click the View icon 5. Navigate to the bottom of the Details page to locate the Tax Rate (%) field (Located above the Notes field)
29
 at Requisition and Purchase Order Details page, we don t have to manually enter tax rate at stockroom part")
30 5 The Use of the Access Tax Rate (%) Field: Tax Rate (%) is the stockroom part tax rate. If we select Tax Rate (%) at Requisition and Purchase Order Details page, we don t have to manually enter tax rate at stockroom part addition time in requisition and purchase order.
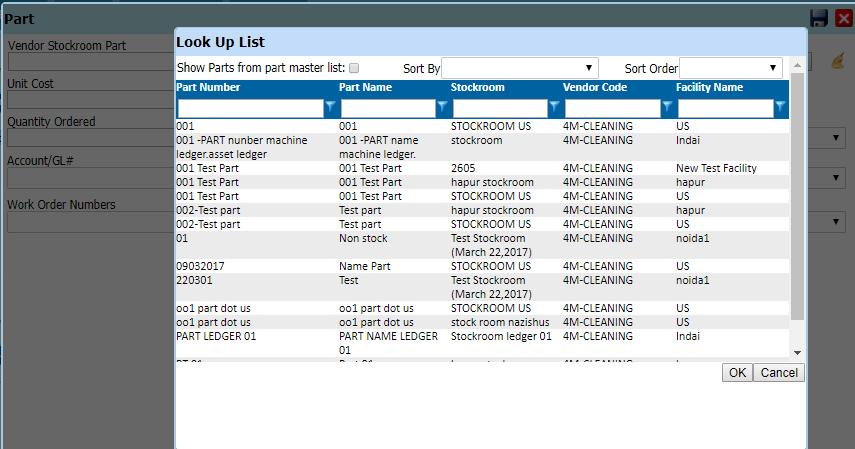
31 9. Show Parts from part master list checkbox added in Stockroom Parts lookup list in Requisitions and Purchase Orders. How to Access Show Parts from part master list Checkbox: 1. Go to the Purchasing module 2. Click on Requisitions from the drop-down menu 3. Select a requisition record 4. Click the Edit icon 5. Click the Parts tab, next to the Details tab 6. Click the Add icon 7. Click the icon (next to the Clear icon) 8. Locate the Show Parts from part master list checkbox (located at the top of the Look Up List)

32

33 8 7
34 How This Feature Works: Suppose there are no parts in the stockroom of selected vendor in Requisitions and Purchase Orders. So, there is no need to go to the stockroom and add a vendor and parts. We can simply add the part by clicking on the checkbox. As we click on the checkbox, a window will populate, opting you to select a stockroom. After selecting the stockroom click on the OK button, then all parts will be shown in lookup list.


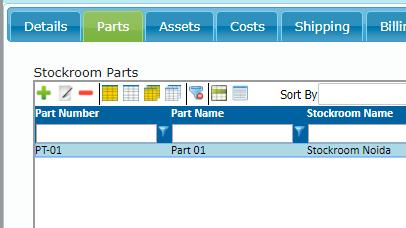
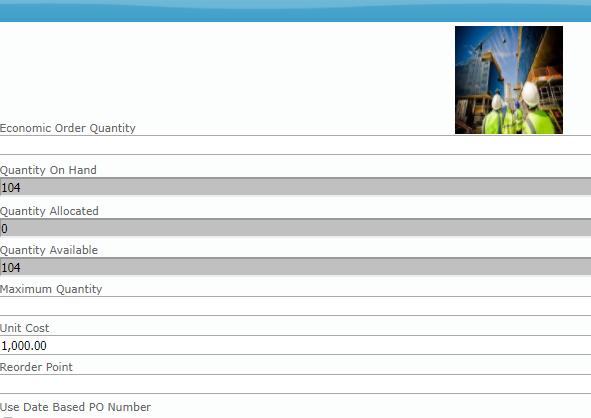
35 Select the part and then save it. The selected part here will be shown in association with the selected stockroom 10. Profile Image added in Stockroom Parts. (Read-Only Mode)


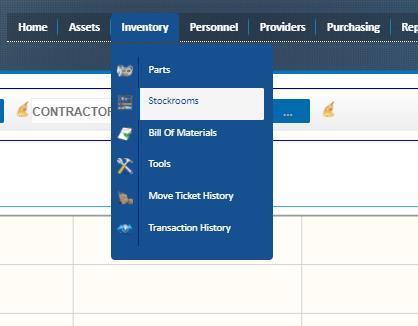
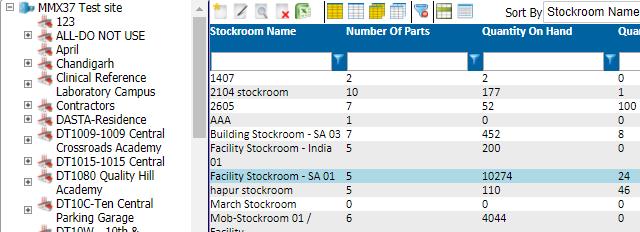
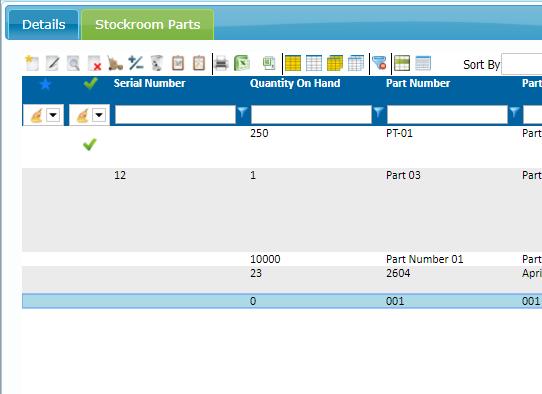
36 How to Access Profile Image in Stockroom Parts: 1. Go to the Inventory module 2. Click on Stockrooms from the drop-down menu 3. Select a stockroom record 4. Click the Edit icon 5. Click the Stockroom Parts tab, next to the Details tab 6. Select a stockroom part record 7. Click the Edit icon 8. Navigate to the Profile Image field (located furthest right, above the Economic Order Quantity field)
37
38 11. Contracted Vendor icon added in Vendor tab in Stockroom Parts. How to Access the Contracted Vendor Feature: 1. Go to the Inventory module 2. Click on Stockrooms from the drop-down menu 3. Select a stockroom record 4. Click the Edit icon 5. Click on the Stockroom Parts tab, next to the Details tab 6. Select a stockroom part record 7. Click the Edit icon 8. Click the Vendors tab, in-between the Details and Attachments tabs
39
40


41 How to Use the Contracted Vendor Feature: Step 1. Go to Inventory >> Parts Step 2. Create Part and give Contracted Vendor and Contracted Price value. Save the part once you ve entered those values.


42 Step 3. Go to Inventory >> Stockrooms Step 4. Create stockroom and go to Stockroom Parts tab. Step 5. Click on New icon in Stockroom Parts.
43 Step 6. Select Part that has the Contracted Vendor icon. Step 7. At last, go to the next tab Vendors tab. And here we can see contracted vendor with the added icon. 12. Work Order Masters Template added in Work Orders module.

44 How Work Order Masters Template Works: Step 1. Go to Work order masters template. Work Orders >> Work Order Masters Template Step 2. Click on the Create icon to create a work order masters template.


45 Step 3. Fill out the required details and select a facility, more than 1. Once you ve completed filling out those details, save it. Step 4. Select the created work order masters template and click the Copy icon, a window will open, opting you to add the target. It ll show only those facilities you have selected at the time of work order master template creation time. Select the target, then save it.

46 Step 5. Go to the work order master and search for the job number that you have given in the work order masters template at creation time. NOTE: - If we update work order master template then work order master will be overwritten but any change in work order master will not affect work order master template. It s required to manage duplicity in work order master. Ex: - Work order master template and work order master created are the same (suppose both have part P1 only). Go to work order master and add part P2. Now work order master template has only part P1, but the work order master has two parts, P1 and P2. Go to work order master template and add part P2. This P2 must reflect in work order master but work order master has already part P2. So, you ll overwrite the work order master to manage duplicity. NOTE: - In this module, to reflect changes in other module (Work Order Master) clicking on SAVE is required
 If a user selects the value, 'IDENTIFIED THROUGH")

47 12. for a specific customer 'Customer 1' only. (CUSTOMER ABC) If a user selects the value, 'IDENTIFIED THROUGH BREAKDOWN', in the 'MAINTENANCE CODE' dropdown of the Work Order Page. Then the following 3 fields will become mandatory: ACTUAL DOWNTIME ESTIMATED DOWNTIME USER DEFINED 21