JBS Protein Crystallization Starter Kit
|
|
|
- Mae Atkins
- 5 years ago
- Views:
Transcription

1 Cat. No. CS-401EN Amount 1 Kit For in vitro use only Quality guaranteed for 12 months Store at 4 C Introduction and Theory of Crystallization There are currently two main methods for determining the three-dimensional structure of a protein: Nuclear Magnetic Resonance (NMR) Spectroscopy and X-ray crystallography. The NMR method is able to resolve the atomic structure of proteins with an upper molecular weight limit of approximately Da (25 kda, or approximately 220 amino acids), whereas the X-ray method is more suitable for determining the structure of larger proteins or macromolecular complexes. The pioneering studies on the X-ray crystal structures of myoglobin (1950) and hemoglobin (1955) were honored with the Nobel Prize in Chemistry in This recognition not only underscored the importance of X-ray crystallography but also signalled the emergence of structural biology as an essential field in the life sciences. The first step in the determination of an X-ray crystal structure, which is often also the most difficult step, is the growth of sufficiently large protein crystals. A crystal is a three-dimensional periodic arrangement of building blocks; in our case, these building blocks are protein molecules. How does one manage to grow crystals from such complicated molecules like proteins? In order to arrive at a crystalline form starting from a dissolved form, the solubility of the protein molecules must be reduced. As a general rule, reducing the solubility of a protein solution will result in the formation of an amorphous protein precipitate. However, if the appropriate conditions are selected so that complementary patches are present on the surfaces of adjacent protein molecules in solution, specific attractive interactions can occur between the protein molecules. If these interactions are also geometrically favorable, this can lead to protein crystallization. Fig. 1: Schematic phase diagram of a protein precipitant mixture The process of crystallization can be differentiated into two steps: (1) the nucleation process, and (2) crystal growth. With correctly selected conditions, crystal nucleation and growth can occur within the supersaturated regions of the phase diagram. (see Figure 1). As can be implied from the Figure 1, crystallization requires the formation of a supersaturated protein-precipitant solution, i.e. a solution which contains more protein molecules than would dissolve under normal conditions. Unfortunately, one needs a higher degree of supersaturation for nucleation as for growth, and therefore the different processes of crystal nucleation and growth are often difficult to individually control. The nucleation range is also called the labile zone, while the growth range is known as the metastable zone. For crystal nucleation to occur, the experimenter must push the protein solution into the labile zone, which is also the region where fast growth of crystal nuclei occurs. Herein lies the danger: maintaining the protein solution within the labile zone for too long will result in rapid growth of too many crystal nuclei and produce an excess of small crystals. Since one is interested in obtaining large protein crystals (ca. 0.5 mm in length), it's important that not too many nuclei are formed. This means that for a successful experiment, the protein/precipitant mixture must approach the nucleation zone very slowly so that the developing nuclei have enough time to grow. Page 1 of 7 Last update: December 04, 2012
2 The transition from a stable solution to a supersaturated solution can be achieved by adjusting the position of the protein-precipitant mixture in the example phase diagram. This can be achieved by increasing either the concentration of the protein or the precipitant (vertical and horizontal axes in Figure 1). The physical process of causing a change in concentration can be carried out through dialysis or diffusion. Both are characterized by the transport of material. The method of vapor diffusion is particularly suitable for protein crystallization. The experimental setup for a typical vapor diffusion experiment is illustrated in Figure 2. This particular setup is also known as the hanging drop method. The protein solution is located within a drop hanging on the underside of a microscope cover slip. The drop size can vary from 0.5 µl up to approximately 20 µl. The reservoir solution (ca. 1 ml), which is located beneath the hanging drop, contains a high concentration of precipitant and thus has a lower vapor pressure than the protein solution. Over the course of time, water from the drop diffuses as water vapor into the reservoir solution. This raises the concentration of the protein and precipitant in the drop. With the correctly chosen conditions, crystallization of the protein will occur over the course of days or weeks. In principle, one therefore uses a system (drop plus reservoir) in which thermodynamic equilibrium is slowly adjusted over time. Which Materials are Useful as Precipitants? In principle any material which has an influence on the solubility of the protein can be used as a precipitant, provided that a high concentration of the precipitant does not denature the protein. One differentiates the different precipitants which are often used in protein crystallization according to the effect they have on the solution. Commonly used precipitants include salts, organic polymers, alcohols, and occasionally pure water. Salts such as (NH 4) 2SO 4, NaCl, LiCl, KH 2PO 4, etc., change the ionic strength of the solution. The solubility of proteins as a function of ionic strength is shown in Figure 3. Fig. 3: Dependence of the solubility (S) on the ionic strength (I) Fig. 2: The hanging-drop method The zone to the left of the protein solubility maximum is the 'salting-in' zone, and to the right is the 'saltingout' zone. Solubility increases within the salting-in range due to the elevation of the dielectric constant of the solvent. This results in the charges on the protein surface interacting better with the environment. Within the salting-out range the solubility is reduced again because the charges of the precipitant compete for water molecules with the charges on the protein surface, thereby effectively lowering the overall hydration state of the protein. Page 2 of 7 Last update: December 04, 2012
3 Organic precipitants such as ethanol, methanol, propanol, MPD (2-methyl-2,4-pentanediol) or acetonitrile reduce protein solubility by lowering the dielectric constant of the solvent. Organic polymers work the same way, such as PEGs (polyethyleneglycol), which are available in different molecular weights from 400 to Da. Another important parameter which affects protein solubility is the ph-value of the solution. As a general rule, solubility is lowest at the protein's isoelectric point (IEP), since at the IEP the protein carries a net charge of zero. Due to the enormous number of possible parameters that can affect crystallization, and because of the relatively small quantity of protein which is usually available, it is practically unfeasible to test all parameter combinations over their entire range. It is therefore important to develop a strategy to arrive at your goal as quickly as possible and without using too much material. Characteristics of Protein Crystals Protein crystals are built up in principally the same manner as crystals of small molecules or salt. The same rules of molecular packing and symmetry apply, however there are also some fundamental differences. These differences extend to mechanical and optical characteristics of crystals as well as composition. Protein crystals are very soft and generally contain between 30% and 70% water, most of which is relatively unordered within the crystal. The integrity of protein crystals is maintained by interactions between the individual protein molecules, and the remaining space within the crystal consists of large cavities containing water and/or buffer molecules. Consequently, the protein molecules within the crystal exist in a quasi natural, i.e. aqueous, environment. The native structure (the proper folding of the protein molecule which essentially confers its function or activity) remains, and can often be demonstrated by carrying out enzymatic activity tests on the protein in the crystalline form. In some cases the crystalline form is even a natural storage form, such as in the case of insulin. The The Jena Bioscience Protein Crystallization Starter Kit contains all the materials necessary to explore the nucleation and crystal growth of an example protein (lysozyme from hen egg-white) using the hanging drop vapor diffusion method. On the one hand the ph value is changed in small steps, while on the other hand the concentration of the precipitant (NaCl) is gradually varied. The experiment is set up in a grid organization to allow direct visualization of the effects of the two variables on the magnitude of nucleation, the crystal morphology (shape) and final crystal size. Moreover, the kit contains all the material to crystallize lysozyme using the 'Batch Method'. In this method precipitant solution and protein solution are mixed together directly, and protein crystals grow in the absence of vapor diffusion or a concentration equilibrium. Kit Components: well SuperClear TM plates for hanging-drop crystallization 2. 1 syringe with 5 ml silicone grease to seal the plates cover slides for hanging-drop crystallization 4. 1 microscope slide ml of 20% (m/v) NaCl solution 6. 3 ml each of 2 Na-acetate buffer ph 4.0, 4.4, 4.8 and lysozyme solution (20 mg/ml) in water, 8. 1 ml precipitant solution for batch-crystallization (30% (m/v) PEG 5000-MME, 1 M NaCl, Na-acetate ph 4.4) Additional Required Material not Included in the Kit: 1. Eppendorf pipettes or similar, with the possibility to pipette volumes of 1-2. Accompanying pipette tips 3. Distilled or deionized water 4. Tweezers 5. Temperature-controlled room (20 22 C) 6. Microscope (50 100X magnification) to observe the crystals Page 3 of 7 Last update: December 04, 2012
4 Hanging-Drop Experimental Protocol In the hanging-drop experiment (see Figure 2), lysozyme is crystallized as the diluted protein/precipitant drop is equilibrated against the precipitant solution in the reservoir within a sealed crystallization plate. For this experiment a Naacetate/NaCl system is used, whereby one can visualize the dependence of protein crystallization on the ph value of the buffer and the concentration of NaCl. A ph range of is tested in combination with a NaCl concentration of 4-9%. Running the Experiment: 1. Grease the crystallization plates: using the enclosed syringe, apply silicone grease evenly to the upper surface of the circular edges around the individual reservoirs. Aim for a smooth and even application, and try to avoid applying blobs of grease to the edge or pulling threads of the silicone across the reservoir opening. 2. Pipette the reservoir solution according to the accompanying pipetting scheme (Figure 4): the total volume per reservoir amounts to 1 ml, and the final buffer concentration after mixing with precipitant and water is. Note: before pipetting, ensure that the crystallization plate is correctly oriented by checking that the row (A-D) and column (1-6) identifiers are rightside up. 3. Pipetting the crystallization drop: pipette 1 µl protein solution and 1 µl reservoir solution onto the round glass cover slip. Pipette each row (A-D) separately. First apply the drop of protein solution to the center of the cover slide. Subsequently, carefully add 1 µl of the reservoir solution to each drop. The opening of the pipette tip is carefully placed on the surface of the protein drop and the reservoir solution is squeezed out without forming bubbles in the drop. The pipette tip must be changed after each drop to avoid cross contaminating the mixtures. 4. Mounting the cover slides: with tweezers, each cover slide is inverted and gently placed over the corresponding reservoir so that the hanging drop is positioned over the center of the reservoir (see Figure 2). Now press down on each cover slide lightly with your fingers (or other soft object) so that the silicone grease forms a complete hermetic seal and isolates the interior reservoir chamber. Store the prepared crystallization plates in a suitable area with the temperature remaining as constant as possible (20-22 C). It is recommended to remove the plate cover when observing the drops under the microscope. Caution should be exercised when adjusting the microscope objective so as not to get it contaminated with grease. Make sure to observe the entire depth of the protein droplet under the microscope. Polarized light can also be applied in order to distinguish between amorphous precipitate and crystalline material, since crystals are able to polarize the transmitted light. Figure 5 displays an overview of the crystallization drops under the microscope (40 x magnifications) after 20 hours. The coordinate numbering scheme (A-D, 1-6) corresponds to the coordinate system on the crystallization plate. It can be clearly seen that the number of crystals rises with increasing NaCl concentration. An optimum of crystal quality is reached at a salt concentration slightly lower than the maximum on the grid, according to the phase diagram shown in Figure 1 (see the relationship between nuclei formation and crystal growth in the introduction of this manual). Also note that nuclei formation decreases with rising ph value, which expresses itself as a decrease in the number of crystals with increasing ph. Batch-Method Experimental Protocol The batch-method has a similar pipetting strategy as the hanging-drop method, in that a drop of the precipitant solution and a drop of protein solution are mixed together on a cover slip. However in the batch experiment, the composition of the precipitant solution is optimized in such a manner that the crystallization of the protein begins immediately. After approximately 20 minutes, the first small crystals can be seen under the microscope, and rapidly grow bigger over the next minutes. Crystals can be grown relatively fast in this way compared to the hangingdrop method. Page 4 of 7 Last update: December 04, 2012
5 Running the Experiment: 1. Pipetting the precipitant solution: pipette 4 µl of the batch precipitant solution onto the microscope slide. 2. Pipetting the protein solution: pipette 2 µl of protein solution onto the precipitant solution drop. Now observe the drop under the microscope. The precipitant/protein volume ratio can also be varied, which will lead to a different speed of crystal growth and overall quantity of crystals. Acknowledgements We thank Dr. Manfred Weiss for the original idea and the assistance in organizing this kit. Large portions of this manual are based on experimental instructions from Dr. Weiss. Copyright All figures in this manual are copyright Dr. Manfred S. Weiss. All rights to the figures remain with the owner. Duplication of this manual, in whole or in part, is prohibited without express written permission of Jena Bioscience GmbH. Page 5 of 7 Last update: December 04, 2012

6 Final concentration 20 % NaCl 4 % 5 % 6 % 7 % 8 % 9 % ph Sodium Acetate ph 4.4 ph 4.8 ph % NaCl 2 Na-Acetate distilled water Fig. 4: Pipetting scheme for the hanging-drop experiment Page 6 of 7 Last update: December 04, 2012


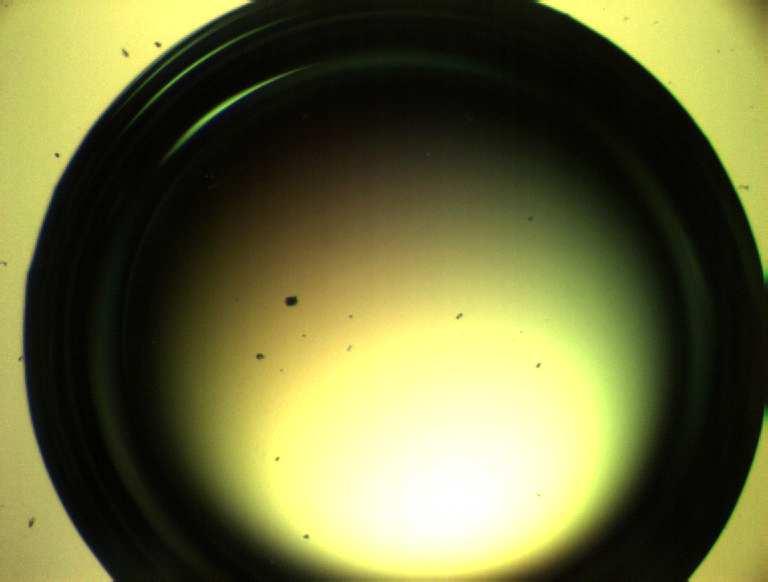
7 A B C D Fig. 5: Appearance of the protein droplets in the hanging-drop experiment after 20 hours (40x magnification) Page 7 of 7 Last update: December 04, 2012