Wall Cladding Installation Guide. v
|
|
|
- Aubrie Hood
- 5 years ago
- Views:
Transcription

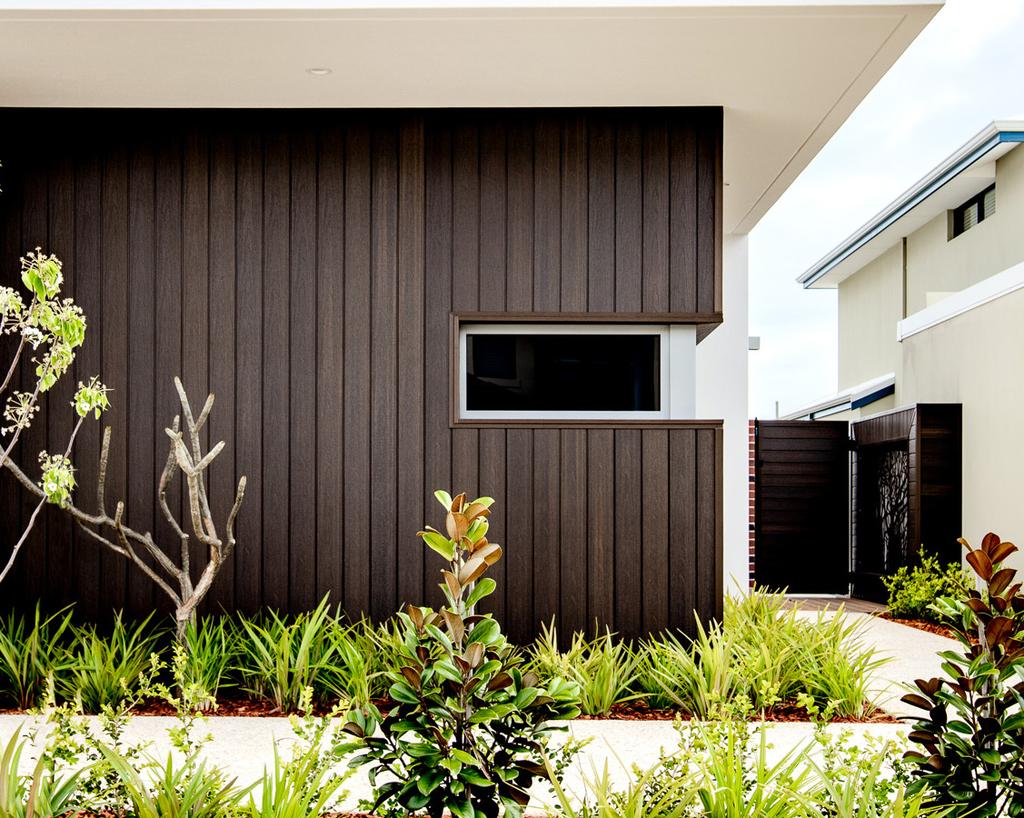
1 Wall Cladding Installation Guide v
2 IMPORTANT: Read All Sections Before You Start For the most up to date information, please visit our Prior to installing any composite cladding system, it is recommended that you check with local building codes for any special requirements or restrictions. The diagrams and instructions outlined in this guide are for illustration purposes only and are not meant or implied to replace a licensed professional. Any construction or use of NewTechWood must be in accordance with all local zoning and/or building codes. The consumer assumes all risks and liability associated with the construction and use of this product. Safety When dealing with any type of construction project, it is necessary to wear appropriate safety equipment to avoid any risk of injuries. NewTechWood recommends, but is not limited to the following safety equipment, when handling, cutting, and installing NewTechWood: gloves, a respiratory protection, long sleeves, pants, and safety glasses. Tools Standard woodworking tools may be used. It is recommended that all blades have a carbide tip. Standard stainless steel or acceptable coated deck screws and nails are recommended. Environment A clean, smooth, flat, and strong surface is needed to install NewTechWood s products correctly. Please check with local building codes before ever installing any type of cladding. If installation does not occur immediately, NewTechWood s products need to be put on a flat surface at all times. Never ever should it be put on a surface that is NOT flat. Planning Plan a layout for your cladding before starting it to ensure the best possible looking cladding for your project. Building codes and zoning ordinances generally apply to permanent structures, meaning anything that is anchored to the ground or attached to the house. So nearly every kind of cladding requires permits and inspections from a local building department. We recommend drawing out a site plan of your proposed project that you intend to do to minimize errors and make your perfect wall cladding. Construction NewTechWood UltraShield is NOT intended for use as columns, support posts, beams, joist stringers or other primary load-bearing members. NewTechWood must be supported by a code-compliant substructure. While NewTechWood products are great for retrofits, NewTechWood s products CANNOT be installed on existing cladding boards. Static Static can also be more prevalent in areas that are of higher altitude because the humidity is lower. For these areas, be careful of using conducive objects such as metal railing and chairs as static shocks might occur more often. A potential way to lower the amount of static shocks occurring is to apply Staticide Wall Cladding Installation Guide / v
3 ( on your deck or use anti-static mats before doorways. NewTechWood s products have been tested against EN Assessment of Static Electrical Propensity and have received values under the maximum standard of 2kV. Ventilation NewTechWood products CANNOT be directly installed onto a flat surface. It must be installed onto a substructure, so there is adequate and unobstructed air flow under the cladding to prevent excessive water absorption. A minimum of 25 mm (1 inch) of continuous net free area under the cladding surface is required for adequate ventilation on all cladding, so air can circulate between adjacent members to promote drainage and drying. Heat and Fire Excessive heat on the surface of NewTechWood products from external sources such as but not limited to fire or reflection of sunlight from energy efficient window products. Low-emissivity (Low-E) glass can potentially harm NewTechWood products. Low-E glass is designed to prevent passive heat gain within a structure and can cause unusual heat build-up on exterior surfaces. This extreme elevation of surface temperatures, which exceeds that of normal exposure, can possibly cause NewTechWood products to melt, sag, warp, discolor, increase expansion/contraction, and accelerate weathering. Current or potential NewTechWood customers that have concerns about possible damage by Low-E glass should contact the manufacturer of the product, which contains Low-E glass for a solution to reduce or eliminate the effects of reflected sunlight. Fasteners When fastening NewTechWood s products all screws that are face fastened should always be driven in at a 90 degree angle to the cladding surface. Toe nailing/screwing should never be done to the products. An extra joist should be added if a 90 degree angle cannot be driven into the board. All fasteners should be on their own independent joists, when two boards ends meet each other there must be a sister joist. The end of each board must sit on its own joist. Use white chalk, straight boards, or string lines as templates for straight lines. NEVER USE COLORED CHALK. Colored chalk will permanently stain NewTechWood s products and are highly not recommended. All nails/screws that are face fixed should always be stainless steel. Depending on the screws that you use when face fixing, there could be potential bulging or mushrooming. It is recommended to take care of these mushrooms/bulges by taking a rubber mallet and patting them down to give your cladding a better look. When choosing which screws/nails to use always check first with your local home centers and hardware stores to see if they have screws that are engineered specifically for composite wood. These screws/ nails will always work and give NewTechWood s products the best looking outcome, using other screws/ nails that are not recommended for composite could potentially damage/harm the cladding. If you are unsure which screw/nail to use, contact your manufacturer for more information. Wall Cladding Installation Guide / v


4 Wall Cladding Parts Product Purpose Part AW-02 Used for the installation of the first board AW-08 Used at every joist to fix each board to the joist T-7 Used on the last wall cladding board US09 Wall Cladding Board (can be used in place of US30, US31) US44 F-Trim, used at the windows US45 I-Trim, used if there is a break between two boards to cover up the gap US46 Outside Corner Trim, used on the outside corners US47 Inside Corner Trim, used on the inside corners Wall Cladding Installation Guide / v

5 Wall Cladding Screws Product Purpose Part *M3 x 12 SS304 Used when locking the board and installing into wood joists *M4 x 13 SS410 Used when locking the board, installing into metal joists, and installing AW-08 *M4 x 80** SS304 **depends on the thickness of your joists Used to install the joist to the wall *Note: All screws are based on our recommendation and if the installation requires something different than what is shown, a professional should be consulted before installing. The following installation guide will use the above screw sizes. Wall Cladding Installation Guide / v
 from center to center. Extra care is required in order to provide sufficient joisting in and around obstacles such as windows, fascia s, soffits, guttering, ventilation points etc.")
6 Under Construction We recommend for the under construction aluminum or pressure treated wood joists. Each cladding board needs to be supported by a joist NO MORE than 500 mm (1.64 feet) from center to center. Extra care is required in order to provide sufficient joisting in and around obstacles such as windows, fascia s, soffits, guttering, ventilation points etc. Below is an example of the layers that would occur in a typical installation, but a licensed professional should always be consulted prior to any installation. Insulation Brick Joist Breathable Membrane NewTechWood UltraShield Cladding Wall Cladding Installation Guide / v

7 Joist Installation A building professional should be consulted regarding vapor barriers and insulation for your project. Where a vapor barrier is to be used, it should be a breathable type and must be positioned behind the joists to allow the cladding a minimum 25 mm airflow. Wood joists should be fixed into position at 500 mm centers using a suitable A4 Stainless Steel Countersunk Wood/Masonry screw. All joists need to be flat and leveled against the wall surface use shims if necessary. Joist 500 mm 500 mm Joist Horizontal Installation Vertical Installation Wall Cladding Installation Guide / v

8 Locking the Wall Cladding Board Every AW-08 clip comes with a separate hole in the case there is a need to lock the board. The wall cladding boards will expand and contract and to take care of this movement, we must lock the board in one position and then allow the board to expand and contract readily in the other direction. You can see how we lock the board in Diagram 1, 2, and 3. Note: DO NOT LOCK EVERY BOARD. General rule of thumb is every board will only need one locking/ fixation point. Note: We recommend using the I Trim if you need to butt joint more than two boards together. Locking Expansion and Contraction DIAGRAM 1 DIAGRAM 2 Locking Expansion and Contraction DIAGRAM 3 Wall Cladding Installation Guide / v


9 Framing The frame needs to be completely level before installing any wall cladding boards. Note: Adequate spacing in the joists is required to keep the cladding boards from bending. Please review page 6 of this installation guide to see what spacing is required. The wall as shown in Diagram 4 will be installed to replicate different scenarios potentially occurring when installing the wall cladding. DIAGRAM 6 DIAGRAM 4 1 First start by fixing the joist onto the wall you plan to install on. DIAGRAM 5 2 Next, the span needs to be measured for the next joist. Please review page 6 for the maximum span allowed from the center of center of each joist. Diagram 7 shows the final installation of the first joist. DIAGRAM 7 Wall Cladding Installation Guide / v


10 Inside Corner Trim 1 The inside corner will be installed as shown in Diagram 8 by first pre drilling and then fixing with screws. DIAGRAM 9 Starting Strip 1 The starting strip will now be installed on the bottom of the joists as shown in Diagram 10 by first pre drilling into the AW-02 and then fixing with screws. 2 Repeat step 1 and install the rest of the starting strip onto the rest of the joists. The finished starting strip across the joists can be see in Diagram 10. DIAGRAM 8 Diagram 9 is an above cross section view of the inside corner after installation. The inside corner was first installed onto the joists and then the boards were slotted into both openings when installed. DIAGRAM 10 Wall Cladding Installation Guide / v


11 Wall Cladding Board 1 Take a wall cladding board and place the side with the lip down as shown in Diagram When you are on the last board of the wall cladding you will need to first install T-7. The T-7 will be installed onto every joist first and then the wall cladding board will be installed like normal as shown in Diagram 13. Note: The T-7 is used as a place holder for the last board, so that the board will not slant. DIAGRAM 11 2 Place the AW-08 on the board and install with screws as shown in Diagram 12. Please review page 7 of this installation guide on how to lock the board with AW-08. Note: A gapping of at least 10 mm needs to be left at the bottom of the ground and the lip of the board to allow for expansion and contraction and ventilation. DIAGRAM 13 DIAGRAM 12 Wall Cladding Installation Guide / v


12 4 After installing the last board, the wall cladding should look like Diagram 14. Outside Corner Installation 1 Next, take the outside corner and fix it to the side of the wall cladding that is open as shown in Diagram 15. DIAGRAM 14 DIAGRAM 15 Wall Cladding Installation Guide / v


13 2 Fix the outside corner by screwing on the opposite face of the outside corner. Note: Always pre-drill before screwing unless using composite screws designed for non pre-drilling. The distance between each screw should be no more than 300 mm center to center. DIAGRAM 17 Wall Cladding Board 1 Now you are ready to install the other side of the wall as Diagram 18. Repeat steps 1-2 of starting strip on page 9 of this installation guide. DIAGRAM 16 DIAGRAM 18 Diagram 17 is an above cross section view of the outside corner after installation. The outside was installed after the wall cladding was installed on one of the walls. Then, the outside corner was pushed into the opened side of the wall cladding and screw fixed from the other side. 2 Then, repeat steps 1-3 of wall cladding board on page 10 of this installation guide. Continue to the top for a final finish as shown in Diagram 20. Wall Cladding Installation Guide / v


14 F Trim Installation 1 An F trim can now be used to finish off the open side of this wall cladding as shown in Diagram 21 and 22. DIAGRAM 19 Note: Always pre-drill before screwing unless using composite screws designed for non pre-drilling. The distance between each screw should be no more than 300 mm center to center. DIAGRAM 20 DIAGRAM 21 Wall Cladding Installation Guide / v


15 DIAGRAM 23 Wall Cladding Board DIAGRAM 22 1 Now the other side of the inside corner wall will be installed. First, attach the AW-02 at the bottom of the wall as steps 1-2 of starting strip on page 9 of this installation guide.. Diagram 23 is an above cross section view of the F trim after installation. The outside was installed after the wall cladding was installed on one of the walls. Then the F trim was pushed into the opened side of the wall cladding and then screw fixed from the other side. DIAGRAM 24 Wall Cladding Installation Guide / v


16 2 Then, install the wall cladding boards as shown in Diagram 25 by repeating the steps 1-3 of wall cladding board on page 10 of this installation guide. I Trim Installation 1 Using the I trim install the I trim on the opened side of the wall cladding as shown in Diagram 27. DIAGRAM 25 3 Continue to install the wall cladding boards until the top is reached as shown in Diagram 26. DIAGRAM 27 DIAGRAM 26 Wall Cladding Installation Guide / v


17 2 Fix the I trim to the joist by screw fixing the I trim and joist. Note: Always pre-drill before screwing unless using composite screws designed for non pre-drilling. The distance between each screw should be no more than 300 mm center to center. DIAGRAM 29 2 Next install the wall cladding board on top of the AW-02 and install the clips as steps 1-3 of wall cladding board on page 10 of this installation guide. Note: A gapping of at least 10 mm needs to be left at the bottom of the ground and the lip of the board to allow for expansion and contraction and ventilation. DIAGRAM 30 DIAGRAM 28 3 Install the rest of the wall cladding boards to the top as shown in Diagram 31. Wall Cladding Board 1 Repeat steps 1-2 of starting strip on page 9 of this installation guide on the section shown in Diagram 29. Diagram 32 is an above cross section view of the I trim installed. The I trim was installed after the wall cladding was installed onto the wall. The I trim then comes in from the side and is screw fixed to the joist on the other side of the I. Alternatively, the I trim can be installed first by screw fixing and then have the wall cladding boards come in afterwards but this would require the distance of your cladding project precalculated. Wall Cladding Installation Guide / v


18 F Trim Installation 1 Install the F trim on the open side of the wall cladding as shown in Diagram 33. DIAGRAM 31 DIAGRAM 33 2 Fix the F trim to the joist by screw fixing into the F trim to the joist as shown in Diagram 34. Note: Always pre-drill before screwing unless using composite screws designed for non pre-drilling. The distance between each screw should be no more than 300 mm center to center. DIAGRAM 32 Wall Cladding Installation Guide / v


19 DIAGRAM 36 3 Now fix face the cut pieces to the tops of the joists as shown in Diagram 37. Note: Always pre-drill before screwing unless using composite screws designed for non pre-drilling. The distance between each screw should be no more than 300 mm center to center. DIAGRAM 34 DIAGRAM 37 Wall Cladding Board Window Installation 1 Take the F trim and cut them to the length of the top of the cladding structure you are installing on as shown in Diagram Windows should be installed after all wall cladding has been installed on the wall as shown in Diagram 38. Note: This installation of the window will be done on joists and framing that are on wood. DIAGRAM 35 2 Cutting out a notch at both ends might be required to ensure that it fits around the joist as shown in Diagram 36. If installation is done on a brick or concrete wall framing, metal joists, or wood, joists need to be added first in order to install the boards onto that structure. Installing directly on brick or concrete is not recommended. Wall Cladding Installation Guide / v


20 DIAGRAM 38 DIAGRAM 40 2 Take the wall cladding board and cut down the middle to create a rectangle to fit in the window as shown in Diagram 39. DIAGRAM 32 DIAGRAM 39 3 Take the cut pieces and install them to the frame of the window as shown below in Diagram 40 and 41. Note: Always pre-drill before screwing unless using composite screws designed for non pre-drilling. The distance between each screw should be no more than 300 mm center to center. DIAGRAM 41 Wall Cladding Installation Guide / v


21 4 Take the F trim and cut to match the corners of the window as shown below in Diagram 42. DIAGRAM 42 5 Install the cut F trim pieces over the cut composite wall cladding as show in Diagram 43 and 44. Note: Always pre-drill before screwing unless using composite screws designed for non pre-drilling. The distance between each screw should be no more than 300 mm center to center. DIAGRAM 44 6 The completed window installation should look like Diagram 45. DIAGRAM 43 DIAGRAM 45 Wall Cladding Installation Guide / v

22 Wall Cladding Installation Guide v Huidong Meixin Plastic Lumber Products Manufacturing Co., Ltd. NewTechWood is a registered trademark of Huidong Meixin Plastic Lumber Products Manufacturing Co., Ltd. To obtain a copy of the most current version of this installation guide, visit us online at
Siding Installation Guide. v us
 Siding Installation Guide v20180201us IMPORTANT: Read All Sections Before You Start For the most up to date information, please visit our website @ www.newtechwood.com Prior to installing any composite
European Siding System Installation Guide. v
 European Siding System Installation Guide v20190215 CONTENTS Important Note 2-3 European Siding Parts 4-5 Under Construction and Framing 6-8 European Siding Installation 9-17 European Siding System Installation
Decking Installation Guide. v
 Decking Installation Guide v20170808 IMPORTANT: Read All Sections Before You Start For the most up to date information, please visit our website @ www.newtechwood.com Prior to installing any composite
UltraEasy Fence Installation Guide. v
 UltraEasy Fence Installation Guide v20170726 IMPORTANT: Read All Sections Before You Start For the most up to date information, please visit our website @ www.newtechwood.com Prior to installing any composite
Decking Installation Guide. v
 Decking Installation Guide v20180427 IMPORTANT: Read All Sections Before You Start For the most up to date information, please visit our website @ www.newtechwood.com Prior to installing any composite
Decking Installation Guide. v au
 Decking Installation Guide v20170912au IMPORTANT: Read All Sections Before You Start For the most up to date information, please visit our website @ www.newtechwood.com.au Prior to installing any composite
Decking Installation Guide. v
 Decking Installation Guide IMPORTANT: Read all sections before you start For the most up to date information please visit our website @ www.newtechwood.com Prior to installing any composite decking it
Installation Guide. IMPORTANT: Read all sections before starting. For the most up-to-date information, visit our website: leadvisioninternational.
 Installation Guide IMPORTANT: Read all sections before starting. For the most up-to-date information, visit our website: leadvisioninternational.com Before installing a composite wall cladding, it is recommended
Decking Installation Guide. v AUS
 Decking Installation Guide v20180618 AUS IMPORTANT: Read All Sections Before You Start For the most up to date information, please visit our website @ www.newtechwood.com.au Prior to installing any composite
Installation Guide (888)
") BamDeck Pro360 Installation Guide (888) 788-2254 The Collection Decking Systems BAMDECK PRO360 5-1/2 Wide Plank Dims: 96 L x 5-1/2 W x 7/8 H BAMDECK PRO360 16FT. 5-1/2 Wide Plank Dims: 192 L x 5-1/2 W
BamDeck Pro360 Installation Guide (888) 788-2254 The Collection Decking Systems BAMDECK PRO360 5-1/2 Wide Plank Dims: 96 L x 5-1/2 W x 7/8 H BAMDECK PRO360 16FT. 5-1/2 Wide Plank Dims: 192 L x 5-1/2 W
Cladding & Facade Installation Guide (888)
") TruOrganics Cladding & Facade Installation Guide (888) 788-2254 The Collection Decking Systems TRUORGANICS SQUARE EDGE 5-7/16 Wide Plank Dims: 192 L x 5-7/16 W x 7/8 H Available Colors SEDONA GLACIER DENALI
TruOrganics Cladding & Facade Installation Guide (888) 788-2254 The Collection Decking Systems TRUORGANICS SQUARE EDGE 5-7/16 Wide Plank Dims: 192 L x 5-7/16 W x 7/8 H Available Colors SEDONA GLACIER DENALI
Planter Box Installation Guide. v
 Planter Box Installation Guide v20170720 IMPORTANT: Read All Sections Before You Start For the most up to date information, please visit our website @ www.newtechwood.com Prior to installing any composite
Deck Tile Installation Guide. v
 Deck Tile Installation Guide v20170809 IMPORTANT: Read All Sections Before You Start For the most up to date information, please visit our website @ www.newtechwood.com Prior to installing any composite
INSTALLATION GUIDE COMPOSITE DECKING
 INSTALLATION GUIDE COMPOSITE DECKING sales@ecoscapeuk.co.uk CONTENTS STORAGE & HANDLING 03 SAFETY & USE 04 TOOLS 05 CALCULATING BOARDS 06 DECKING COMPONENTS + ACCESSORIES 07 PRE INSTALLATION NOTES 09 FALLS
Decking Installation. Veranda ArmorGuard Decking. Veranda Decking. Fiberon Horizon Decking. verandadeck.com (800.
 Veranda ArmorGuard Decking 5.3 in. x.93 in. x 8 or 20 ft. (13 cm x 2.3 cm x 3.66,4.88 & 6.1 m) Square Edge.93 in. x 5.3 in. x 12, 16 or 20 ft. (13 cm x 2.3 cm x 3.66 m) Grooved Fascia.75 in. x 11.25 in.
DuraLife Capped Composite Decking Installation Instructions
 DuraLife Capped Composite Decking Installation Instructions Planning the design of the deck is the beginning of a successful project. 1. Read the application instructions carefully before starting the
Vertigo Cladding Board
 Installation guide Vertigo Cladding Board Geolam: a stunning alternative to wood cladding Vertigo is a composite wood cladding board requiring minimum maintenance. Durable and fade resistant, it will not
Veranda ArmorGuard Decking, Veranda Composite Decking and Fiberon Horizon Composite Decking Installation Instructions
 Veranda ArmorGuard Decking, Veranda Composite Decking and Fiberon Horizon Composite Decking Installation Instructions VerandaDeck.com 800.566.3337 (800.HomeDepot) Decking Profiles Veranda ArmorGuard Decking
Resysta Gold and Platinum Decking Installation Guidelines
 Resysta Gold and Platinum Decking Installation Guidelines NOTE: Proper planning of the deck layout is essential for ease of installation of deck boards and deck components. Thoroughly read the following
EP Decking Inc. Installation Guide
 EP Decking Inc. Installation Guide www.epdecking.com EP Decking Inc. Installation Guide Calculating Material Requirements To calculate how many EP Decking pieces you will need, start by calculating the
31 installation. 32 Job Site Storage & Safety. 33 Tools. 34 Fasteners. 35 Trex Hideaway Hidden Fasteners
 INstallation 3 Job Site Storage & Safety 33 Tools 34 Fasteners 35 Trex Hideaway Hidden Fasteners 37 Framing & Fastening Tips and Special Patterns 38 Gapping 39 Span Guidelines 40 Stairway Assembly 41 Rooftop
Decking Installation Guide
 Decking Installation Guide Starting your project Following delivery of your composite decking boards, we recommend you allow them 24 hours to adjust to local temperature conditions before starting work.
TruGrain 12 Inch Commercial Profile Installation Recommendations
 TruGrain 12 Inch Commercial Profile Installation Recommendations o Delivery, Storage and Handling o General Requirements o Application of Stain & Sealer o Storage and Handling (Post-Treatment) o Installation
Dura Deck Type 146 Warranty Approved Install Instructions
 Dura Deck Type 146 Warranty Approved Install Instructions Material Composition Dura Deck is produced by extruding a unique composition of reclaimed wood, high density polyethylene and a number of engineered
Exterior System installation instructions
 Exterior System installation instructions 11/20/14 WPS ES-400 & 500 INSTALLATION INSTRUCTION. The WPS ES-400 & 500 systems Façade panels are designed for use as an external wall cladding in conjunction
DuraComp Composite Decking Installation Guide. Hidden Plastic Clip Fixing
 Composite Decking Installation Guide Hidden Plastic Clip Fixing Table of Contents SECTION ONE: General Information Site Preparation......2 Site Storage.....2 Safety. 2 Tools....2 Foundation & Sub Structure.2
Decking Installation and Maintenance Guide
 Decking Installation and Maintenance Guide Passport American Classic Trailways www.gossencorp.com Building with Gossen Decking is similar to building with traditional decking materials. Installation must
Resysta Wall Cladding Installation Guidelines
 Resysta Wall Cladding Installation Guidelines NOTE: Proper planning of the wall cladding layout is essential for ease of installation of wall cladding boards and wall cladding components. Thoroughly read
ULTRA LOW MAINTENANCE RETAINS WOOD-LIKE APPEARANCE. 25-YEAR eon WARRANTY
 ULTRA LOW MAINTENANCE RETAINS WOOD-LIKE APPEARANCE 25-YEAR eon WARRANTY Maintain your peace of mind, not your backyard. Your outdoor living space is your sanctuary. It s that part of the world where the
DECKING INSTALLATION, CARE & MAINTENANCE INSTRUCTIONS
 DECKING INSTALLATION, CARE & MAINTENANCE INSTRUCTIONS 866.729.2378 MOISTURESHIELD.COM limited lifetime warranty 866.729.2378 W W W.MOISTURESHIELD.COM Welcome To The Even Greater Outdoors. Congratulations
Siding and Soffit Installation Guidelines
 Siding and Soffit Installation Guidelines email web phone 07 46 16 Longboard Siding & Soffit INTRODUCTION INSTALLATION GUIDELINES NOTE: These instructions are prepared for persons experienced in the field
The better way to build TM. Installation Manual NAILBASE PANELS
 The better way to build TM Installation Manual PANELS November 2018 SIPs Installation Manual Table of Contents Topics General Requirements................................... 3 Materials..............................................
SECTION WOOD FRAMING. A. Includes But Not Limited To: 1. Furnish and install wood framing and blocking as described in Contract Documents.
 SECTION 06 1100 WOOD FRAMING PART 1 - GENERAL 1.1 SUMMARY A. Includes But Not Limited To: 1. Furnish and install wood framing and blocking as described in Contract Documents. B. Products Installed But
SECTION EXTERIOR GRILLS AND SCREENS
 SECTION 10 82 13 PART 1 GENERAL PART 1 1 SUMMARY A. Section Includes: 1. Exterior perforated aluminum screen wall system with Ombrae TM Optical Tile imaging technology. 2. Accessories including attachments,
INSTALLATION GUIDE TREDZ DECKING
 INSTALLATION GUIDE TREDZ DECKING 1 TABLE OF CONTENTS General Introduction... 3 Local Building Codes... 3 Tools Required... 3 Tredz Part Numbers... 3 Sub-Structure Framing... 4 Sub-Structure Framing (con
Siding and Soffit Installation Guidelines
 Siding and Soffit Installation Guidelines email web phone 07 46 16 Longboard Siding & Soffit INTRODUCTION INSTALLATION GUIDELINES NOTE: These instructions are prepared for persons experienced in the field
SECTION WOOD FRAMING. A. Includes But Not Limited To 1. Furnish and install wood framing and blocking as described in Contract Documents.
 SECTION 06110 WOOD FRAMING PART 1 GENERAL 1.1 SUMMARY A. Includes But Not Limited To 1. Furnish and install wood framing and blocking as described in Contract Documents. B. Products Installed But Not Supplied
Deck Design Mike & Melissa Deck Option #02
 Deck Design Mike & Melissa Deck Option #02 Congratulations! You just completed your Trex deck design. This report will provide the following information: Deck Layout Diagrams Basic Installation Tips Deck
DEXERDRY INSTALLATION INSTRUCTIONS - PAGE - 1
 DEXERDRY INSTALLATION INSTRUCTIONS - PAGE - 1 Tools and Items Needed Drill/power screwdriver 1/8 drill bit Table saw Circular saw with carbide-tip blade Rubber mallet Chisel or board straightener tool
SECTION STAINLESS STEEL WALL PANELS
 SECTION 07400 PART 1 GENERAL 1.1 SUMMARY A. Section Includes: 1. Dry joint, Rainscreen stainless steel wall panel system. 2. Accessories including attachments, clips, sub girts, shims, and fasteners 3.
EXOTIC WOOD DECKING INSTALLATION MANUAL
 EXOTIC WOOD DECKING INSTALLATION MANUAL Before beginning to install Planchers Bellefeuille exotic wood decking, the consumer must carefully read all following instructions to ensure full understanding
Agenda. Safety Decking Basics Decking Issues Felt Kick Out Flashing Fascia
 Decking & Fascia Agenda Safety Decking Basics Decking Issues Felt Kick Out Flashing Fascia 2 Chapter 7 Tools & Materials Tools for Decking Hammer Measuring Tape Chalk Line Speed Square Utility Knife Circular
Installation Guidelines
 Installation Guidelines Exteria Building Products provides these instructions as general guidelines only. Exteria Building Products neither installs siding nor has any control over any installation. The
OUTBACK DECKING INSTALLATION GUIDE CONTENTS. Let s have a look at what you will find in this installation guide.
 o u t b a c k d e c k i n g. c o m. a u OUTBACK DECKING INSTALLATION GUIDE CONTENTS Let s have a look at what you will find in this installation guide. Page. 2 BEFORE YOU START Things you need to know
KEVIN JATON. Deck Designer Specification Kit. All rights reserved copyright 2017 DIY Technologies. Page 1
 Deck Designer Specification Kit Page 1 Deck layout diagram Top view without planks Bottom view with planks Top view with planks Page 2 Installation Checklist Building code and zoning requirements Check
Genesis Panel Systems LLC Dura-Max Brick Panel Siding Installation Instructions
 Genesis Panel Systems LLC Dura-Max Brick Panel Siding Installation Instructions Thank you for purchasing the Genesis Dura-Max Brick Panel system for your project. The system allows you to have the look
GA APPLICATION OF GYPSUM SHEATHING
 1. Scope 1.1 This specification describes the minimum requirements for, and the methods of handling, storage, and application of, gypsum sheathing for use as a substrate for exterior claddings. 1.1.1 Exterior
INSTALLATION GUIDELINES
 INSTALLATION GUIDELINES CONTENTS 1 Introduction 2. Storage and handling 3. Expansion and contraction 4. Cutting 5. Spans and supports 6. Ventilation 7. Fasteners 8. Deck installation 9. Installation diagram
Iron Woods Vanish Rain Screen and Cladding System. Pushing the Envelope
 Iron Woods Vanish Rain Screen and Cladding System Pushing the Envelope The perfect complement to the natural beauty of our Iron Woods premium grade exterior building products and our existing line of siding
November 2017, V 1.2 INSTALLATION MANUAL
 November 2017, V 1.2 INSTALLATION MANUAL FOREWORD INSTALLATION MANUAL FOR THE PROFESSIONAL INSTALLER Dear customer, Congratulations on your purchase of this product. Known for its outstanding qualities,
elegrodeck Decking Installation Guide MATERIALS LIST Joist Spacing Installing the Decking Boards
 can be cut and drilled in the same way as timber, however care should be taken to eliminate drill/saw-slip as this can mark the surface of the product. It is recommended that the decking boards are cut
INSTALLATION GUIDE DUOFUSE DECKING
 INSTALLATION GUIDE DUOFUSE DECKING We recommend reading through the entire installation instructions before starting, and check the website for the latest installation instructions. Plastivan disclaims
DECKING INSTALLATION GUIDE
 DECKING INSTALLATION GUIDE WWW.LUNAWOOD.COM Decking Installation Guide Please check and read carefully legal disclaimer and written instructions after the picture guidelines. 1. 2. 3. 2 Copyright Lunawood
Installation Manual. Foundations. Version 2
 Installation Manual Foundations Version 2 Contents Overview...1 Planning the Job... 2 Introducing DMX FlexSheet...2 Supplies Required...3 Tools Required...4 Preparing the Site...4 Where to Start?...5 Installing
APPLICATION INSTRUCTIONS REALSIDE TM
 APPLICATION INSTRUCTIONS REALSIDE TM GENERAL INFORMATION: RealSide is a natural, real wood siding product designed for use in exterior cladding applications. RealSide is manufactured from hand selected,
DECKING INSTALLATION GUIDE
 DECKING INSTALLATION GUIDE It is very important to follow the manufacturer s instructions when installing Outback Decking. Fluctuations in climatic temperatures can cause an issue with how the decking
PVC Decking & Balustrading
 Dura Park Deck PVC Decking & Balustrading Decking Perfect decking and handrailing for mobile homes, lodges boardwalks & roof garden terraces....designed for the future Industrial Rail Marine Decking Cladding
EON DECKING INSTALLATION MANUAL. READ THIS BEFORE STARTING INSTALLATION Refer to Quick Tips on back cover for Do's and Don'ts EFFECTIVE 2005
 EON DECKING INSTALLATION MANUAL Welcome to eon, Natural Beauty that lasts. EFFECTIVE 2005 READ THIS BEFORE STARTING INSTALLATION Refer to Quick Tips on back cover for Do's and Don'ts CODES & STANDARDS
CARROLL COUNTY BUREAU OF PERMITS AND INSPECTIONS RESIDENTIAL CODE COMPLIANCE GUIDELINES FOR DECKS
 CARROLL COUNTY BUREAU OF PERMITS AND INSPECTIONS RESIDENTIAL CODE COMPLIANCE GUIDELINES FOR DECKS Code Reference: Chapter 97, Code of Public Local Laws and Ordinances of Carroll County and The International
Bobbie. Deck Designer Specification Kit. All rights reserved copyright 2016 DIY Technologies. Page 1
 Deck Designer Specification Kit Page 1 Deck layout diagram Top view without planks Bottom view with planks Top view with planks Page 2 Deck Part Identification 1. Riser 2. Stringer 3. Tread 4. Fascia 5.
Proudly Made in the U.S.A. 5-Year Warranty. Wayfinding Products
 5-Year Warranty Proudly Made in the U.S.A. Wayfinding Products Proudly Made in the U.S.A. Directional Bar Tile surface mount or cast-in-place replaceable (wet-set) Bar Tile and Guide Tile units shall be
Façade Architectural Wall Panel System - Guide Specification 3/11/2017 SECTION FRAMED DECORATIVE PANEL SYSTEMS PART 1 - GENERAL 1.
 SECTION 09 7710 FRAMED DECORATIVE PANEL SYSTEMS PART 1 - GENERAL 1.1 SUMMARY A. Section Includes: Decorative ½ / ¾ (13mm/19mm) thick prefinished panel with preengineered attachment clip along with hardware
INSTALLATION INSTRUCTIONS
 INSTALLATION INSTRUCTIONS Thank you for purchasing our decorative Stone Panels. The investment in our panels will greatly increase the value of your home, and result in additional savings by lowering your
Kedeck Installation Guide
 Kedeck Installation Guide Kedeck can be cut and drilled in the same way as timber, however care should be taken to eliminate drill/saw-slip as this can mark the surface of the product. It is recommended
Project No: Pakenham Branch Library, Pakenham, Ontario Section DECEMBER, 2016 Page 1 of 6
 DECEMBER, 2016 Page 1 of 6 1 GENERAL 1.01 RELATED SECTIONS.1 Section 01 33 00 - Submittal Procedures..2 Section 07 21 16 - Batt and Blanket Insulation..3 Section 07 92 10 - Sealants..4 Section 09 91 00
Conergy SolarFamulus II
 Conergy SolarFamulus II Installation manual www.conergy.com Table of Contents Table of Contents SolarFamulus II for universal use on flat roofs 1 Introduction 1 1.1 Short description 1 1.2 Intended use
A. ASTM C190 - Test Method for Tensile Strength of Hydraulic Cement Mortars
 SECTION 04850 (04 40 00) MSI PRECAST STONE VENEER SYSTEM PART 1 GENERAL 1.1 SECTION INCLUDES A. MSI Precast Stone Veneer for exterior and interior vertical surfaces. 1.2 RELATED SECTIONS Specifier Notes:
maintenance-free free from painting easy to install Fixing Guide Cedral Click
 maintenance-free free from painting easy to install Fixing Guide Cedral Click www.cedralsidings.com CONTENT Step by step guide to installing your Cedral Click façade Required materials and tools 1. Prepare
SECTION COMPOSITE DECKING. Display hidden notes to specifier. (Don't know how? Click Here)
") SECTION 06 73 00 COMPOSITE DECKING Display hidden notes to specifier. (Don't know how? Click Here) Copyright 2017-2017 ARCAT, Inc. - All rights reserved PART 1 GENERAL 1.1 SECTION INCLUDES A. Composite
SECTION 06 73 00 COMPOSITE DECKING Display hidden notes to specifier. (Don't know how? Click Here) Copyright 2017-2017 ARCAT, Inc. - All rights reserved PART 1 GENERAL 1.1 SECTION INCLUDES A. Composite
DECKING PRODUCT GUIDE INSTALLATION CARE & MAINTENANCE
 DECKING PRODUCT GUIDE INSTALLATION CARE & MAINTENANCE DECKING INSTALLATION COEN WPC is a new type of composite made by mixing 60% wood powder with 28% HDPE and 12% additives. These are extruded through
Octaform Quick Liner Wall & Ceiling Panels Guide Specification CAN Page 1
 Guide Specification CAN Page 1 This master guide specification Section is intended for use when specifying plastic panelling. This section includes performance, and descriptive type specifications; edit
Decking. Installation Instructions. fiberondecking.com Manufactured by
 Decking Installation Instructions Manufactured by fiberondecking.com 800.57.884 Decking installation instructions Getting started Follow local approved building codes. Careful planning of the finished
Chapter 53: Endwall Overhang(s) Only - Enclosed
 Only - Enclosed") Chapter 53: Endwall Overhang(s) Only - Enclosed Most Common Mistakes: 1. Incorrect eave height. 2. Placing standard heel end trusses at same height as interior trusses. 3. Fascia board top edges not bevel
Chapter 53: Endwall Overhang(s) Only - Enclosed Most Common Mistakes: 1. Incorrect eave height. 2. Placing standard heel end trusses at same height as interior trusses. 3. Fascia board top edges not bevel
Installation Guidelines
 Installation Guidelines Siding Trim Accessories Soffit Rainware Mouldings Deck Fence Rail Window Profiles Pipe Fittings Material Storage, Safety & Tools Material Storage Royal Deck has been properly packaged
STORAGE AND TRANSPORTION
 Content 1. General & Notes 2. Substrate Processing 3. Panel Layout 4. Tools 5. Screws 6. Installation instructions 7. Cleaning 8. FAQS 8. MSDS General & Notes In comparison to natural or cast stone, Questone
Sports center (Ciudad Real - Spain) - Arch. Javier Ramírez de Arellano Rayo
 - Arch. Javier Ramírez de Arellano Rayo") Sports center (Ciudad Real - Spain) - Arch. Javier Ramírez de Arellano Rayo Sports center (Ciudad Real - Spain) - Arch. Javier Ramírez de Arellano Rayo Ventilated Facades XLIGHT XLight is a new type of
Sports center (Ciudad Real - Spain) - Arch. Javier Ramírez de Arellano Rayo Sports center (Ciudad Real - Spain) - Arch. Javier Ramírez de Arellano Rayo Ventilated Facades XLIGHT XLight is a new type of
ThermaSteel Corporation ASSEMBLY MANUAL
 ThermaSteel Corporation ASSEMBLY MANUAL TABLE OF CONTENTS 1- INTRODUCTION 1.1 THERMASTEEL TM WALL PANELS 1.2 Drawing and Element Numbers 2- ASSEMBLY 2.1 Sequence of Assembly 2.2 Preparation of Foundation
Architectural Wall Products Guide Specifications
 Western States Metal Roofing 901 W. Watkins St. Phoenix, AZ 85007 PH: 602-495-0048 FX: 602-261-7726 Architectural Wall Products Guide Specifications FORMED METAL WALL PANELS This Guide Specification is
Commercial Flashing Details
 This technical note illustrates many of the most common flashing details for commercial buildings. The purpose for flashing is to direct moisture to the exterior and in so doing, prevent moisture from
SPECIFICATIONS MODERRA MORTARLESS MASONRY VENEER
 SPECIFICATIONS MODERRA MORTARLESS MASONRY VENEER PART 1: GENERAL 1.01 Section Includes A. Product description and definitions. B. Constructing base ledge for concrete wall units. C. Installing modular
Planning and installation instructions
 Planning and installation instructions Stofix Oy Ahlmaninkatu 2 E 40100 Jyväskylä Finland stofixgroup@stofix.com www.stofix.com 2 PLANNING AND INSTALLATION INSTRUCTIONS... 1 1 General... 3 2 Project Design...
ARCHITECTURAL WALL PANELS APPLIED OVER A SHEATHED STUDWALL BY MEANS OF A FIELD ASSEMBLED TEN66 SUB-FRAME SYSTEM
 SYSTEM TEN66 INSTALLATION DATA & DETAILS Omnis Panels, Inc. Architectural Building Panels 22 East Chicago Avenue Suite 210 Naperville, Illinois 60540 (800) 450-6099 (630) 355-4040 Fax: (630) 355-4995 www.omnis-panels.com
SRP-AirOutshield UV Issued:
 SECTION 07276: SRP-AirOutshield UV Ultra Violet (UV) resistant, Vapour Permeable Air Barrier Underlayment and Sheathing Membrane Guide Specification This specification is a guide only and may need editing
TABLE OF CONTENTS. 1.0 INTRODUCTION 1.1 Greenstone Structural Engineered Panels 1.2 Drawing and Element Numbers
 version 2.5 updated as of 08.04.2017 2 TABLE OF CONTENTS 1.0 INTRODUCTION 1.1 Greenstone Structural Engineered Panels 1.2 Drawing and Element Numbers 2.0 ASSEMBLY 2.1 Sequence of Assembly 2.2 Preparation
Decking Installation Guide
 Decking Installation Guide 1. Getting Started: Eco Systems Distribution Ltd is the UK distributor for NewTech manufacturing that produces this elegant composite decking. The formula is made up of 50% recycled
HOLLOW DECKING PRODUCT GUIDE INSTALLATION TECHNICAL SPECIFICATIONS CARE & MAINTENANCE
 HOLLOW DECKING PRODUCT GUIDE INSTALLATION TECHNICAL SPECIFICATIONS CARE & MAINTENANCE HOLLOW DECKING CN-007A / CN-001T Prior to the installation of any form of Decking, it is recommended that you check
Installation Guide Wall Panels
 Installation Guide Wall Panels Jointless or Dry-Stacked Installation (Read Prior to installation) The MStone system is a jointless / dry-stacked installation where panels and corners fit tightly together
1 Exam Prep Application and Finishing of Gypsum Board GA Tabs and Highlights
 1 Exam Prep Application and Finishing of Gypsum Board GA-216-2013 Tabs and s These 1 Exam Prep Tabs are based on the Gypsum Association GA-216-2013 Application and Finishing of Gypsum Panel Products. Each
DMX AG AIR-GAP MEMBRANE. Section Damproofing and Waterproofing
 DMX AG AIR-GAP MEMBRANE Section 07 10 00 Damproofing and Waterproofing NOTE TO SPECIFIER: These specifications were current at the time of publication but are subject to change at any time without notice.
Designed with the Fiberon Deck Design Tool
 Designed with the Fiberon Deck Design Tool All rights reserved copyright 2015 DIY Technologies Deck layout diagram Top view without planks Bottom view with planks Top view with planks Page 2 Deck Part
SECTION TIMBER FLOATS
 SECTION 06210 PART 1 - GENERAL 1.01 SUMMARY A. This section covers furnishing and installing the timber float framing for the pile guide area, and all other components not specifically mentioned, necessary
Central Dartmouth Section Exterior Envelope Renovations METAL-CLAD WOOD DOORS Page 1 of 5 Dartmouth, NS
 Exterior Envelope Renovations METAL-CLAD WOOD DOORS Page 1 of 5 Part 1 General 1. RELATED SECTIONS 1. Section 07 92 10 Joint Sealing 2. Section 08 71 00 Door Hardware 2. REFERENCES 1. American Society
SECTION HANDRAILS AND RAILINGS. A. Section Cast-In-Place Concrete; coordination with substrate.
 SECTION 05520 HANDRAILS AND RAILINGS PART 1 GENERAL 1.1 SECTION INCLUDES A. Welded stainless steel railing systems. 1.2 RELATED SECTIONS A. Section 03300 - Cast-In-Place Concrete; coordination with substrate.
1 Exam Prep Application and Finishing of Gypsum Board GA Tabs and Highlights
 1 Exam Prep Application and Finishing of Gypsum Board GA-216-2016 Tabs and s These 1 Exam Prep Tabs are based on the Gypsum Association GA-216-2016 Application and Finishing of Gypsum Panel Products. Each
UNIVERSAL BRACKET. Shown in red color for illustration purposes. Bracket can be painted to match panels.
 US PATENT PENDING #62/536,219 Shown in red color for illustration purposes. Bracket can be painted to match panels. (15) 79-6500 1515 VALLEJO ST, SAN FRANCISCO, CA 9109 17 3 17 SIMPLE, EFFICIENT, FLEXIBLE
The Ashland Project. Total Area: 1,778 Sq.Ft. 3 Bedroom, 2 Bath, 2 Car Garage
 The Ashland Project Total Area: 1,778 Sq.Ft. 3 Bedroom, 2 Bath, 2 Car Garage The garage and bedroom extend from the front of this three bedroom home, drawing you visually into the entryway. Brick and stucco
Ameriplate. Rain Screen Wall System
 Ameriplate Rain Screen Wall System Efficiency and fascinating free-floating effects are hallmarks of Metalwërks Ameriplate wall systems. With Ameriplate, the cut edges of the face plate material are the
Installing the decking 1. An edge clip is screwed to one end of the joists before installing the decking. Designed to enjoy life
 ELEGRO decking installation guide ELEGRO decking board measurements: thickness 32mm / width 142mm / length 3000mm. ELEGRO decking can be cut and drilled like timber. It is recommended that decking boards
B. Engineering design and performance requirements for terracotta baguette & fin assemblies.
 SECTION 07 4229 TERRACOTTA BAGUETTE & FIN ELEMENTS PART 1 GENERAL 1.1 SECTION INCLUDES A. Drawings and general provisions of the Contract, including General and Supplementary Conditions and Division 01