WHY CHOOSE FIBO WALL PANELS?
|
|
|
- Rosaline Lawrence
- 5 years ago
- Views:
Transcription

1 BY BEYOND TILES
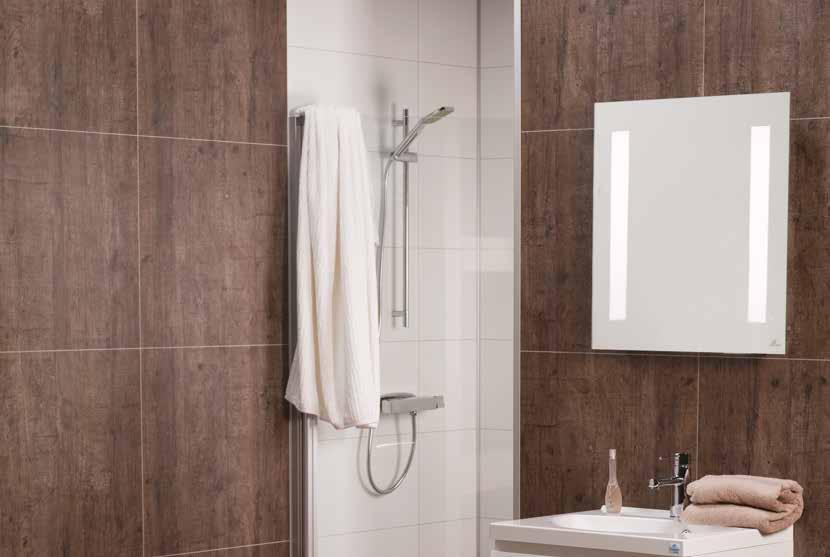
2 WHY CHOOSE FIBO WALL PANELS? THE MODERN ALTERNATIVE TO CERAMIC TILES MANUFACTURED IN NORWAY Easy and quick to install Fits over existing tiles Low maintenance/easy clean No grouting required Unique range of finishes Environmentally friendly 15 year domestic guarantee THE LEADING NAME IN QUALITY WALL PANELS FOR OVER 30 YEARS MAKING FIBO THE NATURAL CHOICE FIBO is the original wet room wall panel which offers a lower cost and maintenance free alternative to ceramic tiles. Fibo wall panels provide instant waterproof walls with a great choice of colours and finishes suitable for use in both commercial and domestic environments. Designed to cope with high humidity, Fibo wall panels can transform all types of rooms to reflect your moods and aspirations. The decorative panels bring together beauty and practicality providing instant, waterproof and hygienic walls. Our precision engineered Aqualock tongue and groove system with a 7-layer plywood core is a perfect fit every time and can be installed directly over existing tiles. Our collections provide you with a wealth of choice from a wide selection of luxurious decors, subtle pastels and exciting contemporary tile effect designs. Modern and environmentally friendly, Fibo panels provide timeless designs to suit all tastes. Designed and manufactured in Norway, the home of wood technology and contemporary Scandinavian style, Fibo is the leading bathroom wall panel brand and has been manufactured since Originally known as Respatex in the UK since 1981, our panels have been proven for over 30 years in prestigious projects and numerous private homes. Proven in the past designed for the future! BEYOND TILES 1


3 OUR COLLECTIONS Page 3 Page 9 MARCATO TILE RANGE New and exciting tile effect panels reflecting today s style CLASSIC TILE RANGE The luxurious look of ceramic tiles with the benefit of panels Page 13 Page 15 COLOUR SPLASH RANGE Fantastic extra matt finish with colour splash range TRADITIONAL PLUS Contemporary and fun decors Page 16 Page 19 TRADITIONAL RANGE Timeless classic colours KITCHEN PANEL RANGE A new concept for kitchen splashbacks 2

4 3 Cracked Cement 2204-M63
5 MARCATO TILE RANGE Our latest tile panel collection gives you modern matt finishes, large tile patterns and thin grout lines of 1.8mm - a more contemporary and stylish look for your bathroom White Tile S 2091-M63 White Tile S 2091-M66 Sahara EM 5342-M63 Shabby Chic RU 2898-M63 Grey Concrete EM 4943-M63 Tile Panels above are only available in 600m width with Aqualock. Effect Panels are only available in 300m width with Aqualock. Cracked Cement S 2204-M63 Roughwood SC 7969-M66 Zink S 2069-ME88 (Effect panel) Black Coal C 1066-ME88 (Effect panel) Letter denotes surface finish: S - Silk C - Cement EM - Extra Matt RU - Rustic SC - Bark Effect Grey Grout Line White Grout Line Images and colours shown must be used as a guide only. Please see actual laminate samples before purchase as colours are only as accurate as printing allows. 4


6 Palermo 4761-M63 and Denver White 3091-M63 Acacia 4553-M63 and White Tile 2091-M63 5 Marina Grey Oak 0194-M64 and White Tile 2091-M64
7 MARCATO TILE RANGE We have added some exciting new decors to our Marcato tile panel collection. Panels have a thin grout line - 1.8mm wide. All panels sized 600mm x 2400mm x 10.2mm Acacia S 4553-M63 Palermo GEM 4761-M63 Athen White HG 5091-M63 Marina Grey Oak EM 0194-M64 Lentini Light STN 8054-M64 Kalahari HG 4098-M64 Letter denotes surface finish: HG - High gloss EM - Extra Matt GEM - Gem Stone S - Silk finish STN - Stone Grey Grout Line White Grout Line Images and colours shown must be used as a guide only. Please see actual laminate samples before purchase as colours are only as accurate as printing allows. 6

8 MARCATO TILE PANELS - TECHNICAL DETAILS Panel size: 2400mm x 600mm x 10.2mm Grout Line is 1.8mm wide on all M tile designs Design M63 Tile size: 600mm x 300mm Design M64 Tile size: 600mm x 400mm Design M66 Tile size: 600mm x 600mm White Tile S 2091 Grey Concrete EM 4943 Palermo GEM 4761 Lentini Light STN White Tile S 2091 Cracked Cement S Sahara EM 5342 Athen White HG 5091 Kalahari HG 4098 Roughwood SC 7969 Shabby Chic RU 2898 Acacia S 4553 Marina Grey Oak EM 0194 Effect Panel size: 2400mm x 300mm x 10.2mm Design ME88 Effect Panel Tile size varies - panel size: 300mm x 2400mm The drawings show the full size panels in the Marcato Tile range and how the size of the tile appears on the panel. The different tile designs are only available in the colours shown. These panels are only available in the 600mm width size as the Aqualock joint is hidden in the textured grout line, creating an invisible join. Zink S 2069 Black Coal C 1066 Effect Panels only available in 300mm width Sahara 5342-M63 with Zink 2069-ME88 Letter denotes surface finish: S - Silk EM - Extra Matt RU - Rustic SC - Bark Effect C - Cement HG - High Gloss STN - Stone GEM - Gem Stone 7 Images and colours shown must be used as a guide only. Please see actual laminate samples before purchase as colours are only as accurate as printing allows.

9 Shabby Chic 2898-M63 and White Tile 2091-M66 8

10 9 Toscana Tile 2506-F23

11 CLASSIC TILE RANGE The luxurious look of ceramic tile with all the benefits of a wall panel Ivory Tile G 2520-F23 Toscana Tile HG 2506-F23 Anthracite HG 4054-F24 Santiago Tile HG 2586-F22 White Tile S 2091-F08 The two Fibo tile panel ranges introduce the luxurious look of traditional tiling with the benefits of easily installed panels. The unique Aqualock jointing system ensures a perfect fit every time. Tile panels only available in 600mm width with Aqualock. Tile panels have an invisible join - hidden in the grout lines. Ivory Tile 2520-F23 Letter denotes surface finish: G - Gloss HG - High Gloss S - Silk Grey Grout Line White Grout Line Images and colours shown must be used as a guide only. Please see actual laminate samples before purchase as colours are only as accurate as printing allows. 10

12 CLASSIC TILE PANELS - TECHNICAL DETAILS Panel size: 2400mm x 600mm x 10.2mm Grout Line is 3.2mm wide on all F tile designs The drawings show the full size panels in the Classic Tile range and how the size of the tile appears on the panel. The different tile designs are only available in the colours shown. Design F08 Tile size: 150mm x 200mm Design F22 Tile size: 300mm x 400mm These panels are only available in the 600mm width size as the join is hidden in the textured grout lines. White Tile S 2091 Santiago Tile HG 2586 Design F23 Tile size: 200mm x 300mm Design F24 Tile size: 600mm x 150mm Toscana Tile HG 2506 Anthracite Tile HG 4054 Ivory Tile G 2520 Santiago Tile 2586-F22 Letter denotes surface finish: G - Gloss HG - High Gloss S - Silk 11 Images and colours shown must be used as a guide only. Please see actual laminate samples before purchase as colours are only as accurate as printing allows.

13 Anthracite Tile 4054-F24 and Ivory Tile 2520-F23 12
14 COLOUR SPLASH RANGE All panels sized 600mm x 2400mm x 10.2mm Grout Line is 1.8mm on all M64 tile designs With a fantastic extra matt finish our colour splash range adds a fresh, bright palette of colours to our existing collections. Available in a choice of two designs, plain without grout lines or with a large tile M64 (600mm x 400mm). Aberdeen EM 0089 Zanzibar EM 0732 Cairo EM 0091 Design M00 Design M64 Tile size: 600mm x 400mm Lima EM 0528 Hanoi EM 0087 Marrakech EM 0092 Colour Splash panels are also available with other tile designs as a special order, please check with the Sales office. Letter denotes surface finish: EM - Extra Matt White Grout Line 13 Images and colours shown must be used as a guide only. Please see actual laminate samples before purchase as colours are only as accurate as printing allows.


15 Lima 0528-M64 and White Tile 2091-M64 Hanoi 0087-M64 and White Tile M64 Cairo 0091-M64 and Aberdeen 0089-M64 14

16 15 Grey Concrete 4943 and White Tile 2091-M66

17 TRADITIONAL PLUS RANGE Bold and exciting colours to liven up your space All panels are 2400mm high and are available in 600mm & 900mm widths with Aqualock or 1200mm width with square edge only. Sugar Sparkle HG 030 Black Sparkle HG 033 Grey Concrete EM 4943 TRADITIONAL RANGE Our collection of classic and timeless panel colours Titan 192 Titan S 192 Frost Green S 551 Bilbao HG 592 Letter denotes surface finish: HG - High Gloss S - Silk EM - Extra Matt Images and colours shown must be used as a guide only. Please see actual laminate samples before purchase as colours are only as accurate as printing allows. 16

18 17 Toscana 506
19 TRADITIONAL RANGE Our collection of classic and timeless panel colours DISCONTINUED Crystal White Silk S 110S Crystal White Gloss HG 110HG Ivory G 520 Oyster HG 537 Gavot G 505 Peach Nimbus S 546 Milano Marble G 962 Sandstone S 232 Toscana HG 506 Frost Blue S 544 All panels are 2400mm high and are available in 600mm & 900mm widths with Aqualock or 1200mm width with square edge only. Letter denotes surface finish: G - Gloss HG - High Gloss S - Silk Images and colours shown must be used as a guide only. Please see actual laminate samples before purchase as colours are only as accurate as printing allows. 18


20 New York Black 2124-KM99 19 Shabby Chic 2898-K00


21 KITCHEN PANEL RANGE Fibo introduce our new collection of kitchen splashback panels. Especially designed and engineered for quick and easy installation, these panels provide a stylish and hygienic solution in the kitchen Grout line is 1.8mm wide on KM tile designs and 3.2mm wide on K tile designs Shabby Chic RU 2898-K00 Cracked Cement S 2204-K00 Sahara EM 5342-KM25 Grey Sahara STN 4746-KM3010 New York Black - HG 2124-KM99 Anthracite HG 4054-K03 Denver White HG 3091-K03 Denver White 3091-K03 Denver White HG 3091-K40 A new kitchen in one afternoon with Fibo kitchen panels. Letter denotes surface finish: S - Silk HG - High Gloss EM - Extra Matt STN - Stone RU - Rustic Grey Grout Line White Grout Line Images and colours shown must be used as a guide only. Please see actual laminate samples before purchase as colours are only as accurate as printing allows. 20


22 KITCHEN PANELS - RECIPE FOR STYLE Easy care and maintenance free, Fibo Kitchen Panels have a smooth and durable surface, resistant to splashes and temperature fluctuations and are simple to install with our Aqualock system. And with no messy grouting or cracking to trap bacteria, they help create a hygienic and safe environment where food can be prepared with complete peace of mind. Renew your kitchen in a few hours with Fibo panels fitted in the area between worktop and wall cabinets. The kitchen panels can be mounted directly onto battens or glued to existing screw fixed walls or tiles. Follow the simple installation instructions, included in the panel pack or downloadable from our website, and you will achieve a great result in no time which you will enjoy for years. Cleaning tips: The panels are easily cleaned with a mild detergent and warm water and, for more stubborn stains, a general multi-purpose surface cleaner can be used. Never use abrasive cleaners or pads on the laminate as this will cause scratch marks or surface dullness. Grey Sahara 4746-KM3010 Do not use steam cleaners on the panels. Fibo kitchen panels can be fitted adjacent to a gas hob if necessary but it is essential to check with the hob manufacturer regarding the minimum distance needed between the board and the gas jets and we would suggest a gap of no less than 50mm. Failure to comply with the hob manufacturer recommendation may invalidate our product guarantee. We would recommend a glass or stainless steel panel behind gas cookers or hobs. Cracked Cement 2204-K00 Fire Resistance: Fibo Kitchen panels have a Class 1 Spread of Flame tested to NS-EN :2007+A1:2009. Fire Certificate: D-s1.d0 Design KM99 New York Black HG

23 KITCHEN PANELS - TECHNICAL DETAILS 2 Panel sizes: 600mm x 580mm x 10.2mm 600mm x 900mm x 10.2mm Available in two handy sizes, the standard 580mm size panel and a 900mm panel for use behind hobs to height of extractor fan. The drawings show the full size panels in the kitchen panel range and how the size of the tile appears on each panel. The different tile designs are only available in the colours shown. Design KM25 Tile size: 150mm x 150mm Sahara EM 5342 Design K03 Tile size: 300mm x 50mm Anthracite HG 4054 Denver White HG 3091 Design K00 Plain - No grout line Design K40 Tile size: 100mm x 100mm Shabby Chic RU 2898 Cracked Cement S Denver White HG 3091 Design KM3010 Tile size: 300mm x 100mm Grey Sahara STN 4746 Anthracite 4054-K03 Letter denotes surface finish: S - Silk EM - Extra Matt RU - Rustic HG - High Gloss Images and colours shown must be used as a guide only. Please see actual laminate samples before purchase as colours are only as accurate as printing allows. 22
24 PROFILES Fibo profiles are designed for use with our wall panels to complete your installation correctly Depending on the size and shape of your room, use the appropriate shaped profile to fit the panels correctly and securely into place. The use of an approved polymer sealant in conjunction with the profiles will ensure a watertight fit every time. 22.5mm 17.5mm INTERNAL PROFILE 10.4mm 14mm Use to fit panels into an inside 90 corner. White PVC Aluminium EXTERNAL PROFILE 21mm 35mm 24mm Use to fit panels around an outside 90 corner or in a window reveal or for edging box work. White PVC 21.6mm 19mm Aluminium 19mm FINISHING PROFILE (L - SHAPED OR J - SHAPED) Use to finish off any raw outer edges of the panels or for edging box work. 25.5mm 12.7mm White PVC or Aluminium 17mm 6mm 12.7mm Aluminium Only H-SHAPED STACKING PROFILE Use this profile to stack panels on top of each other in areas where the panel height required is more than 2400mm. 30mm 18mm 25mm 15mm Note: Cannot be used with the Aqualock system. 11mm White PVC 11mm Aluminium A BASE PROFILE MUST BE USED IN ALL AREAS WHERE PANELS WILL BE IN CONTACT WITH WATER. 23

25 PROFILES All Profiles are 2400mm long unless otherwise stated and are available in either standard white PVC or in anodised aluminium BASE PROFILE It is essential to use a base profile in all wet areas to prevent water penetration from underneath the panel. 13mm 35.35mm Aluminium Only KITCHEN PANEL BASE PROFILE Use in all wet areas to prevent water penetration from under the panel. Install between bottom of panel and top of kitchen worktop. 25mm 13.2mm 5mm Aluminium Only 19.5mm KITCHEN PANEL INTERNAL PROFILE Use to fit panels into an inside 90 corner. 14mm This profile is 580mm long for a perfect fit to your kitchen panel. Aluminium Only KITCHEN PANEL L-SHAPED PROFILE Use to finish off any raw outer edges of the panels or for edging box work. This profile is 580mm long for a perfect fit to your kitchen panel. 12mm 15mm Aluminium Only SEALING OF ALL EXPOSED PLYWOOD IS ESSENTIAL TO ENSURE JOINTS ARE TOTALLY WATERPROOF. 24

26 25 White Tile 2091-M66 and Roughwood 7969-M66


27 FIBO AQUALOCK Tongue and groove system - making panel fitting as easy as 1,2,3... With our Aqualock tongue and groove system of fixing, Fibo panels are perfect for both refurbishment or new construction projects as panels can be fitted directly to existing walls, including tiles, or onto stud partitioning. Using Fibo panels provides a wall that is every bit as effective as a tiled one, with a high quality and long lasting surface but without the disadvantages - no grouting to clean and replace, no mould growth, low maintenance, shorter installation time and lower fitting costs /900 PREPARATION BEFORE INSTALLATION Panels should be stored flat in their packaging and protected from moisture. Being a wood product, they must be acclimatised in the room or area in which they are to be used for at least 3 days prior to fitting. Before installing your Fibo panels to the wall, check that it is completely dry and level and provides a firm nail/screw hold. It is always preferable to attach panels to battens using screws and plugs or nails especially if the surface is uneven or out of plumb. There needs to be a vertical batten under every panel joint. Where heavy items are to be attached to the wall, extra battens must be installed to carry these. Panels can also be glued to walls, studwork or on top of existing tiles provided they are sound and reasonably square. Walls should be dry and ceramic tiles should be degreased. Use a waterproof, high tensile strength glue applied to the back of the panel in a zig-zag pattern. Use a plastic film between panels and an outside wall. Distance between battens: Vertically - 600mm or 900mm Horizontally - 800mm 800 3mm CUTTING THE PANELS Fibo panels are easy to cut place panels decorative side down when cutting with circular saw or jigsaw. Using a fine toothed handsaw, place decorative side up and cut on the down stroke only. Sealant Panel cut outs Pre-drill with largest possible drill-bit before cutting. Apertures for pipes etc. The opening should have a clearance of approx. 5mm Seal the clearance with polymer sealant. A BASE PROFILE MUST ALWAYS BE USED IN ANY WET AREAS. AS WITH ALL WOOD PRODUCTS, PANELS SHOULD BE ACCLIMATISED FOR THREE DAYS PRIOR TO FITTING. CHECK PANELS THOROUGHLY FOR DAMAGE, FLAWS, SHADING OR DEFECTS BEFORE INSTALLATION AND REPORT ANY PROBLEMS TO YOUR SUPPLIER. GUARANTEE MAY BE INVALIDATED IF THESE PROCEDURES ARE NOT CARRIED OUT. 26
28 WHOLE ROOM INSTALLATION Install panels using our Aqualock easy-to-fit tongue and groove system, clicking into place as you go. Check that the panels are correctly aligned and remember to use sealant in all the joints Fibo wall panels with Aqualock are fixed to battens/walls by nailing or screwing into the groove running along the length of the panel using No. 6 screws or 35mm gypsum board nails. Leave a distance of 200mm between each nail/screw. The lowest nail/screw must be fastened a maximum of 20mm from the bottom of the panel. Start here In areas of high humidity, Fibo panels must be fitted with a polymer waterproof sealant in every joint and to all exposed edges to ensure that they are totally waterproof. Apply the sealant when the panel is upright against the wall, next to the previously installed panel. It is then easy to lock the two panels together into position without creating a mess. Run a bead of sealant along the length of the panel groove with a sufficient amount to provide a good seal for the panels once they are assembled. Where an installation is to go around a room, for best results, start fixing the panels in one corner, panelling in both directions so that the last wall to be panelled is the wall with the door. Finish up with the last panel installed and cut to fit over the doorway. STARTING A WALL When setting up the first panel, fix an internal corner profile to the wall and apply sealant into both channels. Cut the panel to size and push the clean cut panel edge firmly into the profile. Excess sealant in the joint must be removed at once and then sprayed with methylated spirit and wiped with a damp cloth. This will ensure a virtually invisible joint. FINISHING OFF A WALL The last panel of each run of a wall should be measured and cut to size and then swung into position with the internal corner profile already attached. The profile is then fastened to the stud or batten on the return wall. Ensure that sealant is applied into the profile channel before inserting the panel. Fix the other side of the panel to the wall or batten by screwing or nailing along the tongue ensuring it is correctly aligned before securing. Countersink the screws so that they don t catch on the panel. Install the next panel into the other side of the profile securing in place as before. Continue along the wall, clicking the panels into place after applying sealant into each joint. Sealant Sealant CAREFULLY READ THE INSTRUCTIONS PROVIDED WITH THE PANELS BEFORE FIXING. PLEASE VISIT OUR WEBSITE TO VIEW AN ANIMATION OF THE INSTALLATION PROCESS. LAST PANEL OVER DOORWAY Cut the two panels left and right of the door so they have a centred space (full panel width) over the door frame. The last panel can be inserted tongue first on one side with the lip of the other edge removed to fit flush to the adjoining panel. Fix by gluing the back edge. Fit panels around the door frame with screws/nails which will be hidden by door moulding and coving. 27
29 INSTALLING PANELS IN A SHOWER To ensure that you get a waterproof seal every time, make certain that all exposed plywood has sealant applied. IN A TWO SIDED SHOWER ENCLOSURE Remember to use a base profile fitted as per instructions for a wet area (see below) 1) Fix an internal corner profile to the wall first, remembering to countersink the screws so they won t catch and then apply sealant into the two channels. If using mechanical fixing, insert the first panel into the prepared internal profile, push back the panel to the wall and screw it into place through the groove in the fixing lip. If gluing to the wall, first apply adhesive to the back of the panel then insert panel into the internal profile and push the panel back to the wall applying pressure to fix into place. 2) Insert the second panel into the other channel of the internal profile and fix into place as in step 1. 3) Finish the installation by fixing the L-shaped finishing profile to the exposed edges of the panels using sealant. If using a J-shaped profile, this should be fitted to the exposed edge of the panel with sealant prior to fixing into place as above. Wipe off any excess sealant from the panels using a damp cloth. IN A THREE SIDED SHOWER ENCLOSURE Remember to use a base profile fitted as per instructions for a wet area (see below) In a 3 sided shower installation, the back panel must always be fitted first. If using a 600mm or 900mm wide panel, remember to cut off the tongue of the panel to be used on the back wall. 1) Fix an internal corner profile to the left hand side corner and apply sealant into both channels. 2) Apply sealant into both channels of a second internal profile and attach to the right hand side of the panel that will form the back wall. Apply glue to the reverse side of the panel and insert this panel into the internal profile that is already attached to the wall and swing the panel into position to form the back of the enclosure, applying pressure to fix into place. Fix the second internal profile to the wall with screws, remembering to countersink them so they won t catch. 3) Insert the second and third panels into the channels of the two internal profiles and fix into place either by screwing through the fixing lip of the opposite edge or, if using glue, ensuring that this is applied to the back of the panels before inserting into the internal profiles. 4) Finish the installation by using L-Shaped or J-shaped profiles as described before. Wipe off any excess sealant with a damp cloth. IF USING 1200MM PANELS FOR A SHOWER ENCLOSURE, FOLLOW THE INSTRUCTIONS ABOVE BUT GLUE ALL THE PANELS TO THE WALL. SCREWS CANNOT BE USED IN THIS INSTANCE AS THESE PANELS DO NOT HAVE FIXING LIPS. FITTING PANELS AT FLOOR LEVEL DRY AREA Height adjustments should be made where the panel meets the ceiling. A. Where there is vinyl floor covering - the material should continue approx. 100mm up the wall behind the panel and the distance from the bottom of the panel to the floor should be 60-80mm B. Where there is a ceramic tile or upstand - apply sealant between the bottom of the panel and the top of the upstand remembering to leave a gap of 4-5mm to allow for expansion of the sealant. WET AREA - In all wet areas a base profile must always be used. BATH, SHOWER OR WETROOM Height adjustments should be made where the panel meets the ceiling. A. In a wetroom installation the floor covering should continue approx. 100mm behind the panel and the base profile. Sealant should be used both in front and behind the profile and the panel. The clearance between the bottom of the profile and the floor should be 60-80mm B. When fitting over a bath or shower tray, or above a ceramic upstand, sealant must be applied in front and behind the base profile and the panel as well as between the bottom of the profile and the top of the bath, shower tray or upstand. Allow a gap of min 2-3mm under the base profile to allow for expansion of the sealant. C. When fitting behind a bath or shower tray, always use a base profile between the bottom of the panel and the floor. Seal between the underside of the profile and the floor allowing a gap of min 2-3mm to allow for expansion of the sealant. You will also need to seal where the bath or shower tray meets the panel. A Vinyl Flooring B Sealant Ceramic Upstand A Sealant 60-80mm Floor Covering Base Profile Sealant Floor Covering B Sealant 2-3mm Bath / Shower Tray Base Profile Sealant Sealant Bath / Shower Tray C Sealant Base Profile Sealant FAILURE TO INSTALL FIBO PANELS IN ACCORDANCE WITH MANUFACTURER INSTRUCTIONS MAY INVALIDATE THE GUARANTEE 28


30 PRODUCT SPECIFICATION Fibo Wall Panels provide instant waterproof, hygienic walls with a choice from an attractive range of colours and finishes. Suitable for use in all areas of high humidity within a domestic or commercial environment. CONSTRUCTION Fibo panels have a decorative, high pressure laminate surface, bonded to a specially developed high quality 9mm 7 layer WBP Plywood core with a balancer laminate on the reverse. Each panel with the Aqualock system is tongue and grooved on its longest side. The plywood core material is PEFC certified - refer to website to download certificates. Panels are manufactured in an ISO 9001 quality assured environment. FIRE CERTIFICATE Fibo wall panels have a Class 1 Spread of Flame tested to NS-EN :2007+A1:2009. Fire Certificate: D-s1.d0 SIZE AND WEIGHT Standard Wall Panel: 600mm x 2400mm x 10.2mm Weight Approx: 12kg per panel Shower Panel: 900mm x 2400mm x 10.2mm Weight Approx: 18kg per panel Shower Wall: 1200mm x 2400mm x 10.2mm Weight Approx: 24kg per panel Standard Kitchen Panel: 600mm x 580mm x 10.2mm Weight Approx: 2.3kg per panel Kitchen Hob Panel: 600mm x 900mm x 10.2mm Weight Approx: 4.3kg per panel HEAT RESISTANCE Do not expose the laminate surface to sustained high temperatures - max 180 degrees Centigrade or 356 Fahrenheit. CLEANING AND MAINTENANCE Simply wipe with a damp cloth or a mild non-abrasive cream cleaner. Household disinfectants and detergents do not affect the durable surface. Do not use steam cleaning devices on our panels. GUARANTEE Fibo offers the domestic consumer a 15 year guarantee, from the date of purchase, that the wall panels will remain watertight and will neither crack nor delaminate. Base profiles must be used with shower trays and in all wet areas with appropriate polymer sealant to prevent water damage occurring. Remember to acclimatise the panels for 3 days prior to fitting. The guarantee will be void if panels are not fitted according to the manufacturers instructions (supplied with panels). Product CE marking: 1071-CPD EN EN636-2 EN335-3 Class 2 Formaldehyde E1 29


31 ABOUT US Our wall panels are manufactured in Norway by Fibo which is the leading manufacturer and supplier of wall panels in Scandinavia. With two warehouses in England and Scotland, Fibo panels are offered for sale through a network of stockists and distributors throughout the UK. Please check with our Sales Office for your nearest supplier. BEYOND TILES The Fibo factory in Lyngdal, Norway FIBO AND THE ENVIRONMENT Fibo UK Limited believe that businesses are responsible for achieving good environmental practice and operating in a sustainable manner. We are therefore committed to reducing our environmental impact and continually improving our environmental performance as an integral and fundamental part of our business strategy and operating methods. It is our priority to encourage our customers, suppliers and all business associates to do the same. Not only is this sound commercial sense for all; it is also a matter of delivering on our duty of care towards future generations. Our policy is to: Wholly support and comply with or exceed the requirements of current environmental legislation and codes of practice. Minimise our waste and then reuse or recycle as much of it as possible. Minimise energy and water usage in our buildings, vehicles and processes in order to conserve supplies, and minimise our consumption of natural resources, especially where they are non-renewable. Operate and maintain company vehicles (where appropriate) with due regard to environmental issues as far as reasonably practical and encourage the use of alternative means of transport and car sharing as appropriate. Apply the principles of continuous improvement in respect of air, water, noise and light pollution from our premises and reduce any impacts from our operations on the environment and local community. As far as possible purchase products and services that do the least damage to the environment and encourage others to do the same. Assess the environmental impact of any new processes or products we intend to introduce in advance. 30


32 FIBO UK LIMITED, Watermeadow House, Chesham, Buckinghamshire HP5 1LF Tel: Fax: NORWEGIAN ACCREDITATION No S03 NS ISO 9001 CERTIFICATED FIRM Q U A L I T Y A S S U R E D FIBO UK LIMITED15 YEARS GUARAN T EE
Stylish, maintenance-free & waterproof THE HOME OF RESPATEX SINCE FSC Logo. Bathrooms Kitchens Showers & more.
 Wall Panels 2012/13 The Original wall panel Stylish, maintenance-free & waterproof Bathrooms Kitchens Showers & more www.respatex.co.uk byggma uk LIMITED Watermeadow House, Chesham, Buckinghamshire HP5
A smart way to transform your wall
 Fibo Marcato 8056 LENTINI DARK STN M6040 A smart way to transform your wall Robust and contemporary high pressure laminate wall panels with 100% waterproof surface. www.fibosystemusa.com Fibo Marcato 4746
A smart way to transform your wall
 Fibo Marcato 8056 LENTINI DARK STN M6040 A smart way to transform your wall Robust and contemporary high pressure laminate wall panels with 100% waterproof surface. www.fibosystemusa.com Fibo Marcato 4746
PVC panelling for walls and ceilings
 1 PVC panelling for walls and ceilings COVER EVERY SURFACE IN STYLE Splashpanel Kit Arctic Sparkle 2 Smart looking PVC that s easy to fit, easy to clean and easy to maintain Give your home the wow factor
White Galaxy. Black Wave. showerwall.co.uk White Galaxy (top) / Black Wave 37
 / Black Wave 37") White Galaxy Black Wave showerwall.co.uk White Galaxy (top) / Black Wave 37 02 Breccia Breccia Stylish waterproof panelling system Showerwall is the ultimate versatile easy to fit waterproof panelling
White Galaxy Black Wave showerwall.co.uk White Galaxy (top) / Black Wave 37 02 Breccia Breccia Stylish waterproof panelling system Showerwall is the ultimate versatile easy to fit waterproof panelling
To ensure your Multipanel Tile is properly bonded, ensure all surfaces to which adhesive will be applied are clean, dry and flat.
 Jig saw or Hand saw Measuring Tape Ruler Pencil High-grab adhesive Silicone Sealant Masking Tape Drill & Screwdriver Pre-installation check-list Inspect panels for any flaws, defects or damage* Check colour
phone web . Pictured on cover: Roman Marble. Search trust IPSL on Google
 phone web email 0114 279 9188 www.ipsluk.co.uk info@ipsluk.co.uk Pictured on cover: Roman Marble Search trust IPSL on Google IPSL offer an extensive range of products and designs that are cost Core: Hollow
TILE RANGE. Pre-installation check-list
 Pre-installation check-list Jig saw or Hand saw Measuring Tape Ruler Pencil High-grab adhesive Silicone Sealant Masking Tape Drill & Screwdriver Inspect panels for any flaws, defects or damage* Check colour
PVC panelling for walls and ceilings
 1 PVC panelling for walls and ceilings COVER EVERY SURFACE IN STYLE Smart looking PVC that s easy to fit, easy to clean and easy to maintain Give your home the wow factor with smart PVC panels. Choose
1. What are the benefits of Decorative Wall Panels? 2. Where can these decorative panels are used? 3. Are the panels waterproof?
 1. What are the benefits of Decorative Wall Panels? Decorative Wall Panels are made from precision extruded PVC and decorated with unique designs ranging from marble, onyx to wood grain patterns. Other
SPAPANEL WALL LINING SYSTEM. Product. Scope. Building Regulations. Appraisal No. 906 [2016] Appraisal No. 906 (2016) Amended 11 December 2017
![SPAPANEL WALL LINING SYSTEM. Product. Scope. Building Regulations. Appraisal No. 906 [2016] Appraisal No. 906 (2016) Amended 11 December 2017](/thumbs/84/89171875.jpg "SPAPANEL WALL LINING SYSTEM. Product. Scope. Building Regulations. Appraisal No. 906 [2016] Appraisal No. 906 (2016) Amended 11 December 2017") SPAPANEL WALL LINING SYSTEM Amended 11 December 2017 BRANZ Appraisals Technical Assessments of products for building and construction. AB Building Products Level 13, Citigroup 2 Park St Sydney NSW 2000
SPAPANEL WALL LINING SYSTEM Amended 11 December 2017 BRANZ Appraisals Technical Assessments of products for building and construction. AB Building Products Level 13, Citigroup 2 Park St Sydney NSW 2000
THE ULTIMATE BOOK OF BATHROOM & KITCHEN PANELLING. the perfect alternative to tiling
 THE ULTIMATE BOOK OF BATHROOM & KITCHEN PANELLING the perfect alternative to tiling Welcome to the book of bath SERIES Be inspirational in your bathroom and kitchen with the ultimate range of panelling
aquapanel InstallatIon GuIde
 Installation Guide AQUAPANEL BEFORE YOU START It s a good idea to stand the AQUAPANEL sheets in the area for 2 days prior to cutting and installing, to allow the sheets to breathe and reach moisture equilibrium.
Frameless Hinged Door - Alcove. These instructions must be left with the user. Installation Guide W2-B
 Frameless Hinged Door - Alcove These instructions must be left with the user Installation Guide 1 1290647-W2-B 1290647-W2-B 2 Introduction Thank you for purchasing a quality product. To enjoy the full
STEP UP SHOWER BASE INSTALLATION GUIDE FOR TIMBER AND CONCRETE FLOORS
 GUIDE FOR TIMBER AND CONCRETE FLOORS EDITION: APRIL 2016 IMPORTANT: This guide is for the installation of a Step Up shower base on a timber or concrete floor. If you require a walk in (flush with floor)
INSTALLATION INSTRUCTIONS This leaflet must be read thoroughly before commencing installation. Scan for more information
 Scan for more information INSTALLATION INSTRUCTIONS This leaflet must be read thoroughly before commencing installation Showerwall is the ultimate versatile easy to fit waterproof panelling system, with
Outward Folding Bathscreen Instruction Manual
 Outward Folding Bathscreen Instruction Manual OBV3 Important Information Toughened glass is completely safe for use in our shower enclosures and bath screens; providing our products are installed according
Impression Graphic panels
 Impression Graphic panels Installation Guidelines 6003.I Rev. 02 8/15 Please Read Disclaimers: PLEASE READ ALL INSTRUCTIONS BEFORE BEGINNING INSTALLATION!! These guidelines are provided in good faith to
Specifications. The ideal solution for waterproof walls, floors & ceilings
 Specifications The ideal solution for waterproof walls, floors & ceilings Product Specification Sheets CLICK ON AN OPTION BELOW: t tilepanel t ceilingpanel t Contents twinfloor cleanpanel t t multipanel
Hygienic cladding solutions. the complete internal cladding solution
 Hygienic cladding solutions the complete internal cladding solution Hygienic cladding range overview Our range of sheets, prof iles and adhesives are made to industry leading standards to meet all customer
NoMorePly The first tile backing system with a lifetime guarantee
 Installation Guide NoMorePly.net The first tile backing system with a lifetime guarantee QUICK & EASY THIN PROFILE STRONGER BUILD WATER RESISTANT LIFETIME GUARANTEE KG KG It s quick and easy, and we re
These instructions must be left with the user
 Torsion Quadrant These instructions must be left with the user Installation Guide 1 1209651-W2-A Thank you for purchasing a quality Kohler product. To enjoy the full potential of your new product, please
PERLA BATHROOM PANELS
 PERLA BATHROOM PANELS Designed For The Way We Live Today A combination of innovative design with advanced manufacturing techniques gives Perla an unique character and supreme practicality. Perla Bathroom
Beautiful shower and wall panels
 Beautiful shower and wall panels Our Heritage We ve been making Wetwall, the UK s best selling shower panel in our base in Perthshire, Scotland for the last twenty years and we still design, build and
decorative interior cladding
 decorative interior cladding for walls & ceilings for a contemporary look easy to fit... easy to maintain... decorative solutions Mosaic small tile effect with a wipe clean flush finish Pack Size 25cm
Hygienic Cladding Solutions. White, Pastel & Vibrant Colours. Satin & Gloss Ranges
 Hygienic Cladding Solutions White, Pastel & Vibrant Colours Satin & Gloss Ranges The complete cladding solution. A quality, cost efficient, high performance hygienic wall and ceiling system that you can
Please Note: PhoneStar was previously branded as Phonewell
 Soundproofing Floors Timber Joist or Concrete Floors Installation Instructions Acoustic Insulation Please Note: was previously branded as Phonewell There are two options to achieve noise reduction through
Glasboard Liners. installation details. Installation Guide for Glasbord Fibreglass Reinforced Plastic (FRP) panels
 panels") Glasboard Liners installation details Installation Guide for Glasbord Fibreglass Reinforced Plastic (FRP) panels PLEASE READ ALL INSTRUCTIONS BEFORE BEGINNING INSTALLATION These guidelines are provided
Glasboard Liners installation details Installation Guide for Glasbord Fibreglass Reinforced Plastic (FRP) panels PLEASE READ ALL INSTRUCTIONS BEFORE BEGINNING INSTALLATION These guidelines are provided
WALK-IN SHOWER BASE INSTALLATION GUIDE FOR CONCRETE FLOORS
 WALK-IN SHOWER BASE INSTALLATION GUIDE FOR CONCRETE FLOORS EDITION: APRIL 2016 IMPORTANT: If you require a Walk In shower base for timber floors, please go to our support page at www.hydroblok.com.au IMPORTANT:
Knauf Aquapanel Interior. Tile Backing. Cement board for wet areas. Will not deteriorate in water. Easy to score and snap
 Tile Backing Will not deteriorate in water Easy to score and snap Resistant to mould and mildew Knauf Aquapanel Interior Cement board for wet areas Knauf Aquapanel Interior Cement Board Drywall for Wet
Important Information
 Hinged Door Instruction Manual CL Important Information Toughened glass is completely safe for use in our shower enclosures and bath screens; providing our products are installed according to our guidelines.
of the 2011 Best of Bath Gold Award Kitchen & Bath Industry Easy to maintain Effortless to install Luxurious and elegant finish lustrolite.
 R WINNER of the 2011 Best of Bath Gold Award Kitchen & Bath Industry Show (KBIS), Las Vegas lustrolite.com Easy to maintain Effortless to install Luxurious and elegant finish The award winning Lustrolite
FreeStyle Linear Drain with Full Mortar Bed Adapter Kit
 FreeStyle Linear Drain with Full Mortar Bed Adapter Kit U.S. Patent No. 8,474,068 Patents Pending: Canada & EP Publication No. 2354339 Discard Linear Drain installation instructions and refer to these
CLADDING INSTALLATION GUIDE
 CLADDING INSTALLATION GUIDE CREATE A LASTING IMPRESSION FRIENDLY BUILDING PRODUCT ON THE PLANET INSTYLE TIMBER CLADDING HAS BEEN DEVELOPED TO PROTECT AND BEAUTIFY ANY BUILDING DESIGN OR STYLE. THE FOLLOWING
INSTALLATION GUIDANCE. Easy to Install, Clean and Maintain NO GROUT! Perfect for Showers!
 INSTALLATION GUIDANCE Easy to Install, Clean and Maintain NO GROUT! Perfect for Showers! GENERAL INSTALLATION GUIDANCE Panels should be checked for any damages, imperfections, colour tone differences or
EDITION BATHROOM WALL PANELS. Photo reproduced with the permission of bathstore
 EDITION 17 BATHROOM WALL PANELS 10 YR WARRANTY BEAUTIFUL STYLES The Perla concept is to transform the ordinary bathroom adding beautiful practicality and youthful exuberance without costing the earth.
ASSEMBLY INSTRUCTIONS
 ASSEMBLY INSTRUCTIONS MAGNET SEAL PACK,TO FORM 8MM HINGED CORNER ENTRY ENCLOSURE THESE INSTRUCTION REPLACE THE SET SUPPLIED WITH THE SHOWER DOORS. V04/09/2014 BEFORE YOU START, HERE IS SOME IMPORTANT INFORMATION
Straight Panel Bath Screen Instruction Manual
 Straight Panel Bath Screen Instruction Manual Consumer Guarantee - Please make sure the purchaser/end user completes and returns the Guarantee card which is enclosed with this product. Failure to validate
Knauf Aquapanel Interior. System Solutions Tile Backing. Cement board for wet areas. Quick and simple to construct
 System Solutions Tile Backing Quick and simple to construct Will Range not of deteriorate partitions in water Easy Fully to warranted score and systems snap Resistant CE Marked to mould and mildew Knauf
optimum glue Preparation INSTALLATION INFORMATION We recommend to order all panels for the same commercial flooring project at the same time.
 Preparation We recommend to order all panels for the same commercial flooring project at the same time. Always store and transport your vinyl floor carefully to prevent distortions. Store and transport
BUILD A SHOWER CUBICLE
 BUILD A SHOWER CUBICLE Building a shower cubicle requires some experience in carpentry and tiling. You also need a degree of expertise in wiring and plumbing in order to install a shower unit. By all means
FAST PANEL Bathroom Wall Panels
 FAST PANEL Bathroom Wall Panels Installation Guidance (Please Read Carefully Before Installation) These panels have been manufactured using the finest quality materials and profiled by highly trained machinists
Rigid Core Installation & Maintenance Instructions
 Rigid Core Installation & Maintenance Instructions Suitability Rigid Core Click Vinyl Flooring is completely waterproof floating floor and has got exceptional acoustic and insulation properties due to
Frameless Return Panel. These instructions must be left with the user. Installation Guide W2-A
 Frameless Return Panel These instructions must be left with the user Installation Guide 1 1326491-W2-A 1326491-W2-A 2 Introduction Thank you for purchasing a quality product. To enjoy the full potential
Hygienic Wall Cladding
 n Hygienic n Impact Resistant n Waterproof n Decorative Hygienic Wall Cladding Hygienic materials including PVC and Aluminium Composite in colours and textures to suit a wide variety of applications. Hygienic
SCYon tm THE BUILDING MATERIAL OF THE FUTURE
 SCYon tm THE BUILDING MATERIAL OF THE FUTURE SCYON22689_ProductCards_v4.indd 1 23/4/08 10:29:17 AM SCYON tm THE BUILDING MATERIAL OF THE FUTURE are available today with the introduction of a heavy-duty,
Eco friendly manufacture which is kind to the environment. Kind to the Environment. High Compressive Strength. Lightweight & Easy to Handle
 Kind to the Environment High Compressive Strength Lightweight & Easy to Handle Fire Retardant Waterproof Properties Insulating Properties Easy to Cut Economical Construction Product 10 TEN YEAR G U A R
Installation Guide. Thank you for your order PLEASE READ these entire instructions BEFORE you START
 Installation Guide Acrylic Wall Installation Tiled Wall Installation Thank you for your order PLEASE READ these entire instructions BEFORE you START PH: 09 913 3110 FAX:09 913 3113 5 Smales Road East Tamaki,
maxtopquartz.co.uk TAKE IT TO THE WITH MAXTOP QUARTZ
 maxtopquartz.co.uk TAKE IT TO THE WITH MAXTOP QUARTZ 1 QUARTZ MADE SIMPLE Enjoy the stunning beauty and strength of a solid quartz surface, without any of the drawbacks of traditional solid stone surfaces.
We've got it covered
 We've got it covered WALL, FLOOR AND CEILING SURFACES Call down and visit our showroom today! We are open Mon-Fri: 8.00am - 5.00pm, Sat: 8.00am - 12.00pm T.A PLASTICS SUPPLIES Ltd Tudhoe Industrial Estate,
DEEP SOAK PRODUCT REQUIREMENTS. A. Product Requirements. B. Product Inspection. C. Clearance Requirements T01-A
 DEEP SOAK INSTALLATION INSTRUCTIONS / INTEGRATED ACRYLIC BATH(WITH APRON/DRAIN) K-98156T/K-98157T/K-98158T/K-98159T BEFORE YOU BEGIN Please read these instructions carefully to familiarize yourself with
IMPORTANT NOTES ABOUT YOUR FLOORING PLEASE READ BEFORE INSTALLING
 IMPORTANT NOTES ABOUT YOUR FLOORING PLEASE READ BEFORE INSTALLING ACCLIMATIZATION AND STORAGE Your new flooring has to be acclimatized for 24 hours before installation begins. The flooring must remain
Over 20 years experience of high quality commercial hygienic wall and ceiling cladding supplies. Quality you can trust
 Over 20 years experience of high quality commercial hygienic wall and ceiling cladding supplies Quality you can trust In association with - the hygienic cladding specialists HPS is proud to announce the
Premium wall cladding. Complete system. Installation guide. Preparation Profiles Sheet preparation and installation After care
 Premium wall cladding Complete system Installation guide 1969 Preparation Profiles Sheet preparation and installation After care Cladright wall cladding installation guide This installation guide complies
INSTALLATION GUIDE DUOFUSE DECKING
 INSTALLATION GUIDE DUOFUSE DECKING We recommend reading through the entire installation instructions before starting, and check the website for the latest installation instructions. Plastivan disclaims
Bushboard Nuance Laminate Wall Panelling Kit - Arctic
 Bushboard Nuance Laminate Wall Panelling Kit - Arctic Arctic - Gloss Rating: Not Rated Yet Price Base price with tax 578.93 Salesprice with discount 434.20 Sales price 434.20 Discount -144.73 Tax amount
EVOK BEFORE YOU BEGIN PRODUCT REQUIREMENTS. A. Summary Of Key Requirements. B. Product Inspection T01-A INSTALLATION INSTRUCTIONS
 EVOK INSTALLATION INSTRUCTIONS ACRYLIC BATH K-1704T BEFORE YOU BEGIN Please read these instructions carefully to familiarize yourself with the required tools, materials, and installation sequences. Follow
Tile Safe Shower System
 Tile Safe Shower System Tile Safe Shower System CONTENTS ABOUT SHOWERWELL 2 THE SHOWERWELL TILE SAFE SHOWER SYSTEM 4 SHOWERWELL STERLING 10MM DOOR 6 SHOWERWELL 10MM SLIDING DOOR 9 SHOWERWELL STERLING
Cornerview Shower Enclosure & Base
 Cornerview Shower Enclosure & Base SHOWER ENCLOSURE AND BASE INSTALLATION INSTRUCTIONS IMPORTANT DreamLine reserves the right to alter, modify or redesign products at any time without prior notice. For
RIGID VINYL PLANK HIGHLAND OAK. heartridge.com.au
 RIGID VINYL PLANK HIGHLAND OAK heartridge.com.au why choose heartridge floors? At Heartridge, we believe beautiful floors are the heart of any home. Part of the Dunlop Flooring group, leaders in the underlay
Decorative Fiberglass Reinforced Wall Panels
 SECTION 097720 DECORATIVE FIBERGLASS REINFORCED WALL PANELS PART 1 - GENERAL 1.1 SUMMARY A. Section Includes: Prefinished polyester glass reinforced plastic sheets and adhered to unfinished gypsum wallboard.
Product Catalogue 02
 Product Catalogue 02 Contents Why choose HS Butyl 05 Product selector 06-07 Our products 0303-0305 - 0311-0320 - 323-330 Series 08-09 361-0361 WT - 0372-0390 - 2239-2788 10-11 GCA - Polyband - Foilband
Assembly Instruction. wedi Fundo Primo Shower System
 Assembly Instruction wedi Fundo Primo Shower System Assembly Instructions wedi Fundo wedi Fundo Shower System-Primo Overview & General Product Description of the wedi Fundo Shower Systems All wedi Waterproof
1. PREPARATION 2. INSTALLATION 3. FINISHING 4. MAINTENANCE
 In the following text vinyl floor(s) refers to floors from the Quick-Step Livyn Ambient Glue+ and Balance Glue+ collections. The branded accessories refer to the specific Quick-Step vinyl accessories.
ASSEMBLY INSTRUCTIONS
 ASSEMBLY INSTRUCTIONS INFINITI 8mm SLIDER/SLIDER WITH SIDE PANEL THIS PRODUCT IS UNIVERSAL. LEFT HAND OPENING ILLUSTRATED. CHANGE THE HAND BY TURNING THE DOOR/SIDE PANEL UPSIDE DOWN. V03.09.2015 BEFORE
LAMINATE GENERAL INSTALLATION INSTRUCTIONS FOR DROP LOCK FLOORING
 LAMINATE GENERAL INSTALLATION INSTRUCTIONS FOR DROP LOCK FLOORING WARNING Prior to installation, please ensure that the product received is the correct style and color as well as to the customer s satisfaction.
NBS M50 ALTRO WHITEROCK DIGICLAD WALL CLADDING
 NBS M50 ALTRO WHITEROCK DIGICLAD WALL CLADDING TYPE(S) OF COVERING 110 PVCu LININGS TO WALLS: - Project: - Location: - Substrate: - Preparation: - Sheet: Extruded semi-rigid PVCu sheet, EU Grade - Maximum
create a real impression with your interior walls, ceilings and floors
 create a real impression with your interior walls, ceilings and floors Make the smart choice Welcome to the world of waterproof panelling. Hard wearing, easy to install, long lasting panels to provide
EMERALD ROUGHING-IN. A. Summary Of Key Requirements. B. Product Inspection. A.Ordering Information: A. : T01-B 1 INSTALLATION INSTRUCTIONS
 EMERALD INSTALLATION INSTRUCTIONS ACRYLIC BATH K-18778T BEFORE YOU BEGIN Please read these instructions carefully to familiarize yourself with the required tools, materials, and installation sequences.
DeltaTrayTamar PCS. Installation Guide for Centre and Offset Drain. INSTALLING DELTATRAY tamar A PCS GUIDE TO CREATING THE PERFECT WETROOM
 INSTALLING DELTATRAY tamar DeltaTrayTamar Installation Guide for Centre and Offset Drain PCS High Performance Construction Products A PCS GUIDE TO CREATING THE PERFECT WETROOM INSTALLING DELTATRAY TAMAR
DLB-23 Shower Enclosure Installation and User s guide
 DLB-23 Shower Enclosure Installation and User s guide I. Mounting Preparation 1. After opening the case, read this introduction carefully, check all the packed parts, examine the shower cabinet for shipping
EMERALD PRODUCT REQUIREMENTS ROUGHING-IN. A. Summary Of Key Requirements. B. Product Inspection. A.Ordering Information: T01-E
 EMERALD INSTALLATION INSTRUCTIONS ACRYLIC WP BATH K-18777T/K-18777T-H-* BEFORE YOU BEGIN Please read these instructions carefully to familiarize yourself with the required tools, materials, and installation
COASTLINE ALASSIO Swing Door. Installation & Maintenance Instructions. Rev Lakes. Bathrooms
 COASTLINE ALASSIO Swing Door Installation & Maintenance Instructions Rev 01.16 Lakes Bathrooms IMPORTANT NOTES : Please Read Carefully & retain these instructions for Future Reference. 1. For ease & safety
BASE MKII SHOWER SCREEN & BASE
 page of 8 900 x 900 x 000 (mm) 000 x 000 x 000 (mm) Dimensions are nominal measurements only. To see the complete BASE range go to www.reece.com.au/bathrooms SPECIFICATIONS Recommended use Material Frame
! COMMERCIAL PANELLING
 COMMERCIAL PANELLING! riven marble/ slate spapanel When specifying products for wet areas in commercial environments such as hotels, motels, back-packers and holiday parks, there are many different needs
SlimLine Single Threshold Base & Q-Wall-5.1 BASE & BACKWALL INSTALLATION INSTRUCTIONS
 SlimLine Single Threshold Base & Q-Wall-5.1 BASE & BACKWALL INSTALLATION INSTRUCTIONS IMPORTANT DreamLine reserves the right to alter, modify or redesign products at any time without prior notice. For
QUAD Rectangular Hinged Door Shower Enclosure Installation Instructions
 QUAD Rectangular Hinged Door Shower Enclosure Installation Instructions IMPORTANT Please read carefully the following instructions before installing your shower enclosure. If you have any questions on
INSTALLATION INSTRUCTIONS
 CLICK BAMBOO FLOORING INSTALLATION INSTRUCTIONS General The locking system is a revolutionary system for installing bamboo floors without using glue. The panels can be clicked together simply. Position
Schluter -KERDI-DRAIN
 Schluter -RONDEC Finishing and edge-protection profile with a rounded reveal surface. Schluter -RONDEC is a finishing and edge-protection profile for tiled edges and outside corners of tiled surfaces.
Facade panel PICTURA Product Information Sheet
 Facade panel PICTURA Product Information Sheet 1 Product range PICTURA fibre cement facade panels are made from: Portland cement Mineral filler Natural organic fibres (cellulose), synthetic organic fibres
Lakes. COASTLINE LEVANZO Hinged Bypass Panel Installation / Maintenance Instructions. Bathrooms. Rev 01.16
 COASTLINE LEVANZO Hinged Bypass Panel Installation / Maintenance Instructions Rev 01.16 Lakes Bathrooms Typical application, (Cannes) shown. May also be used with Marseilles & Riviera * IMPORTANT NOTES
Bushboard Nuance Laminate Wall Panelling Kit - Magma
 Bushboard Nuance Laminate Wall Panelling Kit - Magma Magma Rating: Not Rated Yet Price Base price with tax 717.22 Salesprice with discount 537.91 Sales price 537.91 Discount -179.30 Tax amount 89.65 Ask
Wet Areas Using Plasterboard
 INSTALLATION 168 DEFINITIONS 168 WET AREA REQUIREMENTS 168 WATERPROOFING REQUIREMENTS BY AREA 169 GENERAL REQUIREMENTS 171 FRAMING 171 PLASTERBOARD LAYOUT 171 PLASTERBOARD FIXING 171 CONSTRUCTION DETAILS
Nudo Guide Specification 03/01/2016 FiberScore FRP Wall Panels SECTION FIBERSCORE FIBERGLASS REINFORCED WALL PANELS
 SECTION 09 7720 FIBERSCORE FIBERGLASS REINFORCED WALL PANELS PART 1 - GENERAL 1.1 SUMMARY A. Section Includes: Prefinished polyester glass reinforced plastic sheets and adhered to unfinished [gypsum] [cementitous]
PARKAY LAMINATE FLOORING (UNILIN DROP) Installation Instructions
 Installation Instructions") Parkay Floors 1855-5-PARKAY www.parkayfloors.com PARKAY LAMINATE FLOORING (UNILIN DROP) Installation Instructions BEFORE YOU START PARKAY LAMINATE FLOORING has a patented UNILIN DROP system. The collections
Parkay Floors 1855-5-PARKAY www.parkayfloors.com PARKAY LAMINATE FLOORING (UNILIN DROP) Installation Instructions BEFORE YOU START PARKAY LAMINATE FLOORING has a patented UNILIN DROP system. The collections
Tidy tiles Walls, floors, stairs and tiles on tiles Building materials of brand-name quality for your home Nur im
 www.probau.eu Building materials of brand-name quality for your home PROBAU offers a wide range of products in many areas of application for home improvement, renovation and construction. In professional
Aqua Swing Tub Door & EX/RT Panel
 Aqua Swing Tub Door & EX/RT Panel TUB DOOR AND PANEL INSTALLATION INSTRUCTIONS IMPORTANT DreamLine reserves the right to alter, modify or redesign products at any time without prior notice. For the latest
Benefits of hard foam PVC. What are Durasid sidings?
 SIDINGS Benefits of hard foam PVC Durable and longer-lasting Hard foam PVC is a durable and resistant plastic that withstands the rigours of time and weather. This guarantees that the sidings will still
ULTRACOMPACT SURFACES. Worktop Design and Installation Manual
 ULTRACOMPACT SURFACES Worktop Design and Installation Manual CONTENTS DESIGN PRINCIPLES 6 MEASUREMENTS 6 Piece design 6 CUT-OUTS. MINIMUM RADII AND DISTANCES 8 OVERHANGS 10 WORKTOP EDGES 11 JOINS. SEAMS
Schluter -KERDI-BOARD Substrate, building panel, bonded waterproofing
 Schluter -KERDI-BOARD Substrate, building panel, bonded waterproofing Schluter -KERDI-BOARD The universal substrate for tiles Flat. Level. Plumb. Square. No matter the quality, cost, or extravagance of
bt-3000 n Technical Sheet Recommended use Materials Substrates
 Technical Sheet bt-3000 n bt-3000 n is a type D2 dispersion adhesive, as per EN 12004, for laying all kinds of ceramic tiles on indoor walls. This adhesive is served ready-to-use and does not need any
EDITION. Photo reproduced with the permission of Cliff Cuthbertson BATHROOM PANELS FOR CONTRACTORS & SPECIFIERS
 EDITION 18 Photo reproduced with the permission of Cliff Cuthbertson BATHROOM PANELS FOR CONTRACTORS & SPECIFIERS BATHROOM PANELS FOR CONTRACTORS & SPECIFIERS BATHROOM PANELS FOR AFFORDABLE HOUSING JTC
Prime Shower Enclosure & Base Kit
 Prime Shower Enclosure & Base Kit SHOWER ENCLOSURE AND SHOWER BASE KIT INSTALLATION INSTRUCTIONS IMPORTANT DreamLine TM reserves the right to alter, modify or redesign products at any time without prior
INSTALLATION INSTRUCTIONS FOR WICANDERS HYDROCORK
 INSTALLATION INSTRUCTIONS FOR WICANDERS HYDROCORK GENERAL INFORMATION Hydrocork floors are intended for indoor use only. Please read the following instructions before installation. Hydrocork connection
Arborite ColorEdge is available in a partial range of Arborite solid colors, patterns and textures.
 ARBORITE COLOREDGE LAMINATES TECHNICAL DATA Manufacturer Arborite 385 Lafleur, Lasalle (Québec), H8R 3H7 Web site : www.arborite.com - Phone: 1-800-996-0366 Product Description Recommended Usage Arborite
Shower Tray - Timber Floors
 Shower Tray - Timber Floors Assembly information Assembly information The JACKOBOARD shower unit consists of a floor panel and a drainage system. Both components are coordinated with each other and form
premium click optimum click
 1 In order to obtain a good result, we advise to follow all given instructions carefully. PREPARATION We recommend to order all panels for the same flooring project at the same time. 2 Always store and
SlimLine Neo-Angle Base & Q-Wall-2
 SlimLine Neo-Angle Base & Q-Wall-2 BASE & BACKWALL INSTALLATION INSTRUCTIONS IMPORTANT DreamLine reserves the right to alter, modify or redesign products at any time without prior notice. For the latest