CHAPTER I INTRODUCTION TO ZAHIR ACCOUNTING 5.1
|
|
|
- Barbra Wilcox
- 6 years ago
- Views:
Transcription
1 CHAPTER I INTRODUCTION TO ZAHIR ACCOUNTING Introduction Welcome and thank you for choosing Zahir Accounting Version 5.1, we hope our product and service will fulfill your needs. Zahir Accounting Version 5.1 is a flexible accounting program with complete facility and high efficiency, designed for Windows 98/2000/NT/XP operation system. The application concept is that accounting is easy to use and enjoyable experience. In addition to the ease of recording transactions and making reports without learning the accounting theory, Zahir Accounting Version 5.1 is designed to help users in business decision-making process quickly and accurately. With systematical program design, data structure and provides high stability within a high volume transaction, also supported by an accurate data maintenance facility, Zahir provides complete and professional features. The facilities and distinctions of Zahir Accounting Version 5.1 are as follows: 1.2 Introduction to Client Server Client Server is the latest technology database application development, called SQL technology. Simply, Client Server is defined as central database management application, which is arranged and driven by a single computer called server. The server function is to serve the request from other computers called workstation/client. Workstation requests to server by sending a small sized parameter contains order to server to meet the clients requests. Server processes the order and sends the outcome directly to Client. Accordingly, the server performs more processes than client. 1
2 1.3 Zahir Version 5.1 with Client Server In this 5.1 Version, Zahir adopts the Client Server technology, which previously, adopts the file-sharing based database. In Client Server version, Zahir uses Interbase with Firebird service, the freeware version of Interbase. Thus, the users are not subjected with the server database license charges. The Interbase excellence has been verified in many data based applications. Therefore, Zahir, as an integrated accounting application which equipped with records, maintenance and complex data gathering, is expected to accomplish the needs of financial management in small, medium, and large sized companies and corporates. In spite of Client Server based, Zahir 5.1 Version is able to run on PC without network, which function as a client. The PC runs automatically as server since the firebird as an interbase service application will be installed optionally along with Zahir installation in PC. 1.4 Zahir Accounting Version 5.1 Product Zahir Accounting comprises sort of products as a complete package. Zahir Accounting products are: Zahir FlexyGL, General Ledger accounting software for users who understand accounting and supplemented with Cash/Bank module. Users only fill the transaction journal and the program automatically formulates the financial statement. Users could design general ledger module, multi user, multi company, multi level password, voucher journal layout, export report to excel, word, html, etc. There are also ratio analysis, charts, recurring transaction, and windows graphic based. Zahir FlexyMoney, used in businesses without inventory facility such advertising, consultant, co-operation, etc. The software supplemented with integrated modules and postdated checks facility. Integrated module, accounts payable, accounts receivable, sales, purchase, general ledger, post-dated checks/bank, bank reconciliation, multi user, multi company, multi level password, more than 100 statements, tax invoice, designable invoice layout, export reports to excel, word, html, etc, ratio analysis, cash projection chart, calendar, reminder, recurring transaction and windows graph based. 2
3 Zahir FlexyTrade, used in businesses with inventory facility such distributors, retails, stores, pharmacy, workshop, cooperation, restaurant, etc, supplemented with various integrated modules and post-dated check facility. This program has link to Zahir Point of Sale as a cashier. Zahir FlexyTrade provides integrated module, accounts payable, accounts receivable, sales, purchase, general ledger, post-dated check/bank, inventory, bank reconciliation, multi user, multi company, multi level password, more than 100 statements, tax invoice, designable invoice layout, export reports to excel, word, html, etc., ratio analysis, cash projection chart, calendar, reminder, recurring transaction and windows graph based. Zahir Personal is similar to Zahir Accounting FlexyMoney Edition with some additional features such as multi department module, multi project and automatic asset calculation. Zahir Standard is similar to Zahir Accounting FlexyTrade Edition with some additional features such as multi department, multi project, goods transfer and automatic asset calculation. Zahir Enterprise the main module is similar to the Standard Edition with some additional facilities such as procurement module, quotation request, purchase order, received goods, purchase return, sales order, goods delivery, sales return, received consignment, returned consignment, true multi currency, multi warehouse, multi measurement unit, multi tax, using English language for program and chart of account, import cost allocation to cost of goods, more than 250 reports etc. Zahir Point of Sales. Zahir Point of Sales Program is a module to input selling transaction at supermarkets, restaurant, etc., and the program is used as an additional of Zahir Accounting FlexyTrade Edition, Standard and Enterprise as back office. The program could be set up with barcode scanner, customer display, printer and drawer. Zahir products comparisons and their facilities are as follows: 3
4 The most completed package is Zahir Enterprise Edition which allow you to upgrade some facilities such as: Standard Module consists of service transactions, inventory, project, department, fixed asset, post-dated check, return, disassembly, inventory movement, cash and bank, bank reconciliation. 4
5 Data Facility consists of data classification, serial number, lot number, account or product name, product group, standard term of sales, FIFO and LIFO. Multi Facility consists of multi phase project, multi unit, multi currency, multi warehouse, multi tax, multi price, multi discount, multi fraction, multi sales commission, multi delivery cost. Report Facility consists of unit report, design report, custom financial report, custom adding schedule, export report, click report, tax invoice. Extra Facility consists of consignment, purchase request, purchase order, sales quotation, sales order, business analysis, reminder, chart, predictive entry, auto purchase order, synchronized branches. Extra transaction facility consists of transaction number, delivery status, delivery note, import cost distribution, recurring transaction, final discount. Tips: If you purchase Zahir version 5.1 and need to add some of the above features, you will be subjected the additional charge. Note: This manual is composed by using Zahir Enterprise. If you need some additional programs, you could contact us. 1.5 Getting Started The subsequent will explain how to make transaction in Zahir quickly and easily. In this case, the company name example is Creative Innovation Creating New Data Open Zahir program to create New. On the main menu press New button and the company information windows will appear as follows: 5

6 Fill in any information needed, at least your company name and click Next button to go to next windows: Select the period month starting your company uses Zahir program, for example January After it is completely filled in, click Next button to the last window of Last Confirmation and press Process button to continue creating data. Wait for a moment and the creating data process will appear. 6

7 1.5.2 Creating Master Data Prior entering the transaction, the first thing to do is creating master data as used in transaction. A. Account List Account List is the posts used to summarize all decreases and increases of asset, such as cash or other asset, payable and equity, revenue and cost. The first step to create data is creating account list. Zahir has standard account list, but users could edit, change, or delete to make some changes. To preview the account list press [General Ledger] and [Chart of Account] on menu. The following is the Account List Window: Press New button to Create Chart of Account, Edit to Revise Account List Data, and Delete to Delete Account List Data. 7
8 The first step is to fill in Classification to determine the sub-classification where the account to be made. Use Dropdown Combo Box classification to preview sub-classification List. Next, fill in estimation Code and Account List Name to be made. Give the Check Mark ( ) sign on Cash/Bank Check Box if the Account List is cash or bank Account List. After filling all the information correctly, press Save button to save the new Account List data or press Cancel to cancel data creating. B. Address Data Zahir requires address master data such customer, supplier, employee and partner names. For example, your customer's name: Petro Central, vendor's name: Betts, Partner's name: Intl. Bank, employee's name : Cindy. To create the data, press [Data Store], [Master Data], and [Name Address] and Name and Address List window will appear, then click New button to create. The display will be: 8


9 Fill all data needed. Make ID No. on every name and differentiate between one ID and another. Select the right type. Click Save button to store the data. Go over the same way to create address data. The address list will appear like the following: 9
10 C. Product Category To separate the goods category from Zahir standard setting, Click [Inventory], [Product Data], and [Product Category] to display the Data Product Category: Type the determined product category This inventory system should be consistent. Do not change the current period Determine the account code as the above product category 10
![D. Product Data To create new product data, click [Inventory], [Product Data] and [Product Data] on the menu, then press New button and the product data window as follow: Click here to set the base](/docs-images/71/65852019/images/11-0.jpg "unit Click here to select the product category related to goods Leave it blank Fill in any data needed and click Save button. 1.5.")
11 D. Product Data To create new product data, click [Inventory], [Product Data] and [Product Data] on the menu, then press New button and the product data window as follow: Click here to set the base unit Click here to select the product category related to goods Leave it blank Fill in any data needed and click Save button Fill in Account Beginning Balance If your company has had the previous transactions before accounting period in Zahir, then you must fill in balance sheet, accounts receivable, accounts payable, and inventory. Since your period is January 2009, then you must input the above balance within the end of December 2009 period. A. Account Beginning Balance To fill in Balance sheet, press [Setting], [Beginning Balance], and [Account Beginning Balance] on program menu and the displayed window will as follows: 11

12 Fill beginning balance data as needed. To go to the next account click Tab button on keyboard. Press Save button if you have finished filling in Account Beginning Balance. Based on the above account balance, the balance statement automatically made. To view the report click [Report], [Financial Statement], [Financial Statement] and [Balance Sheet Standard] as the following figure: 12
13 13

14 B. Accounts Receivable Beginning Balance As Account Beginning Balance, accounts receivable beginning balance will help you to fill in outstanding accounts receivable balance without making sales transaction journal. For example, your company has accounts receivable from Petrocentral in amount of USD To view accounts receivable beginning balance window, press [Setting], [Beginning Balance] and [Accounts Receivable Beginning Balance] on program menu. The accounts receivable beginning balance window will appear and click New button to input accounts receivable beginning balance as the figure follows: Type customer name by clicking data search button on the right side. The customer name list will appear. Choose address data and click OK. Type date, Invoice No, Purchase Order (PO) No. and Accounts Receivable value as the figure above. Click Save button and if there are some mistakes, click Edit button to revise and Delete button to delete Accounts Receivable Beginning Balance. If you have more than one customer, then click New button again. The total accounts receivable balance should be equal with Account Beginning Balance. 14
15 Inputting accounts receivable beginning balance will not creating any journals, but it will create accounts receivable voucher. To preview Accounts Receivable voucher, click [Report], [Sales and Receivable Reports], [Account receivable] and [Customer Balance Real Currency]. C. Account Payable Beginning Balance Account Payable Beginning Balance helps you to fill in outstanding account payable balance without composing any purchase transaction journal. For example, if your company has account payable from Betts in amount of USD To view Account Payable Beginning Balance window, press [Options], [Beginning Balance], then [Account Payable Beginning Balance] on program menu. Account payable beginning balance window will appear and click New button to input account payable beginning balance as follows: 15
16 To fill in supplier s name, click data search button on the right side to display the supplier s names. Select the appropriate address data and click Ok to select the supplier. Fill in date, Invoice Number, Purchase Order (PO) Number and Account Receivable Value as the above figure shows. Click Save button after you fill all the data needed. If you make any mistakes, click Edit button to revise and Delete button to delete Account Payable Beginning Balance. If you have more than one supplier, click New button again. Total Account Payable Balance must be equal with account beginning balance. Inputting account receivable balance will not create any journals, but it will create account receivable voucher. To view account receivable voucher, click [Report], [Purchase and Payable Report], [Account Payable] and [Account Payable Mutation Real Currency], the following figure will appear: 16
17 D. Inventory Beginning Balance Inventory Balance helps you to fill in accrued inventory balance when you start to use the program. For example, you have inventory beginning balance of 100 pairs of shoes with the price unit USD 43. Before inputting Inventory Beginning Balance, you must create product category and product data. To view Inventory Beginning Balance window, press [Option], [Beginning Balance] and [Inventory Beginning Balance] on menu program. The following is Inventory Balance window: 17
18 Select Location where the products are stored by press data search button. Select product code by using data search button on the right side. Select product data that previously made. Fill in balance stock in quantity and price unit. Press Save button to save inventory beginning balance information or Cancel button to cancel data creating. Stock value in inventory beginning balance list must be balance as in the account beginning balance. Click Edit button to revise inventory beginning balance or Delete button to delete inventory data. The entered inventory beginning balance input will become a statement on stock card. To view the statement, click [Reports], [Product Report], [Inventory] and [Inventory Ledger by Location], but the date filter should be selected from December 1, 2009.The report will appear as follows: Increased quantity due to inventory beginning balance Transaction There are many kinds of transaction in Zahir Accounting such as purchase, sale, cash receive, cash payment, etc. 18

19 A. Purchase On January 1, 2010 your company purchased 50 pair of shoes with the price unit USD. 45., 10% VAT and delivery cost USD. 25 and down payment USD. 250 with credit payment. To create purchase, press [Purchase], [ Enter Transaction] and [Received Goods] on menu. Received Goods window will appear as follows: Fill in any data needed such VendorName, Invoice Date, and Item Number. Vendor Name. To fill in vendor name, click data search button on the right side. When vendor data search window appears, select the appropriate vendor data. Since BETTS has already in the list, select as vendor Invoice Date. Fill in according to the purchase transaction. Click calendar button on the right side of the invoice date. 19
20 Item Number. To preview product data, double-click product data column so that the product list window will appear. Select product data needed or click New button if the data is not available. Fill in the quantity in amount of 50 and price unit USD. 45. Tax. Since the purchase is charged with tax, fill in the column of VAT. To preview, double-click Tax column and select the appropriate one. Click New button if there is no list. Zahir has already consisted of tax VAT, so that the program will automatically fill in 10% of total purchase and the rate will appear in Total Tax. Fill in the delivery cost USD. 25 on Landed Costs and the account will automatically send to Cost account for delivery. If you do not want the account, click red triangle button next to it. The Delivery Cost Account Code will appear and select the appropriate account code by clicking data search button. Down Payment. Since your company pays down payment in amount of USD. 250 and, when you fill it in, the account will automatically journalize to Bank account. If you do not want the account, click red triangle button next to it. Delivery Cost Account Code window will appear. Select the appropriate account code by clicking account data search button Do not forget to check mark the invoice if you want to post the transaction and appear automatically. If you have fill in all data needed, click Save button. Since there is down payment, the down payment confirmation window will appear as follows: 20

21 Click Save button of you have filled all data needed The Created Report Goods received transaction will create many reports automatically if the transaction has been posted. All reports are printable and previewed on Report Module. The examples of the report are as follow: Journal Transaction Report. To view, click [Reports], [General Ledger] and [Journal all transaction] 21
22 Balance Sheet. To view, click [Reports], [Financial Statements] and [Balance Sheet Standard] Changed value due to purchase journal General Ledger. To view, click [Reports], [General Ledger] and [General Ledger-Running Balance] 22
23 Value of purchase transaction Purchase and Payable Reports. To view, click [Reports], [Purchase and Payable Reports], [Purchasing] and [Goods Received by Category Summary] You can also preview the payable voucher which will be added automatically if the term of payment is in credit. You could control the company liabilities position through this statement. To view the statement, click [Reports], [Purchase and Payable Report], [Account Payable] and [Vendor Balance Default Currency] 23
24 Purchase down payment Total Purchase Product Report. One of the reports is stock card report. The stock will automatically be added because of the received goods transaction. To view the report, click [Reports], [Product Report], [Inventory] and [Inventory Ledger By Location] Increased inventory due to goods in from purchasing 24
25 B. Account Payable Payment From the above purchasing transaction hence, your company s payable in amount of USD. 5, for the supplier of Betts. For example on January 7, 2010, the paid payable for invoice is USD For the payable payment make the account payable payment transaction by pressing [Purchase] and [Account Payable Payment] on menu. The Account Payable Payment window will appear as follows: Select the needed Account as an account releasing the account payable payment. Select by pressing Dropdown Combo Box Account button. For cash check payment, select Checking Account Click data search button on Received to select the payment receiver. Select Betts since the payment is received by the supplier. Fill in the transaction date. Click calendar button and input January 7,
26 Double-click Invoice Number so that the invoice list from the previous payment will appear. Select invoice number Fill in the payment value and click the amount of the value by mouse. The formed value will be equal with the payment value. Click Save button if you finish inputting the data The created report The above payable payment transaction will form various reports automatically if the transaction has been posted. All reports could be printed and previewed in a report module. The example of the reports are: Journal Transaction Report. To view, click [Reports], [General Ledger] and [All Transaction Journal] Balance Sheet. To view, click [Reports], [Financial Statement], and [Balance Sheet-Standard] 26
27 Changed balance due to payable payment In addition to the above report, you also can see the report of payable voucher. With this report, you could control your company liabilities position. To view this report, click [Report], [Purchase and Payable Report], [Account Payable] and [Vendor Balance Default Currency] 27
28 Decreased payable voucher due to payable payment C. Sales Before conducting sales, first you could set an automatic selling price. To use this facility, click [Inventory], [Activity] and [Set Selling Price] on menu. Inventory selling list window will appear. Give a check mark to Calculate Automatically and press Calculate Selling Price button to display the following window: 28
29 If you wish to state 20% Percentage Margin, fill the column and click Process button. The standard selling proce will automatically appear as follows: Selling price is automatically displayed by using Calculate Automatically facility For example, your company conducts the sale to Petrocentral on 4 January 2010 with the shoes supply with the amount 25, unit price USD and VAT 10%. Delivery cost is USD. 25. and down payment is USD. 750 and the rest of the payment are in credit. 29
30 To create Sales, press [Sales], [Enter Transaction] and [Sales Invoice] on pictorial menu. Sales Invoice window be as follows: Customer Name. To fill in the Customer Name, click data search button on the right side and customer data search window will appear. Select the appropriate customer data, in this case, is Petrocentral. Invoice Date is filled according to sale transaction date, in this case is 4 January To fill in, click calendar button on the right side of invoice date. Item Number. To preview Product Data, double-click item No. column to display the inventory window. Select the appropriate item data or click New button if the data is not available. 30
31 Tax. Since the purchasing is charged with VAT, fill it by double-clicking tax column. If the tax list appears, click one of the taxes or click New button to create new data. Zahir has already consisted of tax, the so-called VAT, and the program will automatically fill in 10% from total transaction. The value will appear in Total Tax. Fill the value of delivery cost equal to USD. 25 in Landed Cost. Automatically, the account will journalize to Revenue on Delivery Account. If you wish to preview the account, click the red trilateral button next to it so that the Delivery Cost Account Code window will appear. Select the appropriate account code by clicking the data search button Down Payment. Since your company received the down payment in amount of USD. 750, you have to fill it here. Automatically, the account will journalize to Bank account. If you wish to preview the account, click the red trilateral button next to it so that the Delivery Cost Account Code window will appear. Select the appropriate account code by clicking the data search button Do not forget to check mark the invoice if the transaction is already posted and you wish to preview the report automatically. If all data is filled, click Save button. The created report The above goods delivery transaction (sale) will create many kinds of report automatically if the transaction has been posted. All reports can be printed and previewed in a report module. The example of the reports are: Transaction Report Journal. To preview, click [Reports], [Ledger] and [Journal All Transactions] 31
32 Balance Sheet. To preview, click [Reports], [Financial Statement] and [Balance Sheet Standard] 32
33 Changed balance due to sales Profit and Loss Statement. To preview, click [Reports], [Financial Statement] and [Profit and Loss Standard] 33
34 General Ledger. To preview, click [Reports], [Ledger] and [General Ledger Job and Dept] 34
35 Value in ledger due to sales transaction Sales and Account Receivable Report. Consists of many kinds of reports, one of them is complete sales report. To preview, click [Reports], [Sales and Receivable Report], [Sales] and [Sales Invoice Detail] 35
36 You can also preview the receivable voucher which will be added automatically in accordance with the sales transaction. You could control your company receivable position through this report. To preview the report, click [Reports], [Sales and Receivable Report], [Account Receivable] and [Customer Balance Default Currency] Receivable voucher due to down payment Product Report. Consist of many kinds of reports; one of them is stock card report in which the stock will be automatically decreasing because the sales payment is in credit. To preview, click [Reports], [Product Report], [Inventory] and [Inventory Ledger General] Goods-out due to sales 36

37 D. Account Receivable Payment From the above sales transaction, your company will have an account receivable in amount of USD for Petrocentral, if on January the debt is paid in amount of USD for invoice number To pay the account receivable, create an account receivable payment transaction by clicking [Sales] and [Customer Payment] on pictorial menu. The following is Account Receivable Payment window: Select the needed Account as an account for account receivable payment by pressing Dropdown Combo Box button. For example, if the payment is in cash check, select Checking Account on the Account. Click data search button on Receiver to select the name who receives the account receivable payment. In this case, select Petrocentral. 37
38 Fill the date of the transaction. Click calendar button and date input of January 22, Double-click Invoice No. to display the previous sales. Select invoice no Fill the amount paid (USD ) and click in Amount by using mouse. The value should be equal with the amount paid. Click save button if you have input all data needed. The Created Report The account receivable payment transaction will decrease the receivable voucher and create journal to decrease the account receivable as the following example: 38
39 E. Inventory Adjustment Inventory Adjustment Journal used to input inventory adjustment transaction. For example, some goods in the location have been used for a project production, promotion or decrease for any other activities. For example, your company took 2 shoes for promotion activity on January To create Inventory Adjustment Inventory, press [Inventory] [Enter Transaction] and [Inventory Adjustment] on pictorial menu. 39

40 Date. Fill the transaction date. Press Date Selection Button on the right side to preview and select date From Location. Fill with the location data where the goods are taken from To Location. Fill with the location data where the goods to be transferred Code. Fill with existing Inventory Code as in Creating New Inventory Data section. Quantity. Fill the goods quantity for the transaction. Since 2 shoes are taken from the location, fill the amount with -2. The negative mark shows the amount of goods in inventory is reduced by 2. Account. Fill with Account Code. For the above example, the credited account is the advertising expense account and promotion on profit and loss. If you have filled all data, press Save button to save the journal or press Cancel to cancel it. The inventory adjustment transaction will create transaction journal and stock card will decrease as follows: 40
41 Total spent goods from inventory adjustment Automatic COGS F. Cash Transfer It is not representing a special journal but only as a tool to make the transaction of cash transfer from one bank account to other bank account. For example, on January 16, 2010 your company transferred some money from Checking Account to Petty Cash in amount of USD To preview Cash Transfer facility, press [Cash & Bank], [Enter Transaction] and [Fund Transfer] on pictorial menu. The window will appear as follows: 41

42 From. Fill with the credited bank account. Click account data search button and select Checking Account. To. Fill with the debited bank account. Click account data search button and select Petty Cash. Date. Fill the transaction date. Press Date Selection button on the right side to preview and select January 16, Ref. Fill with the transaction reference. The program will automatically fill with TRANS to show the cash transfer transaction. However you are not allowed to change it. Amount. Fill with the transferred fund amount. Fill with USD The transaction will create journal and automatically will change the balance on the balance sheet with the following value: 42
43 G. Cash - In Journal Cash In Journal is used to input cash in transaction. To view, click Cash - In Journal by accessing pictorial menu on [Cash & Bank], [Enter Transaction] and [Make a Deposit]. The cash In journal window will appear as follows: Select the needed account for cash - in. Select by pressing Dropdown Combo Box Account button. If the payment is cash check, select Checking Account on the Account. Click data search button in From to select the payer s name. Select Intl. Bank Fill the transaction date. Click calendar button and select 25 January 2010 Cash allocation item on the bottom side of the journal is filled with the appropriate account for cash expenditure. Select Bank Draft and fill the paid amount. 43
44 Fill the money paid in amount box. The value should be equal with the value on fund allocation. Click the mouse on this area and the program will automatically calculate it. Click Save button after entering all data. Based on the above transaction, the transaction journal will automatically appear as follows: H. Cash - Out Cash - Out is used for cash expenditure transaction, for instance the operational expense. Do not use this facility for receivable payment in relation with the receivable voucher. For example, company cash expenditure from Checking Account on 25 January 2010 is used for Cindy s salary payment in amount of USD To preview cash - out, access pictorial menu on [Cash & Bank], [Enter Transaction] and [Write a Check]. The cash - out journal window will appear as follows: 44
45 Select the needed account as cash account issuance. Select by pressing Dropdown Combo Box Account button. For cash check payment, select ABN Amro bank on the account. Click data search button in Received By to select the receiver s name. Select Hadi. Fill the transaction date. Click calendar button and select 25 January 2010 Fund allocation item on the bottom side of the journal is filled with the appropriate account code for cash expenditure. Select Wages and Salaries and fill the amount of the money paid. The amount is filled with the money paid. The value should be equal with the fund allocation value. Click the mouse on this area and the program will automatically calculate it. If you have inputted all data, click Save button. The transaction journal will automatically appear as follows: 45
46 Based on the above report, the Balance Sheet will be as follow: 46
47 47
48 Following is the Profit-Loss Report: 48
49 CHAPTER II BASIC ACCOUNTING THEORY To support your understanding on Zahir Accounting program, we provide the basic accounting theory as your guidance to know the logic of Zahir Accounting as an integrated accounting software 2.1 Definition of Accounting Accounting is a process to identify, classify, sort, and provide financial transaction (economic information) which user could make assessment and decision-making. Tips: In learning this section, you do not have to be confused with any difficult terms or theory. Zahir Accounting Version 5.1 requires you to enter data by using the same form as in real activities. If you find any difficulties and specific cases in making transactions, learn more the accounting theory from accounting textbooks Account List Account list is the posts used to summarize any increase or decrease in certain assets, such as cash, or any other assets, liabilities and equity, revenue and cost. Asset Account Classification Cash Sub Classification Petty Cash Cash HS Bank 1906 Account BCA Bank Total Cash Receivables Account Receivable Non Account Receivable Total Receivable
50 2.1.2 Account Classification This transaction record is classified into appropriate account group and will be displayed in the financial statement. See the explanation from Account Data and Account Classification Journal Journal is the financial transaction record based on the activity sequence. Required information to create journal is the account based on the transaction, debit or credit value of transaction. General journal is the example of the simplest journal Accounting Equation In an accounting equation, the part owned by the company is called asset. On the right and left side we could find the expenditure source consists of creditor s rights or liabilities and owner s rights or equities or capital: Asset = liabilities + capital The above accounting equation is always used in manual or computerized transaction journal. Asset will be positive if it is debited and negative if it is credited. In the contrary, liabilities and capital will be negative if they are debited and positive if they are credited. Then, what about profit and loss? Profit and loss is a part of balance but it is only the net profit that is previewed in Equity group. Net profit gained from the total amount of revenue subtracted with all cost in one period. If the revenue transaction occurs, the revenue account will be credited and if expense transaction occurs, the cost estimation will be credited. Note: Generally, the balance sheet as the above accounting equation uses T Account model. Asset is positioned on the left side while Liabilities and Equities on the right side. However, in order to make it simpler, Zahir Accounting Version 5.1 places Liabilities and Equities after Asset in downwards format. 50
51 2.2 Examples of Transaction Example 1. If you remit some money to bank in amount of $. 50,000 as company's equities, the Bank account will be debited and Equity account will be credited. To create a journal, use cash in journal and preview the transaction journal report to preview the results Bank $. 50, Capital $. 50,000 The balance sheet of the above transaction is: Asset = Liabilities + Capital Changed 50,000 = ,000 Example 2. Your company purchases vehicle at the prices of $. 20,000. The vehicle account will be debited and bank account will be credited. To make a journal, use cash payment journal Vehichle $. 20, Bank $. 20,000 The balance sheet as follow: Asset = Liabilities + Capital Cash + Equipment Beginning Balance 50,000 = ,000 Changed -20, ,000 = 0 Ending Balance 30 million + 20 million = ,000 50,000 = 50,000 Example 3. Your company purchases goods inventory in amount of $ 100,000. The payment will be conducted by next month (credit payment). In this case, the inventory account will be debited (increase) and account payable will be credited (decrease). To make the journal, use purchase journal. 51
52 1-400 Inventory $ 1, Account Payable $ 1,000 The balance sheet: Asset = Liabilities + Capital Cash + Inventory + Equipment = Account Payable Beginning Balance 30, ,000 = ,000 Change 0 + 1, = 1,000 Ending Balance 30, , ,000 = 1, ,000 51,000 = 51,000 Example 4. Your company conducts credit sale in amount of $ The account receivable will be debited and equity account will be credited. Use sales journal to make this journal Account Receivable $ 51, Sales $ 51,000 The balance account will be represented by current year earning. The balance sheet as follow: Asset = Liabilities + Capital Cash + Receivable + Inventory + Equipment = Payable + Capital + Gain Beg. Balance 30, ,000 = ,000 Change 0 + 5, = ,000 End. Balance 30, , , ,000 = 1, ,000 +5,000 56,000 = 56, Posting In manual accounting posting system, after making transaction journals in every end period (or in few days), the transaction values will be posted in general ledger for every account. If the general ledger is filled based on transaction journal which involves cash account, the final form of general ledger will be alike with your bank account book. In Zahir Accounting Version 5.1 the posting process will be done automatically and you could preview the general ledger from every account. 52
53 2.4 Correcting Mistakes For any mistakes occurred in making journal, the correction is conducted by making reversing entries through the same journal but with reversible values, for example debit will be changed to credit and conversely. Tips: Zahir Accounting Version 5.1 enables users to revise/correct the journal making mistakes. However, the facility is limited on general journal; cash - in journal, and cash -out journal. In order to do this, re-preview the previous journal through general ledger, revise the wrong information and re-record them. Besides the above revised journal, to maintain your data consistency, you must make a reversing journal. 2.5 Closing Period By the end of the month, the temporary company ledgers account such as revenue and expense will be closed for they only depict activity on a certain period. The temporary account on the next period will be started again and the balance should be zero. In every end of the year, after processing monthly closing period, the annual closing period process is also conducted but limited to transfer current year earnings balance to retained earnings. 2.6 Financial Statements Financial Statement is information provided as the main foundation in business decisionmaking process. Accounting statements are based on the previous transaction journals and have been posted in general ledger. The most important Accounting statements are Balance Sheet, Income Statement and Cash Flow. Balance Sheet is a summary list of asset, liabilities and equity of a whole part company on a certain period which is, usually, closed on the last day of a period/month. Income Statement is a revenue report and expense summary of a company on a certain period. 53
54 2.7 Adjusting Transaction To identify the net profit obtained and to draw up the financial statement in accurate figure, the business period is divided into the same accounting period. Zahir Accounting uses months period. Transaction adjustment in every ending period is needed as a consequence of a relative short accounting period usage on a certain business period. Transaction adjustment deals with the revenue and expense transaction with longer benefit period than the accounting period with the consideration that revenue or expense could influence the decision-making process. For example, if you purchase the fire insurance policy in a period of a year, you couldnot charge the total value of insurance policy at the month you buy the policy, but only 1/12 of the total value of insurance policy. Types of Adjusting Transactions There are four common categories of adjusting transaction in a company: 1. Entries to apportion recorded costs. It happens if costs have been paid but their benefit period is longer than the accounting period. You have to debit the asset account (balance account) when you spend the cost. By the end of period, the asset account is debited and cost account (income account) is credited. 2. Entries to apportion unearned revenue. Occurs when customers pay the product or service in advance for some periods and customers will receive product or service on the next periods. You have to credit the payable account (balance account) when you receive the payment from customers and by the end of period, the payable account is debited and revenue account (profit-loss) is credited. 3. Entries to record unrecorded expense. If some expenses occurred but your company does not have the invoice yet. 54
55 4. Entries to record unrecorded revenue. If some revenue occurred (customer uses your service) but customer has not received the invoice on the period when the revenue occurred. Adjusting Transaction Characteristics 1. Every adjusting transaction involves one of revenue or cost accounts (profit-loss account) and asset or payable account (balance account). 2. Adjusting transaction is based on revenue or accrual accounting, not based on invoices or cash payment on a certain period Case Samples 1. Entries to apportion recorded costs Down payment. When you purchase $ 2,400 insurance policy for 12 months, the expense journal will be: Insurance in advance $ 2, Cash $ 2,400 By the end of period (end of month), you should make the adjusting journal with general ledger as follow: Insurance Fee $ 2, Insurance in advance $ 2,400 The amount of $ 2,000 is based on the insurance value divided into 12 months benefit period. Office Supplies. For example your company purchases many stationeries for inventory amount $ 500. The cash expense should be made as follow: Stationary Inventory $ Cash $ 500 By the end of month, the inventory amount is $ 400 Then, by the end of month, you should make the adjusting journal by using general ledger as follow: Office Administration Expense $ Stationary Inventory $
56 The amount of $ 100 comes from $ 500 minus $ 400, as used inventory for one month. Machine and Equipment Depreciation. When you purchase 7,000 machine, then you have to estimate its benefit period and value by the end of benefit period. For example, the machine benefit period is 5 years and the estimated residual is Rp. 1,00, then the monthly depreciation is (7,000 1,000) divided into 5 years, the result is divided into 12 months that is 100. ( There are some other methods to calculate depreciation, this sample uses straight line method). When you purchase the machine, you should make the cash expense journal: Machine and Equipment $ 7, Cash $ 7,000 By the end of month, you should make the adjusting journal by using the general ledger: Machine and Equipment Depreciation $ Machine and Equipment Depreciation Accumulation $ 100 Machine and Equipment Depreciation Accumulation account is contra account of machine and equipment account in asset. It is generally used to recognize which part of machine has been used. 2. Entries to apportion unearned revenue Advance revenue. For example your customer pays $ 6000 for the following 6 months service. When you approve the agreement, you should make the cash-in journal as follow: Cash $ 6, Advance revenue $ 6,000 By the end of period, you should make the Adjusting journal with general ledger: Advance revenue $ 1, Service revenue $1,000 56
57 You only need to make the Adjusting journal for 6 months. The above adjusting journal could be made with sales journal, where the down payment account (previously bank account) is chaged to advance revenue account. Entries to record unrecorded expense. Debt interest. For example your company has $3,000 debt to Bank, the loan period is 3 months with 18% annual interest. The bank will require you to sign the promissory note. You should make cash-in journal for this transaction, as follow: Cash $ 4, Notes Receivables $ 4,000 Notes receivables is similar to account payable, but the difference is notes receivables states the payment including the interest. In the example given, your company should settle $ 4,000 within 3 months, and pay $ 135 interest (3,000 x 0.18 x 3 /12). $ 135 is the total interest for three months. Although you do not pay monthly interest, but one-third of total interest is monthly charged, that is Rp By the end of months (for 3 months) you should make the adjusting journal as follow: Interest fee Interest Debt 451 When you pay the debt, you could make the journal transaction with expense journal, as follow: Notes Receivables $ 4, Interest Debt $ Cash $ 3,135.1 Employee s Salary. For example your company pays employee s salary on the date 5 of following month. Then, by the end of period (end of month) you should make the adjusting journal with general ledger as follow: Salary $ Payable Salary $
58 When you pay the payable salary on date 5, you could make the payment transaction by using expense journal as follow: Payable Salary $ Cash $ Entries to record unrecorded revenue For example your company provides long term service agreement and will be charged when the service has finished. Then, by the end of period (end of month) you should make the adjusting journal with sales journal as follow: Account Receivable $ 1, Service Revenue $ 1,000 On the following period when the service has finished and customer paid your service, the sales journal is: Account Receivable $ Service Revenue $ 500 And account payable payment as follow: Cash $ 1, Account Receivables $ 1,500 You should make sales journal for $ 500, because your service would have finished in the following period and the total value is $ 1,500 which $ 1,000 has been approved. 2.8 Conclusion of Basic Accounting Theory Zahir Accounting Version 5.1 is designed to use easily even if you do not know the accounting theory. By understanding the accounting theory you could take benefit on the reports provided by Zahir Accounting Version 5.1 to make accurate business decision making. 58
59 2.9 Transaction Journal in Zahir Accounting Transaction journal is used to input company financial transaction on the computer and the results are financial statements or analysis. In manual accounting system, every transaction journal is made on the general journal form based on transaction from (for example purchase invoice). In Zahir Accounting Version 5.1 you will only have to fill the forms at they are but, in this case, you do not need to know how the journals are made. Every time you make transaction journal by filling transaction form, the program automatically create the general journal. The following are the transaction journals in Zahir Accounting Version 5.1 : 1. Sales Journal : to input the sales transaction occurred, both credit or cash payment 2. Sales Return Journal : to input sales return transaction, both credit or cash payment 3. Purchase Journal: to input purchase and purchase return transaction, both credit or cash payment. 4. Purchase Return Journal: to input purchase return transaction, both credit or cash payment. 5. Cash - In Journal : to input cash - in transaction 6. Cash - Out Journal : to input cash - out transaction 7. Account Receivable Payment Journal : to input cash - in transaction from customers account receivable payment 8. Account Payable Payment Journal: to input cash - out transaction for account payable payment to supplier. 9. Account Receivable Over Payment Return Journal: to input account receivable over payment return journal. 10. Account Payable Over Payment Return Journal: to input account payable over payment return journal. 11. Inventory Adjustment Journal : to input inventory adjustment transaction such as raw material as the base selling price (standard edition only) 12. Inventory Movement Journal: to input inventory movement transaction such as raw material usage into finished product (standard edition only). 59
60 13. General Journal: to input financial transaction without separate journal such as adjusting transaction. There are also some means to assist the journal creating for routine transaction: 1. Fund Transfer : to make fund transfer journal from cash account to another cash account by using general journal 2. Auto Build: to make inventory transfer journal, cash from inventory to another inventory by using Inventory Movement. It is usefull to make finished/semi-finished goods journal from many raw materials (standar edition only). 3. Inventory Taking: to make inventory adjustment journal when you calculate inventory balance by the end of the month (standard edition only) 4. Account Receivable Write-off Journal : to make account receivable write-off journal, returned goods or cancelled order 5. Account Payable Write-off Journal : to make account payable write-off journal, returned goods or cancelled order Notes : In order to make it easier, the following information in this book will be classified based on economy activities such sales, purchase, cash, and inventory Before entering transaction, you are suggested to make Account Data, Account Classification and any supporting data such Name and Address Data, Project Data and Inventory Data. You could do it even when you are making transaction journal with the Data Search Window assistance. Zahir Acounting Version 5.1 requires the control account information (used accounts in transaction journal which do not appear in journal window). Check the control accounts made by the program, whether or not it is appropriate with your needs. You can use Zahir Accounting Version 5.1 to continue inputting the current transaction, if your company has established before you use Zahir. Before inputting transaction it is recommended to fill the balance needed. Zahir Version 5.1 is also completed with Procurement Transaction. The transaction will not cause any transaction journal but it controls the process from the beginning of Material 60
61 Request through the making of PO at Purchase and Quotation Order to the making of SO at Sales Module. 61

62 CHAPTER III PREPARING INITIAL DATA Initial setting is needed to prepare data before they are used in the transaction. The first step to create initial setting is creating new data. 3.1 Create New Data To create new data in Zahir Accounting, open Zahir program by clicking [Start], [Programs] and select Zahir Accounting System Version 5.1 and the following window will appear: The following are the button functions on the underside of main menu window: Open Previous Data to open the last financial data you run 62
63 Create New Data to create new financial data Open Data to open zahir financial work data Open Backup File to open zahir backup data Operation Manual to display the Manual of Zahir Accounting as you read right now Exit to exit from program To create new financial data, press New Data button on Main Menu or if you open other financial data previously, press [File] and [Create New Data] on program menu. When creating new data, the program will display a window consists of company information in which you have to fill all the fields completely. All data should be filled according to your company s actual situation. Company Name is needed as an identity and will be often used on reports display. Click Next to go to the next window. 63
64 Accounting Period is the month you use Zahir Accounting to register the financial transactions of your company. The Year entry should be filled with the period of year the Account List occurs. Note: This program uses the 12 month Accounting List approach with the starting period on January and ending period on December. For example : Current Accounting List Period should be filled with March if you intend to use the program to register transactions on March, and so on. Therefore you do not have to register transaction since January, but only the balance at March for Account Beginning Balance, Account Receivable, Account Payable and Inventory Balance. Click Next to go to next window: 64


65 Click Next to go to next window: If all data have been filled correctly and Data Directory has been determined, press Next button. The window will appear and ask you to read and check all registered information to avoid any mistakes. 65

66 If you are sure that there are no mistakes, press Next button and the program will set up your financial data. Wait for a moment until the main menu is closed. It occurs if you create new financial data through main menu window. If you choose to create new data through program menu, a small window with data creating status will be displayed. You have to wait a moment until this small window is closed after finishing data creating process. Tips: Some company information can be changed, press [File] and [Company Information Set Up] on menu program. A window consists of company information and Accounting List Period will appear. Click [Process], wait a moment and Base Currency Data Set Up will appear as follows: Select the currency generally used in your country. Click Next to go to next window. 66

67 Select foreign currency generally used at your company. Determine the exchange rate and click Next button to go to next window. Click Finish button to finish the company currency setting. 67
68 3.2 Creating Master Data Before transaction input, you must create master data used for transactions Account List The first step before inputting transaction journal is to set up Account List used by company. Zahir Accounting Program has a facility of creating Account Data called Account List Classification, List and Control Account List. A. Account List Classification The first step before creating Account List is to set up Account List classification for your financial data. Account List Classification is the classification of Account Lists used based on type or classification such as whether Account List A will be displayed on balance or profit - loss statement. In order to group Account List as a part of classification whether it will be displayed on cash, inventory or in company asset and so on, you must make subclassification. By grouping Account Lists classification or sub-classification, you can read financial statement easily. All you have to do is identifying subtotal figure on balance sheet without calculating balance from each of cash/bank Account. Note : You are strongly suggested to sort the Account List based on Liquidity sequence such as cash is first before inventory since cash is more liquid. The program has organized the Account List classification based on generality so that you do not have to make changes. Account List Classification Set Up To view Account List classification window, press [Options] and [Account Classification] on menu program. The following is Account Classification window: 68

69 The 1 st level consists of Classification List and 3 rd level consists of sub-classification list. You cannot change Classification List since the program has made this list with the common financial data. Note: Click Alias button to display the alias name Click Next button to go to next window: 69
70 To change the numerical order or information on Level 1, activate number or information you want to change by using mouse (point the cursor to the number or information you want to change and left-click once). If it has been activated, press [F2] button on keyboard so that the number or information blocked previously will be changed into a thin line (cursor). Use left or right arrow on keyboard to continue making changes. Click Next button to go to next window: 70
![You can use [New] button to add new sub-classification or [Delete] button to delete active sub-classification (active means the cursor is on sub-classification position).](/docs-images/71/65852019/images/71-0.jpg "Use Setup button to set-up Account List in current assets. You could make some posts on level 2 by grouping the report posts on level 3 by filling the lines on group column with appropriate words.")
71 You can use [New] button to add new sub-classification or [Delete] button to delete active sub-classification (active means the cursor is on sub-classification position). Use Setup button to set-up Account List in current assets. You could make some posts on level 2 by grouping the report posts on level 3 by filling the lines on group column with appropriate words. Then fill the lines on the column by doubleclick and select the Account List needed. Notice: Sub-classification number cannot be the same as other sub-classification and the first number from sub-classification number should be the same as the classification number!! Click Next button to go to the next window: 71
72 If you need Account List on Level 2, type the total number you want and double-click under the From column so that the Account List window will appear with To column. Press Tab button on keyboard to add the second line. Press Next button so that the window will appear as follows: 72

73 Press Next button so that the window will appear as follows: And press Finish button If there is an addition on level 2 and the grouping on level 3, the report will be formed as follows: 73
74 Asset Cash and Bank Cash Petty Cash Cash 0.00 Total Cash 0.00 Bank Dollar Cash Bank Dollar Bank 0.00 Total Bank 0.00 Total Cash and Bank 0.00 B. Account List If you have made Classification on Account List, you can start making Account List used by company. To view the account list, press [General Ledger] and [Chart of Account] on pictorial menu. The following is Account List window: 74

75 Press New button to create New Estimation, Edit button to revise Account List Data and Delete button to delete Account List Data. Note: This program has prepared the common Account Lists. You can add, edit or delete to make some adjustments. Tips: At first column of Account List you can find button, press this button to display General Ledger per Account List Creating New Account Press New button on Account List window to display Add New Account List window. Fill any information needed. 75

76 The first step to do is to fill Classification. You have to decide on which sub-classification the account you will make. Use Dropdown Combo Box classification to display Subclassification List. Insert account Code and Account Name of account you will make. Give Check Mark sign on Cash/Bank Account Check Box if this Account List is cash or bank Account List. If you finish filling any information needed, press Save button to save this new Account List data or press Cancel to cancel the data created. Notice: The first two number from Account List code number must be the same as subclassification number on the caption (window tittle) If you want to display this cash or bank Account List on cash flow report, give check mark on the check box. Revising Account List Data Press Edit button on Account List Window to display Edit Account and revise the information. Deleting Account Data Press Delete button on Account List Window to delete Account data. 76
77 Program will ask whether you really want to delete the data. If you press Yes button, the active Account data will be deleted. If the current data have been used in some transactions, the program will display an error warning. Budget and Realization To create Budget and realization for each Account List, press Budget button on Account Data window. If this is your first time using this Budget facility, the Budget window will display the month that the transaction occurs and realization column has been filled. To fill the Budget, place the active cell to Budget column and type the budget value. To fill in realization, fill in the realization column. Notice: You can only fill the Account List realization value on months before the early period of Accounting List that you have determined when you create New Financial Data Control Account In performing some automatic operation, Zahir Accounting program will need some information dealing with control Account List. For example, if you perform credit sales, the program will create journal automatically between sales and account receivable. In this case, the Account List code for account receivable should be recognized. The same thing should be done if you want to make common Account Lists for inventory, bank, account payable, etc. You only have to inform the control Account once from control Account set up facility. Control Account Set up To display control Account List, press [Options] and [Control Account] on program menu and the following picture will appear: 77

78 Click Next button to go to the next window After the Control Account Window appears, use keyboard or double-click the left button of mouse on Account List column code to modify control Account List code. Next, the Data Search Window contains all Account List will appear. Select Account List code you want to use in Control Account List. If all of important Account Lists has been set, press Close button to close the form. Tips: See Control Account Code if you want to modify the control Account code when you perform transactions. Note: The program has prepared Account Lists based on Accounting List Standard so that you could/couldnot perform modification. Before you define/set up the Control Account, it will be better for you to prepare the Account List Data at first. 78
79 3.2.3 Address Data Zahir requires address data master such name, customer, supplier, employee and partner. To create, press [Data store], [Name Address Data] so that the Name and Address List will appear. Click New button so that the following window will appear: ID: create ID No. for every name. Make different between one address and another Company: Fill with the company name Currency: Select currency used in next transaction for inputted address Type: Select the appropriate company type. In selecting Vendor, Customer, Employee or Other in Zahir, you must select the right type for it will have an effect on displayed address list when the transaction occurs. Classification: Click data search button on the right side and select classification needed or click New button if the group is not available. 79

80 Type: select the appropriate address whether it is a company or personal You could fill other data or not, but it should be noticed that the above data should be all filled. Press Address and Notes Tab to display the following window: Fill any data needed. Click Save button to save the data. Do the same thing to create other address data. 80

81 3.2.4 Product Category The first step to create inventory is by creating product category. You must classify the current inventory to determine the account data used automatically and to make it easier for report selection in Zahir. To display the product category, click [Inventory], [Product Data] and [Product Category] so that the following window will appear: Click New button to create a new data group. Click Edit button to modify the current data and Delete button to erase unused data. The following is the appearing window if you click Edit button: 81
 - Purchased if the goods are purchased from other party and not produced")
82 Product Category: fill with the name of the product category needed Inventory Property: consists of three Check Box items. Give the check mark on: - Inventory if the goods are managed in inventory location (the goods are not sold or used directly) - Purchased if the goods are purchased from other party and not produced internally from the company - Sold if the goods will be sold to buyers. Fill the created control account based on the selected inventory property. The selected account will be created automatically when the transaction occurs on sales, purchase, or inventory. Click data search button to display account list. 82
83 Inventory Property: you must select whether you use FIFO, LIFO or Average. The selection result will determine the form of cost of goods sold on stock card. Click Save button if you have inputted all information needed Tips: - For produced inventory, you could create Raw material and finished product goods group. If your company is a trading company, you can create product category according to your reports need. - Every product category should be followed with making different account for its inventory or base price Product Data After creating product category, the second step to create inventory is making the product data. To display product data, press [Inventory], [Product Data] and [Product Data] hence the product data will appear. Press New button to create New Inventory Data, press Edit button to Revise Inventory and Delete button to Delete Inventory. Tips: On the first column of inventory list there is button. Press the button to display Ledger by products. The way to use the inventory general ledger is the same as general ledger account. Note: In Zahir Accounting Enterprise, you can not only manage and register the stored goods in the inventory, but also goods that are not stored such the bought goods and used in production process. 83
 - Description is filled with the name or item description (must")
84 A. Creating New Inventory Data Press New button on Inventory List Window to display the new data registration window. Fill any information needed. The product data consists of some fields such as: - Item Code should be filled with the inventory code /product data (must be filled) - Description is filled with the name or item description (must be filled) - Product Category is filled with the product category relates to the product data. Select the appropriate product category by clicking data search button on the right side - Group is filled with the related product data. Select product category by clicking the data search button on the right side - Alias Code is filled with the alias name for the product data - Basic Unit is filled with the unit of goods - Report Unit is filled with the unit of report used in the relevant product data - Use Serial Number checkmark if the utilized product data uses serial number / IMEI 84
85 - Use Lot checkmark if the utilized product data uses lot and expiry date - Consignment checkmark if the product data is utilized for consigment goods - Not Active checkmark if the product data is not already active and will not utilized anymore - Seasonal Product checkmark if the product data is the seasonal product used for inventory management - Minimum Inventory is filled with the information of allowed minimum inventory - Minimum Order is filled with the information of minimum order to supplier - Selling Unit Price is filled with the goods selling price to buyer - Tax on the right side of Selling Unit Price is filled with the goods sales tax to be sold to buyer (in percent) - Main Vendor is filled with the vendor s name for this goods purchase Tips : For inventory with serial number / IMEI such mobile phone, motorcycle, car, or other electronic equipments to be controlled per goods or per serial number, use serial number and inventory report related to serial number on the Report For inventory with lot number and expiry date such medicine, use lot facility For inventory closely related with season, use facility on product data to be used in inventory management facility To fill information dealing with Inventory Data on Account Code and Cost of Goods Sold, press Account Code and Cost of Goods Sold on the upper side of Product/Inventory Data window as the following example: 85
 - Purchased if the goods are bought from other party and not produced")
86 Property: consists of three Check Box items. Give the check mark on: - Inventory if the goods are managed in inventory location (the goods are not sold or used directly) - Purchased if the goods are bought from other party and not produced internally from the company - Sold if the goods will be sold to buyers. Account Code has some possibilities or combinations: 1. If the goods is only stored whether they are bought or not, but they are not sold to customers, such as in-process goods or purchased raw material and stored before they will be used, the appearing account code is the inventory account code. Program will fill automatically based on previous Control Account. 2. If the goods are purchased only, for example raw material used up for production, the appearing account code will also only one which is cost account code 86
87 3. If the goods are sold only, for example goods produced by your company, the appearing account code will be sales and sales return 4. If the goods are purchased and sold only, there will be two account codes, cost, sales and sales return account code 5. If the goods are only sold and stored even if they are not purchased, you have to determine the three account codes which are base price, sales, sales return and inventory. Inventory System is a base price system determination with three possibilities such: 1. FIFO (First In First Out), where the base price is determined based on the earliest delivered goods price in location/ firstly bought 2. LIFO (Last In First Out), if the base price is determined based on the most recently goods price delivered in location/purchased 3. Average Costing, where the base price is determined by using the average price of goods remained at location. To fill any information dealing with Inventory Data on automatic selling price for each customer category depended on sales quantity, press Selling Price tab on the upper side of Product/Inventory Data window as the following example: 87
88 - Customer Category, press this button to create group data if the data is not available - New, press this button to create selling price for each category. On group column, press to select the previous group created. - Delete, press this button to delete existing sales price data To fill any information on Tax Data relevant with the product data, where the tax occurs for each transaction, click Tax tab as the follows: 88

89 First, make tax data to be utilized and fill any buying or selling tax relevant with goods data by clicking on every tax. Tips: Press to display tax data that has been set up previously on [Data] and [Tax] Press to insert the tax data if the data is not available To fill any information on discount data which will be automatically displayed in sales and purchase with discount level on customer or buyer relevant with product data, click Discount tab as the following example: 89
90 Press to identify the current group data list. The group data could be inputted on Customer Category. Press to display Group and Discount specified Select group by pressing Discount will be displayed more than one/five if Multi Step Discount facility is activated To fill any information on Other Data used in product data, press Other Info tab button on Product/Inventory Data window as the following example: 90


91 Other Info is used to create other information dealing with product data based on its length, width, height, weight or other information dealing with the inventory data. Tips: Press to insert product data picture by selecting the picture box Press to delete the inserted picture Press Auto Build button to use Auto Build Facility from Zahir Accounting Enterprise 91
92 If you have filled any information correctly, press Save button to save the data or press Cancel to cancel data creation. Press New button if you want to create another data without closing the window. B. Revising Inventory Press Edit button on Inventory Data Window to display Inventory Data window for the revised goods data. Note: You can modify on every current field/information on goods/inventory except for Inventory System if the goods/inventory balance is not in zero value. If you have filled any information correctly, press Save button to save the data or Cancel to cancel data creation. C. Deleting Inventory Press Delete button on Inventory List Window to delete Inventory Data Note: you cannot delete the inventory already used in transactions Location Data Location data is used if your company has more than one location and, as a result, you will need the inventory stock control in every location. The relevant transaction is received goods transaction (Purchase), delivered goods (Sales) and nventory transaction. To create location data go to [Inventory], [Other Supporting Data] and [Location] so that the following window will appear: 92

93 Fill any needed data or, at least, fill the warehouse code and warehouse name. if you have filled any data needed, click Save button Measurement Unit If your company has more than one goods measurement unit, you could create other measurements by clicking [Data data], [Other data] and [Measurement Unit] so that the measurement unit window will appear. Zahir has already consisted of pieces and dozenmeasurement unit. Press New button to create new measurement unit so that the following window will appear: 93

94 Unit Code: fill with unit code used for relevant measurement unit Unit Name: fill with the name of unit created Base Unit: checkmark if the current unit is the base unit of goods Click Unit Conversion so that the following window will appear: 94

95 Click New button and when the unit conversion window appears, create formula from unit used. Click Save button if you have inputted all data Delivery Costs If your company has delivery costs relevant with the sold or purchased goods, you can put the costs relevant with such transactions by creating delivery cost data. Click [Data data], [Supporting Data] and [Delivery Cost] so that the Delivery Costs List window will appear. Press New button to create new delivery cost so that the following window will appear: 95

96 ID: fill with id utilized on goods delivery cost Name: fill with delivery cost name Sales Account: fill with the Account List when the sales transaction for delivery cost Account List is created. Click data search button on the right side to search the appropriate Account List. Purchase Account: fill with Account List when the purchase transaction for delivery cost Account List is created. Click data search button on the right side to search the appropriate Account List. Distributed Cost: Put checkmark if the delivery cost has an effect on goods condition and add cost of goods sold. Distribution Method: click cursor to select base price charge to the goods utilized. You can select Volume, weight, or value. Tips: Use this facility to figure product base price, which uses not only raw material but also other elements such delivery, cost, import, wages, etc. 96

97 3.2.9 Foreign Currency Zahir Accounting has foreign currency facility for every transaction. Zahir Accounting consists of two currencies that are Rupiah and Dollar. To insert new currency, click [Master Data] and [Currency Data] so that the currency rate list will appear. Next, click New button to create new currency data so that the following window will appear: Currency Name: select currency you want to insert by using data search button on the right side Click Set Exchange Rate: click this button so that the Exchange Rate Input window will appear. Fill date and exchange rate compared to Euro rate Click Control Account List so that the following window will appear: 97

98 Select Account List by clicking data search button on the right side. Make sure that all Account List needed have been all selected. Click save button if you have inputted all data Note: The journal of transaction will be displayed automatically based on Account List set in this currency Click Exchange Rate Detail to create daily exchange rate Tax Data Zahir Accounting has a multi-tax facility in case your company has several kinds of tax. To create tax data, click [Master data] and [Tax Data] so that the tax list window will appear. Click New button to create new tax data. 98

99 Code: type the code number of tax to be created Tax: type the name of tax to be created Percentage: fill with the percentage of tax amount for the transactions Purchase Tax: fill with Account List needed when the purchase transaction for tax Account list to be created occurs. Click data search button on the right side to search for the appropriate Account List. Sales Account: fill with Account List needed when the sale transaction for tax Account list to be created occurs. Click data search button on the right side to search for the appropriate Account List. COGS Deductible: checkmark if such tax will decrease the product base price. Click Save button to save the tax data created Tips: You can create more than one tax data and utilize them in the same time on one transaction. 99
100 3.3 Beginning Balance Data Zahir Accounting program provides balance facility to assist you in using the software. The balances needed in Zahir Accounting Program are Account Beginning balance, Account Payable Beginning Balance, Account Receivable Beginning Balance and Inventory Beginning Balance. Note: total amount of account payable, account receivable and inventory balance should be equal with the Account List balance Account Beginning Balance To fill the beginning balance, press [Setting], [ Beginning Balance] and [Account Beginning Balance] on program menu and the folloding window will appear: 100
101 To fill beginning balance, slide the active cell on balance position and press [F2] button on keyboard to enter edit phase. Next, type the balance value. Example: If you start to use this program to register the financial transaction on March, you have to insert the ending value of Account List Balance sheet on December as the balance sheet on January, and so on. Press save button if you have finished filling up the Account Beginning Balance and press Cancel to cancel the creation. Note : Account Beginning Balance does not create any journal transaction so that you have to fill Account Receivable Beginning Balance, Account Payable Beginning Balance, and Inventory Beginning Balance separately. It is done in order to equal the value appeared in the sheet with the actual condition Fill the beginning balance value as it is appeared in balance sheet. If the beginning balance is not in balance condition, the program will allocate the difference (unbalanced) to Historical Balancing Account List which functioned as the supporting Account List. In some other days you have to delete the value on Historical Balancing Account List by filling the right balance sheet. The balance sheet should be in balance. The program will sum up the difference value based on Total Asset subtracted with Total Liability and Total Capital The value of Account Balance cannot be changed or modified if you have conducted the annual closing period. Note: Account Beginning Balance in financial term is commonly called as the beginning sheet or the sheet that states the condition of a company in early period. You can change the Account Beginning Balance even if you have conducted financial transactions or if you have finished conducting a monthly closing period. But if you fail to change the Account Beginning balance after you have finished the process of a number of monthly closing period, then you have to change it through general journal. 101
102 The Account Beginning balance input above will create a balance sheet automatically. To display the report, click [Reports], [Financial Statements], [Financial Statement] and [Balance Sheet Standard] as the following picture: 102
103 103
104 3.3.2 Account Receivable Beginning Balance Account Receivable Beginning Balance will assist you to fill the unpaid account receivable balance without creating sale transaction journal. Notice: Account receivable beginning balance does not conduct any kinds of journal transaction so that when you fill the account receivable beginning balance, it will not effect the Account List balance sheet from account receivable. Therefore, you have to fill the Account Beginning Balance separately. To view the Account Receivable Beginning Balance, press [Option], [Beginning Balance] and [Account Receivable Beginning Balance] on program menu. The following is the Account Receivable Beginning Balance window: Press New button to fill Account Receivable Beginning Balance, Edit button to revise, and Delete button to delete. 104
105 Creating Account Receivable Beginning Balance When you press New button and press payment term, the following window will appear: You can fill Customer Name by activating Customer Name Edit Box and press [enter] button on keyboard or by pressing small button on the right side of Customer Name edit box. The program will display customer name list to be selected. To fill Date, press small button on the right side of Date Edit Box. The program will display a mini calendar. Select the date when the account receivable occurs and press OK button on the mini calendar. Fill Invoice No. with the reference/invoice number of the account receivable Fill Purchase Order No. with the PO number of customer 105
106 Fill Currency with the currency used in this account receivable data. Press the arrow to select the currency used. Fill Receivable Value with the unpaid value for the customer and invoice number. Press Term of Payment and the following items will appear: Fill Discount Days with the amount of days customers can make use of discount Fill Due Date with the due date stated to pay the account receivable Fill Early Discount with the early discount set to customers on account receivable Fill Late Charges with the percentage of charge to be paid by the customers. Press save button to save the information on account receivable balance you have created or cancel button to cancel data creation. The inputted account receivable beginning balance will create report on account receivable voucher. To display the report, click [Reports], [Sales and Receivable Report], [account receivable] and [Account Receivable Mutation Real Currency] so that the following report will appear: Transaction of account receivable beginning balance 106
 No., and account receivable value.")
107 Revising Account Receivable Balance After selecting Account Receivable Beginning Balance item you want to revise, press edit button on Account Receivable Beginning Balance window and the program will display the following window: You cannot change the customer name but you can revise the date, Invoice No., Purchase Order (PO) No., and account receivable value. Press save button to save the account receivable balance information revised or press Cancel button to cancel it. 107
108 Deleting Account Receivable Beginning Balance You can delete account receivable beginning balance by selecting account receivable beginning balance item you want to delete on the Account Receivable Beginning Balance window. Click Delete button and the program will display the notice to confirm you to delete it or not. Click Yes if you want to delete and No if you want to cancel Account Payable Beginning Balance Account payable beginning balance will assist you to fill the unpaid account payable balance without creating purchase transaction journal. To view the Account Payable Beginning Balance, press [Options], [Beginning Balance] and [Account Payable Beginning Balance] on program menu. The following is the Account Payable Beginning Balance window: Press New button to fill Account Payable Beginning Balance, Edit button to revise, and Delete button to delete. Note: All processes of creating, revising and deleting account payable balance is similar with the Account receivable balance 108
109 Notice: Account Payable Beginning Balance does not create any journal transaction so, when you fill account payable beginning balance, it will not effect the Account payable beginning balance. Therefore, you must fill Account balance separately. Creating Account Payable Beginning Balance When you press New button on Account Payable beginning balance window, the following window will appear: You can fill Vendor Name by activating Vendor Name Edit Box and press [enter] button on keyboard or by pressing small button on the right side of Vendor Name edit box. The program will display customer name list to be selected. 109
110 To fill Date, press small button on the right side of Date Edit Box. The program will display a mini calendar. Select the date when the account payable occurs and press OK button on the mini calendar. Fill Invoice No. with the reference number of the account payable Fill Purchase Order No. with the PO number of supplier Fill Currency with the currency used in this account payable. Press the arrow to select the currency used. Fill Payable value with the unpaid value for the supplier and invoice number. Press Term of Payment and the following items will appear: Fill Discount Days with the amount of days company can make use of payable Fill Due Date with the due date to pay the account payable Fill Early Discount with the early discount to company on account payable Fill Late Charges with the percentage of charge to be paid by the company due to late. Press save button to save the information on account receivable balance you have created or cancel button to cancel. The inputted account payable beginning balance will create report on account receivable voucher. To display the report, click [Reports], [Purchase and Payable Reports], [Account Payable] and [Account Payable Mutation Real Currency] so that the following report will appear: 110
111 Revising Account Payable Balance After selecting Account Payable Beginning Balance item you want to revise, press edit button on Account Payable Beginning Balance window and the program will display the following window: You cannot change the supplier name but you can revise the date, Invoice No., Purchase Order (PO) No., and account payable value. Press save button to save the account receivable balance information revised or press Cancel button to cancel it. 111
112 Deleting Account Payable Beginning Balance You can delete account payable balance by selecting account payable balance item you want to delete on the Account Payable Balance window. Click Delete button and the program will confirm you to delete it or not. Click Yes if you want to delete and No if you want to cancel Inventory Beginning Balance Inventory beginning balance will help you to fill the remains of inventory balance when you start using the program. Before inputting the inventory beginning balance, you have to create product category and product data (see in Chapter IV). To view the Inventory Beginning Balance, press [Options], [Beginning Balance] and [Inventory Beginning Balance] on program menu. The following is the Inventory Beginning Balance window: Press New button to fill Inventory Beginning Balance, Edit button to revise Inventory Balance and Delete button to delete Inventory Beginning Balance. 112

113 Notice: Inventory beginning balance does not conduct any kinds of journal transaction so that when you fill the inventory beginning balance, there will be no affect. Therefore, besides filling the inventory beginning balance, you also have to fill the beginning balance of Inventory Account. Note: You cannot fill any beginning balance on inventory if the inventory is used on transactions. Creating Inventory Beginning Balance When you press New button on Inventory Beginning Balance window, the following window will appear: Fill Location with the location used on inventory beginning balance data inputted by pressing Data Search Button Fill Item Code with the goods code to be made its balance by pressing Data Search Button Fill Beginning Balance with the amount/value/inventory balance Fill Unit Cost with the inventory base price Serial Number : click checkmark if the inventory uses a serial number Lot Number : click checkmark if the inventory uses a lot number Press Save button to save inventory balance information created or Cancel button to cancel. 113
114 The inputted Inventory beginning balance will become a statement on stock voucher. To display the statement click [Reports], [Product Reports], [Inventory] and [Inventory Ledger By Location] so that the following window will appear: Revising Inventory Beginning Balance If you press Edit button on Inventory Beginning Balance window, the program will display a window to revise data. Notice: You can change all fields except for inventory field (inventory code) Press Save button to save inventory beginning balance information created or Cancel button to cancel. Deleting Inventory Beginning Balance If you press Delete button on Inventory Beginning Balance window, the program will delete the inventory balance data created. Notice: In order to maintain the consistency on base price, you cannot delete Inventory Balance if, after filling the inventory balance, you use it on some transactions. 3.4 Program Set Up Zahir Accounting consists of numerous settings which will affect the display and facility used. To display the needed facility, the setup setting must be displayed. The following are the program Setup of Zahir. 114
![To change or modify some configurations on Zahir Accounting, press [Options] and [Program Setup] on program menu. On the upper side there are some tabs (kind of map sign).](/docs-images/71/65852019/images/115-0.jpg "On the first tab you can determine the 3 digit level value, Account List format, automatic number, etc. The following is the (setup) program of configuration window. 3.4.")
115 To change or modify some configurations on Zahir Accounting, press [Options] and [Program Setup] on program menu. On the upper side there are some tabs (kind of map sign). On the first tab you can determine the 3 digit level value, Account List format, automatic number, etc. The following is the (setup) program of configuration window Program Setting There are several program setting on Zahir can be setup automatically. General setting on Zahir Accounting consists of General setting, Display Design, Regional Setting, Invoice and Tax and Ratio Analysis. A. General Setting The pictorial display on General Setting is as follows: 115
116 Display Calendar: checkmark to show the zahir calendar automatically when it is opened for the first time Open All Data: give checkmark if you open data for the first time, the data opening process is automatically. Display Chart if Available: checkmark to display the chart automatically on every transaction list Use Pop Up Menu: checkmark to preview zahir facility of a module from upside to downside Display Master Data Icon in Every Page: to display data master such Data on every module opened for transaction. FTP Server Set-Up: utilized to import or export data which, generally utilized to inter-branch synchronization. B. Display Design Zahir Accounting provides the facility for user to modify the display (program design) for its convenience. To use this facility, you have to display Setup Program and select Display Design. The display available on Display Design will be as follows: 116

117 Select design available on Theme Design Dropdown Combo Box and use Color Item Dropdown Combo Box to change the colors on specific parts. Next, press color button on the right side and the program will display the color selection window. Select the appropriate color and press OK button. If you want to display program Without Design, give checkmark on the check box. To erase the frame of the program display, do not give checkmark on Display Frame check box. If you want to display program with sound, give checkmark on With Sound Effect check box Press Save button to close the configuration window. Tips: To create your own design, go to the picture directory on Zahir Accounting program directory (use Windows Explorer available on your Windows system). Picture directory contains some directories which become design storage location. Make duplication from the 117
118 available design directory and change with the name you want to and modify the picture files in it. C. Regional Setting To change the display (format) of currency and date, press Regional Setting on the upper side of configuration window: Date Format. On date format, d means day, m means month and y means year Fill Date Separator with character you want to insert between date parts such - to display Fill Short date format with a combination of date code to be used by program to display the date on a short form. Fill Complete Date Format with a combination of date to be used by program to display the date in a complete form. 118
119 The following are the date code can be created: Code Meanings d display the day in numerical form without 0 in the beginning (1-31) dd display the day in numerical form with 0 in the beginning (01-31) ddd display the abbreviated name of the day (Mon, Tue, Wed.) dddd display the complete name of the day (Monday, Tuesday ) m display the month in numerical form without 0 in the beginning (1-12) mm display the month in numerical form with 0 in the beginning (01-12) mmm display the abbreviated name of the month (Jan Dec) mmmm display the complete name of the day (January-December) yy display the year in two-digit numerical form (00-99) yyyy display the year in four-digit numerical form ( ) Currency Format Fill Thousands Separators with character you want to display in thousand amount. For example, coma character will display Rp. 2,000, Fill Decimal Separators with character as a decimal sign (cent) Fill Decimal Numbers with the numerical form displayed behind the decimal sign Note: When you input data (in numerical form), you do not have to type the thousand separators but you have to type the decimal separators if there is a decimal sign you want to insert Notice: There is a problem on program system which gives you difficulty on using decimal separator sign except for. (Dot) to input data. D. Invoice and Tax To use the Invoice and Tax facility on Zahir Accounting, you have to fill some items first so that the program can create Invoice and Sales Tax automatically. To display the invoice configuration and sales Tax, press Tax Invoice Form tab on the upper side of program configuration window as follows: 119

120 You have to fill some items so that the program will display the Invoice and Tax automatically. Tax Invoice Tax ID: fill with the number of your company Tax ID Taxable Firm: fill with the name of your tax-charged company Taxable Firm Date: fill with the date in which you stated as a tax-charged businessman Serial Number: fill with the tax invoice you have Last Sequence Number: fill with the last tax serial number Taxable Firm Address: fill with the registered taxable firm address Taxable Firm Area: fill with the name of the city where your company located. You can choose the city by clicking dropdown button on the right side 120

121 Tax Form Signed Name: press data search button on the right side to fill employee names Position: fill with the position of the person who will sign the tax invoice E. Ratio Analysis Before using the Financial Analysis facility on Zahir Accounting, you should determine some important variables so that the program can create the financial ratio accurately. To display the financial analysis configuration, press Ratio Analysis tab on the upper side of program configuration window as the following example: You can determine the Account Sub-Classification Number for each Edit Box available. To make it easier, see Sub-classification List below it. 121
122 3.4.2 Data Setup Zahir Accounting uses data setup for Account List and Product Data A. Account Data To change the Account List digit, click Account data so that the display will be as following: Level 3 digits. If the transaction occurred has a level 3 or 4 digit number, the digit number on the program can be changed up to 5 digit Account List Digit Number. If the transaction occurred has more than five digit Account List number, then the digit number on the program can be changed up to nine digits. If you want to change the current Account List, use Account List Format. 122

123 Account Format. If you want to change the account format display, then you can change it here. Use Alias Name as Default. Checkmark if you want to show the alias name. The First Digit Should be the same as the 3 rd level value. Checkmark the box to adjust the account regarding to the account classification digit. B. Product Data Zahir consists of Product Data facility to be displayed based on the product needs. Use Product Group: checkmark if the goods data need product group Download All Data When Opening Product List: checkmark the goods data, if you want to speed the display process of Product List Download All Data When Creating/Editing Product Data: checkmark if you want to create the product data 123

124 Find Serial Number by Using Barcode Reader: checkmark if you want to search the serial number on product data by using barcode reader Default COGS Method: click the black triangle to choose the inventory method to be used in company Use Field Name Customization to change the names used in product data. If you want to change the product data, click this button so that the following window will appear: Change each name above depends on the company need. Press save button to save the changes made and see the changes on product data Transaction Setting This transaction setting is used to change the setting on facilities available in Zahir such sales transaction, purchase, inventory or general journal. 124
125 To display this setting, click [Options] Menu and [Program Setup] and choose Transaction Setting. A. Automatic Reference Number Reference Number is used to display reference number automatically. Set the reference number to change the first character of journal number code of reference display. General Journal is the reference number used for transaction in General Journal. If you give a checkmark, then it will automatically use the reference number from zahir program and vice versa. Sales is the reference number used in transaction of Goods Delivery on sales module. If you give a checkmark, then it will automatically use the Invoice number from zahir program and vice versa. 125
126 Purchasing is the reference number used in transaction of Received Goods on Purchase module. If you give a checkmark, then it will automatically use the Purchase number from zahir program and vice versa. Make a Deposit is the reference number used in cash-in transaction on Cash and Bank module. If you give a checkmark, then it will automatically use the reference number from zahir program and vice versa. Write a Check is the reference number used in cash payment transaction on Cash and Bank module. If you give a checkmark, then it will automatically use the reference number from zahir program and vice versa. Inventory is the reference number used in transaction on all Inventory modules. If you give a checkmark, then it will automatically use the reference number from zahir program and vice versa. Set Transaction Reference No : is used to change the journal number code. If you press the Set Transaction Reference No, the picture will be displayed as the following. 126

127 B. Transaction In General This setting is used to activate the facilities available on every Zahir transaction. Use Job Costing: give a checkmark on this check box if you want to use the project for transaction record. Use Department: give a checkmark on this check box if you want to use department for transaction record. Display Project and Department Field in Transaction Header: give a checkmark on this check box if you want to use department and project for every transaction head. The difference on using the above department and project above is, that it only uses per transaction item but if you use the head transaction, it means that a transaction has the same project and department. Use Fraction: give a checkmark on this check box to activate fraction facility on inventory unit. You can input the quantity of goods on fractions. 127
128 Use Document Number and Date: give a checkmark on this check box to activate Document Name and Date column on every Zahir transaction form. It is used if your company has a different document with the reference or invoice number. Use Daily Rate for Exchange Rate: give a checkmark on this check box so that the program will automatically search the detail rate table (the exchange rate on the current day) Unique Reference Number should not be similar: give a checkmark on this check box to activate the facility of the same reference number. If it actives then you could control the reference number on every transaction to avoid making the same number. Save To File All Warning Messages When Posting The Transactions: give a checkmark on this check box to record if there is an error message sent by Zahir program during the transaction. Control Account may be used in transaction (not recommended): give a checkmark on this check box if the control account you used on zahir program will be used manually on transaction, for example in general or cash/bank journal. Default Journal Note: press this button if you want to change the information on journal. If you press Default Journal Note, the display will be as follows: 128

129 Change the words by clicking the mouse on the direction of the words you want to change Aging Schedule Account Payable/Receivable and Aging Schedule on Post-Dated Check: choose the appropriate aging schedule. There are three kinds of Aging Schedule on the statement. To change the figure, input on the column or by directing the up or down arrow. C. Sales Transaction This setting is used to display some facilities on Sales module. The facilities automatically displayed are: 129

130 Create Inventory Adjustment When Posting Sales Transaction: give a checkmark on this check box to determine if the program automatically creates COGS journal on sold goods every time you make sales transaction. Check Customer Credit Limit Before Posting: give a checkmark on this check box to activate every sales posting or sales order automatically. Please check whether the above account receivable is over limit. Set Multi Level Discount as Multi Price: give a checkmark on this check box to activate the sales price calculation with automatic discount. Create Sales Commission Journal: give a checkmark on this check box to activate the current discount automatically when the sales transaction occurs with the discount expense table as on Data data. Sale Commission from Total Sales, Incl. Delivery and Tax: give a checkmark on this check box if you want the program to calculate the commission on total sales including delivery and tax expenses. If it is not active, then it will be only the sales total excluding tax and delivery expense. 130
131 Display Warning When User Left Salesperson Name Empty: give a checkmark on this check box to activate the notice when input sales, the user does not input the salesman names. It is to avoid the mistake of not inputting data and the transaction has already posted. Display Payment System: give a checkmark on this check box to activate the payment system when the payment occurs. If it is on credit, then the credit card number will appear. Activate Sales Order Module: give a checkmark on this check box to activate the Quotation to Sales Order facility Selling price below the base price is not allowed: give a checkmark on this check box to activate the notice if the sale price inputted is below the base price. Note: Down Payment transaction is the same as the selling note: give a checkmark on this check box to activate the notice if the sales down payment would be the same with the sales note. D. Purchase Transaction This setting is used to display some facilities available on Purchase module. The facilities displayed automatically are as follows: 131
132 Use Multi Vendor for Quotation Request: give a checkmark on this check box to activate the quotation facility from several vendors to select the appropriate vendor. Display Warning When User Left Purchase Name Empty: give a checkmark on this check box to give an automatic notice if user has not inputted Purchasing Division yet. Activate Procurement Module: give a checkmark on this check box to activate the Procurement facility up to Purchase Order. E. Sales and Purchase This setting is used to display some facilities available on Sales and Purchase module. The facilities displayed automatically are as follows: 132

133 Use Multiple Step Discount: give a checkmark if the product data to be set automatically consists of multi discount. It could be taken from the sold quantity or based on group Use Multiple Price: give a checkmark if the product data needs more than one customer groups or any other. Use Multi Tax: give a checkmark if the product data to be related automatically to more than one tax, whether it is on purchase or sale. Use Delivery Info and Notes: give a checkmark on this check box to activate the Goods Delivery Info on Purchase and Sales Invoice Use Landed Cost: give a checkmark on this check box to activate the costs facility appeared on purchase and sale. The facility will appear as Landed Cost. Use Final Discount: give a checkmark on this check box to activate the Final Discount facility on purchase and sales module, it could be be in percentage or nominal. 133
134 Include Delivery Cost in Final Discount Calculation: give a checkmark on this check box to activate the delivery cost facility including on final discount calculation. Final Discount after Tax: give a checkmark on this check box to calculate after tax final discount value. If it is the final discount excludes tax, then do not checkmark the facility. Calculate Total Sales/Buy In Additional New Item: give a checkmark on this check box to activate the total balance of sales or purchase calculation facility to add line on transaction. Use Delivery Status/Notes for Delivered Product: give a checkmark on this check box to activate the Delivery Status to recognize the sold or purchased goods condition,so that the quality could be analyzed. Use Measurement Unit for Service Transaction: give a checkmark on this check box to activate the measurement unit facility during sales or purchase transaction Display Additional Term of Sales/Payment: give a checkmark on this check box to activate the three term of sales column (see the effect on purchase order and sales order transaction) Debit/Credit Memo Field Should Have Value For Return and Negative Transaction: give a checkmark on this check box to activate the previous credit sales or purchase transaction which will reduce the previous account receivable/payable. Display Notes in Sales and Purchase Transaction: give a checkmark on this check box to activate note facility during sales and purchase. F. Inventory Transaction This setting is used to display some facilities available on Inventory module. The facilities could be displayed automatically are as follows: 134
135 Create Journal Entry in Goods Transfer: give a checkmark on the checkbox so that when the Goods Transfer occurs it will automatically create inventory transaction journal Display Inventory Cost in Inventory Adjustment Transaction : give a checkmark on this check box so that the Inventory Adjustment Journal will display the base price on every goods. Use Material Requisition for Goods Transfer: give a checkmark on this check box to display the Request Material Number (Goods Request) on Purchase used for Goods Transfer transaction. Use Sales Order Document for Goods Transfer: give a checkmark on this check box to display the Sales Order Number on Sales used in Goods Transfer transaction. Activate Consignment Module: give a checkmark on this check box to activate consignment facility on goods data and consignment transaction on Inventory. 135
136 G. Cash and General Journal Transaction This setting is used to display some facilities available on Cash/Bank and General Journal module. The facilities could be displayed automatically are as follows: Display Print button in Receivable/Payable Payment: give a checkmark on this check box to activate this option. There will be a Print button on account receivable/payable payment transaction to print the transaction before it is saved. Predictive Journal Input: give a checkmark on this check box to display every previous possible transaction to be copied. The Charge Journal is Separated from Accounts Payable/Receivable Journal: give a checkmark on this check box to separate charge journal from account payable/receivable payment 136
137 CHAPTER IV PURCHASE AND ACCOUNT PAYABLE 4.1 Definition of Purchase and Account Payable Purchase is a transaction where there is good or service from supplier/vendor. Company commonly uses this kind of transaction. Purchase transaction could be conducted on cash or credit term. Account Payable is a transaction to conduct an account payable payment to supplier or certain vendor due to previous purchase transaction. 4.2 Purchase Facility in Zahir Accounting Zahir Accounting Enterprise Edition consists of some Purchase facilities, such as Material Requisition, Quotation Request, Purchase Order Input, Received Goods, Purchase Return, Account Payable List, Account Receivable Payment and all lists. The following is the picture of Purchase module: 137
.")
138 Note: Transaction on Purchase module could be deleted or unposted completed with the Audit Trail statement on general ledger (for details see Chapter VIII). 138
139 4.2.1 Material Requisition Material requisition is used to input goods/service request data as needed by company. To view Material Requisition, press [Purchase], [Enter Transaction] and [Material Requisition] on pictorial menu. The Material Requisition window will as follows: - Manager Name : fill with the name of company s manager to apply the material or service request as needed by company - Request Number : fill with your request number. Program will automatically create this number and you could change it. - Issued Date : fill with the date when the goods/service request transaction is created. Press Date Selection Button on the right side to display and select date. 139
140 - Required Date : fill with the date when this goods/service request applied. Press Date Selection Button on the right side to view and select date. - Give a checkmark on Completed check box if the transaction data is no longer needed so that it will not appear on Number Request list. - Give a checkmark on Service Check Box if the transaction is a service or goods purchase that does not use inventory-processing facility. Do not put a checkmark if it is a goods purchase transaction. - Material For : fill with the purchase requirement of this transaction. Zahir Accounting Enterprise will create the requirement automatically but you should modify the requirement in relevant with your company. For service purchase request, the items should be filled are as follows: - Item Description : fill with the purchasing order name. Type the purchase order item directly here. - Item No. is the Account Code where the purchase order will be allocated. Press enter on this cell to display Data Search Window from available account. You must fill this field. - Quantity : fill with the order amount - Unit : fill with the unit used for order or goods - Unit Price : fill with the unit price from order or goods - Total : fill with the total price of purchase order. It will be automatically appear if you have inputted the value and price. - Job and Project : fill with the project data which uses this purchase order. However, for goods purchase request, there is a slight different on Item No item: - Item No is filled with the Inventory/Goods Code. Press enter on this field to display Data Search button. - To create the automatic purchase invoice, you can give a checkmark on Print column. If you consider all information inputted are correct, press Save button to save this journal or press Cancel to cancel it. Note: This facility will not create journal posting but only its material request. 140
141 Material Requisition List can be re-displayed on [Purchase] and [Material Requisition] Quotation Request Quotation Request is utilized to input quotation request data of goods/service needed by company based on inputted material requisition data. To view the Quotation Request, press [Purchase], [Transaction Input] and [Quotation Request] on pictorial menu. The Quotation Request Window will be as follows: 141
142 - Assigned To : fill with the name of assigned personel. Press enter on Edit Box or press Data Search Button on its right and program will display Data Search Window. - Quotation Number : fill with your quotation number. Program will automatically create it and possible to change it. - Request Number : fill with the request number you want to purchase. Press data search button on its right side and program will automatically display the request list. - Date : fill with the date when the goods/service quotation request created. Press Date Selection Button on the right side to view and select the date. - Give a checkmark on Completed Check Box if the transaction data is no longer needed so that it will not appear on Quotation Number again. - Give a checkmark on Service Check Box if the transaction is a service or goods purchase that does not use inventory-processing facility. Do not put a checkmark if it is a goods purchase transaction. - Note : fill with the transaction note. Zahir Accounting Enterprise will automatically create note but you could modify the note to meet your company s needs. Press Detail tab to input goods or service data transaction ordered. Fill the data needed such item description, quantity, unit, unit price, and Job Press Landed Cost tab to input costs on this purchase transaction. Program will automatically insert the total value if it has been inputted on Landed Cost item on the right side of Detail. 142
143 Double-click to select Cost ID. Press Tax tab to input the relevant tax with this purchase transaction. You can input more than one tax. This Landed Cost tab will appear if Use Landed Cost in program setup is activated. Tax setting can be made on [Data Store], [Tax Data] Press Discount tab to input discount for this purchase transaction. The discount applied could be more than one in which this will be a multi-step discount. 143
144 This Discount Tab will only appear if the Multi Step Discount program setup is activated. Press Invited Vendor to identify the vendors who participate on the goods purchase. The Invited Vendor Tab will only appear if the quotation request (Tender) with multi vendor is activated in program setup. - Term of Payment 1 : fill with the Term of Payment Data if it is needed - Validity Date : fill with the goods or service delivery date offered - Term of Payment : fill with the term of payment stated with the purchase offer applied. Press enter on this edit button or click a small button on its right side to display window to fill the term of payment. - Term of Payment 2 : fill with the second Term of Sales Data if it is needed. - Purchasing Department : fill with the name of person in charge for this purchase. - Order Note : fill with the note if it is needed on invoice. For service transaction, the items on quotation are: 144
145 - Item Description : fill with the ordered item name. Type the item directly here. - Item No. is the Account Code where this purchase will be allocated. Press enter on this cell to display Data Search Window from available account. You must fill this field. - Quantity : fill with the order amount - Unit : fill with the unit of service or goods - Unit Price : fill with the unit price of service or goods - Job is the project data which needs this purchase. Press project to display the project list. - Department : fill with the department data relevant with this transaction However, for goods transaction, there is a slight difference on Item No. item - Item No. : fill with the Inventory Code. Press Enter in this field to display Data Search Window. - To create purchase invoice automatically, give a checkmark on Print column. If you consider all information inputted are correct, press Save button to save this journal or press Cancel to cancel it. Note: This facility will not create journal posting but only its purchase data. Quotation List can be redisplayed on [Purchase] and [Quotation Request]. Tips: If there are other expenses dealing with the transaction, you could input them on and the value will be inserted on Landed Cost automatically. If there is a tax dealing with the transaction, the tax can be inputted on and the value will be inserted automatically on Total Tax Purchase Order Input Purchase Order Input is used to input the purchase order to purchase goods/service needed by company based on received quotation. To view the Purchase Order, press [Purchase], [Enter Transaction] and [Purchase Order] on pictorial menu. The Purchase Order Input window will be as follows: 145
146 - Vendor Name : fill with the name of vendor. Press enter on Vendor Name Edit Box or press Data Search Button on its right and program will display Data Search Window. - PO Number : fill with your purchase order number. Program will automatically create it and it is possible to change it. - Quotation Number : fill with the quotation number you want to purchase. Press data search button on its right side and program will automatically display the request list. - Date : fill with the date when the goods/service quotation request created. Press Date Selection Button on the right side to view and select the date. 146
147 - Into Location : fill with the place where the received goods will be placed. Press data search button on the right side and the program automatically will display the location list. - Give a checkmark on Completed Check Box if the transaction data is no longer needed so that it will not appear on PO Number. - Give a checkmark on Service Check Box if the transaction is a service or goods purchase that does not use inventory-processing facility. Do not put a checkmark if it is a goods purchase transaction. - Note : fill with the note on this transaction. Zahir Accounting Enterprise will automatically create note but you could modify to meet your company s needs. Press Detail tab to input ordered goods or service data transaction. Fill the data needed such goods data, amount, unit, price, and Job Press Landed Cost tab to input costs on this purchase transaction. Program will automatically insert the total value if it has been inputted on Landed Cost item on the right side of Detail. 147
148 This Landed Cost tab will appear if Use Landed Cost in program setup is activated. Press Tax tab to input tax relevant with this purchase transaction. You can input more than one tax. To setup the tax, go to [Data Store], [Tax Data]. Press Discount tab to input discount applied for this purchase transaction. The discount applied can be more than one which will be a multi-step discount. This Discount Tab will appear if the Multi Step Discount in program setup is activated : 148
149 - Term of Payment 1 : fill with the Term of Payment Data if it is needed - Delivery Date : fill with the goods or service delivery date - Term of Payment : fill with the term of payment stated with the quotation applied. Press enter on this edit button or click a small button on its right side to display window to fill the term of payment. - Term of Payment 2 : fill with the second Term of Sales Data if it is needed. - Purchasing De : fill with the name of person in charge of this purchase. - Order Note : fill with the note if it is needed on invoice. - Landed Cost : fill with expenses relevant with the goods delivery transaction. The program will automatically insert the total value if the data has been inputted in Landed Cost on the right side of Detail. - Total Tax : fill with tax relevant with the received goods/service transaction. The program will automatically insert the value if the data has been inputted in Tax on the right side of Landed Cost - After Tax Total : fill with the total calculation between goods/service price, landed cost and total tax relevant with this transaction. The program will automatically calculate the value. For Service transaction, the items on purchase detail are: - Item Description : fill with the purchasing order item name. Type the purchase order item directly here. - Item No is the Account Code where the purchase order will be allocated. Press enter on this cell to display Data Search Window from available account. You must fill this field. - Unit : fill with the unit used on service/goods purchased - Unit Price : fill with the unit price from order of goods/service purchased - Job is the project data which needs this purchase. Press project to display the project list. - Department : fill with the department data relevant with this transaction However, for goods purchase, there is a slight difference on Item No. - Item No. : fill with the Inventory/Goods Code. Press Enter in this field to display Data Search Window. 149
150 - To create purchase invoice automatically, give a checkmark on Print column. If you consider all information inputted are correct, press Save button to save this journal or press Cancel to cancel it. Note: This facility will not create journal posting but only its purchase order. Purchase Order List can be redisplayed on [Purchase] and [Purchase Order]. If you have inputted the Quotation Number, the selected quotation data will display the items automatically. Tips: If there are landed cost dealing with the transaction, you can input them on and the value will be inserted on Other Expenses automatically. If there is a tax dealing with the transaction, the tax can be inputted on and the value will be inserted automatically on Total Tax Received Goods Received Goods Facility is used to input and journal the goods/service received by company based on the purchase order data, on cash or credit payment. To view the Received Goods, press [Purchase], [Enter Transaction] and [Received Goods] on pictorial menu. The Received Goods window as follow: 150
151 - Vendor Name : fill with the vendor name. Press enter on Vendor Name Edit Box or press Data Search Button on the right side and program will display Data Search Window. - Purchase No. : fill with purchase order number. Program will automatically create it and enables you to modify it. - PO Number : fill with PO number to be purchased. Press data search button on the right side and program will automatically display the Purchase Order (PO) list. - Invoice Date : fill with the date when the goods/service received. Press Date Selection Button on the right side to view and select the date. - Into Location : fill with the place where the received goods will be placed. Press data search button on the right side and program automatically display the warehouse list. 151
152 - Note : fill with the transaction information. Zahir Accounting Enterprise will create note automatically which enables you to modify the note based on your needs. - Check mark Service Check Box for service or goods purchase transaction which do not use inventory-processing facility. Unmarked if it is goods purchase transaction. Press Detail tab to input purchased goods or service data transaction. Fill the data needed such as goods data, amount, unit, price, and Job Press Landed Cost tab to input expenses on this purchase transaction. Program will automatically insert the total value if it has been inputted on Landed Cost item on the right side of Detail. Landed Cost tab will appear if Use Landed Cost in program setup is activated. Press Tax tab to input the relevant tax with this purchase transaction. You can input more than one tax. To setup the kinds of tax utilized, go to [Data Store], [Tax] 152
153 To view more than one tax, it can set on [Data-data], [Tax], [Tax Data]. Press Discount tab to input applied discount for this purchase transaction. The applied discount could be more than one which will be multi-step discount. This Discount Tab will appear if Multi Step Discount in program setup is activated. Press Delivery Information tab to input the delivery information on received goods. 153
154 This Delivery Information Tab will appear if the Delivery Information in program setup is activated. Press Delivery Status tab to input the delivery information on received goods. This Delivery Status Tab will appear if the Delivery Status in program setup is activated. - Document No. : fill with the purchased document number according to its voucher number. The document number will appear if the program setting of transaction in general is activated. - Document Date : fill with the date of purchase document as in its voucher. The document date will appear if the program setting of transaction in general is activated. - Delivery Date : fill with the delivery date of the received goods or service - Term of Payment : fill with the term of payment stated with the received goods/service. Press enter on this edit box or click a small button on the right side to display the term of payment window. - Purchasing Department : fill with the name of person in charge for this purchase - Landed Cost : fill with expenses related to goods delivery transaction. The program will automatically insert the total value if the data has been inputted in Landed Cost item on the right side of Detail. - Total Tax : fill with the tax related to this received goods/service transaction. The program will automatically insert the value if the data has been inputted on Tax item on the right side of Landed Cost. - After Tax Total : fill with the total value between goods/service price, landed cost and total tax related to this transaction. The program will automatically calculate the value. - Down Payment : fill the amount of payment paid when the transaction occurs - Balance : fill with the amount of charged payable on the company which receives the goods/service. 154
155 For service purchase, the items on purchase detail are: - Item Description : fill with the ordered item name. Type the purchased item direhere. - Item No is the Account Code where this purchase order will be allocated. Press enter on this cell to display Data Search Window from available account. You must fill this field. - Received : fill with the goods/service quantity received by company based on the PO number stated. - Ordered : fill with the goods/service quantity ordered by company. The quantity will automatically appear based on PO number data used. - Unit : fill with the amount of goods/service purchased. Give a negative sign if it is the purchase return transaction where the goods are returned or the purchase is canceled. - Unit Price : fill with the unit price used on purchased service/goods - Disc : fill with the discount percentage of purchase given by supplier to you. The program will automatically subtract the purchase value based on discount received. - Tax : fill with the purchased tax percentage per ordered item. - Job fill with the project name related to received service/goods. There is a slight difference on Item No. for goods purchase - Item No. : fill with the Inventory/Goods Code. Press Enter in this field to display Data Search Window. If all information are correct, press Save button to save this journal or press Cancel to cancel it. Note: Received goods/service journal could be re-displayed by pressing [Purchase] and [Enter Transaction Received Goods]. While the payable occurred by this transaction can be viewed on [Purchase] and [Account Payable List] To delete one line on purchase items, press Delete Row button or press [Ctrl]- Del on keyboard if the cursor is in the line to be deleted. Check mark on Print column to create the purchase invoice Tips: 155
156 Press enter when the cursor position is on Code, Item No. and Job columns to select account code, goods code and project data from Data Search Window. Press to select the required account list if the existing control account is not appropriate. Press Stock List to display the current inventory data. The created report The above received goods transaction will form various reports automatically if the transaction has been posted. All reports are printable and viewed in report module. The examples of the statements are: Balance Sheet: to view, click [Reports], [Financial Statement] and [Balance Sheet-Standard] 156
157 157
158 General Ledger: to view, click [Reports], [Ledger] and [General Ledger-Job and Dept] Journal Transaction Report: to view, click [Reports], [Ledger] and [Journal all transaction] 158
159 Purchase and payable report: consists of various reports such as complete purchase report. To view, click [Report], [Purchase and Payable Reports], [Purchasing] and [Goods Received by Category Summary] You could view the payable voucher report. The Account Payable voucher will increase the credit payment and, with this statement, the company s payable is controllable. To view, click [Report], [Purchase and Payable Report], [Account Payable] and [Vendor Balance Default Currency] Increased payable due to purchase transaction with credit payment Product Report: consists of various reports such as stock card report. Stock will automatically increased due to the received goods transaction. To view, click [Reports], [Product Report], [Inventory] and [Inventory Ledger By Location] 159
160 4.2.5 Purchase Return Purchase Return Facility is used to input and journal the goods/service returned by company based on received purchase order whether cash or credit payment. To view the Purchase Return, press [Purchase], [Purchase Return] on pictorial menu. The transaction window will be as follows: 160
161 - Vendor Name : fill with vendor name. Press enter on Vendor Name Edit Box or press Data Search Button on the right side and program will display Data Search Window. - Purchase No. : fill with your purchase order number. Program will automatically create and enables you to modify it. - PO No. : fill with PO number to be purchased. Press data search button on the right side and program will automatically display the Purchase Order (PO) list. - Invoice Date : fill the date of received goods/service. Press Date Selection Button on the right side to view and select the date. - Out from Location : fill with the place where the delivered goods to be placed. Press data search button on the right side and the program automatically display the warehouse list. - Note : fill with the transaction information. Zahir Accounting Enterprise will create note automatically, but enables yout to modify the note as your needs. - Check mark on Service Check Box if the transaction is service or goods purchase which does not use inventory-processing facility. Un-marked if it is a purchase return transaction. - Document No. : fill with the document number of purchase return according to its voucher number. The document number will appear if the program setting in [Setting], [transactions in general] is activated. - Document Date : fill with the date of purchase return document used on its voucher. The document date will appear if the program setting in [Setting], [transactions in general] is activated. - Delivery Date : fill with the delivery date of returned goods or service - Term of Payment : fill with the determined term of payment with returned goods/service. Press enter on this edit box or click a small button on the right side to display the window of term of payment. - Purchasing De : fill with the name of person in charge for this purchase return. - Memo of Credit/Debit : fill with the payable to be credited as an effect of this purchase return. To view the list, select the vendor name first. - Landed Cost : fill with expenses related to this returned goods delivery. The program will automatically insert the total value if the data has been inputted in Landed Cost item on the right side of Detail. 161
162 - Total Tax : fill with the tax related to this goods/service return transaction. The program will automatically insert the value if the data has been inputted on Tax item on the right side of Landed Cost. - After Tax Total : fill with the total value between goods/service price, landed cost and total tax related to with this transaction. The program will automatically calculate the value. Press Detail tab to input returned goods or type of returned service data. Fill the data needed such as product data, quantity, unit, price, and Job Press Landed Cost tab to input expenses on this purchase return transaction. Program will automatically insert the total value if it has been inputted on Landed Cost item on the right side of Detail. Landed Cost tab will appear if Use Landed Cost in program setup is activated. Press Tax tab to input the tax related to this purchase return transaction. You could input more than one tax. To setup the utilizied tax, go to [Data Store], [Tax] To view more than one tax, set on [Data Store], [Tax], [Tax Data]. 162
163 Press Discount tab to input applied discount for this purchase transaction. The applied discount can be more than one which will be a multi-step discount. This Discount Tab will appear if the Multi Step Discount Facility in program setup is activated. Press Delivery Information tab to input the delivery information on goods received. 163
164 This Delivery Information Tab will appear if the Delivery Information Facility on program setup is activated. Press Delivery Status tab to input the delivery information on received goods. This Delivery Status Tab will appear if the Delivery Status Facility in program setup is activated. For service return, the items on purchase detail are: - Item Description : fill with the ordered item name. Type the purchase order item here. - Code is the Account Code where the expense of this purchase return will be allocated. Press enter on this cell to display Data Search Window from available account. You must fill this field. - Returned : fill with the goods/service quantity received by company based on the PO number stated. - Ordered : fill with the goods/service quantity ordered by company. The quantity will automatically appear based on PO number data. - Unit : fill with the unit price of returned service/goods - Disc : fill with the discount percentage of purchase given by supplier. The program will automatically reduce the purchase value based on discount received. - Tax : fill with the percentage of purchase return tax per item ordered. - Job : fill with the project name related to returned service/goods. However, there is a slight difference on Item Code item for goods purchase. - Item No. : fill with the Inventory/Goods Code. Press Enter in this field to display Data Search Window. If all information are correct, press Save button to save this journal or press Cancel to cancel it. 164
165 Note: Goods/service return journal could be re-displayed by pressing [Purchase] and [Enter Transaction Purchase Return]. While the payable reduction of this transaction could be viewed on [Purchase] and [Account Payable List] To delete one line on purchase return items, press Delete Row button or press [Ctrl]-Row on keyboard when the cursor is on the line to be deleted. Check mark on Print column to create the purchase invoice. Tips: Press enter when the cursor position is on Code, Item Code and Job column to select account code, item code and project data from Data Search Window. Use Re-curring Transaction to use automatic facility to help you create re-curring transaction journal faster. Press to select account list needed if the available important account is not appropriate. Press Stock List to display the current inventory data. The created report The above purchase return transaction will form various reports automatically if the transaction has been posted. All reports could be printed and viewed in reports module. The sample reports are: Balance Sheet: to view, click [Reports], [Financial Statement] and [Balance Sheet-Standard] 165
166 Changed value due to purchase return transaction General Ledger: to view, click [Reports], [Ledger] and [General Ledger-Job and Dept] 166
167 Besides the above statement, you could also view the payable voucher statement. You could control company payable position. To view, click [Reports], [Purchase and Payable Report], [Account Payable] and [Vendor Balance Default Currency] 167
168 Decreased payable due to purchase return Product Report: consists of various statements such as stock card report. To view, click [Reports], [Product Report > Inventory], and [Inventory Ledger By Location] Decreased stock card due to purchase return 4.3 Purchases with Serial Number and Lot Number Zahir Accounting provides serial number and lot number facilities. This facility is available on product data. If you need this facility during creating your product data, give a check mark on its serial number or lot number. 168

169 4.3.1 Serial Number Serial Number is used if the goods have particular serial number or IMEI. Serial number is commonly used on mobile phone or machines inventory. The product data with active serial number will display the following window: Enter serial number used Press this button to remove the entered serial number to the right coloumn Click New button to make new Serial Number on Serial Number column. Click Delete to delete the right column, but first determine which part to delete. Click Delete All to delete all data inputted. Click Enter Automatically to create a range if more serial numbers are used. The following is the Enter Automatically window: 169

170 Fill the required data and click OK. If it has been inputted, the range number will automatically appear on previous window. Click OK after entering all data. Note: Serial number window will appear if serial number in product data is activated. The entered qty must be the same as the existing serial number. See the special report for serial number on [Reports], [Product Report], [Inventory] and [Serial Number Available]. The following is the example: 170
171 4.3.2 Lot Number Lot Number is used for inventory with expiry period, such as medicine. This facility enables you to control the expired inventory. To utilize this facility, activate the lot number on product data by giving a check mark. The following is the lot number input window during the purchase: Double click to open lot number list Double-click lot ID column and the lot number list will appear. Select the appropriate lot number or if it is not available, click New button and the following window will appear: 171

172 Fill any needed data and click Save as you finish. Click OK on Lot Number list and click Save to save the selected lot number data and used for purchase. To see the sold and available serial number on [Reports], [Products Report], [Inventory] and [Lot Number Available] as the following example: Note: The Lot Number window will appear if Lot Number facility on goods data is activated. 4.4 Account Payable Account Payable is automatically created when the Received Goods transaction occurred and the purchase is not on cash. 172
173 4.4.1 Account Payable List This facility is used to display all current Account Payable list from purchase transaction. To display the Account Payable list, press [Purchase], [Enter Transaction] and [Account Payable List]. Press Including Zero balance Check Box to display the paid/settled Account Payable. Press button on Account Payable table or Detail button to display the Account Payable details. The following Account Payable details window will appear: 173
174 The upper section contains purchase transaction list which generates Account Payable while the lower section contains transaction details on current Account Payable. Press button on Account Payable details table or Details button to display the transaction journal occurs. Press Write Off button to delete Account Payable. Then, the program will create Account Payable Write Off Journal Account Payable Payment This journal is used to input Account Payable payment transaction as the result on goods/service purchase. To view the Account Payable payment journal, press [Purchase] and [Account Payable Payment Journal] on pictorial menu. The following is the Account Payable Payment window: 174
175 - Account : select bank account where the cash utilized to pay the Account Payable taken from Account Drop down Combo Box, for instance if the payment is cash cheque, select bank A on Account, and so on. - Received By : fill with supplier/seller's name who receives the payment - Check No. : fill with the number of cheque or journal reference. Zahir Accounting has provided them for you but enables you to modify them to meet your needs. - Date : fill with the date of the payment - Amount : automatically filled if the amount of payment has been filled by clicking the mouse - Project : fill with selecting the project related to Account Payable payment - Department : fill with selecting which department is related to the Account Payable payment - Memo : fill with the journal note. Zahir Accounting has provided them for you but enables you to modify them. There are some fields on payment details (fund allocation): 175
176 - Invoice No. : fill with the invoice number (purchase journal reference) to be paid. Press [enter] on keyboard when you are on this field to display the Data Search Window. - Discount : fill with the discount value provided - Payment Value : fill with the amount of invoice payment (stated on Invoice field). To pay the invoice, type the amount of payment with Account Payable balance subtracted with discount per invoice. - Document No. : fill with the number of purchase return document according to its voucher number. The document number will appear if the program setting on [Setting], [transactions in common] is activated. - Document Date : fill with the date of purchase return document according to its voucher. The document date will appear if the program setting on [Setting], [transactions in general] is activated. - Fine : fill with the amount of charge stated to your company due to late payment. Press Save button to save the transaction or press Cancel to cancel. Note: If you use Term of Payment facility when create Purchase Journal and then perform the payment as the determined discount period, the program will calculate the discount value. If you want to create the Account Payable payment journal for previous Account Payable before using this software, then you have to fill the Account Payable balance first. If you want to delete one line on payment details item, press Delete Row button or [ctrl]-del on keyboard when the cursor is on the line to be deleted. Notice: Do not create any Account Payable payment transaction on cash/bank payment, eventhough it is appropriate according to journal. However, if you review the payment transaction of Account Payable voucher through cash/bank payment, it will not reduce the Account Payable voucher since the Account Payable database is only located on Purchase module. 176
177 The created report The above goods return transaction will create various statements automatically if the transaction has been posted. All statements can be printed and viewed in reports module. The example of report : Balance Sheet: to view, click [Reports], [Financial Statement] and [Balance Sheet- Standard] 177
178 Reduced payable balance due to payable payment Journal Transaction Report: to view, click Report > Ledger > Journal all transaction 178
179 Besides the above report, you could view the Account Payable voucher report to control the payable position on your company. To view, click [Report], [Purchase and Payable Report], [Account Payable] and [Vendor Balance Default Currency] Payable payment will reduce the payable Account Payable Overpayment Receipt Journal This journal is used to input the overpayment receipt transaction from supplier's Account Payable payment. This transaction is needed if the Account Payable has been paid but the amount is larger than the account payable value. Vendor could return the overpayment to your company by returning the money. The following is the example of Account Payable payment which the amount is larger than the account payable value: 179

180 As the above transaction result, your company will receive the payment in cash or it will reduce the Account Payable balance with other invoice. To view the Account Payable overpayment journal, press [Purchase] and [Vendor Debit/Refund]. Subsequently, program will display the data search window of invoice number (purchase transaction reference number) with negative value. Select invoice number to be performed its overpayment such as the following picture: 180
181 The value as the over payment result during payable payment Select payment data on Account Payable Overpayment Receipt Journal and click OK on the selected one. Program will display the window to confirm the fund allocation of the overpayment, whether it is received in cash or used to pay the other account payable. 181

182 If you ask to return in cash, the program will display the journal window as follows: Zahir Accounting Enterprise program will fill the journal automatically. You could modify the transaction date and the amount of received fund. Press Save button to save the journal or Cancel to cancel it. If you have other outstanding invoice (Account Payable) and want to use the overpayment to pay other Account Payable, select Allocation. Subsequently, the program will display Account Payable Payment Journal. The program will automatically fills some main fields on Account Payable Payment journal and you have to select the invoice number to be paid using the overpayment. The following is the window to select other invoice payment. 182
183 Select invoice number to be replaced with the Account Payable overpayment and match the value with the amount paid. If there are several invoice numbers, press tab to go the next line. Click Save to save the transaction. The transaction will reduce the Account Payable on balance, general ledger or account payable voucher as the following example: Payment balance over the payable balance Reduced payable balance because of cash payment Account Payable Write-Off Journal The account payable write off journal is used to remove the current outstanding payable, allowed by vendor since you are not afford to pay or the vendor is no longer exists. To perform the write-off of Account Payable, you have to view the Account Payable List by clicking [Purchase], [Enter Transaction] and [Account Payable List]. Select supplier name on the list and click Details button and select invoice number which its account payable balance to be deleted. The program will display the following journal: 183


184 Select the invoice no to write-off Select invoice number to write-off, click Write Off button to display the Account Payable Write Off Journal as follows: - Ref : fill with reference number of Account Payable write off journal. Zahir Accounting Enterprise will automatically fill this number but enables you to modify it. - Date : fill with the date of Account Payable write off transaction - Note : fill with the note relevant with this transaction. Zahir Accounting Enterprise will create a note automatically but you could modify it based on your needs. - Amount : fill with the amount of Account Payable to be written off - Account Payable is the account code of Account Payable. The code is filled based on previous Control Account Code created. You do not need to change it, unless you are sure. 184
185 - Account Payable Write Off is the account code where you will allocate the Account Payable write off. Press Save button to save the journal or Cancel to cancel it. Notice: Account Payable write off journal is created by using General Journal. To view this transaction again, you could view it on general journal window. Although the transaction created on general journal could be revised (edited), you are strongly advised not to revise (edit) this Account Payable write off journal since this transaction is related to the Account Payable information. The Account Payable could not be seen on General Journal Window due to data inconsistency. The Account Payable write off transaction will reduce the Account Payable voucher and create journal to reduce payable such as the following example: The Account Payable voucher after write-off transaction will be: 185
186 Invoice No to write-off and reduced as inventory value 4.5 List of Transaction and Print Invoice All transactions on Purchase Module will create a transaction list on any Purchase facilities List of Transaction All transactions on Purchase has their lists such as: a. Material Requisition b. Quotation Request c. Purchase Order d. Received Goods (Invoice) e. Purchase Return f. Account Payable List To view all previous Purchase transaction lists, press [Purchase] and [List of Transactions and Print Invoice] on pictorial menu. 186
, you should not make any changes anymore.")
187 How to Open Received Goods Transaction List If you open the received goods transaction list, the following display will appear: After opening the Purchase list, you could review the previous purchase journal by pressing button or Details. Once the transaction is inputted (see note below), you should not make any changes anymore. Note: on the right column of the purchase list, you will see a red check mark if the transaction has been inputted on general ledger to change the transaction. 187

188 4.5.2 Print Invoice Every transaction in Zahir program provides an invoice/voucher to be printed for each Purchase transaction. To view the invoice, press [Purchase] and [List of Transaction and Print Invoice]. The following is the Account Payable Payment Transaction window: Press Print Invoice to print the Account Payable payment transaction automatically as follow: Variable: to fill statement variable on tax invoice (you could fill it on Setup Program) Design: to design the Account Payable payment invoice based on your needs. Preview: to preview the invoice statement display. 188
189 Print: if the invoice statement display is appropriate as on Account Payable payment transaction, press Print button to print it Close: to close the menu on Account Payable payment invoice. 189
190 CHAPTER V SALES AND ACCOUNT RECEIVABLE 5.1 Definition of Sales and Account Receivable Sales is a transaction in which goods/service for customers occurred. Company usually uses this transaction for its revenue. This transaction could be performed in cash or Account Receivable. Account Receivable is a transaction for customers payment on previous sale. 5.2 Sales Facility on Zahir Accounting Sales module consists of Sales transactions such as creating Sales Quotation, Sales Input, Sales Order, Delivery Order, Sales Return, Account Receivable List and Customer Credit/Refund. There are similarities on window display of Sales Quotation, Sales Input and Delivery Order. The difference is on the Quotation No. (create Quotation), SO No. (Sales Input), and Invoice No. (Delivery Order). The following is the display of Sales Module: 190
.")
191 Note: The transaction on Sales Module could be deleted or unposted along with the Audit Trail Report on general ledger ( see the details on Chapter VIII). 191
192 5.2.1 Creating Sales Quotation This facility is available on Zahir Accounting Enterprise, which is utilized to create sales quotation to customer. To view this facility, press [Sales], [Enter Transaction] and [Sales Quotation] on pictorial menu and the window will be as follow: - Customer Name : fill with customer's name. Press enter on Customer Name Edit Box or press Data Search Button on the right side and program will display Data Search Window. - Quotation No. : fill with your sales quotation number. Program will automatically create and it is possible to change it. - Date : fill with the date when the transaction occurs. Press Date Selection Button on the right side to view and select the date. 192
193 - Note : fill with the transaction note. Zahir Accounting Enterprise will create the note automatically but enables you to modify it based on your needs. - Job fill with the project data related to this transaction. - Department : fill with the department data related to this transaction - Check mark on Completed Check Box if the transaction data is no longer needed and it will not appear on Quotation No. list again. - Check mark on Service Check Box if the transaction is service or goods purchase which do not use inventory-processing facility. Un-mark if it is a goods purchase transaction. - Check mark on Fraction Check Box if the transaction is goods sales which uses fraction facility. Un-mark if it is not used for non multi fraction inventory. Press Details tab to input goods or service data transaction. Fill the data needed such as product data, quantity, unit, price, and Job Press Landed Cost tab to input expenses on this sales transaction. Program will automatically insert the total value if it has been inputted on Landed Cost item on the right side of Details. 193
194 This Landed Cost tab will appear if Use Landed Cost program setup is activated. Press Tax tab to input the related tax with this sales transaction. You can input more than one tax. Tax setting is on [Data-data], [Tax] Press Discount tab to input applied discount for this sales transaction. The applied discount could be more than one which will be a multi-step discount. 194
195 This Discount Tab will only appear if the Multi Step Discount is activated. - Term of Sales 1 : fill with the Term of Sales Data if needed - Validity Date : fill with the goods or service delivery date - Term of Payment : fill with the determined term of payment as the offer applied. Press enter on this edit box or click a small button on its right side to display window to fill the term of payment. - Term of Sales 2 : fill with the second Term of Sales Data if it is needed. - Salesman : fill with the name of person in charge for this sales. - Order Note : fill with the note if it is needed on invoice. - Total Tax : fill with the relevant tax on this goods/service sales transaction. The program will automatically insert the value if data has been inputted by using tax item on the right side of Landed Cost. - After Tax Total : fill with the total value of goods/service price, landed cost and total tax relevant with this transaction. The program will automatically compute the value. - Final Discount : fill if there is another discount besides the existing one on discount menu. Fill with inserting the value on the right side or its percentage. - After Discount Total : fill with the total value of goods/service price, landed cost, total tax and final discount charged which related to this transaction. The program will automatically compute the value. For service quotation, the items on sales quotation are: - Item Description : fill with the item ordered. Type the sales item directly here. - Code is the Account Code where the sales will be allocated. Press enter on this cell to display Data Search Window from available account. You must fill this field. 195
196 - Quantity : fill with the order amount or goods offered. - Unit : fill with the ordered goods or service unit - Unit Price : fill with the unit price from service or goods. You could use automatic calculate selling price on Inventory module. - Total : fill with the total price of per item sales order. The value will appear automatically if the amount and price have been inputted. However, for goods purchase, there is a slight difference on Item Code - Item Code : fill with the Inventory/Goods Code. Press Enter in this field to display Data Search Window. - To create automatic sales invoice, give a check mark on Print column. If you consider all information inputted are correct, press Save button to save this journal or press Cancel to cancel it. Note: This facility does not create a posting journal, but only its Quotation data. Quotation List can be re-displayed on [Sales],[List of Transaction and Print Invoice] and [Sales Quotation] Tips: If the above project and department windows are selected (project and department head), the transaction related to the project will be changed automatically to the current project and department. But, if each goods code has different job and department, select each goods code for their job and department Input Sales Order This facility is utilized to create Sales Order to customer. Sales Order is inputted based on the previously created quotation or not. To view this facility, press [Sales], [Enter Transaction] and [Sales Order]: 196
197 - Customer Name : fill with customer's name. Press enter on Customer Name Edit Box or press Data Search Button on the right and program will display Data Search Window. - Order Letter No. : fill with your Sales Order Letter. The program will automatically create this number and enables you to modify it. - Quotation No. : fill with your sales quotation number available on the list. Press data search on the right side and the program will automatically display the previously created quotation list. - Date : fill with the date when the transaction occurs. Press Date Selection Button on the right side to view and select the date. - Note : fill with the note on this transaction. Zahir Accounting Enterprise will create the note automatically but it enables you to modify it as your needs. - Job fill with the project data related to this transaction. 197
198 - Department : fill with the department data related to this transaction - Check mark on Completed Check Box if the transaction data is no longer needed and will not appear on Quotation No. list. - Check mark on Service Check Box if the transaction is service purchase or goods purchase which does not use inventory-processing facility. Unmarked if it is goods purchase transaction. Press Details tab to input sold goods or service data transaction. Fill the data needed such as product data, quantity, unit, price, and Job Press Landed Cost tab to input expenses on this sales transaction. Program will automatically insert the total value if it has been inputted on Landed Cost item is on the right side of Details. This Landed Cost tab will appear if Multi Delivery Cost in program setup is activated. 198
199 Press Tax tab to input related tax with sales transaction. You could input more than one tax. Tax setting is on [Data-data], [Tax] Press Discount tab to input applied discount discount could be more than one which is a multi-step discount. for this sales transaction. The applied This Discount Tab will only appear if the Multi Step Discount in program setup is activated. - Term of Sales 1 : fill with the Term of Sales Data if required - Delivery Date : fill with the delivery date of goods or service - Term of Payment : fill with the determined term of payment as in the sales quotation. Press enter on this edit box or click the small button on the right side to display window to fill the term of payment. - Term of Sales 2 : fill with the second Term of Sales Data if required. - Salesman : fill with the name of person in charge for this sales. - Order Note : fill with the note if invoice requires it. 199
200 - Landed Cost : fill with the expenses generated by this sales transaction. The program will automatically insert the total value. - Total Tax : fill with the related tax on this goods/service sales transaction. The program will automatically insert the value if data has been inputted. - After Tax Total : fill with the total value of goods/service price, landed cost and total tax related to this transaction. The program will automatically compute the value. For service sales, the items on sales detail are: - Order Description : fill with the ordered item name. Type the sales item here. - Code is the Account Code where this sales will be allocated. Press enter on this cell to display Data Search Window of existing account. You must fill this field. - Ordered : fill with the ordered goods/service quantity to customer. The quantity will automatically appear when Quotation No. is inputted. - Delivered : fill with the delivered goods quantity to customer. - Unit Price : must be filled with the unit price from order or goods. You could use automatic set selling price on Inventory module (see Chapter V). - Disc : fill with the discount percentage of sales given to customer. - Total : fill with the total price of sales per item ordered. The value will automatically appear if the total and price have been inputted. - Tax : fill with the sales tax percentage per ordered item. However, for goods purchase, there is a slight difference on Item Code - Item Code : fill with the Inventory/Goods Code. Press Enter in this field to display Data Search Window. - To create automatic sales invoice, give a check mark on Print column. If all information are correct, press Save button to save this journal or press Cancel to cancel it. Note: This facility will not create any posting journal but only its Sales Order data. Entered Sales Order Data could be re-displayed on [Sales], and [Sales Order List] If you have inputted Quotation No., the data from selected quotation will appear automatically on items. 200
201 Tips: - If there are other expenses generated by this transaction, you can input them on and the value will automatically be inserted on Landed Cost. - If there are taxes generated by this transaction, you can input them on and the value will automatically be inserted on Total Tax. - If there is multi-step discount generated by this sales, you can input them on - If the above project and department windows are selected (project and department head), all transactions related to the project will be automatically changed to the current project and department. But, if each item code has different job and department, select each item code for their job and department Sales Invoice (Invoicing) This facility is utilized to input goods delivery transaction (sales input) performed in cash or credit. To view this facility, press [Sales], [Enter Transaction] and [Sales Invoice (Invoicing)] : 201
202 - Customer Name : fill with customer's name. Press enter on Customer Name Edit Box or press Data Search Button on the right and program will display Data Search Window. - Invoice No. : fill with sales invoice number. The program will automatically create the number but enables you to change it. - Order Letter No. : fill with your sales Order Letter. Press data search on the right side and the SO No. list will appear. - Invoice Date : fill with the date when the goods delivery transaction occurs. Press Date Selection Button on the right side to view and select the date. - Note : fill with the note on this transaction. Zahir Accounting Enterprise will create the note automatically but you could modify the note for your needs. - Job fill with the project data relevant with this transaction. - Department : fill with the department data related to this transaction 202
203 - Check mark on Invoice Check Box to post the transaction to general ledger. If the transaction is only an order and the goods have not been delivered yet, unmark. When the goods are delivered, you could re-open the journal and give Check Mark, then save the transaction. - Check mark on Service Check Box if the transaction is service purchase. Unmark if it is goods purchase transaction. - Check mark on Cash Check Box for sales transaction with cash payment. Unmark if it is in credit. Press Details tab to input sold goods or service data transaction. Fill the required data such as product data, quantity, unit, price, and Job Press Landed Cost tab to input expenses on this sales transaction. Program will automatically insert the total value if it has been inputted on Landed Cost item on the right side of Detail. 203
204 Press Tax tab to input the related tax with this sales transaction. You could input more than one tax. Tax setting is on [Data-data], [Tax] Press Discount tab to input applied discount for this sales transaction. The applied discount could be more than one which will be a multi-step discount. This Discount Tab will only appear if the Multi Step Discount in program setup is activated. Press delivery info tab to input delivery information on received goods. 204
205 This Delivery Info Tab will only appear if the delivery information facility in program setup is activated. Press Delivery Status tab to input delivery information on received goods This Delivery Status Tab will only appear if the delivery status facility in program setup is activated. - Document No. : fill with the document number of sales used according to its voucher number. The document number will appear if the program setting of transactions in general is activated. - Document Date : fill with the sales document date used on its voucher. The document date will appear if the program setting of transactions in general is activated. - Term of Payment : fill with the determined term of payment. Press enter on this edit box or click a small button on the right side to display the window of term of payment. - Salesman : fill with the name of person in charge for this sales. - Landed Cost : fill with expenses relevant with this goods delivery transaction. The program will automatically insert the total value if the data has been inputted in Landed Cost item on the right side of Details. - Total Tax : fill with the tax related to this goods/service delivery transaction. The program will automatically insert the value if the data has been inputted on Tax item on the right side of Landed Cost. - After Tax Total : fill with the total value of goods/service price, landed cost and total tax related to this transaction. The program will automatically compute the value. 205
206 - Down Payment : fill the amount of paid payment when the transaction occurs - Balance : fill with the amount of payable charged on the customer which receives the goods/service. For service sales, the items on sales details are: - Item Description : fill with the ordered item name. Type the sales item directly here. - Code is the Account Code where this sales will be allocated. Press enter on this cell to display Data Search Window from available account. This field must be filled - Ordered : fill with the goods quantity ordered by customer (will be automatically appear when SO No. is inputted). - Delivered : fill with the goods quantity delivered to customer. - Unit : fill with the unit used on returned goods. - Price : must be filled with the unit price of order or goods. You could use automatic setting selling price on Inventory module (see Chapter V). - Disc : fill with the discount percentage of sales given to customer. - Total : fill with the total price of sales per item ordered. The value will automatically appear if the total and price have been inputted. - Tax : fill with tax percentage per item ordered. However, for goods purchase, there is a slight difference on Item Code item - Item Number : fill with the Inventory/Goods Code. Press Enter in this field to display Data Search Window. - To create automatic sales invoice, give a check mark on Print column. If all information are correct, press Save button to save this journal or press Cancel to cancel it. Note: If you check mark Auto Posting on Journal Perpetual Basis check box on Program Configuration Window, the program will create automatic Inventory Adjustment Journal. If you check mark Auto Posting on Journal Account Receivable Write Off Reserve on Program Configuration Window, the program will create automatic Journal from Account Receivable Write Off Reserve. 206
207 Sales journal can be redisplayed through [Sales] and [Goods Delivery Transaction List]. Tips: Press enter when the cursor is pointed on Code, Item Code,and Job columns to select account code, item code and project from Data Search Window. Further detail on Data Search Window, item code, item description and etc will appear automatically if the SO No. has been selected. Use Recurring Transaction to make the automatic facility faster. Press to select account list needed if the existing ones do not meet. Press Stock List to view the available inventory list Any landed cost generated from this transaction, could be entered them on and the value will automatically be inserted on Landed Cost. Any other taxes generated from this transaction, input them on and the value will automatically be inserted on Total Tax. After entering SO No., then the data from selected Sales Order will automatically appear. If the above project and department transaction windows are selected (project and department head), all related transactions with the project will be automatically changed to the current project and department. But, if each item code has different job and department, select each item code for their job and department. The created report The above goods delivery (sales) transaction will create various reports automatically if the transaction has been posted. All Reports are printable and viewed in the Report module. The examples of the Reports are: Balance Sheet: to view, click [Reports], [Financial Statement] and [Balance Sheet-Standard] 207
208 Changed value due to sales transaction 208
209 Profit and Loss: to view, click [Reports], [Financial Statement] and [Profit and Loss -Standard] 209
210 210
211 General Ledger: to view, click [Reports], [Ledger] and [General Ledger-Job and Dept] Journal Transaction Report: to view, click [Reports], [Ledger] and [Journal all transaction] Sales and Account Receivable Reports: one of these complete reports is Sales Report. To view, click [Reports], [Sales and Receivable Reports], [Sales] and [Sales Invoice Detail] 211
212 Besides the above Report, you could also view the payable voucher Report. Account Receivable voucher will increase due to sales transaction. With this report, you could control your company s payable position. To view, click [Report], [Sales and Receivable Report], [Account Receivable] and [Customer Balance Real Currency] Increased receivable due to sales transaction Product Report: one of these reports is stock voucher Report where stock will automatically be decreased generated by the sales transaction if the payment is not in cash. To view, click [Reports], [Products Report], [Inventory] and [Inventory Ledger By Location] 212
213 5.2.4 Sales Return Sales Return Facility is used to input the returned delivery of sales occurred, both cash or credit payment. To view the Sales Return, press [Sales], [Enter Transaction] and [Sales Return] on pictorial menu. The Sales Return window will be: 213

214 - Customer Name : fill with the customer's name. Press enter on Customer Name Edit Box or press Data Search Button on the right side and program will display Data Search Window. - Invoice No. : fill with the sales invoice number. The program will automatically create the number but enables you to modify it. - Order Letter No. : fill with your sales Order Letter. Press data search on the right side and the Order Letter No. list will appear. - Note : fill with the note on this transaction. Zahir Accounting Enterprise will create the note automatically but it is possible to modify the note as your needs. - Invoice Date : fill with the date when the return delivery transaction occurs. Press Date Selection Button on the right side to view and select the date. - Department : fill with the department data related to this transaction 214
215 - Project : press search button on the right side and select project data related to this transaction. - Check mark on Invoice Check Box if the transaction is directly posted to general ledger. If it is only an order and the goods have not been delivered yet, do not check mark. When the goods are delivered, you could re-open the journal and Check Mark, then save the transaction. - Check mark Service Check Box if the transaction is service purchase. Unmark if it is goods purchase transaction. - Check mark Cash Check Box if this transaction is the sales with cash payment. Unmark if it is credit. Press Details tab to input sold goods or service data transaction. Fill the data needed such as item data, quantity, unit, price, and Job Press Landed Cost tab to input expenses on this sales return transaction. Program will automatically insert the total value if it has been inputted on Landed Cost item on the right side of Detail. 215
216 Press Tax tab to input the tax relevant with this sales return transaction. You could input more than one tax. To setup the tax, go to [Data-data], [Tax] Press Discount tab to input applied discount for this sales transaction. The applied discount could be more than one which is a multi-step discount. This Discount Tab will only appear if Multi Step Discount Facility in program setup is activated. Press Delivery Info tab to input the delivery information on received goods. 216

217 This Delivery Information Tab will only appear if the Delivery Information Facility on program setup is activated. Press Delivery Status tab to input the delivery information on received goods. This Delivery Status Tab will only appear if the Delivery Status Facility on program setup is activated. - Document No. : fill with the sales document number used according to its voucher number. The document number will appear if the program setting of transactions in general is activated. - Document Date : fill with the date of sales document used on its voucher. The document date will appear if the program setting of transactions in general is activated. - Delivery Date : fill with the return delivery date on returned goods. - Term of Payment : fill with the determined term of payment. Press enter on this edit box or click a small button on the right side to display the window of term of payment. 217
218 - Salesman : fill with the name of person in charge for for this sales. - Landed Cost : fill with expenses relevant with this goods delivery transaction. The program will automatically insert the total value if the data has been inputted in Landed Cost item on the right side of Detail. - Total Tax : fill with the tax relevant with this goods/service delivery transaction. The program will automatically insert the value if the data has been inputted on Tax item on the right side of Landed Cost. - After Tax Total : fill with the total value of goods/service price, landed cost and total tax relevant with this transaction. The program will automatically compute the value. - Down Payment : fill the amount of settled payment when the transaction occurs - Balance : fill with the amount of payable charged to customer which receives the goods/service. The transaction will reduce the current Account Receivable. For service sales, the items on sales details are: - Order Description : fill with the ordered item name. Type the sales item here. - Code is the Account Code where this sales will be allocated. Press enter on this cell to display Data Search Window from existing account. You must fill this field. - Returned : fill with the amount of returned goods/service on this transaction. - Ordered : fill with the goods quantity when sold (will automatically appear when SO No. is inputted). - Unit : fill with the unit used on returned goods. - Price : must be filled with the unit price of order or goods. You can use automatic set selling price on Inventory module (see Chapter V). - Total : fill with the total price of sales per ordered item. The value will automatically appear if it is delivered and price has been inputted. - Disc : fill with the sales discount percentage for customer - Tax : fill with the percentage of sales tax per ordered item. However, there is a slight difference on Goods Code for goods purchase, - Item Number : fill with Inventory/Goods Code. Press Enter in this field to display Data Search Window. - To create automatic sales invoice, check mark on Print column. 218
219 If all information are correct, press Save button to save this journal or press Cancel to cancel it. Note: Check mark Auto Posting on Journal Perpetual Basis check box on Program Configuration Window, the program will create Inventory Adjustment Journal automatically. Check mark Auto Posting on Journal Account Receivable Write Off Reserve on Program Configuration Window, the program will create Journal from Account Receivable Write Off Reserve automatically. Sales return list could be redisplayed through [Sales], [List of Transaction], and [Sales Return] Tips: Press enter when the cursor is pointed on Code, Item Code and Job columns to select account code, item code and project from Data Search Window. The item code, item description and etc will appear automatically if SO No. has been selected. Press to select account list needed if the available ones do not meet your needs. Press Stock List to view the available inventory list The landed costs generated from this transaction are entered on and the value will automatically be inserted on Landed Cost. Any other taxes generated from this transaction, you could input them on and the value will automatically be inserted on Total Tax. If you have inputted SO No., then the data from Sales Order selected will automatically appear on items. If the above project and department transaction windows are selected (project and department head), all transactions relevant with the project will be changed automatically to the current project and department. But, if each item code has a different job and department, select each item code line for their job and department. 219
220 The created Report The above goods delivery (sales) transaction will create various reports automatically if the transaction has been posted. All Reports are printable and viewed in the Report module. The examples of the Reports are: Balance Sheet: to view, click Report > Financial Statement > Balance Sheet- Standard 220
221 Reduced balance due to sales return 221
222 Profit and Loss Report: to view, click [Reports], [Financial Statement] and [Profit and Loss Standard] 222
223 223
224 Ledger Report: to view, click [Reports], [Ledger] and [General Ledger-Job and Dept] 224
225 225
226 Journal Transaction Report: to view, click [Reports], [Ledger] and [Journal all transactions] Sales and Account Receivable Reports: one of the reports is complete Sales Report. To view, click [Reports], [Sales and Receivable Reports], [Sales] and [Sales Return Detail] Besides the above Report, you could also view the Account Receivable voucher Report. Account Receivable voucher will increase generated by sales transaction. With this Report, 226
227 you could control the company s payable position. To view, click [Reports], [Sales and Receivable Report], [Account Receivable] and [Customer Balance Real Currency] Reduced receivable voucher due to sales return Product Report: one of these reports is stock voucher Report which will automatically be decreased by the sales transaction if the payment is not in cash. To view, click [Reports], [Product Report], [Inventory] and [Inventory Ledger General] Stock is automatic increased due to sales return 5.3 Sales By Using Serial Number and Lot Number Zahir Accounting provides serial number and lot number facilities. This facility is available on product data. Thus, when you create product data, you need to check mark its serial number or lot number. 227
228 5.3.1 Serial Number Serial Number is used for goods with certain serial number or named IMEI. The inventories commonly use Serial Number are mobile phone and machinery. If the serial number on product data is activated, then when the sales occurs the following window will appear: Click by using mouse to remove the serial number Click this button to remove the selected serial number list to the issued serial number Click this button to remove the issued serial number to the original location Select the issued serial number by using mouse. Click to remove the issued seriall number. Click OK button if all data have been inputted. View the report of sold serial numbers and existing ones on [Reports], [Product Report], [Inventory] and [Serial Number Sold]. The following is the example: 228

229 Issued serial number due to sales Lot Number Lot Number is used for inventory with expiry date, such as medicine and food. By using this facility, you could control the expired inventory. To use this facility, activate lot number product data by giving a check mark. The following is the lot number input window during for sales: 229
230 Double click to display lot id list Double-click lot ID column to display the lot number list. Select the appropriate lot number with the inventory. The following is the example of lot number Report. Click [Reports], [Product Report], [Inventory] and [Lot Number Available]. Notice: Lot Number Window will appear if Lot Number facility on goods data is activated. 230

231 5.4 Account Receivable Account Receivable will be created automatically when the payment of goods delivery is not in cash List of Account Receivable This facility is used to display the available Account Receivable list from sales transaction. To view Account Receivable list, press [Sales], [Enter Transaction] and [Account Receivable List] on pictorial menu. Press Including Zero Balance Check Box to preview the settled Account Receivable. Press button on Account Receivable list table or Detail button to preview the Account Receivable detail. The Account Receivable detail window will be as follows: 231

232 The upper side of the list is the sales transaction list which generates Account Receivable while on the lower side is the transaction details of the Account Receivable. Press button on Account Receivable detail table or Detail button to display the transaction journal. Press Write Off button to delete Account Receivable and the program will create Account Receivable Write Off Journal Account Receivable Payment Journal This journal is used to input the Account Receivable payment transaction due to sales. To display the Account Receivable payment journal, press [Sales], [Enter Transaction] and [Customer Payment] on pictorial menu. The following is the Account Receivable Payment window: 232

233 - On Account Drop down Combo Box, select bank account in which the cash received from Account Receivable payment will be allocated. For example, cash cheque payment, select bank A on Account, etc. - From : fill with the customer s name who pays the Account Receivable - Ref. No. : fill with the journal reference number. Zahir Accounting Enterprise has created it, but enables you to modify as your needs. - Date : fill with the payment date - Memo : fill with the note on this journal. Zahir Accounting has created them for you but you could modify them as your needs. - Amount : fill with the total Account Receivable payment - Department : fill by selecting the department related to the transaction - Project : fill by pressing the search button on the right side and select project data relevant with this transaction - Post-Dated Check : fill with the total amount of accounts payable payment. There are some fields on payment details (allocation): 233
234 - Invoice No. : fill with the invoice number to be settled. Press [enter] on keyboard when you are on this field to display the Data Search Window. - Discount : fill with the discount value given to customer - Payment Value : fill with the amount of payment for an invoice (stated on Invoice field). If you want to settle the invoice, type the amount of payment with accounts payable balance subtracted with discount per invoice. - Document No. : fill with the number of sales document used according to the voucher number. The document number will appear if the program setting on transactions in general is activated. - Document Date : fill with the date of sales document used according to the voucher. The document date will appear if the program setting on transactions in general is activated. - Fine : fill with the charge amount subjected to your company due to the late payment. Press Save button to save the transaction or press Cancel to cancel. Note: To use Term of Payment facility when you create Sales Journal and the customer pays during the determined discount period on the term of payment, the program will compute the discount value. To create the Account Receivable payment journal for previous Account Receivable before using this software, you have to fill the Account Receivable balance first. To delete one row on payment details item, press Delete Row button or [Ctrl]-Del on keyboard when the cursor is on the line to be deleted. Tips: If the above project and department transaction windows are selected (project and department head), all transactions relevant with the project will be changed automatically to the current project and department. But, if each invoice has a different job and department, select each invoice line for their job and department. Notice: Do not input any Account Receivable payment transaction on cash received journal, although it is an appropriate journal. However in accordance to the Account Receivable 234
235 voucher, the payment through cash received will not reduce the Account Receivable voucher since the Account Receivable database is only located on Sales module. The Account Receivable payment transaction will reduce the Account Receivable voucher and create journal to decrease the Account Receivable as the following: Reduced Receivable due to account receivable payment Account Receivable Overpayment Return Journal The journal is used to input Account Receivable overpayment return transaction to the customer. This transaction is needed if an Account Receivable has been paid but the goods 235
236 has been returned, thus the paid money should be returned or posted it as other Account Receivable payment. The following is the example of Account Receivable payment in which its value is larger than the Account Receivable balance: The above transaction shows that the Account Receivable payment is larger than the Account Receivable balance. As a consequence, the money should be returned to customer or subtract other Account Receivable invoice. As a result, the Account Receivable voucher Report will be negative. 236
237 Receivable balance is negative (-) due to receivable overpayment To display the Account Receivable overpayment return journal, press [Sales], [Enter Transaction] and [Customer Credit /Refund] on pictorial menu: 237
238 The program will display the Data Search Window consists of invoice number with negative balance. Select invoice number to be processed its overpayment, then click OK if you have selected one 238

239 Program will display the window to confirm the money allocation and its return, will be returned in cash or used to pay other Account Receivable. If customer requires you to return in cash, the program will display the following journal window: Zahir Accounting Enterprise will fill the journal automatically. It enables you to modify the transaction date, journal information and the amount returned. Press Save button to save the journal or Cancel to cancel it. If your customer has another outstanding invoice and agrees to use the overpayment to pay other Account Receivable, then select To pay other invoice. Then the program will display Account Receivable Payment Journal. Program will automatically fills some main fields on Account Receivable Payment journal and select the invoice number to be paid by using the overpayment. This selection could be done if there are other outstanding invoices from the same customer. 239
240 Payment value should be equal to the amount received Select Invoice number to replace with the Account Receivable overpayment and balance the value with the payment value. If there are several invoice numbers, press tab to go to the next line. If you finish, click Save to save the transaction. This transaction will reduce the Account Receivable balance, general ledger or Account Receivable voucher such as follows: 240
241 Reduced receivable voucher due to cash returned Account Receivable Write Off Journal Account Receivable write off journal is used to remove the Account Receivable write off in case the customer is not afford to pay, and your company allows to write off it or if the customer is no longer exists. To perform the write-off on outstanding Account Receivable, you have to display the Account Receivable List by clicking [Sales], [Enter Transaction] and [Account Receivable List]. Select customer name available on the list, press Detail button and select invoice number to be removed its Account Receivable balance. The program will display the following journal: 241

242 Select invoice number to write-off, click Write Off button to view the Account Receivable Write Off Journal window as follows: 242
243 - Ref : fill with the reference number of Account Receivable write off journal. Zahir Accounting Enterprise has created it for you but enables you to modify it. - Date : fill with the transaction date - Journal Info : fill with the transaction note. Zahir Accounting has provided, however you could modify them based on your needs. - Amount : fill with the Account Receivable write off - Account Receivable : is the account code from Account Receivable. This code is filled based on the previous control account code. You should not make any changes unless you are sure of what you do. - Write Off : is the account code to allocate the Account Receivable write off. Press Save button to save the journal or Cancel to cancel it. Notice: Account Receivable write off journal is created based on General Journal. As you have saved this transaction and to view it again through general journal window. Although the transaction created on general journal could be revised (edited), you are strongly advised not to revise (edit) this journal. This transaction is connected to the Account 243
244 Receivable information hidden on General Journal Window and it will cause the data inconsistency. The Account Receivable write off transaction will reduce the Account Receivable voucher and create journal to reduce Account Receivable as following example: Reduced receivable voucher due to receivable write off 5.5 List of Transaction and Print Invoice All transactions on Sales Module will create transaction list on all facilities in Sales Transaction List All transactions on Sales will have each lists such as: a. Sales Quotation b. Sales Order c. Delivery Order 244
![d. Sales Return e. Customer Payment To view all lists on previous Sales transaction, press [Sales], [List of Transaction and Print Invoice], [Delivery Order] on pictorial menu.](/docs-images/71/65852019/images/245-0.jpg "Sample of Delivery Order (Invoicing) Transaction After Sales List Window on required transaction is opened, the previous sales transaction could be viewed by pressing button or Detail button.")
245 d. Sales Return e. Customer Payment To view all lists on previous Sales transaction, press [Sales], [List of Transaction and Print Invoice], [Delivery Order] on pictorial menu. Sample of Delivery Order (Invoicing) Transaction After Sales List Window on required transaction is opened, the previous sales transaction could be viewed by pressing button or Detail button. If this transaction has already posted on general ledger, you could not change it (only on goods delivery transaction list and sales return transaction list). Note: On the right column of transaction list, there is a red check mark to show that the transaction has been posted into ledger. Therefore, you could not change the transaction (only available in delivery order transaction and sales return) 245

246 5.5.2 Print Invoice Every transaction on Zahir program has invoice/voucher to be printed on every sales transaction. To view the Account Receivable Payment Transaction, press [Sales], [List of Transaction and Print Invoice] and [Delivery Order] on pictorial menu. The following is the goods delivery transaction window: Press Detail button to identify Account Receivable transaction occurs and press Print Invoice to print the Account Receivable payment transaction invoice automatically as follows: 246
247 Variable: to fill the Report variable on tax invoice (you can fill on Program Setup) Design: to design Account Receivable payment invoice based on your needs Preview: to view invoice statement display you have created Print: if the invoice statement display is already appropriate with what you have filled on Account Receivable payment transaction and your needs, you can print it by pressing Print button. Close: to close the menu on Account Receivable payment invoice display. 247
248 CHAPTER VI INVENTORY 6.1 Definition of Inventory Inventory is the most important part for a company since it is an asset for sales. It is necessary to control the inventory because there is employees involvement on this process. Zahir Accounting Enterprise has an adequate inventory processing facility, but before using this facility, the inventory data must be prepared. The following is the Inventory module picture: 248
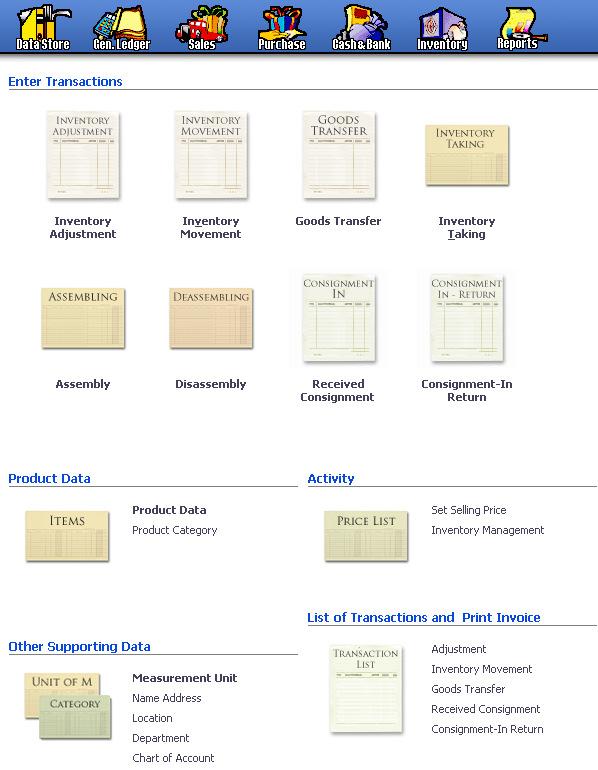
249 249
250 Note: It is possibly to delete or unpost transaction on Inventory Module by using the Audit Trail statement on general ledger. Read Chapter VIII for more detail. 6.2 Inventory Initial Setting Before conducting any transaction related with inventory, you have to create product category and product data. The explanation of product category and product data are mentioned in Chapter III. Make product category into raw material and finished goods which the raw material properties are stored and purchased, while finished goods are stored and sold. Create clothes product data with finished goods category, which the raw material category consists of wool, button and thread material. 6.3 Auto Build Facility If in creating goods/inventory numerous goods/inventory as the supporting components are needed, the Auto Build facility will be useful. By filling some information needed, Zahir Accounting Enterprise will create Inventory Movement Journal automatically. First, you have to create New Inventory Data on Product Data in [Inventory] and [Product Data]. Press Auto Build button and the Automatic Product Order Information window will appear: 250
251 On the upper section there is Production Quantity field. Fill with the production quantity of main goods/inventory (the term main is used to differentiate between goods to be produced with the supporting goods). Code : fill with the supporting goods code. Press [enter] to display data search window Quantity : fill with the amount of supporting goods needed to produce the amount of main goods as stated on Production Quantity field. Fixed : shows the amount of supporting goods which will be fixed/ do not influence the main goods quantity. Fill with character x if it is fixed (you could type small character of x in this column or by left-clicking when the arrow points on this column) If you want to delete one row of supporting goods, press Delete Row button when the cursor points the row to delete. Press Finish button to finish. 251

252 6.4 Set Selling Price The facility is used to determine the sales price of goods manually and automatically. To use this facility, press [Inventory], [Activity] and [Set Selling Price] on pictorial menu. The window of inventory/goods sold will be as follows: To fill the sales price manually, place the cursor on Selling Price column and type the sales price you want. As the sales tax, place the cursor on Tax column and type the sale tax here. Zahir Accounting Enterprise has an automatic set selling price facility, it is not necessary to fill the sales price of each goods manually. To use this automatic facility, check mark on Calculate Automatically Check Box and press Calculate Selling Price button to calculate the selling price. Tips: To determine the selling price for certain goods, select some goods at once by pressing [Ctrl] button on keyboard. Next, left-click on the needed goods item and hold [Ctrl] button during selecting all needed goods. Press Filter button on the upper section of set selling price to filter the inventory data before selling price is determined. After pressing Calculate Selling Price, the following window will appear: 252

253 On Calculation Method section, select the selling price calculation system, by determining the profit margin, markup or fixed gross profit. Fill the percentage number of profit margin or markup or gross profit on Edit Box on the right side of selection. Round up is used to round up the selling price value. Select available option on Round up Drop down Combo Box and determine the minimum unit of round up on Smallest Unit Edit Box on the bottom part. Pricing Base is used as the base to set selling price, whether it is based on the latest selling price or production base cost. Tax to Selling Price is used to determine the sales tax of sold goods. Press Process button to continue selling price calculation or Cancel to cancel the process. The program will return to the previous window. To close the window, press Close button or repeat the process to calculate the selling price for other goods. Tips: This selling price creation will cause the unit selling price appear on unit price column during the Sales. 253

254 6.5 Inventory Adjustment Journal Inventory Adjustment Journal is used to input inventory adjustment transaction, for example for goods in location that are used for production of a project, promotion, or any other matters. To view Inventory Adjustment Journal, press [Inventory] [Enter Transaction] and [Inventory Adjustment] on pictorial menu. - Ref : fill with the reference number of this transaction. The program will automatically fill but possible to modify it. - Date : fill with the transaction date. Press Date Selection Button on the right side to display and select date - Note : fill with this transaction note - From Location : fill with the location data where the goods are released - To Location : fill with the location data where the goods are transferred. - Project : fill with the project which the data is used - Department : fill with which department data is used 254
255 - Posting : check mark if you want the data automatically posted in journal While to fill the form, the items available are: - Code on the first column is filled with Inventory/Goods Code previously created on Creating New Inventory Data section - Quantity column is filled with the change on goods quantity on this transaction. For example, goods A are used 2 pieces for finishing a project then Quantity is filled with -2. The negative sign shows the goods quantity in inventory is reduced by 2. - Unit Price is filled with the acquired goods price. Zahir Accounting Enterprise will calculate based on FIFO, LIFO or average as it is stated on set selling price system when you create New Inventory Data. You are not allowed to change it unless you are sure of what you do. - Account column on the sixth column is filled with Account Code. For the above example (goods A), the account code to be credited is advertising and promotion on profit-loss. - Job column is filled with the project code if the cost occurred will be allocated on a project. - Dept column is filled with the dept code related to the cost selected. If all information are correct, press Save button to save this journal or press Cancel to cancel it. Note: Inventory adjustment journal could be redisplayed through Ledger and Inventory Ledger. To delete one row on purchase items, press Delete Row button or [ctrl]-del on keyboard when the cursor points to the row to be deleted. Tips: - Press [enter] when the cursor is located on Code, Item Code Job and dept columns to select account data code, project goods code and department from Data Search Window. 255
256 - If the above project and department transactions are selected (project and department head), all transactions relevant with the project will be automatically changed to the current project and department. But, if each item code has a different job and department, select each item code line for their job and department. This inventory adjustment transaction will create transaction journal and stock voucher will decrease as following picture: Released quantity from inventory adjustment 6.6 Inventory Movement Inventory Movement Journal is used to input inventory movement transaction for manufacture industry that produces finished /semi-finished goods from supporting goods, for example product A is produced by using 5 products B, 6 products C, 3 products D and so on. 256
257 To view Inventory Movement Journal, press [Inventory] and [Inventory Movement] on pictorial menu. - Ref : fill with the reference number of this transaction. The program will automatically fill, but possible to modify it. - Date : fill with the transaction date. Press Date Selection Button on the right side to display and select date - Note : fill with the note on this transaction. - From Location and To Location : fill with the location data where the inventory movement occurs. - Project (project head) : fill with the project related to inventory movement transaction. Click data search button to select the project 257
258 - Department (department head) : fill with the department relevant with inventory movement transaction. Click data search button to choose the department. - Posting : check mark to post the data automatically. While to fill the form, the items available are: - Code on the first column is filled with previous Inventory Code on Creating New Inventory Data section - Quantity column is filled with the change on goods quantity on this transaction. For example, to produce one goods A the quantity is 1, while supporting goods B is - 5 an so on. - Unit Price is filled with the goods acquired price. Zahir Accounting Enterprise will calculate based on FIFO, LIFO or average as it is stated on selling price system when you create New Inventory Data. You are not allowed to change it except you are sure of what you do. For goods to be produced, you could calculate its base price by positioning cursor on unit price column, pressing [F2] button on keyboard and pressing small button on the cell. - Job and Department columns are filled with the project code if the cost occurs will be allocated on a project. Select on each item code if it is different from the head of project and department above. If all information inputted are correct, press Save button to save this journal or press Cancel to cancel it. Note: Inventory adjustment journal could be redisplayed through Ledger window and Inventory Ledger. If you want to delete one row on purchase items, press Delete Row button or [ctrl]- del on keyboard when the cursor points to the row to be deleted. Notice: The lower line of journal window consists of difference as the total calculation of inventory movement value. The value should be ZERO. 258
259 Tips: - Press [enter] when the cursor is located on Code, Item Code Job and dept column to select account data code, project item code and department from Data Search Window. - Inventory movement for its supporting item code, is selected on the first line and so on, while the finished goods are selected lastly after all raw materials are inputted. Unit price on finished goods will be created automatically according to the quantity of raw material created. This transaction will create inventory movement journal for inventory account whilst the stock voucher on raw material inventory (product support) will decrease and goods inventory will increase. The following is the statement of journal transaction and stock voucher. To open Journal Transaction statement, click [Report], [Financial Reports], [Ledger] and [Journal all transaction] 259
260 To open Stock Card, click [Reports], [Product Report], [Inventory] and [Inventory Ledger General] Supporting goods in stock card are reduced 260
261 6.7 Goods Transfer Zahir Accounting Enterprise provides Goods Transfer facility to transfer inventory from a location to other location. Before using this facility, you must create location data to select the location. See detail on Chapter II. To view Goods Transfer, press [Inventory], [Enter Transaction] and [Goods Transfer] on pictorial menu. - Ref : fill with the reference number of this transaction. The program will automatically fill it, but possible to modify it. - Date : fill with the transaction date. Press Date Selection Button on the right side to display and select date - Note : fill with the note on this transaction. 261
262 - From Location : fill with the location data where the goods are released - Document No. : fill with the manual document number on this transaction - Document Date : fill with the document date manually for this transaction. - To Location : fill with the location data where the goods to be transferred. - Project : fill with the project which the data is used - Department : fill with which department the data is used - Order Letter No. : fill by pressing data search button on the right side. Select SO No. relevant with this data. - Posting : check mark if to post the data in journal automatically While to fill the form, the items available are: - Code on the first column is filled with Inventory Code transferred to other location. - Quantity column is filled with the change of goods quantity on this transaction. For example, goods A are transferred 1 piece to Head Quarter location then Quantity is filled with 1. - To location column is filled with the location where the inventory data to be transferred. - Job column is filled with the project code if the cost occurs will be allocated on a project. If you consider all information inputted are correct, press Save button to save this journal or press Cancel to cancel it. Note: If you want to delete one row on purchase items, press Delete Row button or [ctrl]- del on keyboard when the cursor points to the row to be deleted. Tips: - Press [enter] when the cursor is located on Code, Job, Department and Order Letter No. to select account data code, project, item code, department and order letter No. from Data Search Window. - Order Letter No. will appear if the Inventory Data Setting on Setting is activated. This transaction will create the decrease of stock voucher from previous location and stock voucher report per location. 262
263 To open journal transaction report, click [Reports], [Financial Statement], [Ledger] and [Journal All transaction] Journal with COGS value To open stock card report, click Reports > Product Report > Inventory > Inventory Ledger by Location 6.8 Inventory Taking By the end of accounting period, such as at the end of the month, every company which has goods inventory in location often conducts inventory taking, calculating the amount of goods in location and compare them with the inventory record. Should there any difference amount, correction on inventory amount must be performed by searching the causes of the difference. To use Inventory Taking facility, press [Inventory], [Enter Transaction] and [Inventory Taking] on pictorial menu. 263
264 The stock op name window will appear and display the existing inventory list with the appropriate amount compared to the record in Zahir Accounting Enterprise. See On Hand (Book). Point cursor on On Hand (Physic) column and on the line where the inventory amount in location is different from the notes. Type the amount of goods based on the calculation result in location on this column. Repeat this process until all of them calculated. Press Process button to continue process and the new window will appear: The program will need Account Code information to allocate the costs occur in this inventory taking. For example, you should choose Damaged Material if the difference in inventory amount is caused by defect. Press Continue button and the program will display 264
265 Inventory Adjustment Journal in which the next process will be similar with the Inventory Adjustment Journal. Note: - Press to print the inventory taking statement - Press if the posting result (book) is balance with the on hand (physical) - Press if the on hand (book) result is balance with the on hand (physical) Click Continue button to continue Inventory Taking transaction to display the following window : 265
266 Displayed automatically according to the difference on physic and recod Displayed automatically after selecting the account list in window The above window is the inventory adjustment window. Click Save button if all data are correct. Tips: is used if inventory taking input is similar with the physical stock is used if during the inventory taking, there are no physical goods or equal to zero. is used if in during the inventory taking, all goods are decreasing one is used to print inventory taking form and other document 266
267 6.9 Auto Build As it is stated on Auto Build Facility, when creating goods/inventory requires other goods/inventory as the supporting components, the Auto Build facility will be useful to make Inventory Movement Journal automatically. To use this facility, press [Inventory], [Enter Transaction] and [Assembly] on pictorial menu. Select location name to create Auto Build and Auto Build window will appear as follows: 267
268 Fill with the finished goods to create Place cursor on goods item you want to create its transfer journal and type the amount of goods to be made on TO Create column. Press Continue button to display Inventory Movement Journal. The next process will be similar with Inventory Movement Journal with a slight difference, which you do not have to fill all supporting goods item and count the base price of goods created. Next, press Save. Note: You could create automatic inventory movement journal for numerous goods at once Dis-assembly Zahir Accounting Enterprise provides Dis-assembly facility. This facility is used if a company which has already produced some goods would like to modify the raw material. To display Dis-assembly facility, press [Inventory] and [Dis-assembly] on pictorial menu. 268
269 Input the quantity to be extracted Place cursor on goods item you want to create its transfer journal and type the amount of goods to be made on To Extract column. Press Continue button to display the Inventory Movement Journal window. 269
270 The next process will be similar with Inventory Movement Journal with a slight difference, which all supporting goods item are not required and calculate the base price of goods created. Next, press Save. Unlike Auto Build, Dis-assembly will create a positive sign on raw material inventory and a negative sign on finished goods since they are decreasing. Next, press Save. This transaction will create a journal and stock voucher on raw material will decrease and on finished goods will increase. 270
271 6.11 Received Consignment Zahir Accounting Enterprise also has Received Consignment facility. The important thing to do so, is the consignment product data must be activated. To view Goods Transfer, press [Inventory] and [Received Consignment] on pictorial menu 271
272 - Vendor Name : fill with the name of supplier which gives the existing inventory consignment goods. Press Data Search Button on its right to display vendor data. - Ref. No. : fill with the reference of this transaction. Program will automatically create it and could be changed it. - Date : fill with the transaction date. Press data search button on its right side to display and select date. - Into Location : fill with the data of location which receives the goods. - Note : fill with the note on this transaction - Currency : fill with the currency used in this transaction. If you use foreign currency, select the foreign currency data. - Purchasing Dept : fill with name of person in charge for the received consignment. 272
273 - To Location : fill with the location data where the goods will be transferred. - Project : fill with the project relevant with this transaction - Department : fill with the department relevant with this transaction - Posting : check mark to automatic journal While on the filling table, the items available are: - Fill Item No. column with Inventory/consignment goods code received - Fill Quantity column with the changes on goods quantity on this transaction - Fill Job column with the project code if it will be allocated in a project If you consider all information inputted are correct, press Save button to save this journal or press Cancel to cancel it. Note: If you want to delete one row on purchase items, press Delete Row button or [ctrl]- del on keyboard when the cursor points to the row to be deleted. If you want to change the currency used in transaction, press sign to display other currency facility Notice: This transaction will not create a journal posting but the statements could be viewed on [Report], [Product Report/Inventory] and [Consignment In Detail] Tips: Press [enter] when the cursor is pointed on Item No, Job and Department column to select account data code, project and item code from Data Search Window. For consignment goods, it is recommended to use consignment goods category to display the statement easily. Received Goods transaction will create an increase on stock voucher for consignment. If the consignment goods sales occurred, then the sales journal, cost of goods sold and consignment outstanding which have been set on product data will be created automatically. The consignment payable payment is performed in cash-out with the allocation on consignment payable fund. 273
![6.12 Consignment In Return To view Consignment In Return, press [Inventory] and [Consignment In Return] on pictorial menu - Vendor Name : fill with the name of vendor which gives the existing](/docs-images/71/65852019/images/274-0.jpg "consignment in return. Press Data Search Button on its right to display vendor data. - Ref. No. : fill with the reference of this transaction.")
274 6.12 Consignment In Return To view Consignment In Return, press [Inventory] and [Consignment In Return] on pictorial menu - Vendor Name : fill with the name of vendor which gives the existing consignment in return. Press Data Search Button on its right to display vendor data. - Ref. No. : fill with the reference of this transaction. Program will automatically create it and possible to change it. - Date : fill with the transaction date. Press data search button on its right side to display and select date. - Note : fill with the note on this transaction - Project : fill with the project relevant with this transaction - Department : fill with the department relevant with this transaction 274
275 - Currency : fill with the currency used in this transaction. If you use foreign currency, select the foreign currency data. - Purchasing De : fill with the name of person in charge for consignment in return. - Return Note : fill to add some note on return data. - Posting : check mark for automatic journal. While on the filling table, the items available are: - Fill Item No. column with consignment Inventory/item code received - Fill Quantity column with the changes on goods quantity on this transaction - Fill Job column with the project code to be allocated in a project If you consider all information inputted are correct, press Save button to save this journal or press Cancel to cancel it. Tips: If you want to delete one row on purchase items, press Delete Row button or [ctrl]- del on keyboard when the cursor points to the line to be deleted. If you want to change the currency used in transaction, press sign to display other currency facility Notice: This transaction will not create a journal posting but the statements could be viewed on [Reports], [Product Report - Inventory] and [Consignment In Return] Tips: Press [enter] when the cursor is pointed on Item No, Job and Department column to select account data code, project and item code from Data Search Window. Consignment in return transaction will create a decrease on stock voucher for consignment goods. The following is the consignment goods stock statement. 275
276 Reduced goods due to consignment in return 276
277 CHAPTER VII CASH & BANK and GENERAL JOURNAL 7.1 Definition of Cash and Bank Cash/Bank module is used for transaction relevant with the cash and bank in your company. This kind of transaction is commonly used to transfer between cash from bank to cash or vice versa. Other transaction is cash payment which is commonly used for operational such as salary payment, electricity bill, telephone bill, etc. Other transaction is cash-in which is commonly used for cash receipt transaction other from sales and Accounts Receivable payment such as receiving money from share deposit and etc. Cash/Bank Module also has Checks receipt and Checks payment facility. 7.2 Fund Transfer This is not a particular transaction but only as an assistance to create fund transfer transaction from one bank account to other bank account, as you transfer money from Bank to Cash. To view Fund Transfer facility, press [Cash & Bank], [Enter Transaction] and [Fund Transfer] on pictorial menu and the following window will appear: - From : fill with the bank account to be credited (cash -out for payment) 277
278 - To : fill with the bank account to be debited (receiving cash) - Ref : fill with the reference of this transaction. The program will automatically fill with TRANS to confirm that this is a cash transfer transaction. You could change it based on your needs. - Date : fill with the transaction date. Press Date Selection Button on the right side to display and select date. - Amount : fill with the amount of money to be transferred. The transaction will create journal and, automatically, change the balance with the following amount: If transfer is performed through Bank/Cash which comprises foreign currency to Bank/Cash comprises Rupiah or vice versa, the following Bank Transfer window will appear: - USD Exchange Rate : fill with the foreign currency value compared to Rp. 1 - Value : fill with the currency deposited to Bank/cash followed by the required value 278
279 If you consider all information inputted are correct, press Save button to save this journal or press Cancel to cancel it. Note: The saved transaction can be revised (changed/edited) through General Ledger by displaying general journal transaction list. Click Detail button to display the previous transaction 7.3 Make a Deposit Make a deposit is used to input cash in transaction. To view Make a Deposit Journal, click [Cash & Bank], [Enter Transaction] and [Make a Deposit] and the following window will appear: - Account : fill with bank account in which the cash received will be saved. - From : Is the source of the cash 279
280 - Ref No. : fill with the reference of your cash received. The program will automatically create, but you could change it based on your needs. - Date : fill with the transaction date. Press Date Selection Button on the right side to display and select date. - Amount : fill with the amount of money received. The value should be balance with the total value of fund allocation. To fill it, click the mouse when the cursor is located on this field and the program will calculate it. - Project : fill with the project relevant with this transaction - Department : fill with the department relevant with this transaction - Memo : Fill with the note on this transaction. Zahir will create it for you but you could modify based on your needs. - Post- Dated Check : give a check mark if cash received uses post-dated check Fund allocation item on the lower line of the journal is filled with the account code on code column while Amount is filled with the value to be credited for the account. If you want to relate the transaction occurs with a project, fill Job column with the relevant project number and dept column with the relevant department number. - Document No. : fill with the existing document number on the document voucher. Input them manually. - Document Date : fill with the date of document. Press Date Selection Button on the right side to view and select date. If you have inputted all data, click Save button. The above transaction will create transaction journal automatically as follows: 280

281 If the above transaction uses post-dated check, then during the saving process the following window will appear: - Check No. : fill with the Checks number received by your company - Due date : fill with the post-dated check due date. Press Date Selection Button on the right side to view and select date. - Bank Name : fill with the name of bank of the received Checks - Bank Account No. : fill with the bank account number - Check Receivable Account : select list for Accounts Receivable Checks by pressing data search button If the payment uses multi Checks, click Multi Checks button to display the following window: 281
282 Fill the value of post-dated check for each Checks number. Click Tab button to go to the next line. If you use multi Checks facility, the journal will appear as follows: This transaction will appear on Checks receipt list on [Cash&Bank], [List of Transaction and Print Invoice] and [Received Post-Dated Checks] as follows: Click Cashed Checks button to cash the outstanding Checks. If you click the button the following notice will appear: 282
283 Click OK button to continue transaction or Yes to cancel. If you click Yes, the Checks list will automatically be removed and the following journal will appear: If the cash account used is Bank/cash which comprises of foreign currency, the display of cash receipt window will be: 283

284 Enter Foreign Currency window will appear and insert the foreign currency value, then insert the EUR Value by pressing $ and the foreign currency value will automatically appear. If you consider all information inputted are correct, press Save button to save this journal or press Cancel to cancel it. The transaction above will create a transaction journal as follows: If you want to re-evaluate the foreign currency, use monthly closing period facility in Chapter VII. 284
285 Tips: - If fund allocation has been used for more than one accounts, click tab button to go to the second line - The transaction contents which have saved could be revised (changed/edited) through [ Ledger] and [Account List]. Select cash/bank account to be revised and click Detail button. Another way is by opening cash in list in Cash/Bank Module, select List of Transaction and Print Invoice, then select Cash - In Transaction. - To edit the transaction, activate cash/bank edit in [Setting], [Program Setup] and [Cash & General Journal], check mark Cash - In Journal, Cash - Out and General Journal. - If you want to delete one row on cash - in items, press Delete Row button or [ctrl]- del on keyboard when cursor is on the row to be deleted. - If the transaction is performed monthly, press Save Record. The example of repeated cash - in transaction is interest revenue from bank etc. 285

286 7.4 Write a Check Write a Check Journal is used to input cash - out transaction. To view Write a Check Journal, click [Cash & Bank], [Enter Transaction] and [Write a Check] and the following window will appear: - Account : fill with bank account to be credited (release the cash for payment). - Received By : cash receiver. - Check No. : fill with the reference of your cash payment (You could put the check or Checks number here). The program will automatically create, but you could change it for your needs. - Date : fill with the transaction date. Press Date Selection Button on the right side to display and select date. 286
287 - Amount : fill with the amount of money received. The value should be balance with the total value of fund allocation. To fill it, click the mouse when the cursor is located on this field and the program will calculate for you. - Project : fill with the project relevant with this transaction - Department : fill with the department relevant with this transaction - Memo : Fill with the note on this transaction. Zahir will create it for you but you could modify for your needs. - Post dated check : give a check mark if cash - in uses post-dated check Fund allocation item on the lower line of the journal is filled with the account code on code column while Amount is filled with the amount to be credited for the account If you want to relate the transaction occurs with a project, fill Job column with the relevant project number and dept column with the relevant department number. - Document No. : fill with the existing document number on the document voucher. Input them manually. - Document Date : fill with the date of document. Press Date Selection Button on the right side to view and select date. If you have inputted all data, click Save button. The above transaction will create transaction journal automatically as follows: The above transaction will create journal transaction used for Bank/Cash which comprises of foreign exchange. The cash -in window will be as follows: 287

288 Foreign Currency Entry window will appear and insert the foreign currency value, then insert the EUR Value by pressing $ and the foreign currency value will automatically appear. If you consider all information inputted are correct, press Save button to save this journal or press Cancel to cancel it. The transaction above will create a transaction journal as follows: If you want to re-evaluate the foreign currency, use monthly closing period facility in Chapter VII. 288

289 Tips: - If fund allocation has been used for more than one accounts, click tab button to go to the second line - The transaction content you have saved could be revised (changed/edited) through [Ledger] and [Account List]. Select cash/bank account to be revised and click Detail button. The other way is by opening cash-out in Cash/Bank Module, select List of Transaction and Print Invoice, then select Cash - Out Transaction. - To edit the transaction, activate cash/bank edit in [Option], [Program Set - up] and [Transaction Setting Cash & General Journal], check mark Cash - In Journal, Cash -Out and General Journal. - If you want to delete one row on cash-in items, press Delete Row button or [ctrl]- del on keyboard when cursor is on the row to be deleted. - If the transaction is performed monthly, press Save Record. The common repeated cash - in transaction is interest revenue from bank etc. 7.5 Bank Reconciliation Reconciliation is used to balance the bank account with financial posting by using Zahir Accounting. Reconciliation is commonly used once in a month after receiving account statement from Bank. To view reconciliation facility, press [Cash & Bank], [Enter Transaction] and [Bank Reconciliation] and the following window will appear: 289

290 Account Code : fill by selecting bank account list to be reconciled. Click data search button to select account number to be used. Current Account Date : fill with the account statement date, which commonly uses end of the month date. Use calendar facility to select date. Current Account Balance : fill with the balance value on account statement from Bank. Click Continue to go to the next window so that the Bank Reconciliation window will appear as follows: Click mouse on column X for transaction appropriate with your bank account statement. The red check mark sign will appear which confirms that the transaction is similar with the account statement. Pay attention to Reconciliation window on the right side of Reconciliation list. The following is the window you should pay attention for it will change every time you click column X. This will be your guideline to make adjustments. 290

291 Value will change if transaction is checkmarked Value must be zero for reconciliation Press Adjustment button to make adjustment. This adjustment is used if there is a different transaction with the account statement, whether it is debit or credit transaction. The transactions commonly inputted are administration transaction and bank interest. If you click Adjustment button, the following window will appear: 291

292 - Account Code : fill with which account is relevant with this adjustment. Use account list search button on the right side. - Date : fill with the date of adjustment transaction. Press Date calendar select date. - Reference : fill with the reference number used. - Note : fill with the needs of adjustment journal manually - In (Debit) : fill with the nominal needed if transaction has not been inputted to Zahir and it exists on account statement but the transaction goes into the company bank. For example, bank interest which will become company revenue. - Out (Credit) : fill with the nominal needed if transaction has not been inputted to Zahir and it exists on account statement but the transaction goes out of the company bank. For example, administration fee which will become company expense. Click Save button to save the transaction The above transaction will create an automatic journal as follows: After making some adjustments, the nominal on reconciled bank ledger should be balanced with the account statement. Pay attention on Reconciliation and Analysis window on the right side of Reconciliation list. The value on Difference should be zero. 292
293 Then, click Reconciliation button to view the Reconciliation Statement 7.6 Transaction List and Print Invoice Every transaction creates on Cash & Bank will form a transaction list and based on the transaction list, the invoice could be printed. The formed transaction list is cash - in and cash - out list. For inter cash transfer transaction, the transaction list is attached on general journal list. Click [ Ledger] and [General Journal] Transaction List Transaction Lists on Cash & Bank are: Cash In Transaction Cash Out Transaction Received Post Dated Checks Post Dated Issuance To view all lists on Cash & Bank consists of previous Sales transaction, press [Cash & Bank] and [List of Transaction and Print Invoice] on pictorial menu as follows: This Received Cash is used to view the cash receipt journal display and print the invoice or previous received cash by pressing button or Detail button. You could modify the transaction and if any problem occurs, then the setting on setup program has not been activated to change the cash & bank transaction and general journal. Tips: Press $ IDR button to identify the exchange rate on rupiah Received Check will appear on the list if there is a transaction uses post-dated check on received cash and receivable payment. Cash-out will appear on the list if there is a transaction uses post-dated check on cash payment and payable payment. 293
294 7.6.2 Print Invoice/Voucher To print sales invoice, select sales transaction you want to print by sliding cursor on the right line. Press Print Invoice button then the following will appear: Press Print Invoice to print invoice or Received Cash form automatically as follows: 294
295 Design: to design received cash invoice based on your needs. Preview: to display the created invoice Print: if the invoice statement display is already appropriate as you have filled on received cash transaction and your needs, you can print it by pressing Print button. Close: to close the menu on received cash display. Tips: you could save the designed invoice by selecting directory C on Zahir Data, then select Report Directory and received cash invoice. Fill the name of the modified file and save. 7.7 General Journal and General Ledger Zahir Accounting provides journal facility to create the needed journal but, it is not available on other module. General ledger is used to view the transaction list per account. 295
296 7.7.1 General Journal General Journal is used to input transaction that does not have its own journal, such asset depreciation; adjusting transaction, etc. (see Chapter II for transaction examples which are used in this general journal). To view general journal, press [General Ledger] and [General Journal] on pictorial menu so that the following window will appear: There is some information to be filled: - Ref : fill with the reference of this transaction. The program will automatically create, but you could change it based on your needs. 296
297 - Date : fill with the transaction date. Press Date Selection Button on the right side to display and select date. - Note : fill with the note on this transaction - Document No. : fill with the sales document number used according to its voucher number. The document number will appear if the program setting of transactions in general is activated. - Document Date : fill with the sales document date used on its voucher. The document date will appear if the program setting of transactions in general is activated. - Department : fill by pressing search button on the right side. Select the department relevant with this transaction. - Project : fill by pressing search button on the right side. Select the project relevant with this transaction. While the transaction items should be inserted on the available lines on the lower line of general journal are: Code column is filled with Account Code Debit and Credit is filled with the amount of debit or credit charged for the account To relate the transaction occurs with a project, then fill Job column with the relevant Project Code and to relate the transaction occurs with a department, fill Dept column with the relevant department. Note: The transaction created can be revised (changed/edited) through [General Ledger] and [General Journal Transaction List] If you want to delete one line on transaction items, press Delete Line button or [Ctrl]-Del on keyboard when the cursor points on the line to be deleted. Tips: Press enter when the cursor points on Code column, Job column and Dept column to select account code data and project from Data Search window. Use Save Record if you use the same transaction in one month. 297

298 7.7.2 General Ledger General Ledger is a financial activity record on each account to identify the changes. Your bank saving book is the example of a general ledger issued by bank for you The following is the general ledger window: To view general ledger from an account, you must view the Account List. Select account which you want to view its general ledger and press button on the very left column of the account code, or press General Ledger button on the right side of account list window. 298
299 CHAPTER VIII OTHER FACILITIES 8.1 Inter Branches Synchronization Synchronization facility is used if a company has branches, in which the head company financial statement is combined to its branches. To combine the financial statement, Zahir has an Inter Branches Synchronization facility. This facility has a capability to match the data spread in different locations by using a simple Dial-up internet network. This facility could be used by a company which has some branches in different locations. The program will automatically import all data from the branches to head office at the soonest, then the head office could have better control to its branches. All branches transaction will automatically be inserted to head office, even for the data of Accounts Receivable, Accounts Payable and inventory. This Inter branches synchronization uses FTP server in which every head and branch should use internet to export and import data. Click [Option] and [Program Setup], select General Setting so that the following picture will appear: 299
300 Click here to set FTP Server Click FTP Server Setting to create data setting on FTP Server. 8.2 Delete and Unpost / Edit Transaction This facility is used for inputted transactions on Zahir, but that transaction is to be deleted or unposted/edited. To use this facility, click transaction list according to previous transaction inputted, for example goods delivery, and then select transaction to be deleted or unposted. Click Delete or Unposting button or right-click and select facility required. To Delete and Unpost this transaction will require confirmation. The modification result could be traced on Audit Trial Report in General Ledger. This facility is controllable by using level password which only particular user uses this facility. 300
301 If there is a note that the transaction cannot be deleted or Unposted, it is because the transaction is related to the proceeding transaction. If it is right, you have to unpost the previous transaction before modifying the transaction required. It is generally related to the inventory or Accounts Payable/Receivable. For those which relate to inventory, see stock voucher and transaction per goods code. Should there any relation with Accounts Receivable or Accounts Payable, see Accounts Receivable and Accounts Payable voucher statement and relate them with the reference number to be modified. Note: The deleted transaction will be removed from previous transaction list and all statements. The unposted transaction will create a red check mark sign on previous transaction list, which shows that the transaction has not been posted yet and all statements related to that previous transaction will be removed. Cash/Bank and General Module do not have Unposting facility since the transaction could not be edited. 8.3 Multi Level Discount Multi level discount is used if the sales and purchase transactions of your company have more than one discounts and the second discount and so forth is set based on the previous one. For example, your company sells 75 pieces of shoes with the price of USD to Petrocentral. This customer is categorized as agent. An agent will obtain discount 1 for 10%, discount 2 for 5%, and discount 3 for 2.5%. This discount is issued if the sales volume is up to 50. To view the multi discount, activate Multiple Step Discount facility on Sales and Purchase program setup. Click Category On customer Address Data to display the following window: 301

302 Fill any needed data especially for discount applied based on customer category. Click Save button if you have finished. After creating customer address, the next step is the product data. If you click discount on product data, the following window will appear: 302

303 The price of the goods is USD Press New button and select category required by clicking category column to display the category list. Select category required. If the amount of sold goods is limited, fill goods quantity for the discount to be applied. Based on the above example, the customer who buys more than 50 pairs of shoes will obtain first discount 10% and so on. Click save button if you have filled all of them The following is the example of sales using multi level discount: 303

304 Select any data needed as it is explained in Chapter V. Since the quantity purchased is 75, which is more than the amount limitation to obtain discount, when you click Discount, the discount form will automatically appear on Sales as follows: 304
 : USD. 618.75 Disc 1, 10% : USD. 61.87 After Discount 1 Total : USD. 556.87 Discount 2, 5% : USD. 27.")
305 Click save button if all data is inputted. Note: This multi discount facility is related to customer name and product data which are previously set. Price Calculation Example : Selling price (USD56.25 * 11) : USD Disc 1, 10% : USD After Discount 1 Total : USD Discount 2, 5% : USD After Discount 2 Total : USD
306 Discount 3, 2% : USD After Discount 3 Total : USD Multi Price Multi Price facility is used for a company, which needs more than one kinds of selling price during sales. For example: Your company sells 75 pairs of shoes to Petrocentral. Petrocentral is categorized as agent and will obtain selling price of USD. 58 if the sales quantity is 10 to 100. To use the facility, the first step is to create Name Address Data. To create the category, use Category. To create agent name, use Data data. For the product data, click [Options], [Program Setup] and [Sales and Purchase], activate Use Multi Price to display the following window: Select the appropriate Price Method. If it is based on price then select % Mark Up from Standard Price List. Click New button to view the selling price. Currency is select based on 306
307 the currency used. Double-click to view selection. Double-click category to select the category applied. From Quantity is filled with the minimum quantity sold to get the appropriate price. To Quantity is filled with the maximum quantity sold to get the appropriate price. Percentage is filled with the price raise from price method applied. Use negative sign if the price is lower than the usual. Selling Price will be created automatically if all data have been inputted. The goods selling price is USD. 64.5, for 10 to 100 pieces purchase, you would get a selling price of USD 58 (10% taken from USD. 64.5). Click Save if you have finished. If you are going to perform sales transaction, the following transaction will appear: From the above sales form, the automatic unit price for Petrocentral will not be USD 64.5 but it will be USD. 58 since the address is used Agent Category. 307
 from sales.")
308 8.5 Multi Tax This facility is used if the sales or purchase in your company uses more than one tax. The example of a company with more than one taxes is a contractor which uses PPN and Pph 23. For example, Petrocentral performs sales in amount of USD with 10% VAT and 6% Pph 23 (Income Tax) from sales. To create tax, click Data-data, select Tax, create tax data of PPN and Pph23 or click New if the data is not available yet (see Chapter III). To view tax form on sales and purchase, click [Options], [Program Setup], activate Use Multi Tax so that the sales will create tax form as follows: 308

309 8.6 Sales Commission Sales commission facility is used on sales transaction in which every sales relates to particular salesman. The sales commission will automatically create sales fee and payable commission. If there is sales in amount of USD. 1,000 with the salesman name John, the salesman will get a sales fee in amount of 5% of sales. The first step is to create employee name on Data data Fill category of sales commission and fill the fee value based on percentage. If there is a fee limitation on sales value, use sales commission table facility. To view the table, click [Data store], [Name and Address] and [Sales Commission Table], the following window will appear: 309
310 Click New button to view fee data. Select currency used, category, sales value and fee based on percentage. Click Save to save the data. There is a sales transaction in amount of USD. 1,000 with the salesman name Hadi. Input as the following example: 310

311 Save the transaction. From the transaction, commission journal will appear if Program Setup on Sales Transaction and Create Sales Commission Journal is activated. The journal will be as follows: 311

312 8.7 Report Generator If your company needs a different report from the existing report format in Zahir Accounting, then you could create the report by using generator report facility. Click [Reports] and [Financial Statement] and select [Generator Report]. Press New button to create new financial statement so that the Report Generator window will appear: Check mark if T form is used Fill any data needed and select one. Press continue to display following Generator Report: 312
313 Fill Report Item as you need. Then, select type (Title, Detail, Detail or Break) used and select the data including D or K. The example is as follows: Press Continue so that the Item Composer window will appear as follows: 313

314 If you had set the window previously on Detail type, the Total Component Item will appear. Select from which the account starts to ends for Report Detail created. Fill any Report Detail created by clicking Report Detail. Then, click Next to display the following window: 314

315 The Total type which has been set previously will appear on Total Component Item. Fill any data included on Report Detail on the available Total Post. The Report Detail will be available if it had been already set on Account Detail on Detail type. Click tab button on keyboard for report detail which, later on, will compose the total acquired and then select again the report detail. Press continue and Report Column window will appear as follows: Press Continue and the example of report from you created yourself will appear 8.8 Period End There are two kinds of period end in Zahir program namely monthly period end and annual closing period. Monthly period end is performed every month while annual period end is performed annually. A. Monthly Period End Monthly period end will create a change on accounting period to the following month by calculating all balance in the previous month and become the beginning balance for the next 315

![Every end of the month, you have to close financial book by pressing [Period End] and [Month End] on program menu.](/docs-images/71/65852019/images/316-1.jpg "Closing period window picture will appear as follows: Press Ok button to go to the next window so that the following window will appear:")
316 month. Monthly period end also provide a facility to create an automatic journal for assets. Other facility is to create an automatic journal for rate of exchange. Every end of the month, you have to close financial book by pressing [Period End] and [Month End] on program menu. Closing period window picture will appear as follows: Press Ok button to go to the next window so that the following window will appear: Zahir program recommends you to back up the data before performing monthly period end. To continue, click Yes to display the following window: 316


317 Give a checkmark on Calculate and Create Depreciation Journal to create automatic Assets Depreciation Journal from monthly period end. Before performing monthly period end, you have to create fixed assets data on [Data Store] and [Fixed Assets]. See page 265 for details. Give a checkmark on Foreign Currency Revaluation for an automatic calculation on Foreign Currency Revaluation used by your company. Next, press Process and the following window will appear: Press Continue to continue monthly period end process and Cancel to cancel the process. If you select Continue the following picture will appear: 317


318 Insert foreign rate of exchange when you perform the monthly period end. Press Back to go to the previous window. Continue to continue the monthly period end process or Cancel to cancel. If you select to press Continue the following window will appear: Give a checkmark on Activate Account Type Filter to select which account to be revaluated. Press Back to go to the previous window or Continue to go to the next window 318
319 Give a checkmark on Activate Account Code Filter to select which account to be revaluated. Press Back to go to the previous window or Continue to continue the process of monthly period end or Cancel to cancel the process. If you select to press Continue, the following window will appear: Give a checkmark on Split Foreign Exchange Profit Loss Account to differentiate the rate difference of profit and loss. Select profit account for profit rate difference and loss rate 319
320 difference by pressing account list search button on the right side. Press Back to go to the previous window, Continue to continue the process or Cancel to cancel the process. If you choose to press Continue, the following window will appear: Give a checkmark on delete revaluation transaction that created in this period to delete the previous revaluation data. Press Process to continue the process or Back to go back to the previous window. This process will transfer the ending balance of all balance account to the following month. Notice: Do the back-up data process before performing monthly period end process Note: You could make transaction for the monthly period end as long as you have not done the Annual Period End process. B. Annual Period End This process will create beginning year adjustment journal which transfers the current year profit value to retained profit. Every end of the year, you could close financial book by pressing [Period end] and [Year End] on program menu. Notice: Do the back-up data process before performing annual period end 320
321 Note: You cannot perform any transactions on the year closed by processing annual period end. Should there any transactions to be performed on the year above, or if the year has not been audited yet, annual period end process should not be made. Continue to create journal on the next year even the Monthly Period End process although the previous year has not been closed yet. 8.9 Financial Analysis Zahir Accounting Enterprise has a supporting facility for decision making process. You could recognize the company condition or status quickly, easily and accurately through integrated financial analysis facility. Zahir has three kinds of reports to be viewed such Business Analysis, Reminder, and Calendar. Business Analysis is used to view the charts for asset, balance, profit/loss, bank balance, sales charts and financial ratio analysis. To view Business Analysis facility, press [Report], [Business Analysis] and [Business Analysis], then window will appear. Wait for a moment until this facility finishes its calculation 321

322 Press button to display the existing option for each section and right-click on each chart to display other option. You could choose the type of chart required by right-click on the analysis picture. You could print Financial Analysis by displaying the financial analysis report first; click financial analysis to be printed by left-click the location. Right-click and choose copy to clipboard. Open word or excel program using right-click and paste. 322

323 Reminder is used to display the Accounts Receivable and Payable due date and also their charts, received Checks, Checks payment, purchase recommendation, the best vendor and minimum stock. To view Business analysis facility, press [Reports], [Business Analysis] and [Reminder]. The window will appear. Wait for a moment until this facility finishes the calculation Tips: click Calendar to view the calendar for Accounts Receivable/Payable due date, received Checks and Checks payment 323

324 Calendar is used to view the Accounts Receivable/Accounts Payable due dates, received Checks and Checks payment. This facility enables you to control the due date of each Accounts Receivable, Accounts Payable or Checks. To view the Business Analysis facility, press [Report], [Business Analysis] and [Calendar]. The window will appear. Wait for a moment until this facility finishes the calculation. Tips: click the date box to identify the detail contents of the date Zahir Enterprise has other report to analyze sales per salesman, sales per goods data per customer, product analysis and etc. 324
![8.10 Backup Data Working data created could be backed up by Zahir. Backup is used to store the data safely. To use this facility, press [File] and [Data Backup] on program menu.](/docs-images/71/65852019/images/325-0.jpg "The following window will appear: - Back up Folder: fill with the directory name on hard disk and the data will automatically be stored in C:\.")
325 8.10 Backup Data Working data created could be backed up by Zahir. Backup is used to store the data safely. To use this facility, press [File] and [Data Backup] on program menu. The following window will appear: - Back up Folder: fill with the directory name on hard disk and the data will automatically be stored in C:\. You could choose which directory to save in directory selection button on the right side. - Archive File Name: fill with the backup file name (Archive) - Run in Background: give a checkmark on this Check Box so that client unable to read the backup process. The compression facility will make the backup data process faster but you are advised not to checkmark. Press Continue button to continue back-up process or Cancel to cancel the process. Note: The program will automatically fill the available Edit Box but it is possible to modify it. When you are out of Zahir Accounting Enterprise program, program will automatically display this back-up data facility. For data security, perform daily data back-up with the different archive file name Re- opening Back-Up Archive 325
![If you ever created back-up data through Back-Up Data Facility, you could open the back-up data again by pressing [File] and [Open Backup File] on program menu.](/docs-images/71/65852019/images/326-0.jpg "The following window will appear: Archive File Name: fill with the backup file name (Archive) to be opened. Program will automatically fill the backup file name for the data opened.")
326 If you ever created back-up data through Back-Up Data Facility, you could open the back-up data again by pressing [File] and [Open Backup File] on program menu. The following window will appear: Archive File Name: fill with the backup file name (Archive) to be opened. Program will automatically fill the backup file name for the data opened. New Location: fill with the directory name on Hard Disk in which you want to store the new working data. Select storage location required by clicking data search button on the right side. New Archive File Name: fill with the working data file name and it will be automatically created based on your company name. Press Continue button to continue the process or Cancel to cancel it Opening Data Base Zahir has a multi company facility, which the data of this multi company is independent. To open each working data, click [File] and [Open Data] or on the main menu by clicking Open Data so that the following window will appear: 326

327 Local database: click if the data base is available on client computer (stay alone) Server database: click if the data base is on the server computer Server name: there will be an automatic local host sign. If the data is on another computer, then change the server name with the IP name of that computer Protocol: will be filled automatically, do not change File Name in the Server: fill with the name the same as the name of storage location. Use directory search Tools Zahir Accounting Enterprise is supplemented with the Tools which can help client to identify the financial data condition. Note: make sure that there are no other users who are opening the same financial data if you use this tool. Check and Repair Data This facility is used to check and repair financial data. To view this facility, press [File], [Tool] and [Check and Repair Data] on program menu. The following window will appear: 327

328 Click Start button to start data checking, wait for a moment and press Close button if the checking is finished. When the window appears, the program will directly check the financial data you open. Should there no damaged files, the program will try to repair it. On the other hand if the repair does not work, then the data could no longer be used, so that you have to Reopen Back Up Archive. Press Finish button to close data repair window. SQL Script Executive SQL Script Executive is used to update database from the previous build to the current build which is performed to anticipate the possibility of adding some facilities. To use this facility, click [File], [Tools] and [SQL Script Executive]. Click Yes button to continue checking or No to cancel checking 328
329 SQL Script is used as a database connection SQL Monitor is used as a database connection information Load from file is used to load the upgraded file Clear is used to clear the screen Execute is used to start the data checking Click Finish button to finish the checking Re-Calculate Inventory Ending This tool is used to calculate the total and final value of inventory. This tool is used if there is any discrepancy in inventory report such balance, general ledger, stock voucher or inventory mutation. It is also used if the available goods couldnot be sold and the goods are in adequate amount. To view this facility, press [File], [Tools] and [Re-calculate Inventory Ending Balance] 329
330 Re-Calculate Account Ending Balance This tool is used to re-calculate account ending balance of every available account. It is used if there is any discrepancy in previous ending balance with the beginning balance of accounting period used or discrepancy between balance or profit/loss with the general ledger. It occurs due to the new input or input revision on the previous month. To view the facility, press [File], [Tools] and [Re-calculate Account Ending Balance] on program menu. Note: Make sure which accounting period that has a different ending account balance. If it is not on accounting period opened, change the required accounting period by click [File] and [Company Information Setup]. Do the monthly period end up to the last input so that the calculated ending balance could be displayed until the very last month. Reset No Index This tool is used to help index number reset created. To view the facility, [File], [ Tool] and [Reset Index No] on program menu. Unbalance Transaction Check This tool is used to check the possibility of unbalanced journal and to identify the unbalanced data. To view the facility, [File], [Tools] and [ Unbalance Transaction Check] on program menu. When the window appears, the program will check the financial data opened. If there is an unbalanced data, the program will display the data. Press Detail button to identify the inputted transaction source. Press Voucher Journal button to identify the unbalanced transaction journal. Press Ok button to close the Balance Check window. Tips: If the unbalanced transaction comes from general journal and bank cash, then the unbalanced journal could be edited by pressing Detail button to resave the transaction Use Re-calculate Account Ending Balance if you have edited the unbalanced journal. 330

331 Examine Version 3.0 Imported Data Zahir Version 5.1 is able to continue the transaction from Personal or Personal Enterprise Version 3.0 by performing data import from version 3.0 to version 5.1. This tool is used to verify data import result from Enterprise or Personal Enterprise Version 3.0 to avoid the data on version 5.1 from problem Export Report to Other Program Zahir Accounting Enterprise is supplemented with export report facility to other program such as Excel, word or pdf and etc. The first step to export report is Display Financial Data to be exported as the following picture: Click Export button to export report to other file form 331
 to be displayed")
332 Choose the file form to export report. Choose PDF to be displayed on PDF, choose RTF file to be displayed on word form and Excel table (XML) to be displayed on excel. Click Ok to continue transaction. The following window will appear: 332

333 Click the triangle on save in, choose save location, give the file name and save as type will be changed to excel spreadsheet and save. Open the excel program, click open and open the saved file, the report will be displayed on excel. Tips: You can also export the report and open with word program by changing the save as type with the HTML document Report Design The report in Zahir Version 5.1 could be designed to meet your needs. Select the appropriate report as the following picture: 333

334 Click Design so that the following picture will appear: 334

335 Variables consists of master data and standard function such as company name. The available options are variable and variable system Function consists of logic calculation used in mathematics such as Mathematics, Aggregate, String, Date and Time and etc. Data consists of variable collection related to transaction report such as Sales report, Detail product, Sales Detail Service, Sales Master and etc. If you open other report such as Purchase, the data released will be different with the data on Sales. Tips: If you find variable/function or appropriate data for your report, click one of them, hold with mouse and move to the report Code is the script filter which displays report 335

336 After finish designing report, the next step is to save the report designed. Click [File] and [Save As] so that the following save window will appear: Click triangle on save in, select save location and the program will automatically save in Report, select the appropriate folder to save report, give the name in File name. Click Save if you have finished. The new name will appear on Report menu on Zahir program based on the data folder saved Invoice Design Every transaction on Zahir could create an invoice or voucher. You could design them based on your needs. Select the transaction to be created its invoice. Every transaction is located on transaction list in every module. If you want to create tax invoice, click [Sales], [List of Transaction and Print Invoice] and [Goods Delivery] and the following Sales Invoice window will appear: 336

337 Press Design button to change/design invoice/voucher to display the following design window: How to design Edit name: click with the mouse the name to be edited and double-click the mouse to display the following picture: 337


338 Change the name as needed Press this as finish and to save If you have finished, click checkmark sign and cross then Invoice will be changed into Goods Invoice automatically Create new: choose one of the names, right-click and copy and paste, double-click the copy and double-click with mouse to display the above window. Click field to change other data field to displya the following window : button or insert data Select the appropriate data field and variable on the right side, then click the checkmark. Create line: copy the most appropriate line then slide it with mouse or arrow on keyboard. Select paper: paper type on invoice design could be changed by clicking [File] and [Page Options] to display the following window: 338


339 Change any needed data and click Ok if you have finished. Save design: click [File] and [Save as], the following window will appear: Click the triangle on save in, choose save location and the program will automatically save in Invoice, select the appropriate folder to save report, give the name in File name. Click Save if you have finished. The new name will appear on Print Invoice menu on Zahir program based on the data folder saved. 339

340 8.17 Data Protection with Password If the program is used by many users, a password for every user to protect the data is needed. Thus, the data could be properly protected to avoid being used by unauthorized persons. To protect your company financial information, you could use password facility on Zahir Accounting Enterprise. This facility is activated to enable the financial data of your company could be accessed by more than one user. In this case, every user has different authority to access different data. For example, sales journal is created by A, but A has no authority to view the company s financial statement, etc. User name list Create user name and new password Press here to display sub level user name Change user s password Modify user s authority Delete user s data Close the window To activate this facility, press [File] and [Password] on program menu. Press New button to create new user data, Change Password button to change the username and password, Modify button to modify the right of users in accessing data. Create New Password Press New button on Password Manager window to create new user data. 340

341 Type new username Enter Password Re-enter Password to confirm Fill any data needed and click Next button to go to the next window. Checkmark if user is allowed to access the facility. Press Next button to go to the next page and you could determine the user rights to access data. Press Back button to go back to the previous page and finish to Process button. 341

342 If you have the highest position on finance, then all facilities should be checkmarked. Create new password to be used by other users. The display window of set up password is as follows: User name with higher authority New user name New user name s password Master user password Confirm master user password Note: if this is the first time to create user data, the program only require to insert name and password from the highest position user in company, for example director or finance director, then other user names could be created. Tips: pay attention to the position and the access authority of every user on data. Check again in Zahir after you use password which was previously created Project Data Project data facility from Zahir Accounting Enterprise is a special facility in which every journal transaction can relate/allocate the project revenue or expense in detail. Therefore, project profit/loss analysis and other analysis could be performed completely. Project revenue and expense allocation is useful not only for manufacturing company which produces based on order or mass products, but also contractor service which has many projects. 342
![To view project list, press [Data Store], [Master Data] and [Project Data] on program menu.](/docs-images/71/65852019/images/343-0.jpg "The following is the Project List appeared on Project List window: Press New button to Create New Project Data, Edit button to Revise Project Data, and Delete button to Delete Project Data.")
343 To view project list, press [Data Store], [Master Data] and [Project Data] on program menu. The following is the Project List appeared on Project List window: Press New button to Create New Project Data, Edit button to Revise Project Data, and Delete button to Delete Project Data. Create New Project Data Press New button on Project List Window to display new data window. Fill any information needed. - Project ID is the number of a project. It is used as reference or project codification. This field is filled with figure or character or the combination such PA-001. This field will appear on every journal report. - Project Name is filled with the project name such as Print Invitation Project 343
344 - Customer : fill with the name of project customer. You do not have to fill the customer name if it is company's internal project. - Project Manager : fill with the name of project manager - Give a checkmark on Job Order Check Box if it is an ordered project. - Give a checkmark on Not active if the project is inactive and it will not appear on project list. - Job Order No. : fill with the job order reference number which is commonly similar with order number/job order/invoice number. Do not fill if it is an ordered project. - Note : fill with the important note on this project. You do not have to fill this field. - Order Date : fill with the date of ordered or started project. - Delivery Date : is the settled delivery date with the customer. - Status : is the project status, whether Not Started Yet, In Process, etc (You could add the status item). - Contact : fill with the contact person who becomes an intermediary between company and customer. - Checkmark on Use This Phase Check Box if you want to draw the project expense in detail for every phase. - % Finish : fill with the project completion percentage. You do not have to fill this field. Press Complete button to display other project facility such as creating project cost based on the completion phase and other facility. If all data are correct, press Save button to save the data or press Cancel to cancel the data creation. Press Delete button to delete project data and the program will confirm it. Press New button to create other project data. Revising Project Data Press Edit button on Project Data Window to display new data form window and revise any information needed. If all data are correct, press Save button to save the data or press Cancel to cancel. Press Delete button to delete project data and the program will confirm it. Press New button if you want to create other project data. 344

345 Deleting Project Data Press Delete button on Project Data Window to delete active project data (selected) then a message will appear to confirm it. Press Yes to continue or No to cancel deletion. Project Phase Zahir Accounting Enterprise is designed with the ability to record project costs in detail for every phase, the phase data in your company will be needed. To view project phase data, press [Data Store], [Project] and [Project Phase] on pictorial menu. The following is the phase list table: Press New button to Add Project Phase, Edit button to Revise Project Phase, and Delete button to Delete Project Phase. Tips: Zahir Accounting Enterprise has arranged some phases to be adjusted based on your needs. Add Project Phase Press New button on Phase List Window to display new data form window. Fill any needed information. 345

346 - Field Code is filled with the phase code to be created. The code can be the combination of figure and character. - Field Name is filled with the name of the phase - Checkmark on Not Active Check Box if the phase is no longer active - Checkmark on Use Cost Code if this phase has some sub phases called cost code. - Choose the cost type from the phase on Cost Type Dropdown ComboBox if the phase is no longer has cost code (no sub phase). If all data are correct, press Save button to save the data or press Cancel to cancel the data creation. Revise Project Phase Press Edit button on Phase List Window to display Phase Data window to be revised. If all data are correct, press Save button to save the data or press Cancel to cancel the data creation. Delete Project Phase Press Delete button on Phase List Window to delete project data active (selected) then a message will confirm the deleting process. Press Yes to continue or No to cancel deletion. 346


347 Cost Code Project Phase has Code Cost (sub section/sub phase) to trace the cost on a project more detail. To view Cost Code list, press [Data Store], [Project] and [Cost Code] on pictorial menu. The following is the cost code list table: Press New button to Create Cost Code, Edit button to Revise Cost Code, and Delete button to Delete Cost Code. Tips: Zahir Accounting Enterprise has arranged some Cost Codes to be adjusted based on your needs. Create Cost Code Press New button on Cost Code List Window to display new data form window. Fill any information needed. - Field Code is filled with the cost code to be created. The code can be the combination of figure and character. 347

348 - Field Name is filled with the name of the cost code - Checkmark on Not Active Check Box if the phase is no longer active - Field Cost Type is filled with the Cost Type required - Field Cost Account is filled by choosing account list for this cost. If all data are correct, press Save button to save the data or press Cancel to cancel the data creation. Revise Cost Code Press Edit button on Cost Code List Window to display Cost Code Data window to be revised. If all data are correct, press Save button to save the data or press Cancel to cancel the data creation. Delete Cost Code Press Delete button on Cost Code List Window to delete Cost Code data active (selected) then a message will appear to confirm the process. Press Yes to continue or No to cancel. Project Status Project status is used on Zahir Accounting Enterprise to record the project status whether it is not started yet, in progress, etc. To view Project Status list, press [Data Store], [Project] and [Job Status] on pictorial menu. The following is the project status list table: Press New button to Create Project Status, Edit button to Revise Project Status, and Delete button to Delete Project Status. Tips: Zahir Accounting Enterprise provides some Project Status to be adjusted based on your needs. 348

349 Create Project Status Press New button on Project Status Window to display new data form window. Fill any information needed. - Field Status is filled with Project Status Name to be created. - Field Note is filled with the note if it is needed. If all data are correct, press Save button to save the data or press Cancel to cancel. Revise Project Status Press Edit button on Project Status List Window to display Project Status Data window to be revised. If all data are correct, press Save button to save the data or press Cancel to cancel. Delete Project Status Press Delete button on Project Status List Window to delete active Project Status data (selected) then a message will confirm the process. Press Yes to continue or No to cancel. Project is used if there is a transaction related with the project, in all transactions window, a job column which can be selected with the appropriate transaction job You could view the report on [Reports], [Other Reports] and [Project]. The following is the project profit and lost report from a data: 349

350 8.19 Department Data Zahir Accounting Enterprise provides Department management facility to maintain a department/division/business unit of a company. To view the available department data, press [Data Store], [Supporting Data] and [Department] on pictorial menu. Press New button to Create New Department Data, Edit to Revise Department Data, and Delete to Delete Department Data. 350
 Name of person in charge (press enter here).")
351 Create New Department Data Press New button on Department Data Window or Department Data Search Button on other available window. Department Code, consists of numbers as company standard Enter master department of created department (above de code) Name of person in charge (press enter here). Filling this field is not a must Department name Enter required information (not a must) Note of De field (press enter here). Filling this field is not a must Navigation button to previous and next data Create new de data Cancel create data and close the window Save data and close the window If all data are correct, press Save button to save the data or press Cancel to cancel. Notice: You cannot change department data 0 on Zahir program. To create a new one, press new menu on department data. Revise Department Data Press Edit button on Department List Window Department or Data Search Button on other available window to display department to be revised. If all data are correct, press Save button to save the data or press Cancel to cancel. 351
352 Tips: See Department Data to identify how to display department data window See Create New Department Data to identify the department items available. Delete Project Status Press Delete button on Department List Window to delete the department data. Notice: You could not delete department data related with other data Tips: See Department Data to identify how to display department data window 8.20 Fixed Assets Data Fixed Asset facility is useful to maintain company fixed asset and calculate monthly depreciation, accumulation and book value. To view the available fixed asset list, press [Data Store], [Fixed Asset] and [Fixed Asset Category] on pictorial menu. Press New button to Create Fixed Asset Data, Edit to Revise Fixed Asset Data, and Delete to Delete Fixed Asset Data. Press revise button to perform data revision directly such worksheet for the previous created data. Press button to choose display type. 352

353 Create Fixed Asset Data To create new fixed asset data, press New button on Fixed Asset Window. Fill any needed data up to Economic Age; click Calculate Button that the program will automatically calculate the accumulation, current year charge, book value and monthly charge,thus manual calculation is not needed. Note: Press complete button to display more complete data item. This data item will automatically be filled when you select asset Category, regarding to the existing information of asset category. Complete button facility is used to determine the depreciation method or a different account code. 353
354 If all data are correct, press Save button to save the data or press Cancel to cancel. Note: The program will automatically fill the required information when you select asset category based on the existing information when you Create Fixed Asset Category Data. See Depreciation Table Data to create new depreciation data. If all data are correct, press Save button to save the data or press Cancel to cancel. Tips: See Fixed Asset Data to identify how to display the fixed asset data window Revise Fixed Asset Data Press Edit button on Fixed Asset Window to revise selected fixed asset data. If all data are correct, press Save button to save the data or press Cancel to cancel. Tips: See Fixed Asset Data to identify the fixed asset items available. Delete Fixed Asset Data Press Delete button on Fixed Asset Window to delete the fixed asset data selected. Notice: You couldnot delete fixed asset data related with other data Fixed Asset Category Data To create a systematic and make it easier on Fixed Asset management, Zahir Accounting Enterprise will require you to categorize fixed asset based on the category such as machine, equipment, vehicle, computer, etc. To view the existing fixed asset category data, press [Data Store] and [Fixed Asset] and [Fixed Asset Category] on pictorial menu. 354

355 Press New button to Create Fixed asset Category Data, Edit to Revise Fixed Asset Category Data and Delete to Delete Fixed Asset Category Data. Tips: to identify the available functions on inventory list window. 355

356 Create Fixed Asset Category Data To create new fixed asset category data, press New button on Fixed Asset Category Window. Fixed Asset Category Select the used depreciation method if you select the method From Depreciation Table Depreciation method used in this category Note of created fixed asset category (not a must to fill it) Account code of fixed asset depreciation accumulation Fixed asset account code Data Navigation (to other fixed asset category) Create new fixed asset category Cancel to create or revise fixed asset category Save created fixed asset category Note: 356

357 Select the appropriate depreciation Method with existing asset category through the available Drop Down Combo Box. Insert suitable Economic Age which is appropriate with government tax regulation. For example, if a machine will be expired after 20 years, then fill 20 years on this section. Depreciation table couldnot be accessed except you select From Depreciation Table Asset category If all data are correct, press Save button to save the data or press Cancel to cancel. Revise Fixed Asset Category Data Press Edit button on Fixed Asset category data Window to revise fixed asset category data selected. If you consider all inputted data are correct, press Save button to save the data or press Cancel to cancel the data creation. Delete Fixed Asset Category Data Press Delete button on Fixed Asset Category Window to delete the selected fixed asset category data. Notice: You could delete fixed asset category data related with other data 357

358 Depreciation Table Data Zahir Accounting Enterprise will help you to maintain the fixed asset category by using depreciation method which is not based on calculation formula. You are allowed to determine the annual depreciation percentage based on any consideration. To view the existing depreciation data table, press [Data Store] and [Fixed Asset] and [Depreciation Table] on pictorial menu. Press New button to Create Depreciation Table Data, Edit to Revise Depreciation Table Data and Delete to Delete Depreciation Table Data. Create Depreciation Table Data To create new fixed asset category data, press New button on Depreciation Table Window. Note: Fill with the required depreciation table name Year N is filled with the depreciation percentage per year N Notice: Total percentage must be 100%. 358
359 If all data are correct, press Save button to save the data or press Cancel to cancel the data creation. Revise Depreciation Table Data Press Edit button on Depreciation Table Data Window to revise depreciation table data selected. If all data are correct, press Save button to save the data or press Cancel to cancel the data revision. Delete Depreciation Table Data Press Delete button on Depreciation Table Data Window to delete the depreciation table data selected. Notice: You cannot delete depreciation table data related with other data 359
360 CHAPTER IX ZAHIR INSTALLATION Before using Zahir Accounting program, you must install this program to computer hard drive. Zahir Accounting application box consists of CD ROM installation. 9.1 Zahir Accounting Version 5.1 Installation Before using Zahir Accounting program, you must install this program to computer hard drive. Zahir Accounting application box consists of Zahir CD Installer. Installation will be performed on Client computer, but for multi user, then the server should also be installed with the database server without Zahir program if the server is not actively using Zahir but only to save the data Installation on Client Computer Installation on client computer can use Package or non Package CD. Installation by using Package CD In using CD Installer, insert Installation CD on drive D or any drive which can read CD on your computer. Zahir CD Installer has an auto run facility, as it is inserted in CD ROM, the following installation dialogue will appear: Click Install Zahir button to run the installation procedure Installation by using Non-Package CD You can also install Zahir through windows explorer. Right-click My Computer icon on Windows 98/2000/NT/XP and left-click Explorer Menu. From Windows Explorer, open Drive CD icon (removable CD drive) which consists of files as follows: 360

361 To run the installation process, double left-click setup.exe file Note: There are different displays according to the version of Windows operation system used. Installation program uses program in English. Follow the following steps. For the first time, the installation program will display the following window: Press Next to continue installation or Cancel to cancel. If you click Next, the following window will appear: 361

362 Press Next to continue installation program or Cancel to cancel and Back to go back to the previous window. Next, the program will ask which directory the program will be installed on Hard drive with the following window: 362
363 Tips: The installation program will select the best location automatically for you. Before continuing installation process, there are two directory options to be installed. Typical: to install database engine and the whole case of Zahir Accounting Version 5.1 program Custom: to perform installation program process by selecting one of the programs to be installed. Press Next button to continue installation, Back to go to the previous window and Cancel to cancel. The following window will appear: 363

364 Press Back to go to the previous window, Install to continue installation program or Cancel to cancel. Wait for a moment and the final installation window will appear as follows: 364

365 Wait for a moment and the following window will appear: 365

366 After finishing installation process, a window will inform you that the installation process is finished. Checkmark on the check box of with Launch the program note to run Zahir Accounting application directly after pressing Finish button Installation on Computer Server Installation on server is performed if you use more than one users and the server is on passive or active condition. If your server is on passive condition (will not be used on transaction and only saves the working data), then you will only install its database server without Zahir program, while if the server is on active condition (used for transaction and saves the working data), then the program and its database server will be installed. For an active computer server, installation is done in general while if the server is inactive, the installation will be as follows: 366

367 Click Next button and the following window will appear: 367

368 Cross the Program and Zahir program will not be installed. The installed one is firebird database server. Click Next button up to Finish button. 9.2 License Zahir license uses fingerprint system 9.4 Program Registration To view registration window, run Zahir Accounting Version 5.1 and the main menu will appear as picture 13. You will find Register selection on the main menu, click this selection to display registration window as follows: 368

369 As it is shown on the registration window picture above, the Computer ID column will automatically appear if you have installed the dongle driver. If you have got the registration code from Zahir, then insert the serial number on Serial Number column, insert registration code on Registration Code column, and if the registration information letter from Zahir has an additional code, the code is used to activate the module addition as you order. Insert the code on Special Code column. Then, click Ok to finish registration process. Registration is considered succeed if, after you click Ok button, there will be information displayed that the registration is succeed. Then you have to go out of the Zahir program and re-run the program. Now, Zahir has been registered. Note: If you have not registered or if Zahir is on Unregistered condition, then Zahir could be used but you will have limited transaction with only maximum 500 journals. If Zahir has not been registered yet, then the data which reach more than 500 journals cannot be opened. 369
Getting Started Tutorial
 Getting Started Tutorial Welcome This tutorial will introduce you to the main functions of your MYOB accounting software. You can use this tutorial with the current versions of MYOB Accounting, MYOB Accounting
AccStar Integrated Accounting System
 AccStar Integrated Accounting System User s Guide (2013) Rachadapon Company Limited. Matchim Paisalyakit Table of Contents Basic information for AccStar... 10 Database... 10 Select Company s database...
BillQuick Peachtree Integration
 Time Billing and Business Management Software Built With Your Industry Knowledge BillQuickPeachtree Integration Integration Guide BQE Software, Inc. 2601 Airport Drive Suite 380 Torrance CA 90505 Support:
TurboCASH Business Class
 TurboCASH Business Class Guide to Point-of-Sales Philip Copeman The following icons have been placed on specific places throughout the documentation: Keyboard access Press the F1 key when focussed on screens
WHAT S NEW IN PASTEL EVOLUTION VERSION 6.60
 WHAT S NEW IN PASTEL EVOLUTION VERSION 6.60 Softline Pastel s continuous investment in research and development ensures that you are kept up to date with the latest and most cutting-edge business management
Summit A/P Voucher Process
 Summit A/P Voucher Process Copyright 2010 2 Contents Accounts Payable... 4 Accounts Payable Setup... 5 Account Reconcile Protection.... 5 Default Bank Account... 5 Default Voucher Method - Accrual Basis
BillQuick MYOB Integration
 Time Billing and Business Management Software Built With Your Industry Knowledge BillQuickMYOB Integration Integration Guide BQE Software, Inc. 2601 Airport Drive Suite 380 Torrance CA 90505 Support: (310)
QCD Financial Suite. Information Sheet Version 2.0
 f QCD Financial Suite Information Sheet Version 2.0 1. OVERVIEW 1.1 General System Features This lists the general features of the system regardless of what module is accessed. Architecture - Client/Server
Table of Contents. QuickBooks 2018 Chapter 2: Working with Customers 21. QuickBooks 2018 Chapter 1: Introducing QuickBooks Pro 1
 Table of Contents Preface UNIT 1: ESSENTIAL SKILLS QuickBooks 2018 Chapter 1: Introducing QuickBooks Pro 1 Presenting QuickBooks Pro 2 Editions of QuickBooks 2 Determining the Edition 2 Types of Tasks
CALENDAR & FISCAL YEAR END CLOSING PROCEDURES
 CALENDAR & FISCAL YEAR END CLOSING PROCEDURES MICROSOFT DYNAMICS GP RELEASES GP 2013, GP 2015 and GP 2016 Date: 11/30/17 Page 1 CONTENTS CALENDAR & FISCAL YEAR END CLOSING PROCEDURES... 1 General Tips
How to Configure the Initial Settings in SAP Business One
 SAP Business One How-To Guide PUBLIC How to Configure the Initial Settings in SAP Business One Applicable Release: SAP Business One 8.8 European Localizations English July 2009 Table of Contents Introduction...
General Ledger Table of Contents. Accounts Overview General Journal Entries Overview Jobs Overview
 General Ledger Table of Contents Accounts Overview General Journal Entries Overview Jobs Overview Analyzing your job activity To analyze your job activity Assigning transactions to jobs Tip #1: Look for
Exact Globe Next Purchase. User Guide
 Exact Globe Next Purchase User Guide Exact Globe Next Purchase Despite the continued efforts of Exact to ensure that the information in this document is as complete and up-to-date as possible, Exact cannot
Connecting Time Matters/Billing Matters and QuickBooks. 35*45 Consulting - Global 7 Second System
 Why Choose QuickBooks... 3 Why Use Billing Matters... 3 Question to Ask... 3 Getting Started in Billing Matters... 4 Getting Started in QuickBooks... 11 Linking Billing Matters and QuickBooks... 14 Using
Chapter 3 Inventory. Objectives. QuickBooks Tools for Tracking Inventory
 Chapter 3 Inventory Objectives After completing this chapter, you should be able to: Activate the Inventory function (page 47). Set up Inventory Items in the Item list (page 48). Use QuickBooks to calculate
What s New in PBS v12.04 by Module
 What s New in PBS v12.04 by Module System-wide Features Check Reconciliation Order Entry Manufacturing Accounts Payable General Ledger Purchase Order Data Import Manager Accounts Receivable Inventory Control
A Beginners Guide to Sage 200. Part 1: The Financials Modules
 A Beginners Guide to Sage 200 Part 1: The Financials Modules Introduction A Beginners Guide to Sage 200 s Financial Modules Whether you ve been using Sage products for years or are a complete newbie,
Forrest Terrace, Abbotsford, BC V2S 1G7 Tel: Fax: Website:
 203-34334 Forrest Terrace, Abbotsford, BC V2S 1G7 Tel: 604-504-7936 Fax: 604-504-7976 Website: www.kcsi.ca Email: sales@kcsi.ca SIMMS Inventory Management System General Ledger Manual Table of Contents
Table of Contents. Welcome to igo Figure...1 About this Guide...1 A Few Important Things to Know...1
 2 Manager Table of Contents Overview Welcome to igo Figure...1 About this Guide...1 A Few Important Things to Know...1 Chapter 1: Handling Members and Customers Customer Account...3 Collections Status...3
Pastel Partner Version 11
 Pastel Partner Version 11 Certified Pastel Administrator Certified Pastel Administrator Training This Pastel Certified Administrator Qualification will enhance your bookkeeping and Pastel Partner knowledge
PENTAGON2000 Software, Inc.
 1 Accounting Introduction PENTAGON2000 Software, Inc. The Pentagon Financials is an Accrual Based accounting system, by which every Sale or Purchase flows via Accounts Receivable and Accounts Payable.
Microsoft MB6-871 Exam Questions & Answers
 Microsoft MB6-871 Exam Questions & Answers Number: MB6-871 Passing Score: 700 Time Limit: 180 min File Version: 40.2 http://www.gratisexam.com/ Microsoft MB6-871 Exam Questions & Answers Exam Name: Microsoft
CHAPTER 3: GENERAL JOURNALS
 Chapter 3: General Journals CHAPTER 3: GENERAL JOURNALS Objectives Introduction The objectives are: Explain the General Journal entry and posting system. Create and post General Journal entries. Describe
HOW INTEGRATION WORKS...
 Contents INTRODUCTION... 1 How to Use This Guide... 1 Software Editions Supported... 2 HOW INTEGRATION WORKS... 3 INTEGRATION RULES... 4 SYNC SETTINGS... 7 General Settings... 7 Send Settings... 8 Get
Accounts Payable PARTICIPANT WORKBOOK
 Accounts Payable PARTICIPANT WORKBOOK INTEGRATED SOFTWARE SERIES Accounts Payable PARTICIPANT WORKBOOK Version 3 Copyright 2005 2009 Interactive Financial Solutions, Inc. All Rights Reserved. Integrated
INI POS (RETAIL) USER MANUAL
 USER MANUAL") I N I P O S S O L U T I O N INI POS (RETAIL) USER MANUAL ver. 16.04.21.en INI Solutions #340-17 Fawcett Rd., Coquitlam, BC V3K 6V2 Phone 604-628-8772 Fax 604-461-6707 Table of Contents 1. Getting Started
I N I P O S S O L U T I O N INI POS (RETAIL) USER MANUAL ver. 16.04.21.en INI Solutions #340-17 Fawcett Rd., Coquitlam, BC V3K 6V2 Phone 604-628-8772 Fax 604-461-6707 Table of Contents 1. Getting Started
1. What lists can be imported from Excel spreadsheets, when setting up a QuickBooks Online company?
 QuickBooks Online Practice Test (with answers) 1. What lists can be imported from Excel spreadsheets, when setting up a QuickBooks Online company? A) Locations, Classes, Products and Services, and Vendors
Work4Me Managerial Accounting Simulations. Problem Two
 Work4Me Managerial Accounting Simulations 1 st Web-Based Edition Problem Two Job-Order Costing Elmwood Manufacturing, Incorporated Page 1 INTRODUCTION Elmwood Manufacturing, Incorporated operates in a
BillQuick MYOB Integration
 Time Billing and Business Management Software Built With Your Industry Knowledge BillQuickMYOB Integration Integration Guide BQE Software, Inc. 2601 Airport Drive Suite 380 Torrance CA 90505 Support: (310)
JAWA Money & Markets Software
 Imagine an accounting software solution that puts your business first. That serves up the smart features and fierce power you and your employees need to get the job done efficiently and brilliantly. A
Once you have completed this topic, you will be able to create and verify opening balances for Business Partners.
 1. SAP BUSINESS ONE FINANCIALS SAP Business One Accounting Overview This course will give you an overview of the accounting features in SAP Business One. Start Using Financials Navigate the chart of accounts
1 About Deskera ERP 9. 2 Getting Started with Deskera ERP 10
 Table of Contents 1 About Deskera ERP 9 2 Getting Started with Deskera ERP 10 2.1 Basic Settings 11 2.1.1 Create Users 12 2.1.2 Manage Application Access 13 2.1.3 Configure Company Settings 14 2.1.4 Import
Chapter 0 - Index. USER MANUAL v2.1 DSBS BUSINESS MANAGEMENT SYSTEM. Presented by Deepsky Technology
 Chapter 0 - Index USER MANUAL v2.1 DSBS BUSINESS MANAGEMENT SYSTEM Presented by Deepsky Technology Introduce Deepsky Sdn Bhd is a multimedia company, which specializes in developing and marketing software
INTRODUCTION TO QUICKBOOKS PRESENTED BY SHARPER TRAINING SOLUTIONS
 INTRODUCTION TO QUICKBOOKS PRESENTED BY SHARPER TRAINING SOLUTIONS CEIL HEARN Email: info@stsico.com Material: www.stsico.com/books Newsletter: www.computerkindergarten.com INTRODUCTION WHAT IS QUICKBOOKS?
Microsoft Dynamics GP. Purchase Order Processing
 Microsoft Dynamics GP Purchase Order Processing Copyright Copyright 2012 Microsoft. All rights reserved. Limitation of liability This document is provided as-is. Information and views expressed in this
QuickBooks Premier 2018 Level 1
 Courseware 1767 QuickBooks Premier 2018 Level 1 Accounting Series Course Description This course introduces basic accounting tasks using the Canadian version of QuickBooks Premier Accountant Edition 2018.
Standard ERP Logistics Advanced
 Standard ERP Logistics Advanced Version 8.0, Windows January 2016 Table of Contents INTRODUCTION... 3 LOGISTICS SCHEME... 4 COST ACCOUNTING... 5 SWITCHING COST ACCOUNTING ON... 6 ITEMS... 8 Item Record...
Entrepreneur. Getting Started
 Entrepreneur Getting Started G u i d e Entrepreneur Getting Started 1 Setting Up Your Company 5 Setting Up Customers & Suppliers 14 Setting Up Items 17 Essential Tasks 18 Reporting 23 System Administration
MICROSOFT DYNAMICS GP RELEASES GP 2013, GP 2015, GP 2016, AND GP 2018
 MICROSOFT DYNAMICS GP RELEASES GP 2013, GP 2015, GP 2016, AND GP 2018 Table of Contents Page 2 Contents GENERAL TIPS AND REMINDERS... 1 Backups... 1 Timing... 1 History... 2 File maintenance (Optional)...
Perfect Financial & Accounting Management System
 Perfect Financial & Accounting Management System Perfect is a comprehensive financial management System(Bi-lingual) Arabic & English that performs the fundamental financial of the ERP system. It includes
Chapter 1: Payroll Categories Overview 516. Chapter 2: Creating payroll categories 522. Chapter 3: Changing payroll categories 527
 Table of Contents Chapter 1: Payroll Categories Overview 516 Creating payroll categories 516 Changing payroll categories 519 Removing payroll categories 520 Chapter 2: Creating payroll categories 522 To
MRI General Ledger for Web Operational Training Guide Version 4.2
 MRI General Ledger for Web Operational Training Guide Version 4.2 2012 MRI Software LLC. Any unauthorized use or reproduction of this document is strictly prohibited. All Rights Reserved. 2012 MRI Software
Module 9 Business Process and ADempeire
 Module 9 Business Process and ADempeire By Wipawii Jaraswarapan Business Consultant, ecosoft wipawii@gmail.com ADempiere ERP 1 2 Module Objectives Overall ADempiere Go through purchase cycle Purchase module
HDPOS EASY. Hyper Drive Information Technologies (P) Ltd
 Ltd") HDPOS EASY Chapters 1. Getting Started 1.1. Download & Installation 1.2. Application Registration 2. Database 2.1. Sample database 2.2. Blank Database 2.2.1. Back up database 2.2.2. Restore database 3.
HDPOS EASY Chapters 1. Getting Started 1.1. Download & Installation 1.2. Application Registration 2. Database 2.1. Sample database 2.2. Blank Database 2.2.1. Back up database 2.2.2. Restore database 3.
Archdiocese of Chicago Parish QuickBooks Reference Manual
 Archdiocese of Chicago Parish QuickBooks Reference Manual April, 2016 A publication of the Archdiocese of Chicago Parish Operations INTRODUCTION... 2 USING FORMS... 2 USING LISTS... 2 USING REGISTERS...
BPC31 COMPUTERISED ACCOUNTING Units : I - V
 BPC31 COMPUTERISED ACCOUNTING Units : I - V UNIT I Introduction, Features Basic concept of computerized accounting and Inventory system Accounts organization & types of accounts, account statements Purchases
Data Exchange Module. Vendor Invoice Import
 Data Exchange Module Vendor Invoice Import Information in this document is subject to change without notice and does not represent a commitment on the part of Dexter + Chaney. The software described in
Enterprise by HansaWorld Point of Sales
 Enterprise by HansaWorld Point of Sales Version 7.2, Mac OS October 2014 Table of Contents INTRODUCTION...4 What is Point of Sales?...4 THE 3 DIFFERENT WAYS OF IMPLEMENTING POS...5 POS Online...5 Live
Sanjay Srinivas PH:
 Microsoft Dynamics AX 2012 Training course Content [Financials I, II, and Fixed Assets] Financials I Financials I course introduces the student to the Microsoft Dynamics AX 2012 General Ledger Accounting
Sage Simply Accounting. Getting Started Guide First Step
 Sage Simply Accounting Getting Started Guide 2012 First Step Sage Simply Accounting Getting Started Guide First Step 2012 Getting Started... 1 Setting Up Your Company... 3 Setting Up Customers and Vendors...
PROCEDURES AND PAPERFLOW
 PROCEDURES AND PAPERFLOW I. Purchasing A. Purchase Orders 3 1. Special Orders 3 2. Stock Order 3 3. Printing 3 4. Monitoring 4 5. Acknowledging 4 II. Inventory Movement 5 A. Inventory Receiving Worksheet
Sage 50 Accounting. Getting started guide
 Sage 50 Accounting Getting started guide Getting started Getting started Welcome to Sage 50 Accounting! Use this guide to help you set up your company so that you are up and running as quickly as possible.
Data Exchange Module. Vendor Invoice Import
 Data Exchange Module Vendor Invoice Import Information in this document is subject to change without notice and does not represent a commitment on the part of Dexter + Chaney. The software described in
Microsoft Dynamics GP. Fixed Assets Management
 Microsoft Dynamics GP Fixed Assets Management Copyright Copyright 2011 Microsoft. All rights reserved. Limitation of liability This document is provided as-is. Information and views expressed in this document,
PBS v12.04 contains many new enhancements and fixes. This document explains the benefits and features of the enhancements by module.
 What s New in PBS v12.04 by Module System-wide Features Check Reconciliation Order Entry Manufacturing Accounts Payable General Ledger Purchase Order Data Import Manager Passport ACA Accounts Receivable
Eagle Business Management System - Manufacturing
 Eagle Business Management System - Manufacturing Table of Contents INTRODUCTION...1 Technical Support...1 Overview...2 CREATING A BATCH...5 Creating a Simple Manufacturing Batch...5 Using Inventory Components
HansaWorld Enterprise
 HansaWorld Enterprise Integrated Accounting, CRM and ERP System for Macintosh, Windows, Linux, PocketPC 2002 and AIX Consolidation Program version: 4.2 2004-12-20 2004 HansaWorld Ireland Limited, Dublin,
Sage 50 Premium Accounting 2017 Level 1
 Courseware 1665 Sage 50 Premium Accounting 2017 Level 1 Course Description This is an introduction to accomplishing basic accounting tasks using Sage 50 Premium Accounting 2017. Students will begin with
Vendor Database Tutorial
 Vendor Database Chapter 10Page 1 Vendor Database Tutorial This database module is for use with the following programs from AbbottSoft I-Rent Software I-Sell POS Software XPressSell POS Software QuickFix
tyuiopasdfghjklzxcvbnmqwertyuiopas
 qwertyuiopasdfghjklzxcvbnmqwertyui opasdfghjklzxcvbnmqwertyuiopasdfgh jklzxcvbnmqwertyuiopasdfghjklzxcvb nmqwertyuiopasdfghjklzxcvbnmqwer QuickBooks Instructional Manual MiraCosta College tyuiopasdfghjklzxcvbnmqwertyuiopas
Users Manual BLITZKASSE GastroExpress for Android
 2016 v2.1 Users Manual BLITZKASSE GastroExpress for Android Dear Customer, Thank you for placing your trust in us by purchasing our POS system. For any questions and suggestions concerning our POS system,
OneStep. Accounting 4.0. User Guide. Enable Computing
 OneStep Accounting 4.0 User Guide Enable Computing 2 Table of Contents 1 Introduction... 5 2 Getting Started... 7 2.1 2.2 2.3 2.4 2.5 2.6 2.7 Installation... 7 Starting OneStep Accounting...7 Opening The
Basic Accounting Option
 Basic Accounting Option This document provides an overview of the Basic Accounting Option, explains how to set it up, and provides directions for using Accounts Payable, General Ledger, and Check Reconciliation.
Microsoft Dynamics GP. Project Accounting Accounting Control Guide
 Microsoft Dynamics GP Project Accounting Accounting Control Guide Copyright Copyright 2010 Microsoft. All rights reserved. Limitation of liability This document is provided as-is. Information and views
Goods Received Vouchers
 Arch User Guide ver. 25 Classification: Document History Date Version Changed By Details 2015-07-11 1.0 Karl van Niekerk Created Document 2016-02-22 1.1 Michelle Lategan Updated Addendum A Document Version
Foreword. Sales Associates Managers
 Foreword This book is a pocket guide for using the Register module for the InfoTouch Store Manager. It outlines the basic steps and procedures for processing sales, from the beginning to the end of a day.
Sage 50 Premium Accounting 2014 Level 1
 Courseware 1615 Sage 50 Premium Accounting 2014 Level 1 Course Description This is an introduction to accomplishing basic accounting tasks using Sage 50 Premium Accounting 2014. Students will begin with
Step Action See: 1 Install MYOB AccountEdge page 3. 2 Upgrade your files page 3. 3 Read about the new features in MYOB AccountEdge page 6
 MYOB AccountEdge v6 Release Notes MYOB Licence Agreement IMPORTANT READ THIS CAREFULLY BEFORE PROCEEDING. This Product (consisting of the user documentation and the installation CD or other media containing
ECAPS (ENTERPRISE CONTROL AND PLANNING SYSTEM)
") 1 Table of Contents Starting of Software:... 5 Enter the user name & corresponding password to start the software and press login button.... 5 CONTAINS.... 5 Masters... 6 Company... 7 Ledger... 8 Vendor...
1 Table of Contents Starting of Software:... 5 Enter the user name & corresponding password to start the software and press login button.... 5 CONTAINS.... 5 Masters... 6 Company... 7 Ledger... 8 Vendor...
P O S U S E R G U I D E with I N T E G R A T E D E E E. Magenta Retail Support. Australia New Zealand
 P O S U S E R G U I D E with I N T E G R A T E D E E E Support Australia 1800 111 475 New Zealand 0800 088 475 Contents HINTS & TIPS... 5 PRODUCT SEARCHING... 6 1 st Word Search... 6 Advanced Search...
Booklet 3. Guidance Notes. Sales Ledger
 Booklet 3 Guidance Notes Sales Ledger (Revised Aug 2018) 1 Table of Contents 1.0 Sales - Processing...3 1.1 Sales Invoices...3 1.2 Setting up Contacts Customers...6 1.3 Sales Receipts...8 1.4 Sales Credit
5. When two companies are open what function cannot be performed in the secondary window?
 4. What does the toggle function do? a) enables a second company file to be opened b) enables the user to view the version of QuickBooks that the client has c) allows the user to have more than one window
Sage 50 Accounting Product Update January 2013
 Sage 50 Accounting Product Update January 2013 Sage 50 Accounting Product Update for January 31, 2013 Sage 50 Accounting Product Update 2 Install the Correct Product Update... 2 About This Update... 2
Accounting Master Update for Version 14.2
 Accounting Master Update for Version 14.2 Date: October 2014 From: MACC s Product Development Team Re: Version 14.2 Release The following enhancements have been made to the Accounting Master software application.
Sage Evolution Standard Additional modules
 PHONE +27 [0]21 552 6052 FAX +27 [0]86 266 4620 EMAIL info@as2.co.za WEB www.as2.co.za Sage Evolution Standard Additional modules 1. Bank Statement Manager 2. Bill of Materials 3. CRM Basic 4. Debtors
Integrated Accounting, CRM and ERP System for Mac OS X, Windows, Linux, ios, Android and AIX
 Integrated Accounting, CRM and ERP System for Mac OS X, Windows, Linux, ios, Android and AIX Purchase Invoice Register Program version: 7.2 140416 2014 HansaWorld Ireland Limited, Dublin, Ireland Preface
ClubConnect Accounts Payable Understanding Invoice and Check Types for Easy Processing
 ClubConnect Accounts Payable Understanding Invoice and Check Types for Easy Processing Webinar Topics Invoices... 3 Special Invoice Situations... 3 Prepaid Invoices... 3 Reciprocal Club Invoices... 8 Invoices
Welcome to the topic on purchasing items.
 Welcome to the topic on purchasing items. 1 In this topic, we will perform the basic steps for purchasing items. As we go through the process, we will explain the consequences of each process step on inventory
New for 2009! Detecting and Correcting with the Client Data Review Feature
 Chapter 17 New for 2009! Detecting and Correcting with the Client Data Review Feature Introduction: Features and Benefits Starting a Client Data Review Customizing the Client Data Review Center Account
QuickBooks Best Practices for Law Firms
 Opening Separate Bank Accounts Reconciling accounts and preparing for tax time is much easier if you separate personal from business bank accounts. Same goes for credit card and line-of-credit accounts.
User Guide
 User Guide 00-21-602-35062 2006 Sage Accpac International, Inc. All rights reserved. Sage Accpac International, Inc. Publisher No part of this documentation may be copied, photocopied, reproduced, translated,
Financials Module: Accounts Receivable
 The Priority Enterprise Management System Financials Module: Accounts Receivable Contents Introduction...2 Customer Invoices...2 Crediting the Customer...6 Receipts...6 Finance Charges...7 Credit and Aging...7
O U T C O M E S B Y D E S I G N WORKBOOK1
 WORKBOOK1 XERO TRAINING HANDBOOK 1. BANK RECONCILIATION The biggest, and most time-saving feature of Xero is its usage of bank data feeds. This makes reconciling your bank statement an easy process without
Getting started
 Getting started 2016.3 Getting started Getting started Welcome to Sage 50 Accounting! Use this guide to help you set up your company so that you are up and running as quickly as possible. If you have not
Integrated Tour & Travel Online System (ITTOS) 2003, Sentra Solusi Informatika (
 2003, Sentra Solusi Informatika (") Integrated Tour & Travel Online System (ITTOS) 2003, Sentra Solusi Informatika (http://www.sentrasolusi.com) 1. Overview Integrated Tour and Travel Online System (ITTOS) is an integrated software application
Integrated Tour & Travel Online System (ITTOS) 2003, Sentra Solusi Informatika (http://www.sentrasolusi.com) 1. Overview Integrated Tour and Travel Online System (ITTOS) is an integrated software application
Welcome to the course on the working process across branch companies.
 Welcome to the course on the working process across branch companies. In this course we will review the major work processes across branch companies. We will start with the intercompany trade process.
SAGE ACCPAC. Sage Accpac ERP. Converting from Simply Accounting by Sage
 SAGE ACCPAC Sage Accpac ERP Converting from Simply Accounting by Sage 2008 Sage Software, Inc. All rights reserved. Sage Software, Sage Software logos, and all Sage Accpac product and service names are
Contents ADJUSTING THE ACCOUNTS. Analyze Accounts and Prepare Adjusting Entries 43. Learning Goal 4: Explain the Meaning of Accounting Period 7
 Contents Review The Essential Accounts for a Corporation 1 The Accounts For a Corporation 1 Equity Accounts 1 Corporate Financial Statements: Quick Review 2 SECTION I Goal 1: ADJUSTING THE ACCOUNTS Explain
Sage Partner Additional Modules
 PHONE +27 [0]21 552 6052 FAX +27 [0]86 266 4620 EMAIL info@as2.co.za WEB www.as2.co.za Sage Partner Additional Modules 1. Bill of Materials 2. Debtors Manager 3. Fixed Assets 4. Multi-Warehousing 5. Point
ENTERPRISE LIVE USER GUIDE
 MULTI - SITE W ALK - IN SPA HAIR BARBER CLINIC ENTERPRISE LIVE USER GUIDE HOME & MOBILE BEAUTY CONTENTS BASICS... STARTING ENTERPRISE LIVE... NAVIGATING ENTERPRISE LIVE... 2 ACCESS... 3 USING THE ACCESS
Release 11 Feature Highlights
 Release 11 Feature This document summarizes a handful of top-level features of each module and component. Module / Component Common / Overall Feature Multi-user and multi-company Robust & Reliable - Microsoft
Financials Module: Accounts Payable
 The Priority Enterprise Management System Financials Module: Accounts Payable Contents Introduction... 2 Invoices from Vendors... 3 Receiving Credit from the Vendor... 5 Payments... 6 Withholding Tax (dual-currency
Printed in the USA by: clubsystems group, inc.
 Copyright 2012 All rights reserved. This book is for the use of the clients and customers of clubsystems group, inc. in conjunction with their software. This book may not be duplicated in any way without
BillQuick 2015 Update Log
 BillQuick 2015 Update Log List of Items addressed in release 16.0.20.0 February 10, 2016 (SP3A) 1. BillQuick QuickBooks sync was not working due to certification issue. This was fixed. List of Items addressed
Product Comparison Document
 Product Comparison Document te: This document is subject to change. Features Operating Systems / Platforms Microsoft TM Widnows 7/8/10 Professional Edition, Service Pack 1 or later Database Microsoft SQL
Jan Product Features Mambo Software Business ERP
 Jan 2015 Product Features Mambo Software Business ERP Table of Contents 1.1. Features of Mambo Software Business ERP... 3 1.1.1. Company Information... 3 1.1.2. Chart of Accounts... 3 1.1.1. Customers...
Chapter One Introduction to Sage 50 Accounting
 Chapter One Introduction to Sage 50 Accounting After installation of Sage 50 Accounting Software to your computer, you are ready to start running your business with Sage 50. Your remaining tasks will be:
Sage Accounting. Year End Guide
 Sage Accounting Year End Guide 1 Reconciliation and Year End Processing Reconciliation and Year End Processing This guide will assist you with the running of your Year End in Sage Accounting. It is quite
CHAPTER 2: WORKING WITH GENERAL LEDGER ACCOUNTS
 Chapter 2: Working with General Ledger Accounts CHAPTER 2: WORKING WITH GENERAL LEDGER ACCOUNTS Objectives Introduction The objectives are: Identify different posting groups and outline their purpose.
Point Of Sales. Below is the step to enable Optimum Point Of Sales module. Step 1. As shown in the figure, click the menu from the ribbon bar.
 Point Of Sales Below is the step to enable Optimum Point Of Sales module. Step 1 As shown in the figure, click the menu from the ribbon bar. Step 2 Select the Modules item form the drop down list. 1 P