Chapter One Introduction to Inventory
|
|
|
- Adele Clarke
- 6 years ago
- Views:
Transcription
1 Chapter One Introduction to Inventory This chapter introduces Inventory, its features, the organization of the User s Guide, common toolbar buttons and frequently used keyboard and report commands. Introduction Contents Windows Compatible Inventory Features How to Get Help How this Manual is Organized How to Use This Manual Formatting Standards Report Command and Toolbar Buttons Introduction to Inventory 1-1
2 Introduction Use Red Wing's Windows Inventory system to: Track items purchased, on-hand, on order, committed, in-use, available and sold. Monitor inventory movements by tracking detailed inventory history. Identify your best products and understand their purchase/sales cycles. Know the value of items on-hand and the profit on items sold during the year. You will improve your customer service, make informed buying and selling decisions, and make a positive impact on your bottom line. 1-2 Introduction to Inventory
3 Inventory Features Items Set up unique inventory item codes (up to 24 characters each) and include a picture of the item. Also, set up alternate or substitute codes. Add inventory items on the fly. On-hand Quantity Track quantity on-hand at multiple locations for each item. Units of Measure Set up multiple units of measure per item and include unique UPC codes for each unit of measure. Costing Methods Choose from four costing methods (average, standard, LIFO, or FIFO), and use specific costing for serialized items. Multiple Prices Per Item Set up unlimited prices for each item using price options based on who the customer is and what percentage of base price or cost you want the customer to pay. Serialized Items Track serial numbers and individual costs and prices for each serial number. Lotted Items Track lot numbers, in addition to serial numbers. Physical Inventory Assign bin numbers at each location and keep track of the last physical inventory count information for the bin. Process physical inventory count by tag or worksheet entry. Mass Update Mass update prices and costs (by a percent, amount, gross profit margin or markup percent) for a complete product line, location, or other selection criteria. Quick Lookup Inquiry functions let you quickly look at price and availability information, summary or detail history, item information, item location information, cost and vendor information lot information, or serial information. Assemblies Create and maintain assemblies. Add or use serial (and lot) numbers (if desired). Handles up to five levels of subassemblies. Introduction to Inventory 1-3
4 Vendor Information Track multiple vendors per item. User-defined Fields Set up user-defined fields (up to four) and sort by two. Price Breaks Handle quantity price breaks based on percentages or amounts. Material Requisitions Produce material requisitions for internal inventory use. Integrated Integrates with Red Wing's Windows Accounts Receivable to track the sale of inventory items and Red Wing's Windows Accounts Payable to track purchases of inventory items. Post to the Red Wing General Ledger. History Maintain unlimited history information. Flexible Reports Select a variety of options to customize reports. How to Get Help Online Help/Cue Cards Anytime you need help while working in Accounts Receivable, press F1 to display online help and to access cue cards (handy step-by-step directions that stay in the upper right corner of your screen). You can also click on the Help icons to get help, or choose from the help selection on the Help Menu. Sample Data Use Red Wing s sample data (with SAM as the company code) to practice new activities or to refresh your memory on rarely used activities. User Guide The User Guide is another useful source of help. Use the comprehensive table of contents, glossary and index to search for terms and activities. 1-4 Introduction to Inventory
5 Custom Help Create your own online help notes in a separate file. Press Shift F1 to access custom help for any screen. Customer Support And remember, Red Wing s Customer Support team is available to subscribers, ready to answer any of your questions, quickly and competently. For more information call How This Manual is Organized The Inventory User Guide is divided into the following sections. Chapter 1 Chapter 2 Chapter 3 Chapter 4 Chapters 5 through 14 Chapter 15 Introduction Inventory features are listed, along with standards used in this manual. Also, common toolbar buttons, keyboard commands and report commands are listed. Getting Started Step-by-step procedures to follow when first setting up your Inventory system. Practice System Experience some of the more important features of Inventory using sample data. Helpful Procedures Frequently used procedures, as well as less frequent, but important procedures are explained in detail. Reference Guide The Inventory menus are explained, with detail information about every menu selection. Special Options & Appendix The ASCII Input and Label Wizard Special Options (add-ons) are explained and key definitions are provided in a handy glossary. The Change Item Codes feature is also explained. Introduction to Inventory 1-5
6 How to Use This Manual If you are new to Inventory 1. Install the system and review the Getting Started Guide and System Manager User Guide 2. Go to Chapter Three Practice System 3. Set up Inventory Chapters Two, Getting Started, and Eleven, Setup and Maintenance If you have questions while using Inventory 1. Try online help and cue cards 2. Chapter Four Helpful Procedures 3. Chapters Five through Fourteen Reference information on each menu selection. Formatting Standards Notes and hints are identified by a push pin and are printed in italics. These are important messages and suggestions that can save you time and help you avoid potential problems. Extremely important information is printed in boldface type. Not reading this information or following the suggestions offered can lead to serious problems. 1-6 Introduction to Inventory
7 Report Command and Toolbar Buttons Overview These buttons are displayed at the bottom of report screens. Not available on all reports Printers... Use this selection to set up reports to print on different printers (other than the default Windows printer) or to print multiple copies of a report. If you do not enter any users/printers on this screen, the report automatically prints one copy to the default printer. Settings remain as defaults until changed. 1. Report Name The currently selected report is displayed. 2. User Choose to redirect the report for a single user by selecting one user. To select all users, enter an asterisk (*). If you set up a record for all users (*) as well as for individual users, the report will print to the current user s printer(s), if any are set up. If not, the report uses the all users (*) settings. 3. Printer Select the printer to use for the selected user(s). To Print Multiple Copies, enter two records for the same user. To Redirect a Report, change to a different printer (other than {Default}). Alt R Alt F Alt V Alt P Alt C Reset Clear the fields to their original default entries. File Save the report to a file, as follows: HTML Microsoft Excel Rich Text Format (Microsoft Word) MS-DOS Text Preview Switch to Preview mode where you can view the report, print it, output it to a file or other software. For more information see Preview Toolbar (page 1-9). Print Immediately send the report to the currently selected printer. A Printing dialog is displayed, showing the progress of your report. When printing is complete, you are returned to the report screen. Close Close current window. Introduction to Inventory 1-7
8 Report Toolbar Displayed on all report screens. F7 Ctrl P Close Close current window. Print Send current report to printer. Preview Report Display report in Preview mode. See the Print Preview Toolbar (page 9). Output to File Output report in HTML, MS Excel, MS DOS Text or Rich Text format. Reset Report Parameters Clear the fields to their original default entries. F1 Help Display help topics. 1-8 Introduction to Inventory
9 Print Preview Toolbar Displayed in Preview mode. F7 Ctrl P Ctrl U Close Close current window. Print Send current report to printer. Page Setup Change margins, page orientation, printers. Zoom Toggle between the specified magnification percent and the "best fit" to view the current report. One Page Display one page of the report. Two Pages Display two pages of the report. Multiple Pages Choose the number of pages to display at one time (up to 2 rows of 3 pages each). Zoom Choose the percent of magnification to view. or or Office Links Output report to MS Office. Choose from the following options: Merge it to Microsoft Word: Outputs report to Microsoft Word. Publish it in Microsoft Word: Outputs report to Microsoft Word in rich text format (*.rtf) Analyze it in Microsoft Excel: Outputs report to MS Excel in *.xls format Send Output report to HTML, MS Excel, MS DOS Text or Rich Text Format. Output to Notepad Output the report to Notepad in MS-DOS text format (*.txt). F1 Help Display help topics. Introduction to Inventory 1-9
10 NOTES: 1-10 Introduction to Inventory
11 Chapter One Introduction to Inventory This chapter introduces Inventory, its features, the organization of the User s Guide, common toolbar buttons and frequently used keyboard and report commands. Introduction Contents Windows Compatible Inventory Features How to Get Help How this Manual is Organized How to Use This Manual Formatting Standards Report Command and Toolbar Buttons Introduction to Inventory 1-1
12 Introduction Use Red Wing's Windows Inventory system to: Track items purchased, on-hand, on order, committed, in-use, available and sold. Monitor inventory movements by tracking detailed inventory history. Identify your best products and understand their purchase/sales cycles. Know the value of items on-hand and the profit on items sold during the year. You will improve your customer service, make informed buying and selling decisions, and make a positive impact on your bottom line. 1-2 Introduction to Inventory
13 Inventory Features Items Set up unique inventory item codes (up to 24 characters each) and include a picture of the item. Also, set up alternate or substitute codes. Add inventory items on the fly. On-hand Quantity Track quantity on-hand at multiple locations for each item. Units of Measure Set up multiple units of measure per item and include unique UPC codes for each unit of measure. Costing Methods Choose from four costing methods (average, standard, LIFO, or FIFO), and use specific costing for serialized items. Multiple Prices Per Item Set up unlimited prices for each item using price options based on who the customer is and what percentage of base price or cost you want the customer to pay. Serialized Items Track serial numbers and individual costs and prices for each serial number. Lotted Items Track lot numbers, in addition to serial numbers. Physical Inventory Assign bin numbers at each location and keep track of the last physical inventory count information for the bin. Process physical inventory count by tag or worksheet entry. Mass Update Mass update prices and costs (by a percent, amount, gross profit margin or markup percent) for a complete product line, location, or other selection criteria. Quick Lookup Inquiry functions let you quickly look at price and availability information, summary or detail history, item information, item location information, cost and vendor information lot information, or serial information. Assemblies Create and maintain assemblies. Add or use serial (and lot) numbers (if desired). Handles up to five levels of subassemblies. Introduction to Inventory 1-3
14 Vendor Information Track multiple vendors per item. User-defined Fields Set up user-defined fields (up to four) and sort by two. Price Breaks Handle quantity price breaks based on percentages or amounts. Material Requisitions Produce material requisitions for internal inventory use. Integrated Integrates with Red Wing's Windows Accounts Receivable to track the sale of inventory items and Red Wing's Windows Accounts Payable to track purchases of inventory items. Post to the Red Wing General Ledger. History Maintain unlimited history information. Flexible Reports Select a variety of options to customize reports. How to Get Help Online Help/Cue Cards Anytime you need help while working in Accounts Receivable, press F1 to display online help and to access cue cards (handy step-by-step directions that stay in the upper right corner of your screen). You can also click on the Help icons to get help, or choose from the help selection on the Help Menu. Sample Data Use Red Wing s sample data (with SAM as the company code) to practice new activities or to refresh your memory on rarely used activities. User Guide The User Guide is another useful source of help. Use the comprehensive table of contents, glossary and index to search for terms and activities. 1-4 Introduction to Inventory
15 Custom Help Create your own online help notes in a separate file. Press Shift F1 to access custom help for any screen. Customer Support And remember, Red Wing s Customer Support team is available to subscribers, ready to answer any of your questions, quickly and competently. For more information call How This Manual is Organized The Inventory User Guide is divided into the following sections. Chapter 1 Chapter 2 Chapter 3 Chapter 4 Chapters 5 through 14 Chapter 15 Introduction Inventory features are listed, along with standards used in this manual. Also, common toolbar buttons, keyboard commands and report commands are listed. Getting Started Step-by-step procedures to follow when first setting up your Inventory system. Practice System Experience some of the more important features of Inventory using sample data. Helpful Procedures Frequently used procedures, as well as less frequent, but important procedures are explained in detail. Reference Guide The Inventory menus are explained, with detail information about every menu selection. Special Options & Appendix The ASCII Input and Label Wizard Special Options (add-ons) are explained and key definitions are provided in a handy glossary. The Change Item Codes feature is also explained. Introduction to Inventory 1-5
16 How to Use This Manual If you are new to Inventory 1. Install the system and review the Getting Started Guide and System Manager User Guide 2. Go to Chapter Three Practice System 3. Set up Inventory Chapters Two, Getting Started, and Eleven, Setup and Maintenance If you have questions while using Inventory 1. Try online help and cue cards 2. Chapter Four Helpful Procedures 3. Chapters Five through Fourteen Reference information on each menu selection. Formatting Standards Notes and hints are identified by a push pin and are printed in italics. These are important messages and suggestions that can save you time and help you avoid potential problems. Extremely important information is printed in boldface type. Not reading this information or following the suggestions offered can lead to serious problems. 1-6 Introduction to Inventory
17 Report Command and Toolbar Buttons Overview These buttons are displayed at the bottom of report screens. Not available on all reports Printers... Use this selection to set up reports to print on different printers (other than the default Windows printer) or to print multiple copies of a report. If you do not enter any users/printers on this screen, the report automatically prints one copy to the default printer. Settings remain as defaults until changed. 1. Report Name The currently selected report is displayed. 2. User Choose to redirect the report for a single user by selecting one user. To select all users, enter an asterisk (*). If you set up a record for all users (*) as well as for individual users, the report will print to the current user s printer(s), if any are set up. If not, the report uses the all users (*) settings. 3. Printer Select the printer to use for the selected user(s). To Print Multiple Copies, enter two records for the same user. To Redirect a Report, change to a different printer (other than {Default}). Alt R Alt F Alt V Alt P Alt C Reset Clear the fields to their original default entries. File Save the report to a file, as follows: HTML Microsoft Excel Rich Text Format (Microsoft Word) MS-DOS Text Preview Switch to Preview mode where you can view the report, print it, output it to a file or other software. For more information see Preview Toolbar (page 1-9). Print Immediately send the report to the currently selected printer. A Printing dialog is displayed, showing the progress of your report. When printing is complete, you are returned to the report screen. Close Close current window. Introduction to Inventory 1-7
18 Report Toolbar Displayed on all report screens. F7 Ctrl P Close Close current window. Print Send current report to printer. Preview Report Display report in Preview mode. See the Print Preview Toolbar (page 9). Output to File Output report in HTML, MS Excel, MS DOS Text or Rich Text format. Reset Report Parameters Clear the fields to their original default entries. F1 Help Display help topics. 1-8 Introduction to Inventory
19 Print Preview Toolbar Displayed in Preview mode. F7 Ctrl P Ctrl U Close Close current window. Print Send current report to printer. Page Setup Change margins, page orientation, printers. Zoom Toggle between the specified magnification percent and the "best fit" to view the current report. One Page Display one page of the report. Two Pages Display two pages of the report. Multiple Pages Choose the number of pages to display at one time (up to 2 rows of 3 pages each). Zoom Choose the percent of magnification to view. or or Office Links Output report to MS Office. Choose from the following options: Merge it to Microsoft Word: Outputs report to Microsoft Word. Publish it in Microsoft Word: Outputs report to Microsoft Word in rich text format (*.rtf) Analyze it in Microsoft Excel: Outputs report to MS Excel in *.xls format Send Output report to HTML, MS Excel, MS DOS Text or Rich Text Format. Output to Notepad Output the report to Notepad in MS-DOS text format (*.txt). F1 Help Display help topics. Introduction to Inventory 1-9
20 NOTES: 1-10 Introduction to Inventory
21 Chapter Two Getting Started This chapter gives you a step-by-step procedure to follow when first setting up your Inventory system. The focus is primarily on the Setup and Maintenance selections. Contents How to Set Up Inventory Step One Set Up Customization Step Two Define and Organize Inventory Items Step Three Set Up IDs and Codes Step Four Enter Initial Balances Step Five Choose Costing Methods and Assign Units of Measure Step Six Prepare Your Work Flow Daily Tasks Periodic Tasks Getting Started 2-1
22 How to Set Up Inventory Overview Before you can use Inventory, you must follow the setup procedures outlined below. Follow these procedures carefully; the choices you make determine how the system operates. To set up Inventory: Step 1: Set up Customization (page 2-3). Step 2: Define and organize inventory item types (page 2-3). Step 3: Set up codes and IDs (page 2-4). Step 4: Enter initial balances (page 2-7). Step 5: Choose costing methods and assign units of measure (page 2-9). Step 6: Prepare your work flow (page 2-11). 2-2 Getting Started
23 Step One Set Up Customization Use Customization (page 13-3) to select the other Red Wing applications to be interfaced with Inventory; the history, periodic setup, and data entry options; the costing method to use; the default general ledger account numbers; and up to four user-defined fields for screens and reports. Step Two Define and Organize Inventory Items Define Many businesses have a variety of lotted, serialized, nonserialized, and service items. Lotted items are identified by lot numbers. Examples of lotted items are perishable foods with an expiration date and dyed materials. Serialized items are large-ticket items, such as appliances, computers, and stereo equipment, that are identified by serial numbers. Nonserialized items are regular inventory items identified by an item ID and description. Service items are tasks you perform for customers, such as service warranties and repair services. Organize Items in Inventory are identified by an item number and a description. You can also assign additional identification to an item: product line, location, bin number, status, vendor ID, unit of measure, serial number, lot number, and up to four userdefined field values. In some Inventory reports you can select the order in which the information is presented. For example, you can sort information in the Price Report by item ID or by location ID. Keep this in mind when organizing your inventory items. Getting Started 2-3
24 Step Three Set Up IDs and Codes Overview IDs and codes tell the system how to identify each item on file. They are then used to organize the information. General information Do not use these characters in an ID or code: " ' & # Use zeros to make all IDs the same length. If IDs are divided into more than one part, the parts should be the same length in every ID. Do not use spaces to divide IDs into more than one part. For example, use ACE-01 and ACE-11 instead of ACE-1 and ACE11. Use descriptive IDs. For example, WIN0001 and WIN0002 are more descriptive than and If you want to sort items by a particular attribute, put the attribute in the ID. For example, to organize vendors by name, put the first character(s) of the name of the vendor in the vendor ID. Use a combination of letters and numbers that leave room in the sequence for later additions. For example, WIN001 and WIN005 leaves room for three IDs between. Also, see How IDs and Codes are Sorted, page 4-3. Item IDs Item IDs identify items throughout Inventory and other Red Wing applications. Items can have the same product line, location, and price ID, but not the same product line, location, price ID, and item ID. An alias is another name for an item. You can define an alias as an alternate name or ID for any inventory item. For example, item may be the item ID for your 1000 foot roll of number 12 wire, but everyone thinks of it as Number12. By entering Number 12 as an alias, you can search for the item by the common name, instead of having to use the item ID. 2-4 Getting Started
25 Alternate items are comparable or can be substituted for other items. An alternate item is used when you sell an item with insufficient quantities in inventory. Superseded items are replacements for items that are no longer available for purchase or sale. For example, item 700 (plumbing supplies) is no longer available from your vendor. Change the item status to superseded and enter item 100 (another brand of plumbing supplies) in the Supersede Item ID field. If item 700 is entered in a transaction, a message indicates that the item is superseded and asks if you want to use the superseded item ID. If you select Yes, the system enters item 100 in the field. For more information about item IDs, see Items, page Price IDs Price IDs identify a category of items used for pricing calculations and are assigned to items. For more information, see Price IDs on page Use descriptive codes for price IDs. For example, GPMAJD10 identifies gross profit margin (10%) and MRKUP10 identifies base price markup (10%). For more information, see Price IDs on page Vendor IDs Vendor IDs identify the suppliers of inventory items. For more information about vendor IDs, see Item Locations, page Location IDs Location IDs indicate where your inventory items are stored. The location can be a physical location such as a warehouse or a defined location in a storage unit. For more information about location IDs, see Locations, page Sales categories Sales categories are used to sort historical information like detail sales history from Accounts Receivable. They identify the market you sell groups of items to and help you analyze sales. For more information about sales categories, see Sales Categories, page Getting Started 2-5
26 Product lines Product lines categorize your inventory into groups of similar items. For more information about product lines, see Product Lines, page Account codes Use account codes to assign default general ledger accounts to be used when you post sales, purchases, transfers, adjustments, and physical counts to General Ledger. Account codes are also used when an item is sold or returned through Accounts Receivable or purchased or returned through Accounts Payable. Assign an account code to an item and location in Items, page or Item Locations, page For more information about account codes, see Account Codes, page Picture IDs Picture IDs are used to maintain pictures of inventory items. For more information about picture IDs, see Pictures, page Price break IDs Price break IDs identify increasing discounts for customers as the quantity of sales to them increases. For example, you can set up a price break ID that gives a 1% discount on purchases of 10 items, a 2% discount on purchases of 20 items, and a 3% discount on purchases of 30 items or more. For more information about price break IDs, see Price Breaks, page User-defined fields User-defined fields let you set up one to four custom field values. You can specify whether or not the fields are required. The first two fields are used on some function, list and report screens. For more information about user-defined fields, see Customization (page 13-2) to name the user-defined fields, and see User-defined Fields (page 13-62) to assign values to them. 2-6 Getting Started
27 Step Four Enter Initial Balances Overview Use the summary method (page 2-7), the detail method (page 2-8), or a combination of the summary and detail methods (page 2-8) to enter initial balances when you set up Inventory. If you do not require history, enter item quantities and costs in Items and Item Locations. However, you will not have an audit trail. Summary method Use the summary method to quickly enter costs and quantities for your inventory items. This method updates current quantities, dates, and costs, but does not save any history or cost information. If you use this method, you will not have an audit trail. Follow these steps to use the summary method: 1. Use Items (page 13-12) to set up your inventory items. Enter item IDs and item information. Use the Copy From field to quickly copy item information to each item ID. 2. Use Item Locations (page 13-25) to set up locations; and general, cost, and price adjustment information for each item ID you entered on the Items screen. In the costs section of the screen, enter the average, last, and base costs; enter the standard cost if you are using the standard costing method. 3. Select the Cost Detail tab, page Enter the purchase date, on-hand quantity, and unit cost of each item. The extended cost is calculated. Enter a lot number if the item is lotted. Getting Started 2-7
28 Combination method Use the combination method to update current quantities, dates, and costs, and to save summary history and cost information. Follow these steps: 1. Use Items (page 13-12) to set up your inventory items. Enter item IDs and item information. Use the Copy From field to quickly copy item information to each item ID. 2. Use Item Locations (page 13-25) to set up locations; and general, cost, and price adjustment information for each item ID you entered on the Items screen. In the Costs section of the screen, enter the average, last, and base costs; enter the standard cost if you are using the standard costing method. 3. On the Inventory Transactions screen, select the Purchase tab (page 6-16) and enter the quantities of purchased items. 4. If necessary, select the Adjustment tab (page 6-20) and enter adjustment quantities. 5. Use Post Transactions (page 6-41) to post the transactions. 6. If general ledger adjustments were created, use Post General Ledger Adjustments (page 6-48) to post them. Detail method Use the detail method to enter purchase and sales transaction information for your items. This method updates summary and detail history in Inventory. Follow these steps: 1. Use Items (page 13-12) to set up your inventory items. 2. Use Item Locations (page 13-25) to set up locations, and general, cost, and price adjustment information for each item ID you entered on the Items screen. 3. Enter all inventory transactions by selecting the Purchase (page 6-16), Adjustment (page 6-20) and Sale (page 6-12) tabs on the Inventory Transactions screen. 2-8 Getting Started
29 4. Use Post Transactions (page 6-41) to post the transactions. 5. If general ledger adjustments were created, use Post General Ledger Adjustments (page 6-48) to post them. Step Five Choose Costing Methods and Assign Units of Measure Costing methods You must select a costing method on the Options tab (page 13-5) in Customization. The FIFO (first-in, first-out) method uses the oldest items in inventory as the basis for costing sales and inventory. FIFO allocates the oldest unit costs to the cost of goods sold and the most recent unit costs to the ending inventory. When costs rise, the FIFO method yields the highest net income; when costs fall, the FIFO method yields the lowest net income. The LIFO (last-in, first-out) method uses the last items brought into inventory as the basis for costing sales and inventory. When costs of inventory items rise, the LIFO method yields the lowest net income; when inventory item costs fall, the LIFO method yields the highest net income. LIFO is often preferred when prices rise because it results in a lower pretax income and a lower tax obligation. The average cost method calculates a weighted average cost over time. The standard cost method is an estimate of costs that you set. For example, in a manufacturing operation the standard cost is the cost of the item plus costs of raw materials, labor, and overhead. Getting Started 2-9
30 Units of measure You can assign a default unit of measure, unlimited alternate units of measure, conversion factors, and penalties to an item. The base unit of measure should be your smallest unit of measure. You cannot change your base unit of measure if quantities are on file. If the smallest unit of measure is EACH, you might use the following alternate units: a BOX of 10, a PKG of 100, a CARTN of 500, and a CASE of The conversion factor is the portion of the base unit that is the alternate unit. In the example above, enter the units with the following conversion factors: Unit Conversion Factor EACH 1.00 BOX PKG CARTN CASE The base unit of measure is EACH, but you can set up BOX as the default unit of measure if you sell the item most often in boxes. Make sure your base unit of measure is set up. Then, enter each unit of measure and a conversion factor for each unit of measure Getting Started
31 Step Six Prepare Your Work Flow Overview Prepare your work flow to establish consistent daily and periodic routines. Daily tasks Do the following tasks daily or as often as necessary to keep your inventory up to date. Add items. Enter transactions. Enter location transfers. Back up Inventory data files. Produce a Transaction Journal. Produce a Transfers Journal. Post transactions. Produce a General Ledger Adjustments Journal. Post General Ledger adjustments. Getting Started 2-11
32 Periodic tasks Perform the following tasks periodically in Inventory. Freeze quantities. Print physical inventory tags and/or worksheets. Enter the physical count using tags or worksheets. Produce a Batch List. Produce a Physical Count List. Produce a Variance Report. Update perpetual inventory. Change the price of items. Change the standard or base cost of items. Perform year-end maintenance. Remove selected files Getting Started
33 Chapter Three Inventory Practice System This chapter takes you step-by-step through basic procedures you will use when setting up and using your Inventory system. It is an excellent learning tool. Contents Exercise 1: Customization Explore some of the optional features found in the Inventory module, modifying some of them. Exercise 2: Add Inventory Items Experience one way to add new inventory items and, optionally, set them up for multiple locations. Exercise 3: Enter Selling Prices for Items Learn how to enter the initial selling price for an item. Also, look at how to change prices for multiple items. Exercise 4: Enter Beginning Balances Look at one way to enter the beginning on-hand quantity for items. Exercise 5: Print a Valuation Report See how to print a report (in a variety of formats) that shows the current value of your inventory. Before You Begin See Chapter Five in the Windows Getting Started Guide for a short tutorial on navigating Red Wing Windows Accounting without using a mouse. Practice System 3-1
34 Exercise 1: Customization Overview Modify and explore some of the optional features found on the Setup and Maintenance Menu in Inventory. You will go through many of these selections when setting up your Inventory system. For more information see Customization, starting on page When working in the Practice System, make sure you are using the data for the sample company, Mid County Supply (Company ID=SAM) Remember, if you wish to use keystrokes to navigate the Red Wing Inventory system, see Chapter Five in the Getting Started Guide. Step One From the Main Menu, select Inventory. Next, select Setup and Maintenance and double-click on Customization. Or, you can highlight each menu selection and press Enter. 3-2 Practice System


35 Step Two 1. Starting with the Interfaces tab, make sure the General Ledger check box under the Application Interface heading is checked, if you are using the Red Wing General Ledger. The Customization screen uses a tabbed format. You can click on one of the four tabs (Interfaces, Options, Defaults, User Defined Fields) or press Alt and the underlined letter on the tab name (for example, Options is Alt+O) to display that page of the screen and make any changes. Click on a check box to check/uncheck it. Step Three 1. Select the Options tab. 2. Make sure the Costing Method is set to Average Cost. This entry determines the costing method used by your business. For serialized inventory you can assign a specific cost to each item, regardless of the Costing Method selected on the Options screen. Practice System 3-3

36 Step Four 1. Select the Defaults tab. 2. Note that your default General Ledger account numbers are entered on this screen. Step Five 1. Select the User Defined Fields tab. 2. This screen lets you set up four fields you can use for specific inventory item information unique to your business. For example, Mid County Supply is set up with two userdefined fields Season and Color. Several reports can be sorted in order by Season, or can be restricted to just those items with specific information entered in the Season field. 3. When you are finished changing (and viewing) the Customization options, click on the Close Window button on the toolbar (or press F7) to return to the Main Menu. 3-4 Practice System

37 Exercise 2: Add Inventory Items Overview Add two new ceiling fans (16-inch and 24-inch) to your inventory and set one of them up for multiple locations. For more information see Items, pages to Step One 1. From the Main Menu select Inventory, then Setup and Maintenance. Double-click on Items. Practice System 3-5
38 Step Two 1. On the Items screen, click on the New Record button (or press Ctrl A) to begin adding a new inventory item. A blank screen is displayed, as shown to the right. 2. In the Item ID field type: C (the item ID used to identify a 16-inch, 6 blade ceiling fan) and press Enter. Description: Item Type: Item Status: Lotted: 6-Blade ceiling fan with light Accept the default of Nonserialized Use the default value of Active Leave blank 3. The Copy From field automatically appears after the new Item ID is added. You can use this option to copy information from a similar inventory item to speed up the entry process. However, for now, leave this field blank and press Enter. 4. Make the entries shown to the right. Press Enter (or use the Tab key) to move from field to field. Auto Reorder: Base UOM: Default UOM: Weight Leave blank Each The base unit of measure is used as the default unless you change it by adding a different unit of measure and making it the default. Leave blank. This is an optional field. Sales Category: Press Alt to get a list of valid Sales Category codes. Select RE (Retail). Product Line: Price ID: Tax Class Picture ID: Select ELECTRICAL from the list of available product line codes. Leave blank Accept the default value (0). It indicates that the item is subject to sales tax. Leave blank Season: UserDef2: Spring (This user-defined field has been set up in Customization as a required field.) Leave blank 3-6 Practice System
39 Color: UserDef4: Order Cycle Pick No Color from the list of color codes. (This is another user-defined field set up as a required field.) Leave blank Leave blank Practice System 3-7

40 5. After making the entries listed on the previous page, your screen should look like the one to the right. (Complete all entries until your cursor is on the first line of the Unit tab.) 6. The system automatically fills in the information on the Unit tab, using the Base UOM entry as the Unit Code. 7. This is all you need to enter for the 16-inch fan. Step Three 1. To add the next new item, click on the Item ID field (to move from the Unit tab to the Item header portion of the screen) and then click on the New Record button (or press Ctrl H to return to the Item ID field and then press Ctrl A to add a new record). 2. This time you will use the Copy From feature to rapidly add a 24-inch ceiling fan. 3. Make the entries shown to the right. Item ID: Copy From: Description: C Select the previously entered ceiling fan (C ). A new screen pops up. Use it to select the type of information you want to copy from the selected item. Leave all selections set at their default values and press Enter to copy the default information. 6-Blade 24 inch fan without light All remaining entries are already correct, since you copied them from a similar item. 3-8 Practice System


 below the first")
41 4. When you are finished, your screen will look like the one to the right. Step Four 1. For the 24-inch ceiling fan, you are going to set up multiple units of measure. 2. On the Units tab each is already set up as the default unit of measure on the first detail line. 3. To add another unit of measure click on the asterisk (*) below the first detail line and press the Tab key to move to the unit field. Type Pair. 4. Press the Tab key to go to the Practice System 3-9
42 Conversion Factor field and type 2 (There are two of the Base UOM items in each pair, so the conversion factor is 2.) 5. Leave the remaining fields blank Practice System
 in the Location ID field. Next, enter 02 in the Acct Code field.")
43 Step Five 1. You are now going to set up the 24-inch ceiling fan for both the main location (MCSH) and the two warehouses (WHSE1 and WHSE2). 2. Click on the Locations tab (or type Alt L). 3. Enter MCSH (Mid County Supply Headquarters) in the Location ID field. Next, enter 02 in the Acct Code field. (The account code determines the General Ledger account numbers used for this item/location.) Press Enter to move to the next detail line and save your entries. 4. On the Locations tab, enter the remaining additional location information (shown to the right, above the screen). Location ID: WHSE1 Acct. Code: 02 Location ID: WHSE2 Acct. Code When you are finished, your screen will look like the one shown here. Click on the Close Window button (or press F7) to return to the Main Menu. Practice System 3-11

44 Exercise 3: Enter Selling Prices for Items Overview In this exercise you will set up a location for the 16-inch ceiling fan, and then enter its selling price. For more information, see Item Locations, pages through and Item Price Changes, pages 10-3 through Step One 1. From the Main Menu, select Inventory. Next, select Setup and Maintenance and doubleclick on Item Locations. Step Two 1. On the Item Locations screen select Item ID C When you added this item no location was specified. To do that now, click on the Add button to display a secondary screen. Use it to specify the Location ID you are adding. 3. Enter MCSH in the Add Location ID field and click on the OK button to add the location Practice System
 Base Price: 38.95 (the default selling price) List Price: 44.95 Minimum Price:.00 Qty Break ID: Leave blank 2.")
 to open the Item ID list box.")
45 Step Three 1. To enter the selling price for this item, open the Price Information tab (Alt P) and make the entries shown to the right. Unit: Select Each Average Price:.00 (the system automatically updates this field) Base Price: (the default selling price) List Price: Minimum Price:.00 Qty Break ID: Leave blank 2. Your screen will look like this. 3. Press Enter (or Tab) to move to the next detail line (saving your entry). 4. To select the next item ID: Type Alt I to return to the Item ID field. Next, click on the combo box (or type Alt ) to open the Item ID list box. Select the 24-inch ceiling fan, Item ID C and press Enter. Practice System 3-13
 Base Price: 44.95 List Price: 49.95 Minimum Price:.")
46 5. Make sure location MCSH is highlighted and move down to the Price Info tab. Enter the price information shown to the right. Press Enter (or Tab) after the Qty Break ID field. The information for the prior detail line is saved automatically. Unit: Each Average Price:.00 (The system automatically updates this field) Base Price: List Price: Minimum Price:.00 Qty Break ID: Leave blank 6. Next, click WHSE1 in the Location list and enter the same prices for this location. 7. Repeat for Location WHSE2. Obviously, this is a tedious way to enter prices (and can also easily lead to mistakes). Proceed to Step Four for a better method of entering prices for multiple locations. Step Four 1. Follow these steps to enter prices for multiple locations by copying the existing selling prices to a new location. 2. Click on the Add button under the Location list Practice System
. Remaining Entries: Accept the default values. Click on OK to set up the new location. 4.")
47 3. A new screen is opened. Enter the following information. Add Location ID: Copy From Item: Select TRK1 from the list Accept the default value (the current Item ID). Copy From Location: Accept the default value (the current selection from the Location list). Remaining Entries: Accept the default values. Click on OK to set up the new location. 4. Look at the Price Information tab (if not already selected). Note that the prices have been copied for the new location. This is a much better way to add locations for an item, since you can copy the previously entered data. 5. When you are finished, click on the Close Window button (or press F7) to return to the Main Menu. Practice System 3-15

48 Step Five You often need to change selling prices for a group of items. This is easy to do if the prices are changing by a certain percentage or are based on costs, as shown in this procedure. 1. From the Main Menu, select Inventory. Next, select Periodic Processing and double-click on Item Price Change. 2. The Item Price Change screen lets you choose, for example, a specific product line or a range of inventory items and change the selling price for all of the selected items at one time. To do this, make the entries shown to the right. This first group of entries selects all items at all locations that belong to the product line ELECTRICAL. 3. Make the next group of entries (shown to the right) to specify the type of price change being done. Item ID From / To: Location ID From / To: Product Line From: Product Line To: Season From / To: UserDef2 From / To: Sort By: Copy From: Copy To: Adjustment Type: Leave blank (selects all items) Leave blank (selects all locations) Select ELECTRICAL (the product line used when new items were added in the previous step). Accept the default (ELECTRICAL) Leave blank Leave blank Accept the default (Item ID). A report of price changes is produced and printed in this order. Select Price Base (shows what price or cost is being used as the starting value for the price change). Select Price Base from the list (shows the price being changed). Select Percent (you are increasing the Base Price by a percentage). Adjustment Amount: Enter 7.5 (to increase the Base Price by 7.5%, since the Adjustment type is Percent) Practice System


49 4. After making your entries on the Item Price Change screen, it should look similar to the one to the right. 5. Click on OK to make the price change. 6. When the Price Change Log screen is displayed, click on Print to produce a printed report showing the price changes you made. Then, click on Close to return to the Item Price Change screen. This is obviously a quick way to adjust your selling prices. Take a look at the various Copy From and Copy To options. Note how you can also create selling prices based on the current cost of the item. This lets you create selling prices that are a specific Markup Percent or Gross Profit Margin. 7. When you are finished, click on the Close Window button (or press F7) to return to the Main Menu. Practice System 3-17

50 Exercise 4: Enter Beginning Balances Overview This exercise shows how to enter beginning quantities and costs into Inventory. The method provides a good audit trail, showing what you used as a starting point for inventory. By this time in the Practice System you have entered information about your inventory items, but still have not entered the cost of those items or the quantity currently on hand. The first step is to enter transactions directly into Inventory to set up the beginning balances. Normally, after balances are entered, you receive additional inventory by entering invoices into the Accounts Payable system. If you are not using Accounts Payable, you can continue to use this process to enter receipts into Inventory. For more information see Inventory Transactions, pages 6-2 through 6-29 and Transaction Journal, pages 6-37 to Step One 1. From the Main Menu, select Inventory. Next, select Transactions and double-click on Inventory Transactions Practice System
51 Step Two 1. On the Inventory Transactions screen, click on the Purchase tab. You must make at least one entry for each inventory item that has a quantity available for sale (on-hand quantity). If the item has multiple locations, you can either enter one transaction for each location or enter the entire quantity into the main location and then, at a later time, transfer some items from one location to another. 2. To enter a beginning quantity for one of our new items (if there are items already listed on the Purchases tab), click on the New Record button on the toolbar (or press Alt A) and make the entries shown to the right. Otherwise start on the first blank detail line. 3. Press Enter (or Tab) to save the record and enter the next beginning balance record, shown to the right. Type: Item ID: Location ID: Unit: Qty: Select Invoice from the list of valid purchase transaction types Select C MCSH (the main location) Each Unit Cost Enter Type: Item ID: Location ID: Unit: Enter 16 (the beginning quantity for this item) Invoice Select C MCSH Each Practice System 3-19
52 Qty: 12 Unit Cost Practice System
 to display a list box and then selecting an entry, it is often easier to start typing the entry.")
53 By the time you enter the third record, note how easy it is to use your Enter or Tab key to move from field to field, accepting defaults already displayed. Also, instead of using the combo button (or pressing Alt ) to display a list box and then selecting an entry, it is often easier to start typing the entry. For example, type I for Type and then tab to the next field. 4. Save the transaction record for the 24-inch fan and enter a second transaction for the same item, but using a different location, as shown to the right. 5. When you are finished, the three new records appear as shown here. Make sure they are correct. Type: Invoice Item ID: Select C Location ID: WHSE1 Unit: each Qty: 2 Unit Cost The transaction entry screen has a simple (summary) format and a more complete (detail) format with additional data fields. To switch between these two formats, click on the button with the two opposed arrows (in the upper left of the screen). 6. Click on the Close Window button (or press F7) to return to the Main Menu. Practice System 3-21

54 Step Three 1. The next step is to print a list of the beginning balance transactions just entered. 2. Make sure Transactions are still selected on the Main Menu and double-click on Transaction Journal. 3. On the Transaction Journal selection screen make the entries shown to the right. Location ID From / To: Item ID From: Item ID To: Remaining entries Leave blank Select C Select C Accept default values 4. Click on the Print button (Alt P) to print the report. 5. When you are finished, click on Close (Alt C) to return to the Main Menu Practice System
55 Step Four 1. To complete the transaction entry process, you must post the transactions. The General Ledger is updated during the posting process and inventory history totals are updated. 2. Make sure Transactions is still selected on the Main Menu and double-click on Post Transactions. When entering your own beginning balances, if you do not want to affect General Ledger account balances, you can first go into Customization in Inventory and make sure the General Ledger option is NOT selected on the Interfaces tab. (Do this if you already have an inventory balance amount in your General Ledger.) 3. On the Post Transactions screen, do the following: Click on the selection box following the phrase Do the following, then check the box. Click on the OK button to start the Post process. When the message The post has been successfully completed. is displayed, press Enter. When the Post Transactions Log screen is displayed, press Enter to print the report. When the report is finished, click on the Close button to return to the Main Menu. Practice System 3-23

56 Exercise 5: Print a Valuation Report Overview In this exercise, print a report showing the current value of your inventory. You will print the report in several formats, showing how one report can vary significantly, depending on the report options selected. For more information see Inventory Valuation Report, pages 8-3 through 8-5. Step One 1. From the Main Menu select Inventory, then Reports. Double-click on Inventory Valuation Report. Step Two 1. On the report options screen, make the entries shown to the right. Using these options, a report is produced showing every inventory item at every location that does not have a zero quantity on hand. Totals are printed for each Inventory Item. Item ID From / To: Leave blank Location ID From / To: Leave blank Product Line From / To: Leave blank Sales Category From / To: Leave blank Sort By: Select the Item ID option Type: Select the Detail option Include Zero On-Hand: Leave unselected 3-24 Practice System


57 2. Your screen should look like the one shown here. 3. Click on the Print button to produce the report. Step Three 1. In this step, print a more summarized version of the Inventory Valuation Report on which a single line is printed for each inventory item instead of showing the individual item locations. 2. The changes you need to make to the report options screen are listed in the box to the right. Sort By: Type: Select the Item ID option Select the Summary option Practice System 3-25


58 3. Click on the Print button (Alt P) to produce the report. Note that this report is much more compact, since it only prints the inventory item totals, rather than showing the details by inventory item location. Step Four 1. This third version gives you an even more compact report that gives you a very useful view of the value of your inventory summarized by product line. 2. Make the changes to the report options screen as listed in the box to the right. 3. Click on the Print button (Alt P) to produce the report. 4. Try some of the other possible variations of this report using the various Sort By and Type options and the Preview button to become more familiar with the many choices available. 5. When you are finished, click on the Close button (Alt C) to return to the Main Menu. Sort By: Type: Select the Product Line option Select the Summary option 3-26 Practice System
59 NOTES: Practice System 3-27
60 Chapter Four Helpful Procedures This chapter gives you step-by-step procedures to use in your daily operations and explains the use of major menu selections. Contents How to Enter Dates How IDs and Codes are Sorted Using the Inquiry Menu Using the Transactions Menu Using the Material Requisitions Menu Using the Reports Menu Using the Analysis Reports Menu Using the Periodic Processing Menu Taking a Physical Inventory Using the Assemblies Menu Helpful Procedures 4-1
61 How to Enter Dates Overview Enter dates in a date box by double clicking the date entry box (or press Shift + F10) to display a calendar that you can use to select a date. Or, enter dates directly in the format MM/DD/YY. For example, to enter the date January 25, 2000, type You can enter dates for the years 1930 through Thus, a date entered as 05/21/13 is for May 21, How IDs and Codes are Sorted Overview When you define IDs and codes, it is important to know how they appear in a combo box list after they are sorted. Red Wing sorts alphanumeric data alphabetically by comparing first characters, then second characters, and so forth. When two alphanumeric characters are compared, the character with the smaller ASCII value comes first in the alphabetic sort. Listed below are the alphanumeric characters in ascending alphabetic order: special characters ( -, *, /, etc.) (cannot be used in IDs or codes) numbers (0-9) lowercase letters (a - z) uppercase letters (A - Z) Alphabetical rules are not intuitive when numbers are involved. For example, in numerical sorting 60 comes before 112; in alphabetical sorting 112 comes before 60. To ensure that numbers appear in the same order in both an alphabetic and a numeric sort, fill in numbers to the left with zeros until they are the same length. For example, if 60 is defined as 060, 060 comes before 112 in both an alphabetic and a numeric sort. 4-2 Helpful Procedures
62 Using the Inquiry Menu Overview Before using the Inquiry Menu, set up your items, codes and IDs in Setup and Maintenance. Use Inquiry to view, but not change, the following information: price and availability summary history detail history general information item locations costs and vendors lot numbers serial numbers History inquiries are available if you set up the Interfaces tab (page 13-4) in Customization to save detail, lot and serial number history. To change information found on Inquiry screens, use the corresponding Setup and Maintenance or Transaction selections. Helpful Procedures 4-3
63 Using the Transactions Menu Overview Before you use the Transactions Menu selections, set up your items, codes and IDs in Setup and Maintenance and verify them using the Setup and Maintenance Lists and Inquiry. Use the Transactions Menu as follows: To show sales and purchases, adjust quantities, and edit unposted transactions. To move items from one location to another and edit transfers. To print unposted transactions, transfers, cost-of-goods-sold (COGS) adjustments and purchase price variances (PPVs). To post adjustments, sales, purchases, transfers, COGS adjustments, and PPVs. Verifying transactions Print the Transaction Journal, the Transfers Journal, and the GL Adjustments Journal to verify your unposted transactions. Use Inventory Transactions or Location Transfers to edit or delete transactions, and then reprint the appropriate journals. Posting your journal information Item, price, cost, serial, lot, summary and history information is updated when you post. If you post detail to the General Ledger, the General Ledger Transaction Journal is also updated when you post. 4-4 Helpful Procedures
64 Using your posted transaction information After you post transactions, use Reports and Analysis Reports to analyze inventory movement, prices, costs, stock, sales, profit, trends, and serialized, lot, and transaction history. Using the Transactions Menu Use the Transactions Menu as follows: Use Inventory Transactions (page 6-2) to adjust quantities, enter sales and purchases, and edit unposted transactions. Use Location Transfers (page 6-30) to move items from one location to another or to edit transfers. Use the Transaction Journal (page 6-37) to print entered transactions. Use the Transfers Journal (page 6-39) to produce a record of location transfers. Use Post Transactions (page 6-41) to post adjustments, sales, purchases, and transfers. Use the General Ledger Adjustments Journal (page 6-45) to produce a record of the COGS adjustments and purchase price variances PPVs. Use Post General Ledger Adjustments (page 6-48) to post COGS adjustments and PPVs. Helpful Procedures 4-5
65 Using the Material Requisitions Menu Overview Use the Materials Requisition selections to remove items from inventory that are used internally, to return material requisitions, and to change requisitions. If you do not have enough items to fill a requisition, you can enter a backorder quantity. The requisition stays on file until the entire requisition has been filled. To determine which backorders you can fill, produce the Backorder Allocation Report, and use Enter Material Requisitions to fill backordered requisitions. Use Material Requisitions as follows: Use Enter Material Requisitions (page 7-2) to enter, return, and change material requisitions. Use Print Material Requisitions (page 7-13) to print material requisitions. Use the Material Requisitions Journal (page 7-15) and the Backorder Allocation Report (page 7-17) as audit trails. Use Post Material Requisitions (page 7-19) to remove the requisition and returned requisitions (except for backorders) from material requisitions. Use the following Inquiry selections to verify material requisition transactions: Price and Availability Inquiry (page 5-2) shows changes to quantities. Items Inquiry (page 5-16) shows updates to quantity totals. Item Locations Inquiry (page 5-22) shows quantity, cost, serial number and lot number changes. Lot Numbers Inquiry (page 5-36) verifies that a transaction for a lotted item was updated in lot history. Serial Numbers Inquiry (page 5-38) verifies that the status of a serial number was changed when a material requisition return is entered. 4-6 Helpful Procedures
66 Using the Reports Menu Overview Before using the Reports Menu, set up your items, codes, and IDs in Setup and Maintenance. Verify your items, codes and IDs using Setup and Maintenance Lists and Inquiry. Then enter, verify and post your transactions. The Reports Menu selections give you the following information: Use the Inventory Valuation Report (page 8-3) to see the current value of your inventory. Use the Item Status Report (page 8-6) to verify the status of items and view the on-hand, on-order, committed, in-use, and available quantities. Use the Price Report (page 8-10) to analyze your pricing structures. Use the Inventory Alternate Items Report (page 8-12) to list the substitute items available for your inventory items. Use the Inventory Unit Conversions Report (page 8-14) to list all available units of measure for your inventory items. Use the Serialized History Report (page 8-16) to see current or historical information for serialized items. Use the Lot History Report (page 8-18) to see current or historical transaction, material requisition, and transfer information for lotted items. Use the Transaction History Report (page 8-20) to see the history of transactions by item and location. Helpful Procedures 4-7
67 Using the Analysis Reports Menu Overview Before using the Analysis Reports Menu, set up your items, codes, and IDs in Setup and Maintenance. Verify your items, codes and IDs using Setup and Maintenance Lists and Inquiry. Then enter, verify and post your transactions. The Analysis Reports produce the following information: Use the Safety Stock Alert Report (page 9-3) to identify items to restock. Use the Overstock Report (page 9-5) to identify items with in-stock quantities that are above the order points you specified. Use the Slow/Fast Movement Report (page 9-7) to analyze fast-moving and slow-moving items. Use the Sales Analysis Report (page 9-10) to analyze the turnaround time for each stock item during the fiscal year. Use the Gross Profit Analysis Report (page 9-13) to identify the gross profit margin on items for a period. Use the Trend Analysis Report (page 9-16) to identify the number of items sold or purchased during a range of periods. 4-8 Helpful Procedures
68 Using the Periodic Processing Menu Overview Use the Periodic Processing Menu as follows: Use Item Price Change (page 10-3) to change the price of items and to produce an Item Price Change Log. Use Cost Changes (page 10-6) to change the standard or base costs of items and to produce a Cost Change Log. Use Year-End Maintenance (page 10-9) for maintenance tasks and to prepare for the next year by incrementing the current fiscal year by one after transactions are posted for the current year. Use Purge Selected Files (page 10-10) to delete information no longer needed after relevant reports are printed. Helpful Procedures 4-9
69 Taking a Physical Inventory Overview Follow these steps, using the Physical Inventory Menu, to take a physical inventory: Before you begin, print the Item Status Report (page 8-6) for a current list of items and quantities to help you decide what to count in each batch. 1. Use Freeze Quantities (page 11-2) to prepare batch codes that include the items and locations to be inventoried. Choose whether to use tags or worksheets for counting a batch. Choose whether to enter all the inventory counts or to enter only exceptions between frozen quantities and counted quantities. 2. Use the Batch List (page 11-26) to verify the status of each batch. The list shows the physical count processes and indicates whether they are complete. 3. Use Freeze Quantities (page 11-2) anytime after you prepare batch codes to freeze on-hand quantities. Use this selection only after you enter the transactions that affect inventory quantities. Once you freeze quantities, there should be no activity in the warehouse until the physical inventory is updated with the Update Perpetual Inventory selection. However, you can continue to process transactions during this time. 4. Use Print Inventory Tags/Worksheets (page 11-6) to produce tags or worksheets to record the physical count of your inventory. 5. Count the inventory. 6. Use Physical Counts Tag Entry (page 11-10) to enter the physical count quantities on your tags, and use Physical Counts Worksheet Entry (page 11-18) to enter the physical count quantities on your worksheets. 7. Use Physical Counts List (page 11-28) to print a list of quantities from selected batches, verifying that the correct quantities are entered Helpful Procedures
70 8. Use the Variance Report (page 11-30) to see the difference between the counts you entered and the frozen quantities in the system. 9. When you are satisfied with the counts in the Variance Report, use Update Perpetual Inventory (page 11-32) to update quantities for the items selected in each batch. Using the Assemblies Menu Overview The Assemblies selections let you set up assemblies, build (or unbuild) them, and produce a variety of reports. Use the Assemblies Menu as follows: Use Produce Assemblies (page 12-2) to set up a production plan and to produce (build) the assemblies. Use the Shortage Report (page 12-5) to show items that must be ordered before a particular production plan can be completed. Use the Item Usage Report (page 12-8) to produce a "where used" list for selected items. Use Maintain Assemblies (page 12-10) to set up each assembly. You must do this before producing the assembly. Use the Assembly Report (page 12-12) to identify all the components used in an assembly. Use the Production Plan Report (page 12-14) to identify all the assemblies that make up a production plan. Helpful Procedures 4-11
71 NOTES: 4-12 Helpful Procedures
72 Chapter Five Inquiry View item costs, prices and availability, summary and detail history, items, item locations, lot and serial numbers, and vendor information. Contents Price and Availability Inquiry Qtys, Costs, Prices Tab Lot Numbers Tab Serial Numbers Tab Price Breaks Tab Summary History Inquiry Sales and Purchases Tab Internal Transactions Tab Graph Screen Graph Detail History Inquiry Detail Transaction Inquiry Serials Detail History Inquiry Lots Detail History Inquiry Items Inquiry Units Tab Alternates Tab Aliases Tab Locations Tab Additional Description Item Locations Inquiry Loc Defaults Tab Loc History Tab Price Info Tab Cost Detail Tab Vendor Info Tab Bin Info Tab Qty Info Tab Summary View Qty Info Tab Detail View Serial Info Tab Summary View Serial Info Tab Detail View Costs and Vendors Inquiry Costs Tab Vendors Tab Lot Numbers Inquiry Lot Number Detail Serial Numbers Inquiry Serial Number Detail Customer Price Inquiry Inquiry Menu 5-1

73 Price and Availability Inquiry Inquiry Price and Availability Inquiry Tabs Qtys, Costs, Prices Tab (page 5-3) Lot Numbers Tab (page 5-4) Serial Numbers Tab (page 5-5) Price Breaks Tab (page 5-6) Overview Use Price and Availability Inquiry to display the available quantities and prices of lots, service, nonserialized items, and serialized items. Use Item Locations (page 13-25) in Setup and Maintenance to change price and availability information. 5-2 Inquiry Menu
74 Screen options 1. Item ID Select the item ID for which to view price and availability information. 2. Unit The default unit of measure is displayed. Select a different unit of measure to display its cost and price information. The item status and item type are displayed. The check box labeled Lotted is checked if the item uses lot number data. 3. Location Select the location. The minimum on-hand and order point quantities for the location are displayed. The last sale and purchase dates are updated when new sale and purchase transactions are entered. 4. Select any tab to show additional price and availability information. Qtys, Costs, Prices Tab Inquiry Price and Availability Inquiry Qtys, Costs, Prices Tab Overview (picture, page 5-2) The on-hand, available, on-order, committed, and in-use quantities are displayed. The on-hand quantities are increased when you enter purchases and decreased when you post sales. The on-order quantities are updated by new purchase orders and the committed quantities are updated by new sales orders. The default bin number and standard, average, base and last costs are displayed. The average cost and the last cost are calculated when you enter purchases. The average, minimum, list, and base prices are displayed. The average price is updated when you post sales transactions. The minimum is used when entering invoices in Accounts Receivable and prices are reduced because of promotions, quantity breaks, or customer-level pricing. Inquiry Menu 5-3

75 Lot Numbers Tab Inquiry Price and Availability Inquiry Lot Numbers Tab Overview This tab is available for lotted items only. The lot number, quantity available, quantity on order, expiration date, and lot status are displayed. The quantity on order is updated by new purchase order transactions. The status of the lot is updated when you enter purchases and post sales. 5-4 Inquiry Menu
, item status, and unit price are displayed.")
76 Serial Numbers Tab Inquiry Price and Availability Inquiry Serial Numbers Tab Overview This tab is available only for serialized items. The serial number, lot number (if the item is lotted), item status, and unit price are displayed. Inquiry Menu 5-5

77 Price Breaks Tab Inquiry Price and Availability Inquiry Price Breaks Tab Overview The item price break quantity, adjustment, adjustment type, adjusted list price, and adjusted base price are displayed. 5-6 Inquiry Menu

78 Summary History Inquiry Inquiry Summary History Inquiry Tabs/Graphs Sales and Purchases Tab (page 5-8) Internal Transactions Tab (page 5-9) Graph (page 5-10) Overview Use Summary History Inquiry to display item information from the transaction history totals records, including the number of items sold, purchased, transferred, adjusted, requisitioned, built, and issued. The information is shown for each period that had activity in the selected year. Specify the item ID, location ID, year, units, and whether to display a summary showing costs or quantities. Inquiry Menu 5-7
79 Screen options 1. Item ID Select the item ID for which you want to view summary history. 2. Location ID Select the location. 3. Year Enter the year you want to view. 4. Unit The default unit of measure is displayed. Select a different unit of measure to display its quantity information. The cost information is not affected. 5. Quantities / Costs Select whether to display quantity or cost information. 6. Click on the available tabs to switch between sales and purchase information and internal transaction information. 7. Select the Graph button to display the information in a graph. 8. When you are finished, close the screen to return to the Main Menu. Command buttons Graph Display the Graph screen (page 5-10) and show the quantity or cost information as a graph. Sales and Purchases Tab Inquiry Summary History Inquiry Sales and Purchases Tab Overview (picture on page 5-7) If you select Quantities on the Summary History Inquiry screen, the period, purchases, purchases returned, sales, and sales returned quantities are displayed. If you select Costs on the Summary History Inquiry screen, the period, COGS, return COGS, sales costs, and sales return costs are displayed. 5-8 Inquiry Menu
 and the total transfers in and out, adjustments, and requisitioned quantities.")
80 Internal Transactions Tab Inquiry Summary History Inquiry Internal Transactions Tab Overview If you select Quantities on the Summary History Inquiry screen, the totals for each period include the difference between the purchases and sales made during that period (beginning quantities) and the total transfers in and out, adjustments, and requisitioned quantities. If you select Costs on the Summary History Inquiry screen, the totals for each period include the difference between the purchases and sales made during that period (beginning cost) and the total transfer costs, adjustment costs, and material requisition costs. Inquiry Menu 5-9
81 Graph Screen Inquiry Items Inquiry Graph button Overview The graph screen appears when you select the Graph command button on the Summary History Inquiry screen. Screen options 1. Use the Select Graph button to change the information shown on the graph. The Graph Dialog Box (page 5-11) is displayed. 2. When you are finished, close the screen to return to Summary History Inquiry Inquiry Menu

82 Graph Inquiry Summary History Inquiry Graph button Select Graph Overview Select one of the following graph options. The graph screen appears showing the new information. Sale and Purchase Amounts Show the purchase costs, COGS, and sales. Internal Transaction Amounts Show the transfer in and out costs, adjustment costs, and material requisition cost. Sale and Purchase Quantities Show the purchases, purchases returned, sales, and sales returned. Internal Transaction Quantities Show the transfer in and out quantities, material requisition quantities, and adjustment quantities. Inquiry Menu 5-11

83 Detail History Inquiry Inquiry Detail History Inquiry Additional Dialogs Detail Transaction Inquiry (page 5-13) Serials Detail History Inquiry (page 5-14) Lots Detail History Inquiry (page 5-15) Overview Use Detail History Inquiry to display transaction records for an item and location. You can display any one or all types of transactions. You can also specify a range of periods and years for which to display detail. You can use this selection only if you selected to keep detail history on the Interfaces tab (page 13-3) in Customization. Screen options 1. Item ID Select the item ID for which to view detail, serial, and lot information. 2. Location ID Select the location. 3. Period and Year From / To Enter the range of periods and years you want to see Inquiry Menu
84 4. Include Select the types of transaction to view: all transactions purchase purchase return sale return sale material requisition transfer in transfer out adjustment 5. Pd The periods in the range you specified are displayed. Select the period you want to view. The date, source ID, type, application generating the transaction, unit, quantity, and extended cost are displayed. 6. When you are finished, select one of the command buttons or close the screen to return to the Main Menu. Command buttons Detail Open Detail Transaction Inquiry, page Serials Open Serials Detail History Inquiry, page Lots Open Lots Detail History Inquiry, page Detail Transaction Inquiry Inquiry Detail History Inquiry Detail button Overview (Picture on page 5-12) The Detail Transaction Inquiry dialog box appears when you select Detail on the Detail History screen. Use it to view additional information about the selected transaction. When you are finished, select Close to return to the Detail History screen. Inquiry Menu 5-13

85 Serials Detail History Inquiry Inquiry Detail History Inquiry Serials button Overview The Serials Detail History Inquiry screen appears when you select Serials on the Detail History Inquiry screen. There is a history record for every transaction that affects a serial number. For example, if a transaction involves a serialized quantity of five, five serial history entries are made for that serial number. When you are finished, select Main View to return to the Detail History screen Inquiry Menu

86 Lots Detail History Inquiry Inquiry Detail History Inquiry Lots button Overview The Lots Detail History Inquiry screen appears when you select Lots on the Detail History Inquiry screen. Lot history entries exist for every lot involved in a transaction. For example, if there is an order for a quantity of 30 from 3 different lots (5 in one, 10 in another, and 15 in the last), three entries are made to lot history. When finished, select Main View to return to the Detail History screen. Inquiry Menu 5-15
87 Items Inquiry Inquiry Items Inquiry Tabs Units Tab (page 5-17) Alternates Tab (page 5-18) Aliases Tab (page 5-19) Locations Tab (page 5-20) Overview Use Items Inquiry to display general item information, valid units of measure for the item, locations where the item can be found, alternate items that can be substituted for the item and aliases (easily remembered names that can be used in place of the item number). Use Items (page 13-12) in Setup and Maintenance to change item information Inquiry Menu
88 Screen options 1. Item ID Select the item ID for the item you wish to view. General item information is displayed. 2. Select one of the tabs to display additional information. 3. When you are finished, close the screen to return to the Main Menu. Command buttons Addl Descr Open the Additional Description dialog box, page View Picture Display the picture corresponding to the selected picture ID. Units Tab Inquiry Items Inquiry Units Tab Overview (Picture on page 5-16) The valid units of measure for the selected item are displayed. For each unit of measure, the conversion factor (used as a multiplier to convert quantities from the specified unit of measure to the base unit of measure), penalty type and penalty amount (if a penalty is charged for purchases using this unit of measure), and UPC code are displayed. Inquiry Menu 5-17

89 Alternates Tab Inquiry Items Inquiry Alternates Tab Overview All available alternate item IDs are displayed. If the alternate items have a range of specific dates when they can be used, the start and end dates are displayed Inquiry Menu

90 Aliases Tab Inquiry Items Inquiry Aliases Tab Overview If any aliases (other names the item is remembered by) are available, they are displayed, along with the user ID that can use the alias. If all users are allowed to use the alias, the user ID is replaced with an asterisk. Inquiry Menu 5-19
91 Locations Tab Inquiry Items Inquiry Locations Tab Overview All locations that are valid for the selected item are displayed. For each location, the account code (used to specify default account numbers for the item) and current on-hand, committed, in-use, available, and on-order quantities are displayed Inquiry Menu

92 Additional Description Inquiry Items Inquiry Addl Desc. button Overview The Additional Description dialog box appears when you select Addl Descr on the Items Inquiry screen. Use it to view additional descriptive information entered for the item. When you are finished, select Close to return to the Items Inquiry screen. Inquiry Menu 5-21
93 Item Locations Inquiry Inquiry Item Locations Inquiry Tabs Loc Defaults Tab (page 5-23) Loc History Tab (page 5-24) Price Info Tab (page 5-25) Cost Detail Tab (page 5-26) Vendor Info Tab (page 5-27) Bin Info Tab (page 5-28) Qty Info Tab-Summary View (page 5-29) Qty Info Tab-Detail View (page 5-30) Serial Info Tab-Summary View (page 5-31) Serial Info Tab-Detail View (page 5-32) Overview Use Item Locations Inquiry to display item information that can vary from location to location. The information includes general information, such as location status; cost information, vendor information (vendors the item can be purchased from); selling price; bin; lot; and serial information. Use Item Locations on the Setup and Maintenance Menu (page 13-25) to add or to change information Inquiry Menu
94 Screen options 1. Item ID Select the item ID. The item description is displayed. 2. Location Select the location ID. The item location information is displayed. 3. General, Cost and Location Default information is shown for the item/location. 4. Select any tab to display additional information. 5. Close the screen to return to the Main Menu. Loc Defaults Tab Inquiry Item Locations Inquiry Loc Defaults Tab Overview (Picture, page 5-22) The Location Defaults tab has default vendor information (used by the Purchase Order system) and Order Quantities information used to determine when to reorder the item and to calculate the quantity to reorder. Inquiry Menu 5-23

95 Loc History Tab Inquiry Item Locations Inquiry Loc History Tab Overview The Location History tab shows the last date the item was sold, returned by a customer, purchased, returned to the supplier, transferred to a different location, adjusted, or used on a material requisition at the selected location. The fields on this tab are updated as transactions are posted by the appropriate applications Inquiry Menu

96 Price Info Tab Inquiry Item Locations Inquiry Price Info Tab Overview The Price Information tab shows each unit of measure that has been defined for the selected item and the average, base, list, and minimum prices for the unit of measure. The quantity break ID is displayed, if price breaks have been set up for the unit of measure. Inquiry Menu 5-25

97 Cost Detail Tab Inquiry Item Locations Inquiry Cost Detail Tab Overview The Cost Detail tab shows information about each purchase of the item. The date of purchase, quantity, unit cost, and extended cost of the item are displayed. If the item is lotted, the lot number is displayed. When the items have all been sold or disposed of, the purchase record is removed. This tab is not available for serialized items Inquiry Menu

98 Vendor Info Tab Inquiry Item Locations Inquiry Vendor Info Tab Overview The Vendor Information tab shows information about each vendor you have purchased the item from. The vendor ID; vendor item ID; lead time; and last purchase quantity, unit cost, order number, unit of measure and date are displayed. Inquiry Menu 5-27
, date, counted quantity, unit of measure and batch ID.")
99 Bin Info Tab Inquiry Item Locations Inquiry Bin Info Tab Overview The information from the last physical count is displayed for the bin number, including tag number (if tags are used), date, counted quantity, unit of measure and batch ID Inquiry Menu

100 Qty Info Tab Summary View Inquiry Item Locations Inquiry Qty Info Tab Overview The Quantity Information tab shows the quantity of items available from each vendor. If the item is lotted, the lot number is displayed. The base quantity available, average unit cost, expiration date, vendor ID and item status are displayed. Select to toggle from summary view to detail view Inquiry Menu 5-29

101 Qty Info Tab Detail View Inquiry Menu Item Locations Inquiry Qty Info Tab Overview When the Detail View is selected on the Quantity Information tab, the on-hand, committed, in-use, on-order, received, sold and returned base quantities are displayed. The fields on this tab are updated as transactions are posted by the appropriate applications. Select to toggle from detail view to summary view Inquiry Menu

102 Serial Info Tab Summary View Inquiry Item Locations Inquiry Serial Info Tab Overview The Serial Information tab shows each serial number for the selected item and shows the unit price, unit cost, and item status for the serial number. Select to toggle from summary view to detail view Inquiry Menu 5-31

103 Serial Info Tab Detail View Inquiry Item Locations Inquiry Serial Info Tab Overview When the Detail View is selected on the Serial Information tab the unit price, unit cost, item status, lot number, transaction date, and comments are displayed for each serial number. Select to toggle from detail view to summary view Inquiry Menu
 to change cost and vendor information.")
104 Costs and Vendors Inquiry Inquiry Costs and Vendors Inquiry Tabs Costs Tab (page 5-34) Vendors Tab (page 5-45) Overview Use Costs and Vendors Inquiry to display an item's costs and the vendors that are set up for each item location. Use Item Locations on the Setup and Maintenance Menu (page 13-25) to change cost and vendor information. Inquiry Menu 5-33
105 Screen options 1. Item ID Select the item ID. The item description is displayed. 2. Location ID Select the location ID. The location description is displayed. 3. Unit The default unit of measure is displayed. You can select a different unit of measure and display its cost information. 4. Select any tab to display additional information. 5. Close the screen to return to the Main Menu. Costs Tab Inquiry Costs and Vendors Inquiry Costs Tab Overview (Picture on page 5-33) The Costs tab shows the date of purchase, quantity, unit cost, and extended cost of each purchase for the item. If the item is lotted, the lot number is displayed. If the item is serialized, the serial number, unit price, unit cost and status are displayed Inquiry Menu

106 Vendors Tab Inquiry Costs and Vendors Inquiry Vendors Tab Overview The Vendors tab shows information about each vendor from which you have purchased the item. Vendor information includes the vendor ID; vendor item ID; lead time; and last purchase date, quantity and unit cost. Inquiry Menu 5-35
 to change lot information. Screen options 1. Item ID Select the item ID. The item description is displayed. 2.")
107 Lot Numbers Inquiry Inquiry Lot Numbers Inquiry Additional Dialogs Lot Number Detail Dialog (page 5-37) Overview Use Lot Numbers Inquiry to display the costs and quantities of lots. Use Item Locations on the Setup and Maintenance Menu (page 13-25) to change lot information. Screen options 1. Item ID Select the item ID. The item description is displayed. 2. Location ID Select a location ID. The location description is displayed. 3. Unit The item type, item status and default unit of measure are displayed. 4. Include Select the lot status to view. Lot numbers, available quantities, on-order quantities (quantities entered for new purchase orders that have not been received), expiration dates, lot statuses, availability totals, and on-order totals for the item and location are displayed Inquiry Menu

108 5. Select the Detail button or close the screen to return to the Main Menu. Command buttons Detail Open the Lot Number Detail dialog box (shown below). Lot Number Detail Inquiry Lot Numbers Inquiry Detail button Overview The Lot Number Detail dialog box appears when you select the Detail button on the Lot Numbers Inquiry screen. All transactions that have affected the selected lot are displayed, showing the date of the activity, type of activity and quantity added to or used from the lot. When you are finished viewing the information, select Close to return to the Lot Numbers Inquiry screen. Inquiry Menu 5-37
 to add and change serial number information. Screen options 1. Item ID Select the item ID.")
109 Serial Numbers Inquiry Inquiry Serial Numbers Inquiry Additional Dialogs Serial Number Detail (page 5-39) Overview Use Serial Numbers Inquiry to display costs, prices, and transaction information for serialized items at specific locations. Use Item Locations in Setup and Maintenance (page 13-25) to add and change serial number information. Screen options 1. Item ID Select the item ID. The item description is displayed. 2. Location ID Select the location ID. The location description is displayed. 3. Serial numbers and the unit cost, unit price and status of the serial number are displayed. 4. Select the Detail button or close the screen to return to the Main Menu Inquiry Menu

110 Command buttons Detail Open the Serial Number Detail dialog box (below). Serial Number Detail Inquiry Serial Numbers Inquiry Detail Button Overview The Serial Number Detail dialog box appears when you select the Detail button on the Serial Numbers Inquiry screen. Use it to view all activity that has affected the selected serial number. If purchase information is available, the vendor ID, purchase order number and date, invoice number and date and unit cost are displayed. If sale information is available, the customer ID, order number and date, invoice number and date and unit price are displayed. Select Close to return to the Serial Numbers Inquiry screen. Inquiry Menu 5-39

111 Customer Price Inquiry Inquiry Customer Price Overview Use Customer Price Inquiry to look up customers and items to check prices and on-hand quantities for the customer. First, select the customer, item and location you want to see the price for. The display shows all the information used in calculating a price and the actual price for this customer/item (the Calculated Price). The on-hand quantity at the selected location is also displayed, as well as additional information showing how the system arrived at the Calculated Price. If a price is based on a calculation involving the cost of the item and the costing method used is FIFO or LIFO, the average cost is used instead of the actual LIFO/FIFO cost. You MUST have Accounts Receivable installed to use this selection. Use Item Locations in Setup and Maintenance to change price information Inquiry Menu
112 Screen options 1. Customer ID Select the customer for which you want to check prices. 2. Item ID Select the item ID for which you want to view the price. 3. Location ID Select the item's location. 4. Units The default unit of measure is displayed. Select a different unit of measure to display its quantity information. The price information is not affected. Inquiry Menu 5-41
113 NOTES: 5-42 Inquiry Menu
114 Chapter Six Transactions Menu Enter and post transactions and perform location transfers. Contents Inventory Transactions Overview Sale Tab Summary View Sale Tab Detail View Purchase Tab Summary View Purchase Tab Detail View Adjustment Tab Summary View Adjustment Tab Detail View Serial/Lot Number Entry Serial Number Creation Add Lot Number Add Project Information Location Transfers Summary View Detail View Serial/Lot Number Entry Transaction Journal Transfers Journal Post Transactions GL Adjustments Journal Post GL Adjustments Related Topics How to add, change and delete transactions (page 6-3) How to enter serialized item sales (page 6-3) How to enter lotted item sales (page 6-5) How to enter serialized item purchases (page 6-6) How to enter lotted item purchases (page 6-8) How to enter serialized item adjustments (page 6-9) How to enter lotted item adjustments (page 6-10) How inventory quantities are affected by transactions (page 6-11) Accounts affected by posting sale, purchase adjustment and transfer transactions (page 6-41) Understanding purchase price variances (page 6-45) Understanding COGS adjustments (page 6-45) Accounts affected by posting GL adjustments (page 6-48) Transactions Menu 6-1
115 Inventory Transactions Transactions Inventory Transactions Tabs Sale Tab Summary View (page 6-12) Sale Tab Detail View (page 6-14) Purchase Tab Summary View (page 6-16) Purchase Tab Detail View (page 6-18) Adjustment Tab Summary View (page 6-20) Adjustment Tab Detail View (page 6-22) Additional Windows Serial/Lot Number Entry (page 6-24) Serial Number Creation (page 6-26) Add Lot Number (page 6-28) Add Project Information (page 6-29) Overview If you use Inventory as a stand-alone system, use this selection to: enter sales when a new order is placed, an order is verified (shipped), a sale is invoiced, or items are returned enter purchases when a new order is placed, an order is verified (received), a purchase is invoiced or items are returned edit unposted purchase, sale, and adjustment transactions adjust quantities If Accounts Payable is interfaced with Inventory, inventory items are updated automatically as purchases are entered. If Accounts Receivable is interfaced with Inventory, inventory items are updated when you post sales. If you have these applications and you do not want corrections to affect Accounts Payable and Accounts Receivable, use Inventory Transactions to make corrections. Select the Sale, Purchase, or Adjustment tab to enter transaction information. When you select a tab, unposted transactions are displayed. Once you enter and save a transaction, you cannot change the type, item ID, location ID, and unit fields. 6-2 Transactions Menu
116 How to add/change/ delete transactions Add a transaction 1. Select a transaction type. 2. Select an item ID. The item description appears. 3. Select a location ID. The default unit of measure for the item at that location is displayed. 4. Enter the quantity purchased, sold, or adjusted. The unit cost and/or unit price is displayed. Change a Transaction 1. Select the transaction line to edit. 2. Edit the transaction quantity and cost. Delete a Transaction 1. Select the transaction line to delete. 2. Press the F3 function key or click on the toolbar. How to enter sales for serialized items New Order 1. Select the Sale tab. 2. Select New Order for the type of sale. 3. Enter the required information (item ID, location ID, unit of measure, and quantity). You are not prompted to enter serial numbers. Transactions Menu 6-3
117 Verify Order 1. Select the Sale tab. 2. Select Verify Order for the type of sale. 3. Enter the required information (item ID, location ID, unit of measure, and quantity). The Serial/Lot Number Entry screen (page 6-24) appears when you try to go to the next record or when you select Ser No Entry. 4. Select the serial number. Only serial numbers with a status of available can be sold from inventory. (Once you select a serial number, the status changes to in use and you cannot select it again.) The unit cost is displayed and cannot be changed. However, you can change the unit price (the base price). Invoice (Entering a transaction type of Invoice is equivalent to entering both a New Order Transaction and a Verify Order transaction.) 1. Select the Sale tab. 2. Select Invoice for the type of sale. 3. Enter the required information (item ID, location ID, unit of measure, and quantity). The Serial/Lot Number Entry screen (page 6-24) appears when you try to go to the next record or when you select Ser No Entry. 4. Select the serial number. Only serial numbers with a status of available can be sold from inventory. (Once you select a serial number, the status changes to in use and you cannot select it again.) The unit cost is displayed and cannot be changed. However, you can change the unit price (the base price). Miscellaneous Credit 1. Select the Sale tab. 2. Select Misc Credit for the type of sale. 3. Enter the required information (item ID, location ID, unit of measure, and quantity). The Serial/Lot Number Entry screen (page 6-24) appears when you try to go to the next record or when you select Ser No Entry. 6-4 Transactions Menu
118 4. Enter the serial number, or select a serial number with a status of sold to return to inventory. The unit cost and the unit price (the base price) are displayed and can be changed. How to enter sales for lotted items New Order 1. Select the Sale tab. 2. Select New Order for the type of sale. 3. Enter the required information (item ID, location ID, unit of measure, and quantity). 4. Select Lot No Entry to go to the Serial/Lot Number Entry screen, page If you try to go to the next record instead, the system asks whether you want to order lots. If you select Yes, the Serial/Lot Number Entry screen appears. If you select No, the new order is saved and you are returned to Inventory Transactions, page 6-2. Verify Order 1. Select the Sale tab. 2. Select Verify Order for the type of sale. 3. Enter the required information (item ID, location ID, unit of measure, and quantity). The Serial/Lot Number Entry screen (page 6-24) appears when you try to go to the next record or when you select Lot No Entry. 4. Enter the lot number. The unit cost from the costing method you are using is displayed and cannot be changed. If you select a lot number with sold status, the system warns you that the quantity will be negative and the cost (base, average, last, or standard) you selected in the Zero Quantity Sales Costing option on the Options tab (page 13-5) in Customization is displayed. Transactions Menu 6-5
119 Invoice (Entering a transaction type of Invoice is equivalent to entering both a New Order Transaction and a Verify Order transaction.) 1. Select the Sale tab. 2. Select Invoice for the type of sale. 3. Enter the required information (item ID, location ID, unit of measure, and quantity). The Serial/Lot Number Entry screen (page 6-24) appears when you try to go to the next record or when you select Lot No Entry. 4. Enter the lot number. The unit cost from the costing method you are using is displayed and cannot be changed. If you select a lot number with sold status, the system warns you that the quantity will be negative and the cost (base, average, last, or standard) selected in the Zero Quantity Sales Costing option on the Options tab (page 13-5) in Customization is displayed. Miscellaneous Credit 1. Select the Sale tab. 2. Select Misc Credit for the type of sale. 3. Enter the required information (item ID, location ID, unit of measure, and quantity). The Serial/Lot Number Entry screen (page 6-24) appears when you try to go to the next record or when you select Lot No Entry. 4. Enter the lot number. The unit cost from the costing method you are using is displayed and cannot be changed. How to enter serialized item purchases New Order 1. Select the Purchase tab. 2. Select New Order for the type of purchase. 3. Enter the required information (item ID, location ID, unit of measure, and quantity). You are not prompted to enter serial numbers. 6-6 Transactions Menu
120 Goods Received 1. Select the Purchase tab. 2. Select Goods Rcvd for the type of purchase. 3. Enter the required information (item ID, location ID, unit of measure, and quantity). The Serial/Lot Number Entry screen (page 6-24) appears when you try to go to the next record or when you select Ser No Entry. 4. Enter the serial number to add to inventory. The last cost for the item is displayed as a default Unit Cost, but can be changed. If you need to add more than one serial number and the numbers are sequential, select the Auto Gen button. Invoice (Entering a transaction type of Invoice is equivalent to entering both a New Order Transaction and a Goods Received transaction.) 1. Select the Purchase tab. 2. Select Invoice for the type of purchase. 3. Enter the required information (item ID, location ID, unit of measure, and quantity). The Serial/Lot Number Entry screen (page 6-24) is displayed when you try to go to the next record or when you select Ser No Entry. 4. Enter the serial number to add to inventory. The last cost for the item is supplied as a default Unit Cost, but can be changed. If you need to add more than one serial number and the numbers are sequential, select the Auto Gen button. Miscellaneous Debit (Used to return a purchased item to a supplier.) 1. Select the Purchase tab. 2. Select Misc Debit for the type of purchase. 3. Enter the required information (item ID, location ID, unit of measure, and quantity). The Serial/Lot Number Entry screen (page 6-24) displayed when you try to go to the next record or when you select Ser No Entry. Transactions Menu 6-7
121 4. Enter the serial number to remove from inventory. The unit cost is displayed and can be changed. How to enter lotted item purchases New Order 1. Select the Purchase tab. 2. Select New Order for the type of purchase. 3. Enter the required information (item ID, location ID, unit of measure, and quantity). 4. Select Lot No Entry to go to the Serial/Lot Number Entry screen, page If you try to go to the next record instead, the system asks whether you want to order lots. If you select Yes, the Serial/Lot Number Entry screen appears. If you select No, the new order is saved and you are returned to Inventory Transactions, page 6-2. Goods Received 1. Select the Purchase tab. 2. Select Goods Rcvd for the type of purchase. 3. Enter the required information (item ID, location ID, unit of measure, and quantity). The Serial/Lot Number Entry screen (page 6-24) appears when you try to go to the next record or when you select Lot No Entry. 4. Enter the lot number. The last cost defaults in the Unit Cost field and can be changed. Invoice (Entering a transaction type of Invoice is equivalent to entering both a New Order Transaction and a Goods Received transaction.) 1. Select the Purchase tab. 2. Select Invoice for the type of purchase. 6-8 Transactions Menu
122 3. Enter the required information (item ID, location ID, unit of measure, and quantity). The Serial/Lot Number Entry screen (page 6-24) appears when you try to go to the next record or when you select Lot No Entry. 4. Enter the lot number. The last cost defaults in the Unit Cost field and can be changed. Miscellaneous Debit (Used to return a purchased item to a supplier.) 1. Select the Purchase tab. 2. Select Misc Debit for the type of purchase. 3. Enter the required information (item ID, location ID, unit of measure, and quantity). The Serial/Lot Number Entry screen (page 6-24) appears when you try to go to the next record or when you select Lot No Entry. 4. Enter the lot number. The last cost defaults in the Unit Cost field and can be changed. How to enter serialized item adjustments Increase Quantity 1. Select the Adjustment tab. 2. Select Increase for the type of adjustment. 3. Enter the required information (item ID, location ID, unit of measure, and adjustment quantity) and select Ser No Entry. The Serial/Lot Number Entry screen (page 6-24) appears. 4. You can select existing serial numbers that have a sold or lost status or your can enter a new serial number. Transactions Menu 6-9
123 Decrease Quantity 1. Select the Adjustment tab. 2. Select Decrease for the type of adjustment. 3. Enter the required information (item ID, location ID, unit of measure, and adjustment quantity) and select Ser No Entry. The Serial/Lot Number Entry screen (page 6-24) appears. 4. Select serial numbers with available status to remove. The unit cost is displayed and cannot be changed. How to enter lotted item adjustments To increase the quantity of lotted items, follow these steps: 1. Select the Adjustment tab. 2. Select Increase for the type of adjustment. 3. Enter the required information (item ID, location ID, unit of measure, and adjustment quantity) and select Lot No Entry. The Serial/Lot Number Entry screen (page 6-24) appears. 4. If the lotted item is in stock, select the lot number; the last cost of the item is displayed in the Unit Cost field. If the item is not in stock, enter a new lot number and the unit cost. To decrease the quantity of lotted items, follow these steps: 1. Select the Adjustment tab. 2. Select Decrease for the type of adjustment. 3. Enter the required information (item ID, location ID, unit of measure, and adjustment quantity) and select Lot No Entry. The Serial/Lot Number Entry screen (page 6-24) appears. 4. Select the lot number in stock. The unit cost is displayed. Change it, if necessary. If different costs exist for the lot number, the unit cost from the costing method you are using is displayed and can be changed Transactions Menu
124 How inventory quantities are affected by transactions The following chart illustrates how each type of inventory transaction affects inventory quantities: Quantity Quantity Quantity Quantity Quantity Transactions/Status Committed in Use on Hand on Order Available Adjustment: Increase Increase Increase Adjustment: Decrease Decrease Decrease Sale: New Order Increase Decrease Sale: Verify Order Decrease Increase Sale: Invoice (before post) Increase Decrease Sale: Post Invoice Decrease Decrease Sale: Misc. Credit Decrease Increase Purchase: New Order Increase Purchase: Goods Received Increase Decrease Increase Purchase: Invoice Increase Increase Purchase: Misc. Debit Decrease Decrease Transactions Menu 6-11
125 Sale Tab Summary View Transactions Inventory Transactions Sale Tab Overview Sales transactions update inventory when you post and are used to process customer sales. Use this tab to enter sales transactions if you do not have the Accounts Receivable application. Select to toggle from summary view to detail view. Screen options 1. Type Select the type of sale: New Order: A customer places an order to be invoiced and shipped at a later date. A new order increases the quantity committed and decreases the quantity available. When transactions are posted, no entries are made to general ledger accounts for new orders. Verify Order: Record the shipment of items for sales orders. The quantity committed decreases and the quantity in-use increases. Invoice: Record the sale of items that are invoiced and shipped at the same time. An invoice increases the quantity in use and decreases the quantity available Transactions Menu
126 Miscellaneous Credit: Record the return of items from a customer. The quantity in use decreases and the quantity available increases. New Order and Verify Order are equivalent to an Invoice. Therefore, enter either New Order/Verify Order (a two-part entry entered over a period of time) or Invoice. 2. Item ID / Description Select an item ID. The item description is displayed. 3. Location ID Select a location ID. The location is displayed. 4. Unit Select the unit of measure. 5. Qty Enter the quantity sold. 6. Unit Price / Ext Price The unit price of the item is displayed. You can change it, if desired. If the transaction is a miscellaneous credit, the unit cost of the item is displayed. The extended price of the item is displayed. If the transaction is a miscellaneous credit, the extended cost of the item is displayed. Command buttons Lot No Entry Display the Serial/Lot Number Entry screen (page 6-24) when a lotted item is selected. Ser No Entry Lot/Ser No Entry Project Display the Serial/Lot Number Entry screen when a serialized item is selected. Display the Serial/Lot Number Entry screen when an item that is both lotted and serialized is selected. Enter project information on the Project Information screen. Transactions Menu 6-13

127 Sale Tab Detail View Transactions Inventory Transactions Sale Tab Overview Select to toggle from detail view to summary view. Screen options 1. Type See page 6-12 for a complete explanation of the sale types. 2. Date Enter the date of the sales transaction or use the default workstation date. 3. GL Period Enter the general ledger period during which the sales transaction took place, or use the default period corresponding to the workstation date. 4. Item ID Select an item ID. The item description is displayed. 5. Location ID Select a location ID. The location is displayed Transactions Menu
128 6. GL Acct Select the general ledger account number to post the sales transaction to. 7. Quantity Enter the quantity sold. 8. Unit Cost The unit cost from the costing method you are using (FIFO, LIFO, average, or standard) is displayed, if you checked the Show Cost on Sales Transaction Entry box on the Options Tab (page 13-5) in Customization. You can change the unit cost if the sales transaction is a miscellaneous credit. 9. Ext Cost If you checked the Show Cost On Sales Transaction Entry box in Customization, the extended cost is displayed. 10. Unit Select the unit of measure. 11. Unit Price The unit price of the item is shown. You can change it, if desired. 12. Ext Price The extended price of the item is displayed. 13. Comment Enter comments about the sales transaction, up to 35 characters. Transactions Menu 6-15

129 Purchase Tab Summary View Transactions Inventory Transactions Purchase Tab Overview Purchase transactions update inventory quantities immediately and are used to process purchases you make from vendors. Use this tab to enter purchase transactions if you do not have the Accounts Payable application. Select to toggle from summary view to detail view. Screen options 1. Type Select the type of purchase: New Order: Place orders with vendors to be invoiced and shipped at a later date. A new order increases the quantity on order and does not affect the quantity available. When transactions are posted, no entries are made to general ledger accounts for new orders. Goods Received: Update the quantity and cost of the items you received from the vendor. The quantity on hand increases, the quantity on order decreases, and the quantity available increases. Invoice: Record the purchase of inventory items. An invoice increases the quantity on hand and the quantity available Transactions Menu
130 Miscellaneous Debit: Record the return of items to a vendor. A miscellaneous debit decreases the quantity on hand and the quantity available. New Order and Goods Received are equivalent to an Invoice. Therefore, enter either New Order/Goods Received (a two-part entry entered over a period of time) or Invoice. 2. Item ID / Description Select an item ID. The item description is displayed. 3. Location ID Select a location ID. The location is displayed. 4. Unit Select the unit of measure. 5. Qty Enter the quantity purchased. 6. Unit Cost The last cost of the item is displayed. Change it, if desired. 7. Ext Cost The item's extended cost is displayed. Command buttons Lot No Entry Display the Serial/Lot Number Entry screen (page 6-24) when a lotted item is selected. Ser No Entry Lot/Ser No Entry Project Display the Serial/Lot Number Entry screen when a serialized item is selected. Display the Serial/Lot Number Entry screen when an item that uses both lot and serial numbers is selected. Enter project information on the Project Information screen. Transactions Menu 6-17
131 Purchase Tab Detail View Transactions Inventory Transactions Purchase Tab Overview Select to toggle from detail view to summary view. Screen options 1. Type See page 6-16 for a detailed explanation of purchase options. 2. Date Enter the date of the purchase transaction, or use the default workstation date. 3. GL Period Enter the general ledger period during which the purchase transaction occurred, or use the default period corresponding to the workstation date. 4. Item ID Select an item ID. The item description is displayed. 5. Location ID Select a location ID. The location is displayed Transactions Menu
132 6. GL Acct Select the general ledger account number to which to post the purchase transaction. 7. Quantity Enter the quantity purchased (or returned). 8. Unit Cost The item's last cost is displayed. You can change it, if desired. 9. Ext Cost The extended cost of the item is displayed. 10. Units Select the unit of measure. 11. Std Unit Cost The standard unit cost is displayed. Change it, if desired. 12. Std Ext Cost The standard extended cost is displayed. 13. Comment Enter comments about the purchase transaction, up to 35 characters. Transactions Menu 6-19

133 Adjustment Tab Summary View Transactions Inventory Transactions Adjustment Tab Overview Adjustments affect inventory immediately and are used to correct differences in quantities and costs that do not result from the purchase or sale of an item, such as a decrease in inventory because of damaged items. You can also adjust quantities and costs of transactions from other applications. You cannot make adjustments to service items. Select to toggle from summary view to detail view. Screen options 1. Type Select the type of adjustment. Increase: The on-hand and available quantities increase. Decrease: The on-hand and available quantities decrease. 2. Item ID / Description Select an item ID. The item description is displayed Transactions Menu
134 3. Location ID Select a location ID. The location is displayed. 4. Unit Select the unit of measure. 5. Adj Qty Enter the adjustment quantity. 6. Unit Cost If you enter an adjustment to increase the quantity of an item, the last cost of the item is displayed. You can change it, if necessary. If you enter an adjustment to decrease the quantity of an item, the cost from the costing method you are using (FIFO, LIFO, average, or standard) is displayed and can also be changed. 7. Ext Cost The extended cost is displayed. Command buttons Lot No Entry Display the Serial/Lot Number Entry screen (page 6-24) when a lotted item is selected. Ser No Entry Lot/Ser No Entry Display the Serial/Lot Number Entry screen when a serialized item is selected. Display the Serial/Lot Number Entry screen when an item that uses both lot and serial numbers is selected. Transactions Menu 6-21

135 Adjustment Tab Detail View Transactions Inventory Transactions Adjustment Tab Overview Select to toggle from detail view to summary view. Screen options 1. Type Select the type of adjustment. Increase: The on-hand and available quantities increase. Decrease: The on-hand and available quantities decrease. 2. Date Enter the date of the adjustment, or use the default workstation date. 3. GL Period Enter the general ledger period of the adjustment or use the default period corresponding to the workstation date. 4. Item ID Select an item ID. The item description is displayed. 5. Location ID Select a location ID. The location is displayed Transactions Menu
136 6. Adj Acct Enter the general ledger account number affected by the adjustment. If Inventory is interfaced with General Ledger and the adjustment is an increase, the Accounts Receivable General Ledger offset account number selected on the Defaults tab in Customization is displayed; if the adjustment is a decrease, the Accounts Payable General Ledger offset account number is displayed. 7. Units Select the unit of measure. 8. Adj Qty Enter the quantity adjustment. 9. Unit Cost If you enter an adjustment to increase an item's quantity, the last cost of the item is displayed. You can change it, if desired. If you enter an adjustment to decrease the quantity of an item, the cost from the costing method you are using (FIFO, LIFO, average, or standard) is displayed and can be changed, as well. 10. Ext Cost The item's extended cost is displayed. 11. Comment Enter comments about the adjustment, up to 35 characters. Transactions Menu 6-23

137 Serial/Lot Number Entry Screens Transactions Inventory Transactions Any Tab Lot/Ser No Entry Overview The Serial/Lot Number Entry screen appears when you enter a new record on the Inventory Transactions screen for an item with serial numbers, lot numbers, or an item with both serial and lot numbers; or, when you select the Lot No Entry, Ser No Entry, or Lot/Ser No Entry command buttons. If you do not enter information on this screen, the transaction line is deleted. The Quantity field on the Inventory Transaction screen (any tab) is adjusted if you enter a different quantity of lotted items or a different number of serialized item records on this screen. Press F3 or click on the to remove serial and lot number records. Screen options 1. Loc ID The location ID is displayed. 2. Item ID The item ID is displayed. 3. Unit The unit of measure is displayed Transactions Menu
138 4. Total Qty The total quantity that was entered on the transaction is displayed. 5. Qty Remaining The difference between the Total Qty and the quantity entered on the Lot/Ser No Entry screen is displayed. 6. Serial No Select a serial number with available status to adjust or sell, or enter a new serial number to purchase. This field is available only if you are working with a serialized item. 7. Lot No Select a lot number if you are working with a lotted item. If you enter a new lot number for a purchase or an adjustment transaction, the Add Lot Number screen is displayed. This field is available only if you are working with a lotted item. 8. Comment Enter comments about the transaction, up to 35 characters. 9. Qty Order The quantity ordered is displayed, if applicable. 10. Qty Filled The quantity filled is displayed. 11. Qty Bkord The quantity backordered is displayed, if applicable. 12. Unit Cost The unit cost of the item is displayed. 13. Ext Cost The extended cost of the item is displayed. 14. Unit Price - The unit price is displayed. 15. When you are finished, select Close to save your changes and return to Inventory Transactions. Command buttons Auto Gen OK Display the Serial Number Creation screen to have the system automatically generate serial numbers. This button is available only when you are entering purchase transactions for serialized items. Save your changes and return to the Inventory Transactions screen. Transactions Menu 6-25


139 Serial Number Creation Screen Overview Select Auto Gen on the Serial/Lot Number Entry screen and select Simple or By Example in the dialog box that appears. The Serial Number Creation screen appears. The starting serial number you entered on the Serial/Lot Number Entry screen is displayed in the First Serial Number field. Screen options 1. Enter the number of serial numbers to generate. 2. If you selected Simple, the next serial number is displayed. If you selected By Example, enter a serial number in the Next Serial Number field. 3. If you selected Simple, the serial numbers are displayed. If you selected By Example, select Evaluate to have the system create and display serial numbers based on the first and next serial numbers. You can edit the displayed serial numbers Transactions Menu
140 The system ignores separator characters, such as hyphens, when serial numbers are generated. For example, generate five serial numbers beginning with 1-5 and 1-6. The system will generate 1-7, 1-8, 1-9, 2-0, and 2-1. The system reads 1-5 as 15. The system is also limited by the number of digits. For example, generate five serial numbers beginning with 6. The system will display an out of range message and generate the numbers 7, 8, and 9. The number 10 cannot be generated because the beginning serial number is one digit. 4. Select Generate to generate the displayed serial numbers. You are returned to the Serial/Lot Number Entry screen. The generated serial numbers are displayed in the Serial No field. Command buttons Evaluate Generate Cancel Create and display serial numbers. Generate the serial numbers created by the system. You are returned to the Serial/Lot Number Entry screen. The generated serial numbers are displayed in the Serial No field. Return to the Serial/Lot Number Entry screen. Transactions Menu 6-27

141 Add Lot Number Screen Overview This screen appears when you enter a new lot number on the Serial/Lot Number Entry screen for a purchase or an adjustment increase. Use this screen to add information about the lot. Screen options 1. New Lot The new lot code is displayed. 2. Initial Date Enter the date the lotted item was purchased, or accept the default workstation date. 3. Expiration Date Enter the date the lot will expire. 4. Comment Enter comments about the lot (up to 35 characters). 5. Select OK to add the lot number to inventory or Cancel to ignore your changes and return to the Serial/Lot Number Entry screen Transactions Menu

142 Add Project Information Transactions Inventory Transactions Any Tab Project... button Overview The Project Information screen appears when you select the Project command button. Use it to assign project, category and class codes to the transaction. The information can then be brought into Project Cost, if you are interfaced with the Project Cost application. Screen options 1. Project Select the project code you want this purchase or sales transaction attached to. If you are not using the Project Cost application, you can enter up to 10 characters to identify a project. If you decide not to attach the purchase or sales transaction to a project, click on the Clear button (Alt C) to clear the field. 2. Category Enter or select a category. 3. Class Enter or select the class. 4. When you are finished, click on the OK button to return to the Purchase or Sales tab, Cancel to exit with saving your changes, or Clear to delete the project information. Transactions Menu 6-29
143 Location Transfers Transactions Location Transfers Additional Windows Serial/Lot Number Entry (page 6-35) Overview Use this selection to move items from one location to another or to edit transfers. Before you can transfer an item, you must set up the item in the destination location. Select to toggle from summary view to detail view, and select to toggle from detail view to summary view. When you enter a transfer, the system updates the inventory immediately. The quantity on hand and the quantity available at the source location is decreased by the number of items sent to the destination location. The quantity on hand and the quantity available at the destination location is increased by the number of items sent from the source location. Once you enter and save a transfer, you cannot change the From Location, To Location, Item ID and Unit fields Transactions Menu

144 Screen options Summary View 1. From Location Select the location from which to transfer the item. 2. From Item ID Select the item ID at the source location. If you are transferring a serialized item, the serial number must exist. You can add the transfer cost. If you are transferring a lotted item, you can add destination lots and transfer costs. Do not use aliases; the system does not recognize aliases entered in this field. 3. To Location Select the location to which the item is being transferred. 4. To Item ID Select the item ID at the destination location. Items must be the same item type (serialized, nonserialized, lotted, or service) to transfer to another location. Transactions Menu 6-31
.")
145 Do not use aliases; the system does not recognize aliases entered in this field. 5. Unit Select the unit of measure. 6. Quantity Enter the quantity to transfer. 7. Transfer Cost Enter the total cost to transfer the items (usually a shipping or handling charge). When location transfers are posted, the transfer cost is posted to the general ledger account specified for transfer costs by the GL account code that was assigned to the source item location. Transfer costs are added to the cost of the items at the transfer to location and affect the average cost of those items. 8. Click on (or press F7) to return to the Main Menu. Screen options Detail View 6-32 Transactions Menu
146 Screen options Detail View 1. From Location ID Select the location from which to transfer the item. 2. From Item ID Select the item ID at the source location. If you are transferring a serialized item, the serial number must exist. You can add the transfer cost. If you are transferring a lotted item, you can add destination lots and transfer costs. Do not use aliases; the system does not recognize aliases entered in this field. 3. From Unit The item's default unit of measure at the source location is displayed. 4. From Qty Enter the quantity to transfer. 5. From Unit Cost The unit cost of the item from your costing method (FIFO, LIFO, average, or standard) is displayed and cannot be changed. The unit cost is the total cost divided by the total quantity transferred. (The total cost is the extended cost plus the transfer costs.) 6. From Ext Cost The extended cost of the item is displayed. 7. To Location ID Select the location where the item is to be transferred. 8. To Item ID Select the item ID at the destination location. Items must be the same item type (serialized, nonserialized, lotted, or service) to transfer to another location. Do not use aliases; the system does not recognize aliases entered in this field. 9. To Qty Before The number of items at the destination location (before the transfer) is shown. Transactions Menu 6-33
147 10. To Qty After The number of items at the destination location (after the transfer) is displayed. 11. Transfer Cost Enter the total cost to transfer the items (usually a shipping or handling charge). When location transfers are posted, the transfer cost is posted to the general ledger account specified for transfer costs by the GL account code that was assigned to the source item location. Transfer costs are added to the cost of the items at the transfer to location and affect the average cost of those items. 12. Date Enter the date of the transfer, or use the default workstation date. 13. GL Period Enter the general ledger period during which the transfer took place, or use the default period corresponding to the workstation date. 14. Comment Enter comments about the transfer, up to 35 characters. 15. Click on (or press F7) to return to the Main Menu. Command buttons Lot No Entry Display the Serial/Lot Number Entry screen (page 6-35) when a lotted item is selected. Ser No Entry Lot/Ser No Entry Display the Serial/Lot Number Entry screen when a serialized item is selected. Display the Serial/Lot Number Entry screen when an item that uses both lot and serial numbers is selected Transactions Menu

148 Serial/Lot Number Entry Screen Transactions Location Transfers Serial No/Lot No buttons Overview The Serial/Lot Number Entry screen appears when you enter a transfer record for a serialized item, lotted item, or serialized, lotted item, or when you select Lot No Entry, Ser No Entry, or Lot/Ser No Entry. If you do not enter information on this screen, the transaction line is deleted. Screen options 1. Loc ID From The location from which the item is being transferred is displayed. 2. Loc ID To The location to which the item is being transferred is being displayed. 3. Item ID From The item being transferred from is displayed. Transactions Menu 6-35
149 4. Item ID To The item being transferred to is displayed. 5. Units The unit of measure is displayed. 6. Total Qty The total quantity is displayed. 7. Qty Remaining The quantity remaining is displayed. 8. Serial No Select a serial number. This field is available only if you are working with a serialized item. 9. Lot Num From Select or enter a lot number to transfer from. This field is available only if you are working with a lotted item. 10. Lot Num To Select or enter a lot number to transfer to. This field is available only if you are working with a lotted item. 11. Quantity Enter the lot quantity. 12. Unit Cost Enter the unit cost. 13. Ext Cost The extended cost is displayed. 14. Transfer Cost Enter the transfer cost. 15. Comment Enter comments about the transfer, up to 35 characters 16. Close the screen when you are finished and return to the Location Transfers screen, page Transactions Menu

150 Transaction Journal Transactions Transaction Journal Overview Use the Transaction Journal to print transactions entered in Inventory Transactions, (page 6-37). Print the Transaction Journal after entering all your adjustments, sales, and purchases and before you post transactions. Use the journal to verify the quantity, costs, and prices for transactions and as an audit trail of inventory activity. Screen options 1. Location ID From / To Select the range of locations to include in the journal. 2. Item ID From / To Select the range of items to include in the journal. 3. Sort By Select the sort method. You can sort by Item ID/Location ID, Location ID/Item ID, Transaction Type or Transaction Number. 4. Print Select whether you want to include adjustments, sales, purchases and/or assemblies in the Transaction Journal. Transactions Menu 6-37
151 5. Print Transaction Comments Check the box if you want to print transaction comments. 6. Select one of the report command buttons, explained on page 1-7. Transaction Journal 6-38 Transactions Menu
152 Transfers Journal Transactions Transfers Journal Overview The Transfers Journal is a record of the transfers entered in Location Transfers. Print the Transfers Journal after you have entered all the location transfers and before you post transactions. Use the journal to verify the quantity of each item transferred, the transfer cost, the unit and extended cost, and as an audit trail of inventory activity. Screen options 1. Source Location ID From / To Select the range of source locations (locations on the from side of the transfer) to include in the journal. 2. Source Item ID From / To Select the range of source items (items on the from side of the transfer) to include in the journal. 3. Sort By Select whether to sort by Item ID/Location ID, Location ID/Item ID or Transaction Number. Transactions Menu 6-39

153 4. Print Transfer Comments Check the box if you want to print transfer comments. 5. Select one of the report command buttons, explained on page 1-7. Transfer Journal 6-40 Transactions Menu
154 Post Transactions Transactions Post Transactions Overview Use Post Transactions to post adjustments, sales, purchases, and transfers. Posting affects the following information: The general ledger accounts are updated when you post transactions for adjustments, purchases, and location transfers. The in-use and available quantities, general ledger accounts, and sales history are updated when you post sales transactions. If Inventory is interfaced with General Ledger, debit and credit entries are created in the General Ledger Transaction Journal. If you post detail (lineitem) information, entries are made for each line item. If you post summary (totals) information, one entry is made for each account. After posting is complete, you can print a Post Transactions Log. If Inventory is not interfaced with General Ledger, use the Post Transactions Log to manually adjust the accounts affected by posting. Accounts affected by posting When you post transactions, entries are made to the following accounts: Sale Transactions 1. Decrease in quantity and value Price: debit COGS (cost of goods sold), credit Inventory Cost: debit Adjustment, credit Sales 2. Increase in quantity and value (miscellaneous credit) Price: debit Inventory, credit COGS Cost: debit Sales, credit Adjustment Transactions Menu 6-41
155 The inventory, COGS, and sales accounts are determined by the item's account code. The adjustment account is the default Accounts Receivable GL Offset account specified on the Defaults tab in Customization. Purchase Transactions: 1. Increase in quantity and value debit Inventory, credit Adjustment 2. Decrease in quantity and value (miscellaneous debit) debit Adjustment, credit Inventory The inventory account is determined by the item's account code. The adjustment account is the default Accounts Payable GL Offset account specified on the Defaults tab in Customization. Adjustment Transactions 1. Increase in quantity and value debit Inventory, credit Adjustment 2. Decrease in quantity and value debit Adjustment, credit Inventory The inventory account is determined by the item's account code. The adjustment account is the general ledger account specified in the transaction. Transfer Transactions Decrease from source, increase in destination Item Cost: debit Destination Inventory, credit Source Inventory Transfer Cost: debit Source Cost, credit Destination Cost The inventory and cost accounts are determined by the corresponding item's account code Transactions Menu

156 Before you post If you have a multi-user system, make sure no one else is using Inventory. Print the Transaction Journal (page 6-37) and the Transfers Journal (page 6-39). Screen options 1. Do the following After you print the Transaction Journal and the Transfers Journal, check the box. 2. Post Select whether to post transactions, transfers or both. 3. Post to Current Fiscal Year (xxxx) / Post to Last Fiscal Year (xxxx) Choose to post to the current or last fiscal year. 4. Select OK to begin processing. The Post Transactions Log dialog box is displayed. Select one of the report command buttons, explained on page 1-7. Transactions Menu 6-43
157 4/8/99 Mid County Supply Page 2 / 3 10:58 AM Post Transactions Posted to Fiscal Year Transaction Item ID Location ID Type GL Account Debit Credit B WHSE2 Build Adj B WHSE2 Build , B WHSE2 Build Adj B WHSE2 Build Adj B WHSE2 Build Adj B WHSE2 Build Adj B WHSE2 Build Adj B WHSE2 Build Adj B WHSE2 Build Adj B WHSE2 Build Adj B WHSE2 Build Adj B WHSE2 Build Adj , B MCSH AP Invoice P MCSH Transfer From P MCSH Adj. Incr M MCSH AP Invoice B MCSH Adj. Decr A MCSH Adj. Decr B MCSH Misc. Debit B MCSH AP Invoice B WHSE2 Build Adj B MCSH AP Invoice B WHSE2 Build Adj B WHSE2 Build Adj B WHSE2 Build , B WHSE2 Build Adj B WHSE2 Build Adj P WHSE1 Transfer To B WHSE2 Build Adj B MCSH AR Invoice B WHSE2 Build , B MCSH AR Invoice D GX MCSH Adj. Incr B MCSH AP Invoice B MCSH AP Invoice A MCSH Adj. Decr Post Transaction Journal 6-44 Transactions Menu
158 GL Adjustments Journal Transactions GL Adjustments Journal Overview Print the General Ledger Adjustments Journal before you post the General Ledger adjustments to verify that the purchase price variances (PPVs) and the cost-of-goods-sold (COGS) adjustments are correct. If Inventory is interfaced with Accounts Payable, the COGS adjustments from Accounts Payable are also shown in the journal. Purchase price variances (PPV) A purchase price variance is created when you are using the standard costing method and there is a difference between the standard cost and the actual price paid for the item. For example, if the standard cost for an item is $50 and you purchase the item for $60, the purchase price variance is $10. When you post transactions, entries are made to the following accounts: If the standard cost is less than purchase price, debit PPV, credit Inventory Adjustment If the standard cost is greater than purchase price, credit PPV, debit Inventory Adjustment COGS adjustments A COGS (cost of goods sold) adjustment is created in the following situations: The physical count for an item varies from the frozen quantity. A quantity adjustment is entered in Inventory Transactions. Negative quantities are sold (the on-hand quantity is below zero). The system uses the zero quantity sales costing method you selected on the Options tab in Customization to calculate the cost of the item. The next time the item is purchased, a COGS adjustment is made if the cost is different from what was used in the sale. Transactions Menu 6-45
159 When you post COGS adjustment transactions, entries are made to the following accounts: If the adjustment increases inventory value, debit COGS, credit Inventory Adjustment If the adjustment decreases inventory value, credit COGS, debit Inventory Adjustment Screen options 1. Item ID From / To Select the range of items to include in the journal. 2. Location ID From / To Select the range of locations to include in the journal. 3. Sort By Select whether to sort by Item/Location, GL Period/Year or Sequence Number. 4. Select one of the report command buttons, explained on page Transactions Menu

160 GL Adjustments Journal Transactions Menu 6-47
161 Post General Ledger Adjustments Transactions Post GL Adjustments Overview Use this selection to post COGS adjustments and purchase price variances. Both COGS adjustments and purchase price variances in Inventory are updated immediately. A COGS adjustment in Accounts Payable is updated when transactions are processed. A COGS adjustment in Accounts Receivable is updated when transactions are posted. If Inventory is interfaced with General Ledger, debit and credit entries are created in the General Ledger Transaction Journal. If you post detail (line-item) information, entries are made for each line item. If you post summary (totals) information, one entry is made for each account. After posting is complete, you can print a Post General Ledger Adjustments Log. If Inventory is not interfaced with General Ledger, use the Post General Ledger Adjustments Log to manually adjust the accounts affected. Accounts affected by posting When you post General Ledger adjustments, entries are made to these accounts: COGS Post: Increase value (debit COGS, credit Inventory) Purchase Price Variance: Standard cost higher than average cost (debit Inventory, credit PPV) Before you post If you have a multi-user system, make sure no one else is using Inventory. Print the GL Adjustments Journal (page 6-45) Transactions Menu
 / Post to Last Fiscal Year (xxxx) Choose to post to the current or last fiscal year. 3. Select OK to begin processing.")
162 Screen options 1. Do the following Check the box after you print the GL Adjustments Journal. 2. Post to Current Fiscal Year (xxxx) / Post to Last Fiscal Year (xxxx) Choose to post to the current or last fiscal year. 3. Select OK to begin processing. The Post Transactions Log dialog box is displayed. Select one of the report command buttons, explained on page /8/99 Mid County Supply Page 1 / 1 11:32 AM GL Adjustments Post Log Posted To Fiscal Year 1997 Item ID Location ID Trans Date Period Year Seq No COGS/PPV Acct Debit Credit Description Adjustment Type Inv Adj Acct A MCSH 4/8/ Aluminum Snow Shovel Purchase Price Variance Period 4 Total Grand Total *** End of Report *** Post General Ledger Adjustments Transactions Menu 6-49
163 NOTES: 6-50 Transactions Menu
164 Chapter Seven Material Requisitions Enter and post material requisitions (and returns) and print material requisitions, reports, and journals. Contents Enter Material Requisitions Header Tab Detail Tab Summary View Detail Tab Detail View Serial/Lot Number Entry Online Material Requisition Print Material Requisitions Material Requisitions Journal Backorder Allocation Report Post Material Requisitions Topics Covered How to add or change a material requisition (page 7-2) How to delete a material requisition (page 7-3) Material Requisitions 7-1
165 Enter Material Requisitions Material Requisitions Enter Material Requisitions Tabs / Additional Dialogs Header Tab (page 7-5) Detail Tab Summary View (page 7-6) Detail Tab Detail View (page 7-8) Serial/Lot Number Entry (page 7-10) Online Material Requisition (page 7-12) Overview Use Enter Material Requisitions to enter or change existing material requisitions. How to Add a Material Requisition 1. Select the New Record toolbar button (or press Ctrl A). A blank record appears. 2. Select the location ID. (The Transaction No. field is skipped. A transaction number is generated automatically.) Your selection becomes the default for the Detail tab. 3. Select the requisition type: material requisition or material req. return. 4. Enter the requisition number. The system generates a transaction number. 5. Select the Header and Detail tabs to enter requisition information. Change a Material Requisition 1. Select the transaction number to edit. 2. Select Update. 3. Edit the information. 7-2 Material Requisitions

166 Delete a Material Requisition 1. Make sure the material requisition has been filled. 2. Select the transaction number to delete. 3. Press F3 or click on the toolbar icon. Screen options 1. Transaction No When changing or deleting requisitions, select a transaction number. Skip this field if you are adding a new requisition. The system will automatically generate a transaction number. 2. Location ID Select the location ID. Your selection becomes the default for the Detail tab. 3. Requisition Type Select whether this is a Material Requisition or Material Requisition Return. 4. Requisition No Enter the requisition number. The system generates a transaction number. 5. Requested By Enter the name of the person requesting the items. 6. Select the Header and Detail tabs to enter requisition information. The total requisition amount is displayed. Material Requisitions 7-3
167 7. Press F7 or click on to return to the Main Menu. Command buttons Update Online Next Edit the current transaction. Print the currently selected material requisition/requisition return. Display the next transaction. 7-4 Material Requisitions
168 Header Tab Material Requisitions Enter Material Requisitions Header Tab Overview Specify the date the requisition was placed, the date the item is needed, the general ledger period, the date the item is shipped, where the item is shipped, and the shipping method. You must click on the Update button to make changes to existing material requisitions. Screen options (Picture on page 7-3) 1. Date Placed Enter the date the requisition is placed, or use the default workstation date. 2. Date Needed Enter the date the item is needed, or use the default workstation date. 3. Notes Enter comments. They are printed on the material requisition. 4. Date Shipped Enter the date the item is shipped, or use the default workstation date. 5. GL Period Enter the general ledger period or use the default period corresponding to the Date Shipped field. 6. Ship-To ID Select the ship-to ID (set up in Ship-To on the Setup and Maintenance Menu, page 13-64). The name and address of the person receiving the shipment appears. 7. Ship Method Enter the shipping method, up to 20 characters. For example, Best Way or UPS-Red. 8. When you are finished, select the Detail tab (page 7-6). Material Requisitions 7-5

169 Detail Tab Summary View Material Requisitions Enter Material Requisitions Detail Tab Overview Use the Detail section of the requisition to specify what items are needed. Select to toggle from summary view to detail view. Screen options 1. Item ID Select the ID of the item being requisitioned. 2. Description The item description is displayed. 3. Location ID The default location ID is displayed. If you select a different location ID, the Item ID field shows only items with active status that are set up for the location. 4. Qty Requested Enter the number of units requested. 5. Qty Filled Enter the number of units that were received. The on-hand and available quantities are reduced by this number. 7-6 Material Requisitions
170 6. Unit Select the unit of measure. 7. Unit Cost The unit cost of the item is displayed. If the transaction is a material requisition return, you can change the unit cost. 8. Ext Cost The extended cost (total of all units) is displayed. 9. When you are finished, select the Header tab (page 7-5) or close the screen to save your changes and return to the Main Menu. Command buttons Lot No Entry Display the Serial/Lot Number Entry screen (page 7-10) when a lotted item is selected. Ser No Entry Lot/Ser No Entry Display the Serial/Lot Number Entry screen when a serialized item is selected. Display the Serial/Lot Number Entry screen when an item that uses both lot numbers and serial numbers is selected. Material Requisitions 7-7

171 Detail Tab Detail View Material Requisitions Enter Material Requisitions Detail Tab Overview Use the Detail section of the requisition to specify what items are needed. Select to toggle from detail view to summary view. Screen options 1. Item ID Select the ID of the item being requisitioned. The item description is displayed. 2. Location ID The default location ID is displayed. If you select a different location ID, the Item ID field shows only items with active status that are set up for that location. 3. Requested Enter the number of units requested. 4. Units Select the unit of measure. 5. Filled Enter the number of units that were received. The on-hand and available quantities are reduced by this number. 7-8 Material Requisitions
172 6. Backordered Enter the number of units that are backordered. The quantity committed is increased by this number. You cannot enter a backorder quantity greater than the quantity still on demand (the quantity requested minus the quantity filled). 7. Unit Cost The unit cost of the item is displayed. If the transaction is a material requisition return, you can change the unit cost. 8. Ext Cost The extended cost (total of all units) is displayed. 9. GL Account If Inventory is interfaced with General Ledger, the default material expense account you selected on the Defaults tab (page 13-7) in Customization is displayed for the requisition. If Inventory is not interfaced with General Ledger, enter a general ledger material expense account. 10. GL Description Enter a description of the transaction. The description is printed in the Material Requisition Journal. If you set up Customization to post detail to General Ledger, the description is posted to the General Ledger Transaction Journal. 11. When you are finished, select the Header tab (page 7-5) or close the screen to save your changes and return to the Main Menu. Material Requisitions 7-9

173 Serial/Lot Number Entry Screen Material Requisitions Enter Material Requisitions Lot/Serial No. buttons Overview The Serial/Lot Number Entry screen appears when you enter a material requisition for a serialized, lotted, or serialized/lotted item, or when you select the Lot No Entry, Ser No Entry, or Lot/Ser No Entry command buttons. Lot No Entry Screen 7-10 Material Requisitions
174 Screen options 1. Loc ID The location ID is displayed. 2. Item ID The item ID is displayed. 3. Unit The unit of measure is displayed. 4. Total Qty The total quantity that was entered in detail entry is displayed. 5. Quantity Remaining The difference between the Total Qty and the quantity entered on this Serial/Lot Number entry screen is displayed. 6. Serial No Select a serial number, if you are working with a serialized item. The status of the serial number must be available. 7. Lot No Select a lot number if you are working with a lotted item. 8. Comment Enter comments about the transaction, up to 35 characters. 9. Qty Order Enter the lot quantity ordered. 10. Qty Filled The quantity filled is displayed, if applicable. 11. Qty Bkord The quantity backordered is displayed, if applicable. 12. Unit Cost Enter the unit cost. 13. Ext Cost The extended cost is displayed. 14. Click on Close to save your changes and return to the Enter Material Requisitions screen (page 7-2). Material Requisitions 7-11
175 Online Material Requisition Material Requisitions Enter Material Requisitions Online button Overview The Online Material Requisition dialog box appears when you select Online on the Enter Material Requisitions screen (page 7-2). Use it to print the currently selected material requisition or requisition return. MATERIAL REQUISITION Requisition PAGE 1 Number 2580 Date Needed 4/9/99 Order Date Ordered By Ship Method 4/9/99 Rick Scott Pick Up Ship From: Ship To: Loc ID MCSH Shipping Department Mid County Supply Headquarters 491 Highway 19 Red Wing MN USA Replacing bulbs and painting office walls Line Item Loc ID Unit Unit Cost Filled Backordered Description Extended Cost Requested 1 L MCSH Each Watt Bulb (LongLife) P MCSH Gal Gallon Latex Interior - Flat Lot Number Unit Cost Filled Ext Cost BX TOTAL = Material Requisitions
176 Print Material Requisitions Material Requisitions Print Material Requisitions Overview Use this selection to print material requisition forms. Screen options 1. Transaction No From / To Select the range of transaction numbers to include in the requisition. When you do not want to limit your report to a specific range, leave the From/To fields blank. 2. Requisition No From / To Select the range of requisition numbers to include. 3. Location ID From / To Select the range of location IDs to include. 4. Sort By Select whether to sort by Transaction Number, Requisition Number, Date Needed or Location ID. 5. Select one of the report command buttons, explained on page 1-7. Material Requisitions 7-13
177 Material Requisition 7-14 Material Requisitions
178 Material Requisitions Journal Material Requisitions Material Requisitions Journal Overview Use the Material Requisitions Journal as an audit trail of material requisitions and returned material requisitions and to check for mistakes and omissions. Print it before you post requisitions. If you find incorrect material requisitions, use Enter Material Requisitions (page 7-2) to change or delete them. Screen options 1. Requisition No From / To Select the range of requisition numbers to include in the journal. When you do not want to limit your report to a specific range, leave the From/To fields blank. 2. Print Specify whether to print detail or summary information in the journal. 3. Sort By Select the sort method. You can sort by Transaction Number, Requisition Number, GL Period and GL Account or Item ID. 4. Select one of the report command buttons, explained on page 1-7. Material Requisitions 7-15
179 Material Requisitions Journal 7-16 Material Requisitions

180 Backorder Allocation Report Material Requisitions Backorder Allocation Report Overview Use the Backorder Allocation Report as an audit trail. Also, use it to determine which backordered requisitions can be filled. Print the report before you post material requisitions to check for mistakes and omissions. If you find mistakes, use Enter Material Requisitions (page 7-2) to edit or delete them. Screen options 1. Requisition No From / To Select the range of requisition numbers to include in the report. When you do not want to limit your report to a specific range, leave the From/To fields blank. 2. Location ID From / To Select the range of locations to include in the report. 3. Item ID From / To Select the range of items to include in the report. Material Requisitions 7-17

181 4. Ship-To ID From / To Select the range of ship-to IDs to include in the report. 5. Sort By Select how you want the report sorted. The report shows the order in which requisitions can be filled based on your selection and the quantity available in Inventory. You can sort by Date Needed, Requisition Number or Ship-To ID. 6. Select one of the report command buttons, explained on page 1-7. Backorder Allocation Report 7-18 Material Requisitions
182 Post Material Requisitions Material Requisitions Post Material Requisitions Overview Use this selection to post material requisitions. After posting, only requisitions with backordered items are saved. Before posting, print the Backorder Allocation Report (page 7-17) to determine which backordered requisitions can be filled. Use Enter Material Requisitions (page 7-2) to fill or delete requisitions. During posting, if requisitions are for inventory items, the Material Expense account is debited and Material Inventory credited. If requisitions are for noninventory items, the Material Expense account is debited and the Material Miscellaneous account is credited. The default general ledger accounts are selected on the Defaults tab (page 13-7) in Customization, or you can select a different debit account when you enter the requisition on the Detail tab (page 7-8) in detail view. Before you post If you have a multi-user system, make sure no one else is using Material Requisitions. Complete the material requisition entry. Print the Material Requisitions and the Material Requisitions Journal. Material Requisitions 7-19
 / Post to Last Fiscal Year (xxxx) Choose whether to post to the current fiscal year or to the last fiscal year. 3.")
183 Screen options 1. Do the following Check the box after completing the material requisition entry, printing the Material Requisitions and printing the Material Requisitions Journal. 2. Post to Current Fiscal Year (xxxx) / Post to Last Fiscal Year (xxxx) Choose whether to post to the current fiscal year or to the last fiscal year. 3. The Post Material Requisitions Log dialog box is displayed. Select one of the report command buttons, explained on page Material Requisitions
184 Chapter Eight Reports Menu Produce reports that provide inventory valuation, quantity information, item status, pricing, profitability, cost and history information. Contents Introduction Common Screen Options Inventory Valuation Report Item Status Report Price Book Price Report Inventory Alternate Items Report Inventory Unit Conversions Report Serialized History Report Lot History Report Transaction History Report Reports Menu 8-1
185 Introduction Common screen options Many of the screen options are the same from report to report. Each is defined below: When you do not want to limit your report to a specific range, leave the From/To fields blank. Item ID From / To Select the range of items to include in the report. Location ID From / To Select the range of locations to include in the report. Product Line From / To Select the range of product lines to include in the report. Sales Category Select the range of sales categories to include in the report. 8-2 Reports Menu
 of the paint is $797.44 (89 x $8.96). Screen options 1. Item ID From / To 2.")
186 Inventory Valuation Report Reports Menu Inventory Valuation Report Overview The Inventory Valuation Report shows the value of your inventory based on the quantity on-hand and the average cost. Thus if the average cost of 89 gallons of latex exterior paint is $8.96, the total cost (valuation) of the paint is $ (89 x $8.96). Screen options 1. Item ID From / To 2. Location ID From / To 3. Product Line From / To 4. Sales Category From / To See Common screen options on page Include Zero On-Hand Check the box if you want to include items with no on-hand quantity. 6. Show Cost Columns with... Select whether you want to show Average Cost and Total Cost columns with two or three decimal places. 7. Sort By Select the sort method for the report. You can sort by Item ID, Location ID, Product Line, or Sales Category. Reports Menu 8-3
. 9.")
187 8. Type The summary report format depends on the Sort By option. A single summary line is printed for each Item, Location, Product Line or Sales Category depending on the Sort By option selected. The summary line shows the total quantity, unit cost and extended cost. The detail report shows each inventory item with all locations combined (except when the Sort By order is Item ID). 9. Costing Method Select the costing method to use for calculating total cost. The default is the costing method you set up in Customization on the Options tab. 10. Select one of the report command buttons, explained on age 1-7. Inventory Valuation Report -- Summary 8-4 Reports Menu
")

188 Inventory Valuation Report -- Detail (Sorted by Item ID) Inventory Valuation Report -- Detail (Sorted by Location) Reports Menu 8-5
 for all sort options, except when sorted by Location ID. Screen options 1. Item ID From / To 2. Location ID From / To 3.")
189 Item Status Report Reports Menu Item Status Report Overview Use the Item Status Report to verify the status of items and to view the on-hand, on-order, committed, in-use, and available quantities. Items are summarized into one line (combining all locations) for all sort options, except when sorted by Location ID. Screen options 1. Item ID From / To 2. Location ID From / To 3. Product Line From / To 4. Sales Category From / To -- See Common screen options on page Show If the item(s) have serial and/or lot numbers, you can select to show (or not show) the serial or lot numbers or you can show both serial and lot numbers on the report. 6. Sort By Select the sort method. You can sort by Item ID, Location ID, Product Line, or Sales Category. 8-6 Reports Menu
190 7. Include Status Select the status(s) of the item statuses to include in the report. Select as many (or as few) status levels as you want. 8. Select one of the report command buttons, explained on page 1-7. Item Status Report Reports Menu 8-7

191 Price Book Reports Menu Price Book Overview Print a Price Book report that shows up to five selling prices for each inventory item. Salespeople can use it as a quick reference book showing all possible calculated selling prices. You can also include the current on-hand quantities. Behind the Scene 1. Price Calculations (page 13-69) and up to five price codes from Accounts Receivable are used. 2. If an item does not have a Price ID assigned, it will not calculate the prices (the Price ID will be blank). 3. If an item does have a Price ID assigned, but does not have price calculations set up for some or all price codes, it will show calculated prices for only the codes that currently have calculations set up. 4. Base Price comes directly from the Price Info tab in Setup and Maintenance - Item Locations. 8-8 Reports Menu
 you want included in the report. 6. Sort By Select how you want the report sorted; by Item ID, Location ID, Product Line or Sales Category. 7.")
192 Screen options 1. Item ID From / To 2. Location ID From / To 3. Product Line From / To 4. Sales Category From / To See Common screen options on page Display Price Select the price(s) you want included in the report. 6. Sort By Select how you want the report sorted; by Item ID, Location ID, Product Line or Sales Category. 7. Include Status Select the status(s) of the items to include in the report. You can select as many (or as few) status levels as you want. 8. Display On-Hand Qty? Check the box to include the current quantity on hand. 9. Display Cost? Check the box to include the cost along with the selling price(s). 10. Select one of the report command buttons, explained on page 1-7. Sample Price Book (with no additional price codes set up) Reports Menu 8-9

193 Price Report Reports Menu Price Report Overview Use the Price Report to view selling price information for selected items. The quantity printed on the Price Report is not the on-hand quantity, but rather the base quantity. The base quantity always prints as 1, unless you select to print quantity breaks. The price comes from the Base Price field in Item Locations on the Price Info tab (page 13-36). Screen options 1. Item ID From / To 2. Location ID From / To 3. Product Line From / To 4. Sales Category From / To See Common screen options on page Sort By Select how you want the report sorted; by Item ID, Location ID, Product Line or Sales Category. 6. Include Status Select the status(s) of the items to include in the report. You can select as many (or as few) status levels as you want Reports Menu

194 7. Print Profit Margin Check the box to print the profit margin. The profit margin is the cost of a single item minus the adjusted selling price. If the on-hand quantity is zero, the last cost amount is used when calculating profit, rather than the normal costing method. 8. Print Quantity Breaks Check the box to print quantity price breaks in the report. If you select this option, the adjustment type, adjustment amount, and adjusted price are displayed for each unit of measure that has been assigned a break ID (set up in Price Breaks, page 13-60). 9. Select one of the report command buttons, explained on page 1-7. Price Report Reports Menu 8-11
195 Inventory Alternate Items Report Reports Menu Inventory Alternate Items Report Overview Use the Inventory Alternate Items Report to list all available substitute items for the selected range of items. Substitute items are suggested for use during sales invoice entry when the selected item is unavailable. Screen options 1. Item ID From / To 2. Product Line From / To 3. Sales Category From / To See Common screen options on page Select one of the report command buttons, explained on page Reports Menu
196 Inventory Alternate Items Report Reports Menu 8-13
197 Inventory Unit Conversions Report Reports Menu Inventory Conversions Report Overview Use the Inventory Unit Conversions Report to show each of the alternate units of measure available for each item. The report shows the base unit, alternate unit, conversion factor, penalty type and penalty. Screen options 1. Item ID From / To 2. Product Line From / To 3. Sales Category From / To See Common screen commands on page Select one of the report command buttons, explained on page Reports Menu
198 Inventory Unit Conversions Report Reports Menu 8-15
199 Serialized History Report Reports Menu Serialized History Report Overview The Serialized History Report shows current or historical transaction information for serialized items. You must keep serial history (set up in Customization on the Interfaces tab, page 13-3) to produce this report. Screen options 1. Item ID From / To 2. Location ID From / To 3. Product Line From / To See Common screen options on page Lot Number From / To Select the range of lot numbers to include in the report. 5. Serial Number From / To Select the range of serial numbers to include in the report. 6. Sort By Select the sort method; by Item ID or Location ID Reports Menu

200 7. Print Select the type(s) of transactions to include in the report. Options are Sales, Purchases, Material Requisitions, Adjustments, and/or Transfers. 8. Select one of the report command buttons, explained on page 1-7. Serialized History Report Reports Menu 8-17
 to produce this report. Negative signs (-) are shown after transactions that reduce inventory.")
201 Lot History Report Reports Menu Lot History Report Overview The Lot History Report shows current or historical purchase, sales, material requisition, adjustment, and transfer information for lotted items. You must keep lot history (selected in Customization on the Interfaces tab, page 13-3) to produce this report. Negative signs (-) are shown after transactions that reduce inventory. The following calculations are used in the report: Field Calculation Extended Cost unit cost x transaction quantity Extended Price unit price x transaction quantity Screen options 1. Item ID From / To 2. Location ID From / To 3. Product Line From / To See Common screen options on page Lot Number From / To Select the range of lot numbers to include in the report Reports Menu

202 5. GL Period From / To Enter a range of general ledger periods to restrict the report to only those transactions with matching periods. 6. Transaction Date From / To Enter a range of transaction dates to include in the report. 7. Print Select the types of transactions to include in the report. You can print Sales, Purchases, Material Requisitions, Adjustments and/or Transfers. 8. Select one of the report command buttons, explained on page 1-7. Lot History Report Reports Menu 8-19
 to save detail history to produce this report.")
203 Transaction History Report Reports Menu Transaction History Report Overview Use the Transaction History Report to see all transactions that have affected inventory during any time period. You must have selected the Save Detail History option on the Interfaces tab in Customization (page 13-3) to save detail history to produce this report. Negative signs (-) are shown after transactions that reduce inventory. The following calculations are used in the report: Field Calculation Base Quantity transaction quantity x unit of measure conversion factor Base Unit Cost extended cost / base quantity Screen options 1. Item ID From / To 2. Location ID From / To See "Common screen options" on page Reports Menu

204 3. Application ID Select the range of application IDs to include in the report. Only transactions generated by the selected applications are included. 4. GL Period Enter the range of general ledger periods or accept the defaults. Only transactions using the selected periods are included. 5. Transaction Date Enter a range of transaction dates to include in the report. 6. Sort By Select the sort method; by Item ID, Location ID, or Date. 7. Select one of the report command buttons, explained on page 1-7. Transaction History Report - Sorted by Item ID Reports Menu 8-21

205 Transaction History Report - Sorted by Date 8-22 Reports Menu
206 Chapter Nine Analysis Reports Menu Produce useful analysis reports that help maintain proper inventory levels and give you valuable information about inventory movement, sales, gross profit, and trend information. Contents Introduction Common Screen Options Safety Stock Alert Report Overstock Report Slow/Fast Movement Report Sales Analysis Report Gross Profit Analysis Report Trend Analysis Report Analysis Reports Menu 9-1
207 Introduction Common screen options Many of the screen options are the same from report to report. Each is defined below: When you do not want to limit your report to a specific range, leave the From/To fields blank. Item ID From / To Select the range of items to include in the report. Location ID From / To Select the range of locations to include in the report. Product Line From / To Select the range of product lines to include in the report. UserDef1 and UserDef2 From / To Select the range of user-defined fields 1 and/or 2 to include in the report. The user-defined fields are optional fields set up in Customization. The actual labels are replaced with your specific settings. For example, the Sample company (SAM) that comes with your system uses the UserDef1 field for Season information. The From/To label will be Season rather than UserDef Analysis Reports Menu
208 Safety Stock Alert Report Analysis Reports Menu Safety Stock Alert Report Overview The Safety Stock Alert Report lists items that have fallen below the safety stock level (usually half the order point). Therefore, if the on hand quantity (or if the available quantity, if that option is selected) is less than the safety stock quantity, the item appears on the report The Allocated quantity shown on the report is a total of both the committed and in-use quantities. The quantity Available is the On-Hand quantity less the Allocated quantity. Screen options 1. Item ID From / To 2. Location ID From / To 3. Product Line From / To 4. UserDef1 and UserDef2 From / To See Common screen options on page Sort By Select the sort method for the report. You can sort by Item ID, Location ID, Product Line, or one of two user defined fields set up in Customization. Analysis Reports Menu 9-3
.")
209 6. Include Status Select the statuses to include in the report: Discontinued, Superseded and/or Obsolete. 7. Calculate Safety Stock Alert based on Available Quantity Check this box to look at the available quantity (which includes quantities on order). If the box is left un-checked, only on-hand quantity is considered. The system compares the available quantity to the safety stock level, instead of comparing the on-hand quantity to the safety stock level. 8. Select one of the report command buttons, explained on page 1-7. Safety Stock Alert Report 9-4 Analysis Reports Menu
. Screen options 1. Item ID From / To 2. Location ID From / To 3. Product Line From / To 4. UserDef1 and UserDef2 From / To See Common screen options on page 9-2. 5.")
210 Overstock Report Analysis Reports Menu Overstock Report Overview The Overstock Report lists items with in-stock quantities above the order points you specified (the on-hand value is greater than the maximum on-hand value). Screen options 1. Item ID From / To 2. Location ID From / To 3. Product Line From / To 4. UserDef1 and UserDef2 From / To See Common screen options on page Sort By Select the sort method for the report. You can sort by Item ID, Location ID, Product Line, or one of two user defined fields set up in Customization. 6. Include Status Select the statuses to include in the report: Discontinued, Superseded and/or Obsolete. Analysis Reports Menu 9-5

211 7. Include Items with Zero Maximum On Hand Check the box to include items with zero maximum on hand. 8. Select one of the report command buttons, explained on 1-7. Overstock Report 9-6 Analysis Reports Menu

212 Slow/Fast Movement Report Analysis Reports Menu Slow/Fast Movement Report Overview Use the Slow/Fast Movement Report to analyze fast-moving and slow-moving items. The report shows the period-to-date and year-to-date quantities sold, and sales and profit amounts for each selected inventory item. The following calculations are used in the report: Field Calculation PTD Sales total sold for the current period - total returned YTD Sales total sold for the current year - total returned PTD Profit period-to-date sales - cost (sold - returned) for everything in the current period YTD Profit year-to-date sales - cost (sold - returned) for everything in the current period Analysis Reports Menu 9-7
213 Screen options 1. Item ID From / To 2. Location ID From / To 3. Product Line From / To 4. UserDef1 and UserDef2 From / To See Common screen options on page Sort By Select the sort method for the report. You can sort by Sales or Profit. 6. Sort Order Select whether you want the report printed in Ascending or Descending order. 7. Summary History Period Enter the summary history period for which to print the report. 8. Fiscal Year Enter the fiscal year. 9. Suppress Zero Quantity Items Check the box to exclude zeroquantity items (items with period-to-date and year-to-date quantities that equal zero) from the report. 10. Select one of the report command buttons, explained on page Analysis Reports Menu


214 Slow/Fast Movement Report Analysis Reports Menu 9-9
215 Sales Analysis Report Analysis Reports Menu Sales Analysis Report Overview The Sales Analysis Report shows the period-to-date and year-to-date sales history for selected items. Use it to analyze the turnaround time for stock items during the fiscal year. Only posted transactions are included in this report. The following calculations are used in the report: Field Calculation Profit Amount Total sales - cost of sales - COGS adjustments Profit Percent Profit amount / total sales Annual Turns (365 x C1) / (D3 x V1) C1 = YTD cost sold - YTD cost returned - YTD COGS adjustment D3 = Number of days so far in the year V1 = Extended cost for nonserialized items or total serial cost for serialized items (if V1 is zero, then Turns is zero) 1. Inventory value is based on current on-hand quantities at the time the report is run. Therefore, changing summary history periods will not change inventory value. 2. The Annual Turns field uses year-to-date values. Use the field to analyze turnaround time only when you select the YTD print method. Quantity quantity sold - quantity returned 9-10 Analysis Reports Menu

216 Screen options 1. Item ID From / To 2. Location ID From / To 3. Product Line From / To 4. UserDef1 and UserDef2 From / To See Common screen options on page Sort By Select the sort method for the report. You can sort by Volume, Cost, Sales or Profit. 6. Sort Order Select the order for printing the report. Ascending: The report is sorted on the field you selected in the Sort By field in ascending order. Descending: The report is sorted on the field you selected in the Sort By field in descending order. For example, if you are sorting by sales, the Sales field is sorted in descending order. 7. Print Select the print method for the report. If you select Period-To-Date, only items in the selected period appear on the report. If you select Year-To-Date, the report includes items from the beginning of the year through the selected period. 8. Calculate Turns As Of The date to begin calculating the turnaround time is displayed. The default is the current workstation date. This date is used to calculate the number of days to use in the inventory turns calculation, explained on page Analysis Reports Menu 9-11
 the summary history period for the report. 11. Fiscal Year Enter (or select) the fiscal year. 12.")
217 9. Suppress Zero Activity Items Check the box to exclude items with no activity from the report (items with no period-to-date and year-to-date quantities, sales or costs). 10. Summary History Period Enter (or select) the summary history period for the report. 11. Fiscal Year Enter (or select) the fiscal year. 12. Select one of the report command buttons, explained on page 1-7. Sales Analysis Report 9-12 Analysis Reports Menu

218 Gross Profit Analysis Report Analysis Reports Menu Gross Profit Analysis Report Overview The Gross Profit Analysis Report shows the gross profit margin for selected items in any period. The following calculations are used in the report: Field Profit Amount Profit Pct Quantity Sold Calculation total sales amount - total cost of items sold gross profit amount / total sales amount quantity sold - quantity returned Screen options 1. Item ID From / To 2. Location ID From / To 3. Product Line From / To 4. UserDef1 and UserDef2 From / To See Common screen options on page Profit Percent From / To Enter the range of profit percentages to include in the report. For example, to include only profit percentages higher than 50%, enter 50 to 999. Analysis Reports Menu 9-13
, Item ID; Product Line, GPM; UserDef1,GPM; or UserDef2, GPM. 7.")
219 6. Sort By Select the sort method for the report (each option shows you the primary followed by the secondary sort order). You can sort by Gross Profit Margin (GPM), Item ID; Product Line, GPM; UserDef1,GPM; or UserDef2, GPM. 7. Sort Order Select the order you want the report printed: Ascending GPM (gross profit margin): The profit percent is sorted from smallest to largest. Descending GPM: The profit percent is sorted largest to smallest. 8. Summary History Period Enter the summary history period you want shown on the report. 9. Fiscal Year Enter the year fiscal year for the report. 10. Select one of the report command buttons, explained on page 1-7. Gross Profit Analysis Report Sorted by GPM, Item ID 9-14 Analysis Reports Menu


220 Gross Profit Analysis Report Sorted by Product Line Gross Profit Analysis Report Sorted by User ID (Season) Analysis Reports Menu 9-15
221 Trend Analysis Report Analysis Reports Menu Trend Analysis Report Overview The Trend Analysis Report shows the number of items sold during several consecutive periods. You can use it to analyze trends in your purchase or sales of inventory items. The following calculations are used in the report: Field Calculation Quantity (purchases) Quantity purchased - quantity returned Quantity (sales) Quantity sold - quantity returned Revenue (sales) Total sold - total returned Cost (purchases) Cost of purchases - cost of returned purchases Cost (sales) Cost of sales - cost of returned sales Avg Unit Price (sales) (Total sold - total returned) / (quantity sold - quantity returned) Avg Unit Cost (sales) (Cost of sales - cost of returned sales) / (quantity sold - quantity returned) Avg Unit Cost (purchases) (Cost of purchases - cost of returned purchases) / (quantity purchased - quantity returned) 9-16 Analysis Reports Menu

222 Screen options 1. Item ID From / To 2. Location ID From / To 3. Product Line From / To See Common screen options on page Summary History Period and Fiscal Year From / To Enter the range of summary history periods and fiscal years to include in the report. 5. Print Select whether to include Sales or Purchase totals in the report. 6. Print Detail Check the box if you want to print item detail in the report. This option is used to show each selected period as a separate line on the report, rather than a single summary line for all selected periods. 7. Select one of the report command buttons, explained on page 1-7. Analysis Reports Menu 9-17


223 Trend Analysis Report 9-18 Analysis Reports Menu
224 Chapter Ten Periodic Processing Menu Change item prices and costs, perform year-end maintenance, and remove information you no longer need. Contents Introduction Common Screen Options Item Price Change Cost Changes Year-End Maintenance Purge Selected Files Add/Remove Item Locations Topics Covered How to increase/decrease item prices (page 10-3) How to increase/decrease item costs (page 10-6) Periodic Processing Menu 10-1
225 Introduction Common screen options Many of the screen options are the same from screen to screen. Each is defined below: Item ID From / To Select the range of items affected by the price or cost change. Location ID From / To Select the range of locations to include in the price or cost change. Product Line From / To Select the range of product lines to include in the price or cost change. UserDef1 and UserDef2 From / To Select the range of user-defined fields 1 and/or 2 to include in the price or cost change Periodic Processing Menu
226 Item Price Change Periodic Processing Menu Item Price Change Overview Use this selection to change the prices for large groups of items or locations. An Item Price Change Log is printed listing all the changes. Before you can use Item Price Change, the unit of measure pricing must be set up for the items. When you change the prices of items, each item's unit price is adjusted by the percentage or dollar amount you specify. How to increase or decrease item prices 1. Select the parameters for the price increase or decrease. 2. Select the type of increase or decrease (percent or amount). 3. Enter a positive amount for a price increase and a negative amount for a price decrease. 4. Select OK. Periodic Processing Menu 10-3
227 Screen options 1. Item ID From / To 2. Location ID From / To 3. Product Line From / To 4. UserDef1 and UserDef2 From / To See Common screen options on page Sort By Select whether you want the Item Price Change Log sorted by Item ID or Location. Price Information 6. Copy From Select the basis for the new price calculation. It can be from the average, base, standard or last cost; or the average, base, list or minimum price. 7. Copy To Select whether the price change affects the average, base, list or minimum price. 8. Adjustment Type Select whether the adjustment is based on amount, percent, gross profit margin percent or markup percent (the same as percent). 9. Adjustment Amount Enter the adjustment amount. Positive numbers increase prices; negative numbers decrease prices. For example, if the adjustment type is percent, enter -3 to decrease prices by 3%. 10. Select OK to begin processing. The Item Price Change Log dialog box is displayed. Select one of the report command buttons, explained on page 1-7. Command buttons Reset OK Close Restore the default values Begin processing. Return to the Main Menu Periodic Processing Menu
228 4/12/99 Mid County Supply Page 1 / 1 7:42 AM Item Price Change Log Base Price By Item ID Item Location Unit of Original New ID Description ID Measure Price Price B Garden Pool - Frog MCSH Each B Garden Pool - Frog WHSE2 Each B Garden Pool - Water Lilly MCSH Each B Garden Pool - Water Lilly WHSE2 Each B Garden Pool - Lotus Blossom MCSH Each B Garden Pool - Lotus Blossom WHSE2 Each B Submersible Pump - 5 gal. MCSH Each B Submersible Pump - 5 gal. WHSE2 Each B Submersible Pump - 7 gal. MCSH Each B Submersible Pump - 7 gal. WHSE2 Each B Submersible Pump - 10 gal. MCSH Each B Submersible Pump - 10 gal. WHSE2 Each B Water Filter MCSH Each B Water Filter WHSE2 Each B Water Fall Structure MCSH Each B Water Fall Structure WHSE2 Each B Fountain Structure MCSH Each B Fountain Structure WHSE2 Each B Submersible Light Set MCSH Each B Submersible Light Set WHSE2 Each B Garden Pool Rock MCSH Bag B Garden Pool Rock MCSH Lb B Garden Pool Rock WHSE2 Bag B Garden Pool Rock WHSE2 Lb *** Report Options *** Item ID: B To B Location ID: All Product Line: All Copy From: Base Cost Copy To: Base Price Adjustment Type: Percent Adjustment Amount: 5% Season: All *** End of Report *** Item Price Change Log Periodic Processing Menu 10-5
229 Cost Changes Periodic Processing Menu Cost Changes Overview Use Cost Changes to change the average, base, standard or last cost for groups of items. A Cost Change Log is printed listing all the changes. IMPORTANT: When you update costs, it does not create an entry in the General Ledger. Therefore, your inventory valuation will no longer match the value of inventory in your General Ledger! If you use the standard costing valuation method, a common problem is cost changes due to labor. For example, suppose your distribution costs increase $2 per item for a group of items. Instead of changing each item's cost codes, you can use Cost Changes to select the items, enter the cost codes that are affected, and enter the adjusted dollar amount. If you change the base cost for items, the base cost set up in Item Locations (page 13-29), is updated. When you change the cost of an item, the item's cost is adjusted by the percentage or dollar amount you specify. How to increase or decrease item costs 1. Select the parameters for the cost increase or decrease. 2. Select the type of increase or decrease (percent or amount). 3. Enter a positive amount for an increase or a negative amount for a decrease. 4. Select OK Periodic Processing Menu

230 Screen options 1. Item ID From / To 2. Location ID From / To 3. Product Line From / To 4. UserDef1 and UserDef2 From / To See Common screen options on page Sort By Select whether you want the Cost Change Log sorted by Item ID or Location. Price Information 6. Copy From Select the basis for the new cost calculation. It can be from the average, base, standard or last cost. 7. Copy To Select whether the cost change affects the average, base, standard or last cost. 8. Adjustment Type Select whether the adjustment is based on amount or percent. 9. Adjustment Amount Enter the adjustment amount. Positive numbers increase costs; negative numbers decrease costs. For example, if the adjustment type is percent, enter 5.5 to increase costs by 5.5%. 10. Select OK to begin processing. The Cost Change Log dialog box is displayed. Select one of the report command buttons, explained on page 1-7. Periodic Processing Menu 10-7
231 Command buttons Reset OK Close Restore the default values. Begin processing. Return to the Main Menu. 4/12/99 Mid County Supply Page 1 / 1 7:54 AM Cost Change Log Average Cost By Item ID Item Location Unit of Original New ID Description ID Measure Cost Cost A Snow-Tosser 12 Inch MCSH Each A Snow-Tosser 12 Inch WHSE1 Each A Snow-Tosser 18 Inch MCSH Each A Snow-Tosser 18 Inch WHSE1 Each A Snow-Tosser 24 Inch MCSH Each A Snow-Tosser 24 Inch WHSE1 Each *** Report Options *** Item ID: A To A Location ID: All Product Line: All Copy From: Average Cost Copy To: Average Cost Adjustment Type: Amount Adjustment Amount: $5 Season: All *** End of Report *** Cost Change Log 10-8 Periodic Processing Menu

232 Year-End Maintenance Periodic Processing Menu Year-End Maintenance Overview Use Year-End Maintenance to prepare for the next year by incrementing the current fiscal year by one. If Inventory is interfaced with General Ledger, perform year-end maintenance to keep the current fiscal year in Inventory the same as the current fiscal year in General Ledger. Before you perform year-end maintenance, post the Inventory transactions for the current year. After you perform year-end maintenance, enter and post Inventory transactions for the next fiscal year. Screen options 1. All transactions have been posted Make sure all transactions are posted, then check the box. 2. Select OK to begin year-end maintenance or Close to return to the Main Menu. Periodic Processing Menu 10-9

233 Purge Selected Files Periodic Processing Menu Purge Selected Files Overview Use this selection to delete information you no longer need. This procedure prevents files from growing so large that they slow the processing speed of your system. Before you delete files, complete the following tasks: Back up your data files Print the relevant reports for each file. Make sure no one else is using the Inventory system Periodic Processing Menu
234 Screen options 1. Perform the following tasks Check the box after you back up your data files, print all reports, and make sure no one else is using the system. If you keep serial history, print the Serialized History Report (page 8-16) before deleting serial numbers and/or serial history information. If you keep lot history, print the Lot History Report (page 8-18) before deleting lot numbers and/or lot history information. Print the Price Report (page 8-10) before deleting promotional price IDs. Print the Transaction History Report (page 8-20) before deleting detail history information. Print the following reports before deleting summary history: Slow/Fast Movement Report (page 9-7) Sales Analysis Report (page 9-10) Gross Profit Analysis Report (page 9-13) Trend Analysis Report (page 9-16) Delete 2. Serial numbers with sale dates before Enter the sale date to use when removing serial numbers. Serial numbers sold before this date are removed. 3. Zero quantity lots with sale dates before Enter the sale date to use when selecting zero-quantity lots to delete. Lot numbers sold before this date are removed. Remove lot history Check this box to remove all lot history where the history activity (when accumulated by Item, Location and Lot) adds up to zero. In situations where quantities are transferred between lots/locations, Inventory does not flag the lots as being sold or inactive. This can leave your data files with lots that actually have a zero quantity, but are not removed when using the Delete zero quantity lots... option. This feature lets you remove the history for those lots. 4. Alternate items with end dates before Enter the end date to use when removing alternate inventory items. The alternate items with an end date prior to this date are removed. 5. Serialized history with invoice dates before All history for serialized items with an invoice date prior to the entered date is removed. Periodic Processing Menu 10-11
235 6. Lot history with invoice dates before All history for lotted items with an invoice date prior to the entered date is removed. 7. Detail history with transaction dates before All transaction activity with a date prior to the entered date is removed. 8. Summary history with dates before period/year Summary history totals for all periods prior to the entered period are removed. 9. Select OK to begin processing or Close to return to the Main Menu. Command buttons Reset OK Close Set all fields to their default. Begin processing. Return to the Main Menu Periodic Processing Menu
236 Add/Remove Item Locations Periodic Processing Menu Add/Remove Item Locations Overview Use this menu selection to add or remove a location from a range of items. For example, if you close down a warehouse, you can easily select all items assigned to that location and remove that location from all of them. Or, if you move part of your inventory to a new warehouse, you can quickly add the new location to the items. What Happens When a Location is Added? 1. If the location already has been set up for an item, no information is added or copied for that item. 2. If an item does not have the "copy from location" set up, nothing is copied, but the location is added along with the account code. Everything else stays blank. What Happens When a Location is Removed? 1. If an item location has unposted transactions or material requisitions, it is not deleted. 2. If an item location has quantities on hand, it is not deleted. 3. There is no warning that the item locations are NOT being deleted. All the items that can be deleted are deleted. Periodic Processing Menu 10-13
: Used only if you are adding a location. 3. Copy From Location Enter an existing location for the items.")
237 Screen options Selection Options 1. Location Select the location you want to add or remove from a group of items. 2. Item ID From / To Select the range of item IDs you want to add or remove. To include all items, leave the From/To fields blank. Copy Information (Add Only): Used only if you are adding a location. 3. Copy From Location Enter an existing location for the items. The information from this location is copied to the new location for each item being added. If an item is not assigned to the "copy from" location, no information is copied. 4. Account Code If the "copy from" location does not exist for an item, enter the account code to be assigned to the new location for those items. 5. Copy Price Information Check this box to copy the price information from the "copy from" location to the new location. If the location does not exist for an item, nothing is copied. 6. Copy Vendor Information Check this box to copy the vendor information from the "copy from" location to the new location. If the location does not exist for an item, nothing is copied. 7. Select the Add button to add the items to the location or the Delete button to remove the location from the items. If you want to clear the window and start over, click on the Reset button Periodic Processing Menu
238 Chapter Eleven Physical Inventory Menu Freeze quantities, print and use inventory tags and worksheets, enter physical counts, produce a Variance Report, and update perpetual inventory. Contents Freeze Quantities Print Inventory Tags/Worksheets Physical Counts Tag Entry Physical Counts Tag Entry Summary View Physical Counts Tag Entry Detail View Tag Entry Options Physical Counts Worksheet Entry Physical Counts Worksheet Entry Summary View Physical Counts Worksheet Entry Detail View Worksheet Entry Options Batch List Physical Counts List Variance Report Update Perpetual Inventory Topics Covered How to add or change batch codes (page 11-2) How to delete a batch code (page 11-3) How to freeze a prepared batch (page 11-3) How to add or change a tag number (page 11-7) How to enter tag exceptions (page 11-11) How to add worksheet information (page 11-18) How to change a worksheet item (page 11-19) How to enter worksheet exceptions (page 11-19) Physical Inventory Menu 11-1
239 Freeze Quantities Physical Inventory Menu Freeze Quantities Overview The first step in the Physical Inventory process is to take a snapshot of your inventory as you expect it to be according to your computerized records. Use Freeze Quantities to group your inventory items into batches that match how you expect to organize the actual physical counting of inventory. Make sure all inventory transactions have been posted before starting this process. How to Also, see How to Take a Physical Inventory, page 4-11 Add a Batch Code 1. Select the New Record toolbar button (or press Ctrl A). 2. Enter the batch code, batch code description, count date, and the General Ledger period. 3. Select the range of location IDs, item IDs, bin numbers, product lines, and user-defined fields to include in the batch. 4. Check the appropriate boxes to select the batch options. 5. If you want to save and prepare the batch, but wait to freeze quantities, select the Prepare Batch button. If you want to save, prepare, and freeze a new batch, select the Freeze Quantity button. Change a Batch Code 1. Select a prepared or frozen batch code to edit. 2. Change the batch code description, count date, and the General Ledger period Physical Inventory Menu

240 Delete a Batch Code 1. Select the batch code to delete. 2. Press F3 or click on on the toolbar. Freeze a Prepared Batch 1. Select the prepared batch code. 2. Select the Freeze Quantity button. Screen options 1. Batch Code Enter a batch code, or select a prepared batch for which to freeze quantities. Batch codes are normally entered as numbers. Think of batches as your way to break the inventory counting process down into smaller tasks. Select a shelf, a room or a product line, and assign those items to a batch. A batch can be given to someone to count. 2. Description Enter a description of the batch. You can edit the description after you prepare or freeze the batch. Use the description to define the type of batch of items you are entering. For example, if you have multiple locations, you may want to set up a separate batch for each location and then select only those items that are stored at that location and use the description to describe the location. Physical Inventory Menu 11-3
241 3. Count Date Enter the date when physical quantities are counted. You can edit the count date after you prepare or freeze the batch. 4. GL Period Enter the General Ledger period. You can edit the period after you prepare or freeze the batch. Any adjustments made to the General Ledger for this batch use this period on the transactions. 5. Locked The box is checked when another user is entering physical counts or updating perpetual inventory for the current batch. 6. Location ID Select a range of locations to include in the batch. 7. Item ID Select a range of items to include in the batch. 8. Bin Number Select a range of bin numbers to include in the batch. If you use bin numbers to select items, the current on-hand quantity will be attached to the default bin number and any other bin numbers will have a quantity of zero. For example, Item D has two bin numbers (BIN100 and BIN200) and has a current on-hand quantity of 75. If you select by bin number, and BIN100 is the default bin, the frozen quantity will show 75 for BIN100 and zero for BIN Product Line Select a range of product lines to include in the batch. 10. User-Defined Field 1 Select a range of user-defined field 1 to include in the batch. 11. User-Defined Field 2 Select a range of user-defined field 2 to include in the batch. 12. Use Tag Numbers Check the box if you want to use tag numbers for the physical count. Most people use tags only for serialized items or large, unique items. Physical Counts Worksheet Entry (page 11-18) has a tag number field to record tag number information. 13. Display Frozen Quantities Check the box to include a Frozen field, displaying frozen quantities, on the Physical Counts Tag Entry screen (page 11-7) and Worksheet Entry screen (page 11-18). The frozen quantity is the quantity the person counting the inventory expects to find. If you do not want this quantity to be available to the person counting the inventory, leave the selection empty Physical Inventory Menu
242 14. Enter Exceptions Only Check the box to enter only counted quantities that do not match frozen quantities on the Physical Counts Tag Entry and Worksheet Entry screens; otherwise, clear the box. If you check the box, the Default Frozen Quantities box is automatically selected. TIP: When you enter counted quantities after using this option to freeze your quantities, you must enter the inventory item ID for each exception item and the counted quantity. Instead, it may be quicker to select Default Frozen Quantities when freezing quantities. This option lists every inventory item in the Tag Entry and Worksheet Entry windows with the counted quantities set to the expected quantities. If you have an exception, change only that number. 15. Default Frozen Quantities Check the box if you want frozen quantities to default in the Counted field on the Physical Counts Tag Entry and Worksheet Entry screens; otherwise, clear the box. If you select the Enter Exceptions Only option, this field is automatically selected. The data entry process is much easier if the quantities are supplied by the system. 16. Print Items With Zero Quantities Check the box to print items with zero quantities on tags or worksheets. 17. Close the screen (or press F7) to return to the Main Menu. Command buttons Prepare Batch Freeze Quantity Prepare physical inventory count records and save the batch. Freeze quantities for the batch. If you are working with a new batch, this button saves, prepares, and freezes the batch. Physical Inventory Menu 11-5
243 Print Inventory Tags/Worksheets Physical Inventory Menu Print Inventory Tags/Worksheets Overview Use Print Inventory Tags/Worksheets on the Physical Inventory Menu to print tags for use in the physical count process. If you did not select to print tag numbers on the Freeze Quantities screen, you can change your selection on this screen. If you use worksheets to record the physical count of your inventory, use this selection to print them. Lines on the worksheet can be printed by item, location, bin, product line, and user-defined fields in the order you select. Screen options 1. Batch Code Select one of the batch codes you entered in Freeze Quantities (see page 11-2). 2. Print The Print option defaults to Tags if you checked the Use Tag Numbers box on the Freeze Quantities screen or to Worksheets if you did not check the Use Tag Numbers box. If you change the default print option, a confirmation dialog box appears. If tag numbers or worksheets have already been printed for the batch, you are asked to confirm that you want to reprint them Physical Inventory Menu
244 3. Select Select whether you want to print nonserialized items, serialized items, or both. 4. Sort By Select how to sort the tags or worksheets by double-clicking the options in the order you want them printed. A sort-order number appears after each option you select. If you make a mistake, double-click the option to remove the sort-order number. 5. Print Frozen (Expected) Quantities Check the box if you want to print frozen quantities. If you print the quantities, use them as a guide when counting the inventory. 6. Page Break on Location ID (Worksheets only) If you are printing a worksheet and want a page break in the worksheet after location IDs, check the box. The page-break option is available only if you are printing worksheets. 7. Use Tag Numbers If you are printing tags and chose to use tag numbers on the Freeze Quantities screen, the Use Tag Numbers box is automatically selected. If you did not choose tag numbers on the Freeze Quantities screen, but decide to do so now, the system asks whether you want to use tag numbers. If you choose Yes, the Use Tag Numbers box is automatically selected. 8. Starting Tag Number If you are printing tags, enter the number of the first tag for the physical count. 9. If Restart, Last Good Tag Number If you are reprinting tag numbers, select the number of the last tag number assigned. 10. Select one of the report command buttons, explained on page 1-7. Physical Inventory Menu 11-7
245 Inventory Tags/Worksheets 11-8 Physical Inventory Menu
246 Physical Inventory Worksheets Physical Inventory Menu 11-9
247 Physical Counts Tag Entry Physical Inventory Menu Physical Counts Tag Entry Overview If you use tags to record physical counts, use this selection to enter the actual physical count for those batches that use tags. While you enter physical counts, the current batch is locked to prevent other users from editing the batch and from selecting the batch to update perpetual inventory (page 11-32). Before you use this selection, you must freeze quantities for the batch and use Print Inventory Tags/ Worksheets to print tags for the batch. Select to toggle from summary view to detail view, and select to toggle from detail view to summary view. How to Add a Tag Number Use the Add mode to add a tag number for an item found during the physical count in a location not printed on the tag (the location of the item when you froze quantities). 1. Select Add. The cursor is positioned in the Tag Number field on a blank line. 2. Enter a new tag number, location ID, item ID, bin number, counted quantity, and unit of measure for the item. Change a Tag Number Use the Edit mode to edit counted quantities. 1. Select Edit. The existing records are displayed. 2. Change the counted quantity and the unit of measure Physical Inventory Menu
248 Enter Exceptions Use the Exceptions mode to enter counted quantities that do not match frozen quantities. (Available only if you selected Enter Exceptions Only on the Freeze Quantities screen.) 1. Select Exceptions. A blank screen is displayed. 2. Select a tag number in the Tag Number field. 3. The frozen quantity is displayed in the Counted field. Enter the counted quantity. 4. Enter the unit of measure for the counted quantity in the Unit field. Physical Inventory Menu 11-11

249 Physical Counts Tag Entry Summary View Overview Select any of the batch codes that use the tag option and enter actual counts using the summary view. Select to toggle from summary view to detail view. Screen options 1. Batch Code Select a batch code. The batch description appears. 2. Tag Number Select or enter a tag number. 3. Loc ID The location ID is displayed in the Exceptions and Edit modes. If you are in Add mode, enter a location ID. 4. Item ID The item ID is displayed in the Exceptions and Edit modes. If you are in the Add mode, enter an item ID. 5. Bin Number The bin number is displayed in the Exceptions and Edit modes. If you are in the Add mode, select or add bin numbers. New bin numbers are added when perpetual inventory is updated Physical Inventory Menu
250 6. Expected If you chose the option to display frozen quantities on the Freeze Quantities screen, the quantity is displayed. 7. Counted Enter the counted quantity. If you freeze a batch that contains a serialized item with multiple bins, physical count records are created for each bin, but only one record can have a counted quantity of 1. A message is displayed if you try to enter a count and a counted quantity of 1 already exists for the serialized item. 8. Unit Enter the unit of measure. 9. OK The box is checked when you enter an amount in the Qty Counted field. If you are unsure of the amount, clear the box. Use the Physical Counts List selection to print a list of tags without a physical count. 10. Lot Number If you are working with a lotted item, the lot number is displayed in the Exceptions and Edit modes. If you are in the Add mode, select or enter lot numbers. New lot numbers are added when perpetual inventory is updated. This field is not available in single-line view (Edit mode). 11. Serial Number If you are working with a serialized item, the serial number is displayed in the Exceptions and Edit modes. If you are in the Add mode, select or enter serial numbers. New serial numbers are added when perpetual inventory is updated. This field is not available in single-line view (Edit mode). 12. When you are finished, close the screen (or press F7) to save your changes and return to the Main Menu. Physical Inventory Menu 11-13
251 Command buttons Options Display the Tag Entry Options dialog box, page Add Add tags and tag counts. Edit Exceptions Edit the Counted and Units fields for the selected tag number. Enter counted quantities that do not match frozen quantities for selected tag numbers, if you selected to enter exceptions only on the Freeze Quantities screen, page Physical Inventory Menu

252 Physical Counts Tag Entry Detail View Overview Select any of the batch codes that use the tag option and enter actual counts using the detail view. Select to toggle from detail view to summary view. Screen options 1. Batch Code Select a batch code. The batch description appears. 2. Tag Number Select or enter a tag number. 3. Location ID The location ID is displayed in the Exceptions and Edit modes. If you are in the Add mode, enter a location ID. 4. Item ID The item ID is displayed in the Exceptions and Edit modes. If you are in the Add mode, enter an item ID. 5. UserDef1 User-defined field 1 is displayed. 6. UserDef2 User-defined field 2 is displayed. 7. Product Line The product line is displayed. Physical Inventory Menu 11-15
253 8. Bin Number The bin number is displayed in the Exceptions and Edit modes. You can select or enter bin numbers in the Add mode. New bin numbers are added when perpetual inventory is updated. 9. Qty Counted Enter the counted quantity. If you freeze a batch that contains a serialized item with multiple bins, physical count records are created for each bin, but only one record can have a counted quantity of 1. A message is displayed if you try to enter a count and a counted quantity of 1 already exists for the serialized item. 10. Qty Expected The frozen quantity is displayed. This is the quantity you expected to count. 11. Unit Enter the counted unit of measure. To enter counts for multiple units of measure, add bin numbers for the item and location. 12. OK The box is checked when you enter an amount in the Qty Counted field. If you are unsure of the amount, clear the box. Use the Physical Counts List to print a list of tags without a physical count. 13. Lot Number The lot number is displayed in the Exceptions and Edit modes. If you are in the Add mode, select or enter lot numbers. New lot numbers are added when perpetual inventory is updated. 14. Serial Number The serial number is displayed in the Exceptions and Edit modes. If you are in the Add mode, select or enter serial numbers. New serial numbers are added when perpetual inventory is updated. 15. Close the screen (or press F7) to return to the Main Menu. Command buttons See page Physical Inventory Menu
254 Tag Entry Options Physical Inventory Menu Physical Counts Tag Entry Options button Overview Select the options for entering tags. These options affect the way the Physical Counts Tag Entry screen appears. Screen options 1. Add Style: Random Tag Entry Check the box to enter new tag numbers when you are in the Add mode. Clear the box to have the system generate new tag numbers when you are in the Add mode. 2. Edit Display Style: Single Line Display Check the box to display the fields on the screen in a single line when you are in the Edit mode. 3. Select OK to save your changes and return to the Physical Counts Tag Entry screen (page 11-7) or Cancel to return to Physical Counts Tag Entry screen without saving your changes. Physical Inventory Menu 11-17
255 Physical Counts Worksheet Entry Physical Inventory Physical Counts Worksheet Entry Overview If you use worksheets to record physical counts, use this selection to enter the counts. Lines on the worksheet are printed by item, location, bin, product line, and user-defined fields in the order you selected on the Print Inventory Tags/Worksheets screen, page The current batch is locked while you enter physical counts to prevent other users from editing the batch and from selecting the batch to update perpetual inventory. Before using this selection, you must freeze quantities for the batch and use Print Inventory Tags/Worksheets (page 11-6) to print worksheets for the batch. Select to toggle from summary view to detail view, and select to toggle from detail view to summary view. How to Add Worksheet Information Use the Add mode to add an item found during the physical count in a location not printed on the worksheet (the location of the item when you froze quantities). 1. Select the Add button. A blank line is displayed. 2. Select a location ID and an item ID. If the item is also identified by a bin number, lot number, or serial number, enter this information in the appropriate fields Physical Inventory Menu
256 Change a Worksheet Item Use the Edit mode to edit counted quantities. 1. Select the Edit button. The existing records are displayed. 2. Change the counted quantity and the unit of measure. Enter Worksheet Exceptions Use the Exceptions mode to enter counted quantities that do not match frozen quantities. This mode is only available if you selected Enter Exceptions Only on the Freeze Quantities screen, page Select the Exceptions button. A blank screen is displayed. 2. Select a location ID and an item ID. If the item is also identified by a bin number, lot number, or serial number, enter this information in the appropriate fields. 3. The frozen quantity is displayed in the Counted field. Enter the counted quantity. 4. Enter the unit of measure for the counted quantity in the Unit field. Physical Inventory Menu 11-19

257 Physical Counts Worksheet Entry Summary View Overview Select any of the batch codes not using the tag option and enter actual counts using the summary view. Select to toggle from summary view to detail view. Screen options 1. Batch Code Select a batch code. The batch description appears. The order you selected to sort worksheet information on the Print Inventory Tags/Worksheets screen (page 11-6) is shown below the batch code. 2. Loc ID The location ID is displayed in the Exceptions and Edit modes. If you are in the Add mode, enter a location ID. 3. Item ID The item ID is displayed in the Exceptions and Edit modes. If you are in the Add mode, enter an item ID. 4. Bin Number The bin number is displayed in the Exceptions and Edit modes; select or enter bin numbers in the Add mode. New bin numbers are added when perpetual inventory is updated Physical Inventory Menu
258 5. Tag Number If you are using tag numbers, the tag number is displayed. 6. Expected If you chose to display frozen quantities in Freeze Quantities (page 11-2), the quantity you expect to count is displayed. 7. Counted Enter the counted quantity. If you freeze a batch that contains a serialized item with multiple bins, physical count records are created for each bin, but only one record can have a counted quantity of 1. A message is displayed if you try to enter a count and a counted quantity of 1 already exists for the serialized item. 8. Unit Enter the counted unit of measure. To enter counts for multiple units of measure, add additional bin numbers for the item and location. 9. OK The box is checked when you enter an amount in the Counted field. If you are unsure of the amount, clear the box. Use the Physical Counts List to print a list of items without a physical count. 10. Lot Number If you are working with a lotted item, the lot number is displayed in the Exceptions and Edit modes. If you are in the Add mode, select or enter lot numbers. New lot numbers are added when perpetual inventory is updated. This field is not available in single-line view (Edit mode). 11. Serial Number If you are working with a serialized item, the serial number is displayed in the Exceptions and Edit modes. If you are in the Add mode, select or enter serial numbers. New serial numbers are added when perpetual inventory is updated. This field is not available in single-line view (Edit mode). 12. Close the screen to save your changes and return to the Main Menu. Physical Inventory Menu 11-21
259 Command buttons Options Add Edit Exceptions Display the Worksheet Entry Options dialog box. Add items to the worksheet. Edit the Counted and Units fields for the selected worksheet item. Enter counted quantities that do not match frozen quantities for selected worksheet items, if you selected to enter exceptions only on the Freeze Quantities screen Physical Inventory Menu

260 Physical Counts Worksheet Entry Detail View Overview Select any of the batches not using the tag option and enter actual counts using the detail view. Select to toggle from detail view to summary view. Screen options 1. Batch Code Select a batch code. The batch description appears. The order you selected to sort worksheet information on the Print Inventory Tags/Worksheets screen (page 11-6) is shown below the batch code. 2. Location ID The location ID is displayed in the Exceptions and Edit modes. If you are in the Add mode, enter a location ID. 3. Item ID The item ID is displayed in the Exceptions and Edit modes. If you are in the Add mode, enter an item ID. 4. UserDef1 User-defined field 1 is displayed. 5. UserDef2 User-defined field 2 is displayed. 6. Product Line The product line is displayed. Physical Inventory Menu 11-23
261 7. Bin Number The bin number is displayed in the Exceptions and Edit modes. If you are in the Add mode, select or enter bin numbers. New bin numbers are added when perpetual inventory is updated. 8. Tag Number If you are using tag numbers, the tag number is displayed. 9. Qty Counted Enter the counted quantity. If you freeze a batch that contains a serialized item with multiple bins, physical count records are created for each bin, but only one record can have a counted quantity of 1. A message is displayed if you try to enter a count and a counted quantity of 1 already exists for the serialized item. 10. Qty Counted Enter the counted quantity. If you freeze a batch that contains a serialized item with multiple bins, physical count records are created for each bin, but only one record can have a counted quantity of 1. A message is displayed if you try to enter a count and a counted quantity of 1 already exists for the serialized item. 11. Unit Enter the counted unit of measure. To enter counts for multiple units of measure, add bin numbers for the item and location. 12. OK The box is checked when you enter an amount in the Counted field. If you are unsure of the amount, clear the box. Use the Physical Counts List to print a list of items without a physical count. 13. Lot Number The lot number is displayed in the Exceptions and Edit modes. If you are in the Add mode, select or enter lot numbers. New lot numbers are added when perpetual inventory is updated. 14. Serial Number The serial number is displayed in the Exceptions and Edit modes. If you are in the Add mode, select or enter serial numbers. New serial numbers are added when perpetual inventory is updated. 15. Close the screen (or press F7) to return to the Main Menu Physical Inventory Menu
262 Worksheet Entry Options Physical Inventory Menu Physical Counts Worksheets Entry Options button Overview Choose whether or not to display the fields used during the entry process in a single line or in multiple lines. Screen options 1. Check the box to display the fields used during the entry process in a single line. If not checked, multiple lines are used to display each record. 2. Select OK to save your changes and return to the Physical Counts Worksheet Entry screen (page 11-18) or Cancel to return to the Physical Counts Worksheet Entry screen without saving changes. Physical Inventory Menu 11-25
263 Batch List Physical Inventory Menu Batch List Overview The Batch List shows information about the batches being used in the Physical Inventory process and the selection criteria (location ID, item ID, bin number, product line, and user-defined fields) entered on the Freeze Quantities screen, page Use the Batch List to verify the status of each batch. The list shows the physical count processes and indicates whether they are complete. For example, it might show that the tags and worksheets are printed, but the counts are not entered. Screen options 1. Available Batches / Selected Batches Select the available batches to include in the list, using the arrow keys. 2. Print Selection Criteria Check the box to include selection criteria from the Freeze Quantities screen in the list. 3. Print Selection Toggles Check the box to include selection toggles from the Freeze Quantities screen in the list. 4. Select one of the report command buttons, explained on page Physical Inventory Menu
264 Batch List Physical Inventory Menu 11-27

265 Physical Counts List Physical Inventory Menu Physical Counts List Overview After you enter physical counts, print this list of quantities from selected batches to verify that the correct quantities are entered. Screen options 1. Available Batches / Selected Batches Use the directional arrow keys to select the batches to include in the list. Normally, you will want to select batches using tag numbers separately from those that do not use tag numbers, since the desired sort order will be different. 2. Sort By Select the sort criteria for the list by double-clicking the options in the order you want the list printed. A sort-order number appears after each option you select. If you make a mistake, double-click the option to remove the sort order number. 3. Print Exceptions Only Check the box to list only inventory items with a variance between the frozen and counted quantities. 4. Print Lot/Serial Numbers Check the box to include lot and serial numbers in the list Physical Inventory Menu

266 5. Print Missing Entries Only Check the box to list only tag numbers and worksheet entries without a physical count. 6. Select one of the report command buttons, explained on page 1-7. Physical Counts List Physical Inventory Menu 11-29

267 Variance Report Physical Inventory Menu Variance Report Overview After you enter and verify the physical count of your inventory, print the Variance Report. It shows the difference between the counts you entered and the frozen quantities in the system. Variances are expressed as a quantity and a dollar amount based on your inventory valuation method. You must print the Variance Report before using Update Perpetual Inventory, page Screen options 1. Available Batches / Selected Batches Use the directional arrow keys to select the batches to include in the list. 2. Sort By Select the sort criteria for the list by double-clicking the options in the order you want the list printed. A sort-order number appears after each option you select. If you make a mistake, double-click the option to remove the sort order number Physical Inventory Menu

268 3. Print Lot/Serial Numbers Click on the box to include lot and serial numbers on the report. 4. Select on of the report command buttons, explained on page 1-7. Variance Report Physical Inventory Menu 11-31
269 Update Perpetual Inventory Physical Inventory Menu Update Perpetual Inventory Overview Use this selection to update on-hand item quantities with the difference between the frozen quantity and the physical counts you entered, and also update the month- and year-to-date COGS adjustments with the variance amounts. The variance amounts are based on the inventory valuation method you use. If you use the LIFO or the FIFO method and no cost is available (because the item has no on-hand quantity, for example), the system updates the COGS adjustment amounts by the average cost of the item. If Inventory is interfaced with General Ledger and you choose to post the variance amount to the General Ledger, entries are made to the inventory adjustment and physical count adjustment account (these accounts are set up in Setup and Maintenance, Account Codes). The inventory increases (more inventory counted than expected) are kept separate from the inventory decreases (less inventory counted than expected) so that you can see the total value of each rather than the net result. This is done by posting two entries to the inventory adjustment account (one debit for the total of the increases and one credit for the total of the decreases). A single offsetting amount is posted to the physical count adjustment account. Variance caused by increase in inventory: Debit Inventory Adjustment account and credit Physical Count Adjustment account. Variance caused by decrease in inventory: Credit Inventory Adjustment account and debit Physical Count Adjustment account. If Inventory is not interfaced with General Ledger, use the Update Perpetual Inventory Log to manually adjust the accounts affected by this selection Physical Inventory Menu

270 Before you update perpetual inventory Enter the physical counts for each batch. Print the Variance Report, page Back up your data. Screen options 1. Do the following Check the box after you back up your data, enter physical inventory for the batches and print the Variance Report. 2. Available Batches / Selected Batches Use the directional arrow keys to select the batches to update. A message indicates whether selected batches are locked because they are being used on the Physical Counts Tag Entry or Physical Counts Worksheet Entry screen. You can then remove those batches from the selected list. The batches you select are locked during processing to prevent other users from editing them. 3. Post Variance Amount to General Ledger Check the box to post the variance amount in General Ledger. This option is available only if Inventory is interfaced with General Ledger on the Interfaces tab in Customization (page 13-3). Physical Inventory Menu 11-33
271 4. Post to Current Year Files (xxxx) / Post to Last Year Files Select whether to post the batches to the current or to the last fiscal year. This option is available only if Inventory is interfaced with General Ledger. 5. The Update Perpetual Inventory Log dialog box is displayed. Select one of the report command buttons explained on page 1-7 to produce the report Physical Inventory Menu
272 Chapter Twelve Assemblies This chapter explains maintaining and producing assemblies, as well as printing four different assembly reports. Contents Produce Assemblies Shortage Report Item Usage Report Maintain Assemblies Assembly Report Production Plan Report Shortage Report Assemblies Menu 12-1
, and also to produce assemblies using one of your established production plans.")
273 Produce Assemblies Assemblies Produce Assemblies Related Topics Using the Assemblies Menu (page 4-11) Overview Use this selection to create a production plan after you set up your assemblies in Maintain Assemblies (page 12-10), and also to produce assemblies using one of your established production plans. Before using the Build option to produce assemblies, first run the Shortage Report to make sure you have all the necessary components in inventory. Screen options 1. Plan ID Enter a code to identify the production plan, up to 10 characters. To ADD a new assembly, click on the new record icon enter the new Plan ID. and 2. Copy From If you are adding a new plan and have a similar production plan, select that plan ID to copy information from and use the information as a starting point. All the setup information for that production plan is displayed. You can change any of the production information Assemblies Menu
274 3. Description Describe the production plan, up to 30 characters. 4. Use Inventory From Select the location of the items being used for the assembly. This is also the location where the completed assembly will be placed. 5. Add Assemblies To Select the location to which the assembled items will be added. Production Plan Detail 6. Sequence For each detail line, enter the order in which the assembly is to be produced. It automatically increments by Assembly ID For each detail line, enter the assembly being produced as part of the plan. 8. Description The description of the assembly is displayed. 9. UOM The default base unit of measure for the assembly is displayed. Change it, if you are building the assembly using a different unit of measure. 10. Quantity Enter the number of units of this assembly you are building. Command buttons Resequence Reset the sequence numbers to multiples of 10. Build Build all the assemblies in the plan. You are asked for the Production Date and GL Period before the process starts. You may also check the box to Allow Component Quantities On Hand to go Negative. This lets you produce assemblies even if there are not enough component items on hand (non-serialized and non-lotted items only). If any items have lot or serial numbers, you are asked to select them during the process. The build process stops if there are any shortages. Assemblies Menu 12-3
 to post these transactions to the General Ledger. Unbuild Close Unbuild all the assemblies in the plan.")
275 After producing assemblies, run the Transactions Journal Report (page 6-37) using the Print Assemblies option to see a list of the transactions created during the production process. Use Post Transactions (on the Transactions Menu) to post these transactions to the General Ledger. Unbuild Close Unbuild all the assemblies in the plan. Components are returned to inventory and increase the on-hand quantity. When unbuilding an assembly, the current cost for each component is used (a sum of the current cost for each item is used as the cost for the assembled item). The current cost depends on the costing method selected in Customization. Save all changes and return to the Main Menu. 4/7/99 Mid County Supply Page 1 / 1 9:41 AM Produce Assemblies Report Item Unit Total ID Description Unit Quantity Cost Cost B Garden Pool - Frog Each , B Garden Pool - Water Lilly Each , B Garden Pool - Lotus Blossom Each , *** Report Options *** Report Total 8, Plan ID: April01 Use Inventory From WHSE2 Add Assemblies To WHSE2 *** End of Report *** 12-4 Assemblies Menu
276 Shortage Report Assemblies Shortage Reports Overview Print this report to show items that must be ordered before a particular production plan can be completed. The current inventory quantity on-hand is compared to the quantity needed, to determine the components you will run out of if you attempt to build the assemblies listed in your production plan. Print it before building the assembly in Produce Assemblies. The Produce Assemblies selection does not produce any subassemblies that may be listed as components of the assemblies in the selected production plan. Therefore, to print a Shortage Report that matches the process used in Produce Assemblies, do not choose the Expand Subassemblies option. If you do NOT Expand Subassemblies, the report shows if you have enough components available to complete the assembly, but not if you have enough components available to create any additional subassemblies that may be needed by the assemblies. Example: You have an assembly DESK with components TOP, DRAWER and LEG. The component DRAWER is a subassembly made of components HANDLE, HARDWARE and 1x8x10 LUMBER. If you do not expand subassemblies, the Shortage Report will tell you if you have enough TOP, DRAWER and LEG items available in inventory. However, it will not tell you if you have enough HANDLE, HARDWARE and 1x8x10 LUMBER items available to build the DRAWER subassemblies. If you Expand Subassemblies, the report will show all missing items for all subassemblies. It will tell you if you have sufficient quantity on-hand to build all of the necessary assemblies and subassemblies, after first considering any subassemblies that may already be in inventory. The base unit of measure is used for all items listed on this report. The assembly components are first changed to base unit of measure before checking for shortages. Assemblies Menu 12-5
277 Screen options 1. Plan ID Select the range of production plans to include in the report. When you do not want to limit your report to a specific range, leave the From/To fields blank. 2. Show Shortages Only Check the box if you want to show only items with shortages. 3. Expand Subassemblies Check the box if you want to show shortages in subassemblies and/or their components. 4. Select one of the report command buttons, explained on page Assemblies Menu

278 Shortage Report Assemblies Menu 12-7
279 Item Usage Report Assemblies Item Usage Report Overview Use this report to produce a "Where Used" list for selected items. It is most useful if you replace an item that is used in assemblies with a new item, or if you run out of an item and need to know what assemblies you can no longer produce. Screen options 1. Item ID From / To Select the range of items to include in the report. When you do not want to limit your report to a specific range, leave the From/To fields blank. 2. Assembly ID From / To Select the range of assemblies to include in the report. 3. Select one of the report command buttons, explained on page Assemblies Menu

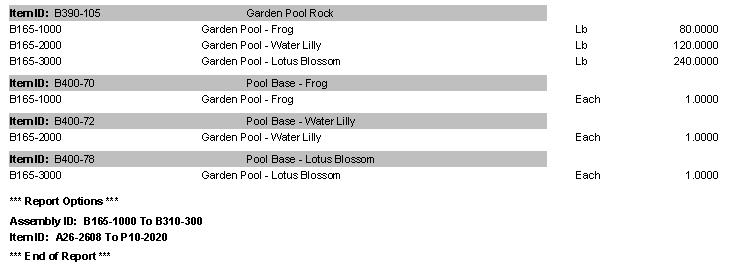
280 Item Usage Report Assemblies Menu 12-9

281 Maintain Assemblies Assemblies Maintain Assemblies Overview Use this selection to designate which inventory items are assemblies and to define what components are used to create those assemblies. Example: A good example of an assembly is a desk. The desk is made from a desktop, drawers, legs, and various hardware components. The drawers could also be assemblies, made of lumber plus hardware. In this case, the desk is an assembly with multiple components, one of which, the drawer, is a subassembly. Before you can create an assembly, you must have all the components set up as Items. When unbuilding an assembly, the current cost for each component is used (a sum of the current cost for each item is used as the cost for the assembled item). The current cost depends on the costing method selected in Customization. Screen options 1. Assembly ID Select the item you want to make into an assembly Assemblies Menu
282 2. Copy From If you are setting up a new assembly, you can select an existing assembly from which to copy information. This is very useful when you have several assemblies that are very similar. 3. Unit Choose the unit of measure you want to use when building this assembly. For example, you may build an assembly by the ton, even though you sell it by the pound. 4. Status Select the assembly's status. The system only produces active assemblies. 5. Date Created The date the assembly was (or is being) defined is displayed. 6. Last Modified The most recent modification date is displayed. 7. Explode on Invoice This feature will be available in a future version of Inventory and will let you list the individual components on the invoice, instead of the assembly. Assembly Detail 8. Sequence On each detail line enter the print order for this item in the listing of the assembly's components. Use this sequence number to show the components in the order they are assembled, giving you a very simple assembly plan. Click on the Resequence button to re-order the detail lines. 9. Item ID On each detail line, enter the item used to build the assembly. 10. Description The description of the item is displayed. 11. UOM The base unit of measure for the selected item is displayed. Use the default or select a different unit of measure that indicates the unit used during the assembly process. 12. Quantity Enter the number of units required for this assembly. Command Buttons Resequence Sequences the existing detail lines and resets the sequence numbers to multiples of 10. Assemblies Menu 12-11
283 Assembly Report Assemblies Assembly Report Overview The Assembly Report shows the assembly ID and all its components. If you select to expand subassemblies, all components of each subassembly are also shown. Costs are shown only on the first level of the assembly. The system always uses average cost, regardless of the costing method you specified in Customization. If you do not use average costing, you can print or preview the subassembly report and manually enter the cost shown there in the sub-assembly Item ID s Average Cost field (Setup & Maintenance - Item Locations). Screen options 1. Assembly ID From / To Select the range of assemblies to include in the report. When you do not want to limit your report to a specific range, leave the From/To fields blank. 2. Cost Location If you are showing costs, specify the location to use when determining the cost Assemblies Menu
284 3. Show Costs Check this box if you want to show the average cost for each component in the assembly. Important: If you print the report for a sub-assembly, the components will use their average costs for the Unit Costs and the Assembly Total will be a sum of those average costs. HOWEVER, if you print an Assembly Report for an assembly that includes subassemblies, the subassembly item will use only the average cost (under Unit Cost) for that item; NOT the calculated cost of the components. 4. Expand Subassemblies Check this box if you want the report to expand subassemblies into their component parts. 5. Select one of the report command buttons, explained on page 1-7. Assembly Report Assemblies Menu 12-13
285 Production Plan Report Assemblies Production Plan Report Overview This report shows the assemblies that are included in a production plan. Production plans are defined during the Produce Assemblies process (page 12-2). Screen options 1. Plan ID From / To Select the range of production plans to include in the report. When you do not want to limit your report to a specific range, leave the From/To fields blank. 2. Select one of the report command buttons, explained on page Assemblies Menu

286 Production Plan Report Assemblies Menu 12-15
287 Bill of Materials Report Assemblies Bill of Material Reports Overview This report shows all inventory items required by a selected aproduction plan (rather than showing only those inventory items that are in short supply, as shown in the Shortage Report, page 12-5). Screen options 1. Plan ID Select the production plan to include in the report. When you do not want to limit your report to a specific range, leave the From/To fields blank. 2. Expand Subassemblies Check the box if you want to show subassembly components. 3. Select one of the report command buttons, explained on page Assemblies Menu
288 Sample Bill of Materials Report Assemblies Menu 12-17
289 NOTES: Assemblies Menu
290 Chapter Thirteen Setup and Maintenance Menu This chapter explains setting up and maintaining items, item locations, sales categories, product lines, account codes, pictures, user-defined fields, customization, and ship-to information. Contents Customization Interfaces Options Defaults User Defined Fields Invalid General Ledger Account List Items Copy From Additional Description Unit Alternates Aliases Locations Item Locations Copy From Loc Defaults Loc History Price Info Cost Detail Vendor Info Bin Info Qty Info Summary View Qty Info Detail View Serial Info Summary View Serial Info Detail View Locations Sales Categories Product Lines Account Codes Pictures Price Breaks User-Defined Fields Ship-To Convert SM Items Price IDs Price Calculations Setup and Maintenance Menu 13-1
291 Customization Setup and Maintenance Menu Customization Tabs Interfaces (page 13-3) Options (page 13-5) Defaults (page 13-7) User-Defined Fields (page 13-9) Overview Use Customization to define application interfaces and general Inventory information. Choose to keep inventory history, specify the General Ledger accounts for material expenses, material inventory, miscellaneous material and more. Command button Invalid GL Account List Produce a list of invalid general ledger accounts Setup and Maintenance Menu
 when you interface Inventory with General Ledger for the first time; after general ledger account changes, particularly account deletions; or")
292 Customization Interfaces Tab Setup and Maintenance Menu Customization Interfaces Tab Overview Specify the applications that link with Inventory, along with history and periodic setup information. Select the Invalid GL Account List button (page 13-11) when you interface Inventory with General Ledger for the first time; after general ledger account changes, particularly account deletions; or when rollback errors occur in Post Transactions. (Rollback errors may indicate that general ledger accounts are incorrectly set up.) Selecting this button causes the system to look through all of the Setup and Maintenance information, searching for general ledger accounts that are not defined in the General Ledger module. Screen options Application Interface 1. General Ledger Check the box to interface Inventory with General Ledger. When interfaced, posting in Inventory makes entries in the General Ledger Transaction Journal for transactions that affect the General Ledger, such as cost-of-goods-sold adjustments. Setup and Maintenance Menu 13-3
293 2. Project Cost Check the box to interface Inventory with Project Cost. When interfaced, project information entered with sales or purchases can be brought into Project Cost. If Accounts Payable is interfaced with Inventory, the quantities, costs, and purchase history are updated in Inventory during transaction entry in Accounts Payable. You can also view vendor information when you set up items. If Accounts Receivable is interfaced with Inventory, the sales quantities and amounts, costs, serial information, and sales history are updated in Inventory when you post transactions in Accounts Receivable. History 3. Save Detail History Check the box to save detail history. If you do not keep detail history, you cannot save lot or serial number history, and cannot use the various history reports found on the Reports Menu. 4. Save Lot History Check the box to save lot history. If you do not save lot history, you cannot use the Lot History Report. 5. Save Serial Number History Check the box to save serial number history. If you do not save serial history, you cannot use the Serialized History Report. Periodic Setup 6. Current Fiscal Year Enter the current fiscal year. Transactions are posted to this year if you choose to post transactions to the current fiscal year in Post Transactions, page Number of Periods Per Year The number of periods in a year (set up in Company Information in System Manager) appears. You cannot change the number of periods. 8. When you are finished, close the screen to save your changes or select another tab: Options (page 13-5), Defaults (page 13-7), or User-Defined Fields (page 13-9) Setup and Maintenance Menu

294 Customization Options Tab Setup and Maintenance Menu Customization Options Tab Overview Use this selection to set up quantity, posting and alias checking options. Also, set up the costing method you want to use. Screen options Options 1. Show Cost on Sales Transaction Entry Check the box if you want to show costs when you enter sales transactions. 2. Post Detail to General Ledger Check the box to post each line item (detail method) to General Ledger. Clear the box to post one total for each account (summary method) to the General Ledger. 3. Check for Alias on Report Options Check the box if you want to enter alias names in the Item ID field on report screens. 4. Check for Alias on Screens Check the box to enter alias names in the Item ID field on function (transaction entry) screens. Setup and Maintenance Menu 13-5
295 5. Zero Quantity Sales Costing Select the cost (last, base, or standard) to use when you enter sales transactions for items with zero quantities on-hand and you are using the FIFO or LIFO costing method. This option is used ONLY if your costing method (specified below) is LIFO or FIFO. 6. Allow Editing of Item Cost Detail Check the box to allow you to edit enter or modify cost information found on the Cost Detail tab in Item Locations (page 13-37). This information is generally maintained by the system automatically and should only be entered or modified under special circumstances. Leave the box clear (unchecked) to best protect cost information maintained within your system. If you change costs, it will not affect the General Ledger directly, but the General Ledger and Inventory will not be valued the same. Costing Method 7. Select the costing method: FIFO (first in first out), LIFO (last in first out), average cost, or standard cost. For serialized items, specific costs are assigned to each item at purchase unless your costing method is standard cost (which always uses the standard cost set up in Setup and Maintenance). 8. When you are finished, close the window and return to the Main Menu Setup and Maintenance Menu

296 Customization Defaults Tab Setup and Maintenance Menu Customization Defaults Tab Overview Use this screen to set up whether or not you want to use attention colors which will alert you when quantities are nearing maximum and minimum levels and when there are missing amounts. If so, enter the percentage of inventory at which to begin using warning and caution colors, and the font style to use. Also, set up General Ledger default accounts. Screen options Attention Color Percentages 1. Use Attention Colors Check the box if you want to use attention colors. If so, select the text style for each level. 2. Warning % / Caution % Enter the percentage of inventory at which to begin using warning and caution colors. The bar changes to reflect the percentages. Setup and Maintenance Menu 13-7
297 The percentages are used on many inquiry screens and reports to alert you when quantities are nearing maximum and minimum levels and when there are missing amounts. For example, enter 50 percent in the Warning % field and 75 percent in the Caution % field. The amount in the Available field is displayed in the warning color when it reaches 50 percent of the minimum on hand amount and in the caution color when it reaches 75 percent of the minimum on hand amount. GL Account Defaults 3. If Inventory is interfaced with General Ledger, enter the default material expense, inventory, and miscellaneous accounts to use during posting. Select the Accounts Receivable General Ledger offset account for posting adjustment increases and the Accounts Payable General Ledger offset account for posting adjustment decreases. If Inventory is not interfaced with the General Ledger, enter the default material expense, inventory, and miscellaneous accounts to use during posting. Material Expense Account: Select the account to be debited for noninventory purchases (on the expense section of the income statement). Material Inventory Account: Select the account to be debited for inventory item purchases (on the asset section of the balance sheet). Material Misc. Account: Select the account to be debited for miscellaneous expenses (on the cost of goods or expense section of the income statement). AR GL Offset Account: Select the account to be debited for sales (on the income section of the income statement). AP GL Offset Account: Select the account to be credited for purchases (on the liability section of the balance sheet. 4. When you are finished, close the window and return to Main Menu Setup and Maintenance Menu
298 Customization User-Defined Fields Setup and Maintenance Menu Customization User-Defined Fields Overview Use this tab to define up to four field names specific to your company. Then use the User-Defined Fields menu selection (page 13-62) to add allowable values to the fields. Screen options Caption 1. Caption Enter captions for the user-defined fields. Hot keys are automatically assigned to each caption. The captions should indicate the type of information to enter in the field; for example, Color or Model. Only enter captions for the fields you want to use. User fields 1 and 2 appear on function, list, and report screens (see step 3); user fields 3 and 4 only appear on the Items, Items Inquiry, Item Price Change, Cost Changes, and Freeze Quantities Screens. 3. Req Check this box if you want the field to be required. You will be unable to exit entry screens until a value is entered. (Field entries are not validated any entry is accepted.) Setup and Maintenance Menu 13-9
299 4. Sort The Sort box is automatically checked for user fields 1 and 2. These fields are available as pick and sort options on the following screens: Items Items Inquiry Item Price Change Cost Changes Freeze Quantities Safety Stock Alert Report Overstock Report Slow/Fast Movement Report Sales Analysis Report Gross Profit Analysis Report Item Summary List Item Location List 5. When you are finished, close the window and return to the Main Menu Setup and Maintenance Menu
300 Invalid General Ledger Account List Setup and Maintenance Menu Customization Invalid GL Account List button Overview Select the Invalid GL Account List button when you interface Inventory with General Ledger for the first time; after general ledger account changes, particularly account deletions; or when rollback errors occur in Post Transactions. Rollback errors may indicate that general ledger accounts are set up wrong. Selecting this button causes the system to look through all of the Setup and Maintenance information, searching for general ledger accounts that are not defined in the General Ledger module. Listed below are the items that can appear on the Invalid GL Account List and where you should go in Setup and Maintenance to correct these invalid accounts. Menu Selection Code Field Account Field(s) Account Codes 01 GLAcctCode 0 GL Account fields Customization -1 Option 0 Defaults Tab, GL Account fields Step-by-step 1. First, the system asks if you want to include the System Manager Item, Bank Account, and Tax Location tables in the list. Next, the Invalid General Ledger Accounts window appears. 2. Select one of the report command buttons, explained on page When you are finished, click on the Close button (or click on ) to return to the Main Menu. Setup and Maintenance Menu 13-11
301 Items Setup and Maintenance Menu Items Additional Dialogs Copy From (page 13-17) Additional Description (page 13-18) Tabs Unit (page 13-19) Alternates (page 13-21) Aliases (page 13-22) Locations (page 13-23) Overview Use this selection to enter and maintain your inventory items at the item level. Specify the item ID, status, type, and other basic information about that item on the Items screen. Then, select one of the tabs to set up other item information, as applicable. How to Add an Item 1. Select the New Record toolbar button (or press Ctrl A). A blank Items screen appears. 2. Enter the new item ID. 3. If desired, select an item in the Copy From field to copy item information. The Copy From Window is displayed. Click on the information you want to copy Setup and Maintenance Menu
302 Only items with the same item type (serialized, nonserialized [the default], or service) are displayed. Therefore, if you want to copy from a serialized item, you must change the item type to serialized before entering the Copy From item. 4. After entering the item information, click on the save record button (or press Ctrl S) to save the item. Change an Item 1. Select the ID of the item you want to change. Information about the item appears. 2. Position the cursor in the field you want to edit and make your changes. 3. Click the save record button (or press Ctrl S) to save the changes. Delete an Item 1. Make sure none remain in inventory. If any remain, you are warned that you cannot delete the item. 2. Select the ID for the item you wish to remove. 3. Press the F3 (Delete) key, or click on on the toolbar. You are asked if you want to remove the item before it is deleted. Setup and Maintenance Menu 13-13
303 Screen options 1. Item ID Enter the item ID, up to 24 characters. If you do not know the Item ID, press the F2 key to search for the item. Because the system uses a proportional font, if you enter an ID in certain combinations of all capital letters (i.e. WWWWWWWWWW...), the entire ID may not appear on some reports and entry screens. This is because the system is set up to accomodate an average size entry, allowing more fields of information to be included on reports and screens. (Numeric entries are not proportional; a 1 takes up the same amount of space as a 7 or a 9). 2 Copy From Select an item to copy information from. Only items with the same item type (serialized, nonserialized, or service) are displayed. For example, to create a new serial item, select Serialized in the Item Type field and then go to the Copy From field and select an item. The Copy From dialog (page 13-17) appears. 3. Description Enter a description of the item, up to 35 characters. 4. Item Type Select an item type. Choices are: serialized, nonserialized, or service. (The default item type is nonserialized.) 5. Item Status Select the item status. Options are: Active Items that can be purchased and sold. Discontinued Items that can be sold, but not purchased Setup and Maintenance Menu
304 Superseded Obsolete Items that cannot be sold or purchased, because they have been replaced by another item. If you change an item status to superseded, the location status also changes to superseded. Items that cannot be purchased or sold. 6. Supersede Item ID Select an item ID to use as a replacement for the item if it is no longer available for purchase or sale. This field appears only if the item has superseded status. 7. Lotted If the item is part of a lot, check the box. This field is not available for service items. 8. Auto Reorder Not used in present system; included for future enhancement. 9. Base UOM Enter the base unit of measure (your smallest unit of measure). This becomes the first record on the Units tab. 10. Default UOM For serialized items, the default unit of measure is the base unit of measure entered in the Base UOM field. For nonserialized items with multiple units of measure, select the default unit of measure on the Units tab. 11. Weight Enter the item s weight. This field is for your information only; it is not used in freight charge calculations and does not appear in reports. If you have not set up the information in Setup and Maintenance for the remaining screen options, press F6 to add it "on the fly." 12. Sales Category Select the item's sales category, set up in Sales Categories, page Product Line Select the item's product line, set up in Product Lines, page Price ID Select the price ID of the item. The price ID identifies the pricing method for the item. They are set up in Price IDs. 15. Tax Class Select the item's tax class. Setup and Maintenance Menu 13-15
305 16. Picture ID Select the item's picture ID. 17. User-Defined Fields 1-4 Select the user-defined field values for the item. User-defined field values are assigned in User-Defined Fields (page 13-62) and are set up in Customization, page Order Cycle Enter a one-character code to classify this item for the Maintain Order File selection in the Red Wing Purchase Order system. For example, you could enter M for items you purchase once a month and W for items you purchase weekly, then select all items from one of those order cycles when creating the order file. 19. Click one of the tabs to enter additional information or close the screen to save your entries and return to the Main Menu. Command buttons Addl Descr Display the Additional Description dialog, page View Picture Display the picture corresponding to the selected picture ID Setup and Maintenance Menu
306 Copy From Setup and Maintenance Menu Items Copy From field Overview The Copy From window appears when you select an item ID in the Copy From field on the Items screen. Use it to select the information you want to copy. Screen options 1. Copy From / Description The ID of the item to copy and the item description default from the Items screen are displayed. You cannot change them. 2. Do You Want to Copy? Check the boxes of the information you want copied to the new item. 3. Select OK to save your changes and return to the Items screen (page 13-12) or Cancel to return to the Items screen without saving changes. Setup and Maintenance Menu 13-17

307 Additional Description Setup and Maintenance Menu Items Addl Descr Overview Use this selection to enter additional descriptive information or comments about an item. Screen options 1. Enter an additional description about the item. You can print this information on some reports. Also, the descriptions can be copied to Accounts Receivable or Accounts Payable for use during transaction entry by selecting the Copy Additional Descriptions From SM/IN Items option in Accounts Payable or Accounts Receivable Customization. 2. Select Close to save the description and return to the Items screen (page 13-12) or Delete to ignore it Setup and Maintenance Menu
 Screen options 1. Unit Enter the item s unit of measure.")
308 Unit Tab Setup and Maintenance Menu Items Unit Tab Overview Use this tab to enter multiple units of measure for nonserialized items. Serialized items can have only one unit of measure. Use the Default button to select or change the default unit of measure. Unit tab for Item A (12 Snow Tosser) Screen options 1. Unit Enter the item s unit of measure. The first record is always the base unit of measure entered in the Base UOM field. 2. Conv Factor Enter the conversion factor (the quantity of the base unit it takes to make one alternate unit) for the unit of measure. Example: The base unit of measure is EACH and the alternate unit of measure is DOZEN. The conversion factor is 12 because there are 12 base units of EACH in one DOZEN. The conversion factor for the base unit of measure is Penalty Type Select the penalty type. It determines the price when fractional parts of a unit are sold. Possible entries are: Percent: Amount: Applies to the fractional parts of units sold, resulting in a unit penalty. Applies to the inventory item, regardless of the quantity sold, resulting in a penalty per sale rather than per unit. Setup and Maintenance Menu 13-19
309 4. Penalty Enter the percent or amount of the penalty. For example, the unit of measure CARTON is set up to assess a 10% penalty when a fraction of a carton is sold. If the price of a carton is $500 and a customer orders 2.5 cartons, the price is calculated as follows: 2 cartons x $500 $1,000.5 cartons x $ Broken case penalty ($250 x.10) 25 Total $1, UPC Enter the identification number for the unit of measure to use as a reference. 6. When you are finished, select another tab, make changes to the Items screen (page 13-12) or close the screen Main Menu. to save your changes and return to the Command button Default Set the default unit of measure (the unit of measure usually used when you sell or purchase the item) Setup and Maintenance Menu
 Screen options 1.")
310 Alternates Tab Setup and Maintenance Menu Items Alternates Tab Overview Use this tab to enter items that are comparable to or can be substituted for other items. An alternate item is used when you sell an item with insufficient quantities. Alternates tab for Item A (12 Snow Tosser) Screen options 1. Alternate Item ID Select the alternate item ID for the item. 2. Start Date Enter the date to begin using the alternate item. Leave this field blank if there is no specific start date. 3. End Date Enter the date to stop using the alternate item. Leave this field blank if there is no specific end date. 4. When you are finished, select another tab, make changes to the Items screen (page 13-12), or close the screen Main Menu. to save your changes and return to the Setup and Maintenance Menu 13-21
311 Aliases Tab Setup and Maintenance Menu Items Aliases Tab Overview Use this tab to enter another name for the item. For example, item PS has an alias of PS. When you enter PS in the item ID field, the full item number is displayed and a message indicates that PS is an alias for item PS. The same alias can also be used for a category of items. Aliases are not recognized in Location Transfers (page 6-30). Aliases tab for Item A (12 Snow Tosser) Screen options 1. Alias Enter the alias for the item, up to 10 characters. 2. User ID Select the user ID for the alias, or enter an asterisk (*) to allow all users to use the alias. 3. When you are finished, select another tab, make changes to the Items screen (page 13-12), or close the screen Main Menu. to save your changes and return to the Setup and Maintenance Menu
 Screen options 1. Location ID Select the location ID where the item is stored.")
312 Locations Tab Setup and Maintenance Menu Items Locations Tab Overview Use this tab to enter locations where the item is stored. Use the Locations selection (page 13-48) to set up locations. Locations tab for Item A (12 Snow Tosser) Screen options 1. Location ID Select the location ID where the item is stored. All locations added on the Item Locations screen (page 13-25) are displayed. 2. Acct Code Select the account code for the item and location. The account code indicates the default general ledger accounts used during posting. Account codes for locations added on the Item Locations screen are displayed. 3. On Hand The number of units on hand at the location is displayed. 4. Committed The number of units reserved for customers at the location is displayed. 5. In Use The quantity in use at the location is displayed. In-use quantities prevent overselling. This field is updated when a sales invoice has been generated, but not posted. 6. Available The quantity available for sale at the location (the in-use and committed quantities subtracted from the on-hand quantity) is displayed. Setup and Maintenance Menu 13-23
313 7. On Order The quantity ordered from vendors at the location is displayed. (This field is updated when a new order is entered in the Purchase Order application.) 8. When you are finished, select another tab, make changes to the Items screen (page 13-12), or close the screen Main Menu. to save your changes and return to the Setup and Maintenance Menu
314 Item Locations Setup and Maintenance Menu Item Locations Additional Dialogs Copy From (page 13-31) Tabs Loc Defaults (page 13-32) Loc History (page 13-35) Price Info (page 13-36) Cost Detail (page 13-37) Vendor Info (page 13-38) Bin Info (page 13-40) Qty Info Summary View (page 13-41) Qty Info Detail View (page 13-43) Serial Info Summary View (page 13-45) Serial Info Detail View (page 13-46) Overview Use Item Locations to add and maintain the following item-specific information at the location level: general default location history price cost detail cost bin numbers vendor lot numbers location defaults serial numbers On the Item Locations screen, specify general, cost, and price adjustment information for the item location. Setup and Maintenance Menu 13-25
315 How to Add Item Locations 1. Select the item. Information about it appears. 2. Select Add. The Copy From window (page 13-31) appears. 3. Use the Copy From window to copy information from an existing location, or close the window and enter location, price, cost, vendor, bin, lot number, and serial number information. 4. After entering the item location information, click on the save record button (or press Ctrl S) to save it. Change Item Locations 1. Select the item ID. 2. Select the location ID. 3. Select the tab containing the information you want to change. 4. Change the information. Delete Item Locations 1. Make sure there are no item quantities at the location. 2. Select the ID of the item with location information to delete. 3. Select the location ID. 4. Select Delete. If quantities of the item remain at the location, a message appears, and you must delete the quantities before deleting the location from the item Setup and Maintenance Menu
316 Assign Default Information 1. Select the item ID. 2. Select the location. 3. Select the tab. Choices are: Loc Defaults, Vendor Info, and Bin Info. 4. Enter the default vendor ID to identify the usual supplier of the item. 5. Enter the default bin number to identify where the item is usually stored. 6. Enter the default price ID (used for calculating the price for which the item is most often sold). 7. Enter the number of days it takes the default vendor to ship the item to you. (The default lead time is used in calculating the order point in the Purchase Order application.) Enter Cost Information 1. Select the item ID. Information about the item appears. 2. Select the location. 3. In the Costs section of the screen, enter the average, last, and base costs. Enter the standard cost if you are using the standard costing method. 4. Select the Cost Detail tab (page 13-37) and enter the initial date, the on-hand quantity, and the unit cost of the item. The extended cost is calculated. Enter a lot number if the item is lotted. You can enter cost detail information for Lot Numbers on the Cost Detail tab if quantities are already assigned to the item, but you will not have a record of your cost history. To keep cost history, you must use Inventory Transactions (page 6-2). 5. If the item is serialized, or is lotted and serialized, select the Serial Info tab (page 13-45). Enter the serial number, price, cost, and item's status. Setup and Maintenance Menu 13-27
; select Delete to delete item locations. General 3. Location Status Select the location status.")
317 Screen options 1. Item ID Select an item ID. Press F2 to find an item or F6 to add a new item. Location 2. Select the location for which you want to enter information. Select Add to add new locations (using the Copy From window, page 13-31); select Delete to delete item locations. General 3. Location Status Select the location status. It is dependent on the item status as follows: Item Status Location Status Active Active, Discontinued, Obsolete, Superseded Discontinued Discontinued, Obsolete, Superseded Superseded Superseded, Obsolete Obsolete Obsolete When you enter transactions, the system checks the item status and then the location status. You cannot purchase an obsolete, discontinue, or superseded item, and you cannot sell an obsolete item Setup and Maintenance Menu
318 4. Supersede Item ID The superseded item ID you selected on the Items screen is displayed. This field appears if the item has superseded status. 5. Forecast Type Not used in present system; included for future enhancement. 6. Account Code Select the account code for the item and location. The account code indicates the default general ledger accounts used when you post. Press F6 to add new account codes. Costs 7. Average The average cost amount is automatically adjusted by the system when items are purchased (using Accounts Payable) or assembly maintenance. When an item is sold, this field uses the average weighted cost of the item over time (if you use the average costing method). The formula for calculating the average cost is: on-hand qty x current average cost + current qty purchased x current unit cost purchased / on-hand qty + qty purchased. 8. Last This field is updated automatically when items are purchased. When a purchase invoice is entered, it defaults to this cost. 9. Base (Optional if not using average costing) Enter the base cost of the item. The Base Cost does not change unless you update it. If you use average costing, the base cost is used for price calculations as a markup from cost. 10. Standard (Optional if not using standard costing) Enter the standard cost of the item if you use the standard costing method. This field is used to cost an item as it is sold. (There is no automatic update.) You can use Periodic Processing to update cost (and price) field, if necessary. However, be very careful when updating costs, as it does not make an entry to the General Ledger. Thus, your inventory valuation will no longer match the value of inventory in your General Ledger. 11. When you are finished, select a Tab or close the screen to save your changes and return to the Main Menu. Setup and Maintenance Menu 13-29
319 Command buttons Add Delete Display the Copy From window. Delete a location Setup and Maintenance Menu

320 Copy From Setup and Maintenance Menu Item Locations Add button Overview The Copy From window appears when you select Add on the Item Locations screen. Screen options 1. Add Location ID Select the ID of the location to add. 2. Copy From Item Select the ID of the item to copy from. 3. Copy From Location Select the ID of the location to copy from. 4. Account Code Select the account code. 5. Check the boxes of the information you want copied to the new location. 6. Select OK to save your changes and return to the Item Locations screen (page 13-25) or Cancel to return without saving changes. Setup and Maintenance Menu 13-31
 Screen options Defaults 1. Vendor ID Enter the default vendor ID (the ID of the most frequent supplier of the item). 2.")
321 Loc Defaults Tab Setup and Maintenance Menu Item Locations Loc Defaults Tab Overview The information on this tab is used in the Purchase Order application. Loc Defaults tab for Item A (24 Snow Tosser) Screen options Defaults 1. Vendor ID Enter the default vendor ID (the ID of the most frequent supplier of the item). 2. Bin Number Enter the default bin number; the bin where the item is most often stored. 3. Lead Time Enter the default lead time (the number of days it usually takes the vendor to ship the item to you). This field will be used in the Purchase Order application to calculate the order point for the location. 4. Carrying Cost Percent Enter the percentage of the total value of your inventory to use in the EOQ (economic order quantity) calculation in the reorder process. You can also enter a carrying cost percent on the Locations screen (page 13-50). The item location percentage overrides the location percentage Setup and Maintenance Menu
322 5. Ordering Cost Amount Enter the total cost of shipping, stocking, and labor to use in the EOQ calculation in the reorder process. You can also enter an ordering cost amount on the Locations screen. The item location amount overrides the location amount. Order Quantities 6. Maximum Qty Enter the maximum number of units to have on hand at one time. The maximum quantity is printed in the Overstock Report, page Order Point (Quantity/Status) Enter the order point (an estimate of the quantity you use during the order process added to the safety stock you maintain). If you want the system to calculate reorders, you must fill in an order point for the item. Select an order point status: Manual Change the status manually. Frozen Freeze the current order point. Calculated This option is not used at this time. If you change the order point, select Manual for the order point status. 8. Safety Stock (Quantity/Status) Enter the minimum number of units to keep on hand at all times. When the number of on-hand (or available quantity) units falls below this point, the item is listed in the Safety Stock Alert Report, page 9-3. Select a safety stock status: Manual Change the status manually. Frozen Freeze the current safety stock amount. Calculated This option is not used at this time. If you change the safety stock amount, select Manual for the safety stock status. 9. EOQ (Quantity/Status) Enter the economic order quantity, (the quantity at which it is most economical to place an order). Select an EOQ status: Manual Change the status manually. Frozen Freeze the current EOQ. Calculated This option is not used at this time. Setup and Maintenance Menu 13-33
323 10. Minimum Order Qty Enter the minimum quantity to order. 11. When you are finished, select another Tab, make changes to the Item Locations screen (page 13-25), or close the screen and return to the Main Menu. to save your changes Setup and Maintenance Menu
 Screen options 1. Last Sale Enter the date of the last sale. 2. Last Sale Return Enter the date of the last sale returned. 3.")
324 Loc History Tab Setup and Maintenance Menu Item Locations Loc History Tab Overview Information on this tab is updated when you post transactions from the applicable applications. Loc History tab for Item A (24 Snow Tosser) Screen options 1. Last Sale Enter the date of the last sale. 2. Last Sale Return Enter the date of the last sale returned. 3. Last Purchase Enter the date of the last purchase. 4. Last Purchase Return Enter the date of the last purchase returned. 5. Last Transfer Enter the date of the last transfer. 6. Last Adjustment Enter the date of the last adjustment. 7. Last Material Req Enter the date of the last material requisition. 8. When you are finished, select another Tab, make changes to the Item Locations screen (page 13-25), or close the screen changes and return to the Main Menu. to save your Setup and Maintenance Menu 13-35
325 Price Info Tab Setup and Maintenance Menu Item Locations Price Info Tab Overview Use this tab to specify unit-of-measure pricing and quantity breaks. Price Info tab for Item A (24 Snow Tosser) Screen options 1. Unit Enter the item s unit of measure. 2. Average Price This is the average selling price of the items sold. It is automatically updated when you enter a sale. 3. Base Price Enter the standard price (per unit) for which you sell an item. It can be used to calculate price breaks and customer pricing in Accounts Receivable. A sales invoice will default to this price if Price Calculations Page 13-69) are not being used. It is also the price used on the Price Report. This field does not automatically update. 4. List Price (Optional) Enter the list price of each unit (the basic, published price without any discounts added to it). It can be used as a reference for the Manufacturer s Suggested Retail Price. 5. Minimum Price (Optional) Enter the minimum price for which the item is sold. Price Calculations uses this field. The system will not allow a calculated sale price to fall below the minimum price. 6. Qty Break ID Enter the ID of the quantity a customer must purchase to receive a discounted price. Press F6 to enter a new quantity break ID. 7. When you are finished, select another Tab, make changes to the Item Locations screen (page 13-25), or close the screen to save your changes and return to the Main Menu Setup and Maintenance Menu

326 Cost Detail Tab Setup and Maintenance Menu Item Locations Cost Detail Tab Overview This tab is not available for serialized items. It shows cost detail information. The information on this tab is updated when you post purchase transactions. You can only change cost information if check the box for Allow Editing of Item Cost Detail on the Options tab in Customization (pages 5-6). This information is generally maintained by the system automatically and should only be entered or modified under special circumstances. Leave the box clear (unchecked) to best protect cost information maintained within your system. If you change costs, it will not affect the General Ledger directly, but the General Ledger and Inventory will not be valued the same. Screen options Cost Detail tab for Item A (Calcium Chloride-Salt) 1. Initial Date The date the item was purchased is displayed. FIFO and LIFO costing methods figure costs based on this date. This date cannot be changed unless the base quantity is zero. 2. Base Quantity Enter the quantity of items in stock at the location. 3. Unit Cost Enter the item's unit cost. 4. Extended Cost The extended cost of the unit is displayed. 5. Lot Number If this item is lotted, select the lot number. 6. Total The total base quantity and total extended cost is shown. 7. When you are finished, select another Tab, make changes to the Item Locations screen (page 13-25), or close the screen to save your changes and return to the Main Menu. Setup and Maintenance Menu 13-37
 Screen options 1. Vendor ID Enter the vendor ID. Name/Item ID 2.")
327 Vendor Info Tab Setup and Maintenance Menu Item Locations Vendor Info Tab Overview The information on this tab is updated when you post transactions from the appropriate applications. Vendor Info tab for Item A (24 Snow Tosser) Screen options 1. Vendor ID Enter the vendor ID. Name/Item ID 2. Name/Item ID Enter the vendor's name and the item ID the vendor uses as an identifier. 3. Lead Time Enter the number of days it usually takes the vendor to ship the item to you. Last Purchase 4. Quantity Enter the last quantity ordered from the vendor. 5. Unit Cost Enter the last cost per unit the vendor charged. 6. Order Number Enter the last purchase order number Setup and Maintenance Menu
328 7. Unit Enter the last unit of measure ordered from the vendor. 8. Date Enter the date the last purchase was made from the vendor. 9. When you are finished, select another Tab, make changes to the Item Locations screen (page 13-25), or close the screen and return to the Main Menu. to save your changes Command buttons Default Update the vendor ID field on the Loc Defaults tab, page Setup and Maintenance Menu 13-39
 Screen options 1. Bin Number Enter a bin number. 2. Tag Number The tag number assigned to the specified bin is displayed. 3.")
329 Bin Info Tab Setup and Maintenance Menu Item Locations Bin Info Tab Overview Use this tab to specify a bin number and to view information from the last physical count. Bin Info tab for Item A (24 Snow Tosser) Screen options 1. Bin Number Enter a bin number. 2. Tag Number The tag number assigned to the specified bin is displayed. 3. Date The last date a physical count was taken is displayed. 4. Count Qty The quantity counted during the last physical count is shown. 5. Unit The unit of measure the last physical count was based on is shown. 6. Batch ID The batch ID used in the last physical count is displayed. 7. When you are finished, select another Tab, make changes to the Item Locations screen (page 13-25), or close the screen changes and return to the Main Menu. to save your Command buttons Default Update the bin number field on the Loc Defaults tab (page 13-32) Setup and Maintenance Menu
.")
330 Qty Info Tab Summary View Setup and Maintenance Menu Item Locations Qty Info Tab Summary View Overview The information on this tab is updated when you post transactions. It shows quantity information for items with and without lot numbers. You can also enter the expiration date for a lot. Select to toggle from summary view to detail view (page 13-43). Qty Info (Summary) tab for Item A (24 Snow Tosser) Screen options 1. Lot Number If the item is lotted, enter the lot number. 2. Base Qty Available The quantity available is displayed. Use the Cost Detail tab (page 13-37) to enter initial quantities. 3. Avg Unit Cost The item's average cost per unit is displayed. 4. Expires Enter the date the lot expires. The system warns you before you can sell an expired lot. 5. Vendor ID The item's default vendor is displayed. Setup and Maintenance Menu 13-41
331 6. Status The item's status is displayed: The status for new items is available. Lots you add for your history records that are past the expiration date have a status of expired. When the on-hand quantity is zero, the status is sold. 7. When you are finished, select another Tab, make changes to the Item Locations screen (page 13-25), or close the screen and return to the Main Menu. to save your changes Setup and Maintenance Menu
 tab for Item A26-2612 (24 Snow Tosser) Screen options 1. Lot Number If the item is lotted, enter the lot number. 2.")
332 Qty Info Tab Detail View Setup and Maintenance Menu Item Locations Qty Info Tab Detail View Overview Use this screen to enter base quantities for both lotted and non-lotted items. Select to toggle from detail view to summary view. Qty Info (Detail) tab for Item A (24 Snow Tosser) Screen options 1. Lot Number If the item is lotted, enter the lot number. 2. Base Qty Avail The quantity available is displayed. Use the Cost Detail tab (page 13-37) to enter initial quantities. 3. Avg Unit Cost The average cost per unit of the item is displayed. Do NOT confuse this cost with the inventory item's actual average cost (displayed in the Costs section of the Item Locations window) which is used for general ledger records. The following example (based on an inventory item named "SAMPLE") clearly explains the differences: Item Location Qty. Cost/Unit Avg. Unit Cost SAMPLE MCSH 10 $8.50 $8.50 SAMPLE WHSE1 20 $9.00 $9.00 The location-specific Avg. Unit Cost (the last column of the chart) is only for those items stored at a specific location. However, the inventory item SAMPLE has an average cost of $8.83 (as shown below). [(10 x $8.50) + (20 x $9.00)] / 30 = $8.83 Setup and Maintenance Menu 13-43
333 4. Expires Enter the date the lot expires. The system warns you before you can sell an expired lot. 5. Vendor ID The default vendor for the item is displayed. 6. Status The item s status is displayed: The status for new items is available. Lots you add for your history records that are past the expiration date have a status of expired. When the on-hand quantity is zero, the status is sold. 7. Base Qty On Hand The on-hand quantity is displayed. 8. Base Qty Committed Enter the quantity that is committed. 9. Base Qty In Use Enter the quantity that is sold, but not posted. In-use quantities are used to prevent overselling. 10. Base Qty On Order Enter the on-order quantity. 11. Initial Date For lotted items, enter the date the item arrived at the inventory location. 12. Base Qty Received For lotted items, enter the quantity received. 13. Base Qty Sold For lotted items, enter the quantity sold. 14. Base Qty Returned For lotted items, enter the quantity returned. 15. Comment Enter a short comment about the lot, up to 35 characters. 16. When you are finished, select another Tab, make changes to the Item Locations screen (page 13-25), or close the screen and return to the Main Menu. to save your changes Setup and Maintenance Menu
 tab for Item A26-2612 (24 Snow Tosser) Screen options 1.")
334 Serial Info Tab Summary View Setup and Maintenance Menu Item Locations Serial Info Tab Summary View Overview This tab is available only when a serialized item is selected. Use it to enter summary information for serialized items. Select to toggle from summary view to detail view. Serial Info (Summary) tab for Item A (24 Snow Tosser) Screen options 1. Serial Number Enter the item's serial number. 2. Price Enter the item's unit price. 3. Cost Enter the item's unit cost. 4. Status Select the item's status: Available items are ready for sale. In Use items are sold but not posted. Sold items are posted. Lost items have decreasing adjustments, which are usually made when you update perpetual inventory. Returned items are returned sales that need to be posted. 5. When you are finished, select another Tab, make changes to the Item Locations screen (page 13-25), or close the screen and return to the Main Menu. to save your changes Setup and Maintenance Menu 13-45
 tab for Item A26-2612 (24 Snow Tosser) Screen options 1. Serial Number Enter the item's serial number. 2.")
335 Serial Info Tab Detail View Setup and Maintenance Menu Item Locations Serial Info Tab Detail View Overview Use this selection to enter detail information for serialized items. Select to toggle from detail view summary view. Serial Info (Detail) tab for Item A (24 Snow Tosser) Screen options 1. Serial Number Enter the item's serial number. 2. Price Enter the unit price. 3. Cost Enter the unit cost. 4. Status Select the item's status: Available items are ready for sale. In Use items are sold but not posted. Sold items are posted. Lost items have decreasing adjustments, which are usually made when you update perpetual inventory. Returned items are returned sales that need to be posted Setup and Maintenance Menu
336 5. Lot Number Select or enter a lot number, if the serialized item is lotted. 6. Initial Date Enter the date the item entered your inventory. 7. Comment Enter a short comment about the item, up to 35 characters. 8. When you are finished, select another Tab, make changes to the Item Locations screen (page 13-25), or close the screen and return to the Main Menu. to save your changes Setup and Maintenance Menu 13-47
337 Locations Setup and Maintenance Menu Locations Overview Use this selection to set up the information for each location where you stock inventory. You can add locations or remove invalid locations, but you cannot delete a location if any items are stored there. You must set up at least one inventory location before you add items. How to Add a Location 1. Select the New Record toolbar button (or press Ctrl A). A blank Locations screen appears. 2. Enter the location ID. 3. Select a location in the Copy From field and copy information or enter the required information. 4. Save the record (or press Ctrl S). Change a Location 1. Select the ID of the location to edit. Information about the location appears in the remaining fields. 2. Make any changes. 3. Save the record Setup and Maintenance Menu

338 Delete a Location 1. Make sure the location does not have any open inventory items. 2. Select the ID of the location to delete. 3. Press the F3 function key (or click on the icon). Screen options 1. Location ID Enter a location ID, up to 10 characters. When you exit the field, the Copy From field appears. 2. Copy From Select a location and copy the information or skip the Copy From field. 3. Name Enter the name of the location. 4. Address1/Address2 Enter the location's address. 5. City Enter the city. 6. State Enter the state. 7. Country Select the country. Countries are set up in Country Codes in System Manager. Setup and Maintenance Menu 13-49
339 8. Zip Code Enter the location's zip code. 9. Contact Enter the name of the contact person at the location. 10. Phone Enter the location's phone number. 11. Fax Enter the fax number. 12. Carrying Cost Percent Enter the default percentage of the total value of your inventory to use in the EOQ (economic order quantity) calculation in the reorder process. (This field is used in the Purchase Order application.) You can also enter a carrying cost percent on the Item Locations screen (page 13-32). The item location percentage overrides the location percentage. 13. Ordering Cost Amount Enter the total cost of shipping, stocking, and labor to use in the EOQ calculation in the reorder process. This field is used in the Purchase Order application. You can also enter an ordering cost amount on the Item Locations screen, page The item location amount overrides the location amount. 14. Close the screen to save your changes and return to the Main Menu Setup and Maintenance Menu
340 Sales Categories Setup and Maintenance Menu Sales Categories Overview Use this selection to set up and maintain sales categories. You can use sales categories to identify your market areas and help you analyze sales in those areas. The sales category codes are used to sort and summarize historical information, such as detail sales history from Accounts Receivable. How to Add a Sales Category 1. Select the New Record toolbar button (or press Ctrl A). A blank record appears. 2. Enter a one or two-character sales category and its description. Change a Sales Category Description Position the cursor in the sales category description and change it. Delete a Sales Category 1. Make sure the sales category is not in use. 2. Select the sales category to delete. 3. Press the F3 key (or click on on the toolbar). Setup and Maintenance Menu 13-51

341 Screen options 1. Sales Category Enter a one or two-character sales category. For example, RE for Retail and WH for Wholesale. 2. Description Enter a description of the sales category, up to 35 characters. 3. Close the screen to save your changes and return to the Main Menu Setup and Maintenance Menu
342 Product Lines Setup and Maintenance Menu Product Lines Overview Use this selection to categorize your inventory items into groups of similar items. You can sort by product line in many reports. You can also specify the product lines to use for promotional pricing. How to Add a Product Line 1. Select the New Record toolbar button (or press Ctrl A). A blank record appears. 2. Enter the product line and its description. Change a Product Line Description Position the cursor in the product line description and change it. Delete a Product Line 1. Make sure the product line is not in use. 2. Select the product line to delete. 3. Press the F3 function key (or click on the on the toolbar). Setup and Maintenance Menu 13-53

343 Screen options 1. Product Line Enter the product line code, up to 12 characters. Use a character sequence that identifies the category of items. For example, WIN identifies window types and DRWOODFRM identifies wood-frame doors. 2. Description Enter the description of the product line, up to 35 characters. 3. When you are finished, close the screen to save your changes and return to the Main Menu Setup and Maintenance Menu
344 Account Codes Setup and Maintenance Menu Account Codes Overview Use this selection to assign default general ledger accounts for use when posting sales, purchases, transfers, adjustments, and physical counts to the General Ledger. The account codes are also used when an item is sold, located or returned through Accounts Receivable, or purchased or returned through Accounts Payable. Assign an account code to an item on the Item Locations screen, page For more information about entries posted to specific general ledger accounts, see Post Transactions (page 6-41), Post Material Requisitions (page 7-21), GL Adjustments Journal (page 6-45), and Update Perpetual Inventory (page 11-33). For more information about setting up general ledger accounts, see Red Wing General Ledger online help or the User's Guide. How to Add an Account Code 1. Select the New Record toolbar button (or press Ctrl A). A blank record appears. 2. Enter the new account code (one or two characters) and its description. 3. Enter the required information, or select an account code in the Copy From field and copy the information. Change an Account Code Select the account code to edit and change the information. Setup and Maintenance Menu 13-55

345 Delete an Account Code 1. Make sure the account code is not being used by any item. 2. Select the account code to delete. 3. Press the F3 function key (or click on the on the toolbar). Screen options 1. Account Code Enter the one or two-character account code. 2. Description Enter the description of the account code, up to 35 characters. 3. If Inventory is interfaced with the General Ledger, you can select accounts from a list of valid accounts. If Inventory is not interfaced with General Ledger, you must enter the following accounts: Setup and Maintenance Menu
346 Account What it Posts What Section of the Financial Statement Sales Income Income Cost of Goods Sold Costs Cost of Goods or Expense Inventory Inventory value Asset (Current) Work in Jobs that are in process Asset (Current) Process (currently not used) Inventory Adjustments made to Asset (Current) Adjustment inventory COGS Adjustment Adjustments made to inventory Cost of Goods or Expense Purchase Price Variance Physical Count Adjustment Transfer Cost Differences between the standard cost and the actual price paid Physical count differences Transfer costs Cost of Goods or Expense Cost of Goods or Expense Cost of Goods or Expense 4. When you are finished, close the screen to save your changes and return to the Main Menu. Setup and Maintenance Menu 13-57
347 Pictures Setup and Maintenance Menu Pictures Overview Use this selection to cut and paste pictures of inventory items. The pictures can be viewed on the Items and Items Inquiry screens or printed in the Item Detail List. Pictures are graphic files and will take up a lot of room on your hard drive. How to Add a Picture 1. Select the New Record toolbar button (or press Ctrl A). 2. Enter the picture ID and a description. 3. Paste the picture from the clipboard into the picture box. Change a Picture 1. Select the picture you want to edit. 2. Double-click the picture box. 3. Edit the picture in the appropriate application opened by Microsoft Windows. Delete a Picture 1. Make sure the picture is not being used. 2. Select the picture ID you want to delete. 3. Press the F3 function key or click on on the toolbar Setup and Maintenance Menu

348 Screen options 1. Picture ID Enter the picture ID, up to 10 characters. 2. Description Enter a description of the picture, up to 35 characters. 3. Enter a picture in one of the following ways: Paste an existing bitmapped picture into the picture box, using any of the Microsoft Windows paste commands (Ctrl V, the Edit Menu Paste command, or a right mouse button Paste command in Microsoft Windows 95). Use object linking and embedding (OLE) to link the picture or to insert the picture as an object in a new window or in the picture box. Refer to Microsoft Windows online help for more information. 4. When you are finished, close the screen to save your changes and return to the Main Menu. Setup and Maintenance Menu 13-59
349 Price Breaks Setup and Maintenance Menu Price Breaks Overview Use this selection to set up price breaks. They usually give increasing discounts for customers as the quantity of sales increases. For example, you can set up a price break ID that gives a 1% discount on purchases of 10 items, a 2% discount on purchases of 20 items and a 3% discount on purchases of 30 items or more. How to Add a Price Break 1. Select the New Record toolbar button (or press Ctrl A). 2. Enter the break ID, break quantity, adjustment, and adjustment type. Change a Price Break Value Select the price break and change the information. Delete a Price Break Value 1. Make sure the price break is not being used on an item. 2. Select the price break to delete. 3. Press the F3 function key or click on on the toolbar Setup and Maintenance Menu

350 Screen options 1. Break ID Enter a price break ID. Keep it simple to make it easier to remember and to relate to the price breaks. 2. Break Quantity Enter the number of items that must be sold before the discount is applied. 3. Adjustment Enter the amount or percent discounted for each item after the break quantity is exceeded. (Use a minus sign (-) to indicate a markdown.) 4. Adjustment Type Select whether the adjustment is a percentage or dollar amount. 5. When you are finished, close the screen to save your changes and return to the Main Menu. Setup and Maintenance Menu 13-61
351 User-Defined Fields Setup and Maintenance Menu User-Defined Fields Overview Use this selection to set up and maintain the values for the user-defined fields set up on the User-Defined Fields tab in Customization.(page 13-9) How to Add a user-defined field value 1. Make sure you have entered captions on the User Defined Fields tab in Customization. 2. Select the tab for which you want to add value(s). 3. Select the New Record toolbar button (or press Ctrl A). 4. Enter the value(s). Change a user-defined field value Select the tab and change the value(s). Delete a user-defined field value 1. Select the tab. 2. Select the value you want to delete. 3. Press the F3 function key or click on on the toolbar Setup and Maintenance Menu
.")
352 Screen options 1. Select a tab and enter values for the user-defined field, up to 12 characters each. For example, if you set up a user-defined field for color, you could enter the colors you will be assigning (red, green, yellow, etc.). The number of tabs on the screen depends on the number of field names set up in Customization: For example, if you defined user field 1 and user field 2, the screen has two tabs. 2. When you are finished, close the screen to save your changes and return to the Main Menu. Setup and Maintenance Menu 13-63
353 Ship-To Setup and Maintenance Menu Ship-To Overview Use this selection to enter, change, or delete shipping addresses. The addresses are used in Material Requisitions (page 7-2), to identify the recipient of the ordered goods. For example, if your purchasing department orders an item, it will be shipped to the address indicated on the materials requisition, based on the ship-to ID. How to Add an Address 1. Select the New Record toolbar button (or press Ctrl A). A blank record appears. 2. Enter the ship-to information. Change an Address 1. Select the ship-to address ID and to edit and change the information. Delete an Address 1. Make sure the address is not being used in transactions. 2. Select the ship-to address ID. 3. Press the F3 function key or click on on the toolbar Setup and Maintenance Menu

354 Screen options 1. Ship-To ID Enter the ship-to ID. 2. Name Enter the ship-to name. 3. Address 1 / Address 2 Enter the ship-to address. 4. When you are finished, close the screen to save your changes and return to the Main Menu. Setup and Maintenance Menu 13-65
355 Convert SM Items Setup and Maintenance Menu Convert SM Items Overview Use this selection to convert inventory items set up in System Manager into Inventory Items in the Inventory module. Check the information in Items (page 13-12) and Item Locations (page 13-25) to verify that the item information is correct before you use it. You may need to add information, such as unit of measure. Screen options 1. Default Location ID Select the location ID to identify where the items will be placed. You can then move them in Item Locations, if needed. Press F6 to add a new location ID. 2. Default Account Code Select a default account code. Items without default General Ledger accounts are assigned to this account. Press F6 to add a new account code Setup and Maintenance Menu
356 3. Maintain Item GL Accounts Check the box to keep the General Ledger accounts assigned to the items. 4. Select OK to begin processing or Close to return to the Main Menu. Setup and Maintenance Menu 13-67

357 Price IDs Setup and Maintenance Price IDs Overview Price IDs identify your different pricing methods and are used in Price Calculations with the customers Price Code (set up in Accounts Receivable) to tell the system how to calculate prices in Accounts Receivable transaction entry. You can assign a default Price ID to each item. Screen options 1. Price ID Enter the price ID, up to 10 characters. If possible, enter codes that indicate the basis of the pricing. For example, GPMADJ for gross profit margin adjustment or BPRADJ for base price adjustment. 2. Description Describe the price ID in more detail Setup and Maintenance Menu
 combinations.")
358 Price Calculations Setup and Maintenance Price Calculations Overview This selection is used to define the price calculation that is done the customer price code (set up in Accounts Receivable) and the item price ID (set up in Inventory) combinations. During invoice entry (in Accounts Receivable), the system looks at the price code and price ID you enter, then uses the selected calculation to determine the proper selling price. Limits If you do not set up a price code, price ID combination, the normal (base) price is used. If a customer does not have a price code, the normal (base) price is used. Each item is assigned a minimum price. If the calculated price falls below the minimum price, the minimum price is used. Setup and Maintenance Menu 13-69
359 Screen options 1. Customer Price Code Select a customer price code. 2. Item Price ID Select an item price ID. 3. Calculation Type Select whether the calculation type is margin, percent or amount. Listed below are examples of each calculation type. Margin = 25% With base = $100 Price = Base / (1 - margin) Price = $ ($100 / ) Percent = 25% With base = $100 Price = $ ($100 + $100 x.25) Amount = $25 With base = $100 Price = $ (1-- + $25) 4. Calculation Base Select whether the calculation is based on cost, base price, average price or list price. When price calculations are based on cost: If Inventory is set up to use the average costing method, price calculations use the Base Cost field. If Inventory is set up to use a LIFO or FIFO costing method, price calculations use the current LIFO/FIFO cost. 5. Adjustment Amount Enter the percent (up to four decimal places) for Margin and Percent calculation types. Enter the adjustment dollar amount for an Amount calculation type. For example, if the margin is 44%, enter If the adjustment reduces the price, enter a minus sign before the percent or amount ( ). 6. Close the screen when you are finished Setup and Maintenance Menu
360 Chapter Fourteen Setup and Maintenance Lists Produce Item Detail, Item Summary, Item Location, Location Detail, Sales Categories, Product Lines, Account Codes, Price Breaks, Price IDs and Price Calculations lists. Contents Introduction - Common Screen Options Item Detail List Item Summary List Item Locations List Location Detail List Sales Categories List Product Lines List Account Codes List Price Breaks List Price IDs List Price Calculations List Setup and Maintenance Lists 14-1
361 Introduction Common screen options Many of the screen options are the same from report to report. Each is defined below: When you do not want to limit your report to a specific range, leave the From/To fields blank. Item ID From / To Select the range of items to include in the list. Location ID From / To Select the range of locations to include in the list. Product Line From / To Select the range of product lines to include in the list. UserDef1 From / To If you use user-defined fields, select the range of userdefined field 1 to include in the list. The user-defined fields are set up in User- Defined Fields. UserDef2 From / To Select the range of your user-defined field 2 to include in the list Setup and Maintenance Lists

362 Item Detail List Setup and Maintenance Lists Item Detail List Overview The Item Detail List contains information about your inventory items, defined in Items (page 13-12) on the Setup and Maintenance Menu. The report shows general information, alternate items, units of measure, and location summary information. Use this selection to specify the items, product lines, and userdefined fields to include in the list. Screen options 1. Item ID From / To 2. Product Line From / To 3. UserDef1 From / To 4. UserDef2 From / To See Common screen options on page Report Type Select the amount of detail you want printed on the report. If you select Item Detail, choose the specific information you want listed under Detail to Include. 6. Sort By Select the sort method. You can sort by Item ID, Product Line, UserDef1 or UserDef2. Setup and Maintenance Lists 14-3
363 7. Print Click on the appropriate check boxes to limit the list to just the information you need. 8. Select one of the report command buttons, explained on page 1-7. Item Detail List 14-4 Setup and Maintenance Lists
364 Item Summary List Setup and Maintenance Lists Item Summary List Overview The Item Summary List summarizes general information about your inventory items, defined in Items (page 13-12) on the Setup and Maintenance Menu. Use this selection to specify the items, product lines and user-defined fields to include in the list. Screen options 1. Item ID From / To 2. Product Line From / To 3. UserDef1 From / To 4. UserDef2 From / To See Common screen options on page Sort By Select the sort method. You can sort by Item ID, Product Line, UserDef1 or UserDef2. 6. Select one of the report command buttons, explained on page 1-7. Setup and Maintenance Lists 14-5

365 Item Summary List 14-6 Setup and Maintenance Lists
 on the Setup and Maintenance Menu. Use this selection to specify the items, locations and user-defined fields to include in the list. Screen options 1.")
366 Item Locations List Setup and Maintenance Lists Item Locations List Overview Use the Item Locations List to show location, price, cost, vendor, bin, lot, and serial information for your inventory items, set up in Item Locations (page 13-25) on the Setup and Maintenance Menu. Use this selection to specify the items, locations and user-defined fields to include in the list. Screen options 1. Item ID From / To 2. Location ID From / To 3. UserDef1 From / To 4. UserDef2 From / To See Common screen options on page Sort By Select the sort method. You can sort by Item ID, Product Line, UserDef1 or UserDef2. 6. Print Check the appropriate boxes to limit the list to just the information you need. 7. Select one of the report command buttons, explained on page 1-7. Setup and Maintenance Lists 14-7

367 Item Locations List 14-8 Setup and Maintenance Lists
368 Location Detail List Setup and Maintenance Lists Location Detail List Overview The Location Detail List shows locations, descriptions, and addresses, set up in Locations (page 13-48) on the Setup and Maintenance Menu. Use this selection to specify the locations to include in the list. Screen options 1. Location ID From / To See Common screen options on page Sort By Select the sort method. You can sort by Location ID or Location Name. 3. Select one of the report command buttons, explained on page 1-7. Setup and Maintenance Lists 14-9

369 Location Detail List Setup and Maintenance Lists
370 Sales Categories List Setup and Maintenance Lists Sales Categories List Overview The Sales Categories List shows the sales categories and descriptions set up in Sales Categories (page 13-51) on the Setup and Maintenance Menu. Use this selection to specify the sales categories to include in the list. Screen options 1. Sales Category From / To Select the range of sales categories to include in the list. 2. Select one of the report command buttons, explained on page 1-7. Setup and Maintenance Lists 14-11

371 Sales Categories List Setup and Maintenance Lists
372 Product Lines List Setup and Maintenance Lists Product Lines List Overview The Product Lines List shows product lines set up in Product Lines (page 13-53) on the Setup and Maintenance Menu. Use the list as a reference when assigning product lines to items. Screen options 1. Product Line From / To Select the range of product lines to include in the list. 2. Select one of the report command buttons, explained on page 1-7. Setup and Maintenance Lists 14-13

373 Product Lines List Setup and Maintenance Lists
374 Account Codes List Setup and Maintenance Lists Account Codes List Overview Refer to the Account Codes List when assigning account codes to items. Also, use the list to check the account codes that have been assigned. Account codes are set up in Account Codes (page 13-55) on the Setup and Maintenance Menu. 1. Account Code From / To Select the range of account codes to include in the list. 2. Select one of the report command buttons, explained on page 1-7. Setup and Maintenance Lists 14-15
375 Account Codes List Setup and Maintenance Lists
376 Price Breaks List Setup and Maintenance Lists Price Breaks List Overview See the Price Breaks List to show break quantities, adjustments, and adjustment types set up in Price Breaks (page 13-60) on the Setup and Maintenance Menu. Specify the range of price breaks you want to show. Screen options 1. Break ID From / To Select the range of price break IDs to include in the list. 2. Select one of the report command buttons, explained on page 1-7. Setup and Maintenance Lists 14-17

377 Price Breaks List Setup and Maintenance Lists

378 Price IDs List Setup and Maintenance Lists Price IDs List Overview Use the Price ID List to show price IDs and their descriptions, set up in Price IDs (page 13-68) on the Setup and Maintenance Menu. Specify the range of price IDs you want to show. Screen options 1. Price ID From / To Select the range of price IDs to include in the list. When you do not want to limit your report to a specific range, leave the From/To fields blank. 2. Select one of the report command buttons, explained on page 1-7. Setup and Maintenance Lists 14-19
379 Price IDs List Setup and Maintenance Lists
380 Price Calculations List Setup and Maintenance Lists Price Calculations List Overview Use the Price Calculations List to show the price calculations that were set up in Price Calculations (page 13-69) on the Setup and Maintenance Menu. Specify the range of item price IDs and customer price codes you want to show. Screen options 1. Customer Price Code Select the range of customer price codes (from Accounts Receivable) to include in the list. 2. Item Price ID From / To Select the range of item price IDs (from Inventory) to include in the list. When you do not want to limit your report to a specific range, leave the From/To fields blank. 3. Select one of the report command buttons, explained on page 1-7. Setup and Maintenance Lists 14-21

381 Price Calculation List Setup and Maintenance Lists
Red Wing Windows Accounting Series. Accounts Payable. Red Wing Business Systems, Inc.
 Red Wing Windows Accounting Series Accounts Payable by Red Wing Business Systems, Inc. All rights reserved. No part of this book or system may be reproduced or transmitted in any form or by any means,
Microsoft Dynamics GP. Sales Order Processing
 Microsoft Dynamics GP Sales Order Processing Copyright Copyright 2012 Microsoft. All rights reserved. Limitation of liability This document is provided as-is. Information and views expressed in this document,
Opera II Accreditation Course. Invoicing / SOP. Pegasus Training & Consultancy Services File Name : OIISOP001
 Invoicing / SOP Pegasus Training & Consultancy Services File Name : OIISOP001 Pegasus Training & Consultancy Services File Name : OIISOP001 Table of Contents Introduction... 1 Invoicing Module Menu...
Solar Eclipse Product Serial Numbers. Release 9.0.1
 Solar Eclipse Product Serial Numbers Release 9.0.1 Disclaimer This document is for informational purposes only and is subject to change without notice. This document and its contents, including the viewpoints,
ReCPro TM User Manual Version 1.15
 Contents Point of Sale Module - Inventory... 2 Inventory Categories... 5 Inventory Adjustments... 5 Price Update... 7 Inventory Sale Price Update... 9 Inventory Availability... 10 Vendors... 12 Vendor
QuickBooks. Premier 2017 Level 1. MasterTrak Accounting Series. Courseware
 QuickBooks Premier 2017 Level 1 Courseware 1763-1 MasterTrak Accounting Series QuickBooks Premier 2017 Level 1 Lesson 2: Inventory and Services Lesson Objectives In this lesson, you will learn how to set
Lesson 2: Inventory and Services
 QuickBooks Premier 2013 Level 1 Lesson 2: Inventory and Services Lesson Objectives In this lesson, you will learn how to set up the Inventory and Services module of QuickBooks Premier. Upon successful
Sage 100 ERP 2015 What s New
 Sage 100 ERP 2015 What s New Global Enhancements Migration Changes If you are converting data for a company using the Purchase Order module, a message appears asking if you want to retain purchase order
CHAPTER 10: ANALYSIS AND REPORTING
 Chapter 10: Analysis and Reporting CHAPTER 10: ANALYSIS AND REPORTING Objectives The objectives are: Define Analysis and Reporting Create Analysis Reports Customize Analysis Reports Create Analysis by
Table of Contents. PriceBook... 1 Objectives... 1 What is the PriceBook?... 1 PriceBook Composition... 2
 Table of Contents PriceBook... 1 Objectives... 1 What is the PriceBook?... 1 PriceBook Composition... 2 PriceBook Composition... 2 Categories... 4 Groups... 4 Items... 5 Pricing (Mark Up) Formulas... 6
Professional Software, Inc. MAS 90 / MAS 200 VERSION 4.4 CLASS OUTLINE April 20, 2010
 Professional Software, Inc. MAS 90 / MAS 200 VERSION 4.4 CLASS OUTLINE April 20, 2010 The Business Framework evolution is nearly complete. Modules that are Business Framework ready: General Ledger (4.0)
CHAPTER 7A MATERIAL MANAGEMENT
 CHAPTER 7A MATERIAL MANAGEMENT Chapter 7A Material Management...1...4 Inventory Management...5 Overview...7 Inventory Maintenance Tabulation Function Overview...8 Inventory Maintenance Toolbar Overview...9
Quick Start Guide. Support Support phone:
 Quick Start Guide www.enablecstore.com Support email: support@enablecstore.com Support phone: 1-888-250-2082 Ecliptic Technologies, Inc. 403 Center Ave., Suite 704 Moorhead, MN 56560 Phone: (218) 359-2000
(Multi-store) Only Headquarters can define assembly items, but remote stores can build and break assemblies as necessary to meet local sales demand.
 Only Headquarters can define assembly items, but remote stores can build and break assemblies as necessary to meet local sales demand.") : Overview An assembly item is an item that is itself composed of two or more other inventory items and sold as a set. For example, a "Ski Slope Package" could be defined as an assembly item made up of
: Overview An assembly item is an item that is itself composed of two or more other inventory items and sold as a set. For example, a "Ski Slope Package" could be defined as an assembly item made up of
Item Management. SIMMS Inventory Management Software 7.3. Updated September 28, 2010
 Item Management SIMMS Inventory Management Software 7.3 Updated September 28, 2010 Contents Item Management.................. 1 Adding an Item s Profile................ 1 Add an Item s Profile..............
Microsoft Dynamics GP. Field Service Returns Management
 Microsoft Dynamics GP Field Service Returns Management Copyright Copyright 2010 Microsoft. All rights reserved. Limitation of liability This document is provided as-is. Information and views expressed
NorthClark Computing, Inc. Part Number Search Query User Guide
 ERP Consulting Web Development Custom Programming Solutions Desktop & Web Applications for Manfact NorthClark Computing, Inc. Part Number Search Query User Guide Web and Desktop Applications for Manfact
General Ledger, Inventory, and Internal Control
 Chapter 5 General Ledger, Inventory, and Internal Control LEARNING OBJECTIVES 1. Restore data from Exercise 4-2. (This backup was made on page 151.) 2. Use Sage 50 s help feature, enter a new account in
Requisitioning Method of Inventory Control
 Requisitioning Method of Requisitioning Method of Course description: Learn how to use emaint Online for inventory tracking, from establishing your inventory records and generating reorder lists through
AccStar Integrated Accounting System
 AccStar Integrated Accounting System User s Guide (2013) Rachadapon Company Limited. Matchim Paisalyakit Table of Contents Basic information for AccStar... 10 Database... 10 Select Company s database...
Eagle Business Management System - Manufacturing
 Eagle Business Management System - Manufacturing Table of Contents INTRODUCTION...1 Technical Support...1 Overview...2 CREATING A BATCH...5 Creating a Simple Manufacturing Batch...5 Using Inventory Components
Requisition line View New Change Cancel... 60
 User Manual erequisitions - Table of Contents How to use this manual... 4 Overview... 4 to erequisitions... 5 Overview... 5 Navigation... 6 How to access and exit erequisitions... 7 How to change password
Purchase Order, Requisitions, Inventory Hands On. Workshop: Purchase Order, Requisitions, Inventory Hands On
 Workshop: Purchase Order, Requisitions, Inventory Hands In this follow up session to the Operations Changes in Purchase Order, Requisition, and Inventory Theory course, this hands on session will look
Contract Based Billing: CN, BL
 Session 3 6 Contract Based Billing: CN, BL Presented By: Tanya Severns Finance Coordinator Tilden Coil Constructors Inc. tseverns@tilden coil.com Credits/Revision History Original Author(s): Natalie Allen,
Creating Purchase Orders
 1 Purchasing: Using CounterPoint Creating Purchase Orders Overview Purchase orders are entered as purchase requests. A purchase request becomes a purchase order when it is posted. Purchase requests can
Connecting Time Matters/Billing Matters and QuickBooks. 35*45 Consulting - Global 7 Second System
 Why Choose QuickBooks... 3 Why Use Billing Matters... 3 Question to Ask... 3 Getting Started in Billing Matters... 4 Getting Started in QuickBooks... 11 Linking Billing Matters and QuickBooks... 14 Using
Global Settings. SIMMS Inventory Management Software February 1, 2012
 Global Settings SIMMS Inventory Management Software 2012 February 1, 2012 Contents Global Settings................... 1 General..................... 1 Item & Stock.................... 4 Purchase.....................
SCANCO WAREHOUSE TRAINING MANUAL
 UNLOCK THE POTENTIAL OF YOUR AUTOMATED WAREHOUSE SCANCO WAREHOUSE TRAINING MANUAL Scanco Software Rev. 101014 Page 1 of 48 Getting Started 1 Welcome to Scanco Warehouse This manual will guide you through
Physical Count by Bin User Manual Table of Contents
 Physical Count by Bin User Manual Table of Contents Scanco Portal setting... 2 Main Applications Physical Count Icon... 3 Count by Bin... 4 Warehouse Prompt... 5 Warehouse Lookup... 6 Starting Bin Prompt...
Activant Prophet 21. Version 12.3 Overview of Prophet 21 New Features
 Activant Prophet 21 Version 12.3 Overview of Prophet 21 New Features This class is designed for Managers System Administrators Objectives Miscellaneous New Features Add an Item to a Closed PO Improved
Chapter 3 Inventory. Objectives. QuickBooks Tools for Tracking Inventory
 Chapter 3 Inventory Objectives After completing this chapter, you should be able to: Activate the Inventory function (page 47). Set up Inventory Items in the Item list (page 48). Use QuickBooks to calculate
New Degree Day History Screen
 This document describes the various enhancements and modifications to DRM Windows that occurred between versions 9.1.270 and 10.2.280. New Degree Day History Screen This screen compares the current heating
QUICKBOOKS PRO 2008 WORKSHOP 5: PART A MARS COMPANY
 QUICKBOOKS PRO 2008 WORKSHOP 5: PART A MARS COMPANY Recording Transactions in the Sales, Receive Pay Bills, Purchases, and Pay Bills Journals This workshop adds to QuickBooks skills learned in Workshops
Microsoft Dynamics GP. Purchase Order Processing
 Microsoft Dynamics GP Purchase Order Processing Copyright Copyright 2012 Microsoft. All rights reserved. Limitation of liability This document is provided as-is. Information and views expressed in this
Manufacturing 100 USER GUIDE V SCANCO SUPPORT: FAX:
 Manufacturing 100 USER GUIDE V. 18.10.19.0 SCANCO WWW.SCANCO.COM SUPPORT: 330.645.9959 FAX: 330.645.9969 EMAIL: SUPPORT@SCANCO.COM Copyright 2018. All rights reserved. Sage, the Sage logos, and the Sage
Sage 300 ERP Sage Fixed Assets Integration Guide
 Sage 300 ERP 2014 Sage Fixed Assets Integration Guide This is a publication of Sage Software, Inc. Copyright 2013. Sage Software, Inc. All rights reserved. Sage, the Sage logos, and the Sage product and
How do I Reconcile MCPS Invoices?
 How do I Reconcile MCPS Invoices? Overview Purpose This document explains how schools can reconcile Montgomery County Public School (MCPS) invoices to requisitions charged to their cash account and to
OneStep. Accounting 4.0. User Guide. Enable Computing
 OneStep Accounting 4.0 User Guide Enable Computing 2 Table of Contents 1 Introduction... 5 2 Getting Started... 7 2.1 2.2 2.3 2.4 2.5 2.6 2.7 Installation... 7 Starting OneStep Accounting...7 Opening The
Solar Product Cutting. Release 8.7.2
 Solar Product Cutting Release 8.7.2 Legal Notices 2011 Epicor Software Corporation. All rights reserved. Unauthorized reproduction is a violation of applicable laws. Epicor and the Epicor logo are registered
Pricing 08/22/2016. User Reference Manual
 08/22/2016 User Reference Manual Copyright 2013-2016 by Celerant Technology Corp. All rights reserved worldwide. This manual, as well as the software described in it, is furnished under license and may
Order entry and fulfillment at Fabrikam: an ERP walkthrough
 Order entry and fulfillment at Fabrikam: an ERP walkthrough In this exercise you will experience the look and feel of a modern ERP system: Microsoft Dynamics GP. You will play the role of an intern at
Procurement. User Guide
 Procurement User Guide The information in this document is subject to change without notice and does not represent a commitment on the part of Horizon. The software described in this document is furnished
Microsoft Dynamics GP. Purchase Order Processing
 Microsoft Dynamics GP Purchase Order Processing Copyright Copyright 2005 Microsoft Corporation. All rights reserved. Complying with all applicable copyright laws is the responsibility of the user. Without
Term Creation and Control Files
 MBS ARC (TEXTBOOK) MANUAL Term Creation and Control Files This chapter will assist users with the options on the Control Files menu. Control Files allow the text staff to maintain a term through initial
Enterprise by HansaWorld. Cost Accounting
 *+"'+,-&./!"#$%&'#() Enterprise by HansaWorld Cost Accounting September 2011 Version 6.3 HansaWorld Ltd. TABLE OF CONTENTS Introduction...2 Why you should use the Stock Module?...2 Terminology...3 Hierarchy
At the end of this module, you will be able to:
 1 At the end of this module, you will be able to: Outline the principles of the Multiple UoM solution and its advantages. Define the basic Multiple UoM definitions. Describe how Multiple UoM are used across
Accounts Payable PARTICIPANT WORKBOOK
 Accounts Payable PARTICIPANT WORKBOOK INTEGRATED SOFTWARE SERIES Accounts Payable PARTICIPANT WORKBOOK Version 3 Copyright 2005 2009 Interactive Financial Solutions, Inc. All Rights Reserved. Integrated
Table of Contents. PROCESSING PROPOSALS...33 Creating a Sales Order...33 Proposal Status Settings...37 Use Proposals in Job Costing...41 INDEX...
 Proposals Table of Contents GETTING STARTED...1 Technical Support...1 Proposals Overview...3 Creating and Printing Proposals...8 Proposal Pricing...14 Contact Information...17 PROPOSAL SETS AND TEMPLATES...19
Foreword. Sales Associates Managers
 Foreword This book is a pocket guide for using the Register module for the InfoTouch Store Manager. It outlines the basic steps and procedures for processing sales, from the beginning to the end of a day.
IBackOffice 7.3 Release Notes IBackOffice Global
 IBackOffice 7.3 Release Notes IBackOffice Global New Features 1 Change Company 2 Security Groups 2 Explorer Views 3 Zoom in Report Parameters Window 3 Accounts Payable 3 Accounts Receivable 5 General Ledger
Decor Fusion Inventory Handheld Gun Usage Guide Version Date [Publish Date]
![Decor Fusion Inventory Handheld Gun Usage Guide Version Date [Publish Date]](/thumbs/89/99422607.jpg "Decor Fusion Inventory Handheld Gun Usage Guide Version Date [Publish Date]") Decor Fusion Inventory Handheld Gun Usage Guide Version 1.2.8.41 Date [Publish Date] Revision 1.0.0.0 Revision Date 10/30/2018 Overview Details: The purpose of this document is to provide instructions
Decor Fusion Inventory Handheld Gun Usage Guide Version 1.2.8.41 Date [Publish Date] Revision 1.0.0.0 Revision Date 10/30/2018 Overview Details: The purpose of this document is to provide instructions
Contents OVERVIEW... 3
 Contents OVERVIEW... 3 Feature Summary... 3 CONFIGURATION... 4 System Requirements... 4 ConnectWise Manage Configuration... 4 Configuration of Manage Login... 4 Configuration of GL Accounts... 5 Configuration
Product Comparison Document
 Product Comparison Document te: This document is subject to change. Features Operating Systems / Platforms Microsoft TM Widnows 7/8/10 Professional Edition, Service Pack 1 or later Database Microsoft SQL
Warehouse Management System for Adagio Accounting
 Warehouse Management System for Adagio Accounting 1. Create PO in Purchase Orders for Adagio Receiving 2. Import PO from Purchase Orders for Adagio into WMS using ERP Light for Adagio Console 3. Check
v10.5 Enhancements List
 General System Changes Business Rules The Options & Interfaces functionality from each application has been moved to a centralized System Manager function called Business Rules. Forms Control You can now
Table of Contents. PROCESSING PROPOSALS Creating a Sales Order Proposal Status Settings Use Proposals in Job Costing...
 Proposals Table of Contents GETTING STARTED... 1 Technical Support... 1 Proposals Overview... 3 Creating and Printing Proposals... 7 Proposal Pricing... 13 Contact Information... 16 PROPOSAL SETS AND
2. Is it possible to manage bill of material with different BOM and routing version?
 MANUFACTURING 1. What is the difference between assemble-to-order versus assemble-to-stock? Assemble-to-order is used for items that you do not want to stock because you want to minimize inventory costs
Exact Globe Next Purchase. User Guide
 Exact Globe Next Purchase User Guide Exact Globe Next Purchase Despite the continued efforts of Exact to ensure that the information in this document is as complete and up-to-date as possible, Exact cannot
TurboCASH Business Class
 TurboCASH Business Class Guide to Point-of-Sales Philip Copeman The following icons have been placed on specific places throughout the documentation: Keyboard access Press the F1 key when focussed on screens
Microsoft Dynamics GP. Purchase Order Processing
 Microsoft Dynamics GP Purchase Order Processing Copyright Copyright 2007 Microsoft Corporation. All rights reserved. Complying with all applicable copyright laws is the responsibility of the user. Without
Order entry and fulfillment at Fabrikam: an ERP walkthrough
 Last modified: January 6, 2015 Order entry and fulfillment at Fabrikam: an ERP walkthrough In this exercise you will experience the look and feel of a modern ERP system: Microsoft Dynamics GP. You will
Setting up inventory
 LESSON 10 Setting up inventory 10 Lesson objectives, 278 Supporting materials, 278 Instructor preparation, 278 To start this lesson, 279 Turning on the inventory feature, 279 Entering products into inventory,
MICROSOFT DYNAMICS GP INVENTORY YEAR-END CLOSING PROCEDURES
 INVENTORY YEAR-END CLOSING PROCEDURES Use the procedure described in this section to close the year for Inventory Control and prepare your inventory records for the new fiscal year. There is no calendar
MARKET LINE COMPUTERS TOTAL RENTAL USER MANUAL
 MARKET LINE COMPUTERS TOTAL RENTAL USER MANUAL CONTRACT FUNCTIONS... 4 OPENING A NEW RENTAL CONTRACT... 5 CREATING A RENTAL RESERVATION... 6 RESERVATIONS... 7 LONG-TERM CONTRACTS... 8 CREATING A QUOTE...
Year End Close Procedures - 1 -
 Microsoft Dynamics GP 2011 Year-End Closing Procedures This manual should be used as a guide along with the screen specific help, printed Microsoft manuals and on-line help available through CustomerSource,
Product and Warehouse Location Maintenance. Release 9.0.2
 Product and Warehouse Location Maintenance Release 9.0.2 Disclaimer This document is for informational purposes only and is subject to change without notice. This document and its contents, including the
Forrest Terrace, Abbotsford, BC V2S 1G7 Tel: Fax: Website:
 203-34334 Forrest Terrace, Abbotsford, BC V2S 1G7 Tel: 604-504-7936 Fax: 604-504-7976 Website: www.kcsi.ca Email: sales@kcsi.ca SIMMS Inventory Management System General Ledger Manual Table of Contents
Managing Direct Through Stock Inventory. Release 9.0.4
 Managing Direct Through Stock Inventory Release 9.0.4 i Table Of Contents Disclaimer This document is for informational purposes only and is subject to change without notice. This document and its contents,
Transferring Inventory
 1 Inventory: Using CounterPoint Transferring Inventory Overview Transfers allow you to move goods from one location to another and to reconcile any difference between what was shipped and what was received.
The Construction Manager. Reports Catalog
 The Construction Manager Reports Catalog The Construction Manager Reports Catalog Published November 2004 Geac Commercial Systems, a division of Geac Enterprise Solutions, Inc. makes no warranty of any
Current Attractions: Get in the Know on Sage BusinessVision v7.2
 Current Attractions: Get in the Know on Sage BusinessVision v7.2 Session Code: VAL04 Product Line: Sage BusinessVision Presenter: Edward Klapatiuk, Sage BusinessVision Description Sage BusinessVision v7.2
CHAPTER 10 ACQUISITION AND PAYMENTS
 CHAPTER 10 ACQUISITION AND PAYMENTS In Chapter 9, your students set up a merchandising business and entered vendors and inventory items. In Chapter 10, they acquire inventory (make purchases) and make
Inventory Physical Count Process
 Inventory Physical Count Process Note - Before you start update all registers that effect inventory. Sales Order Sales Journal, Purchase Order Receipt of Goods, Purchase Order Receipt of Invoice and Inventory
CHAPTER 4A SALES ORDERS MAINTENANCE
 CHAPTER 4A SALES ORDERS MAINTENANCE Chapter 4A Maintenance...1 Sales Order Maintenance...2 Sales Order Maintenance...3 Creating a New Sales Order...5 Manually Creating a New Sales Order...5 Copying an
Microsoft Dynamics GP2010 Inventory Year-End Closing Checklist
 Microsoft Dynamics GP2010 Inventory Year-End Closing Checklist Inventory Control Year End Closing What happens when I close the year on Dynamics GP 2010? Transfers all summarized current-year quantity,
Year End Closing Procedures for. Microsoft Dynamics GP. Martin & Associates
 Year End Closing Procedures for 2017 Microsoft Dynamics GP Martin & Associates Table of Contents Year-End Closing procedures in Inventory Control in Microsoft Dynamics GP... 3 Inventory year-end closing
Getting Started Tutorial
 Getting Started Tutorial Welcome This tutorial will introduce you to the main functions of your MYOB accounting software. You can use this tutorial with the current versions of MYOB Accounting, MYOB Accounting
ilabpos Support Manual ilabpos Supplier Purchase Invoices Support Manual Version 1.0 June 2018 Page 1 of 20
 ilabpos Supplier Purchase Invoices Support Manual Version 1.0 June 2018 Page 1 of 20 Contents 1.0 Introduction... 3 2.0 Purchase Invoices... 4 2.1 Inputting a Purchase Invoice...4 2.2 Free Items in a Purchase
Eclipse Product Serial Numbers. Release (Eterm)
") Eclipse Product Serial Numbers Release 8.6.4 (Eterm) Legal Notices 2008 Activant Solutions Inc. All rights reserved. Unauthorized reproduction is a violation of applicable laws. Activant and the Activant
Eclipse Product Serial Numbers Release 8.6.4 (Eterm) Legal Notices 2008 Activant Solutions Inc. All rights reserved. Unauthorized reproduction is a violation of applicable laws. Activant and the Activant
FLEETMATE. Overview. CUSTOMER GUIDE: Inventory and Receiving
 Overview FLEETMATE features an Inventory Tracking module that will enable you to track your replacement parts inventory. When you use material from stock, we refer to that transaction as an inventory issue.
Microsoft Dynamics GP. Fixed Assets Management
 Microsoft Dynamics GP Fixed Assets Management Copyright Copyright 2011 Microsoft. All rights reserved. Limitation of liability This document is provided as-is. Information and views expressed in this document,
CHAPTER 9 - POINT OF SALE
 Chapter 9 Point Of Sale CHAPTER 9 - POINT OF SALE Your Campground Manager Astra Software has a built in Point Of Sale system For managing store inventory and sales of various products and services you
Sage DacEasy. Point of Sale User s Guide
 Sage DacEasy Point of Sale User s Guide Sage DacEasy Point of Sale Copyright Trademarks Information in this document is subject to change without notice. Company names and data used in examples herein
Getting Around in QuickBooks
 Lesson 1 Getting Started Getting Around in QuickBooks Getting Around in QuickBooks The QuickBooks Learning Center provides access to information to help you get started. Manage your open windows QuickBooks
Chapter 3 Writing a Customer Invoice
 Chapter 3 Writing a Customer Invoice In this chapter, you will learn how to write a customer invoice, starting with adding a new customer and vehicle, then moving on to adding labor operations and parts,
Chapter 2 explains how Sage 50 works with accounts payable transactions and
 Chapter 2 Vendors LEARNING OBJECTIVES 1. Restore data from Exercise 1-2. This backup was made on page 50. (Refer to the Read me box on page 49, Do I need to restore?) 2. Enter a purchase order. 3. Apply
quick start guide A quick start guide inflow support GET STARTED WITH INFLOW
 GET STARTED WITH INFLOW quick start guide Welcome to the inflow Community! This quick start guide includes all the important stuff to get you tracking your inventory before you know it! Just follow along
HDPOS EASY. Hyper Drive Information Technologies (P) Ltd
 Ltd") HDPOS EASY Chapters 1. Getting Started 1.1. Download & Installation 1.2. Application Registration 2. Database 2.1. Sample database 2.2. Blank Database 2.2.1. Back up database 2.2.2. Restore database 3.
HDPOS EASY Chapters 1. Getting Started 1.1. Download & Installation 1.2. Application Registration 2. Database 2.1. Sample database 2.2. Blank Database 2.2.1. Back up database 2.2.2. Restore database 3.
What s Up With the MORE Button?
 What s Up With the MORE Button? INVENTORY: More Menu Items: Vendors Alias Alternate Reorder Pricing Price Lookup Sales Promotion Conner Ash P.C. 2015 Page 1 VENDORS: Allows you to track multiple vendors,
CHAPTER 6: Preventive Maintenance
 CHAPTER 6: Preventive Maintenance Introduction To Preventive Maintenance The Preventive Maintenance (PM) screens in FacilityFocus allow the maintenance manager to monitor and schedule tasks aimed at preventive
ACCPAC FUNDAMENTALS. 1. It offers powerful analysis and reporting tools for accounting, finance, and auditing endusers
 ACCPAC FUNDAMENTALS A. FEATURES OF ACCPAC SYSTEM ACCPAC System The ACCPAC for Windows Series is a Windows accounting software, which provides a comprehensive business management solution for corporate
Inventory User s Manual
 Inventory User s Manual Inventory Health District Information System HDIS (Windows Ver. 4.0 ) Copyright 1998 by CHC Software, Inc All Rights Reserved CHC Software, Inc. Health District Information Systems
Information on each item in your inventory is kept in the Item file. This document explains how to enter items into this file.
 1 Inventory: Using CounterPoint Defining Items Overview Defining an item Information on each item in your inventory is kept in the Item file. This document explains how to enter items into this file. Select
3 Customers. Chapter LEARNING OBJECTIVES
 Chapter 3 Customers LEARNING OBJECTIVES 1. Restore data from Exercise 2-2. This backup was made on page 89. (Refer to the Read me box on page 55, Do I need to restore?) 2. Go to the Customers & Sales Navigation
Contents OVERVIEW... 3
 Contents OVERVIEW... 3 Feature Summary... 3 CONFIGURATION... 4 System Requirements... 4 ConnectWise Manage Configuration... 4 Configuration of a ConnectWise Manage Login... 4 Configuration of GL Accounts...
Inventory Exercise: Use standard cost as default price on item Orders and Purchases
 Inventory The Inventory command centre allows you to; Maintain a stock control system Set-up items of stock Make inventory adjustments Set or adjust inventory prices Enter actual stocktake quantities.
Campus Vouchers NEW VERSION: 8/28/2014
 Campus Vouchers NEW VERSION: 8/28/2014 Table of Contents 1 Campus Vouchers 3 Understanding Campus Vouchers 5 Creating a Campus Voucher 7 Running a Voucher Inquiry 21 1 1 Campus Vouchers 1 Campus Vouchers
Requisition Processing Guide
 Requisition Processing Step by Step May 2004 Requisition Processing Guide Contents CREATE A REQUISITION WITHOUT A MATERIAL MASTER (ME51) 4 CREATE A REQUISITION WITH THE MATERIAL MASTER (ME51) 15 COPY A
APPENDIX C: LAB SOLUTIONS
 Appendix C: Lab s APPENDIX C: LAB SOLUTIONS Lab 2.1 Handling Sales Scenario: Cronus' customer 20000 orders 1200 units of item 70003. The customer requests that the order be delivered with 300 units every
SAGE ACCPAC. Sage Accpac ERP. Converting from Simply Accounting by Sage
 SAGE ACCPAC Sage Accpac ERP Converting from Simply Accounting by Sage 2008 Sage Software, Inc. All rights reserved. Sage Software, Sage Software logos, and all Sage Accpac product and service names are