15 lbs (6.8 kg) Approx. Weight. AB Junior. AB Jumbo. 35 lbs (16 kg) Approx. Weight
|
|
|
- Reynold Gilmore
- 6 years ago
- Views:
Transcription
1
2 1 2


 Approx. Weight AB Junior 18 lbs (8.1 kg) Approx.")


 Approx. Weight AB Jumbo 34 lbs (15.4 kg) Approx.")


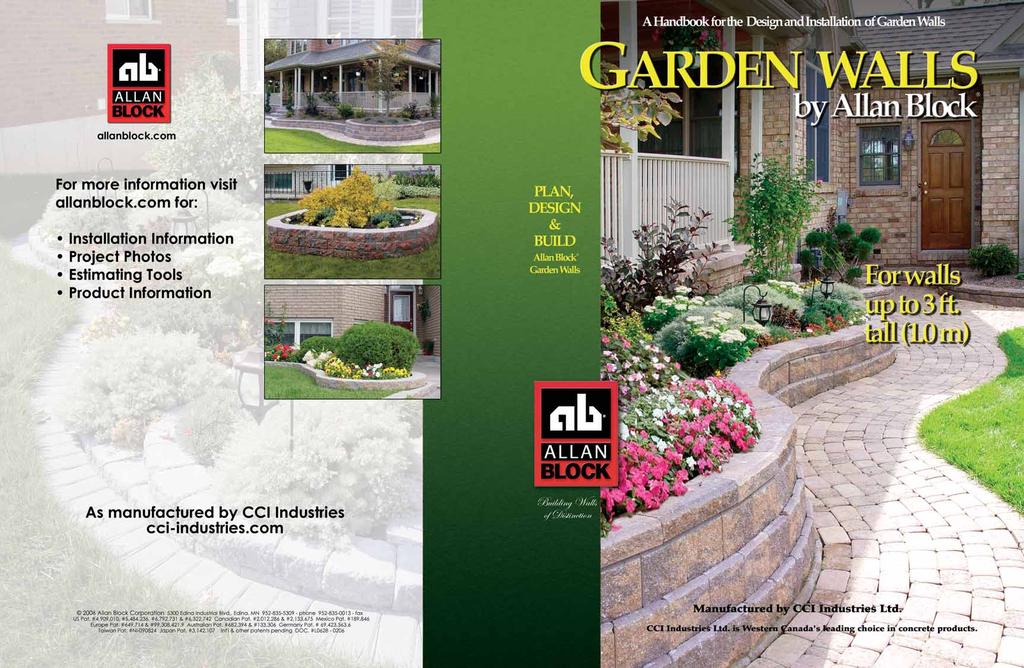
3 The Garden Wall Collection by Allan Block Choose the Right Block. Select the block with the right size and style for your gardening project. AB Garden Accent Textured on both sides, our lightest block is the right choice for sturdy, garden beds and borders that last a lifetime. AB Garden Accent is available in two finishes - Classic Cut Stone and Old World Tumbled. Walls up to 24 inches (600 mm) high. 15 lbs (6.8 kg) Approx. Weight AB Junior 18 lbs (8.1 kg) Approx. Weight Experienced gardeners prefer AB Junior for its versatility and performance. Beautiful fit and finish, and all the design details you will need for custom gardening with a Classic Cut Stone finish. Classic Cut Stone Old World Tumbled Walls up to 30 inches (750 mm) high. 22 lbs (10 kg) Approx. Weight AB Jumbo 34 lbs (15.4 kg) Approx. Weight For larger, more challenging projects, AB Jumbo delivers the sturdy, rugged qualities you need. Our winged-back design lets you build both straight and curved walls with one block and have a Classic Cut Stone finish. Walls up to 36 inches (900 mm) high. The Garden Wall Collection gives you three choices for building Great Gardens! 35 lbs (16 kg) Approx. Weight 47 lbs (21.3 kg) Approx. Weight Want to think BIGGER? If you have a larger landscape project in mind, take a look at our Landscape Collections - a full line of larger block designed and engineered for full-scale construction. Just go to: allanblock.com or cci-industries.com for more details, or call your local Allan Block dealer today. 3 4


 of well-drained organic soils. The Wall Base / Wall Rock To build a good wall, you need a firm foundation, or base.")


4 Plan and Design Your Project A set of simple tools is all you need to build great Allan Block walls. 4 ft and Torpedo level Gloves & Knee pads Rake & Shovel Wheel barrow Broom Chisel and hammer Wooden stakes Hand tamper Safety glasses Tape measure Rubber mallet String line Terraces Consider a layered look in your garden design. You'll love the way Allan Blocks flow. Create a series of raised garden beds, or tackle a tricky slope by turning one wall into two. Job Site Considerations Before Installation Begins A little bit of planning will make your project go faster and turn out right. Lot Lines and Utilities Confirm lot lines and wall location. Your local municipality will have a copy of your lot survey on file. The survey will identify property lines and provide a scaled template to help with your site plan. Call your local utility companies to confirm the location of underground utilities. Buried utility lines are not only dangerous, they may prevent you from locating your project where you want. Drainage Managing water around your gardens is important for two reasons: your plantings require good moisture conditions, and proper drainage will prevent water from ponding or running into areas it's not wanted - like your basement. Always grade your beds to move water away from the house foundation. Make sure water moves freely off of walkways and patios. Slope areas above the walls to send rain water around the sides if possible. Check sprinkler lines before and after construction. See page 18 for more information on drainage. Soils Soil conditions are important in any garden or landscape. Check to see what kind of soil you have before starting. Sandy soils are easy to work with and drain well too. Clay soils are harder to work with and drain poorly. Good organic soils are always best for planting beds. If you have poor soil conditions, consider removal and replacement. Planting beds need to have 6-12 in. (150 to 300 mm) of well-drained organic soils. The Wall Base / Wall Rock To build a good wall, you need a firm foundation, or base. Plan on using clean, granular rock underneath the base row. Good drainage and compaction will add to the quality and performance of your finished wall. We refer to the material used for the base, within and behind the block as "Wall Rock". Crushed or smooth stone, ranging in size from 0.25 in. to 1 in. (6 to 25 mm) is ideal. Your AB dealer will have what you need. Design Options Straight Lines and Curves Mother Nature rarely draws a straight line. Not only will curved designs feel more natural, they are actually easier to build too! Free flowing curves will grace any garden or landscape. If straight lines and corners are your choice, use AB Junior or AB Jumbo - both offer corner blocks, making 90 turns easy to build. Colours Colour selection is key to a great design. Be sure to consider the total composition - house, pavements, and bed mulch - and find the look that's right for you. See page 22 for colours. Structure Be careful not to try and retain too much with the garden wall line of blocks. These lighter duty blocks are great for smaller wall projects. AB Garden Accent up to 24 in. (600 mm), AB Junior up to 30 in. (750 mm), and AB Jumbo up to 36 in. (900 mm) - with sandy soils and no extra weight above the wall. The maximum wall heights above are for walls with level grades above and below the wall, and no added weight - "surcharges" - from driveways, swimming pools, etc If your project has steep slopes above or below the wall, or extra weight from surcharges, ask your AB Dealer about our heavier duty products found in the Landscape Wall Collection. Be sure to follow our recommended maximum wall heights. 5 6 Curves Corners The colours of the house, AB Jumbo and pavers go together beautifully. AB Garden Accent 24 in. (600 mm) Surcharge Slopes 30 in. (750 mm) AB Junior 36 in. (900 mm) Maximum heights shown in sandy soil AB Jumbo
, AB Garden Accent stacks fast and locks together great.")
 W: 8 in. (200 mm) front face 6 in.")
 Setback: 0 Soft, sweeping curves, straight lines, or tight radiuses By adjusting the position of the standard blocks, you can get the line and look you")
 Form soft curves by adjusting the block as you go. Try to keep the blocks tight together at the front of the wall. 5 blocks sq ft.")
 1 course 4 in. (100 mm) 2 courses 8 in. (200 mm) 3 courses 12 in. (300 mm) AB Garden Accent Estimating Chart 5 ft (1.")
 36 68 104 136 172 5 courses 20 in. (500 mm) 45 85 130 170 215 Caps 4 in.")
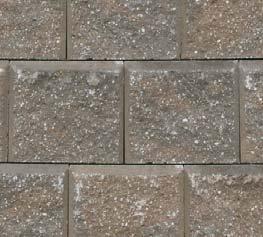
5 Garden Accent Our smallest block comes up BIG in features and performance! At about 15 pounds per block (6.8 kg), AB Garden Accent stacks fast and locks together great. The blocks are coloured and textured on two sides, so you can create beautiful raised beds with less work. Caps Both sides are textured, so you don t have to backfill up all the way to the top. H: 4 in. (100 mm) W: 8 in. (200 mm) front face 6 in. (150 mm) back face D: 7 1/4 in. (180 mm) Both are textured on two sides. Approximate Dimensions: Coverage: 5 blocks per sq ft. Weight: 14 lbs (6.4 kg) Setback: 0 Soft, sweeping curves, straight lines, or tight radiuses By adjusting the position of the standard blocks, you can get the line and look you want. Setback: 0 AB Garden Accent Maximum Wall Height Chart Sandy Soil Clay Soil 24 in. (600 mm) 16 in. (400 mm) Form soft curves by adjusting the block as you go. Try to keep the blocks tight together at the front of the wall. 5 blocks sq ft. Tight radiuses can be formed by placing the long sides of the blocks together. AB Garden Accent is the ideal choice for beautiful beds and borders. Wall Height (NOT Including the Cap) 1 course 4 in. (100 mm) 2 courses 8 in. (200 mm) 3 courses 12 in. (300 mm) AB Garden Accent Estimating Chart 5 ft (1.5 m) 10 ft (3.0 m) Wall Length 15 ft (4.6 m) 20 ft (6.1 m) 25 ft (7.6 m) courses 16 in. (400 mm) courses 20 in. (500 mm) Caps 4 in. (100 mm) Wall Rock Number of Caps needed Amount of Wall Rock needed 100 lbs (45 kg) 200 lbs (91 kg) 300 lbs (136 kg) 400 lbs (182 kg) 500 lbs (227 kg) Minimum Radius Chart Outside Radius Blocks Needed For A Full Circle Straight lines are formed by alternating the long and short sides of the block. 30 in (750 mm) 23 blocks AB Garden Accent is a vertical stacking block, so the radius is the same on every course. 7 8 Radius

 below the finished grade. Fill in behind the blocks with soil, and carefully compact to lock them in place.")


 wide and at least 4 in. (100 mm) deep. Use a large level to check the trench for level as you dig.")
 of rock in the trench, level and compact with a hand tamper.")


, add crushed rock to this area on the base course to make up this amount or use 3 pieces of roofing shingles cut to size.")
6 Build AB Garden Accent Walls As Easy As A-B-C... Walls Up to 24 in. B. Install The Block Set the base course of block in the trench and make sure the edges all touch on the forward side of the block. Tap the blocks into place with a rubber mallet, leveling each block as you go. As a rule, the base block should be set at least 2 in. (50 mm) below the finished grade. Fill in behind the blocks with soil, and carefully compact to lock them in place. Fill the blocks with wall rock for additional stability. Sweep the blocks clean, and check again to make sure the blocks are level. Install base course, level A. Prepare The Base Temporarily lay out the first course of blocks. Adjust the blocks to minimize the gaps between them. This will allow the caps on top to fit snug, and provide a nice, tight finish to the wall. Mark the layout with a shovel, and remove the sod and other surface material from the bed. Dig a shallow trench, in. ( mm) wide and at least 4 in. (100 mm) deep. Use a large level to check the trench for level as you dig. On sloped sites, "step up" the base when it gets more than 6 in. (150 mm) deep. Place 2 in. (50 mm) of rock in the trench, level and compact with a hand tamper. It is essential that the base is level at this point, as errors will multiply as each new row is added. Stepped Base Finished Grade After Before Remove sod and dig trench Layout and mark wall location Stack the next course of AB Garden Accent, and offset the seams from the blocks below. Keeping the seams staggered will lock the block together and make the wall stronger. Check the blocks for level, adjust as needed, and add more courses until you reach the height you want for your wall. C. Cap the Wall Top off your wall with AB Garden Accent Caps. Alternate the long and short faces to match the design of your wall. Apply construction adhesive between and underneath the caps to secure them in place. Corner Details The Garden Accent corner units are available in a left and right configuration. They have a notch on one side for interlocking and a smooth side for a finished cap. Your project should always start from the corner and build out from there. The corner unit used in the first course is placed so the notch is facing up. There will be a slight height adjustment as the corners do not have the bottom notch that the standard units and caps have. This is approximately 3/8 in. (9.5 mm), add crushed rock to this area on the base course to make up this amount or use 3 pieces of roofing shingles cut to size. Once this adjustment is completed you can continue to build your wall by alternating the left and right hand corners per course. Capping Corners Using the Garden Accent corner unit, place the block with the smooth side facing up to cap the corner. Apply construction adhesive between and underneath the caps to secure them in place. If any adjustments or cutting needs to Garden Accent Corner Unit Notch Install additional courses, level Approximate Dimensions: H: 4 in. (100 mm) W: 7 1/4 in. (180 mm) D: 9 3/8 in. (230 mm) Weight: 18 lbs (8.1 kg) Filling the blocks gives additional stability to the wall. Glue caps to secure in place 1st Course Shim under block to adjust for height difference. Install wall rock, level and compact Glue caps in be made try to locate it in an area that is not as noticeable. place to secure nd Course Capping a Corner Place corner block smooth side up

 D: 7 5/8 in. (190 mm) Weight: 22 lbs. (10 kg) Coverage: 3 blks per sq. ft. Corner blocks make linear designs crisp and clean.")
 W: 11 3/8 in. (285 mm) D: 7 5/8 in. (190 mm) Weight: 35 lbs. (15.")
 24 in. (600 mm) 3 blocks per sq Remove the wings to turn the tightest, cleanest outside curve you'll ever need.")
 3 courses 18 in. (450 mm) 4 courses 24 in. (600 mm) 5 courses 30 in. (750 mm) Caps 2 1/4 in. (55 mm) AB Junior Estimating Chart 5 ft (1.")
 8 16 24 32 40 16 32 48 64 80 24 48 72 96 120 32 64 96 128 160 40 80 120 160 200 Number of Junior Caps needed 9 17 26 35 43 Amount of Wall Rock needed")
7 AB Junior will take your Garden Design wherever you want it to GO! You can't find more potential, more possibilities, and more performance in a lightweight, easy to use block. AB Junior offers a world of design opportunity - and delivers professional results. AB Junior Corners Approximate Dimensions: H: 6 in. (150 mm) W: 7 5/8 in. (190 mm) D: 7 5/8 in. (190 mm) Weight: 22 lbs. (10 kg) Coverage: 3 blks per sq. ft. Corner blocks make linear designs crisp and clean. Available in left and right hand. H: 6 in. (150 mm) W: 11 3/8 in. (285 mm) D: 7 5/8 in. (190 mm) Weight: 35 lbs. (15.9 kg) Setback: 3 AB Junior Maximum Wall Height Chart Sandy Soil Clay Soil The two blocks provide every combination of line and form a designer wants. 30 in. (750 mm) 24 in. (600 mm) 3 blocks per sq Remove the wings to turn the tightest, cleanest outside curve you'll ever need. Fan them apart to form great inside curves. Standard blocks are a perfect fit on straight walls. ft. Wall Height 1 course 6 in. (150 mm) 2 courses 12 in. (300 mm) 3 courses 18 in. (450 mm) 4 courses 24 in. (600 mm) 5 courses 30 in. (750 mm) Caps 2 1/4 in. (55 mm) AB Junior Estimating Chart 5 ft (1.5 m) 10 ft (3.0 m) Wall Length 15 ft (4.6 m) 20 ft (6.1 m) 25 ft (7.6 m) Number of Junior Caps needed Amount of Wall Rock needed for base material AB Junior Radius The 3 setback creates a coning effect in curved walls. The tightest curve you can build has a 28 in. (700 mm) radius. With each course you add below, the radius will need to be 1 in. (25 mm) larger. Minimum Radius Chart 250 lbs 450 lbs 650 lbs 900 lbs 1100 lbs Wall Rock (114 kg) (204 kg) (295 kg) (408 kg) (499 kg) Radius Outside Radius 28 in (700 mm) 29 in (725 mm) 30 in (750 mm) 31 in (775 mm) # of blocks for full circle 22 blocks 23 blocks 24 blocks 25 blocks


 wide and at least 6 in. (150 mm) deep, checking for level as you dig.")
 of wall rock in the trench, level and compact thoroughly with a hand tamper.")


 W: 5 5/8 in. (140 mm) 7 5/8 in. (190 mm) D: 8 3/8 in. (210 mm) Weight: 10 lbs. each (4.5 kg) AB 12 in.")
 Available in British Columbia and Alberta locations only. Cutting Caps For A Mitre Joint Look AB Stone 18 in.")
 Weight: 50 lbs. (23 kg) Available in Alberta and Manitoba locations only.")


8 Build AB Junior Walls As Easy As A-B-C... Walls Up to 30 in. Compact thoroughly with a hand tamper or plate compactor. Good compaction is key to a quality job. Sweep the top of the blocks clean, and check again for level. Place the next course of blocks with the seams offset from the course below by 2-4 in. ( mm). This will make the wall stronger and lock Offset the blocks each course more tightly in place. Backfill again with wall rock and appropriate soils to the top of the second row. Backfill behind and in blocks, level and compact. Sweep top of blocks. Compact again and repeat to the top of the wall. If installing pavers behind the block, be sure to prepare the paver base properly. After A. Prepare The Base Use a garden hose to mark the location of the wall. Remove the sod and other surface material. Dig a shallow trench in. ( mm) wide and at least 6 in. (150 mm) deep, checking for level as you dig. On sloped sites, "step up" the trench when it gets more than 8 in. (200 mm) deep. Place 4 in. (100 mm) of wall rock in the trench, level and compact thoroughly with a hand tamper. It is essential that the base is level at this point, as errors will multiply as each new row is added. On larger projects, consider using a mechanical plate compactor for best results. Install wall rock, level and compact Before Layout and mark wall location C. Finish the Wall AB Junior has several options for finishing the top of the wall. Choose the one that's right for your design. Fill in the top course with planting soil or mulch, and use the raised front lip as a finished edge. No caps required. Use the Two-Way for a clean, finished look. Glue the caps in place. Mitred corners will give 90 corners a perfect finish with some cutting. Cap Options For more information on caps and corners see page 21. Two-Way Cap Approximate Dimensions: H: 2 1/2 in. (65 mm) W: 5 5/8 in. (140 mm) 7 5/8 in. (190 mm) D: 8 3/8 in. (210 mm) Weight: 10 lbs. each (4.5 kg) AB 12 in. Straight Cap H: 3 5/8 in. (90 mm) W: 11 1/4 in. (280 mm) D: 11 1/4 in. (280 mm) Weight: 35 lbs. (16 kg) Available in British Columbia and Alberta locations only. Cutting Caps For A Mitre Joint Look AB Stone 18 in. Cap Use with Junior Use with Jumbo Use with Jumbo H: 3 5/8 in. (90 mm) W: 11 7/8 in. (300 mm) D: 17 5/8 in. (440 mm) Weight: 50 lbs. (23 kg) Available in Alberta and Manitoba locations only. Using four of the Two-Way caps and with some cutting you can create a mitre joint at the corner for a custom look. Be sure to wear safety glasses when cutting, and operate power saws carefully. Using a power saw with a masonry blade, make 45 cuts in blocks A & A B B. Install the Block B and place on the C 6 in. 6 in. wall at the corner. Starting at the lowest point of the trench, begin placing the Place block C D B first course of block on the base with the raised front lip facing up and forward. Level each block from side to side and Backfill AB 12 in Straight A against block B on C D front to back, using the rubber mallet to make adjustments. behind and the wall, mark the Caps provide the in blocks, area to be With the base course in place, carefully fill in and behind the level and extra depth needed for comfortable this same process removed. Repeat blocks with wall rock, including a 4-6 in. ( mm) compact. space behind the block. Use on-site soil to fill in front of the Sweep top stair treads. Be for block D. block, and behind the wall rock to the same level as the top of blocks. sure to fasten Use construction of the block. If installing pavers behind the block, be sure to prepare the paver base properly. adhesive. pieces in place. securely with adhesive to secure Cut caps A and B 6 in. from each corner Discard all areas in red

 W: 11 5/8 in. (290 mm) D: 7 5/8 in. (190 mm) Weight: 47 lbs. (21.")
 Fan the back of the blocks for inside curves. To make outside curves, break the \"wings\" off the back of the blocks.")
 2 courses 15 in. (375 mm) 3 courses 22.5 in. (560 mm) 4 courses 30 in. (750 mm) 5 courses 37.5 in. (1 m) Caps 3 5/8 in.")
 7 14 21 28 35 14 28 42 56 70 21 42 63 84 105 28 56 84 112 140 35 70 105 140 175 Number of Deluxe Caps needed 4 8 12 16 20 Amount of Wall Rock")
 radius. With each course you add below, the radius will need to be 1.5 in. (38 mm) larger.")
9 AB Jumbo stacks up more wall in less time! At 35 pounds (16 kg), these larger blocks handle tougher projects with ease. The "wing-back" design lets you build both straight and curved walls with one simple block. AB Jumbo Corners Approximate Dimensions: H: 7 5/8 in. (190 mm) W: 8 1/2 in. (210 mm) D: 9 1/2 in. (240 mm) Weight: 35 lbs. (16 kg) Coverage: 3 blks per sq. ft. Available in left and right hand. H: 7 5/8 in. (190 mm) W: 11 5/8 in. (290 mm) D: 7 5/8 in. (190 mm) Weight: 47 lbs. (21.3 kg) Setback: 6 AB Jumbo Maximum Wall Height Chart Sandy Soil 45 in. (1.1 m) Clay Soil 22 in. (550 mm) Fan the back of the blocks for inside curves. To make outside curves, break the "wings" off the back of the blocks. Straight walls and corners are a snap. 3 blocks per sq ft. Choose AB Jumbo for taller garden wall projects. Wall Height 1 course 7.5 in. (190 mm) 2 courses 15 in. (375 mm) 3 courses 22.5 in. (560 mm) 4 courses 30 in. (750 mm) 5 courses 37.5 in. (1 m) Caps 3 5/8 in. (90 mm) AB Jumbo Estimating Chart 5 ft (1.5 m) 10 ft (3.0 m) Wall Length 15 ft (4.6 m) 20 ft (6.1 m) 25 ft (7.6 m) Number of Deluxe Caps needed Amount of Wall Rock needed for base material AB Jumbo Radius The 6 setback creates a coning effect in curved walls. The tightest curve you can build has a 30 in. (750 mm) radius. With each course you add below, the radius will need to be 1.5 in. (38 mm) larger. Radius Minimum Radius Chart Wall Rock 250 lbs (114 kg) 450 lbs (204 kg) 650 lbs (295 kg) 900 lbs (408 kg) 1100 lbs (499 kg) Outside Radius 30 in (750 mm) 31.5 in (790 mm) 33 in (825 mm) 34.5 in (860 mm) # of blocks for full circle 22 blocks 24 blocks 25 blocks 26 blocks


 deep, checking for level as you dig. On sloped sites, \"step up\" the trench when it gets more than 10 in. (250 mm) deep.")
 and continue digging until the trench is again 12 in. (300 mm) deep. Repeat the process along the entire slope.")
 of base and one full buried block before jumping up to the next course. Bury one full block before Stepping Up Place 4 in.")


10 Build AB Jumbo Walls As Easy As A-B-C... Walls Up to 36 in. With the base course in place, carefully fill in and behind the blocks with wall rock, including a 4-6 in. ( mm) space behind the block. Use on-site soil to fill in front of the block, and behind the wall rock to the same level as the top of the block. Compact thoroughly with a plate compactor. Good compaction is key to a quality job. Sweep the tops of the blocks clean, and check again for level. Place the next course of blocks with the seams offset from the Offset the blocks course below by 2-4 in. ( mm). This will make the wall stronger and lock each course more tightly in place. Backfill again with wall rock and soils to the top of the second row. Compact again and repeat to the top of the wall. Backfill behind and in blocks, level and compact. Sweep top of blocks. A. Prepare The Base After Before Building on Slopes Walls built on a sloping grade require a "stepped base". at the lowest point of the wall. Begin Finished Grade Use a garden hose to mark the location of the wall. Remove the sod and other surface material. Dig a shallow trench 12 in. (300 mm) wide and at least 6 in. (150 mm) deep, checking for level as you dig. On sloped sites, "step up" the trench when it gets more than 10 in. (250 mm) deep. Layout and mark wall location Dig the trench into the slope until it reaches a depth of 12 in. (300 mm). "Step up" 7.5 in. (190 mm) and continue digging until the trench is again 12 in. (300 mm) deep. Repeat the process along the entire slope. The "stepped up" trench should be deep enough to allow for the 4 in. (100 mm) of base and one full buried block before jumping up to the next course. Bury one full block before Stepping Up Place 4 in. (100 mm) of wall rock in the trench, level and compact thoroughly. Use a mechanical plate compactor for best results. It is essential that the base is level at this point, as errors will multiply as each new row is added. B. Install the Block Install wall rock, level and compact Starting at the lowest point of the trench, begin placing the first course of block on the base with the raised front lip facing up and forward. Level each block from side to side and front to back, using the rubber mallet to make adjustments. Install base course, level. C. Finish The Wall AB Jumbo has a raised front-lip which provides a perfect built-in edging to complete your project. Caps blocks work well as does as rock, mulch or grass. For more details, see page 14. Drainage Good drainage practices are important in any garden or landscape. Slope foundation beds away from the house. Route the downspouts into the bed and under the wall to a drainage basket or drywell. Redirecting any concentrated water sources above or at the base of a garden wall will ensure that your wall lasts a lifetime. Basket Drain Downspout Flex Pipe 17 18

 tread.")


 treads using the AB Jumbos. Excavate the area for the stairway. Make the bottom trench 12 in. (300 mm) wide.")
 of wall rock in the trench and compact thoroughly. Set the AB Jumbos in place to form the first riser.")


 Install cap blocks and second riser Repeat to top of slope 12 in. (300 mm) How Many Steps?")
11 Stair Applications Stairs can be designed with flowing curves or straight lines. Curved sidewalls create a softer, natural look. Straight sidewalls and corners offer a crisp, traditional style; however they require corner blocks and take more time to build. Stairs can be built using the AB Jumbo. Tackle Your Slope Match your stairway design to the natural grade of your slope. On steep slopes, keep the steps close together and use our cap blocks for a 12 in. (300 mm) tread. On gentle slopes, add pavers or other materials to increase the depth of the tread and length of the run. Landings can soften a long stairway and provide an easy way to tie the sets of steps together. Basic Stair Construction Once you've picked a stair design, remove any sod or other surface materials and begin to rough in the grades. Be sure to install side walls first if they are part of your design, and make sure to bury enough of the base blocks so the side walls are fully covered by the finished steps. Tight Stairs With Cap Blocks This arrangement will give you 7.5 in. (190 mm) risers and 11 in. (280 mm) treads using the AB Jumbos. Excavate the area for the stairway. Make the bottom trench 12 in. (300 mm) wide. At the back of the trench, step up 6 in. (150 mm) and excavate back another 12 in. (300 mm). Step up again to the top of the slope. Place 4 in. (100 mm) of wall rock in the trench and compact thoroughly. Set the AB Jumbos in place to form the first riser. Fill the block and behind with more wall rock and carefully compact again to lock in place. Check for level and adjust if needed. Install the cap blocks on the first course. Place the second riser to fit snugly against the back of the cap block on the first riser. The bottom of the blocks should be set at the same height as the top of the lower set of blocks. This arrangement will give you a the same rise in each step. Fill the blocks and behind to the back of the trench, and compact again to lock the second riser in place. Wider Steps To build wider steps, simply excavate the back of each trench to allow for additional tread depth. It is a good idea to make each tread uniform in width. If you are using pavers to complete the surface of the treads, try to set the depth so full size pavers will fill it in. This will eliminate cutting. Be sure to slope the treads slightly downward to allow for proper drainage. Excavate slope and place first step on compacted base 6 in. (150 mm) Install cap blocks and second riser Repeat to top of slope 12 in. (300 mm) How Many Steps? To find the number of steps needed in a wall, measure the total rise of your slope in inches and divide by the height of the block. Taller Steps If you have steeper slopes, use the same construction shown above. Be sure to check your local building codes to make sure the taller steps meet code. Space steps apart on gentle slopes AB Jumbo = 7.5 in. high Rise - 30 in. (750 mm) Stair Tread Options 30 in. 7.5 in. = 4 AB Junior steps Cap blocks Cap block with pavers Allan Block s patented front lip provides a built-in edging that works well when installing the stair tread material. Allan Block Caps, pavers, crushed rock, mulches and flagstone are good stair tread examples. Ensure that stair treads are glued in place for safe use


.")


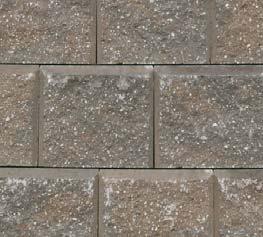
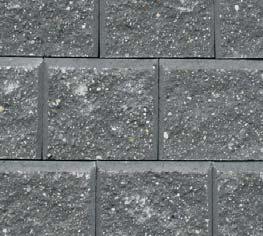
12 Caps & Corners - AB Jumbo Cutting Caps Capping a curved wall takes a bit of cutting and fitting, but produces a beautiful finish. Be sure to wear safety glasses when cutting, and operate power saws carefully. Place two caps on top of the wall spaced so a third cap will fit tightly between their widest point. Set another cap on top of the first two caps and mark where they overlap on the bottom of the center cap. Remove the center cap and cut along the marks. Set the middle cap back in place so the three fit tightly together. Repeat as often as needed to cap the entire curve. It's a good idea to secure caps with a high strength construction adhesive once they are all cut. On tighter curves both caps equally will give a cleaner look. Corner Details Inside Corners Step 1 Step 2 Step 3 Modified blocks Modified blocks Available Colours AB Garden Accent smoke rocky mountain blend desert bloom tumbled rocky mountain blend Available only in Manitoba AB Jumbo grey rocky mountain blend Standard blocks are easily modified to build inside corners. You will need a power saw with a masonry blade to make the necessary cuts (a good chisel will work too). Using your saw or chisel, remove the raised lip from one block, and the left third from another. Set them in place at the beginning of the base course. Locate the adjoining wall so that the raised lip on the modified block is lined up with the raised lips on the two blocks. Finish installing the entire base course in both directions. Modify two more blocks, this time removing the right third of the raised lip from one of them, and use these blocks to start the second course. Continue the process to the top of the wall, alternating as you go. Cut caps at 45 degree angles to complete the inside corner. charcoal antique earthtone AB Junior Available only in Alberta and British Columbia sandstone earthtone Available only in Manitoba Available only in Alberta Outside Corners AB corner blocks come in right and left hand versions, and are all you need to make a perfect outside corner. Always build your walls by starting at the corners and working out. Set the first corner block in place and install the two perpendicular base courses. Level, backfill and compact. Place an alternating corner on the second course and set the entire second course of block in both directions. Level, backfill and compact again. Repeat as often as needed to the top of the wall. Mitre cut a cap block to give the wall a custom finished look. As colour selections will change from time to time, be sure to check with your AB Dealer for the current availability before ordering. Every effort has been made to accurately represent the colours. However, the colours may vary slightly due to the concrete manufacturing process or this printing process. We recommend viewing actual colour samples as you make your colour selection grey charcoal Available only in Alberta
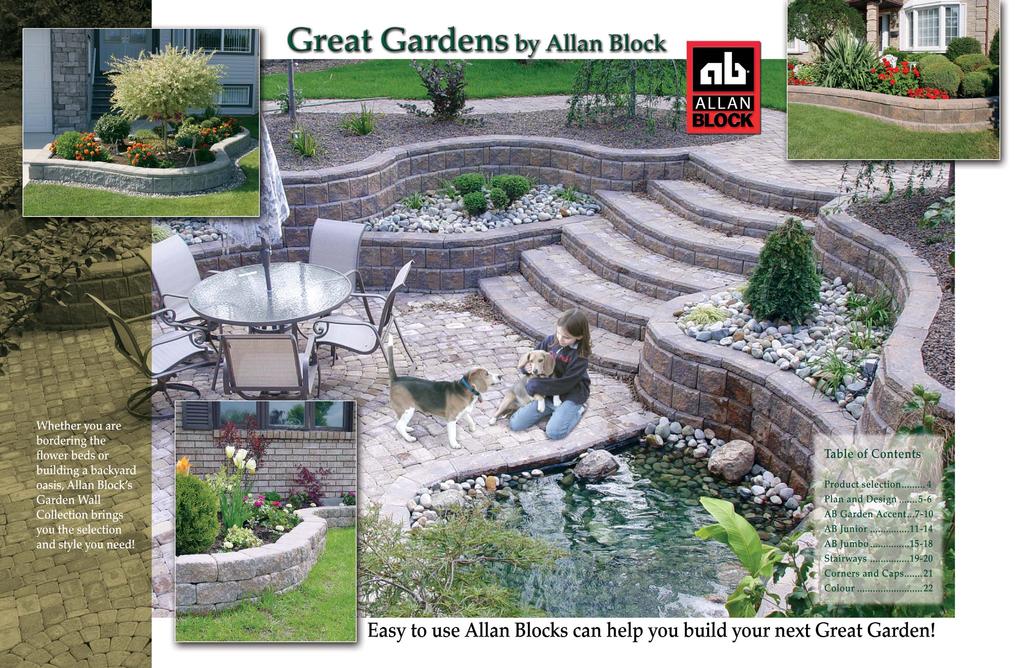
The Garden Wall Collection
 1 2 The Garden Wall Collection by Allan Block The Garden Wall Collection gives you three choices for building Great Gardens! 3 Choose the Right Block. Select the block with the right size and style for
Every effort has been made to accurately represent the colors. However, the colors may vary slightly due to the concrete manufacturing process or
 1 Every effort has been made to accurately represent the colors. However, the colors may vary slightly due to the concrete manufacturing process or this printing process. We recommend viewing actual color
Allan Block. allanblock.com
 allanblock.com Allan Block Allan Block is a leading provider of patented retaining wall systems. For over twenty years Allan Block has been bringing innovative products to the landscape community. We can
at home installation guide Manufactured by:
 at home outdoorsproduct and installation guide Manufactured by: Product and Installation Guide Wall Systems Table of Contents Wall Systems...3-7 Project Planning and Installation... 8-11 DIY Retaining
COUNTY BLOCK. Construction Guidelines on County Block Steps. Special Considerations When Building Steps. Natural Beauty Absolute Strength
 Construction Guidelines on County Block Limits of Liability This County Block Installation Guide provides general information about the product, including installation procedures, technical and engineering
Garden WallScape Installation Guide
 By CornerStone Wall Solutions Inc. Garden WallScape Installation Guide GRAVITY/DETAILS The perfect balance... between design and nature Garden WallScape Overview note: bolded terms are defined in our online
AUGUST 2017 HASTINGS. retaining walls installation guide
 AUGUST 2017 HASTINGS retaining walls installation guide RETAINING WALL INSTALLATION GUIDE RETAINING WALL information Austral Masonry retaining wall blocks are an ideal choice for retaining walls in gardens,
NOVEMBER 2016 GRANDWALL. retaining walls installation guide
 NOVEMBER 2016 GRANDWALL retaining walls installation guide RETAINING WALL INSTALLATION GUIDE RETAINING WALL information Austral Masonry Grandwall retaining wall blocks are an ideal choice for retaining
Introducing the first Eco-Friendly mortarless concrete retaining wall system - AB Fieldstone Collection.
 Introducing the first Eco-Friendly mortarless concrete retaining wall system - AB Fieldstone Collection. This innovative new product has unlimited possibilities in style and constructability. It is right
Steps And Stairs Installation Steps In Wall - Option 1 Steps In Front of Walls - Option 2 Steps In Wall; 10 (25cm) Tread - Option 3 Step Parallel to
 Tread - Option 3 Step Parallel to") Steps And Stairs Installation Steps In Wall - Option 1 Steps In Front of Walls - Option 2 Steps In Wall; 10 (25cm) Tread - Option 3 Step Parallel to Wall - Option 4 Steps and Stairs Q & A E CONSTRUCTION
Steps And Stairs Installation Steps In Wall - Option 1 Steps In Front of Walls - Option 2 Steps In Wall; 10 (25cm) Tread - Option 3 Step Parallel to Wall - Option 4 Steps and Stairs Q & A E CONSTRUCTION
Steps And Stairs Installation Option 1 - Steps In Wall Option 2 - Steps With Plant Space Option 3 - Steps In Front of Walls Option 4 - Steps Along
 Steps And Stairs Installation Option 1 - Steps In Wall Option 2 - Steps With Plant Space Option 3 - Steps In Front of Walls Option 4 - Steps Along Wall Face Option 5 - Steps In Wall; 10 (25cm) Tread Option
decorative Stylish AND Retaining Wall - Wallstone Wallstone Charcoal
 Retaining Wall - Wallstone decorative AND Stylish Wallstone Charcoal Wallstone has many of the features of other systems but with the added advantage of choice between a vertical wall or a setback wall.
Allan Block. Table of Contents. allanblock.com
 allanblock.com AB Fieldstone Collection Facing Series: Cascade Color: Rustic Creek Allan Block Allan Block is a leading provider of patented retaining wall systems. For over twenty years Allan Block has
Gravity Wall. A force to be reckoned with... Gravity (SRW) segmental retaining wall systems are structures
 segmental retaining wall systems are structures") A force to be reckoned with... Gravity (SRW) segmental retaining wall systems are structures lower in height that use the FrogStone unit weight combined with gravel core infill to resist earth pressures
A force to be reckoned with... Gravity (SRW) segmental retaining wall systems are structures lower in height that use the FrogStone unit weight combined with gravel core infill to resist earth pressures
Bordeaux Walling. Product & Technical Information
 Product & Technical Information BORDEAUX WALLING Piece Piece Piece Block Block Block Block Pins No. per per Height Length Width Weight Layer Cube (kgs) 1 2 3 1 2 10 150 400/350 250 28 Yes 2 2 10 150 300/300
Retaining Wall Systems
 Retaining Wall Systems A family of Retaining Wall Products The versatile Allan Block product line allows easy design and construction of retaining walls to meet specific engineering and site requirements.
Allan Block. Table of Contents. allanblock.com
 AB Fieldstone Collection Facing Series: Sierra Color: Sandstone allanblock.com Table of Contents Allan Block Allan Block is a leading provider of patented retaining wall systems. For over twenty five years
LEDGESTONE & Ledgestone radius
 LEDGESTONE & radius FRESTANDING & LANDSCAPE WALL 105 Wall LEDGESTONE WALL A Stone look wall for Landscape and Engineered heights The universal size (4 in. high x 8 in. deep x 12 in. long) and efficient
The Ideal Way to Build
 PAVERS BY IDEAL The Ideal Way to Build Walls with Style using Pisa2 and Roman Pisa Ideal s Pisa2 and Roman Pisa are full component landscape retaining wall systems that are easy to assemble. A tongue and
RETAINING WALL SIGMA WALL 6 AND 8 SIGMA. cambridgewallsupport.com cambridgepavers.com FIND MORE DETAILS AT
 BACKYARD PATIOS & OUTDOOR LIVING ROOMS PAVINGSTONES WALL SYSTEMS SIGMA WALL 6 AND 8 SIGMA RETAINING WALL FIND MORE DETAILS AT cambridgewallsupport.com cambridgepavers.com 41 W Cambridge Sigma Wall System
MUTUAL MATERIALS TECH SHEET RomanStack. Coverage* 4.5 pcs / ft² (48.44 pcs / m²) 3,242 lb (1,470 kg) 4 x 8 Cap Unit. 1.6 pcs / ln ft (4.
 3,242 lb (1,470 kg) 4 x 8 Cap Unit. 1.6 pcs / ln ft (4.") Available in three wall block sizes and two cap sizes accompanied by 90 corner units. Combine multiple sizes of RomanStack to create intricate Ashlar, repeating or random patterns. Each size utilizes a
Available in three wall block sizes and two cap sizes accompanied by 90 corner units. Combine multiple sizes of RomanStack to create intricate Ashlar, repeating or random patterns. Each size utilizes a
HOW TO INSTALL PATIOS AND WALKWAYS STEP 2 STEP 1. For all Patios and Walkways. The base is the most important step in your patio and walkway projects.
 New Project (replacing grass/dirt) STEP 1 PREPARING YOUR PROJECT AREA Determine how much to excavate using the example below. Remove the grass to desired depth (skim rather than dig deep) and a few inches
Tasman Retaining Wall System
 Tasman Retaining Wall System The Tasman Retaining Wall System incorporates purpose made corners and capping units to provide classical reconstructed stone retaining walls for any landscape situation. From
Backyard Renovation - AB Walls and AB Courtyard A Perfect Match
 Backyard Renovation - AB Walls and AB Courtyard A Perfect Match Before Creating usable and beautiful space in your own backyard can be an exciting adventure as these homeowners in Calgary discovered when
HOW TO BUILD Garden Walls Frestanding & Landscape Walls
 HOW TO BUILD Garden Walls Frestanding & Landscape Walls 10 Cambridge Wall Book Garden walls This layout depicts a common application of landscape and freestanding designs together in one wall with Columns
NORTHERN QLD LANDSCAPING COLLECTION RETAINING WALLS. style and function
 NORTHERN QLD LANDSCAPING COLLECTION 2017-18 RETAINING WALLS style and function RETAINING WALLS / NTH QLD / 2 / style and function BEAUTIFUL PRODUCTS with enduring style Our range of coloured, standard
Stretch Your Dollar Theme Designs Fire Pit
 Stretch Your Dollar Theme Designs Fire Pit Tools Garden gloves Garden hose String (5 length) Stake Hammer or rubber mallet 3 Mason Chisel Tape measure 2 level 4 level (most homeowners don t have. We don
PYZIQUE FRESTANDING & RETAINING WALL
 PYZIQUE FRESTANDING & RETAINING WALL 120 Cambridge Wall Book Pyzique Cambridge Wall Book 121 Pyzique Wall PYZIQUE WALL ONE STONE DOES IT ALL! The Trapezoid shape (4 in. high x 9in. deep x 11 in. and 7
44 Installation Instructions: Olde English Radius Wall Double-Sided Freestanding Wall
 44 Olde English Radius Wall Double-Sided Freestanding Wall This project will outline a freestanding or sitting wall. Shown is an Olde English Radius freestanding, double-sided sitting wall with Cambridge
How To Install Your Cambridge Pavingstones System How To Install Your Cambridge Segmental Retaining Wall System
 4 How To Install Your Cambridge Pavingstones System Step 1. Preparation: Sketch a diagram of area to be paved. Square off a 90-degree corner. Set stakes for outside perimeters 6 inches away from area.
Terraces. Terraced hillsides may require engineering assistance. Contact your C&M Representative for more information.
 Allan Block is the ultimate concrete masonry retaining wall system in Australia. The superior colour range and versatile nature of the various components allows designers, architects and engineers to specify
Download the AB Courtyard Estimating App Today!
 Download the AB Courtyard Estimating App Today! F u n O u t d o o r L i v i n g AB Courtyard Collection The AB Courtyard Collection is a durable, versatile and a cost-effective way to bring value into
Tasman Retaining Wall System
 Tasman Retaining Wall System The Tasman Retaining Wall System incorporates purpose made corners and capping units to provide classical reconstructed stone retaining walls for any landscape situation. From
Heron Retaining Walls
 Heron Retaining Walls masonry. build in style build in style Our range of coloured, standard and premium masonry have set a new standard in quality and style for the versatile concrete block. By adding
HOW TO INSTALL PATIOS AND WALKWAYS STEP 2 STEP 1. For all Patios and Walkways. The base is the most important step in your patio and walkway projects.
 STEP 1 PREPARING YOUR PROJECT AREA Most commonly this is removing a grass area that is around your current concrete patio. You will incorporate this area into your new larger outdoor patio design. You
Outdoor Living to Last a Lifetime
 Outdoor Living to Last a Lifetime Once upon a time, backyard improvements meant concrete slabs, treated landscape timbers, maybe a wooden deck and a few plants to finish the job. Today, backyard improvements
freestone eco Prestige & quality DIY vertical wall Large blocks - 10/m 2 Smooth surface finish No concrete footings
 freestone eco Retaining Wall SystemTM The Freestone ECO Retaining Wall System TM is a more sustainable DIY, vertical retaining wall which is manufactured with up to 40% recycled glass aggregate to provide
John Brown, Brown/Woods & Assoc.
 Cover Story Build Strong Walls and get a great night s sleep! Building an outdoor pool and entertainment area on a sloping hillside presented a fun challenge for Dan Swartz of Brown/Woods and Associates,
Products for the residential Market. Where. dreams. & yards meet. anchorwall.com
 Products for the residential Market Where dreams & yards meet Easy installation is more than lip service. No pins. No mortar. No misalignments. Rear-lip locator, invented by Anchor, makes installation
Hardscaping Installation Manual
 Hardscaping Installation Manual INDEX Installation of Pavers... 1 Installation of Meshed Flagstone... 2 Installation of Veneer Stone... 3 Sand Set Installation of Pavers 1. Preparing the ground Mark your
Create the classic look of stone...
 Create the classic look of stone... The AB Courtyard Collection is a mortarless system developed to deliver creative landscape wall solutions. With over 10 million square metres of AB Courtyard products
Retaining Wall Products
 Retaining Wall Products BCP Building Products 18 Kirkcaldy Street Bathurst NSW 2795 Phone 02 6331 2777 Fax 02 6331 6510 sales@bcpbuildingproducts.com.au www.bcpbuildingproducts.com.au Garden Lockstone
Retaining Wall System
 Your local distributor Retaining Wall System Prestige & Quality Near Vertical Walls Do It Yourself No Concrete Footings Flexible - 90 o Corners, Steps, Straight or Curved Walls Commercial or Civil Walls
Retaining Wall Ranges Bribie 4 Daintree 6 Heron 8 Moreton 10 How to Build Retaining Walls 12 Pavers Ranges Ecology 14 How to Pave 16 Contact 18
 contents. Retaining Wall Ranges Bribie 4 Daintree 6 Heron 8 Moreton 10 How to Build Retaining Walls 12 Pavers Ranges Ecology 14 How to Pave 16 Contact 18 Front Cover: range. heron colour. limestone 2 Austral
Gardenstone Retaining Walls
 Gardenstone Retaining Walls masonry. build in style build in style Our range of coloured, standard and premium masonry have set a new standard in quality and style for the versatile concrete block. By
G R A V I T Y / G E O G R I D
 GRAVITY/GEOGRID MAGNUMSTONE Overview note: bolded terms are defined in our online glossary at www.cornerstonewallsolutions.com The MagnumStone retaining wall system was developed with the installer in
FEAT UR IN G V E R T IC A R E TA IN IN G WA LL SYST E M. Installation. Guide. anchorwall.com
 FEAT UR IN G V E R T IC A R E TA IN IN G WA LL SYST E M Installation Guide Table of Contents and How to Use This Guide table of contents HOW TO USE THIS GUIDE 2 BEFORE YOU BEGIN 2 RETAINING WALL BASICS
Features Include: Near Vertical Walls Do it Yourself No Concrete Footings Required
 Features Include: Near Vertical Walls Do it Yourself No Concrete Footings Required Tel: Office: +27 (0)11 964 2995 Fax number: +27 (0)86 601 6692 info@dsmmasonry.co.za www.dsmmasonry.co.za Range three
Old and New Come Together with Style
 Old and New Come Together with Style Ashlar Collection Mario Iantosca is old school. He learned his trade from his father in Naples Italy, where stonemasons have practiced their trade for thousands of
MIRASTONE TM LIBERTYSTONE. Manufactured by: LIBERTYSTONE HARDSCAPING SYSTEMS GRAVITY/GEOGRID. HARDSCAPING SYSTEMS
 MIRASTONE TM MiraStone Installation TM Guide GRAVITY/GEOGRID Manufactured by: LIBERTYSTONE HARDSCAPING SYSTEMS LIBERTYSTONE HARDSCAPING SYSTEMS www.liberty-stone.net MiraStone Overview note: bolded terms
VERSA-Green TM Plantable Retaining Wall System
 www.versa-lok.com VERSA-Green TM Plantable Retaining Wall System VERSA-GREEN INSTALLATION The VERSA-Green Plantable Wall System from VERSA-LOK is truly the greenest retaining wall available. It combines
stackstone romanstack retaining wall installation guide
 stackstone romanstack retaining wall installation guide Congratulations on purchasing one of the finest concrete retaining wall systems available. Easy to install, tacktone and Romantack retaining walls
Fortus Square Foot. Installation Guide
 Willow Fortus Square Foot Installation Guide Step-by-step details on how to properly construct Fortus Square Foot TM segmental retaining walls that will stand the test of time with beautiful results. Fortus
EZ BASE. Paver Base System ECHNICAL DATA SHEET TECHNICAL DATA SHEET TECHNICAL DATA SHEET TECHNICAL DATA SHEE UPDATE APPLICATIONS PROPERTIES
 UPDATE March 14, 2018 Make sure that you have an up-to-date technical data sheet in hand by consulting our website: techniseal.com U.S.A. and Canada: dial 1 800 465-7325 Others: dial (514) 523-8324 (Canada)
How to build 4 DIY projects with. AB Courtyard
 How to build 4 DIY projects with AB Courtyard RECOMMENDED FOR Curved Wall Circular Wall Straight Wall Fences Bench Seat AB Courtyard FEATURES > Double sided free-standing wall > Build directly onto existing
RETAINING WALLS.
 RETAINING WALLS www.expocrete.com RomanPisa StackStone RomanStack RomanPisa ABOUT EXPOCRETE Proud to be 100% Canadian, Expocrete has been serving Western Canada with quality products and outstanding customer
Five Stone System. Trench Depth Compactible Rock. Foundation. 57 lbs 41 lbs 31 lbs 47 lbs. Patent Pending. Approximate Weight
 Five Stone System Patent Pending Introduction to the Multi-Use, Multi-Stone System The multi-use, multi-stone system has been developed to give a natural stone appearance to a manufactured system. The
Terraced Garden Tackles Troublesome Hillside
 Terraced Garden Tackles Troublesome Hillside The Challenge Building a new home can be exciting and often challenging. This hillside lot was indeed a challenge for the homeowners building in a new development.
installation section three: Installation
 section three: Installation block specifications...c2 wall layout, excavation...c3 protection of soils...c4 leveling pad...c5 lay first course...c6 backfill & compacting...c7 stepping & additional courses...c8
Palm Retaining Walls. masonry. build in style
 Palm Retaining Walls masonry. build in style build in style Our range of coloured, standard and premium masonry have set a new standard in quality and style for the versatile concrete block. By adding
Expanded Backyard Makes For A Beautiful View
 allanblock.com Expanded Backyard Makes For A Beautiful View Nestled in the hills of Shell Beach, California the Allee home was in need of a backyard expansion. With a beautiful view of the Pacific Ocean
Courtyard Walls. by Allan Block. NEW Pre-Designed Patio Packages!
 Courtyard Walls by Allan Block Complete Guide for using AB Courtyard. See How Easy it is to build Outdoor Kitchens, Fire Pits, Patio Walls and More. Check Out all of the Patio Ideas with AB Courtyard.
EASY GARDEN WALKWAYS Home Gardeners School March Presented by Robert W. Bellek Owner
 EASY GARDEN WALKWAYS Home Gardeners School March 2018 Presented by Robert W. Bellek Owner LET S GET STARTED You re going to need some important tools in order to accomplish your walkway with less headaches
Construction Procedures
 Construction Procedures 2016 Rev. 1.7 1 Contents Introduction...... 3 Base Row Layout........ 4 Drainage and Backfill..... 6 Compaction... 7 Subsequent Rows... 8 In Pictures.... 10 Variations.. 11 Step
StoneVista Installation Guide
 By CornerStone Wall Solutions Inc. StoneVista Installation Guide GRAVITY/GEOGRID Intriguing patterns... your neighbors will admire StoneVista Overview note: bolded terms are defined in our online glossary
General Brick Installation Instructions
 Excellent Resource for Clay Paver Installation: http://www.bia.org/resources/clay-brick-pavers/clay-paver-informational- Resources These are general guidelines only. Check your paver manufacturer's recommendations
PISA. Retaining Wall System. The choice of professional contractors
 PISA Retaining Wall System The choice of professional contractors PRODUCT CODE DESCRIPTION & DIMENSIONS (H x W x D) ~ WEIGHT PER UNIT No./M² No./ Lin M² UNITS PER PALLET 5501 Light Vertical Straight Unit
InstallatIon. Guidelines. Relax More. A C T G L O B A L. C O M / X T R E M E L A W N E M A I L : X T R M E L A W A C T G L O B A L.
 InstallatIon Guidelines Relax More. Installation Guide 1. 2. 3. 4. Required Materials 1. Xtreme Lawn 2. Shovel or gas powered sod cutter 3. Vibrating plate compactor 4. Weed barrier mesh 5. Rock aggregate
NOVEMBER 2016 MAGNUMSTONE. retaining walls installation manual
 NOVEMBER 2016 MAGNUMSTONE retaining walls installation manual AUSTRAL MASONRY CONTENTS Magnumstone Installation Guide 04 Overview 07 Unit Specifications 08 Installation 08 Gravity MagnumStone Wall 16 Geogrid
67665_MesaInstallationGuide_2 12/10/07 2:12 PM Page 1 E ID U G TION ALLA T INS
 INSTALLATION GUIDE Introduction The Mesa Retaining Wall Systems from Tensar International Corporation offer superior and costeffective solutions for all of your retaining wall needs. This installation
Landscaping. Retaining Walls & Pavers. masonry. build in style
 Landscaping Retaining Walls & Pavers masonry. build in style contents. Retaining Wall Ranges Clifton 4 Arrinastone 5 Valleystone 6 Hastings 8 Keystone 10 Vintagestone 12 How to Build Retaining Walls 14
Construction Procedures
 Construction Procedures 2014 Rev. 1.6 1 Introduction This manual presents the methods and procedures necessary for the proper erection of a LOCK+LOAD retaining wall. problems later during the service life
Landscaping. Retaining Walls & Pavers. masonry. build in style
 Landscaping Retaining Walls & Pavers masonry. build in style contents. Retaining Wall Ranges Arrinastone 4 Valleystone 6 Grandstone 8 Keystone 10 Vintagestone 12 How to Build Retaining Walls 14 Domestic
Paradise Found. they learned, they developed most of the design themselves, and knew exactly what they wanted before they even started the work.
 Paradise Found Immediately upon walking through the black cast-iron gate at this magnificent Vienna, VA private residence, a breathtaking landscape quickly comes into view. Initially greeted by large concrete
INSTALLATION GUIDE SLABS
 INSTALLATION OUTLINE techo-bloc.com 01 EXCAVATION A. Before excavating, call all the local utility companies (e.g., phone, gas, electrical) to ensure that the area in which you plan to dig is clear of
FREESTONE ECOTM. Retaining Wall SystemTM. No one knows Blocks and Pavers better
 FREESTONE ECOTM Retaining Wall SystemTM The Freestone ECO Retaining Wall System TM is a more sustainable DIY, vertical retaining wall which is manufactured with up to 40% recycled glass aggregate to provide
Estimating & Installation Manual
 FEATURING HIGHLAND STONE PRODUCTS 2008-2009 Estimating & Installation Manual ANCHORWALL.COM 1-877-295-5415 TABLE OF CONTENTS 2 TABLE OF CONTENTS BEFORE YOU BEGIN............................ 2 TERMS USED
CORNERSTONE NEAR VERTICAL 100 SERIES
 MUTUAL MATERIALS HARDSCAPE PRODUCT DATA SHEET There is now a CornerStone Near Vertical 100-Series unit with a new redesigned SecureLug system reducing the setback between each course allowing for nearvertical
Strength & Versatility
 Strength & Versatility The RidgeRock II Retaining Wall System has the added advantages of smaller block size, lower costs, and easier installation. All of this with no compromise in structural stability,
TIMELESS BEAUTY Experience Old-World Charm on a Grander Scale...
 TIMELESS BEAUTY Experience Old-World Charm on a Grander Scale... KEYSTONE century wall Introducing Crafted specifically for taller wall structures and heavy-loading conditions, the Keystone Century Wall
Best Block Company- Product Knowledge Training
 Best Block Company- Product Knowledge Training Vendor Company Name: Best Block Company Lowe s Vendor Number: 83591 Vendor Contact Name: Jamie Lambrecht Vendor Contact Phone Number: 586-634-1750 Vendor
BELMURO WALL SYSTEM INSTALLATION GUIDE
 BELMURO WALL SYSTEM INSTALLATION GUIDE TABLE OF CONTENTS TABLE OF CONTENTS... 1 SYSTEM DESCRIPTION... 2 DRY STACK SYSTEM: INSTALLATION GUIDE... 5 GEOGRID WALL SYSTEM: INSTALLATION GUIDE... 9 MASONRY WALL
How To Build A Dry Stone Wall
 How To Build A Dry Stone Wall Installation Guide Complete step by step How-to guide for building a dry-stack stone wall. Copyright 2012 Stone Plus, Inc. How To Build A Dry Stack Stone Wall Dry stone retaining
stone oasis collection oasis circle patio (diameter ) instruction guide
 instruction guide") stone oasis collection oasis circle patio (diameter - 147 ) instruction guide This manual is updated on September 2017. Please check www.barkmanconcrete.com/resources for any manual updates. Materials
stone oasis collection oasis circle patio (diameter - 147 ) instruction guide This manual is updated on September 2017. Please check www.barkmanconcrete.com/resources for any manual updates. Materials
A DIVISION OF INSTALLATION. Guide. Relax More.
 A DIVISION OF INSTALLATION Guide Relax More. Turfscape Installation Guide Required Materials Turfscape Shovel or gas powered sod puller Vibrating plate compactor Weed barrier mesh Rock aggregate Utility
CONTENT. INTrOduCTION 3. units & CONNECTOrs 4. standard INsTallaTION PrOCEdurEs 5
 CONTENT INTrOduCTION 3 units & CONNECTOrs 4 standard INsTallaTION PrOCEdurEs 5 step 1 - Preconstruction Preparation 5 step 2 - Prepare the leveling Pad 5 step 3 - Install the Base Course 5 step 4 - Geogrid
Redi Rock Specification and Installation Manual
 Redi Rock Specification and Installation Manual 1.0 General Scope This Specification covers the Design, Materials and Installation of Redi Rock modular block Retaining and Freestanding Wall systems as
OUTDOOR LIVING PATIOS, WALKWAYS & RETAINING WALLS
 2018 OUTDOOR LIVING PATIOS, WALKWAYS & RETAINING WALLS Lowes_Cat2018_QC_ENG.indd 1 2018-02-26 13:59 OUR STORE TO YOUR DOOR Order in the Store or on the Phone See Lowe s Associate for Delivery Charge Lowe
How to Build a Dry Stone Wall
 Do-It-Yourself: How to Build a Dry Stone Wall An instructional guide for beginners Copyright Stephen Burton and licensed for reuse under this Creative Commons License. By: Stephen T. Kane Table of Contents:
How To Install Dry-Laid Flagstone
 How To Install Dry-Laid Flagstone Patio or Walkway Complete step by step How-to guide for building a dry-laid patio or walkway. Copyright 2012 Stone Plus, Inc. How To Build A Dry Laid Flagstone Patio or
Flagstone Walkway Setting the stone is the fun part; preparing a solid base first will make the walk last
 Laying a Flagstone Walkway Setting the stone is the fun part; preparing a solid base first will make the walk last BY ERIC NELSON Every house needs a walk. Walks are useful and inviting, and installed
Tasman Retaining Wall
 Tasman Retaining Wall EVALUATION AND INSTALLATION GUIDE Landscaping Tasman Retaining Wall Evaluation and Installation Guide This installation guide demonstrates the basics on how to construct: A. Tasman
NORTHERN NSW LANDSCAPING COLLECTION RETAINING WALLS & PAVERS style and function
 NORTHERN NSW LANDSCAPING COLLECTION 2016-17 RETAINING WALLS & PAVERS style and function RETAINING WALLS & PAVERS / NTH NSW / 2 / style and function BEAUTIFUL PRODUCTS with enduring style Our range of coloured,
CHARACTERISTICS CSA A TECHO-BLOC Compressive strength psi [45 MPa] min.
![CHARACTERISTICS CSA A TECHO-BLOC Compressive strength psi [45 MPa] min.](/thumbs/74/69637242.jpg "CHARACTERISTICS CSA A TECHO-BLOC Compressive strength psi [45 MPa] min.") PATIOS, WALKWAYS, POOLSIDES & STEPPING STONES PHYSICAL AND GEOMETRICAL CHARACTERISTICS CHARACTERISTICS CSA A231.1 2 TECHO-BLOC Compressive strength - 6 500 psi [45 MPa] min. Flexural strength 650 psi [4.5
PATIOS, WALKWAYS, POOLSIDES & STEPPING STONES PHYSICAL AND GEOMETRICAL CHARACTERISTICS CHARACTERISTICS CSA A231.1 2 TECHO-BLOC Compressive strength - 6 500 psi [45 MPa] min. Flexural strength 650 psi [4.5
C H A N G E Y O U R V I E W
 www.brownsconcrete.com C H A N G E Y O U R V I E W Thank you for your interest in Rosetta's premium line hardscape products. You will find that no other engineered system offers the natural beauty, the
Stairs. Creating beauty, one step at a time... Proper installation of building stairs requires the same care and
 Creating beauty, one step at a time... Proper installation of building stairs requires the same care and thoroughness as the creation of the wall itself. MiraStone s design features including the hollow
Landscaping. Retaining Walls & Pavers. masonry. style and function
 Landscaping Retaining Walls & Pavers masonry. style and function contents. Retaining Wall Ranges Arrinastone 4 Bribie 5 Valleystone 6 Vintagestone 7 Hastings 8 Keystone 11 How to Build Retaining Walls
Corners VERSA-LOK solid concrete units may be easily used to create an unlimited variety of corners. Basic Wall Design Elements.
 Landscape Steps Landscape Steps Size Pieces per Pallet Weight per Piece Weight per Pallet 6 x 16 x 48 10 420 4200 6 x 16 x 36 10 300 3000 Colors: Brown & Grey Basic Wall Design Elements Half units on outside
DO-IT-YOURSELF PROJECTS GUIDE PAVERS - SLABS - WALLS - CURBS
 2018 DO-IT-YOURSELF PROJECTS GUIDE PAVERS - SLABS - WALLS - CURBS PIAZZA SLAB 2 2018 NEW ARRIVALS WEEK-END PROJECT IDEAS.....................04 MINI-KENDO SLABS........................... 10 SLABS 13 25
shaped for imagination
 Installation Guide Straight or curved garden, retaining & seat walls steps pillars planters tree-rings fireplaces fire-pits water features grill islands BBQ s S-Shape Design shaped for imagination The