RETAINING WALL SIGMA WALL 6 AND 8 SIGMA. cambridgewallsupport.com cambridgepavers.com FIND MORE DETAILS AT
|
|
|
- Morris Harrell
- 5 years ago
- Views:
Transcription


1 BACKYARD PATIOS & OUTDOOR LIVING ROOMS PAVINGSTONES WALL SYSTEMS SIGMA WALL 6 AND 8 SIGMA RETAINING WALL FIND MORE DETAILS AT cambridgewallsupport.com cambridgepavers.com 41

2 W Cambridge Sigma Wall System for Engineered Walls 42


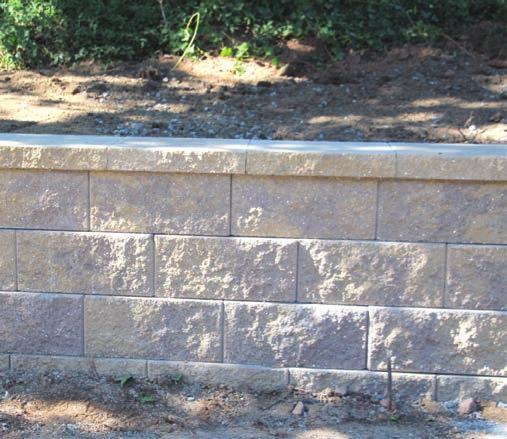
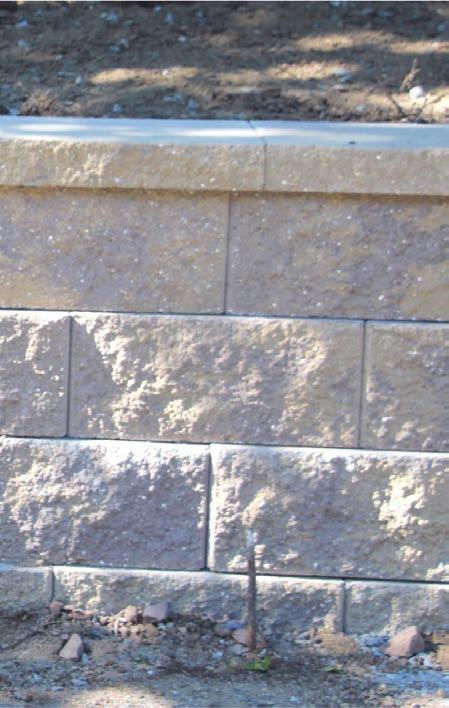
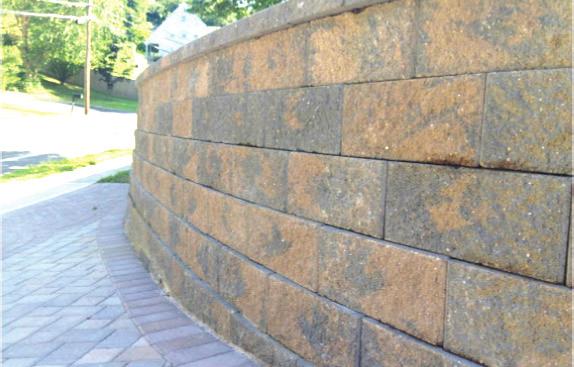
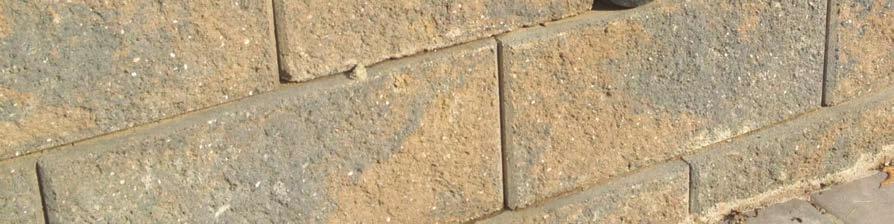
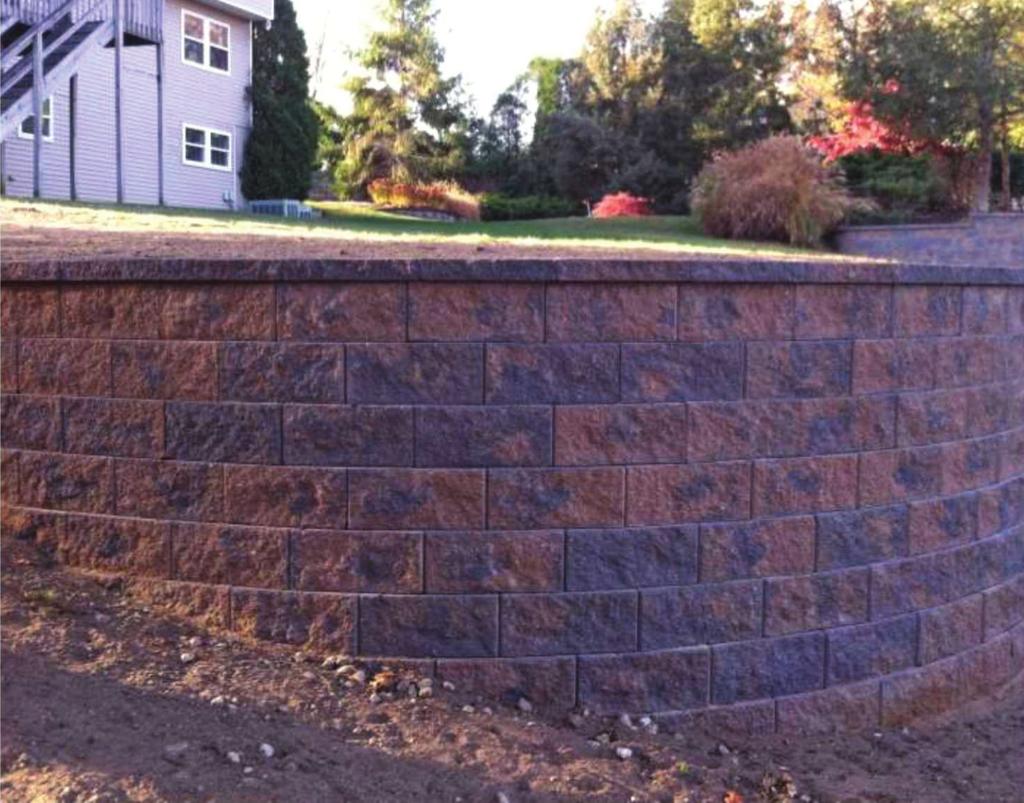
3 SigmaTM Wallstones THE SIGMA WALL SHAPES Developed for the large, commercial Segmental Retaining Wall (SRW) market, Sigma single-sided wallstones provide advantages for smaller and larger residential wall projects as well. The system, available in Split Face and Renaissance in 6 and 8 heights with right and left manufactured corners, is especially ideal for taller, engineered retaining walls as shown. The hexagonal configuration allows for a wall design with a very tight radius. AVAILABLE COLORS See Page 108 for color swatches. For color availability, refer to Page 104. Sigma 8 Split Face 8 High 12 Deep 18 Long Sigma 6 Split Face 6 High 12 Deep 16 Long Sigma 6 & 8 Corner Split Face 6 High or 8 High Both 14 Deep Both 8 Long Cambridge Curbstone Achieve the look of Belgian block with this affordable, durable alternative to plastic edge restraints, aluminum and wood edging as well as concrete curb or toe. Curbstone 9 x 8 x 3 1/2 Cambridge Edgestone Ideal as edging for mulch beds, gardens, decorative gravel and more in lieu of concrete, clay brick, molded plastic and wood edging. Edgestone 8 x 6 x 2 3/8 For color availability of any of the shapes above, refer to the Color Selection Guide on Page


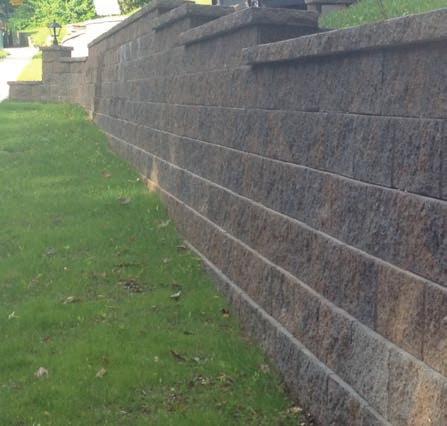
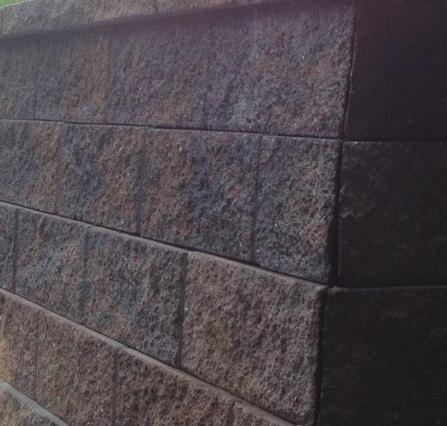
4 SIGMA RETAINING WALL SIGMA The Cambridge Sigma Wall System is built to the highest standards in height, texture, color and ease of use. The Sigma system was designed from contractor feedback. Professional Installers asked for a stone that would not hurt their back, a connection system that was simple to use with no pins, a large wall system that matched our Maytrx and Outdoor Living Kits and a wall that looked good in a residential backyard. The Sigma 6 incorporates our patent pending Double Knob System. It installs as delivered with a 6 degree setback, or by knocking off the front set of break away knobs to get near vertical alignment. The NEW Sigma line includes large corner stones that create a great looking, strong corner. And as a bonus, every Sigma Stone has the ability to create two emergency stub (smaller) corners for that small job. 44

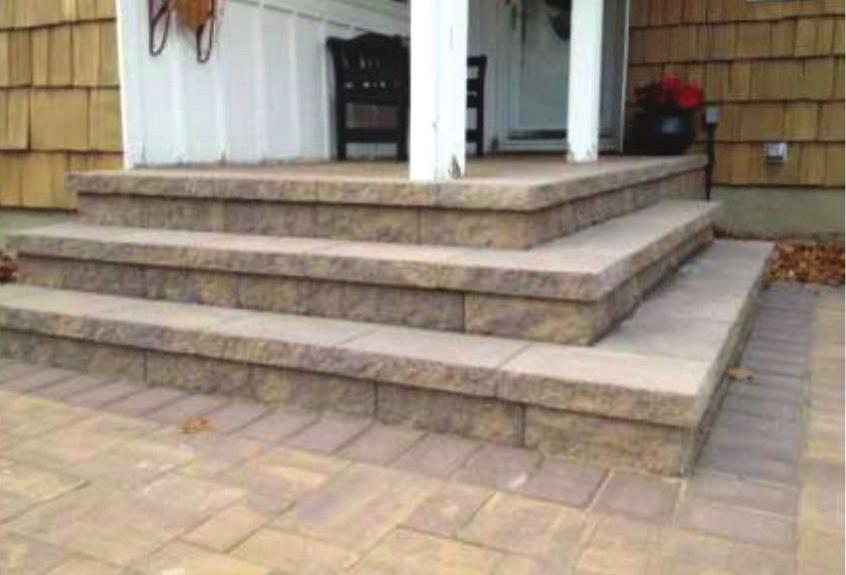
5 SIGMA INDEX Why Use this Sigma stone System? Extremely light, saves your back, increases productivity, saves on trucking Highest Standard for height and quality Effervescence not an issue Color and texture matches a full line of Outdoor Living building products including paving stones and Kits including Firepits, Kitchens, Fireplaces No Pins needed Ability to get two Stub corners from one stone if needed on small jobs Matching Columns made with the Sigma Corners, no cutting, many cap options available Matches the Maytrx System in Look, Color and Texture Build to any engineered height Free project takeoff with cross section drawing and materials list is available from our SRW partner Low cost Stamped drawings available in your state Engineering, getting started and design guides available for download or viewing on tablet or phone Large Corner stones available for good interlock in small packages Single and double sided Caps are available Most colors available in Split face or Renaissance Simple to install; Knobs fit in the cavity of the stones below and then pull the stone forward Comes in 6 and 8 heights (Sigma 6 (16 long ) and Sigma 8 (18 long) Sigma 6 has a set of break away knobs that allow near vertical with same stone Contractors love it to install, Customers love the look. Easy to Make steps stone is flat on top when set on stone below. 45

6 BUILDING A WALL SIGMA This is a starting guide to the Cambridge Sigma Retaining Wall System. In this book we cover the general points that are important in building a retaining wall. For any wall over 36 you should consult our Sigma 6 or Sigma 8 Pro-Guide that is available to download or view at cambridgewallsupport.com or cambridgepavers.com. This will guide you through the factors that influence the strength of the finished wall including load, slope, soil condition, water runoff, geogrid layers, etc. Many municipalities require all retaining walls over a certain height to have a stamp made by a state approved engineer or similar professional that will specify how your wall is built. You will find information on the Cambridge program that allows you to get a free wall design or to receive low cost stamped specifications in your state on page XX of this book. The Sigma stone face and accessories are similar in texture and color to the Cambridge Maytrx line of wall and Outdoor Living Kits. So if you require a tall wall in the rear of your property as well as a double sided wall in your garden and maybe in the future a fire pit or an outdoor fireplace, the finishes will all match. Cap Stone Clean Stone Sigma Wall Geogrid Toe Compacted Fill Perforated Pipe Foundation Retaining Walls are made up of more than the Sigma Wall Stones. Any wall over 36 consists of the pieces in the illustration above. Foundation, drain pipe, drainage stone, geogrid reinforcement, Sigma Wall Stones, Cambridge Cap Stones and select fill are all engineered and installed depending on the site conditions. Consult page 28 of this book for further information. 46
7 SIGMA 47

8 SIGMA WALL 48


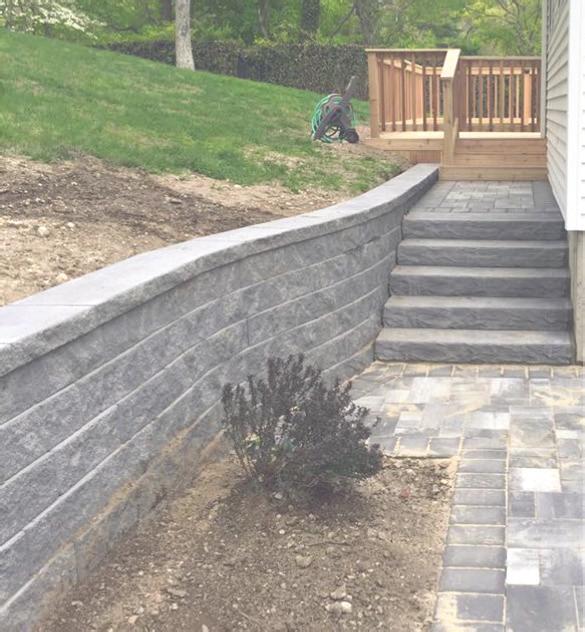
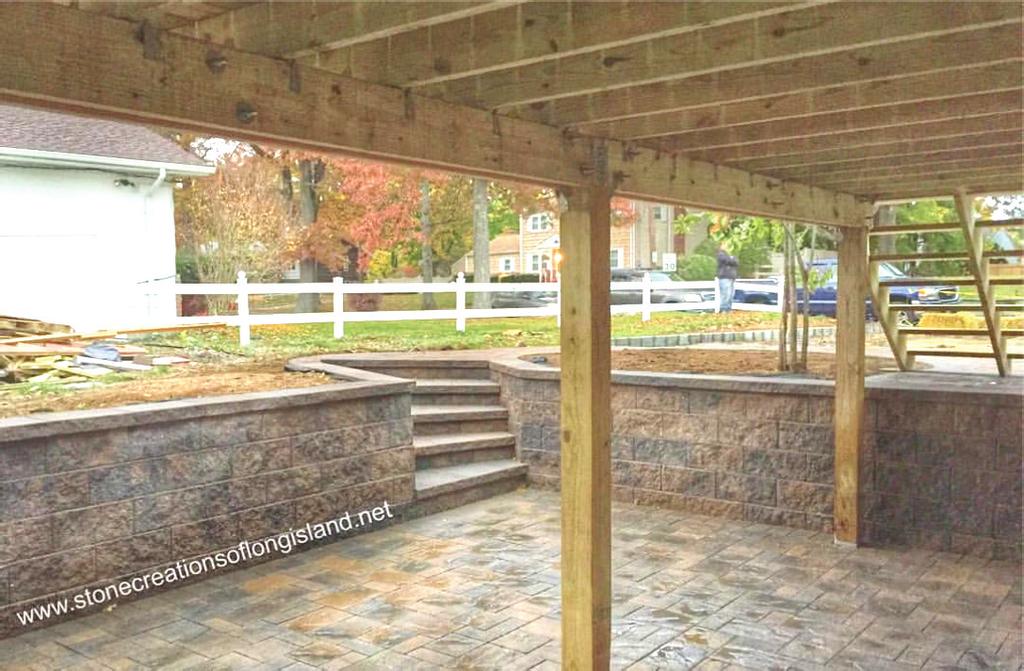
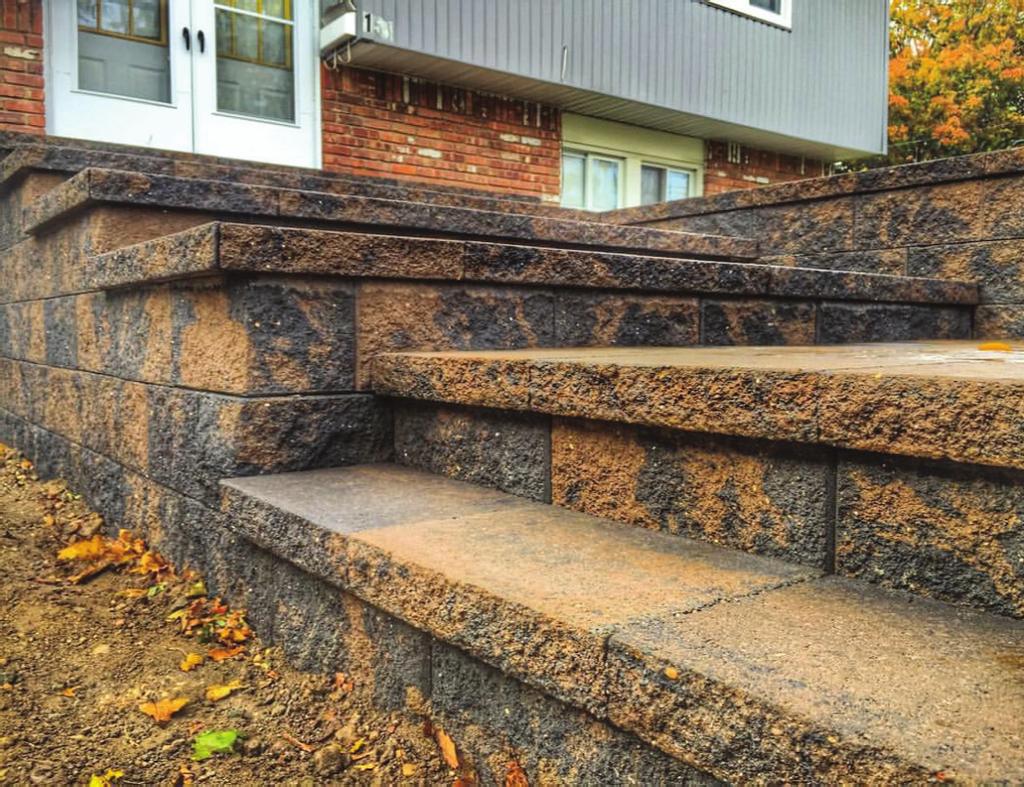
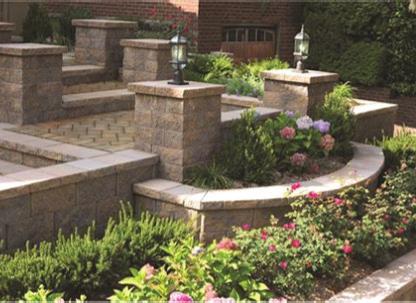
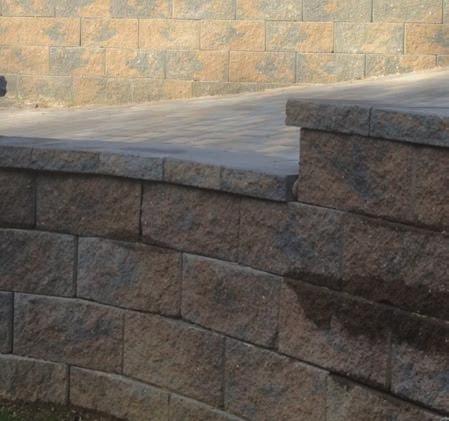
9 SIGMA WALL Sigma 8 Wall and Steps with Cambridge Large Caps as Treads 13 Double Sided Caps above Wall (right) Sigma 8 Wall and Steps with Cambridge 13 Double Sided Caps above Wall (left) 49


10 SIGMA SIGMA 8 WALL STONE KNOBS DIMENSIONS 8 H x 18 W x 12 D SIGMA 8 CORNER UNIT DIMENSIONS 8 H x 14 W x 8 D CAMBRIDGE SIGMA 6 WALL STONE DIMENSIONS 6 H x 16 W x 12 D Set all wallstones with knobs protruding down, so that one knob will drop into each core of the wallstone below establishing a bond. Pull the wallstones forward and center on the bond of the two wallstones below. All full-on bond wallstones are set in this way. Corners and cutting a wallstone for adjustment are discussed in the corner section of this handbook titled: Sigma 6 OR 8 Inch Corner. CAMBRIDGE SIGMA 6 CORNER UNIT DIMENSIONS 6 H x 14 W x 8 D CAMBRIDGE LARGE CAP DIMENSIONS 3 H x 18 W x 12 D CAMBRIDGE 13 DOUBLE-SIDED CAP DIMENSIONS 3 H x 12 W x 13 D The Sigma 6-Inch has 4 knobs protruding from the top of the wallstone. These knobs are used for alignment of setback and for holding the geogrid in place when it is pulled tight. They are not part of the engineering strength of the wall system. The long textured face is the front of the wallstone and the knobs closest to the front are used to set the wallstone for 6 degrees. If the wall is designed as a 6-degree setback, then no changes to the knobs are required. If the wall desired is to be almost vertical, you will need to remove the two knobs closest to the front face. 50


11 SIGMA Downloads INSTALL GUIDES 12 PAGES, 3 BOOKS SIGMA WALL HOW-TO All the Detail you need to build Sigma Wall are located in the Designscape Pages in the rear of this book. Including: Sigma 6 and 8 Setback Sigma 6 Near Vertical Base preparation Geogrid tables And Many More 51


12 SIGMA WALL 52

13 SIGMA WALL 53

14 SIGMA WALL 54

15 SIGMA WALL 55


16 SIGMA WALL 56


17 SIGMA WALL 57


18 Concept: Outdoor Living Building System Think of walls as being part of our Outdoor Living System were each component is engineered to go with the other parts of the system. Think of the fact that your customer picks a paving stone for there back yard from the Cambridge brochure, the contractor has the opportunity to up sell now or in the future the dream of a Fire Pit Add on because the crew and machinery is already going to be there now, or plant the idea for a future project. In the future the customer might want to add a fireplace or Kitchen all the Cambridge products, Wall, Pavers, Kits are part of the same system, available and supported in the same color and textures. Think twice before substituting another Wall for a Cambridge Wall, when the customer wants to add the Outdoor Living Component it will not match the wall, if you think you can build a fireplace on your own with a bargain wall the cost to cut source, and design creates headaches and will not look the same, use the Cambridge Brochure to sell your living space and collect a profit from installing not sourcing parts to build it. The ideal outdoor living environment might include a larger wall in one part of the property that has the same texture and color as the Sitting Walls, Firepits and,columns, the only difference is the change in scale, yet each is designed and engineered for what they do best. 58

19 SIGMA WALL 59
20 Cambridge Wall Products SIGMA Installation Instructions: Sigma 6-Inch Vertical Or Setback Wall Sigma 6-Inch wallstones can be set almost vertical (1.6-degree batter) as well as set back (for additional strength) at a 6-degree batter. These instructions cover the almost vertical and the setback features of the wallstone and use of the knobs on the wallstone. The corner and adjustment wallstone for the corner instructions are available in another section of this book titled Sigma 6-Inch Corner. Knobs The Sigma 6-Inch has 4 knobs protruding from the top of the wallstone. These knobs are used for alignment of setback and for holding the geogrid in place when it is pulled tight. They are not part of the engineering strength of the wall system. The long textured face is the front of the wallstone and Front Figure 1 the knobs closest to the front are used to set the wallstone for 6 degrees. If the wall is designed as a 6-degree setback, then no changes to the knobs are required. If the wall desired is to be almost vertical, you will need to remove the two knobs closest to the front face. The knobs can be removed with a hammer and chisel. Be sure no part of the knob is protruding past the top surface of the wallstone. See Figure 2. First Layer The Sigma 6-Inch wallstones are all set with the knobs positioned down. While laying the first course on the base, either remove the knobs or tap the wallstones into the base to insure all wallstones are level and plumb. To keep the wall straight, use a string line along the back of the wallstones on the first layer. The first layer is the most important part of the wall. It Figure 3 Front Knobs 6 Degrees is the easiest place to adjust for height. All additional layers will use the first layer to establish overall levelness and the heights of all wallstones. Note: Bury the first layer at least 1 inch below finished grade for every foot of wall height. Following the base guidelines (refer to page 5 in this book), a 4-inch perforated drainpipe needs to be installed behind the first layer to carry water away from the wall. For every layer, place 3/4 of an inch of clean crushed stone 12 inches behind the wall. Use the 3/4-inch clean stone for If Building Almost Vertical Then Remove The Front Knobs Figure 4 Figure 2 Crushed Stone Drainage Area core fill. The core should be filled to 3/4 of an inch from the top of the wallstone. Place the correct backfill soil as advised by the engineer and compact in 3-inch lifts. Use only lightweight compaction equipment within 3 feet of the back of the wall. Sweep the top of the wallstones, so they are clean before adding the next layer. Second Layer If you are creating an almost vertical 1.6-degree wall, remove the two knobs closest to the face of the wallstone for all additional wallstones used. If you desire the 6-degree setback, the knobs are already correct as the wallstones are shipped. The wallstones will be set with knobs protruding down. Figure 5 Set all wallstones with knobs protruding down, so that one knob will drop into each core of the wallstone below establishing a bond. Pull the wallstones forward and center on the bond of the two wallstones below. All full-on bond wallstones are set in this way. Corners and cutting a wallstone for adjustment are discussed in the corner section of this handbook titled: Sigma 6-Inch Corner. Geogrid Layers Place the geogrid over the layer of Sigma 6-Inch Wallstones, 3/4-inch drainage stone and the select fill that is designated. Maintain the correct orientation designated by the geogrid manufacturer. Place the next layer of Sigma 6-Inch wallstones. Be certain that the geogrid openings are Figure 7 hooked by the Sigma 6-Inch knobs and fill the cavities with 3/4- inch clean stone. Pull the geogrid tight and place stakes to hold it taught after filling the cores. Do not drive heavy equipment directly on the exposed geogrid. Place the drainage stone and control fill for that layer and compact. Use only lightweight compaction equipment within 3 feet of the back of the Sigma 6-Inch Wall. Place material and compact on every layer in 3-inch lifts. Sweep the top of the wallstones so they are clean before adding the next layer. Curved Walls The Sigma 6-Inch Wall System allows for a very tight inside radius. Although the knobs might not provide a gauge for setback, this can be established visually. Lock the geogrid and the wallstones by filling the cores and compacting on every layer. It is simple to remove a knob if it is in the way of the desired radius. Figure 10 Following Layers The next layers repeat the orientation of the first or second layer. Follow these directions. For walls higher than 36 inches, refer to your engineer s design. Figure 6 Figure 8 Figure 9 Knobs Down Into Core Below Lightly Stake Geogrid Fill Cores Over Geogrid Controlled Fill Stone Drainage Layer Figure 11 60
21 SIGMA Installation Instructions: Sigma 6-Inch Wall Corner Options Shown is a Cambridge Sigma 6-Inch raised patio retaining wall in the full setback configuration with Cambridge Large Caps. The Sigma 6-Inch Wallstones can be set almost vertically (1.6 degree) as well as full setback (6 degrees) for additional strength. These instructions cover the following: The corner structure and the adjustment wallstone for bond as the wall is built higher on each layer and adding cap stones. First Layer Set the corner first if it is used in the design, and then set a full wallstone starting from the long face of the corner. Cambridge Sigma 6-Inch Wallstones are Knob Side Of Wallstone String Line set knobs down. Tap the wallstones into the base with a rubber mallet. Use a line on the rear of the wallstones to guide each stone in the layer to be level and plumb (remove the knobs for the first layer if the base is too hard). It is critical to be level in all directions on the first layer. This is the only layer where adjustment is simple. See Figure 1. IMPORTANT STEP: In the first layer, full wallstones are set next 14 5/8 to the long face of the Sigma 6-Inch Corner Wallstone. The wallstone next to the small face of the corner is cut to 14 inches plus Figure 2 the setback for a wall that is 14 5/8 inches. For an almost vertical configuration, this stone is cut to 14 3/16 inches. This cut allows full wallstones to be cut as the sides adjust in from the setback, eliminating slivers. Cut the edge of the adjustment wallstone closest to the corner normally or away from the line of sight so it is not noticeable. If you are using the Renaissance texture, tap the cut edge lightly with a hammer. See Figure 2. Figure 3 Figure 1 Second Layer To begin the second layer, position the corner as shown in Figure 4. Set the corner in position (5/8 of an inch for a full setback wall or 3/16 of an inch for an almost vertical wall), in from the two face sides for a 7-degree batter (setback) or 1.6-degree batter (almost vertical). After setting the cut wallstone next to the small face of the corner, continue the first row using the rear of the wallstones as a guide along with a straight edge or string line. See Figure 3. Figure 4 Adding The Full Wallstones Set the second layer over the first layer, knobs down (following wall installation instructions). Place a full wallstone over the middle of the two wallstones in the layer below. Line up the knob in the open cavities of the two wallstones below and then pull the wallstone forward toward the front face. Recheck to be sure that bond is maintained. Install all full Figure 4-A wallstones using this method. Measure Adjustment Wallstones Once the wallstones have been set for the second layer, the distance remaining between the last full wallstone in each direction and the corner will be the only cuts needed. These are called adjustment wallstones. The second layer will only require one adjustment wallstone. After this layer, adjustment wallstones will be cut on each side of the corner. Measure For Adjustment Wallstone Cut Adjustment Wallstone Mark and cut the length of the wallstone needed to fill in next to the corner with a masonry saw. Figure 5 Note: Never cut the corner wallstone. If the area for the adjustment wallstone is too small, create two wallstone cuts next to each other. Place the cut side of the wallstone away from line of sight similar to best practice in handling the seam when installing vinyl siding. If a knob section will overlap the corner wallstone below, remove those knobs with a hammer and secure with retaining wall adhesive. Placing the Adjustment Wallstone Maintain alignment and apply retaining wall adhesive. Figure 4-B General Information Figure 6 Level and use a string line to keep the wall straight. Use the line on the rear of the wallstones to guide each layer. If installing on concrete, remove the knobs on the first layer with a hammer and chisel. To set the embedment, place and compact soil in front of the wallstones. Go to or consult your Cambridge Territory Manager for the correct procedures in building an engineered retaining wall. Repeat Layers The next layer repeats the orientation of the corner on the first layer. Note: Because the wall is setback, the distance to the corner from a full wallstone gets smaller as the wall gets higher. To allow for this, the wall is adjusted in 5/8 of an inch or 3/16 of an inch from each side for each layer. The adjustment wallstone length will Figure 7 change on every layer to allocate for this. The different lengths represent the amount of setback for full setback or almost vertical configurations. Cap MaytRx 6 retaining walls use the Cambridge Large Cap (3-inches high x 12-inches deep x 18-inches wide). See Figure 8. Make a corner cap by splitting 2 inches from the end of a cap and use that wallstone as the corner. If the wall will be retaining soil to the top or is being used for a raised patio, the cap can be Figure 8 pulled forward 1 inch to create a reveal. If the caps are above ground in the back of the wall, the Cambridge 13-inch Double- Sided Cap (3-inches high x 13-inches deep x 12-inches wide) can be used. The Sigma 6-Inch wallstone features an emergency corner option one wallstone will yield two (stub) corners in the field for short landscape walls. 61
22 Cambridge Wall Products Installation Instructions: Sigma 8-Inch Vertical Or Setback Wall Sigma 8-Inch Wallstones can be set at 6-degree batter. This wallstone system matches the Cambridge MaytRx product line in colors, edge, and texture. The corner and adjustment wallstone instructions are available in another section of this book. Shown is a Sigma 8-Inch raised patio featuring the new Sigma 8-Inch Corner. Knobs The Sigma 8-Inch has two knobs protruding from the top of the wallstone. These knobs are used for alignment of setback and for holding the geogrid when it is pulled tight. They are not part of the engineering strength of the wall system. The long textured face is the front of the wallstone. All placements of wallstones require THAT KNOBS FACE DOWN INTO THE CAVITY BELOW. The knobs can be removed with a hammer or hammer and chisel. Be sure that no part of the knob is protruding past the top Figure 1 surface of the wallstone. Knobs are removed when a wallstone overlaps the corner or when a radius is required and the knob will interfere. First Layer The Sigma 8-Inch wallstones are all set with the knobs positioned DOWN, so when laying the first course on the base, either remove the knobs or tap the wallstones into the base to insure all wallstones are level and plumb. To keep the wall straight, use a string line along the back of the wallstones on the first layer. The first layer is the most important part of the wall and is the easiest place to adjust for height. All additional layers will use the first layer to establish overall Figure 2 levelness and heights of all wallstones. Note: Bury the first layer at least 1 inch below finished grade for every foot of wall height or as instructed by a licensed design professional. Second Layer Following the base guidelines (refer to Page 5 in this book), install a 4-inch perforated drainpipe behind the second layer to carry water away from the wall. For every layer, place 3/4-inch clean crushed stone every 12 inches behind the wall. Use the 3/4- inch clean stone for core fill. The core should be filled to 3/4 of an inch from the top of the wallstone. Place the correct backfill soil as advised by an engineer and compact in 3-inch lifts. Use only lightweight compaction equipment within 3 feet of the back of the wall. Sweep the top of the wallstones clean before adding the next layer. Finish Layer For Geogrid The Stones Are All Set With Knobs Protruding Down Figure 4 Crushed Stone Drainage Area Figure 3 The wallstones will be set with knobs protruding down so that one knob will go into each core of the wallstone below establishing a bond. Pull the wallstones forward and center on the bond of the two wallstones below. All full on bond Select Fill Area wallstones are set in this way. Corners and field cut adjustment wallstones are discussed in the corner section of this handbook. In every layer, Figure 5 place 3/4-inch clean crushed stone every 12 inches behind the wall. Use the 3/4-inch clean stone for core fill. Stone Drainage Area & Core Fill The core should be filled to 3/4 of an inch from the top of the wallstone. Place the correct select backfill soil as advised by engineer and compact. Use only lightweight compaction equipment within 3 feet of the back of the Sigma 8-Inch Wall. Sweep the top of the wallstones clean before adding the next layer. Geogrid Layers Place the geogrid over the layer of Sigma 8-Inch wallstones, 3/4-inch drainage stone and the select fill that are designated. Maintain the correct orientation designated by the geogrid manufacturer. Place the next layer of Sigma 8-Inch wallstones. Be certain Figure 6 that the geogrid openings are hooked by the Sigma 8-Inch knobs and fill the cavities with 3/4-inch clean stone. Pull the geogrid tight and place the stakes to hold it taught after filling the cores. Figure 7 Do not drive heavy equipment directly on the exposed geogrid. Place the drainage stone and control fill for that layer and compact. Place 3/4- inch of clean crushed stone every 12 inches behind the wall. Use the 3/4-inch clean stone for core fill. The core should be filled to 3/4 of an inch from the top of the wallstone. Place the correct select backfill soil as advised by engineer and compact. Use only lightweight compaction equipment within 3 feet of the back or the Sigma 8-Inch Wall. Sweep the top of the wallstones clean before adding the next layer. Note: Every layer should be filled and compacted before the next layer of stone is added. Curved Walls The Sigma 8-Inch Wall System allows for a radius although the knobs might not provide a gauge for setback in all situations. This can be established visually. Lock in the geogrid by filling the cores. If a knob is in the way of the radius desired, it is simple to remove. Follow the manufacturer s instructions for the geogrid orientation. Geogrid should never go over uncovered geogrid. If you need to change direction, use a universal geogrid or Figure 9 separate the geogrids by placing the second direction on the next layer. Following Layers The next layers repeat the orientation of the first or second layer. Follow these directions. For walls higher than 36 inches, refer to your engineer s design. SIGMA Stake Geogrid Tight Fill Cores Over Geogrid Figure 8 Controlled Fill Stone Drainage Layer Figure 10 62
23 SIGMA Installation Instructions: Sigma 8-Inch Wall Corner Options Shown is a Cambridge Sigma 8-Inch raised patio retaining wall with Cambridge Single-Sided Large Caps. Cambridge Sigma 8-Inch shares the same texture, edge and colors with Cambridge MaytRx Walls and Kits. The Sigma 8-Inch Wallstones are naturally set back (6 degrees) for additional strength. There are several corner options for a Sigma 8-Inch Wall as described below. First Layer Set the Cambridge Sigma 8-Inch Corner first if it is used in the design, and then set a full wallstone starting from the long face of the corner. Cambridge Sigma 8-Inch Wallstones are set knobs down. Tap the wallstones into the base with a rubber mallet using a line on the rear of the wallstones to guide each wallstone in the layer so they are level and plumb. Figure 1 Remove the knobs for the first layer if the base is too hard. It is critical that the first layer is level in all directions. This is the only layer where adjustment is simple. Refer to the Sigma 8-Inch Setback Wall for details on correct installation. See Figure 1. IMPORTANT STEP: In the first layer, the full wallstones are set next to the long face of the Sigma 8-Inch Corner wallstone. The wallstone next to the small face of the corner is cut to 15 3/4 inches. This cut allows full wallstones to be cut because the sides 15 3/4" adjust in from the set back, eliminating slivers. Cut the edge of the adjustment wallstone closest to the corner Figure 2 normally or away from the line of sight so it is not noticeable. If you are using the Renaissance texture, tap the cut edge lightly with a hammer. See Figure 3. First Layer Cut Wallstone Place the cut wallstone next to the small face of the corner wallstone. Figure 3 Knob Side of Wallstone String Line After setting the cut wallstone next to the small face of the corner, continue the first row using the rear of the wallstones as a guide with a straight edge or string line. See Figure 4. Second Layer To begin the second layer, position the corner as shown in Figure 5. Set the corner in a position 3/4 of an inch in from the two faces of the wallstone below. This aligns with the natural 6-degree batter (setback). Set the second layer over the first layer, knobs down (Follow wall installation instructions). Place a full wallstone over the middle of two wallstones in the layer below and line up the knob in the open cavities of the two wallstones. Pull the wallstone forward toward the front face and recheck that bond is maintained. Figure 5 Install all full wallstones using this method. Note: The install page gives instructions on filling cavities, dealing with drainage and compaction. Measure For Adjustment Wallstones Once the full wallstones have been set for the second layer, the distance remaining between the last full wallstone in each direction from the corner will be the only cuts needed. These are called adjustment wallstones. The second layer will only require one adjustment wallstone (short face of corner). After this layer, the adjustment wallstones will be cut on each side of the Figure /4" corner because the wall steps are 3/4 of an inch on each layer. Note: NEVER CUT THE CORNER. Always cut the wallstones next to the corner to keep the wall on bond. This insures a good interlock at the corner. See Figure 7. Measure For Adjustment Wallstone Figure 4 Figure 7 Cut Adjustment Wallstone Mark and cut the length of wallstone needed to fill-in next to the corner with a masonry saw. Note: Never cut the corner stone. If the area for the adjustment wallstone is too small, create two stone cuts next to each other. Figure 8 Place the cut side of the wallstone away from line of sight similar to best practice in handling the seam when installing vinyl siding. If a knob section will overlap the corner wallstone below, remove those knobs with a hammer and secure with retaining wall adhesive. See Figure 8. Placing the Adjustment stone Maintain alignment and apply retaining wall adhesive. See Figure 9. General Information Level and use a string line to keep the wall straight. Use the line on the rear of the wallstones to guide each layer. If installing on concrete, remove the knobs Figure 9 on the first layer with a hammer and chisel. Place and compacted soil in front of the wallstones to set the embedment. Go to cambridgepavers.com or consult your Cambridge Territory Manager for the correct procedures for building an engineered retaining wall. Repeat Layers The third layer repeats the orientation of the first layer corner but is set back 3/4 of an inch on each face from the corner below. Note: Because the wall is on a setback, the distance to the corner from a full stone gets smaller as the wall gets higher. To adjust for this, the wall is adjusted 3/4 of an inch for each layer at the stone next to the corner. The adjustment wallstone length will change on every layer to adjust for this. The different lengths represent the Figure 10 amount of setback. See Figure 10. Cap Layer The Sigma 8-Inch retaining wall uses the Cambridge Large Cap (3H x 12D x 18W). See Figure 11. Make a corner cap by splitting 2 inches from the end of a cap and use that stone as the cap corner. If the wall will be retaining soil to the top or is being used for a raised patio, the cap can be pulled forward 1 inch to create an overhang. If the caps are above ground in the back of the wall, the Cambridge 13-Inch Doublesided Cap (3H x 13D x 12W) can be used. Figure 11 The Sigma 8-Inch Wallstone features an emergency corner option in which one stone will yield two (Stub) corners in the field for short landscape walls. Procedure For Making A Field-Split Corner Two stub corners can be made from one hollow Sigma 8-Inch Wallstone. Break the knobs off the top with a chisel. Break away the rear thin portion of the stone (called the web) with a saw or chisel. With a splitter or chisel, split the preformed split line on the remaining ingot to produce two stub corners. See Figure 12. Figure 12 Using A Stub Corner A corner made from a field split stub corner is utilized on the first layer. In the first layer, full wallstones are set next to the long face of the stub corner wallstone. The wallstone next to the small face of the corner is cut to 14 3/8 inches. This allows full wallstones to be cut as the sides adjust in from the setback, eliminating slivers. Cut the edge of the adjustment wallstone closest to the corner normally or away from the line of sight so it is not noticeable. If you are using the Renaissance texture, tap the cut edge lightly with a hammer. Apply retaining wall adhesive on all corner wallstones. See Figure 13 Turned Stub Corner Turn the field split stub corner 90 degrees for the second layer. There are no rights, lefts, tops or bottoms to this stub corner. Apply retaining wall adhesive. Once the wallstones have been set for the second layer, the distances remaining between the last full wallstone in each direction of the corner will Figure 14 be the only cuts needed. These are called adjustment wallstones. The second layer will only require one adjustment wallstone (short face of corner) after this layer, the adjustment wallstones will be cut on each side of the corner as the wall steps in 3/4 of an inch on each layer. Note: NEVER CUT THE CORNER. Always cut the wallstones next to the corner to keep the wall on bond. This insures a good interlock at the corner. See Figure 14. Third Layer The third layer repeats the orientation of the first layer corner. Note: Because the wall is on a setback, the distance to the corner from a full wallstone gets smaller as the wall gets higher. To adjust for this, the wall is adjusted in 3/4 of an inch for each layer at the corner on both faces. The adjustment wallstone length will change on every layer to adjust for this Figure 15 Figure 13 (the different lengths represent the amount of setback. The adjustments should be cut on each side of the corner (The distance needed between the corner and the next full wallstone). Break off the knob on any wallstone for that portion which overlaps the corner and glue that area. Note: When using these smaller, corner wallstones that you see in Figure 15, the web might need to be cut as the wallstones next to the corner touch the wallstones behind them /8"
44 Installation Instructions: Olde English Radius Wall Double-Sided Freestanding Wall
 44 Olde English Radius Wall Double-Sided Freestanding Wall This project will outline a freestanding or sitting wall. Shown is an Olde English Radius freestanding, double-sided sitting wall with Cambridge
PYZIQUE FRESTANDING & RETAINING WALL
 PYZIQUE FRESTANDING & RETAINING WALL 120 Cambridge Wall Book Pyzique Cambridge Wall Book 121 Pyzique Wall PYZIQUE WALL ONE STONE DOES IT ALL! The Trapezoid shape (4 in. high x 9in. deep x 11 in. and 7
LEDGESTONE & Ledgestone radius
 LEDGESTONE & radius FRESTANDING & LANDSCAPE WALL 105 Wall LEDGESTONE WALL A Stone look wall for Landscape and Engineered heights The universal size (4 in. high x 8 in. deep x 12 in. long) and efficient
cambridgewallsupport.com cambridgepavers.com
 cambridgewallsupport.com cambridgepavers.com INDEX Inside This Guide Page Introduction to Sigma Wall Systems 3 Sigma Stones 4 Building a Wall 6 Foundation 7 Installation 9 Projects 19 Installing Sigma
HOW TO BUILD Garden Walls Frestanding & Landscape Walls
 HOW TO BUILD Garden Walls Frestanding & Landscape Walls 10 Cambridge Wall Book Garden walls This layout depicts a common application of landscape and freestanding designs together in one wall with Columns
How To Install Your Cambridge Pavingstones System How To Install Your Cambridge Segmental Retaining Wall System
 4 How To Install Your Cambridge Pavingstones System Step 1. Preparation: Sketch a diagram of area to be paved. Square off a 90-degree corner. Set stakes for outside perimeters 6 inches away from area.
Garden WallScape Installation Guide
 By CornerStone Wall Solutions Inc. Garden WallScape Installation Guide GRAVITY/DETAILS The perfect balance... between design and nature Garden WallScape Overview note: bolded terms are defined in our online
Five Stone System. Trench Depth Compactible Rock. Foundation. 57 lbs 41 lbs 31 lbs 47 lbs. Patent Pending. Approximate Weight
 Five Stone System Patent Pending Introduction to the Multi-Use, Multi-Stone System The multi-use, multi-stone system has been developed to give a natural stone appearance to a manufactured system. The
COUNTY BLOCK. Construction Guidelines on County Block Steps. Special Considerations When Building Steps. Natural Beauty Absolute Strength
 Construction Guidelines on County Block Limits of Liability This County Block Installation Guide provides general information about the product, including installation procedures, technical and engineering
Gravity Wall. A force to be reckoned with... Gravity (SRW) segmental retaining wall systems are structures
 segmental retaining wall systems are structures") A force to be reckoned with... Gravity (SRW) segmental retaining wall systems are structures lower in height that use the FrogStone unit weight combined with gravel core infill to resist earth pressures
A force to be reckoned with... Gravity (SRW) segmental retaining wall systems are structures lower in height that use the FrogStone unit weight combined with gravel core infill to resist earth pressures
Stairs. Creating beauty, one step at a time... Proper installation of building stairs requires the same care and
 Creating beauty, one step at a time... Proper installation of building stairs requires the same care and thoroughness as the creation of the wall itself. MiraStone s design features including the hollow
VERSA-Green TM Plantable Retaining Wall System
 www.versa-lok.com VERSA-Green TM Plantable Retaining Wall System VERSA-GREEN INSTALLATION The VERSA-Green Plantable Wall System from VERSA-LOK is truly the greenest retaining wall available. It combines
Products for the residential Market. Where. dreams. & yards meet. anchorwall.com
 Products for the residential Market Where dreams & yards meet Easy installation is more than lip service. No pins. No mortar. No misalignments. Rear-lip locator, invented by Anchor, makes installation
67665_MesaInstallationGuide_2 12/10/07 2:12 PM Page 1 E ID U G TION ALLA T INS
 INSTALLATION GUIDE Introduction The Mesa Retaining Wall Systems from Tensar International Corporation offer superior and costeffective solutions for all of your retaining wall needs. This installation
G R A V I T Y / G E O G R I D
 GRAVITY/GEOGRID MAGNUMSTONE Overview note: bolded terms are defined in our online glossary at www.cornerstonewallsolutions.com The MagnumStone retaining wall system was developed with the installer in
Steps And Stairs Installation Option 1 - Steps In Wall Option 2 - Steps With Plant Space Option 3 - Steps In Front of Walls Option 4 - Steps Along
 Steps And Stairs Installation Option 1 - Steps In Wall Option 2 - Steps With Plant Space Option 3 - Steps In Front of Walls Option 4 - Steps Along Wall Face Option 5 - Steps In Wall; 10 (25cm) Tread Option
COUNTRY MANOR TM DIY RETAINING GUIDE
 COUNTRY MANOR TM DIY RETAINING GUIDE HOW HIGH Keystone Country Manor can be installed as a gravity retaining wall, a reinforced retaining wall or a free standing wall. The maximum heights for the gravity
Construction Procedures
 Construction Procedures 2014 Rev. 1.6 1 Introduction This manual presents the methods and procedures necessary for the proper erection of a LOCK+LOAD retaining wall. problems later during the service life
SIGMA MAYTRX OLLDE ENGLISH GETTING STARTED GUIDE RETAINING WALL
 SIGMA MAYTRX OLLDE ENGLISH GETTING STARTED GUIDE RETAINING WALL SIGMA-MAYTRX OLDE ENGLISH PROJECTS Cambridge Wall Book 135 BUILDING A WALL SIGMA-MAYTRX OLDE ENGLISH This is a starting guide to the Cambridge
at home installation guide Manufactured by:
 at home outdoorsproduct and installation guide Manufactured by: Product and Installation Guide Wall Systems Table of Contents Wall Systems...3-7 Project Planning and Installation... 8-11 DIY Retaining
PISA. Retaining Wall System. The choice of professional contractors
 PISA Retaining Wall System The choice of professional contractors PRODUCT CODE DESCRIPTION & DIMENSIONS (H x W x D) ~ WEIGHT PER UNIT No./M² No./ Lin M² UNITS PER PALLET 5501 Light Vertical Straight Unit
AUGUST 2017 HASTINGS. retaining walls installation guide
 AUGUST 2017 HASTINGS retaining walls installation guide RETAINING WALL INSTALLATION GUIDE RETAINING WALL information Austral Masonry retaining wall blocks are an ideal choice for retaining walls in gardens,
Steps And Stairs Installation Steps In Wall - Option 1 Steps In Front of Walls - Option 2 Steps In Wall; 10 (25cm) Tread - Option 3 Step Parallel to
 Tread - Option 3 Step Parallel to") Steps And Stairs Installation Steps In Wall - Option 1 Steps In Front of Walls - Option 2 Steps In Wall; 10 (25cm) Tread - Option 3 Step Parallel to Wall - Option 4 Steps and Stairs Q & A E CONSTRUCTION
Steps And Stairs Installation Steps In Wall - Option 1 Steps In Front of Walls - Option 2 Steps In Wall; 10 (25cm) Tread - Option 3 Step Parallel to Wall - Option 4 Steps and Stairs Q & A E CONSTRUCTION
THE ORIGINAL solid, pinned retaining wall systems
 www.versa-lok.com THE ORIGINAL solid, pinned retaining wall systems Tiered walls, integrated stairs, freestanding walls and columns are all possible with VERSA-LOK Weathered Mosaic. No matter how challenging
TIMELESS BEAUTY Experience Old-World Charm on a Grander Scale...
 TIMELESS BEAUTY Experience Old-World Charm on a Grander Scale... KEYSTONE century wall Introducing Crafted specifically for taller wall structures and heavy-loading conditions, the Keystone Century Wall
installation section three: Installation
 section three: Installation block specifications...c2 wall layout, excavation...c3 protection of soils...c4 leveling pad...c5 lay first course...c6 backfill & compacting...c7 stepping & additional courses...c8
decorative Stylish AND Retaining Wall - Wallstone Wallstone Charcoal
 Retaining Wall - Wallstone decorative AND Stylish Wallstone Charcoal Wallstone has many of the features of other systems but with the added advantage of choice between a vertical wall or a setback wall.
Construction Procedures
 Construction Procedures 2016 Rev. 1.7 1 Contents Introduction...... 3 Base Row Layout........ 4 Drainage and Backfill..... 6 Compaction... 7 Subsequent Rows... 8 In Pictures.... 10 Variations.. 11 Step
KEYSTONE KEYSTONE. Century Wall. Century Wall KEYSTONE. Century Wall. Century Wall. TIMELESS BEAUTY Experience Old-World Charm on a Grander Scale...
 TIMELESS BEAUTY Experience Old-World Charm on a Grander Scale... keystone century wall Introducing Crafted specifically for taller wall structures and heavy-loading conditions, Keystone is distinctive
NOVEMBER 2016 GRANDWALL. retaining walls installation guide
 NOVEMBER 2016 GRANDWALL retaining walls installation guide RETAINING WALL INSTALLATION GUIDE RETAINING WALL information Austral Masonry Grandwall retaining wall blocks are an ideal choice for retaining
Bordeaux Walling. Product & Technical Information
 Product & Technical Information BORDEAUX WALLING Piece Piece Piece Block Block Block Block Pins No. per per Height Length Width Weight Layer Cube (kgs) 1 2 3 1 2 10 150 400/350 250 28 Yes 2 2 10 150 300/300
NOVEMBER 2016 MAGNUMSTONE. retaining walls installation manual
 NOVEMBER 2016 MAGNUMSTONE retaining walls installation manual AUSTRAL MASONRY CONTENTS Magnumstone Installation Guide 04 Overview 07 Unit Specifications 08 Installation 08 Gravity MagnumStone Wall 16 Geogrid
Installation Step By Step Geogrid Installation Installation Q & A
 Installation Step By Step Geogrid Installation Installation Q & A C CONSTRUCTION C-1 With proper design methods, Keystone Retaining Walls can be built to retain a variety of site conditions. Before construction
Fortus Square Foot. Installation Guide
 Willow Fortus Square Foot Installation Guide Step-by-step details on how to properly construct Fortus Square Foot TM segmental retaining walls that will stand the test of time with beautiful results. Fortus
CONTENT. INTrOduCTION 3. units & CONNECTOrs 4. standard INsTallaTION PrOCEdurEs 5
 CONTENT INTrOduCTION 3 units & CONNECTOrs 4 standard INsTallaTION PrOCEdurEs 5 step 1 - Preconstruction Preparation 5 step 2 - Prepare the leveling Pad 5 step 3 - Install the Base Course 5 step 4 - Geogrid
Retaining Wall Systems
 Retaining Wall Systems A family of Retaining Wall Products The versatile Allan Block product line allows easy design and construction of retaining walls to meet specific engineering and site requirements.
Tasman Retaining Wall System
 Tasman Retaining Wall System The Tasman Retaining Wall System incorporates purpose made corners and capping units to provide classical reconstructed stone retaining walls for any landscape situation. From
Corners VERSA-LOK solid concrete units may be easily used to create an unlimited variety of corners. Basic Wall Design Elements.
 Landscape Steps Landscape Steps Size Pieces per Pallet Weight per Piece Weight per Pallet 6 x 16 x 48 10 420 4200 6 x 16 x 36 10 300 3000 Colors: Brown & Grey Basic Wall Design Elements Half units on outside
Estimating & Installation Manual
 FEATURING HIGHLAND STONE PRODUCTS 2008-2009 Estimating & Installation Manual ANCHORWALL.COM 1-877-295-5415 TABLE OF CONTENTS 2 TABLE OF CONTENTS BEFORE YOU BEGIN............................ 2 TERMS USED
Features Include: Near Vertical Walls Do it Yourself No Concrete Footings Required
 Features Include: Near Vertical Walls Do it Yourself No Concrete Footings Required Tel: Office: +27 (0)11 964 2995 Fax number: +27 (0)86 601 6692 info@dsmmasonry.co.za www.dsmmasonry.co.za Range three
Redi Rock Specification and Installation Manual
 Redi Rock Specification and Installation Manual 1.0 General Scope This Specification covers the Design, Materials and Installation of Redi Rock modular block Retaining and Freestanding Wall systems as
Every effort has been made to accurately represent the colors. However, the colors may vary slightly due to the concrete manufacturing process or
 1 Every effort has been made to accurately represent the colors. However, the colors may vary slightly due to the concrete manufacturing process or this printing process. We recommend viewing actual color
SECTION Segmental Concrete Unit Masonry Retaining Wall Height Over 5-0 High
 PART 1: GENERAL 1.0 0 Scope of Standards A. This standard provides general guidance concerning the specific preferences of the Texas State University for a Segmental Retaining Wall up to 5-0 high. B. Texas
The Ideal Way to Build
 PAVERS BY IDEAL The Ideal Way to Build Walls with Style using Pisa2 and Roman Pisa Ideal s Pisa2 and Roman Pisa are full component landscape retaining wall systems that are easy to assemble. A tongue and
Retaining Wall Products
 Retaining Wall Products BCP Building Products 18 Kirkcaldy Street Bathurst NSW 2795 Phone 02 6331 2777 Fax 02 6331 6510 sales@bcpbuildingproducts.com.au www.bcpbuildingproducts.com.au Garden Lockstone
MIRASTONE TM LIBERTYSTONE. Manufactured by: LIBERTYSTONE HARDSCAPING SYSTEMS GRAVITY/GEOGRID. HARDSCAPING SYSTEMS
 MIRASTONE TM MiraStone Installation TM Guide GRAVITY/GEOGRID Manufactured by: LIBERTYSTONE HARDSCAPING SYSTEMS LIBERTYSTONE HARDSCAPING SYSTEMS www.liberty-stone.net MiraStone Overview note: bolded terms
Strength & Versatility
 Strength & Versatility The RidgeRock II Retaining Wall System has the added advantages of smaller block size, lower costs, and easier installation. All of this with no compromise in structural stability,
ALL GUIDETION W ALLAINST RIVERCREST
 I N S TA L L AT I O N G U I D E RIVERCREST WALL Introducing the most natural, versatile and easy to use landscape wall system in the world. The Rivercrest Landscape Wall System incorporates engineered,
Uwall UNIVERSAL CONSTRUCTION MANUAL
 Uwall UNIVERSAL Retaining Wall System CONSTRUCTION MANUAL TM President s Letter CSI is a leader in its industry supplying precast infrastructure products throughout New England and beyond since 1972, developing
MUTUAL MATERIALS TECH SHEET RomanStack. Coverage* 4.5 pcs / ft² (48.44 pcs / m²) 3,242 lb (1,470 kg) 4 x 8 Cap Unit. 1.6 pcs / ln ft (4.
 3,242 lb (1,470 kg) 4 x 8 Cap Unit. 1.6 pcs / ln ft (4.") Available in three wall block sizes and two cap sizes accompanied by 90 corner units. Combine multiple sizes of RomanStack to create intricate Ashlar, repeating or random patterns. Each size utilizes a
Available in three wall block sizes and two cap sizes accompanied by 90 corner units. Combine multiple sizes of RomanStack to create intricate Ashlar, repeating or random patterns. Each size utilizes a
Tasman Retaining Wall System
 Tasman Retaining Wall System The Tasman Retaining Wall System incorporates purpose made corners and capping units to provide classical reconstructed stone retaining walls for any landscape situation. From
StoneVista Installation Guide
 By CornerStone Wall Solutions Inc. StoneVista Installation Guide GRAVITY/GEOGRID Intriguing patterns... your neighbors will admire StoneVista Overview note: bolded terms are defined in our online glossary
HOW TO INSTALL PATIOS AND WALKWAYS STEP 2 STEP 1. For all Patios and Walkways. The base is the most important step in your patio and walkway projects.
 New Project (replacing grass/dirt) STEP 1 PREPARING YOUR PROJECT AREA Determine how much to excavate using the example below. Remove the grass to desired depth (skim rather than dig deep) and a few inches
FEAT UR IN G V E R T IC A R E TA IN IN G WA LL SYST E M. Installation. Guide. anchorwall.com
 FEAT UR IN G V E R T IC A R E TA IN IN G WA LL SYST E M Installation Guide Table of Contents and How to Use This Guide table of contents HOW TO USE THIS GUIDE 2 BEFORE YOU BEGIN 2 RETAINING WALL BASICS
TERRASTOP SYSTEM 2 RETAINING WALLS. Section Page 1 PART 1 - GENERAL 1.1 SUMMARY
 Section 02832 - Page 1 PART 1 - GENERAL 1.1 SUMMARY 1.2 DEFINITIONS 1.3 SUBMITTALS 1.4 JOB MOCK-UP A. This section includes furnishing and installation of modular interlocking concrete masonry units bearing
EASY GARDEN WALKWAYS Home Gardeners School March Presented by Robert W. Bellek Owner
 EASY GARDEN WALKWAYS Home Gardeners School March 2018 Presented by Robert W. Bellek Owner LET S GET STARTED You re going to need some important tools in order to accomplish your walkway with less headaches
A. Modular Unit - A concrete wall interlocking element, machine made from portland cement, water and aggregates.
 Section 02832 - Page 1 PART 1 - GENERAL 1.1 SUMMARY 1.2 DEFINITIONS 1.3 SUBMITTALS 1.4 JOB MOCK-UP A. This section includes furnishing and installation of modular interlocking concrete masonry units bearing
ortana What you need to know to estimate your next Ortana Retaining Wall project
 E S T I M AT I N G G U I D E What you need to know to estimate your next Ortana Retaining project ortana TABLE OF CONTENTS Ortana System.............................................................................
General Brick Installation Instructions
 Excellent Resource for Clay Paver Installation: http://www.bia.org/resources/clay-brick-pavers/clay-paver-informational- Resources These are general guidelines only. Check your paver manufacturer's recommendations
Terraces. Terraced hillsides may require engineering assistance. Contact your C&M Representative for more information.
 Allan Block is the ultimate concrete masonry retaining wall system in Australia. The superior colour range and versatile nature of the various components allows designers, architects and engineers to specify
Outdoor Living to Last a Lifetime
 Outdoor Living to Last a Lifetime Once upon a time, backyard improvements meant concrete slabs, treated landscape timbers, maybe a wooden deck and a few plants to finish the job. Today, backyard improvements
LANDSCAPE RETAINING WALLS
 SUDAS Standard Specifications Division 9 - Site Work and Landscaping Section 9070 - Landscape Retaining Walls LANDSCAPE RETAINING WALLS PART - GENERAL.0 SECTION INCLUDES A. Modular Block Retaining Walls
Monumental Blok. Pallet Overview. Compatible caps. Notes. code 3521 (a) 3522 (b) 3523 (c) texture Chiseled. Specifications per pallet.
 3522 (b) 3523 (c) texture Chiseled. Specifications per pallet.") Monumental Blok code 3521 (a) 3522 (b) 3523 (c) texture Chiseled Pallet Overview (see below) HALF Specifications per pallet Imperial Metric Cubing 13.80 ft 2 /pal. (1.28 m 2 )/pal. 1.73 ft 2 /unit (0.16
Monumental Blok code 3521 (a) 3522 (b) 3523 (c) texture Chiseled Pallet Overview (see below) HALF Specifications per pallet Imperial Metric Cubing 13.80 ft 2 /pal. (1.28 m 2 )/pal. 1.73 ft 2 /unit (0.16
CONCRETE SEGMENTAL RETAINING WALL SYSTEM
 CONCRETE SEGMENTAL RETAINING WALL SYSTEM PART 1: GENERAL SPECIFICATIONS 1.01 Work Included A. Work shall consist of furnishing and constructing a Rockwood Classic 8, Classic 6 and Legend unit segmental
SPECIFICATIONS FOR REDI-ROCK WALL SYSTEM
 SPECIFICATIONS FOR REDI-ROCK WALL SYSTEM SECTION 1 PART 1: GENERAL 1.1 Scope Work includes furnishing and installing concrete retaining wall units to the lines and grades designated on the construction
Best Block Company- Product Knowledge Training
 Best Block Company- Product Knowledge Training Vendor Company Name: Best Block Company Lowe s Vendor Number: 83591 Vendor Contact Name: Jamie Lambrecht Vendor Contact Phone Number: 586-634-1750 Vendor
shaped for imagination
 Installation Guide Straight or curved garden, retaining & seat walls steps pillars planters tree-rings fireplaces fire-pits water features grill islands BBQ s S-Shape Design shaped for imagination The
Michigan State University Construction Standards SEGMENTAL CONCRETE RETAINING WALLS PAGE SECTION SEGMENTAL CONCRETE RETAINING WALLS
 PAGE 323223-1 SECTION 323223 PART 1 - GENERAL 1.1 RELATED DOCUMENTS A. Drawings and general provisions of the Contract, including General and Supplementary Conditions and Division 01 Specification sections,
Retaining Wall System
 Your local distributor Retaining Wall System Prestige & Quality Near Vertical Walls Do It Yourself No Concrete Footings Flexible - 90 o Corners, Steps, Straight or Curved Walls Commercial or Civil Walls
GEOGRID CONNECTION DETAIL OLYMPIA RADIUS UNIT
 PLACE TWO STANDARD CONNECTORS IN EACH UNIT AS SHOWN (VERTICAL ORIENTATION) INSERT TWO CONNECTORS PER HORIZONTALLY ORIENTED BLOCK; INSERT ONE CONNECTOR PER VERTICALLY ORIENTED BLOCK SHIM BETWEEN BLOCK COURSES
INSTALLATION GUIDE A Unique Retaining Wall System That s Engineered to Last!
 INSTALLATION GUIDE A Unique Retaining Wall System That s Engineered to Last! Safety Safety is the number one concern of Big Block, Inc. It s of utmost importance that Big Block walls be installed in a
MODULAR CONCRETE RETAINING WALL
 MODULAR CONCRETE RETAINING WALL PART 1: GENERAL 1.01 Description A. Work shall consist of furnishing and construction of a KEYSTONE Retaining Wall System or equal in accordance with these specifications
Expanded Backyard Makes For A Beautiful View
 allanblock.com Expanded Backyard Makes For A Beautiful View Nestled in the hills of Shell Beach, California the Allee home was in need of a backyard expansion. With a beautiful view of the Pacific Ocean
SPECIFICATION FOR CORNERSTONE GEOGRID REINFORCED SEGMENTAL RETAINING WALL SYSTEM
 CornerStone Specifications Geogrid Reinforced SPECIFICATION FOR CORNERSTONE GEOGRID REINFORCED SEGMENTAL RETAINING WALL SYSTEM PART 1: GENERAL 1.01 Description The work consists of supplying and installing
Retaining Wall Systems
 Retaining Wall Systems Construction & Quality Control Tensar Earth Technologies, Inc. Manual CONSTRUCTION & QUALITY CONTROL This manual provides general guidelines for construction and quality control
How To Build A Dry Stone Wall
 How To Build A Dry Stone Wall Installation Guide Complete step by step How-to guide for building a dry-stack stone wall. Copyright 2012 Stone Plus, Inc. How To Build A Dry Stack Stone Wall Dry stone retaining
MagnumStone Specifications Gravity
 MagnumStone Specifications Gravity SPECIFICATION FOR MAGNUMSTONE GRAVITY MECHANICALLY STABILIZED EARTH SYSTEM PART 1: GENERAL.01Description The work consists of supplying and installing all aspects of
15 lbs (6.8 kg) Approx. Weight. AB Junior. AB Jumbo. 35 lbs (16 kg) Approx. Weight
 Approx. Weight. AB Junior. AB Jumbo. 35 lbs (16 kg) Approx. Weight") 1 2 The Garden Wall Collection by Allan Block Choose the Right Block. Select the block with the right size and style for your gardening project. AB Garden Accent Textured on both sides, our lightest block
1 2 The Garden Wall Collection by Allan Block Choose the Right Block. Select the block with the right size and style for your gardening project. AB Garden Accent Textured on both sides, our lightest block
The Garden Wall Collection
 1 2 The Garden Wall Collection by Allan Block The Garden Wall Collection gives you three choices for building Great Gardens! 3 Choose the Right Block. Select the block with the right size and style for
RETAINING WALLS.
 RETAINING WALLS www.expocrete.com RomanPisa StackStone RomanStack RomanPisa ABOUT EXPOCRETE Proud to be 100% Canadian, Expocrete has been serving Western Canada with quality products and outstanding customer
OneStone.
 www.pavingstones.com The Wall System The system is a modular concrete retaining wall system that is used to stabilize and contain earth embankments, large or small. The system is based on the principles
HOW TO INSTALL PATIOS AND WALKWAYS STEP 2 STEP 1. For all Patios and Walkways. The base is the most important step in your patio and walkway projects.
 STEP 1 PREPARING YOUR PROJECT AREA Most commonly this is removing a grass area that is around your current concrete patio. You will incorporate this area into your new larger outdoor patio design. You
Backyard Renovation - AB Walls and AB Courtyard A Perfect Match
 Backyard Renovation - AB Walls and AB Courtyard A Perfect Match Before Creating usable and beautiful space in your own backyard can be an exciting adventure as these homeowners in Calgary discovered when
Introducing the first Eco-Friendly mortarless concrete retaining wall system - AB Fieldstone Collection.
 Introducing the first Eco-Friendly mortarless concrete retaining wall system - AB Fieldstone Collection. This innovative new product has unlimited possibilities in style and constructability. It is right
SECTION SPECIFICATION FOR STONEBRIDGE RETAINING WALL SYSTEM
 SECTION 32 32 23 SPECIFICATION FOR STONEBRIDGE RETAINING WALL SYSTEM PART 1: GENERAL 1.01 Scope Work includes furnishing all materials, labor, equipment, and supervision to install a Stonebridge segmental
580-1 Wells Road, Orange Park, Florida 32073
 M:\CAD Files\Crescent City\9318561\Design\SHT1.dwg, 3/19/2018 11:12:19 AM 580-1 Wells Road, Orange Park, Florida 32073 Tel. (904) 278-0030 Fax. (904) 278-0840 Florida License EB-6569 M:\CAD Files\Crescent
Anchorplex retaining wall construction guide. Building. Anchorplex. Retaining Wall Systems
 Anchorplex retaining wall construction guide Building Anchorplex Retaining Wall Systems Table of Contents and ow to Use This Guide table of contents ow to Use This Guide. 2 About the Anchorplex System.
BELMURO WALL SYSTEM INSTALLATION GUIDE
 BELMURO WALL SYSTEM INSTALLATION GUIDE TABLE OF CONTENTS TABLE OF CONTENTS... 1 SYSTEM DESCRIPTION... 2 DRY STACK SYSTEM: INSTALLATION GUIDE... 5 GEOGRID WALL SYSTEM: INSTALLATION GUIDE... 9 MASONRY WALL
Installation guide WALLS
 WALLS Installation outline 6" (150 mm) min. 6" (150 mm) min. 12" (300 mm) min. 6" (150 mm) min. 01 EXCAVATION A. Check the location of existing structures and utilities before starting the excavation.
Installation Guide ATX
 Installation Guide ATX ATX Contents This guide, provided at no cost by Risi Stone Inc. is intended to serve only as an informational resource for Architextures product purchasers. It is provided for reference
PROPOSED SEGMENTAL RETAINING WALLS ARGONAUT RETAIL VILLAGE - PHASE I PENSACOLA, FLORIDA
 CERTIFICATE AUTHORIZATION: 2 24 ANCHOR WALL ENGINEERING, LLC MATERIAL NOTES. Concrete Retaining Wall Units: "Anchor Diamond Pro Retaining Wall Units" as manufactured by Block USA under license from Anchor
Installation guide WALLS
 WALLS Installation outline 6" (150 mm) min. 6" (150 mm) min. 12" (300 mm) min. 6" (150 mm) min. 01 EXCAVATION A. Check the location of existing structures and utilities before starting the excavation.
How to build 4 DIY projects with. AB Courtyard
 How to build 4 DIY projects with AB Courtyard RECOMMENDED FOR Curved Wall Circular Wall Straight Wall Fences Bench Seat AB Courtyard FEATURES > Double sided free-standing wall > Build directly onto existing
freestone eco Prestige & quality DIY vertical wall Large blocks - 10/m 2 Smooth surface finish No concrete footings
 freestone eco Retaining Wall SystemTM The Freestone ECO Retaining Wall System TM is a more sustainable DIY, vertical retaining wall which is manufactured with up to 40% recycled glass aggregate to provide
Tasman Retaining Wall
 Tasman Retaining Wall EVALUATION AND INSTALLATION GUIDE Landscaping Tasman Retaining Wall Evaluation and Installation Guide This installation guide demonstrates the basics on how to construct: A. Tasman
Stretch Your Dollar Theme Designs Fire Pit
 Stretch Your Dollar Theme Designs Fire Pit Tools Garden gloves Garden hose String (5 length) Stake Hammer or rubber mallet 3 Mason Chisel Tape measure 2 level 4 level (most homeowners don t have. We don
PERMEABLE INTERLOCKING PAVERS
 PERMEABLE INTERLOCKING PAVERS PART 1 - GENERAL 1.01 SECTION INCLUDES A. Subgrade Preparation B. Placement of Storage Aggregate C. Placement of Filter Aggregate D. Placement of Bedding Course E. Placement
NOVEMBER 2016 MAGNUMSTONE. retaining walls technical manual
 NOVEMBER 2016 MAGNUMSTONE retaining walls technical manual AUSTRAL MASONRY MAGNUMSTONE Technical Manual THE SYSTEM AND UNITS 04 The System 05 The Units 06 Standard Unit 07 Standard Base Unit 08 Standard
SECTION SEGMENTAL CONCRETE UNIT MASONRY RETAINING WALL MAXIMUM HEIGHT OF 5-0 HIGH
 DIVISION 32 EXTERIOR IMPROVEMENTS SECTION 32 32 23.13 SEGMENTAL CONCRETE UNIT MASONRY RETAINING WALL MAXIMUM HEIGHT OF 5-0 HIGH PART 1: GENERAL 1.01 Scope of Standards A. This standard provides general